|
|
Post by scottmev on Oct 28, 2016 21:36:34 GMT
Well today we picked the kit up from MEV. Sort of liking the industrial steel look....has anyone prepped it and sealed it from rust whilst maintaining the industrial finish? 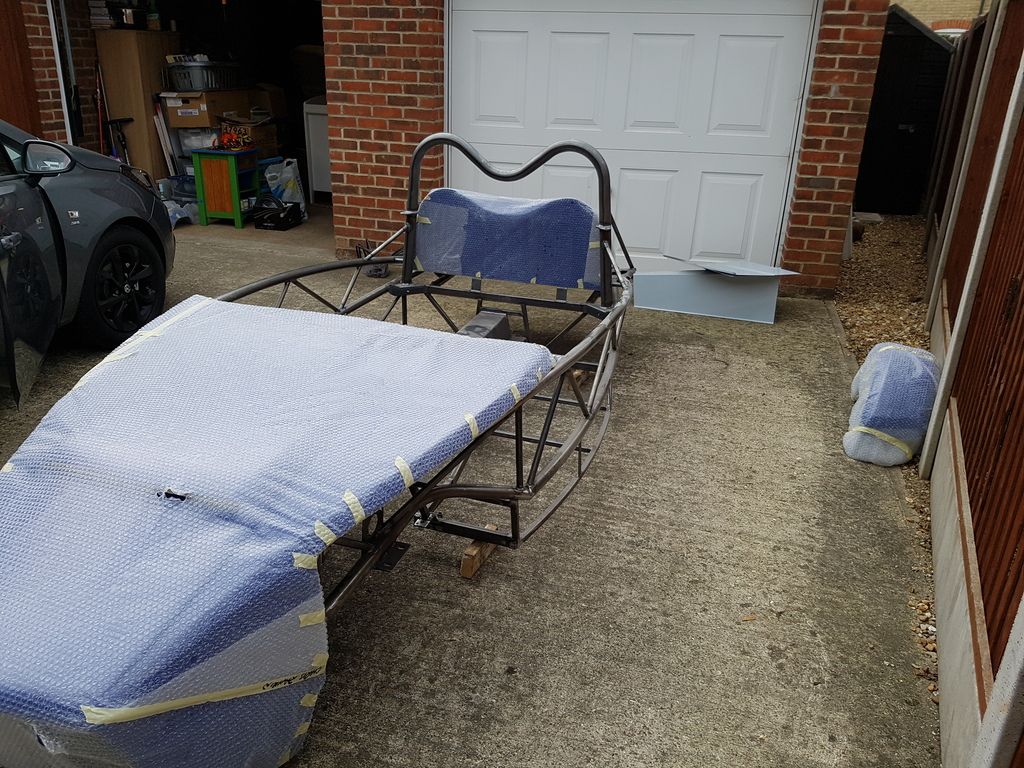 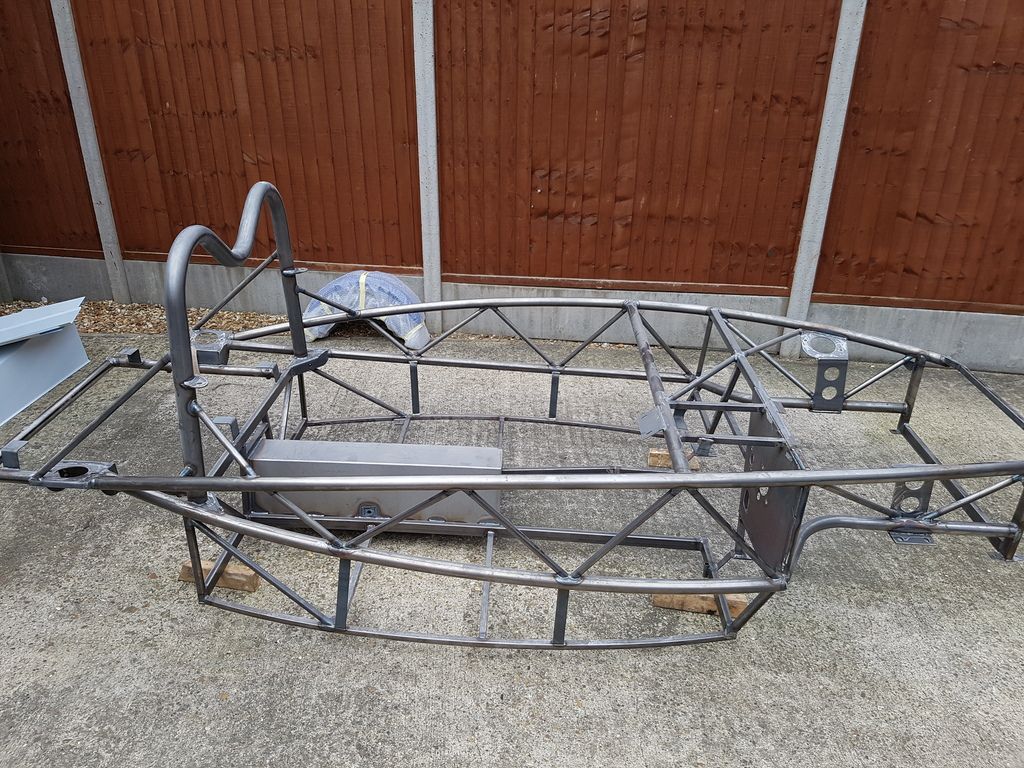 |
|
|
|
Post by iparnell on Oct 28, 2016 23:20:19 GMT
Hey mate. Im based near St Ives and have a 1.6 turbo exocet if you fancy a ride to see what the turbo is like to drive. Cheers Iain
|
|
|
|
Post by scottmev on Oct 29, 2016 6:09:37 GMT
Hey mate. Im based near St Ives and have a 1.6 turbo exocet if you fancy a ride to see what the turbo is like to drive. Cheers Iain Yeah that would be good iparnell maybe we could organise a meet in st neots as thats about half way. |
|
|
|
Post by jsmith on Nov 2, 2016 14:36:49 GMT
It looks like the UK chassis uses smaller tubing than the US chassis?? What size is the tube?
John
|
|
|
|
Post by jgilbert on Nov 2, 2016 17:31:17 GMT
Well today we picked the kit up from MEV. Sort of liking the industrial steel look....has anyone prepped it and sealed it from rust whilst maintaining the industrial finish? I haven't seen one, always a first. I guess the easiest way would be to clear coat the frame with lacquer. If you do this then buff the steel surface with a scotch bite pad, degrease with paint surface prep before you paint. I would advise being quick as the welds and any cut sheet edges will start getting surface rust quickly this time of year. In fact sweaty hands will also start the corrosion processes. |
|
|
|
Post by theancientone on Nov 2, 2016 17:35:12 GMT
We bought a built but not road legal Exocet, which we then sold upon buying a built and road legal Exocet 150R.
The chassis tube o.d. on the Exocet 150R is about 50mm, which is significantly greater than the first Exocet we bought. Regrettably I never measured the diameter of the tube on the first Exocet.
The 150R was built before the other Exocet, so either the tube diameter has been reduced over time or the spec of the 150R involved tube of a greater diameter.
What do you have in the USA?
|
|
|
|
Post by scottmev on Nov 2, 2016 21:00:26 GMT
Well today we picked the kit up from MEV. Sort of liking the industrial steel look....has anyone prepped it and sealed it from rust whilst maintaining the industrial finish? I haven't seen one, always a first. I guess the easiest way would be to clear coat the frame with lacquer. If you do this then buff the steel surface with a scotch bite pad, degrease with paint surface prep before you paint. I would advise being quick as the welds and any cut sheet edges will start getting surface rust quickly this time of year. In fact sweaty hands will also start the corrosion processes. Thanks for the advice @jgilbert although we have decided to just paint normally now. As going to rub down and primer this weekend so to protect it from further rust as doing a bit of a dry build first then strip and paint properly. Once any additions that may be needed are done. A bit like your build. Fin thanks for the advice, made my own bit of kit and works great. Like you say 30s to a minute per bush all good. Will all be out come tomorrow evening then sent for blasting Friday hopefully. |
|
|
|
Post by phocup on Nov 2, 2016 21:54:21 GMT
This is the closest I've seen to a 'bare steel' type finish. Might not be industrial enough for you though.  If you like it, there's more pictures / info here. The finish is "80% chrome" chassis coating and "fine textured wrinkle black" aluminum panel finishing from Industrial Powder Coatings. |
|
|
|
Post by scottmev on Nov 6, 2016 15:39:41 GMT
Little update. Engine and gearbox now removed from front subframe and split for cleaning and painting. Both subframes de greased and cleaned and rubbed down and first coat of paint on. PPF and diff cleaned ready for paint also. Few queries if people could assist. ABS sensors and bracket bolts solid even with wd40 and heat etc. How easy is it to strip and remove abs and be IVA compliant? as looked in Haynes manual for wiring diagram but not there? Are the bolt holes used for wheel guard mounts? Also front top ball joint bolts absolutely solid and whole lot is spinning...any advice to remove? As seems they can be a sod to press out if new ones required. 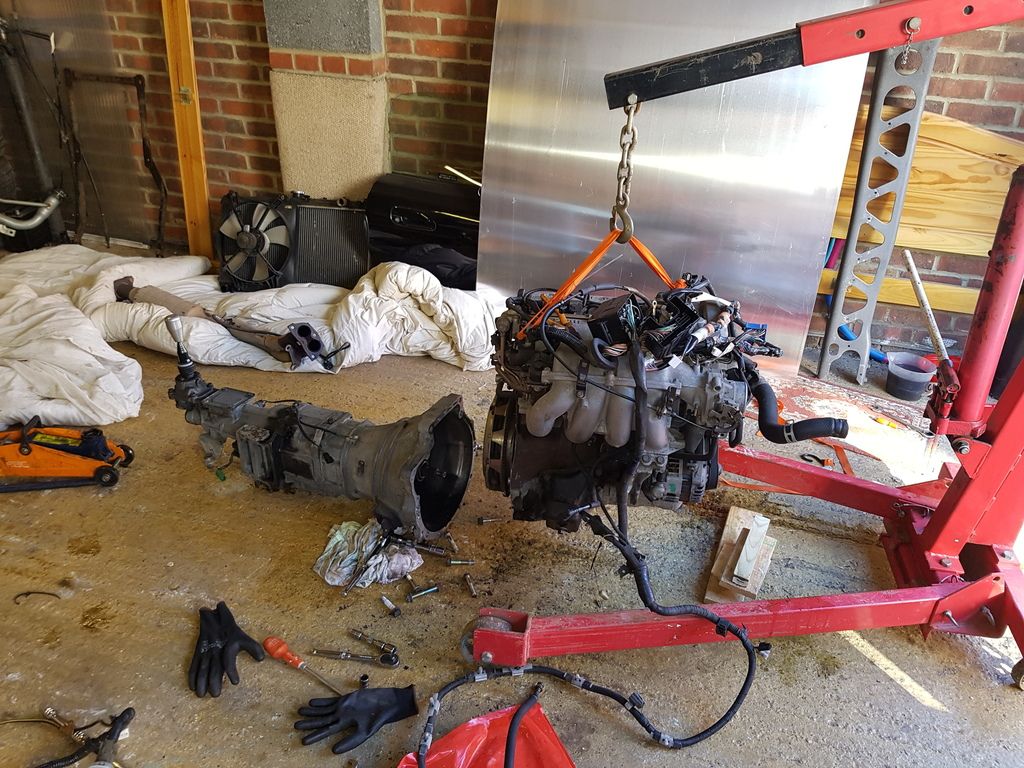 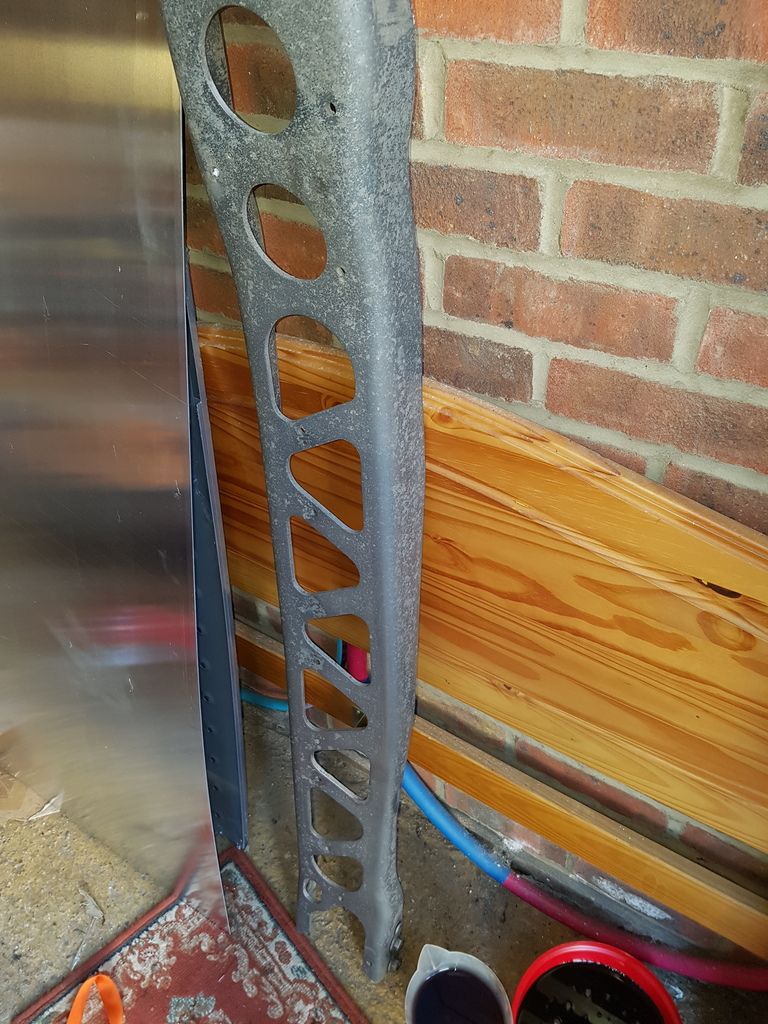 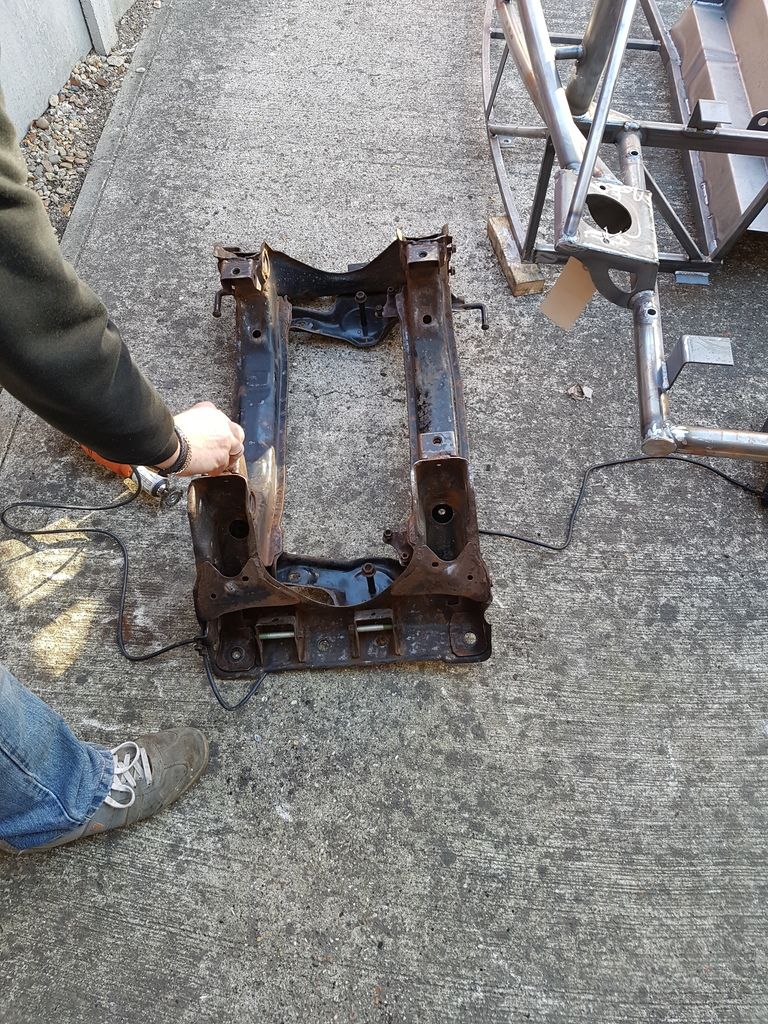 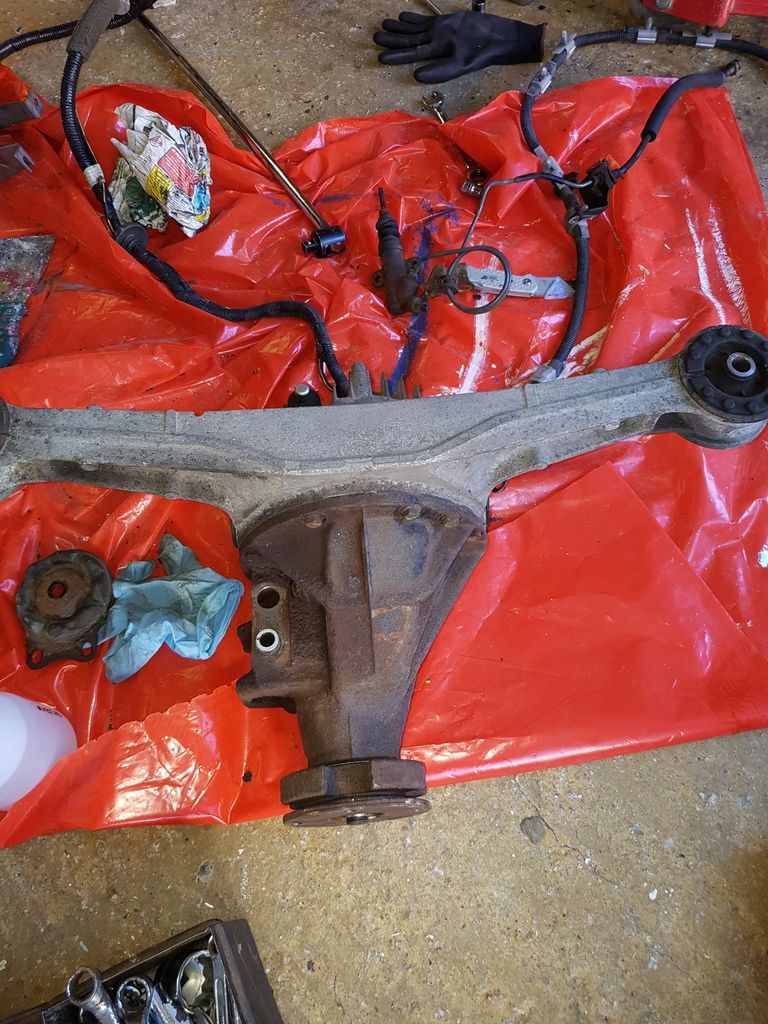 |
|
|
|
Post by gwnwar on Nov 7, 2016 19:41:46 GMT
On painting the PPF make sure you keep the bolt hole for the ground wire lower rear of PPF clean for a good ground.
If not going to reuse ABS.. ABS rings can be punched off axles. The sensor units are a B to remove.. You can cut them off and drill out what is left.. Yes you do drill the sensor mount for the wing brackets..
With the ball joint try putting a jack between the upper and lower and use a big hammer to hit the up right to free the stem.
I like to use a ball peen hammer ball against the hub and hit it with bigger hammer.. WD40 won't do anything for rust or lube
try PB Blaster.. Yes upper BJ can be replaced.. looking good so far..
|
|
|
|
Post by scottmev on Nov 7, 2016 21:36:03 GMT
Thanks for reply gwnwar will try the jack idea. But if nothing works we will cut off then replace them if worst comes to worse. |
|
|
|
Post by Fin on Nov 8, 2016 11:52:41 GMT
My ball joints were the same. We ended up slicing off the protective boot, and locking a pair of mole grips onto the smooth shaft below the thread. That gave sufficient resistance on one, and on the other, I first shaved the castle nut as close to the thread as possible with a junior hacksaw to weaken it, then replaced boot, nut & cotter pin.
|
|
|
|
Post by scottmev on Nov 8, 2016 21:56:35 GMT
Fin have you got link to the repair kit you used? Boot etc.
|
|
|
|
Post by gwnwar on Nov 9, 2016 0:55:14 GMT
|
|
|
|
Post by Fin on Nov 9, 2016 9:41:00 GMT
|
|