|
|
Post by casesensitive on Nov 1, 2013 14:56:54 GMT
|
|
|
|
Post by casesensitive on Oct 30, 2013 17:09:09 GMT
Been a long while since my last update; since then I've received my missing track rod end, tunnel and steering column extension, but not the front floor, which I've just given up on, I'll buy it locally. I have made progress on my donor while I was waiting, most of the bits I need are now off. I had my local garage push the bearings and hubs out of the hub carriers for the price of a cuppa, very decent of them. And, flapper disc, where have you been all my life? I've been sanding things like a mug, when €4 would have saved me untold pain! Brought up a lovely shine on the donor exhaust manifold, which now looks as good as new (in the places the grinder could could reach). Short vid of me cleaning up the exhaust manifold At the moment I'm in a weird holding pattern, I can't attach the floor because I haven't got the chassis powdercoated, and I can't do that until all the welding is finished, which I can't do until I know where everything goes.. So, I may just test fit the engine, make sure the mounts are roughly right, then make up some bars for the seats to sit on and guess where they'll fit :-? Poxy seat runners are 3cm too short to span the bars. |
|
|
|
Post by casesensitive on Sept 27, 2013 16:35:27 GMT
Just out of interest; who's flooring the front/nose section of their Rocket/Exocet?
It seems to me to make sense that it'd route more air through the rad, also protect it from stones, mud etc, but someone's told me it disimproves cooling, which sounds... wrong.
Anyone done it, and regretted or undone it?
|
|
|
|
Post by casesensitive on Sept 27, 2013 16:33:43 GMT
Used this as my weapon of choice. Worked really well and was quick. Longer length of the tool eliminated any waviness (?) of the cut line 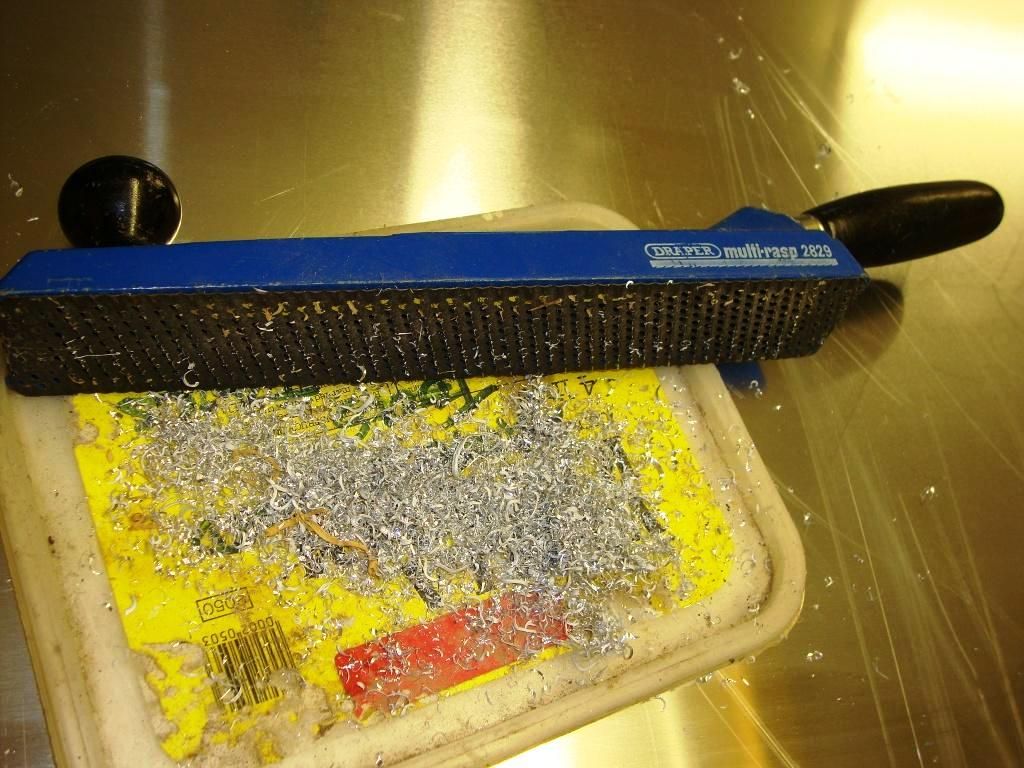 [img alt="" src="http://s894.photobucket.com/user/steve_gerry_barnes/media/DSC00709_zps6248be0c.jpg.html?sort=3&o=2" style="max-width:100%;" Me like. |
|
|
|
Post by casesensitive on Sept 26, 2013 20:28:48 GMT
Spray it with a can of CRC400, dries to a waxy film and they reckon you can leave the coated metal outside for a year withOUT corrosion setting in. Plus when dry the film does not get on your hands or clothes like wet spray or oil. Hmm, what is CRC400? Googling produces no results, ebay thinks its a cooker. |
|
|
|
Post by casesensitive on Sept 26, 2013 16:06:44 GMT
True!
Feint Heart and all that. Will trim again tomorrow but it isn't wide enough for the jigsaw so its a lot of filing ...... unless somebody has a better idea
I used a tin snips (nice long one, I used a 30cm one), which is good to snip down to about 1.5mm wide strips, so pretty accurate. Use a big rasp (like a file, but less fine) to 'plane' the remainder, and a finer file after that. Takes longer, but you get a perfect edge. If you've got time (waiting for parts etc), sand it down too for a nice soft finish. Video of it on YooToob |
|
|
|
Post by casesensitive on Sept 24, 2013 13:58:46 GMT
Thanks casesensitive, very helpful. I have got a couple of mates coming over tonight to help flip chassis back on its floor so I can mark the floor accurately. I tried doing it with the chassis upside down but was happy with the inconsistent marking I was doing! Yeah, if in doubt, stop, and do it a different way till you're happy, a cut too deep will annoy you later every time you look at it. I'd a big TV I loved, and it wasn't until someone else pointed out that there was discoloration on all down one side on certain background colours; didn't bother me until I noticed it, but after I did, I couldn't see anything else. |
|
|
|
Post by casesensitive on Sept 19, 2013 12:56:33 GMT
Yeah, I'm not upset at RTR, this whole process is going to take 2 years I reckon, and I've plenty to be getting on with in the meantime.
The bits I've got are great, the chassis is very impressive, and I'm almost certainly going to order more bits from RTR as I realise what I need (SS-marked nuts'n'bolts for instance, I've already ordered from them). Stuff happens, it's what you do about it that marks the quality of the service, and RTR are sorting it. Topper :-)
|
|
|
|
Post by casesensitive on Sept 18, 2013 22:09:14 GMT
Funny, I had asked for a sheet of ally long enough to cover the front nose section too, but RTR recommended fitting it as a separate piece (using tapped unions rather than rivets in case it needed to be removed to drain the rad or whatever). I'm waiting for the remaining bits from RTR, which they're sending on. Sure, it was 5 weeks (courier took the piss) between the build being finished and me taking delivery, so a few days won't kill me :-)
|
|
|
|
Post by casesensitive on Sept 17, 2013 21:38:20 GMT
|
|
|
|
Post by casesensitive on Sept 17, 2013 18:53:39 GMT
Can I politely suggest you break it into smaller chunks in the future, it makes it easier to comment on specific things for ideas and suggestions. Yep, good idea, I've split it up now. I would leave any welding till later as you may want to tweak things as you go and welding is not so easy to change. Will this not ruin the powder coat though? I'm torn as to how to proceed now, because I want to fit the various bits, but I want to ensure it all fits, the seats being key. But the centre tunnel is still on the floor in Nottingham somewhere, so I can't test fit the seats or fuel tank till I know how much space I'll need in the middle. I'm definitely going to have to secure the seat rails with some sort of bars, and while a bolt in a crush tube cut to fit should work, I think I'd feel better about them if they were (also?) welded on. Get the floor on with clico's or something similar. I tried using a temporary floor and it was crap, fitting the proper floor enables you to fit other things knowing they are correct because it gives the correct datum. With clico's you can have it on and off in a few minutes. Don't use rivets thinking you can drill them out, you can but you end up with dead rivets inside the tubes which is not a biggy but is annoying plus getting under the car to drill would be pain. When fitting the suspension make up some temporary bushes, you can use the proper crush tubes, you won't be able to set up the suspension properly without this, but you don't damage the proper bushes. When turning the chassis over put blocks of wood under the pivot points then any brackets are kept off the ground. I flicked mine over a few times on my own. Temporary bushes? Outta wha'? I 20%-fit two bushes (just the tip, way way) and a crush tube into one of the front upper suspension 'bones, and it went it very easily (in a vice); looks like RTE are chamferring the crush tubes out of the factory now. I didn't push them all the way in because I wasn't confident I could get the OUT again |
|
|
|
Post by casesensitive on Sept 17, 2013 18:43:16 GMT
Drilling the holes
Once I had a reasonable edge on the floor, I set a calipers to exactly 100mm and marked off hole positions at what I reckoned (by Mark I eyeball) would be dead centre over the tubes, giving them a good whack with a ball hammer via a centre punch. 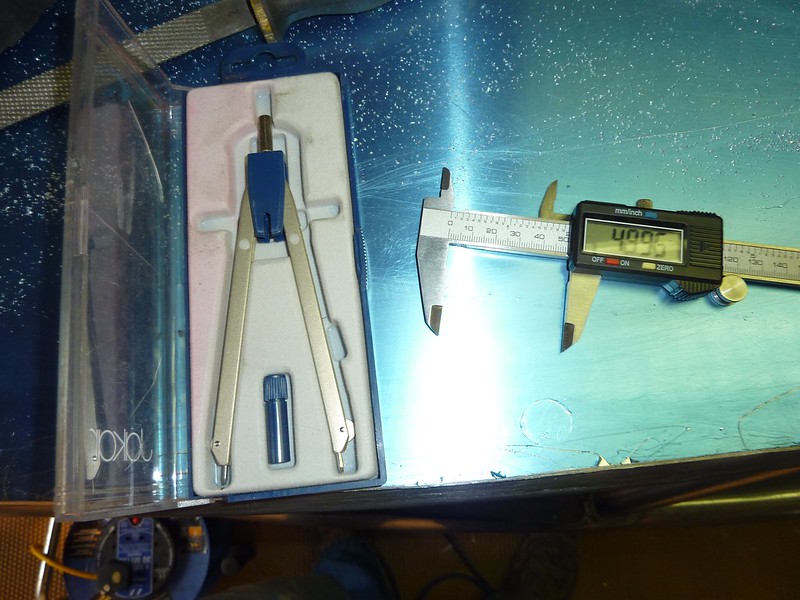  I then went through each of the punched holes with a 2mm drillbit, followed by a 5mm one. Having read both the instructions and other guides, I expected to break a few of these, but I splashed out a bit extra on the cobalt bit the man in the shop insisted I needed to go through stainless steel. The trick to not breaking them apparently is to drill slowly (<1000rpm), which I did religiously, and my chassis is not full of broken metal. 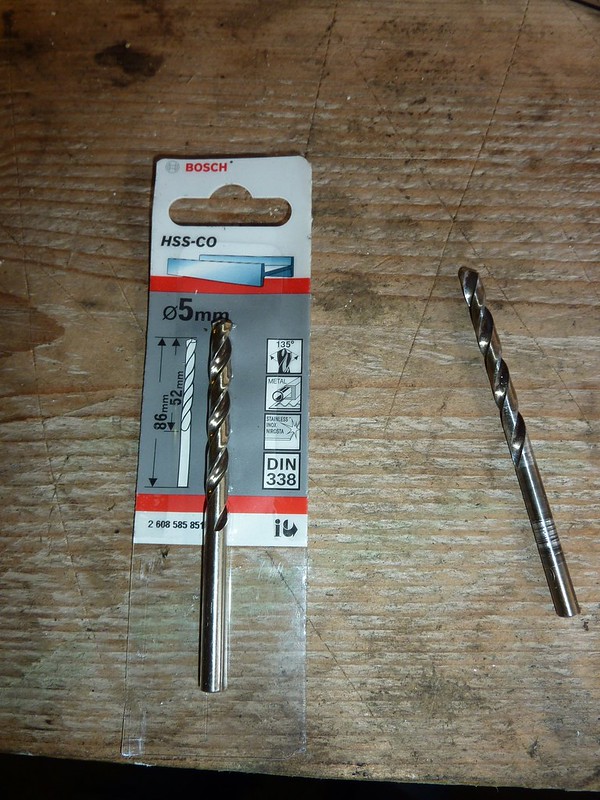 I then climbed under the chassis and marked the underside of sheet carefully with the sharpie to get the centre tube and seat support lines. I lifted the ally sheet off the chassis, placed it on the pallet the kit came on, outside which was now sunny. I used the calipers to mark the centre line of tubes, then centre punched the holes 100mm apart, then the 2mm, then the 5mm drillbits through it, carefully mind, with nothing supporting it, it’s easy to depress the sheet. With the holes now in the right places in the ally sheet, I laid it back on the chassis. I then centre punched the chassis, through the holes in the sheet. You need to give it a really solid whack, the steel takes a good bit more marking than the aluminium. Then 2mm, then 5mm bits again 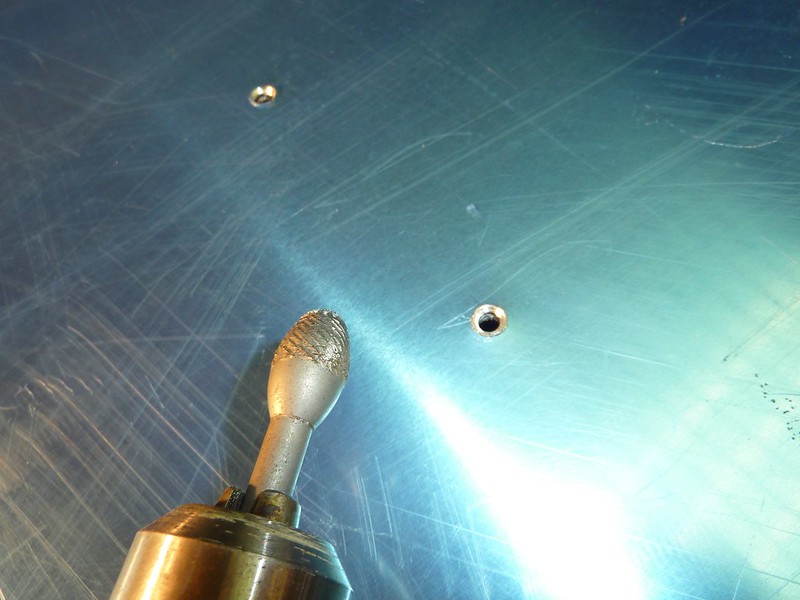 Tedious, but I went over both sides of each hole in with the ally, and all the holes in the chassis with a deburring drill bit, really short, 1 second for the chassis, half a second for the ally. Then 80 grit, then 180 grit with the mouse sander. 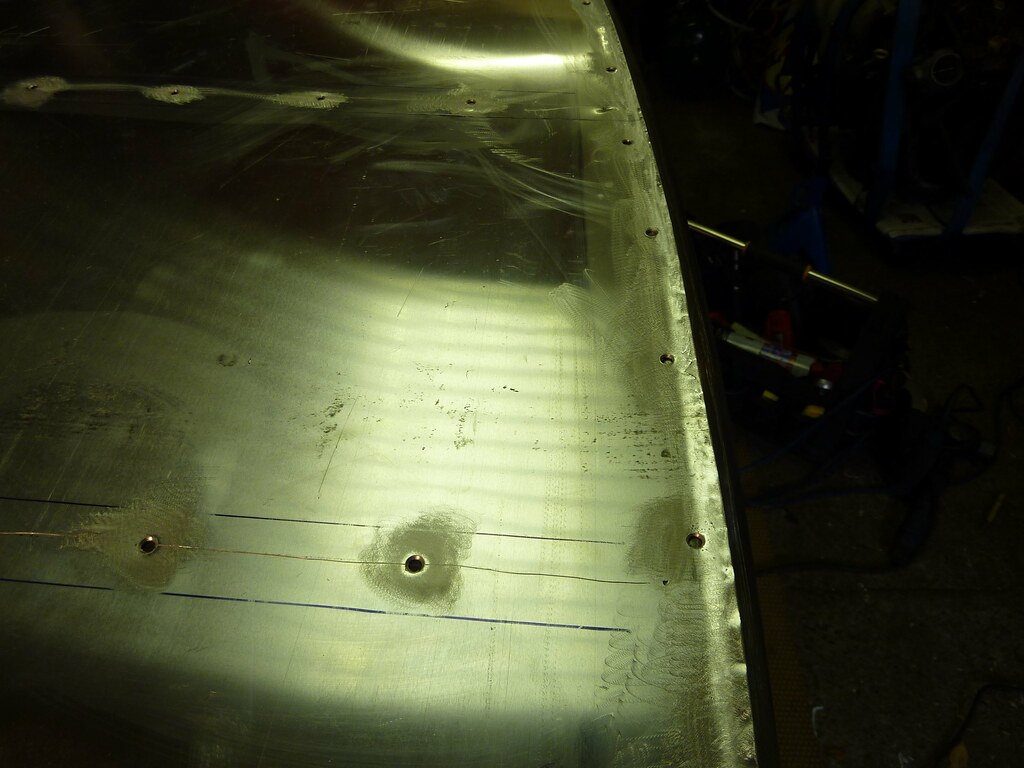 You can see from the image above where I’ve formed the floor to fit the chassis around the edges. I did one side with the round side of a ball hammer, which was overkill, the other side was done much tidier with a big rubber mallet swung with vigour. All in all, I’m extremely happy with results :-) 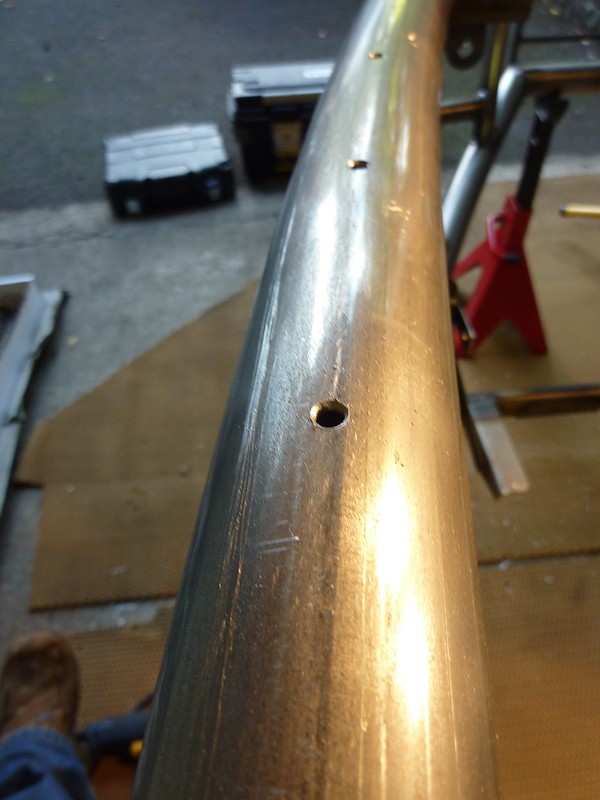 With all that done, the floor came off and was stored away for after Powdercoating when the rivets will go into it, and I’ll do the obligatory rivet forest shot! I’ll cut the front nose floor section when it arrives with the rest of my missing parts >:-|
|
|
|
|
Post by casesensitive on Sept 17, 2013 18:42:50 GMT
Weapons of choiceSharpie Scalpel Stanley knife Jigsaw, size 7 metal cutting blade ear protectors, mask, goggles at least 4 c-clamps with at least 55mm opening Centre punch and big hammer Drill and 2mm and 5mm bits, cobalt if you have them Tin snips Rasp File Calipers or ruler Big rubber mallet Sand paper (80 and 180 grit) and hand sander Deburring drillbit 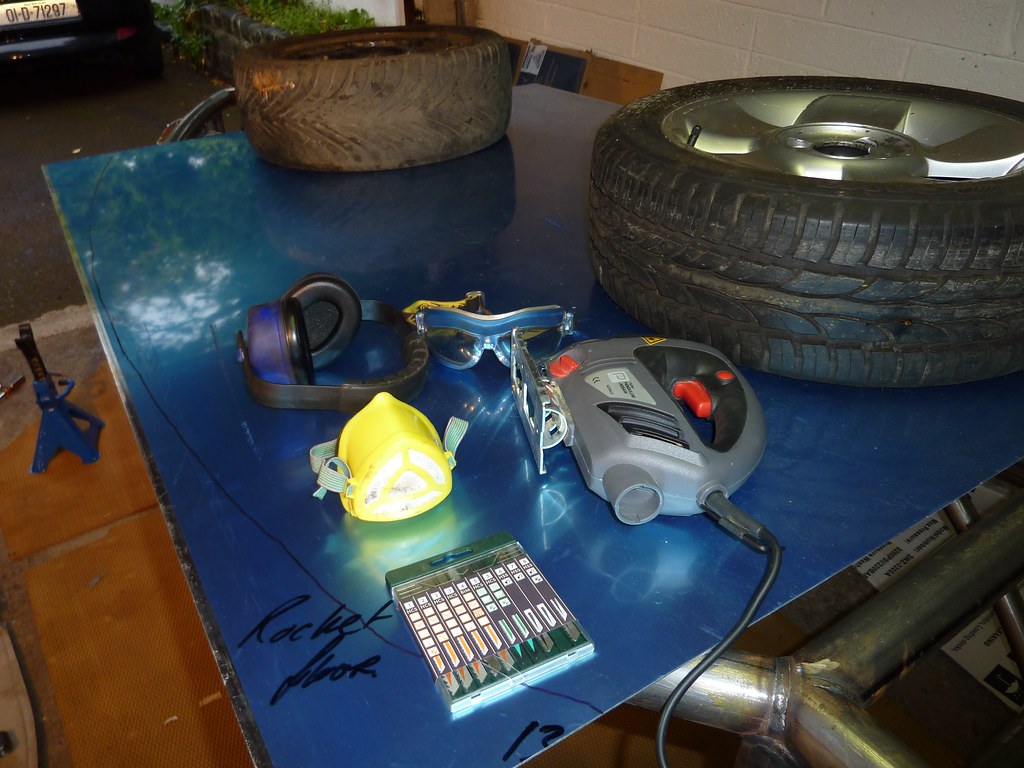 Cutting and sanding aluminium needs breathing protection, so goggles and mask are de rigeur. I ended up using other ones, the seal on that mask is crap, I just can’t bring myself to throw it out. Ear protection helps, I find I get monster headaches after a few hours. Most normal people would get through this whole thing in 90 minutes, I took almost 9 hours at it all told! Jigsaw with size 7 metal cutting blade and handy laser guide. I brought the wheels in closer for the cuts, starting with a horizontal mid point cut so that when I cut along the long side the first half would drop off as I completed the first half of the cut, rather than hanging out. I then set the ally sheet in place on the chassis, adjusting it carefully with a rubber mallet until it was perfectly straight at the two ends (which come exactly the ‘right’ length). I then clamped it in place with 4x 4” C-clamps, and added a couple of other assorted one to be certain.  I then used a centre punch to mark the position of 4 guide holes, making sure they were over tubes and not welds  I nervously drilled a 2mm hole through the ally sheet into the chassis, and was relieved to find it went dead centre through the tube.  I expanded it carefully to 4.5mm with an appropriate bit, and trial-fitted my rivet, which didn’t fit, so I went through with the 5mm, and retested, like a glove. I repeated on the other 3 corners, skipping the 4.5mm hole on the rest of the holes. I then dropped a couple of long m5 machine screws into three of the holes, a drill bit in one because that’s what I had lying around! 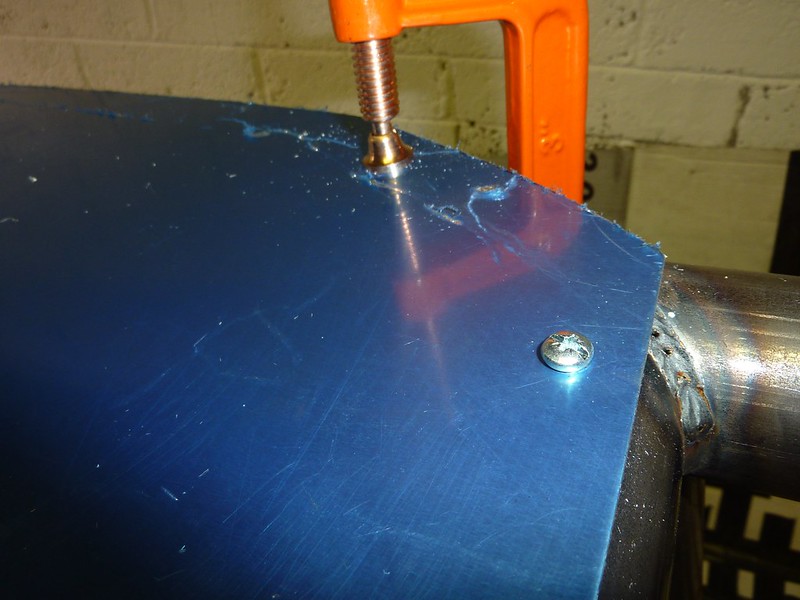 This made sure it was secure enough to be absolutely rock-solid for the next bit, which had potential to get jiggly. 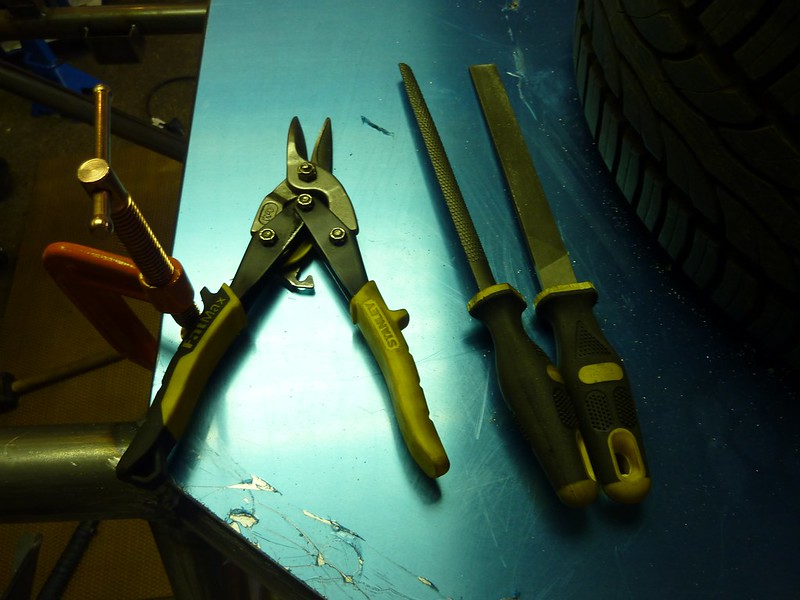 I decided on what sort of fit I wanted, decided on about 8mm shy of the edge of the frame, so I cut the overlap with the snips to about 2-4mm wider than that, leaving enough to file down with the rasp. The eagle-eyed will have spotted that I’ve used a wood rasp, but don’t knock what works, if you have to gouge lots of metal, it does the job. For purely aesthetic purposes I’ve put a chamfer/bevel on the floor section, no one will see it, no one will care, but I’ll know. 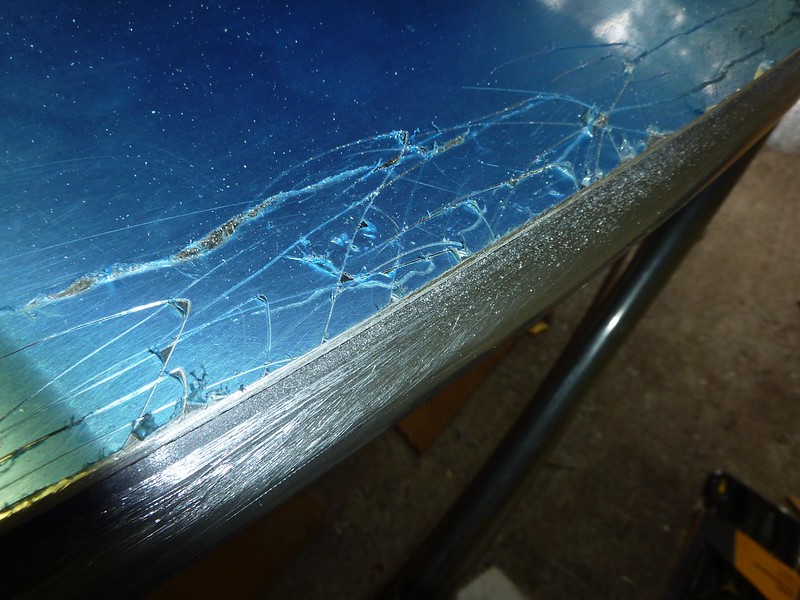 I then ran a finer file over the now-pretty-rough edge, and then 80, followed by 180 grit sandpaper for a decent shine. I've stuck together some of the video I took while doing this, before the bloody battery ran out. I hope to do lots more as I go through the project.
|
|
|
|
Post by casesensitive on Sept 17, 2013 18:41:25 GMT
Fitting the floorI read some interesting ideas on floor fitting on other guy’s build guides, and I was very seriously going to attempt to build a jig from MDF like Jacksdad did. In the end, I remembered that I nearly always mess these things up, so I opted for the counter-intuitive ‘measure once, cut twice’ method. The idea being I’d do a very rough cut, much bigger than I needed, all ‘round, then trim that, then file it to precisely the size I wanted by eye. TemplateAfter dragging a tape over the rocket (~3150 x 1150 in case you wanted to get one in or on a vehicle) I stitched a piece of cardboard a little larger than the Rocket’s base, made by joining pieces of two sturdy cardboard boxes from the opposite side with Duck tape. I placed this on top of the rubber matting, lowered the chassis (awkardly, I’m doing this solo) onto the cardboard and shuffled it around until it was as centred as possible. ![http://farm3.staticflickr.com/2823/9765496181_8fdbe1da1b_c.jpg]() I then drew around the outside edge of the rocket, making sure to angle my Sharpie away rather than towards the Rocket, giving me an outline at least 10mm bigger than the frame. I then cut this out using first a nice scalpel to give the line, and then deeper with a stanley/box knife. 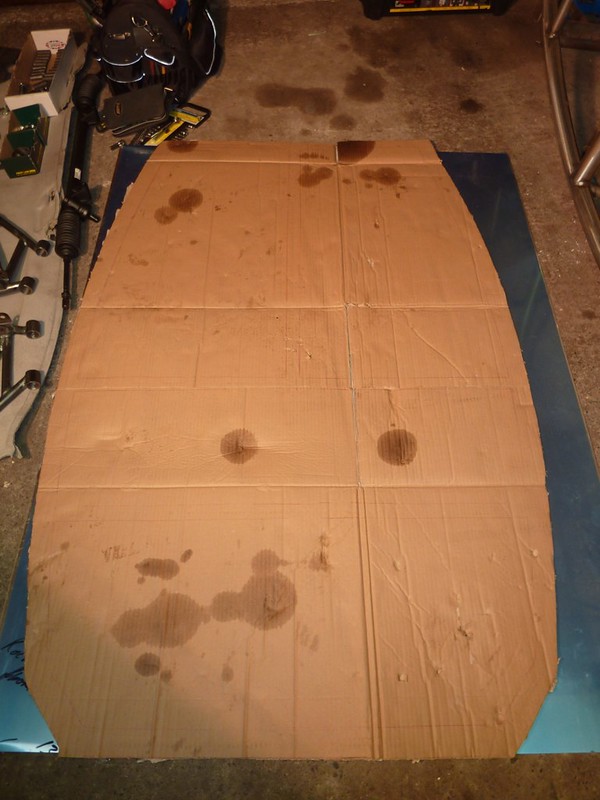 I then placed this on the upturned Rocket chassis, and placed the ally sheet on top to sanity check the fit, make sure it wasn’t buggered up somehow 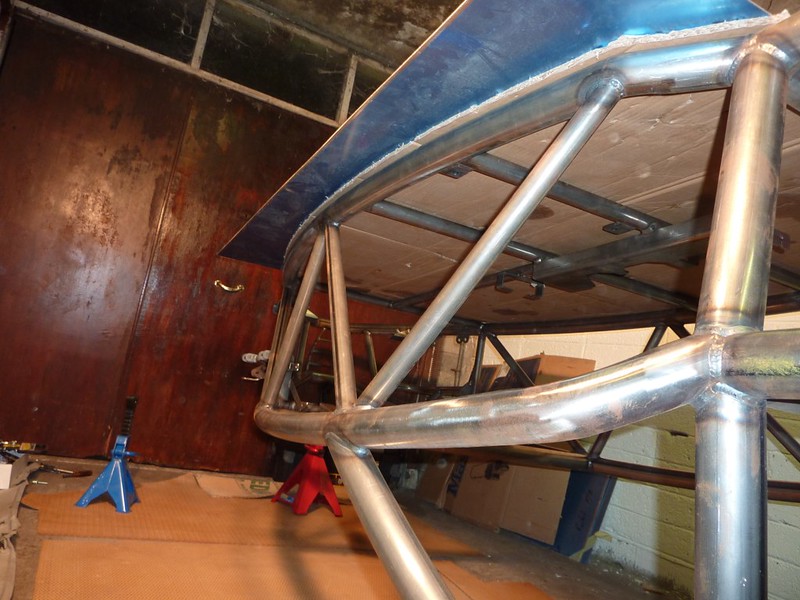 I flipped over the ally sheet and template, and ran around the outside, giving a wider version of the Rocket floor. 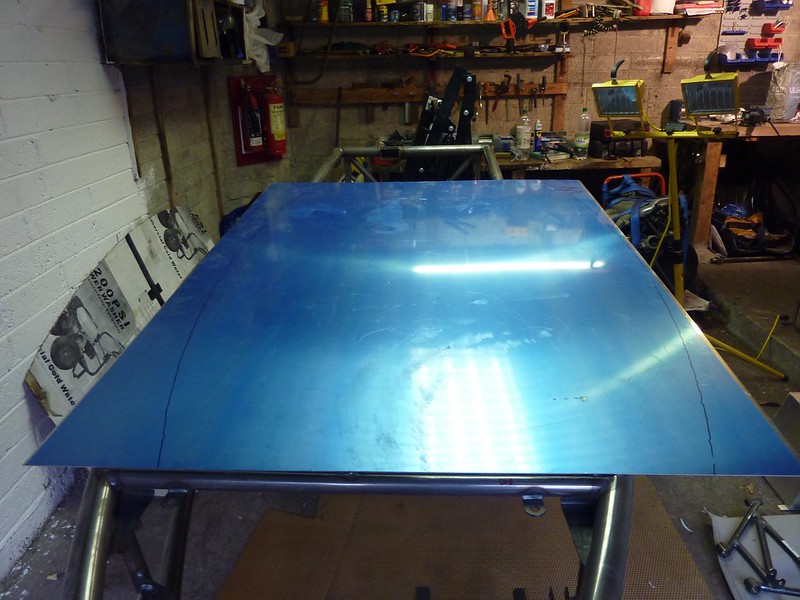
|
|
|
|
Post by casesensitive on Sept 16, 2013 21:03:23 GMT
UnwrappingFirst evening was spent unwrapping the parts which was like Christmas! So exciting figuring out what goodies I had. And just like Christmas and discovering there were no batteries included, I’ve prepared a snag list of what was missing and also things I’ll need to buy. A positive though, and I think this might be new for RTR; they had written on all 8 suspension pieces (bubble wrapped) where each one went (F Up, R Lower etc), which was great. I broke out my label-maker and re-labelled them as the wrapping came off, now if I can just persuade the powdercoaters to put the labels back on the pieces afterwards.. Couple of snags, including my GRP being light grey rather than the Magnum Grey I’d envisioned. Guess another few hundred to get them painted, boo. Is there any point in attempting to get them vinyl wrapped? Would the wings get wrecked? Anyone powder-coated the GRP? Too hot? 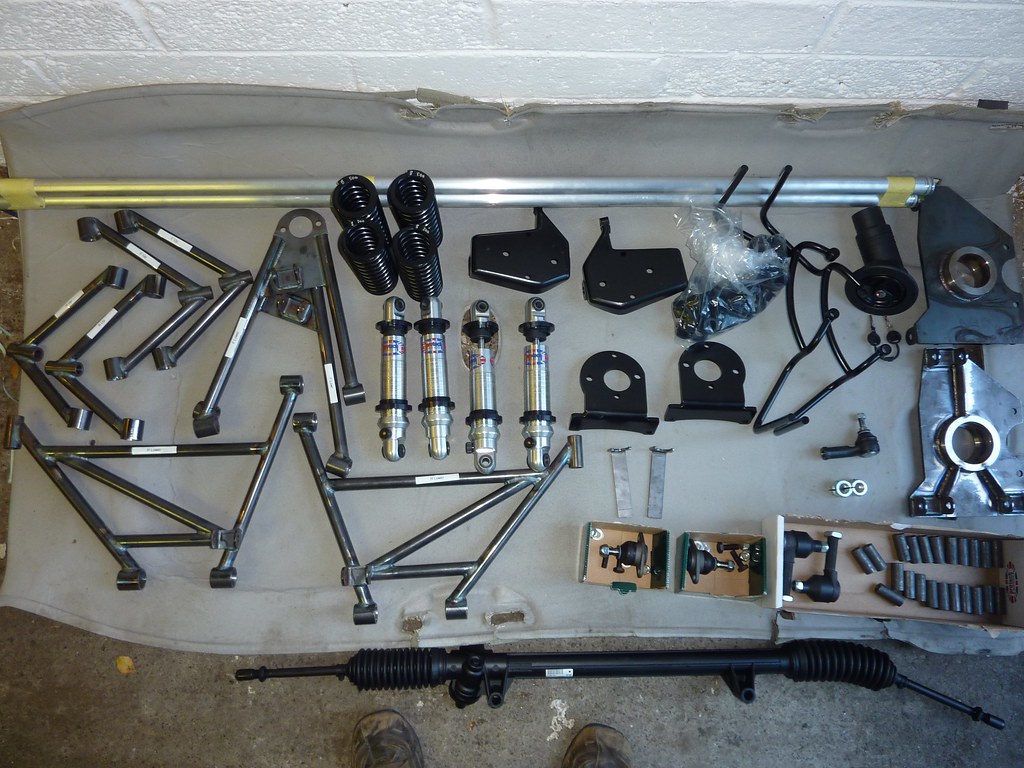 My philosophy for this build has always been to take it really slowly, and gets as good a quality finish as I can, my skills at this do not measure up to my excitement! So I’m going to do the build to about 40%, and then disassemble what I’ve got, send the chassis for powdercoating, and then do it again. So I’m going to (try to); Drill and part-fit the floor Fit and get welded the seat rails bars, fit the seats Fit the radiator (make brackets?) Build up the suspension (less the bushes and crush tubes Fit the steering rack,extension, and steering column from the donor Loosely fit the brakes, less the pipes and cable Test fit the engine mounts and drop the engine in Figure out the exhaust routing, probably have to get one custom made And then strip it back into parts again ready for powder. This allows me to make small mistakes and be rougher with the chassis than I’m prepared to be with my shiny paint on. First NightAfter unwrapping, I spent the remainder of the first night (I ended up staying past midnight, wife was away) just walking around the chassis trying to figure out where to start, what goes where and worrying would it all fit. Ultimately, I didn’t make a single measurement or cut, I just sat my seats, on rails onto what looked like it would hold them, finding the seat rails from , annoyingly, about 3cm too short to span the bars. Looks like I’ll have to get some thick bars and get them welded on. I had been dumpster diving earlier in the day, and in addition to the big cardboard boxes I went looking for, I scavenged some rubber matting with some messy cutting mistakes in it, fortuitously, almost exactly as wide and a foot longer than the chassis! This was laid down on floor of the garage and should mean I don’t scrape the chassis turning it over. Flipping the chassis over by yourself and not accidentally letting its weight support on a bracket of some sort is a bit of a job, best done very carefully and slowly. Really, I’d have paid my little brother to help if I was doing it again.
|
|


