|
|
Post by casesensitive on Oct 30, 2023 8:43:13 GMT
I really enjoyed your Honda Rocket build, and I’d imagine Stuart would be ok with it. I think there may even already be one.
Loads of pictures please! A time-lapse garage real time video would be a nice thing to link to too.
|
|
|
|
Post by casesensitive on Mar 6, 2023 9:31:09 GMT
I had custom flexi lines made from reservoir to caliper an all around.
Though some people have told me it won’t pass an IVA.
I’ll dig out the drawing and dimensions today.
|
|
|
|
Post by casesensitive on Aug 15, 2022 7:37:11 GMT
MEV, RTR, then EXO made them, presumably they have the moulds?
I understand quite a bit of fettling tends to be required, would it be better as a custom cardboard-aided design job?
|
|
|
|
Post by casesensitive on Jun 14, 2022 10:38:23 GMT
I ballsed up the last lid and started over, shiny does not equal clean in the world of aluminium welding. Unroughed bung melted into a lead-cheese alloy as soon as I hit it with the arc, and the resulting chewing gum mush was simply not good enough. New aluminium bung, new AN-6 fittings ordered and waited for and a new lid made. Ouch on many fronts. Retaining ring threaded M5 and a little tack either side to be triple sure  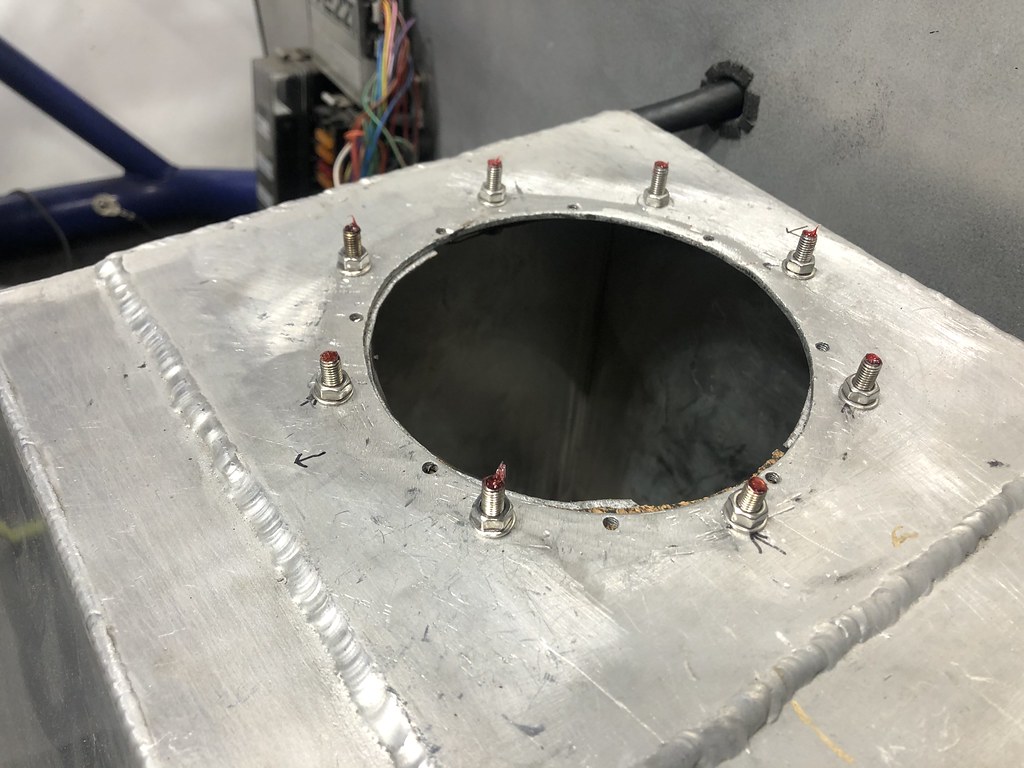   Torn about the tightness of this, question in the other thread about how I should go about making it loose enough to be usable without creating too many leaks.  Welds are on the underside this time, so any crimes can be ground down  You can see where too much heat got into the part, smushing it, had to be carefully ground back with a Dremel  Got to weld these in place and stick on the 12-8mm reducer tube. I'd be tempted to SiB braze it but I'm not confident in it yet, still makes a bit of a mess.  |
|
|
|
Post by casesensitive on May 23, 2022 10:12:00 GMT
Ok, here we go. Cheapo pump (sounds like a solenoid in operation) with pre-filter, in-line fuse holder, chopped off leads from an old charger. 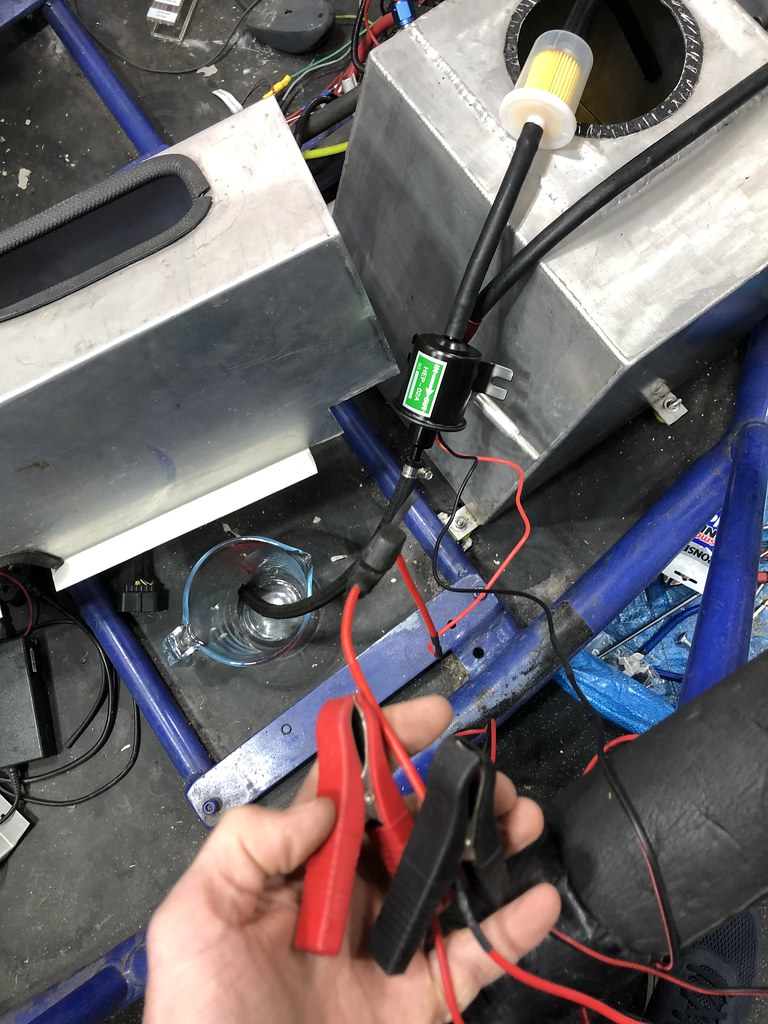 Video in operation Video in operationClean fuel  Horror show of in-tank gunk, mostly the sealant I used 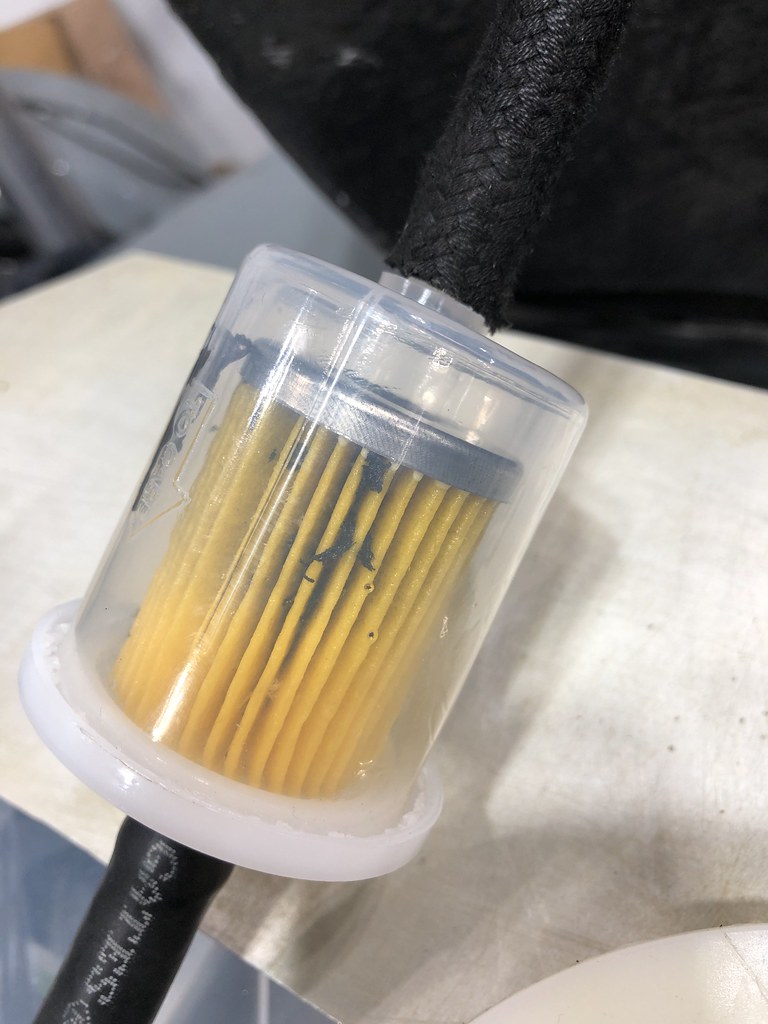 In go the retaining rings, some fettling required. Ok, a lot. 2 nuts on the threads, bit of a whack with a small hammer. 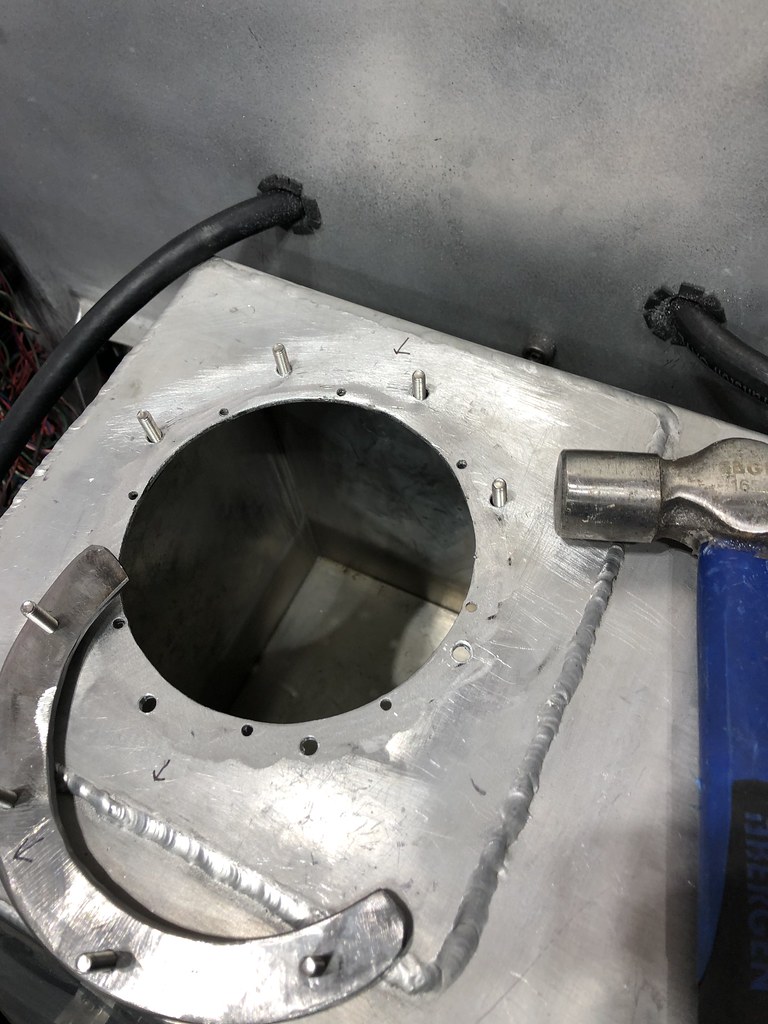 That's in fettling range now. The eagle-eyed will notice this is not the same lid.  Neat holes positioned for the AN fittings and 50mm for the weld-in wiring thingy   And a pair of 1mm cork gaskets, top one looks a bit like a Tuskan Raider.   |
|
|
|
Post by casesensitive on May 19, 2022 14:05:19 GMT
Don't have a good scrap petrol-sound fuel pump, so I put a prefilter on a bit of 8mm ID hose, and plan was to suck the cleanish fuel out of the tank with this. Buuuuut for some reason, there's no power to anything and I haven't got time to troubleshoot extensively. Battery is charged and connected, so it's likely a fuse. Not a job to be rushed with an open-to-the-air fume-filled tank in a small garage, I'll come back tomorrow. Yeah, that'll do it alright. Crimp uncrimped itself. I guess that's what you get when you won't buy the tool, and you use a punch and a bolt cutters. Duuuurrrrh.  |
|
|
|
Post by casesensitive on May 18, 2022 15:25:52 GMT
Don't have a good scrap petrol-sound fuel pump, so I put a prefilter on a bit of 8mm ID hose, and plan was to suck the cleanish fuel out of the tank with this. Buuuuut for some reason, there's no power to anything and I haven't got time to troubleshoot extensively. Battery is charged and connected, so it's likely a fuse. Not a job to be rushed with an open-to-the-air fume-filled tank in a small garage, I'll come back tomorrow.  Obviously, this is a terrible idea. I've ordered a cheap'n'nasty 12v petrol-pump from Jeff's superstore, it'll be here on Friday, I'll just chill my beans till then. All to avoid having to dismount the fuel tank again, which was a pain in the hole!  |
|
|
|
Post by casesensitive on May 18, 2022 15:08:12 GMT
Ok, a little closer. Made some little paper templates, which got turned into 3.5mm plywood templates, screwed to the correctly-spaced (this time) holes, which will eventually be M5.    Then plasma cut my 170mm diameter retaining rings (much cleaning post cut)  Oh lawd that's ugly, my plasma work is rough as a badger's behind  Got my drill press back up and running, these need to be as vertically straight as I can manage  Holes lined up, it's time to transfer these holes to the tank. Lots of load-bearing tape holding them square. 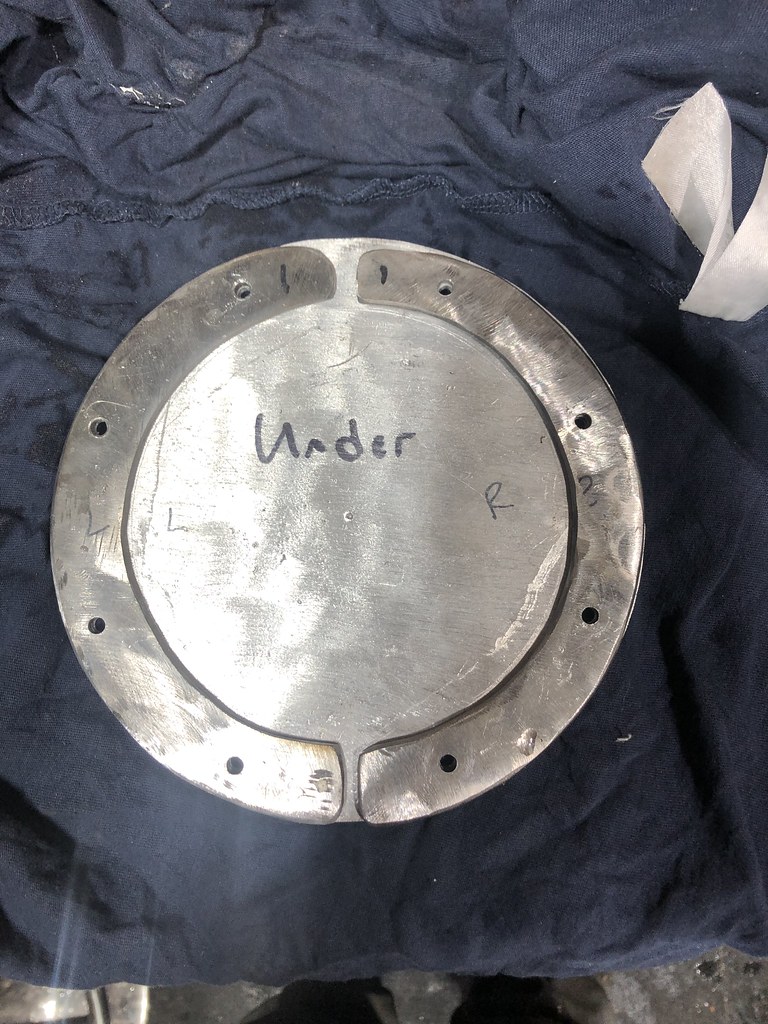  Don't have a good scrap petrol-sound fuel pump, so I put a prefilter on a bit of 8mm ID hose, and plan was to suck the cleanish fuel out of the tank with this. Buuuuut for some reason, there's no power to anything and I haven't got time to troubleshoot extensively. Battery is charged and connected, so it's likely a fuse. Not a job to be rushed with an open-to-the-air fume-filled tank in a small garage, I'll come back tomorrow. This will be the approximate placement of my wiring grommet and weld-on AN fittings. 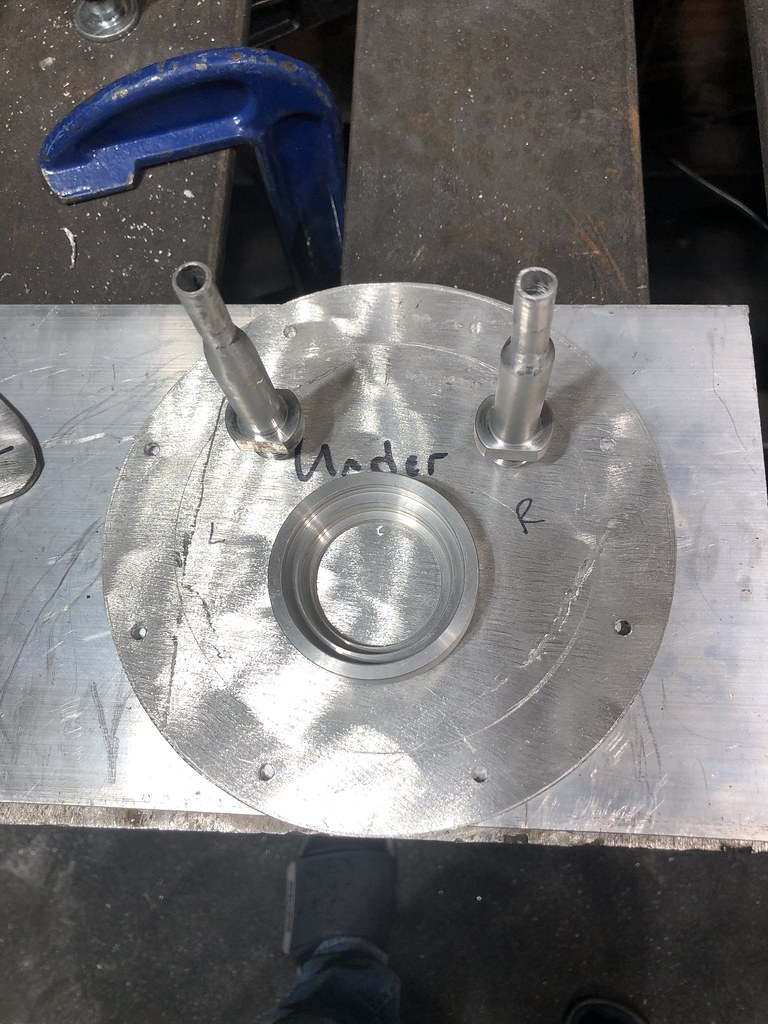 The visible topside is a lot prettier, and will get a nice 80 grit brushed finish before I start drilling or welding.  No turning back once I put that first bead down. Really going to have to think hard about the right settings for those. No pedal. Deep penetration is not vital, but pinholes are out of the question. |
|
|
|
Post by casesensitive on May 12, 2022 14:04:28 GMT
Removing all the fuel lines from their clips and through grommets was a bit of a pain, but necessary to 'screw-in' the AN fittings. Used the old lines to reference the length needed from nice new, unbraided Gates hose. 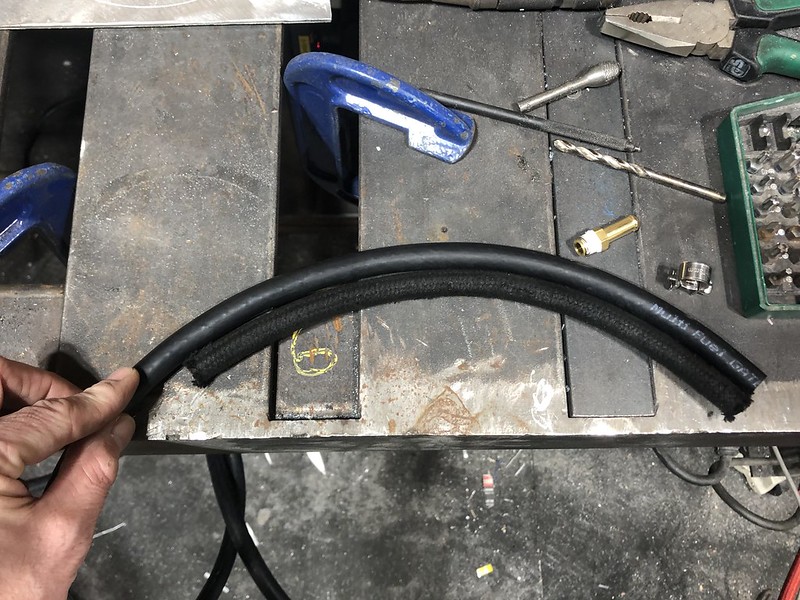 Push the thingy on, heat the hose, mark the line on the fitting so you know you didn't push it off. Push, twist, repeat.   I didn't spring £32 for an AN-6 spanner I'd use once or twice, so I made my own..  Presto 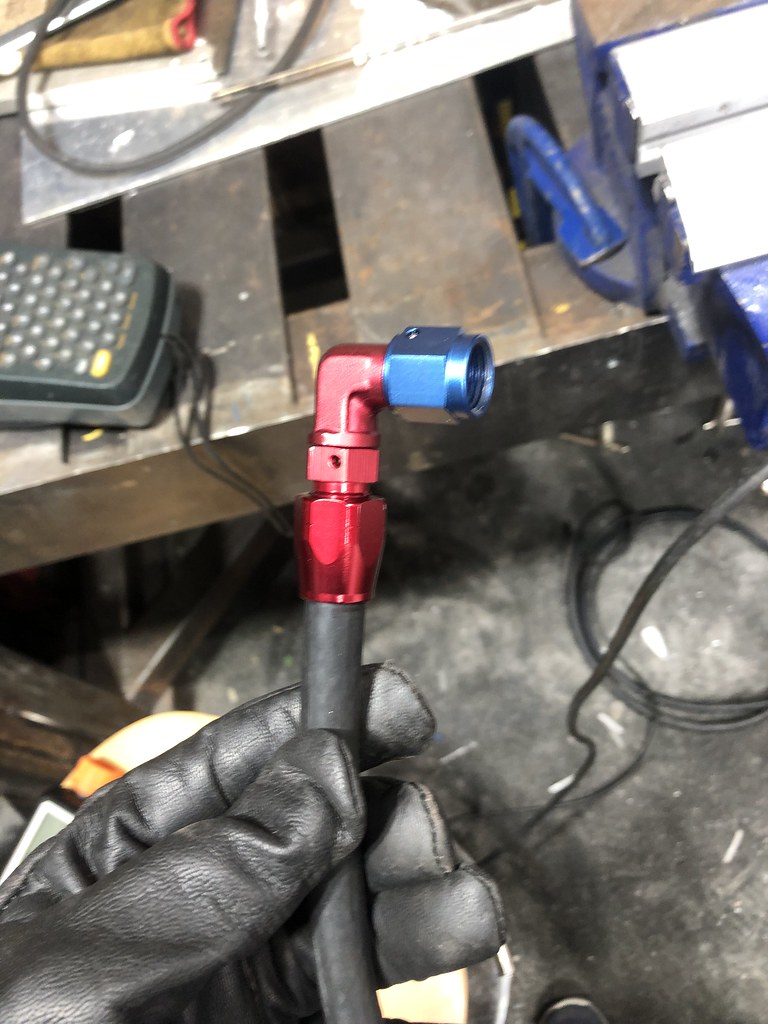 Happy with the Systec FPR. Twice cheap? Buy twice.  Long chat over on the technical forums where we debated whether the system would have the capacity to feed my injectors, and it looks like it will. Hurrah! |
|
|
|
Post by casesensitive on May 11, 2022 12:40:41 GMT
Time on project measured in minutes these days, so at lunch I did the return. 2mm wall to 1mm wall, so I sort of puddled up on the thick-wall stuff and dribbled it down, bit of a chewing-gum weld, required no photo but plenty of 120 grit flap disc.    |
|
|
|
Post by casesensitive on May 9, 2022 12:22:01 GMT
More goodies came.  Though I'm thinking this red clip is going to have to come out or get filed down to fit. Supplier suggested the former, though there's no manual or datasheet available.  |
|
|
|
Post by casesensitive on May 9, 2022 9:11:01 GMT
Ah ok the bolts are tapped into the steel anti rotating plates. What stops the whole plates falling into the tank as you put the lid on before you get the nut on? The alloy ring was laser cut from (think) alloy sheet. If the fit is close enough, and one or two of them are less-than-perfectly 90* to the horizontal, friction from 10 bolts should hold it up. Failing that, I could put some sealant/glue on the underside (though that'd only pull the gasket to the bottom in the currently-planned config). The current one needs to be wiggled into place, if it were upside-down it'd definitely hold up. Though there is of course a decent-sized risk it doesn't work. When you say alloy, do you mean aluminium or an alloy of carbon-steel and (chromium/nickel/manganese etc)? Looking at the frosting at the edge of the welds on the tank to ring inner face, I'd be fairly sure it's aluminium. Unless of course that weld connects your tank to something else I can't see! |
|
|
|
Post by casesensitive on May 6, 2022 14:55:38 GMT
This was our solution to the same problem, should be cheaper for you as you can weld alloy, but the ring cost £25.  Slight aside, that ring looks to be (cast?) aluminium, and the weld definitely is a tig weld of aluminium, if you can do that you can surely do DC steel-to-any-steel too? |
|
|
|
Post by casesensitive on May 6, 2022 12:06:05 GMT
"I may need some sort of barrier grease for the stainless bolts as they pass through aluminum too, thoughts?" ==================================================================== Could you use plastic/nylon spacer or bush? I have cork gasket between the layers, and there will be a nylon washer up top on the nut. It's the threads that may present a vapour pathway, particularly as they'll go up theough untapped holes (m5 bolt through m5 drilled hole, rather than tapped) so I was considering coating the threads in something before putting them in. |
|
|
|
Post by casesensitive on May 6, 2022 12:03:29 GMT
So from top to bottom it'll go: - Nut
- nitrile / fuel proof Washer
- Aluminium lid
- Gasket
- Aluminium tank
- gasket
- steel retaining ring
- stainless steel bolt
Maybe I missed how the lid is held in place, so I will ask the daft question. How are you going to hold the bolts inside the tank to tighten when the lid is in place? This was our solution to the same problem, should be cheaper for you as you can weld alloy, but the ring cost £25. I could draw it but it'd nearly be as quick to go outside and make it! I have made a mild steel ring like you've got, but it'll be cut into 2 segments (think Terry's Chocolate orange) so it can go in. This goes under the lid, inside the tank. Holes all neatly lined up. M5 bolts, welded to the ring on the inside, facing up and pushed up through the holes in the tank, which go through the holes in the new lid. All sandwiched nicely with gasket. As the nuts are tightened up top, the bolt heads will no longer be able to rotate freely in the tank (which is tapped 2.5mm aluminium in my case, I replaced this bit from stock). |
|


