|
|
Post by casesensitive on Jul 31, 2019 9:38:39 GMT
Do you have a fuel pressure regulator / gauge? Does the pressure drop?
Could fuel system be so tight that no air is getting back into the tank when fuel is used? Check this by popping off a fuel hose from the return side of the fuel rail, if there's a vacuum, you'll hear it, if there's pressure, you'll get wet :-)
Will it start up straight away after cutting out, or do it need a while?
|
|
|
|
Post by casesensitive on Jul 2, 2019 13:43:51 GMT
I calibrated it a few months ago, with my Spyda, but it looks like there's a wiring issue since then. It reads full when the wires are completely disconnected, so something's got awry since Jan. I cut about half of the wires running from front to back, because they weren't routed through chassis box section, rather around it, where they'll foul the tunnel. I took the opportunity to extend a few that were a bit short, and to put bullet connectors on a few should they need to be moved again.
|
|
|
|
Post by casesensitive on Jun 25, 2019 17:22:48 GMT
Few small jobs today Flushed the petrol with nice light pee coloured stuff, all grand. Have a feeling my fuel level isn't reacting though, Koso showing full with 5L in the tank, not looking forward to dismantling to check. Cut the hole for my filler into the new full-height rear bulkhead, and drilled holes for the fuel filter bracket. Replaced my 3 wooden coolant pipe separators with 2 Stauff clamps, front one went right in without the lower bracket, replaced with a captive M8 nut instead.  Rear one wasn't tall enough to be supporting the pipes (not that they need it), so I tacked on some 10mm mild underneath  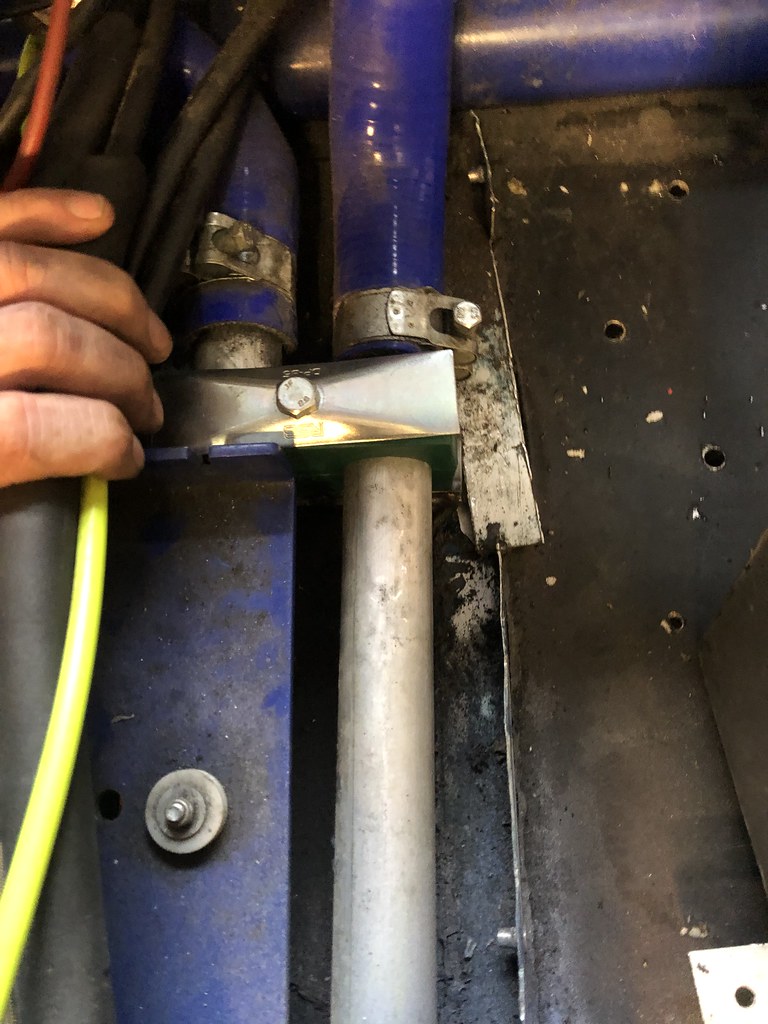 I mostly allowed myself to be paralyzed with the dependency chain of jobs needed to do before I could permanently fit my harnesses, hard to crack on when every job seems to depend on another one I forgot about.  |
|
|
|
Post by casesensitive on Jun 17, 2019 7:52:43 GMT
Trying to sort two problems this weekend, red fuel and removable, sealed tank lid/ring. The existing fuel sender arm had been extended, and was an amalgam of 3 pieces of steel of different grades. I reckon the only place the red colouring could be coming from was one of the welds, likely with mild steel filler. I took 1 nice clean piece of 316L 2.4mm filler and bent it into the right shape, this is the first draft, which needed some extra bends to clear the tank edges in the installed position. 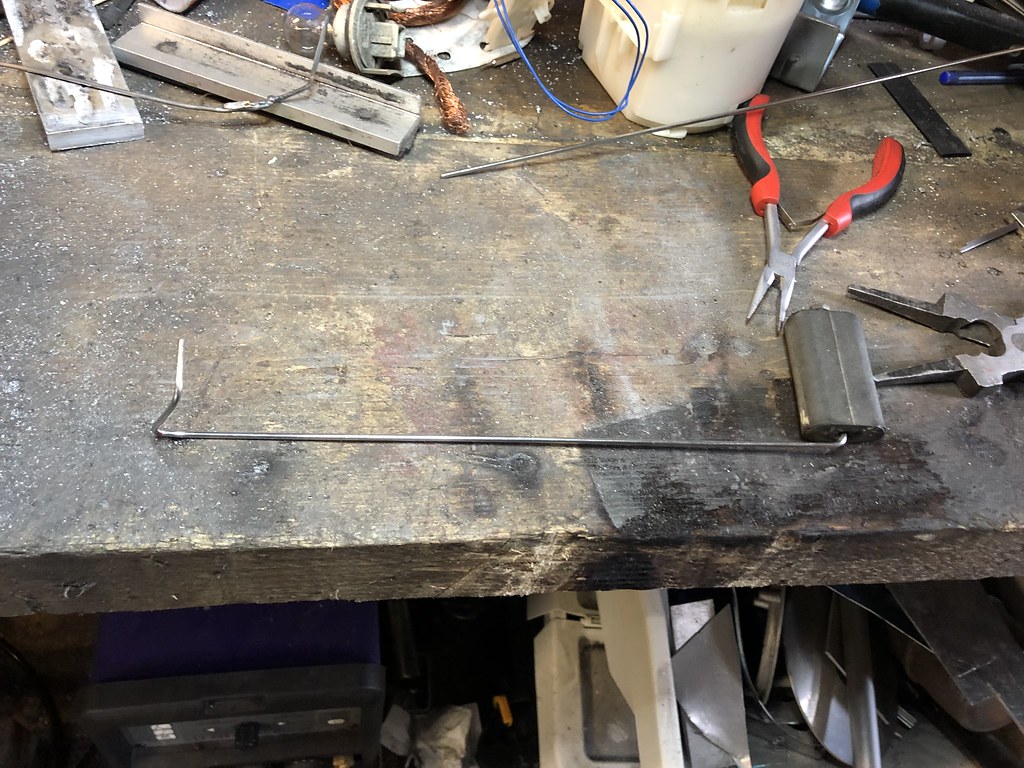 Test fit  No turning back now  Clamp and clean, wipe with acetone and chill blocks to absorb as much heat as practical  Not exactly insta-ready, but it won't leak   Gasket-maker to seal the threaded M4s and to stick down the rubber gasket ring I made 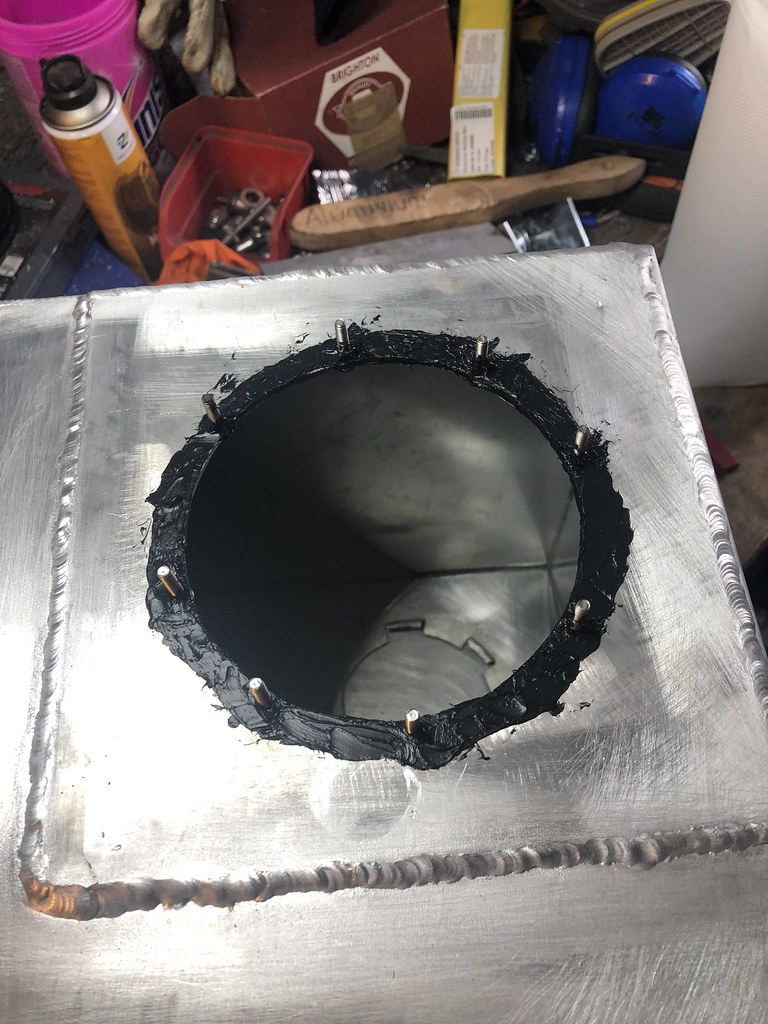   Put the red petrol back in to make sure it turned over, which it reluctantly did; battery definitely needs a new one, but that's a job for closer to the finish line. Dodgy fuel will be flushed through with nice clean stuff next weekend. Added an led in series with the fuel pump wiring, so it illuminates when the pump is being told to run, acts as a nice sense-check for ECU issues. I might do a whole board (1 injector, 1 for each side of the coil pack, fuel pump, vvt) and have a little LED diag board like MSI motherboards from the 00s. |
|
|
|
Post by casesensitive on Jun 14, 2019 14:22:39 GMT
I'm selling my largely unused (because the car isn't on the road or track yet) filter. Pipercross PX600 90mm internal (120mm height external) domed sausage filter for fitting to backplate for individual throttle bodies or carbs. Never used on road or track, only test fitted a few times. Has two small imperfections about 3mm apiece, not visible from a distance. I needed something a little taller to accommodate new, broader airhorns/trumpets, so I've switched to the tallest one (120/150mm) ad still leave the recommended 19mm of gap. Recommend this for 70mm or shorter horns. Includes free DIY-cut backing plate spaced for jenvey throttle bodies on a blacktop/ST170, M14 hole for an IAT, useful template for cutting your own custom one, or you could use it in a pinch. €40 plus registered postage to you at cost, or you can collect from my house in the very unlikely case you're in Dublin for any reason :-) 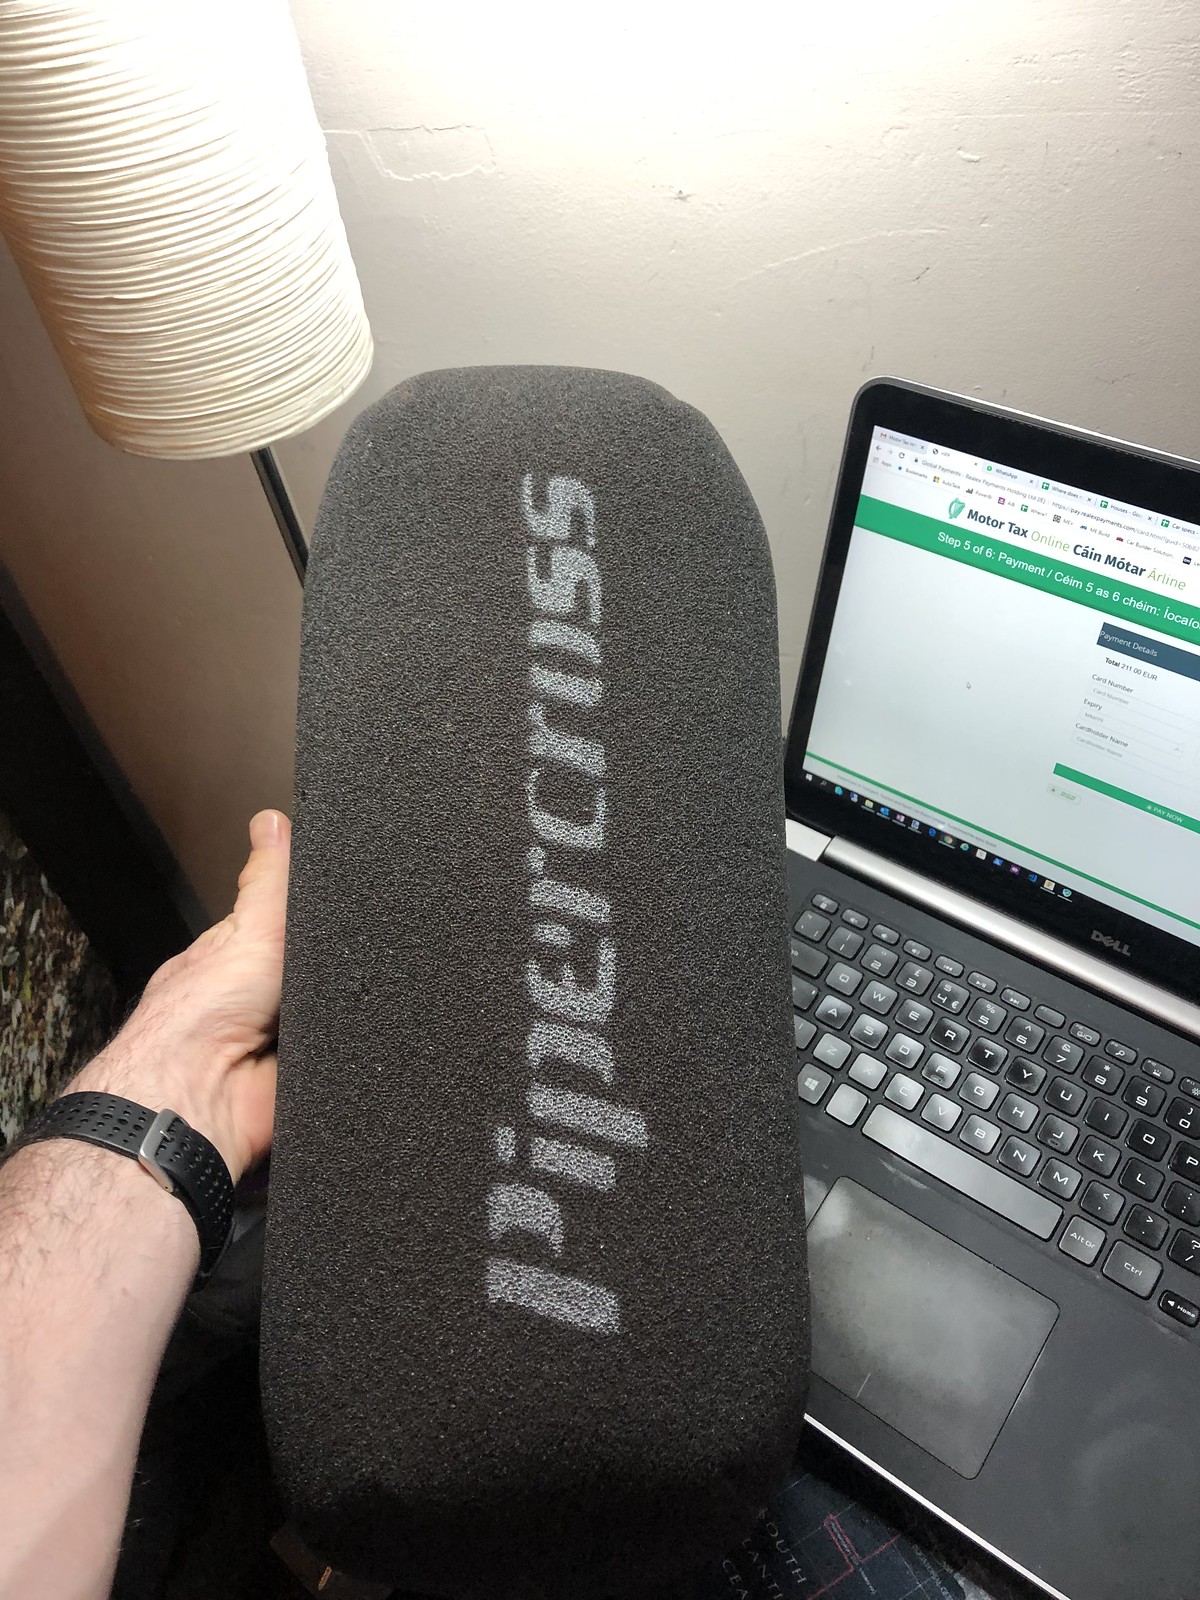     |
|
|
|
Post by casesensitive on Jun 13, 2019 10:05:11 GMT
Go to a show, or go to the vendors (ESC / MEV / Storm etc), look at a few, and try and get a passenger ride in one. I was taken out by Paul in a lowly MR2-engined 130hp demo Race-Rocket, and I've never felt anything like it, more like a rollercoaster than a car. I pootled around their workshop and saw about a dozen Rockets and Exocets in various stages of undress; I was able to walk over to a brand new blank chassis, stand where the floor ought to be and pick it up with relative ease. The Mevabusa bike-engined one outside nearly swung me at the end, but I'm glad I went with an ST170-powered Rocket (now 'Classic Rocket'), as I could barely manage that. If I had more skill, the smaller size and weight of the Exo/Mevabusa might have been my first choice. Unless you're buying already-built, forget whatever you think it'll cost, it's going to be more, initial outlay is manageable, but total spend... eek, I gave up counting years ago. In terms of average difficulty, in the MEV world it probably goes something like this: - Anything already IVA'd
- Anything mostly built
- Exocet kit
- Focus-engined Rocket or Sonic Kit
- Honda or other exotic power plant-ed Rocket/Sonic
- Any MEV with a bike engine
Of course, you could make any MEV harder by putting in exotic materials, have a rough testing regime (ask sammy or Kiwi) or moving the things (fuel tank, rads, gear selector) to places other haven't. Ask kiwicanfly about the Rocket-in-a-box complete kit... |
|
|
|
Post by casesensitive on Jun 7, 2019 21:38:54 GMT
Looks like Jimk's one, retired engineer, amazing build. I really like the perforated steel/al look
|
|
|
|
Post by casesensitive on Jun 2, 2019 9:14:35 GMT
fittingThe next step will be cutting out the old hole and dropping this new ring in, which will require welding aluminium, which I've had very little success at with my current setup. The first hour or two of test welds did not go well. I tried different settings for everything; amps, pulse, frequency, on-time, AC balance, gas flow. I cleaned everything religiously. Mush, just mush all the time. Ultimately it came down to my torch angle, I was getting the filler in the arc before the puddle. Started to improve after that, but I'd say I have a few more hours to nail it down before I go at my only fuel tank.  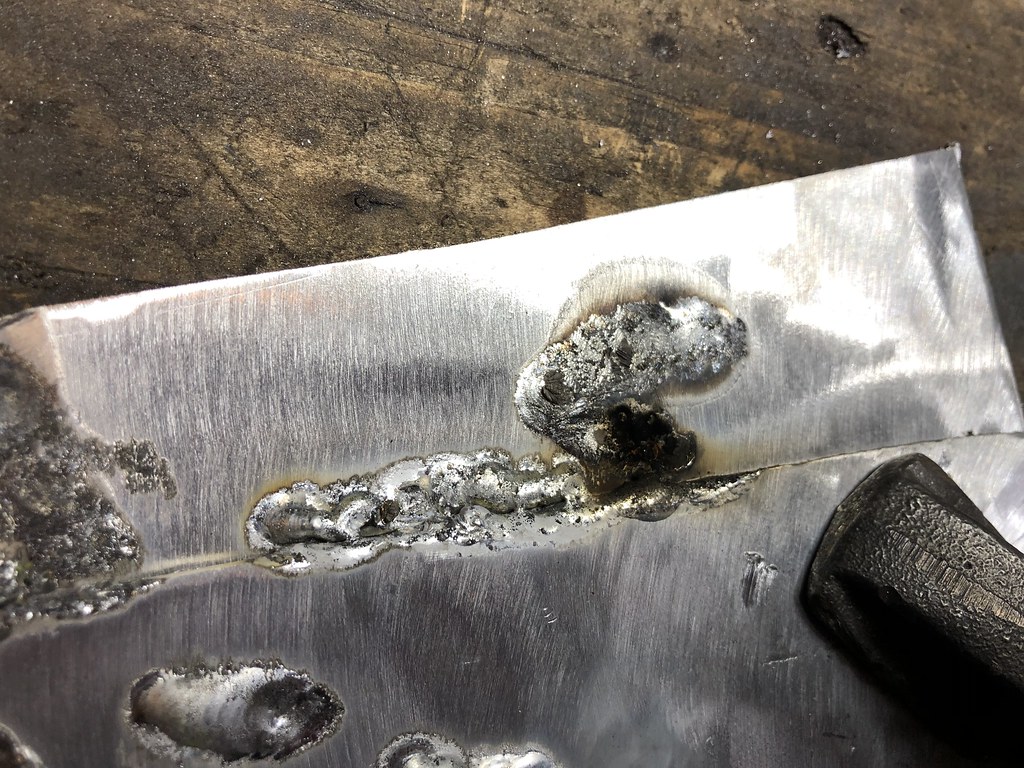   
|
|
|
|
Post by casesensitive on Jun 2, 2019 9:10:00 GMT
Wait, whatnow why's my **** that colour!?Someone's snuck cranberry juice into my tank. Answers on a postcard, I can't imagine how it got that colour. Fuel pump is brand new, fuel lines are new nitrile hoses, rail is aluminium, as is the tank. Presume the colour is coming from iron oxide somewhere, but only the FPR and parts of the fuel level gauge are ferous. 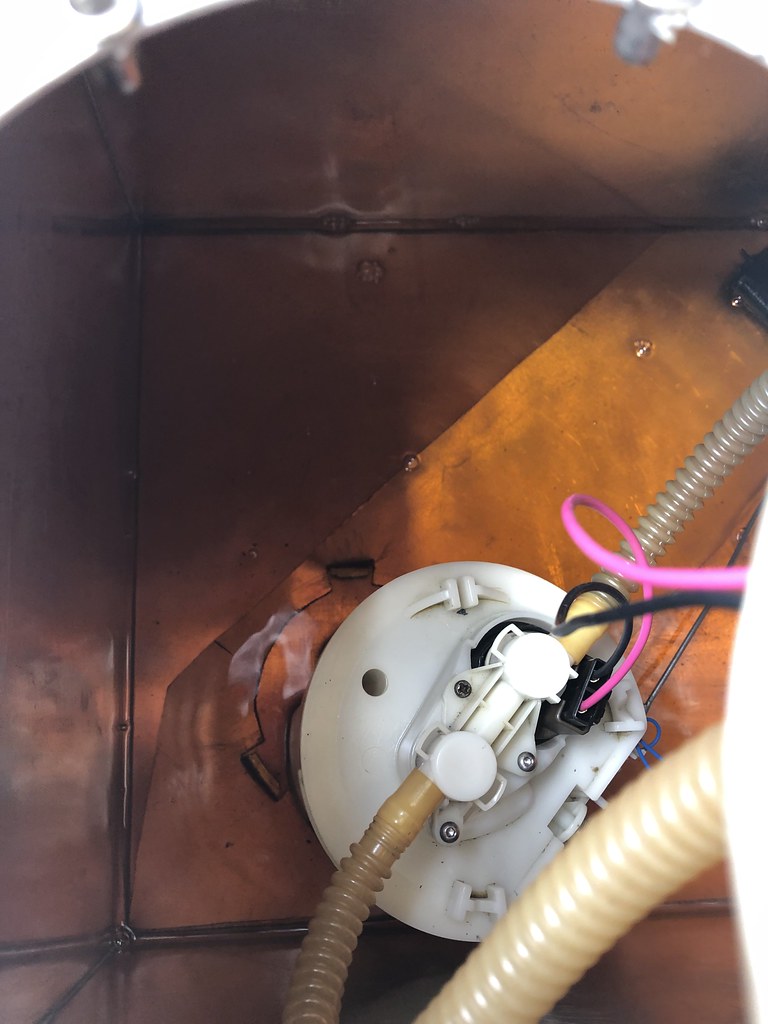 
|
|
|
|
Post by casesensitive on Jun 2, 2019 9:04:49 GMT
Good and bad, this weekend was mostly bad. Dirty weather, so none of the outside jobs got done, and sort of wished I'd left my Rocket alone. Wasn't happy with the sealant gunk, so I set about installing M4 rivnuts in the tank lid. It didn't go stellarly. 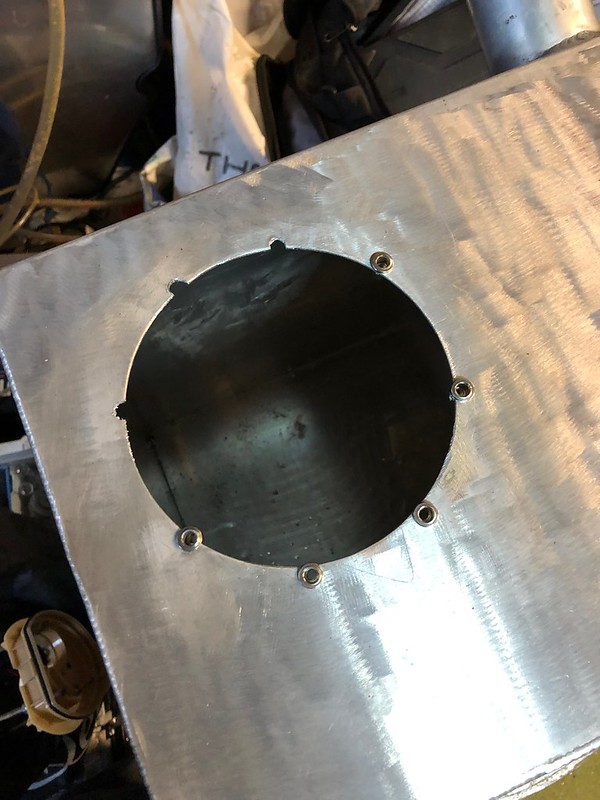 I tried doing an edge build up, or even tacking the rivuts to the aluminium sheet on a piece of scrap, and it just turned to mush. I hate aluminium sometimes. I'll more than likely have to use fuel-proof sealant again, but I think I'll wait till I'm all done. Traced an approximate diameter onto some free 3mm Al, and rough cut with my lidl plasma. Love that yoke.  Rasp and file round  Test fit. Pretty tight in places, <1mm in a few spots. Drilled 3.2mm with a vertical guide to ensure they were as straight as practically possible and tapped M4. 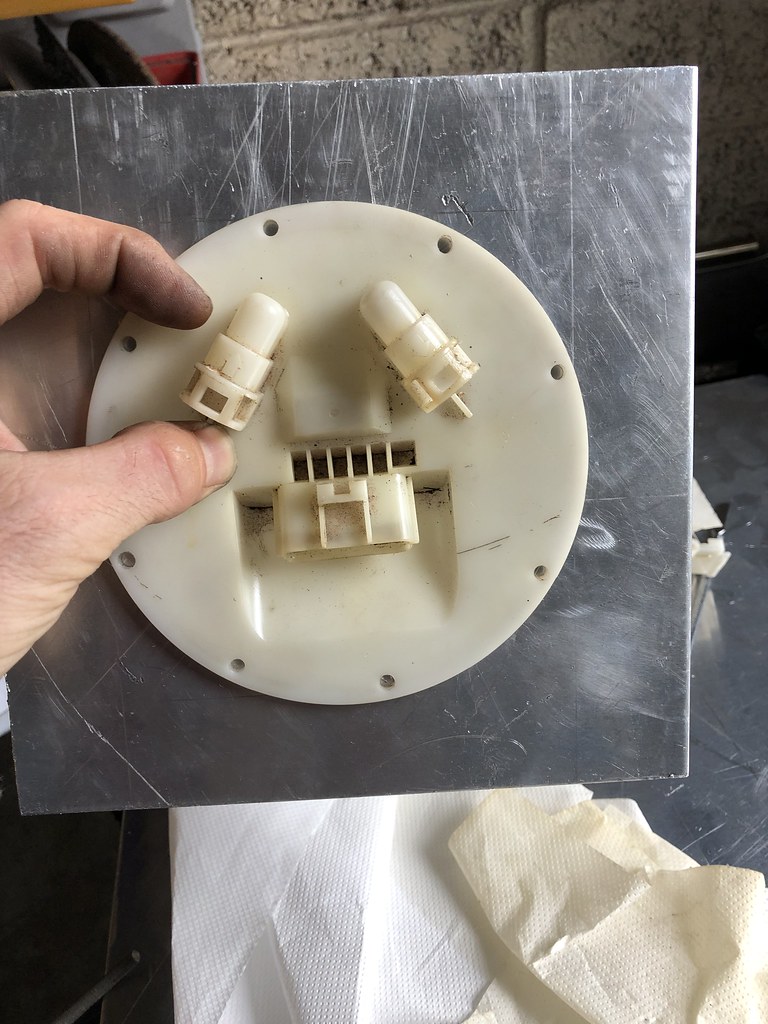 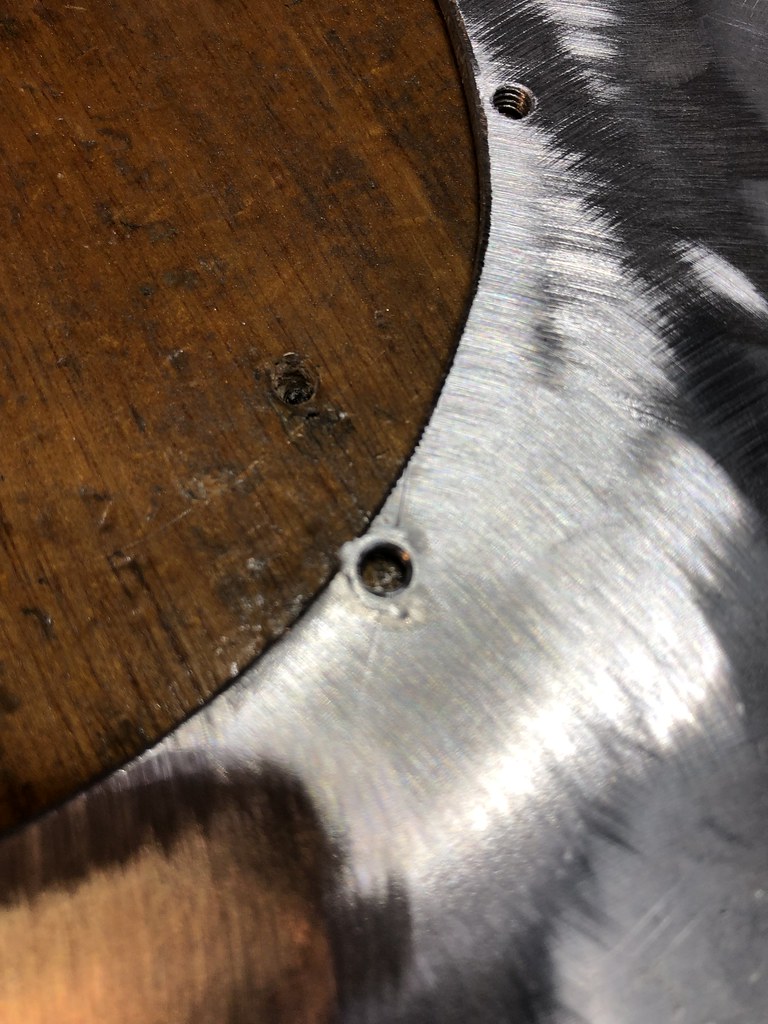 M4s screwed in from the underside  Lots of squashing later and it's a tight mechanical fit.  I do have the Ford rubber grommet but the fuel sender is from a slightly different tank and it's just a bit too snug. 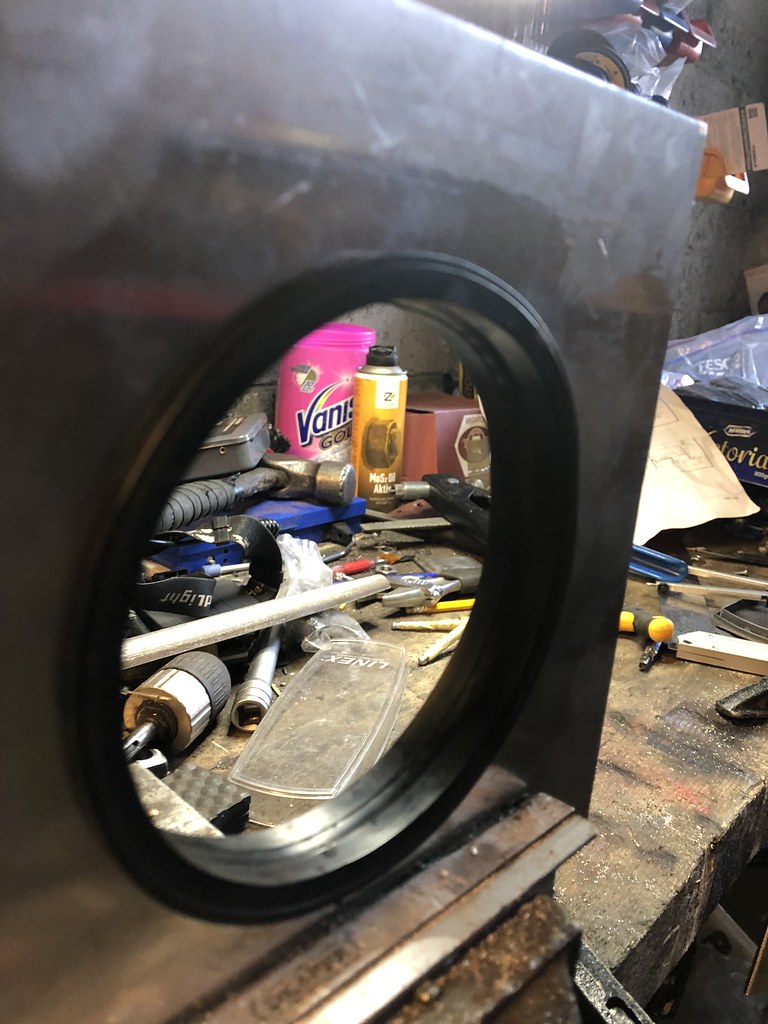 |
|
|
|
Post by casesensitive on May 6, 2019 11:11:10 GMT
This weekend saw a lot of little admin jobs, losing the garage shortly, so not much car building. Moving holesThe outer seat belt mounting positions just aren't compatible with the short eye bolts that go with the Willians harnesses, so they had to be moved. I need them to face perpendicular to the centre of the car so that the belt runs parallel.  The old RTR hole was backed with aluminium scraps, and most of the paint cleared off, good scrub with sandpaper and acetone, then puddle welded up. The 'notches' I had to take out of the seat rail support bar were reinstated and a longer seam weld added, then a new hole drilled and tapped for the eye bolt. I don't have the weird 7/16ths UNF tap, but an M12 x1.75mm provided a thread I couldn't yank it out with hands, plus the correct nut as supplied. Primed and painted, but not dry when I was leaving.   |
|
|
|
Post by casesensitive on Apr 20, 2019 12:17:03 GMT
Detective hat time: If it was collected from MEV in October, has a 1.8 engine, and a prop shaft (Front mounted - RWD), it'll be some sort of Exocet, presumably the G-type. But yeah, OP should definitely provide some sort of detail.. Maybe he decided to persevere? But not to post again anywhere here :-|
|
|
|
|
Post by casesensitive on Apr 20, 2019 0:08:35 GMT
Hi Joker, Just looking at the fuel tank in the 1st picture of your thread, Did it pass the IVA with the fuel filler cap bolted directly to the top of the tank? Just been reading some other posts and it mentioned you could not fill the fuel tank via the cockpit? Cheers BAT304X lad, hasn't logged in since 2015, you'd be better served asking a question, with image, in the technical section. |
|
|
|
Post by casesensitive on Apr 19, 2019 21:32:42 GMT
To this day I can't figure out why the cutouts are in the centre box section. Isn't it to allow gear selector cables to run under it? Nah, they'd never fit, I can only assume it's to 'add lightness'. |
|
|
|
Post by casesensitive on Apr 15, 2019 9:10:54 GMT
Just double check your eye bolt angle, the hole through the eye should be perpendicular to the direction of pull, yours are closer to parallel although the direction of pull on a lap belt is not vertical. Pack it with washer if its not quite right. Bet you wished you had left the powder coating until you had finished building  Oh sure, hadn't really thought about the angle of the eye bolt, that was its posed photo really, just for the 'gram :-) Yeah, my powdercoat has had several bad doings, but back in 2013 when I broke down the order of things, the floor being in looked to be a dependency for lots of other jobs, so it went on first. Didn't know about clecos then, only learned about them from your build's Mad Max phase. Couldn't weld then either (some would say I still can't!). My second build would be much neater! And I'd be divorced if I started again too, so I'd have loads of time, I'd knock through it in 18 months. This mess will be under the tunnel and out of the eyeline, so I wasn't as fussy about the finish. 120grit, 1 coat of zinc primer, 1 coat of sort-of-matched rattle can paint. |
|


