|
|
Post by gnc on Jan 1, 2013 15:33:13 GMT
Its the 18th December and the 2003 donor has been picked up and dropped off at our factory. Almost time to start, will be difficult to go out and do some work when we know the car and kit are back at the factory for a little attention. 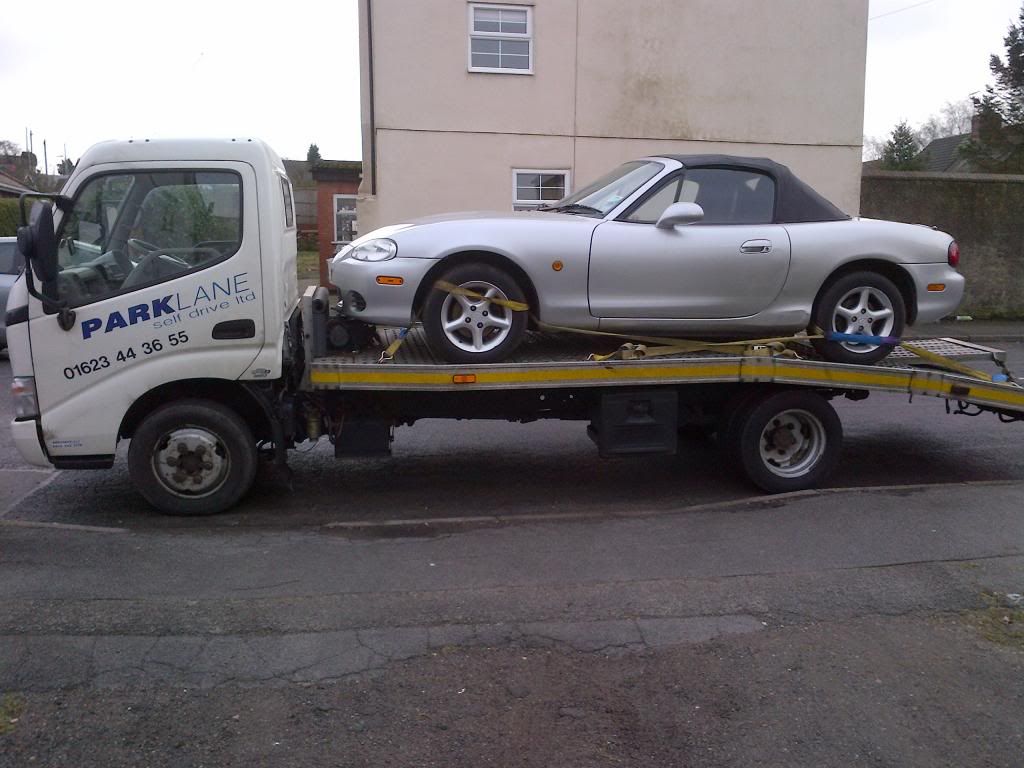 21st December, nearly Christmas and we picked up the kit with everything but the fibreglass from Stuart who waited kindly for us instead of going shopping. Hope Santa doesn't mind but we unwrapped the chassis, couldn't wait ! 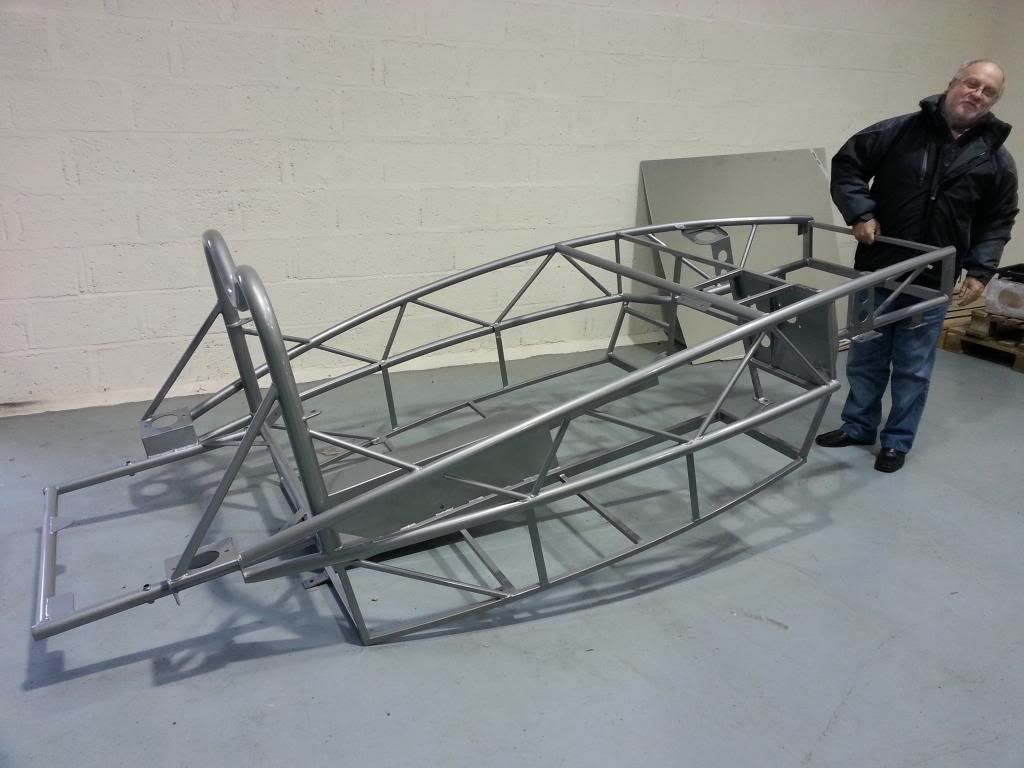 Cannot believe how light this thing is. Must compliment the people who do the powder coating for MEV, the finish in silver is excellent and the extra lacquer coating leaves a superb finish. |
|
|
|
Post by gnc on Jan 1, 2013 15:58:28 GMT
The Mazda, in its final resting position before its makeover begins. 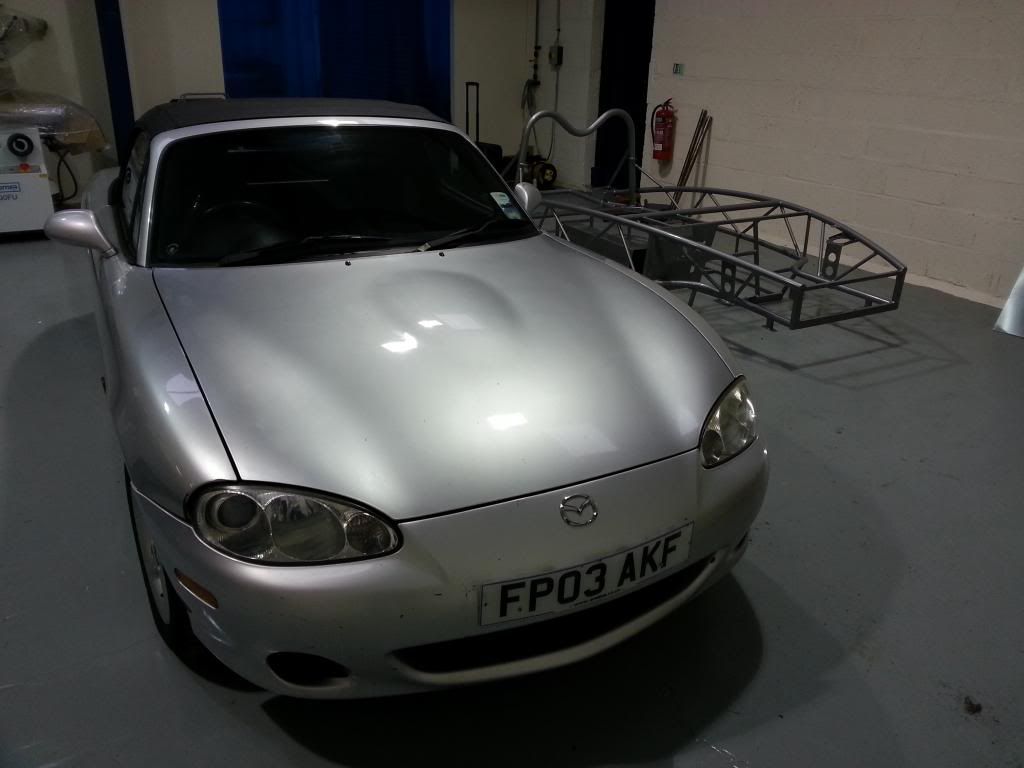 26th December, yes its BOXING DAY, and we found the perfect excuse to leave the house.... In no time at all, the front wings and bumper have come off 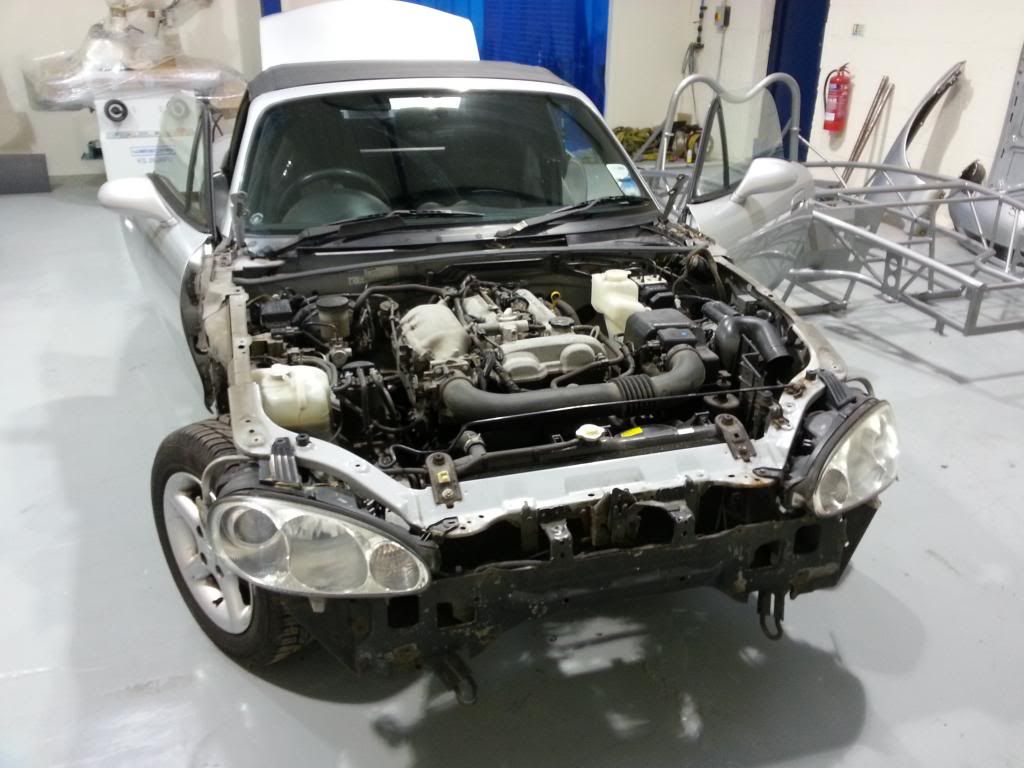 Quickly followed by the hood, bonnet and doors. All in all, quite pleased with the first days work. 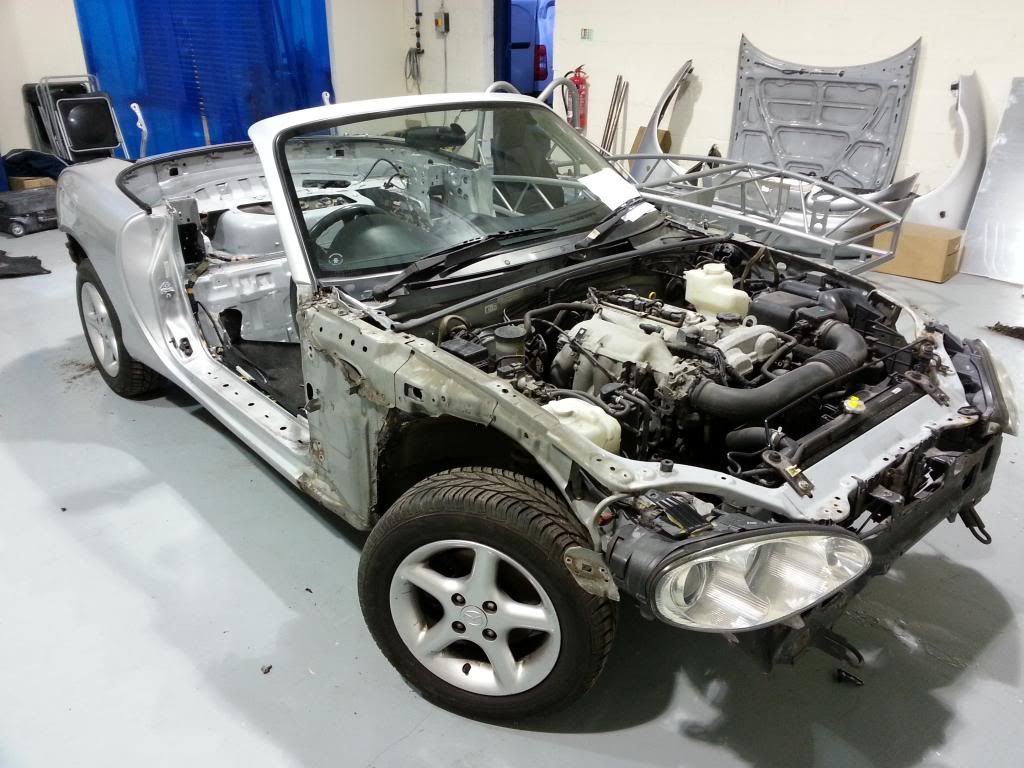 |
|
|
|
Post by mathew on Jan 1, 2013 17:12:22 GMT
Its always nice to see a chassis thats not black!
What colour panels are you going for?
|
|
|
|
Post by gnc on Jan 1, 2013 17:35:44 GMT
Trying to do things in a methodical manner, almost! Masking tape at the ready, working from the back to the front taking the loom out as we go along. First section to come out is from the back end, seperated by a neat connector. Absolutely every cable taped and marked. 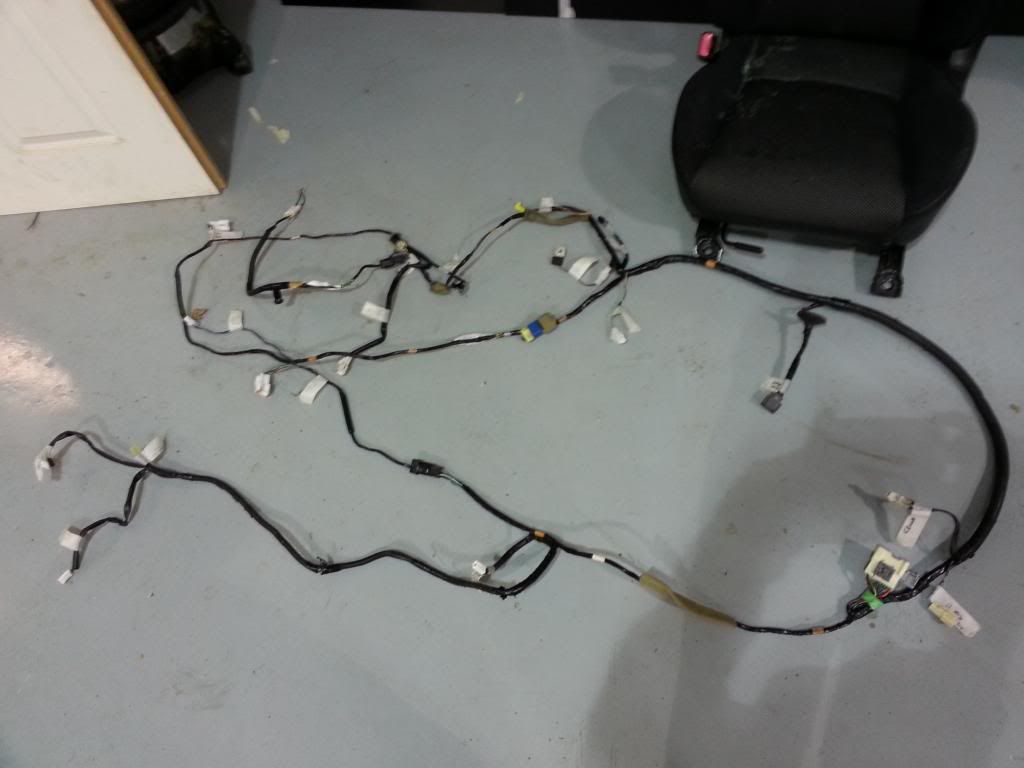 The back of the car now looks a little more depleted. 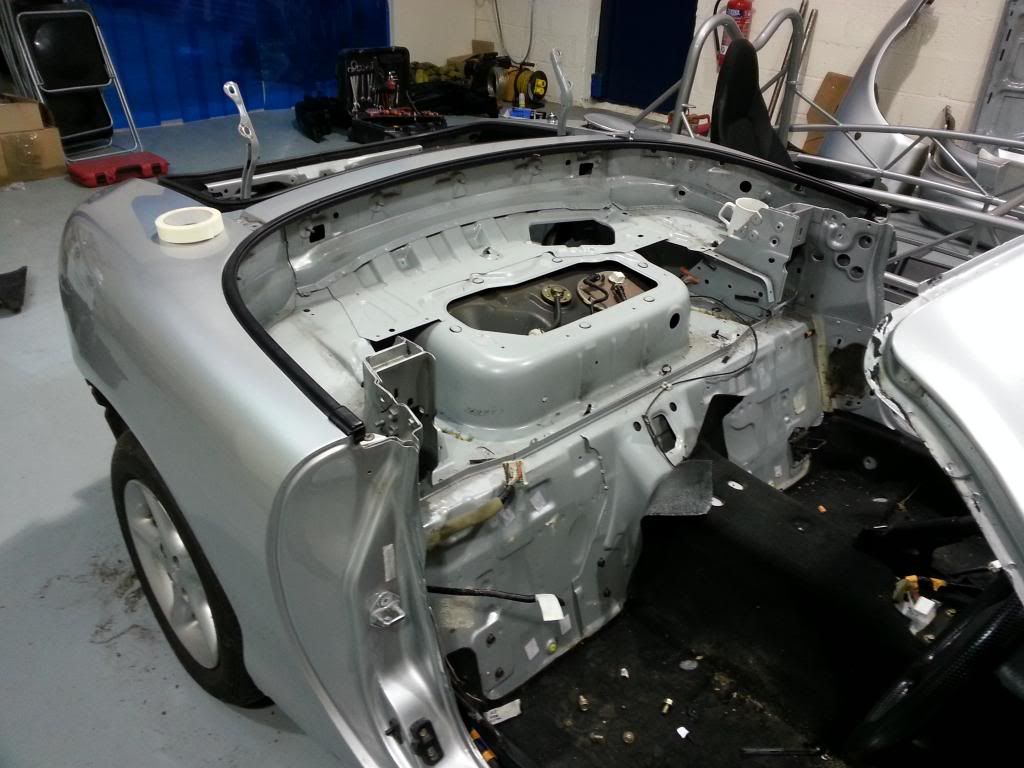 Working forwards again, the steering wheel needs to come out to create a little more access. The spline was undone at the end of the column, followed by the two bolts holding the bracket under the dash and then the bracket holding it to the bulkhead. A bit of a push and a pull, with some release spray on the spline and it all came out very nicely. 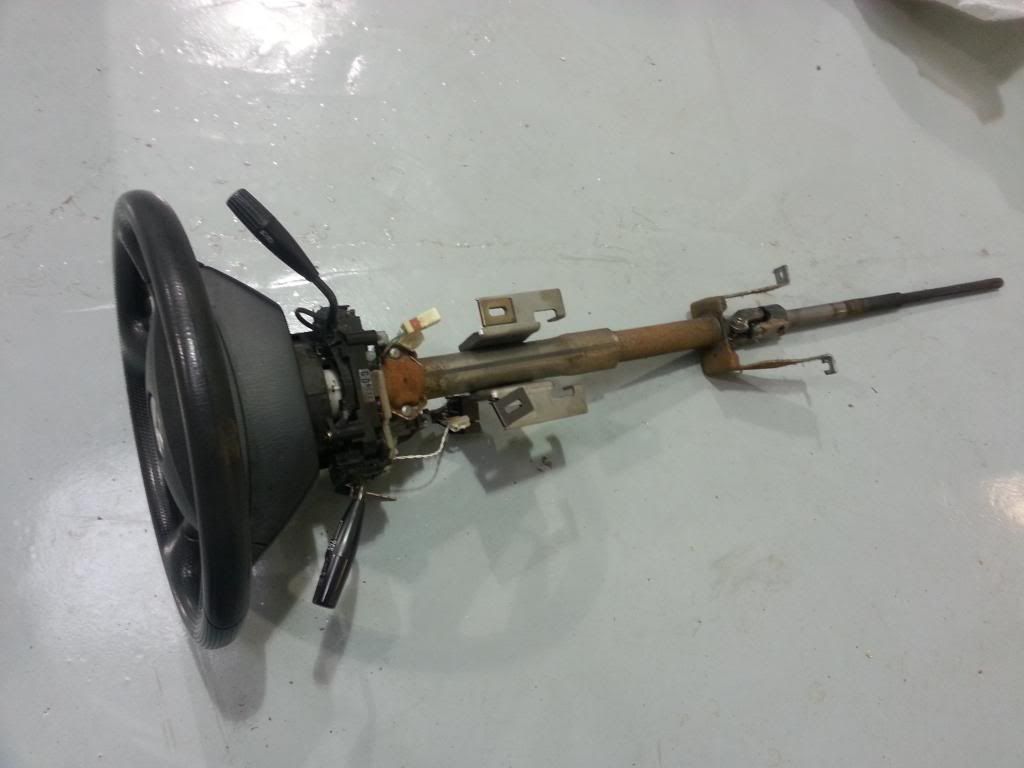 The dashboard wasn't as difficult as we expected, just a case of finding the bolts hidden either side by the covers and the centre one next to the windscreen. The most awkward part was figuring out how to get in to release connectors onto the instrument cluster.... crawl underneath, notice the clips holding the surround, release, pop out and hey presto, an easy access to the rear panel. One complete dashboard removed ! Follow this with a quick removal of the heater assembly and you are quickly rewarded with............ Spaghetti, and LOTS of it ! 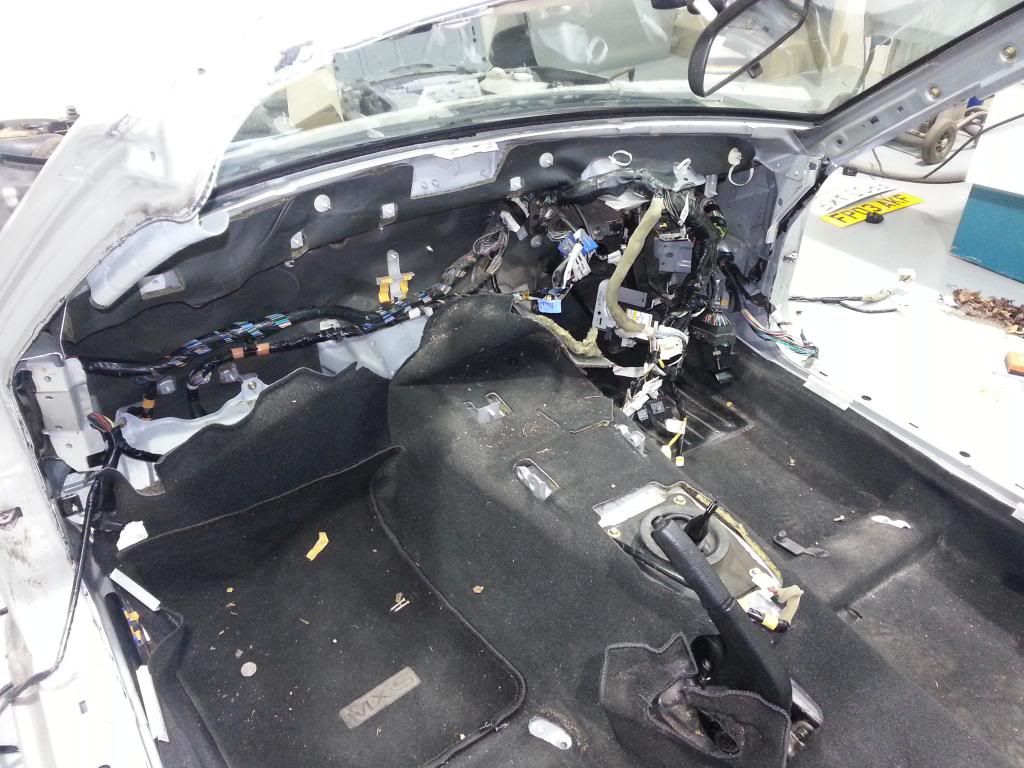 Thats it for another day, New Year beckons, and a whole new chapter awaits. |
|
|
|
Post by gnc on Jan 1, 2013 17:40:59 GMT
Hi Mathew,
The aim is to have the panels in the Kawasaki green, but this is merely to have a base colour through the fibreglass in case of stone chips.
We have a friend of a friend who works at a Ford garage in the bodyshop, so we want to get the panels finished in the pearlescent green from the Focus RS, but this seems a long way away at the moment.
|
|
|
|
Post by gnc on Jan 5, 2013 22:46:49 GMT
A new year and the strip down of the MX5 resumes with much enthusiasm. The rest of the loom was the first to come out, all carefully labelled. Many wires to be stripped out of here, a fair bit of this won't be needed. 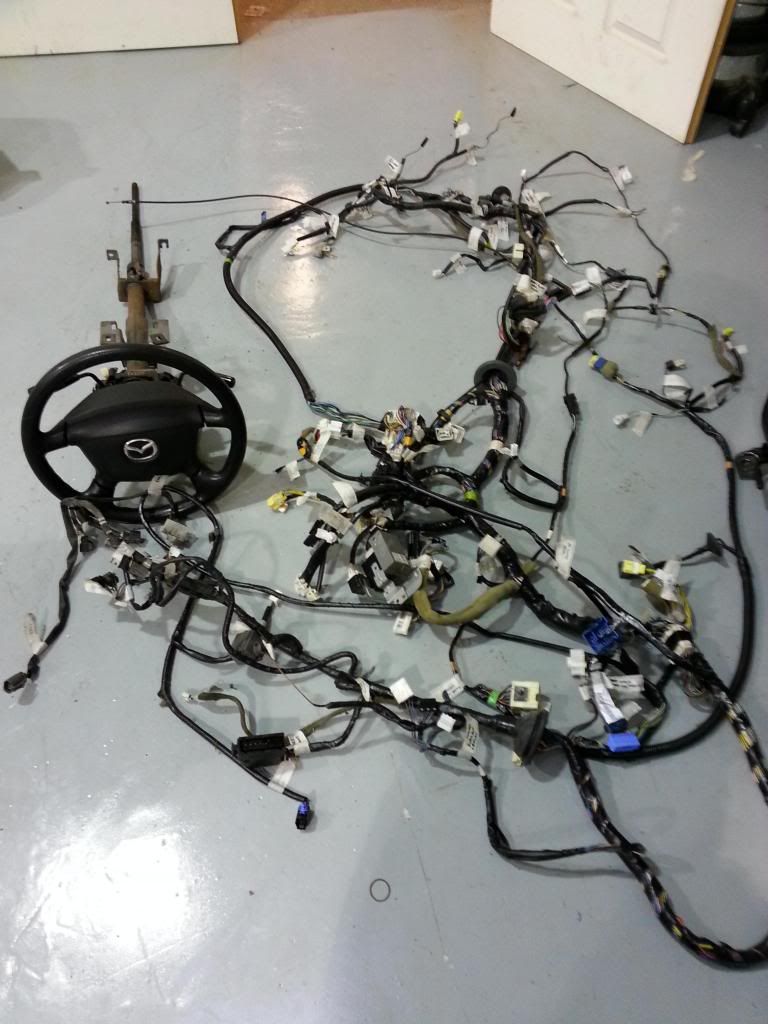 Thought now would be a good time to loosen the nuts on the hubs before the brakelines and handbrake come off, so all four corners have had the nuts slackened slightly. There were no caps over the rear hubs, is this normal or has someone been playing before? I'm not sure but it seems strange for them to be uncovered ! With the wheels put back on and the hubs loose, it was time to take out the brake lines, many a diagram drawn of the routes taken, especially with the ABS going back on. What a pain it is getting to the clips with the engine still in place, but after much persevering, all of the lines are free and the master cylinder has been taken out. 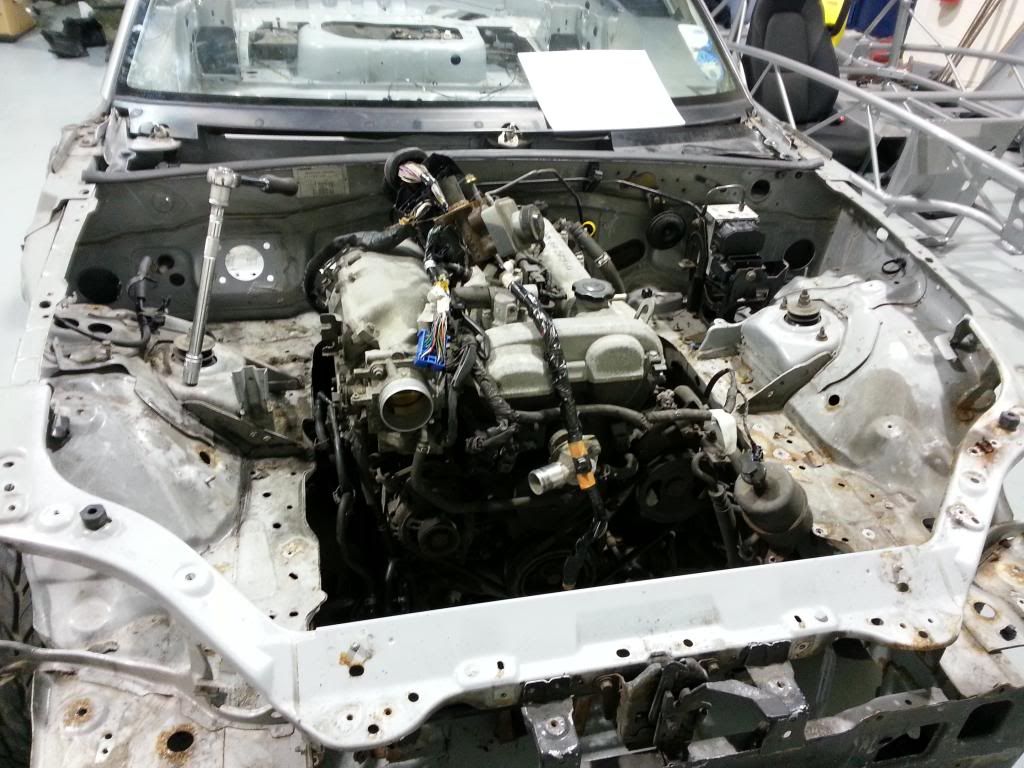 Followed by the pedal assembly and clutch cylinder. Thats the front virtually stripped and ready to be unbolted. 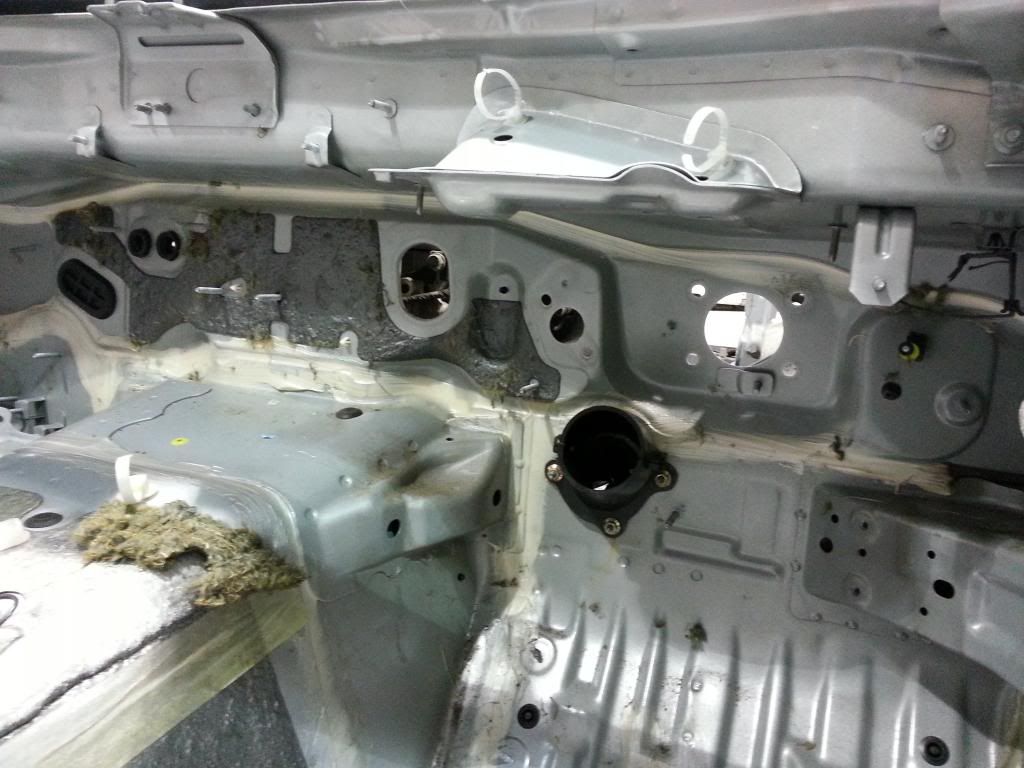 Anyway, dinner beckons, so its back home along the motorway, with thoughts of the bodydhell coming off in the very near future....... if only I can come up with an excuse to get out of the house |
|
|
|
Post by gwnwar on Jan 6, 2013 0:57:24 GMT
No covers over the rear hub bolts.. Don't forget to take vin plates off.. Also the headlamps and bumper will be a good sell if someone looking to go the upgraded lamps on a '99/'00..
|
|
|
|
Post by Stewart on Jan 6, 2013 12:34:53 GMT
Good start. We're about that same point on our second. Chassis bolts undone, just need time to get out to the garage and lift it off. Then the fun really begins.
Small tip if it helps, the rear chassis to subframe bolts were solid and too long to get even a deep socket on. Quick tickle with the angle grinder shortened them enough to get a socket and breaker bar on. Much easier!
|
|
|
|
Post by jgilbert on Jan 6, 2013 16:51:08 GMT
Well done Chaps,
I'd take the opportunity now to spray penetrating oil on all the suspension nuts (if your changing the bushes)and let it work its magic whilst you finish off taking the body off.
And as everybody says take loads of photos for reference.
|
|
|
|
Post by mathew on Jan 6, 2013 17:16:16 GMT
You guys aint hanging about. Looking at these pics give a severe workshop envy  |
|
|
|
Post by gnc on Jan 7, 2013 19:22:19 GMT
Many thanks for all the comments guys.
Gwnwar, we will be trying to sell most of the bits we take off, but unfortunately the car was from a slightly less than accurate lady driver who liked to nudge a thing or two. We did get the car cheap as a result though! Bodyshell is fine but bumpers and things have their share of scrapes and little cracks.
Freak, seeing as you've done one before, we will be doing well to keep up. I like the idea of "tickling" with an angle grinder, sounds like fun. Have a special hollow ratchet that goes all the way over the thread right up to the nut so this lets us get full force to loosen.
Have sprayed penetrating oil on all the suspension and chassis bolts, I found out from the front bolts that these get held in by more than a little time and grime.
Dont get workshop envy, we are very lucky to have a big space to work in, but this is only because we made a showroom for a venture that didnt work out. There's another 4000 sq ft behind the walls but it costs a fortune to pay for and maintain. A lttle garage would be much more economical.
|
|
|
|
Post by Stewart on Jan 8, 2013 11:19:11 GMT
I looked at the nut and thought I should really go and buy a deep 19mm socket. After the 4th I thought I really should have gone and bough that deep 19mm socket  We spent a couple of hours on it last night freeing off the last od the body to subframe bolts and cutting the brake pipes so the body will lift off. We're replacing them with braided again like last time so they can stay on the car and add a few grams to the weigh in. |
|
|
|
Post by gnc on Jan 8, 2013 19:28:36 GMT
While we have the body off, we will be doing all the usual subframe work. I know Stuart says this might not be needed, but if its in bits, now seems the perfect time to do all the work. Are there any particular preferences or good/bad experiences with bush replacement kits?
Any sources or recommendations would be most welcome.
|
|
|
|
Post by jgilbert on Jan 8, 2013 23:16:48 GMT
Guys, if your doing a complete bush replacement then this will include the diff bushes. Its recommended that these are pressed out with a workshop press. I don't have access to one so used this alternative method. (sorry no photos as it all went smoothly I got carried away). 1. Using a jigsaw I cut out the centre of the bushes. The standard bushes have a pair of slots at 180 degrees to each other. I used these to enter the saw blade and then just cut around to the other slot. You should be then able to tap out the middle of the bush and its metal sleeve. 2. Turn the diff over (so the metal flange of the bush is at the bottom). The outer metal sleeve of the bush that is in contact with the diff is actual two separate pieces (image two crankshaft shell bearings). 3. Using a punch or chisel deform one side of the metal casing so that you reduce its diameter and you can then tap this out. 4. The remaining side then just taps out as well. Took no longer that 15mins a side. I managed to fish the bits from the bin and post this photo. This shows the cut out center section and the two bush sections that will be left. One deformed where I used a punch on the metal casing. 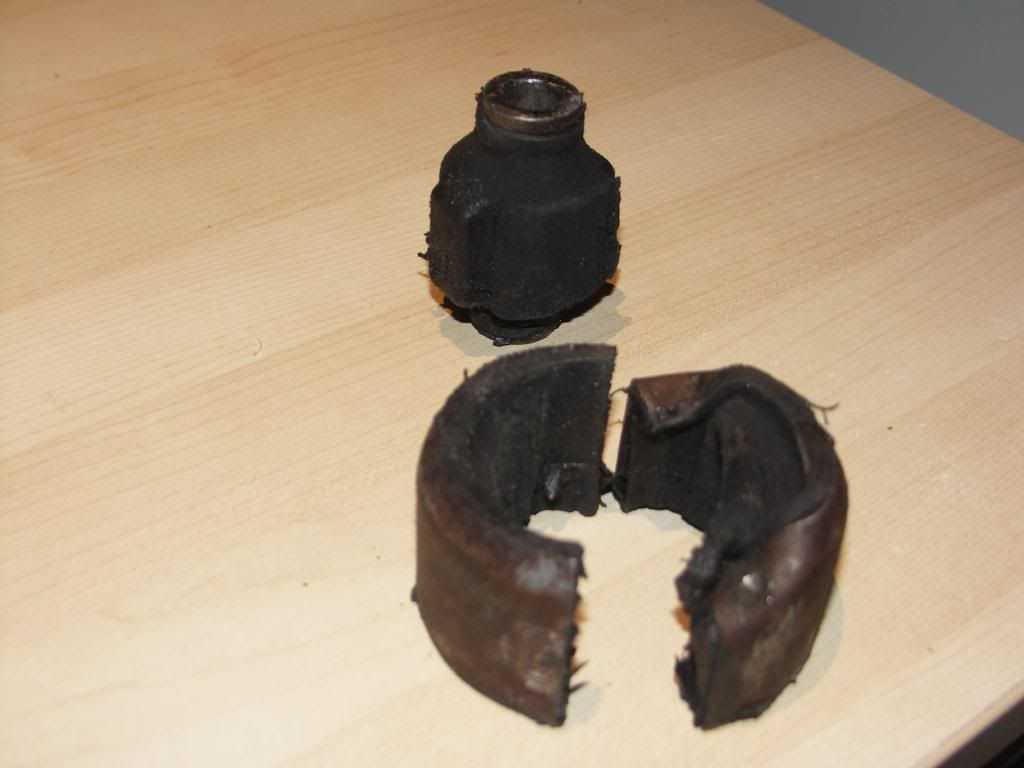 |
|
|
|
Post by gwnwar on Jan 9, 2013 7:24:14 GMT
With the diff bushings just remember were the open parts of the bushing is located. install in same place..
|
|


