|
|
Post by snowbird1 on Jan 11, 2017 14:34:52 GMT
Anybody have a 99-00 with pictures of their wiring that's working? Or a work around that I can follow?
If the Dominators have conventional two filament bulbs the stock wiring should work. The low wattage high beam warning light has a high resistance - you should not need to add more. As gunwar says the headlamps are powered whenever the light switch turned to 'on' and are the grounds are controlled via the Hi/Low/Flash switch, the warning light is grounded via the instrument cluster ground - with the headlights on 'Lo' both sides of the bulb are grounded, with the headlights on 'Hi' a small current flows through the 'Lo' beam filaments and illuminates the bulb. If the Dominators are LED or grounded through the housings things get a bit more complicated! |
|
|
|
Post by calibuild on Jan 15, 2017 17:53:57 GMT
SeanW - arggghhh on the requirement for the windshield wiper. The windshield is easy, but I'll have to embrace the automatic wiper requirement as another opportunity to learn. Thanks for the heads up. Gwnwar & Snowbird1 - thanks again for your thoughts on the headlight indicator. I had to call in the calvary and get a bit of assistance but found the solution. The bright indicator wasn't working because the headlights were wired backwards. Apparently you can wire them backwards, and everything works as it should, except the indicator. Lows, regular, brights, all worked exactly right, just not the indicator. Lots of frustration, finally solved. 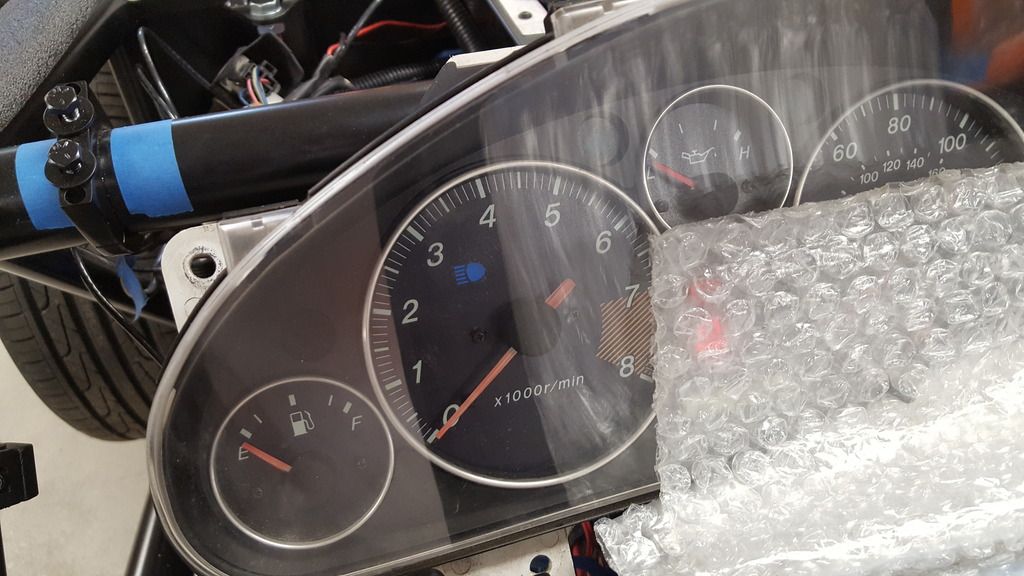 Will hopefully drill the gauge pod to mount, and finalize the license plate holder soon. Using led's in the screws for the license plate light. 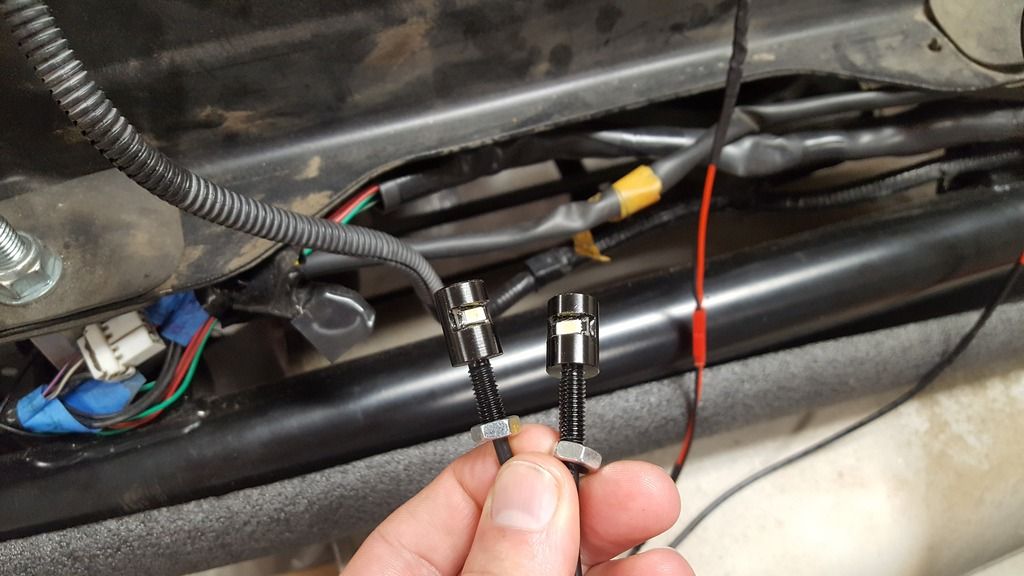 Still haven't found my ideal edge trim size . |
|
|
|
Post by gwnwar on Jan 15, 2017 20:52:27 GMT
Have you tried ebay search like edge trim 1/4" or other size.. You might ask co. for a short sample be sent.. different sizes??
|
|
|
|
Post by calibuild on Jan 18, 2017 1:39:57 GMT
Thanks Gwnwar, saw someone recommend this on another thread, so ordered a few feet of it.
www.ebay.com/itm/Universal-Rubber-Edge-Trim-Seal-Protector-Guard-Strip-Van-Boat-Truck-Bonnet-1ft-/171222731304?hash=item27ddab8a28:g:ZAoAAOSwGIRXaNdO&vxp=mtr
Rear is 95% done (gas filler not included), just need to finalize the reflectors.
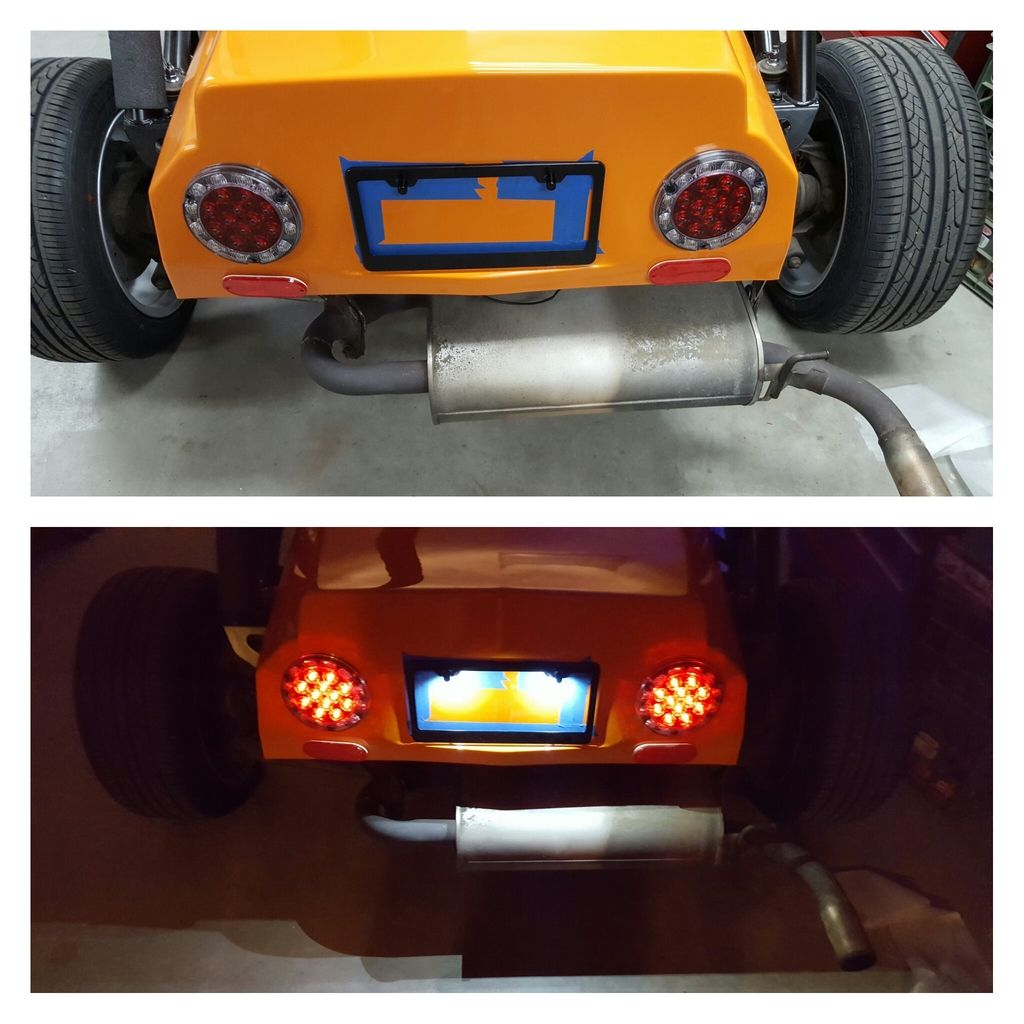
Appointment made with CHP, they said it takes 2 hours! Rumm did his 15 minutes..... I'm open to recommendations! Will spend the weekend collecting and making copies of everything.
Will also look to get the tires rebalanced. For some reason most the weights fell off. Maybe you need to drive it right after so the centrifugal force presses them down. Wasn't an option for me, so oh well. Hoping to get brake and light done the same day, and maybe get it to a mechanic to diagnose the high idle (had it when I bought it). Likely a vacuum leak(s) as I replaced the PVC and tried adjusting the idle screw to no avail. |
|
|
|
Post by gwnwar on Jan 18, 2017 5:37:19 GMT
Did you jump the TEN and GRD. in the Dia box before doing the adjustment.. Does the throttle cable at the throttle body linkage have a little slack (1>3mm) in it not tight.
Are you using hammer on weights or stick on only the back of wheel.. If hammer on were they used weight with wrong clamp design for your rim lip or not squeezed back together....
|
|
|
|
Post by SeanW on Jan 18, 2017 5:51:51 GMT
Thanks Gwnwar, saw someone recommend this on another thread, so ordered a few feet of it.
www.ebay.com/itm/Universal-Rubber-Edge-Trim-Seal-Protector-Guard-Strip-Van-Boat-Truck-Bonnet-1ft-/171222731304?hash=item27ddab8a28:g:ZAoAAOSwGIRXaNdO&vxp=mtr
Rear is 95% done (gas filler not included), just need to finalize the reflectors.

Appointment made with CHP, they said it takes 2 hours! Rumm did his 15 minutes..... I'm opening to recommendations! Will spend the weekend collecting and making copies of everything.
Will also look to get the tires rebalanced. For some reason most the weights fell off. Maybe you need to drive it right after so the centrifugal force presses them down. Wasn't an option for me, so oh well. Hoping to get brake and light done the same day, and maybe get it to a mechanic to diagnose the high idle (had it when I bought it). Likely a vacuum leak(s) as I replaced the PVC and tried adjusting the idle screw to no avail. My CHP appointment took about 30 minutes. |
|
|
|
Post by calibuild on Jan 20, 2017 4:55:52 GMT
Gwnwar - weights are just stick on. At least 3 of the wheels had the weights fall off...
Thanks SeanW, think I'm 90% there on receipts. Just hoping it doesn't rain.
Insurance has been a pain. Big insurers don't want to do it, then some of the smaller guys will do it, but you're not allowed to drive it to work etcetera. If I build a car, I want to drive it! If anyone else is looking for insurance recommendation, there's a thread on here dedicated to it. Very useful.
Hopefully the DMV won't require the smog check to be done before BAR. Otherwise I think I'm all set for CHP, and brake and light then going back to the DMV.
|
|
|
|
Post by SeanW on Jan 20, 2017 4:59:40 GMT
Gwnwar - weights are just stick on. At least 3 of the wheels had the weights fall off... Thanks SeanW, think I'm 90% there on receipts. Just hoping it doesn't rain. Insurance has been a pain. Big insurers don't want to do it, then some of the smaller guys will do it, but you're not allowed to drive it to work etcetera. If I build a car, I want to drive it! If anyone else is looking for insurance recommendation, there's a thread on here dedicated to it. Very useful. Hopefully the DMV won't require the smog check to be done before BAR. Otherwise I think I'm all set for CHP, and brake and light then going back to the DMV. I spent a week trying to get insurance. I ended up going through Rally's Insurance, a brokerage out of Ohio, I think. They got me hooked up with a reasonably good collector's policy that includes a rider specially to let me drive my car to work a few times a week. |
|
|
|
Post by calibuild on Jan 22, 2017 7:08:33 GMT
Thanks for the referral. Once I'm done registering, I'll have to revisit the insurance. Would recommend to anyone else to start the process 2-3 weeks before you need it.
Couple questions: On the gauge pod, the holes line up to drill right through the curve of the pod cover (top picture, right below the bottom of the opening where it curves inward). Doesn't seem ideal. Has everyone else just done this?
Second picture, from the front of the car you can see right into the back of gauge pod, is that just the way it is? Older models appear to have had longer backs on the gauge pod cover. 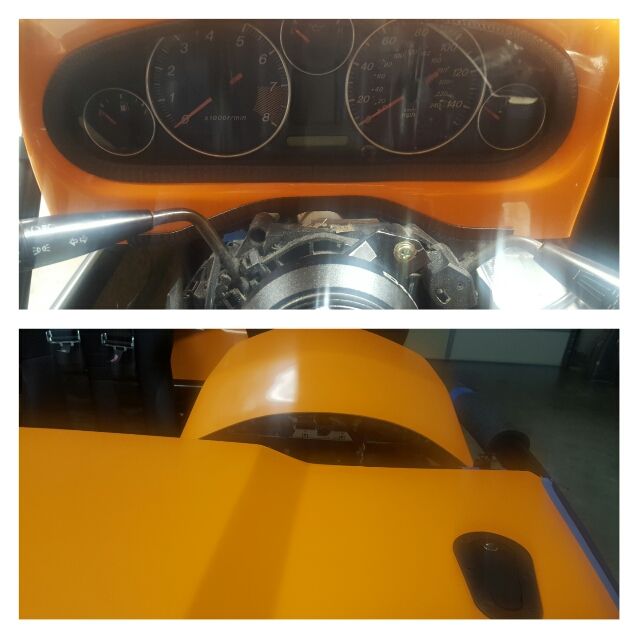
Last question, when it comes to my rims, I'm running the 15x8 JNC 003's sold by exomotive with hub centric rings (73.1mm to 54.1mm ). For whatever reason, the wheels don't seem to be rotating "round". Any thoughts? I'll order some more, plastic ones are cracking, so may get both metal and plastic this time.
Appreciate everyone's insight as I'm "hopefully" nearing the finish line!
|
|
|
|
Post by Trenon on Jan 22, 2017 10:56:49 GMT
Bolt them up and put a dial gage on them. The hubcentric rings are to make them easier to install but are not required at all. Take them out in case you got a bad ring. The tapered lugs locate the rim when tight and take all the load.
|
|
|
|
Post by calibuild on Jan 25, 2017 5:15:14 GMT
I spent a week trying to get insurance. I ended up going through Rally's Insurance, a brokerage out of Ohio, I think. They got me hooked up with a reasonably good collector's policy that includes a rider specially to let me drive my car to work a few times a week. +1 to Rally's. Ended up going through them as well, and they were great. When I mentioned Exocet, they knew what it was which made it easier, and were very patient as it's a weird process. Couple key points I learned along the way regarding insurance. Car has to be in a locked garage at all times Have to get special coverage if you want to drive it to work Everyone who can access the car (not drive it, just could conceivably walk into your garage) has to been named, including their DL number and proof that they are insured. They aren't liable for anything should something happen, but have to be named with the above info.
Managed to get the car over to CHP inspection today, took 2 hours of me waiting in the lobby before they came out and said I passed. Annoyingly they put the number right on the side of the roll bar behind the driver seat, equivalent to pillar between the front and rear door of a sedan, and then to top it off tried to drill two holes in my chassis to rivet it in. They couldn't, so I just have 2 half drilled holes and scuffed powder coat. Wasn't pleased about that, but not much you can do. For the next guy, you may request with the officer ahead of time where to put the number.
Next up Brake & Light. Oddly my brake lights stay on all the time, or flicker. Believe the sensor on the pedal must be to tight and needs to be loosened.
Also the gas gauge seems to have shook loose, and now is working!
Gwnwar - I'll hopefully get to the TEN and GRND for the idle soon. Thanks for the tip.
|
|
|
|
Post by SeanW on Jan 25, 2017 5:21:58 GMT
It's entirely likely you'll got your registration done before me at that rate! Congrats!
|
|
|
|
Post by gwnwar on Jan 25, 2017 6:23:49 GMT
With brake light on all the time check for the plug the pushes the plunger into the switch with pedal up.. It is on a tab on the pedal..If not there the plunger will be out of the switch (lights on) like when you push on brakes..
|
|
|
|
Post by calibuild on Jan 26, 2017 21:18:33 GMT
With brake light on all the time check for the plug the pushes the plunger into the switch with pedal up.. It is on a tab on the pedal..If not there the plunger will be out of the switch (lights on) like when you push on brakes.. Hi Gwnwar - did just that this am and hopefully that does it. Thanks! Made an appointment with brake and light, feel pretty good about the lights. Need to find a way to adjust the beam pattern on the dominators. For brakes has everyone used new brakes? Guy was freaking me out about how if the rotors are worn etc I won't pass. My brakes are pure stock, unchanged from the donor... same pads and everything. Starting to get the windshield sorted... have to find a way to keep it tight and not rattling. 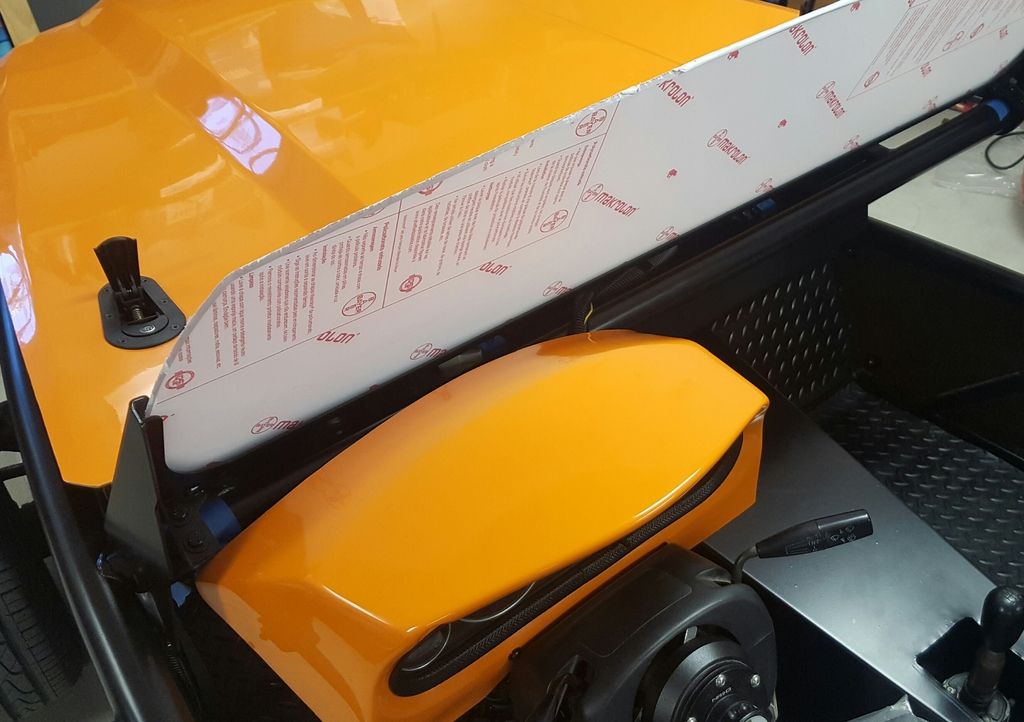 Would also like to find a way to make a cover for the hand brake. Don't love the bare look 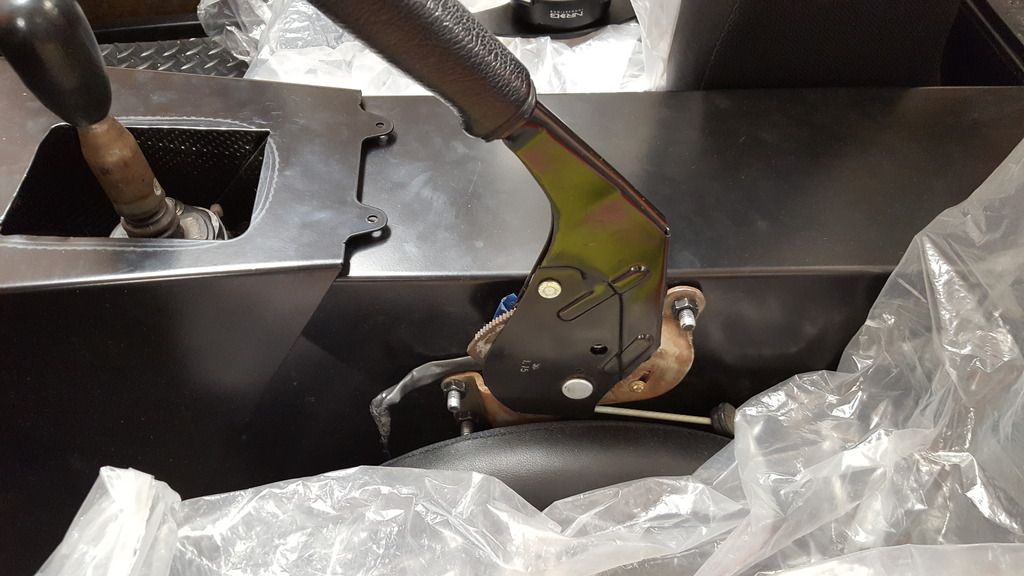 |
|
|
|
Post by SeanW on Jan 27, 2017 0:53:40 GMT
The rotors and pads need to be within thickness tolerance for the application that they came from. Old rotors may be worn down to a point that they my not pass, especially with older donors. Same with pads. Assoc replacement rotors and pads are pretty inexpensive and super easy to change out as a matter of insurance.
|
|