|
|
Post by SeanW on Dec 16, 2016 1:09:29 GMT
That's really weird that they told you that. My guess would be that that office doesn't do many kit cars.
|
|
|
|
Post by calibuild on Dec 18, 2016 22:41:08 GMT
That's really weird that they told you that. My guess would be that that office doesn't do many kit cars. Agreed! A weekend of electrical, snipping and soldering to extend wiring or tighten it up. Couple general questions: Rear: there are 4 mounting points, riveted those in. My initial take is the Quick Latch which requires a 3/4 inch hole and is 1.25 inches in total diameter is too wide. Does everyone just use a rubber grommet, nut and bolt? Hood: the large 2 latches up closer to the dash area, using the aerocatch system what i'll do there. But when it comes to the front of the car, personal preference is to attach it on the sides versus the top. Has anyone done this using 2 quick latches (1 on each side)? After posting found this: mevowners.proboards.com/thread/6520/question-bodyworkHigh Beams (Brights): My lights work, but it doesn't show on the gauge pod. Any obvious places I should look? Orange looks much better in the sunlight 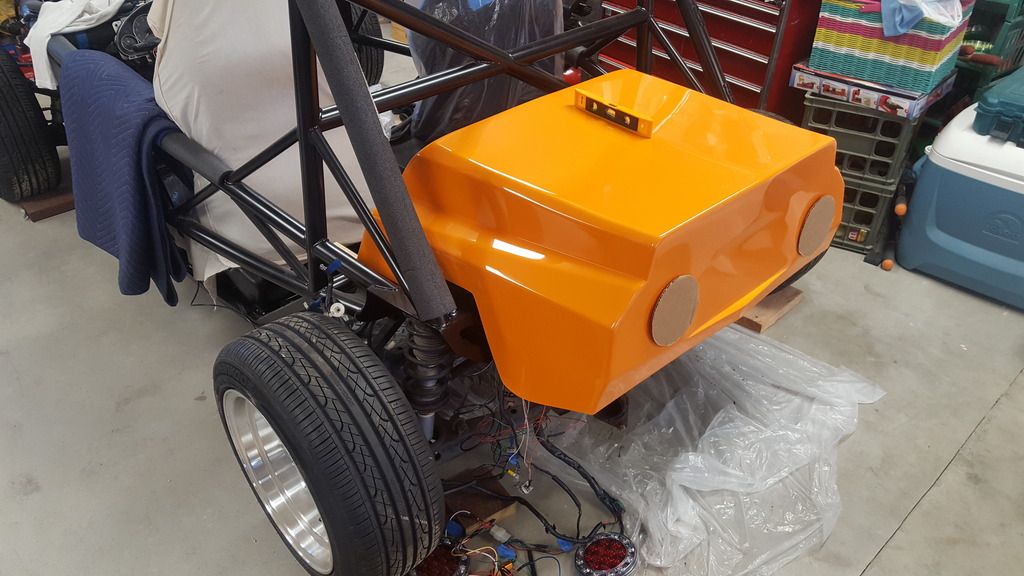 |
|
|
|
Post by SeanW on Dec 18, 2016 23:55:17 GMT
I feel so far behind. I haven't even started to mount my rear or front bodywork. :/. Looking good, though! Are you sure the light isn't showing on your gauge pod? The light in my gauge cluster is very, very dim, to the point that it's almost invisible in bright ambient light. I ended up running a new LED indicator on mine to make sure I'd get through brake and light inspection. Cheap insurance, easy to install. ( You tap power off one of the high-beam positive leads and ground to chassis. ) My stock high-beam indicator under my normal garage lights. Now way I'm seeing that in direct sunlight.  High beam indicator with the garage darkened to roughly night conditions.  The blue LED I bought from the auto parts store and fitted to make sure the brake and light inspector would see a blue high-beam indicator when my high-beams were on. (Super effective during day-light, not blinding at night.)  |
|
|
|
Post by SeanW on Dec 18, 2016 23:56:38 GMT
While I'm at it, mind posting a couple of photos of your riveted in rear bodywork mounts?
|
|
|
|
Post by calibuild on Dec 23, 2016 1:26:45 GMT
While I'm at it, mind posting a couple of photos of your riveted in rear bodywork mounts? Sure, bit of a delay as I don't get to work on my car during the week but I took the day off 😀 I'm using custom black rivets to match the chassis versus the stock silver ones. Lot of sawdust which is fortunately easy to wipe off. 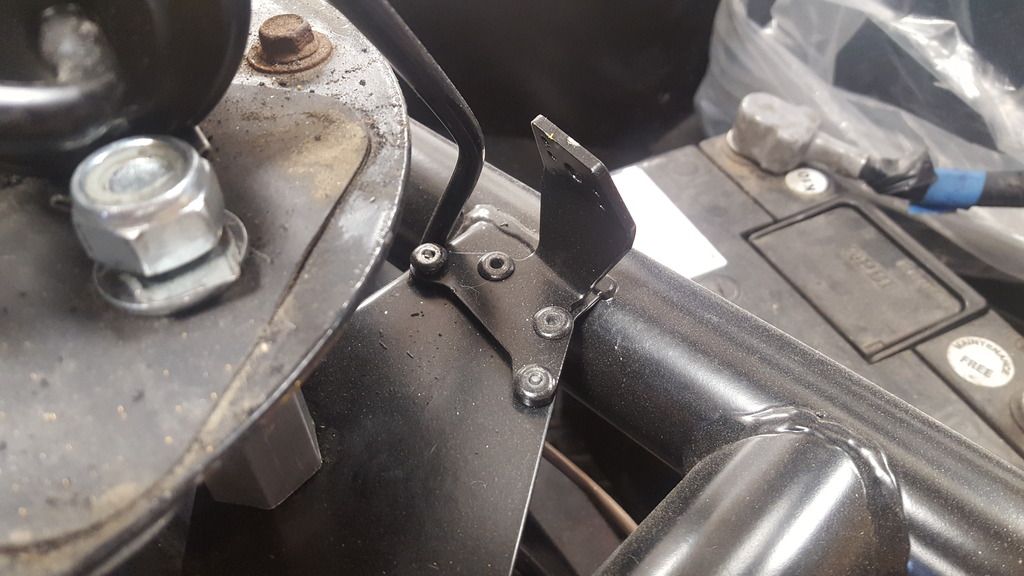 Side mounts 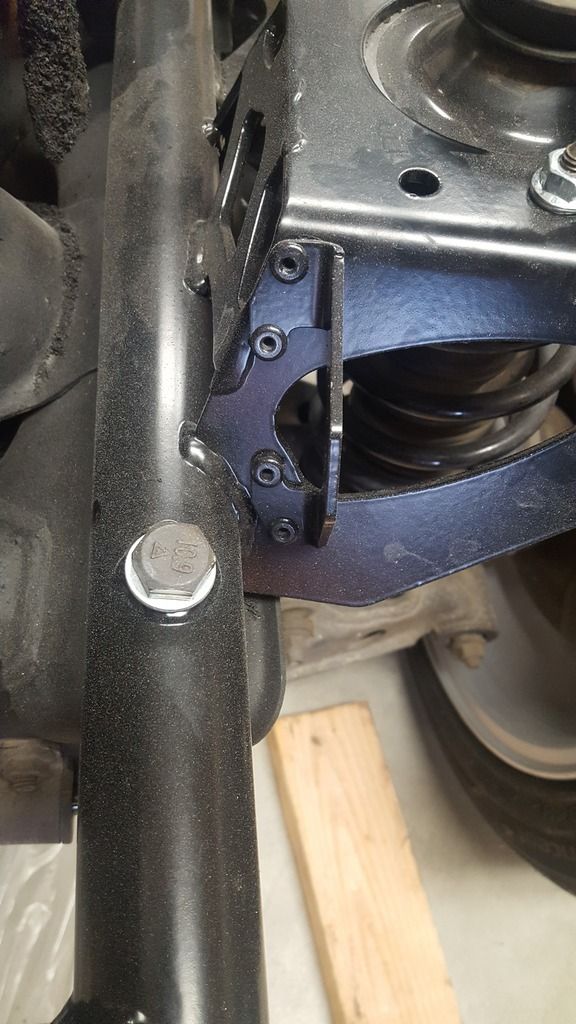 |
|
|
|
Post by gwnwar on Dec 24, 2016 5:11:08 GMT
calibuild.. Did you get the high lamp in cluster to work.. With the hi beams on the R/Y wire to the gauge cluster should have power. Check that the black wires from cluster are grounded use OHM meter there is/was a ground behind the head lamp and under dash..
|
|
|
|
Post by calibuild on Dec 24, 2016 16:33:52 GMT
Thanks Gwnwar! Hope the holidays are treating you well. Here's what I get.... with everything off it shows -0.03, with low beams .04, regular beams .37, brights .91 Believe that I have it grounded, but I'll take a second look. Since both the brights indicator and the fuel gauge (although it moves when i ground the brown & black wire at the fuel pump) don't seem to function, would that indicate it's more likely to be a missing ground? The pod 'lights' up (glows with the back light) when the lights are on, so seems to be getting power. 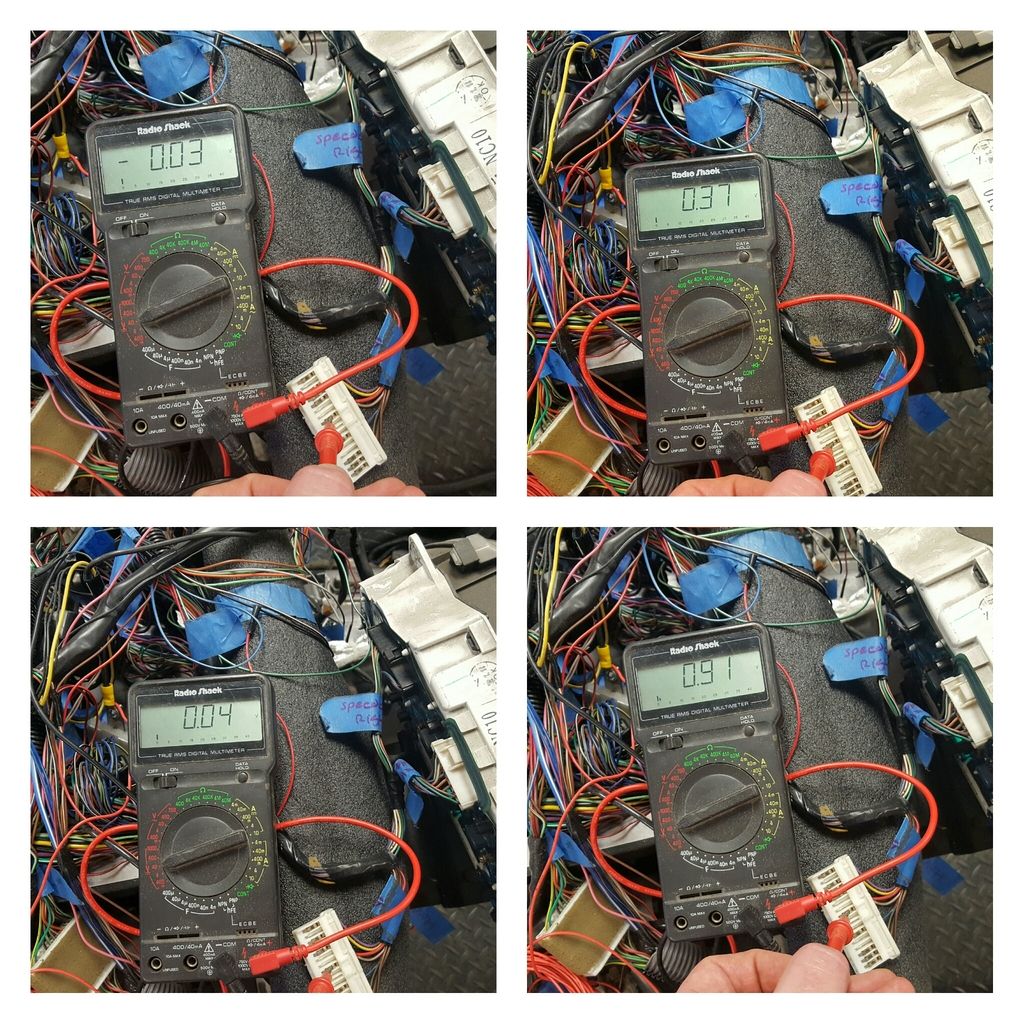 Mounted the rear cover, quite pleased with the low profile grommet and bolt look. Not as quick as a quick latch, but smaller size makes it stick out quite a bit less. Hoping to get the hood today..... then move to mounting the rear brake lights and reflectors. With all that done, I'll be able to take it for brake and light inspection hopefully in early Jan. 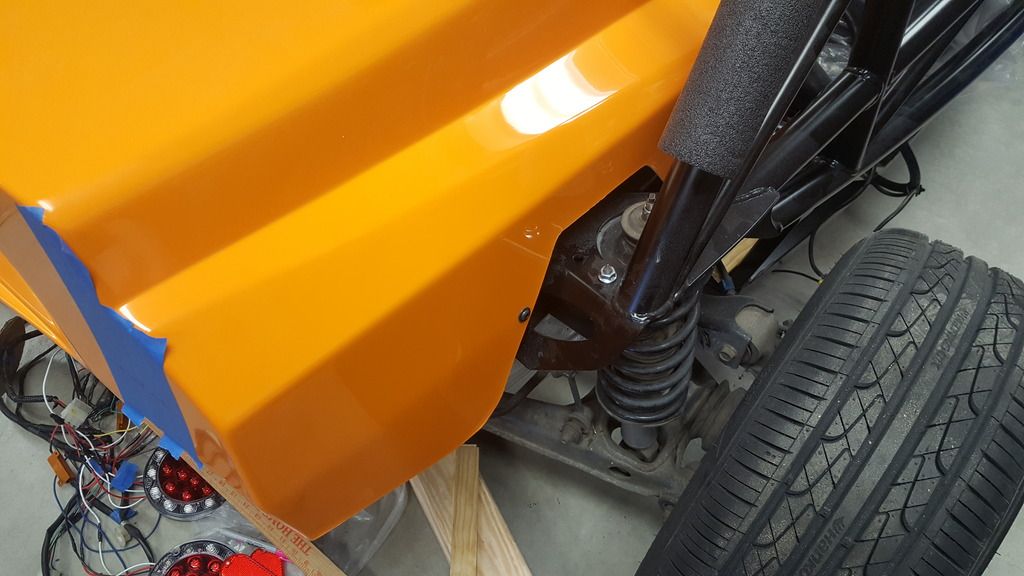 |
|
|
|
Post by calibuild on Dec 26, 2016 19:43:39 GMT
Okay.......... mounting the front hood:
Have trimmed the bottom the around 3 inches,
Have cut a half inch off the bottom of the radiator mounts
Challenge I'm having is the hood hits the throttle bottle, specifically the idle screw housing, and then the front bottom corner of the chassis bumps up against hood. The panel mounts should push out the corners, so my big question is how did everyone solve for the hood and idle screw?
|
|
|
|
Post by rumm on Dec 26, 2016 20:15:45 GMT
Okay.......... mounting the front hood: Have trimmed the bottom the around 3 inches, Have cut a half inch off the bottom of the radiator mounts Challenge I'm having is the hood hits the throttle bottle, specifically the idle screw housing, and then the front bottom corner of the chassis bumps up against hood. The panel mounts should push out the corners, so my big question is how did everyone solve for the hood and idle screw? Sounds like you are on the right track. I had to trim the lower edge to allow room for the radiator. Then I ran into issues with rubbing as you did. At first I had tried to raise the front of the hood high enough to clear, but with the quik-latches, I didn't have enough threads to make it. A much easier solution is t take a flap disc (or grinding wheel) to the throttle body. I'll take a picture in a few of the housing, but unfortunately it won't be on the engine as it is currently at the machine shop. I ended up with two modifications outlined in red. 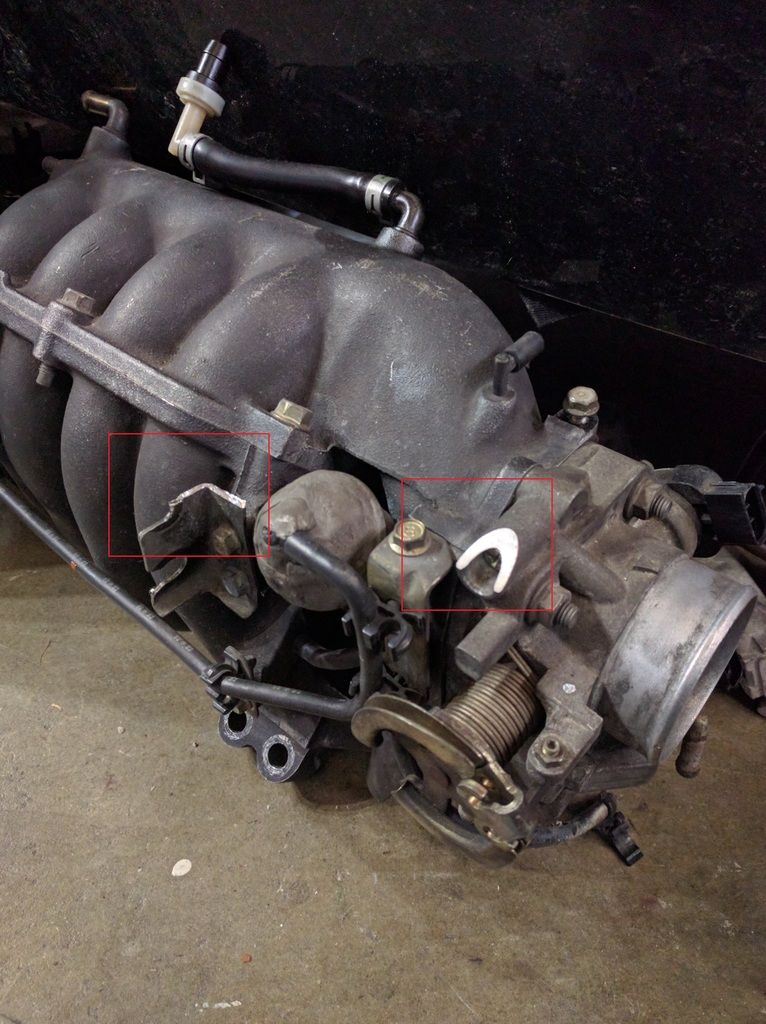 Note* This was not my idea, saw this on someone elses thread, maybe steadfast? |
|
|
|
Post by calibuild on Dec 26, 2016 21:38:51 GMT
Okay.......... mounting the front hood: Have trimmed the bottom the around 3 inches, Have cut a half inch off the bottom of the radiator mounts Challenge I'm having is the hood hits the throttle bottle, specifically the idle screw housing, and then the front bottom corner of the chassis bumps up against hood. The panel mounts should push out the corners, so my big question is how did everyone solve for the hood and idle screw? Sounds like you are on the right track. I had to trim the lower edge to allow room for the radiator. Then I ran into issues with rubbing as you did. At first I had tried to raise the front of the hood high enough to clear, but with the quik-latches, I didn't have enough threads to make it. A much easier solution is t take a flap disc (or grinding wheel) to the throttle body. I'll take a picture in a few of the housing, but unfortunately it won't be on the engine as it is currently at the machine shop. I ended up with two modifications outlined in red.  Note* This was not my idea, saw this on someone elses thread, maybe steadfast? Awesome, thanks for the picture. It was freaking me out a little to grind the throttle body. Hopefully get the mounts today, will post if I get it finished. Thanks! |
|
|
|
Post by gwnwar on Dec 27, 2016 21:07:06 GMT
If you can raise the trans tail shaft up just a little it will drop the front of the engine..
Loosen the 3 bolts on front of the PPF raise tail shaft tighten bolts..
|
|
|
|
Post by calibuild on Jan 1, 2017 16:16:21 GMT
Thanks Gwnwar. Think I've got the hood 90% there. Front holes drilled, top drilled, now need to cut it out to match the aerolatch shape. Back to getting the gauge pod bright lights to work.... after reading up on how it works, it comes on when the current exceeds a certain threshold. For some reason, the new headlights (Dominator Headlight off Exomotive's website) must have changed the current reaching the gauge pod. Using resistors, I can increase the volts and get the blue indicator light to come on, but can't get the brights & indicator to come on at the same time. Used 1 Ohm, 2 Ohm, and 3.3 Ohm resistors in various combinations, the resistors are all 10 watt (gold colored one was out of desperation, it's 6 Ohm 50 Watt). Literally spent 2-3 hours testing different combinations, searching google, etc. Any thoughts? 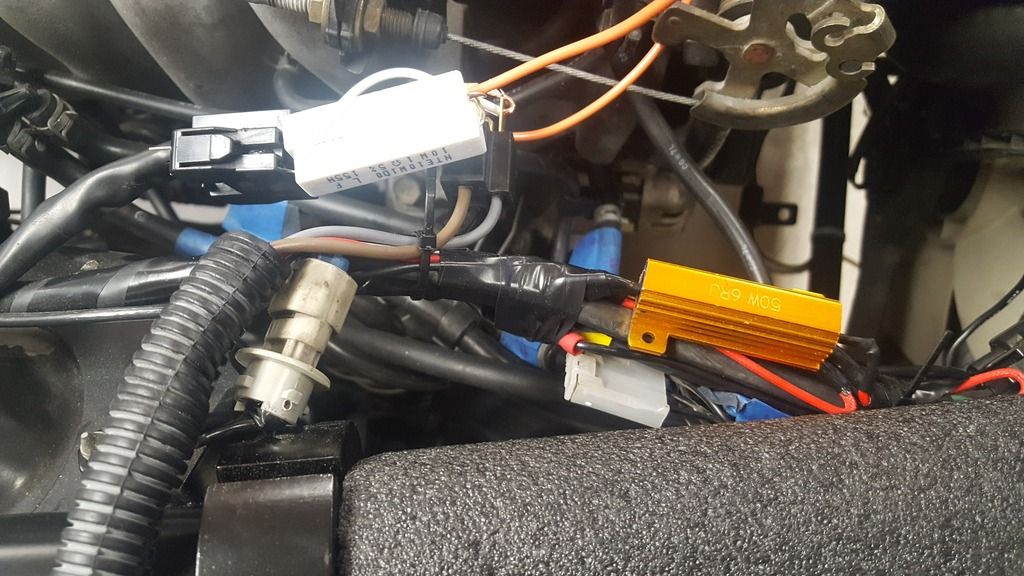 |
|
|
|
Post by gwnwar on Jan 2, 2017 6:19:55 GMT
I think the red wire to the head lamp is the high beam and it is grounded by that wire at the light switch to work. Then the power in the red wire with power should flow to the red wire in the gauge cluster, ground there and light the blue lamp..
Remember in the '99 there is only 1 power wire to each head lamps.. and 2 ground wires from each of them to the light switch..
going from hi to low. the light switch switches which ground wire is used the Red or the White..
Are you using LED headlamps?? or three wire seal beams..
|
|
|
|
Post by calibuild on Jan 10, 2017 4:38:19 GMT
Thanks Gwnwar. Still grinding away, tested more / new resistors again.... Weird thing is changing the resistors on one side, impacts the other. I've tried 3 1 Ohm resistors on 1 side, with 1, 2, or 3 on the other, and then every combination there in. I'm using the headlights from Exomotive's website, the blue indicator in the dash works, just can't get it to work at the same time the brights do. Thinking maybe I got the wires wrong in the harness to the new lights... (it's the only thing I can possibly think as this makes no sense anymore)
Anybody have a 99-00 with pictures of their wiring that's working? Or a work around that I can follow?
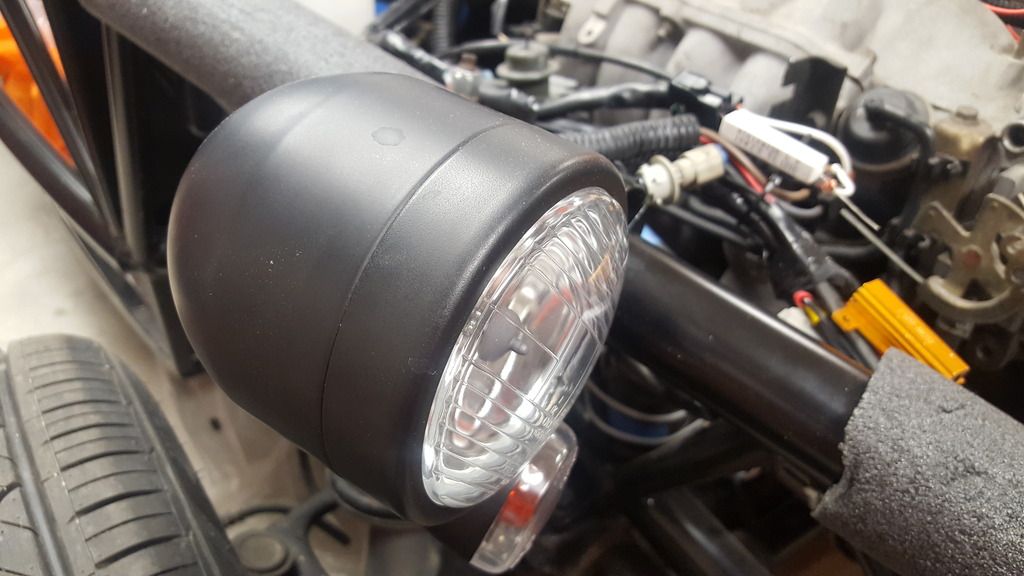
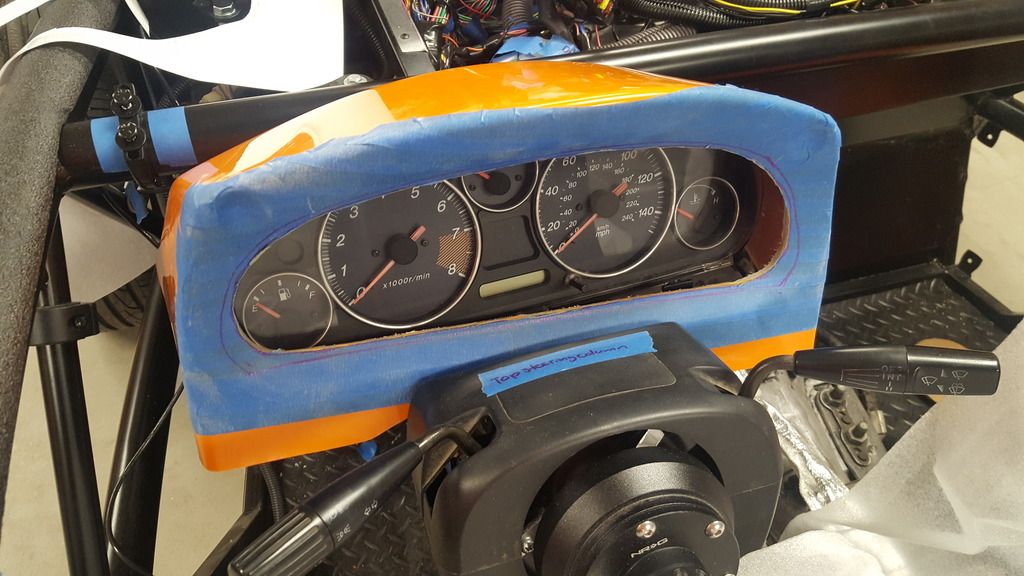
Did manage to get the gauge pod cut out. Now trying to find edge trim.
|
|
|
|
Post by SeanW on Jan 10, 2017 21:59:22 GMT
Quick heads up 'cause I just got bounced by the BAR for it. They're no enforcing the requirement of all specialty construction cars to have a safety glass windscreen (AS-1) and a windshield wiper. Literally just got off the phone with the local ref who explained the BAR's decision to me.
This isn't a new requirement, it's part of CHP892. The BAR, however, is kind of selective and arbitrary about which requirements they decide to enforce for special construction vehicles. Seems the looked out side this morning and decided that safety glass windshields and wipers were a requirement they should start to enforce again.
|
|