|
|
Post by exoRy on Feb 16, 2016 21:52:08 GMT
jgilbert - thanks for comments - it's things like that, that newbies like me don't realise! Why I originally went for "upside down" was - I thought that maybe it would protect the threads (in case it ever needed to be undone) and that it would sit "more flush" with the bottom of the car. However after your comment - I definitely want it staying in if the nut does come off - so a massive thanks! Stiggy - thanks very much for the quick response - much clearer now 
|
|
|
|
Post by jgilbert on Feb 19, 2016 19:01:06 GMT
jgilbert - thanks for comments - it's things like that, that newbies like me don't realise! Why I originally went for "upside down" was - I thought that maybe it would protect the threads (in case it ever needed to be undone) and that it would sit "more flush" with the bottom of the car. However after your comment - I definitely want it staying in if the nut does come off - so a massive thanks! Ryan, just a suggestion but if you cut the bolts to the correct length then you can fit a plastic nut cap to the nut to help protect it from underbody grim and dirt etc. A light smear of grease on the thread to help prevent any corrosion also helps. Do the same on your seat mounting bolts, oh and remember to drill your seat mounting bolt holes before you pop rivet the floor. Otherwise sods law is that a rivet will be where you need to drill. Unlikely to need to remove the chassis bolts, but I have ended up taking my seats out a few times. Hope this helps. J |
|
|
|
Post by exoRy on Mar 13, 2016 18:31:52 GMT
@jgilbert - unfortunately I've already done the floor - needed to get that on and get the car out of the garage I was renting - will have my fingers crossed when I come to do the seats - but I'm not holding my breath. Got back off a weeks holiday yesterday, managed to get a couple of hours in today - started mapping out the routes for the brake/fuel lines - and getting holes drilled. Am going to put the brakes on the chassis and run the fuel lines down the PPF. I've seen other builds use 5/16" fuel hose - does the fuel hose need to be a specific size? Also I'm going to be turbo-charging in the future - will I need to get bigger hose or is there a size I can buy now which will accommodate both? I'll need some fixings for either end of the brake lines - what sizes are these? I bought the braided brake hoses from FreakyParts a while back - I'm just unsure of the size of the fittings I'll need - if anyone has quick access to this, that'd be great  |
|
|
|
Post by abc123 on Mar 13, 2016 21:21:19 GMT
5/16" is the size of the stock miata fuel lines. no need to upgrade or go bigger, they will supply plenty of fuel.
the brake fittings should all be 10mm x 1.0.
|
|
|
|
Post by exoRy on Apr 17, 2016 20:03:57 GMT
thanks abc123! got all them ordered and with me! Got more done this weekend, got the clutch pedal/new master cylinder fitted, old one looked as though there was metal sludge in the bottom of the reservoir. Just waiting on one more part (new clutch bypass hose). Then will fit that along with the new slave cylinder I ordered (only £11), then will have to fill/bleed that system. Also replaced the Brake master cylinder - noticed the brave servo paint (under master cylinder) was bubbling when I was giving it a quick clean - new one ordered and fitted (seal on master cylinder looked shot too). Cleaned and gave the servo a lick of paint. The new master cylinder I ordered has different locations for the pipes - so had to make up two new lines to the brake proportioning valve. All went well and am hoping to finish running the brake lines by the weekend. |
|
|
|
Post by exoRy on Apr 23, 2016 11:00:12 GMT
so, just cracking on with the brake master cylinder and servo. I have the 2015 exocet kit - below is a photo of the servo in place (without the spacers which have been cut off from the pedals) 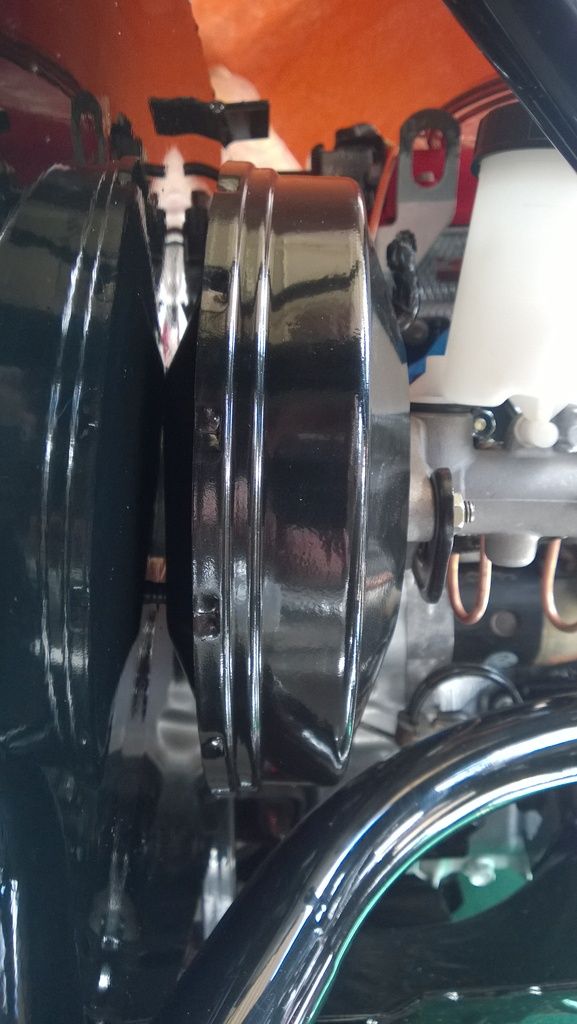 I've tried putting the spacers on this side of the bulkhead however the servo fouls on the frame (the big black bar in the picture) Are others having this trouble with the 2015 kit?? What can I do to solve?? should I leave the spacers and adjust the brake pedal - using the bolt and nut on the "pedal side" and just going from there??? Thanks Ryan |
|
|
|
Post by exoRy on Apr 28, 2016 18:00:17 GMT
hi all, had another quick play with the brake servo tonight to see if I could get any further - I positioned it every way possible (even came up through the bottom of the car) to see if I could get it to sit properly. Unfortunately - no luck. I took a couple more photos (closer) to help show the problem - any ideas would be greatly appreciated as i'm really struggling to find a solution on my own. Thanks in advance 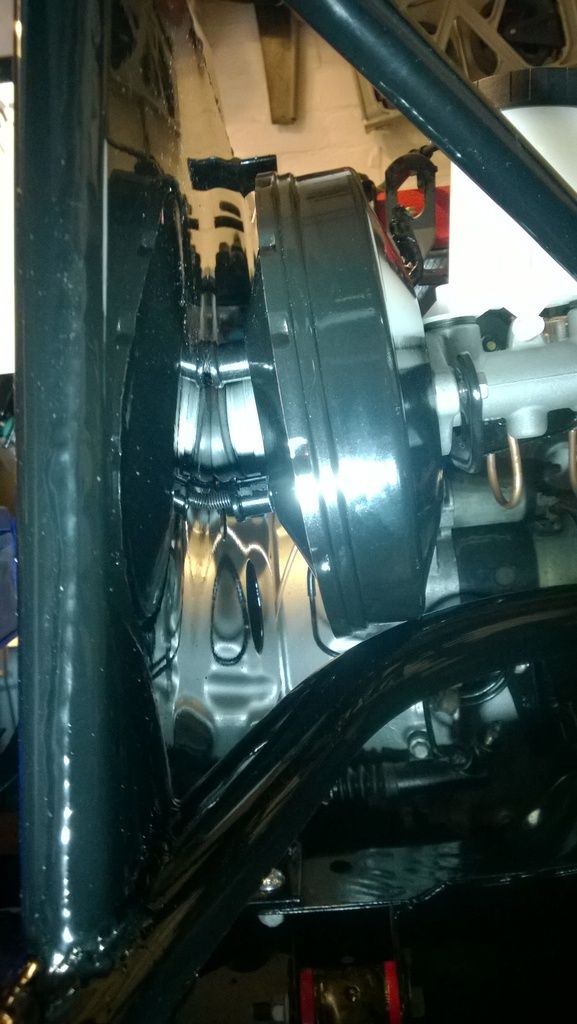 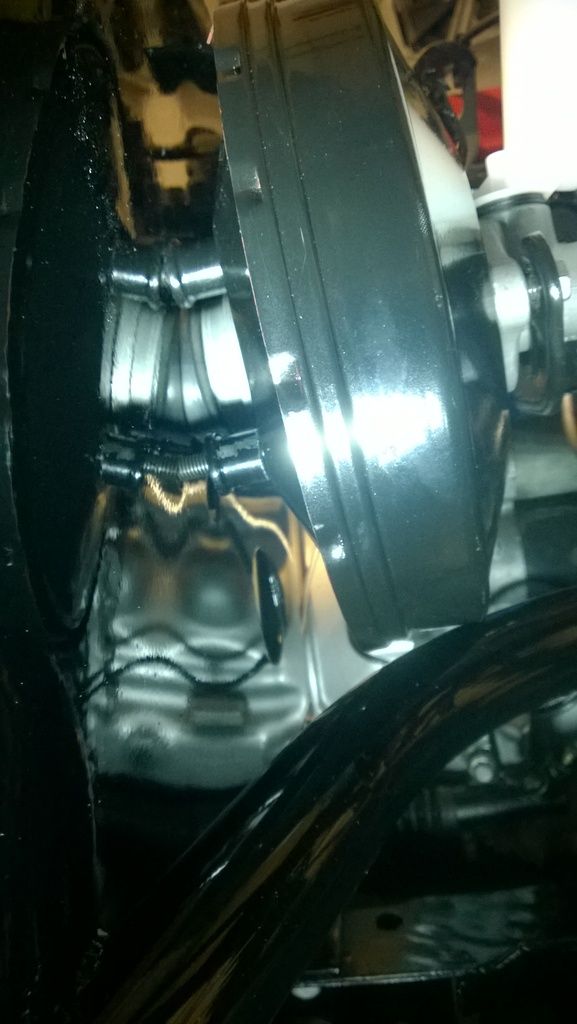 |
|
|
|
Post by ian360 on Apr 29, 2016 8:51:36 GMT
I was trying to recall how I did mine - I remember it being a bit of a tight one. I think I installed the servo without the master cylinder attached - that gives a bit more angle to play with to fit the lower bolts and then offer up the top ones. Also think I attached the brake pedal fittings afterwards, so there is less to worry about from the servo side. Once all bolted in the master cylinder can be attached. Like I say, all a bit tight but think this is how I did it and everything seems to be attached and operating at this time - nothing tested live yet though!
I can't think our servos are different sizes but I'll have a look at the measurements this weekend and let you know
|
|
|
|
Post by jgilbert on Apr 29, 2016 17:58:43 GMT
Ryan, looks to me like the pedal assembly is pushing the servo out of line??? ie more thread at the bottom. I checked back on my build (Page7) and found the following below. I would try 'packing the pedal assemble with washers to see if this helps. Not the pedal assembly does have a large 'rivet head' that will throw the assemble off if you completely remove the spacers. FROM MY BUILD BLOG Next job was to mount the pedals and steering wheel. So like the build guide suggests, I removed the spacers from the back of the brake/accelerate pedal assembly. 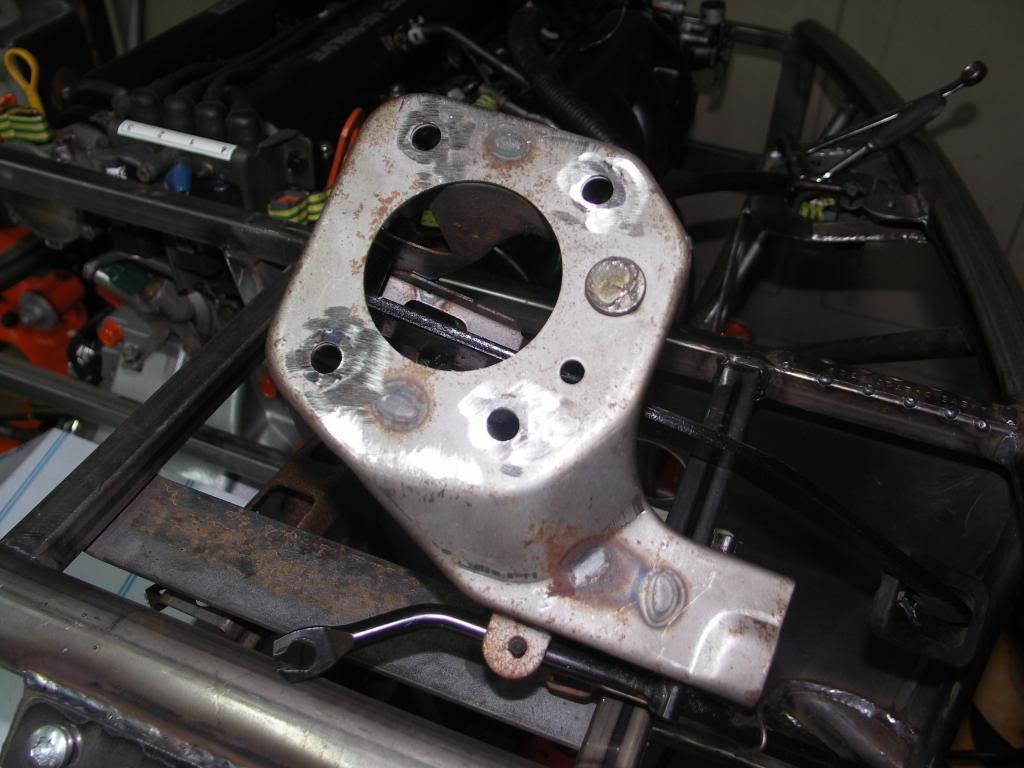 A series of trial fittings left us needing to add back a 12mm spacer between the pedal assembly and the inside of the bulkhead. Trying to fit without this just twisted the steering column mounting and slewed the column out of line. 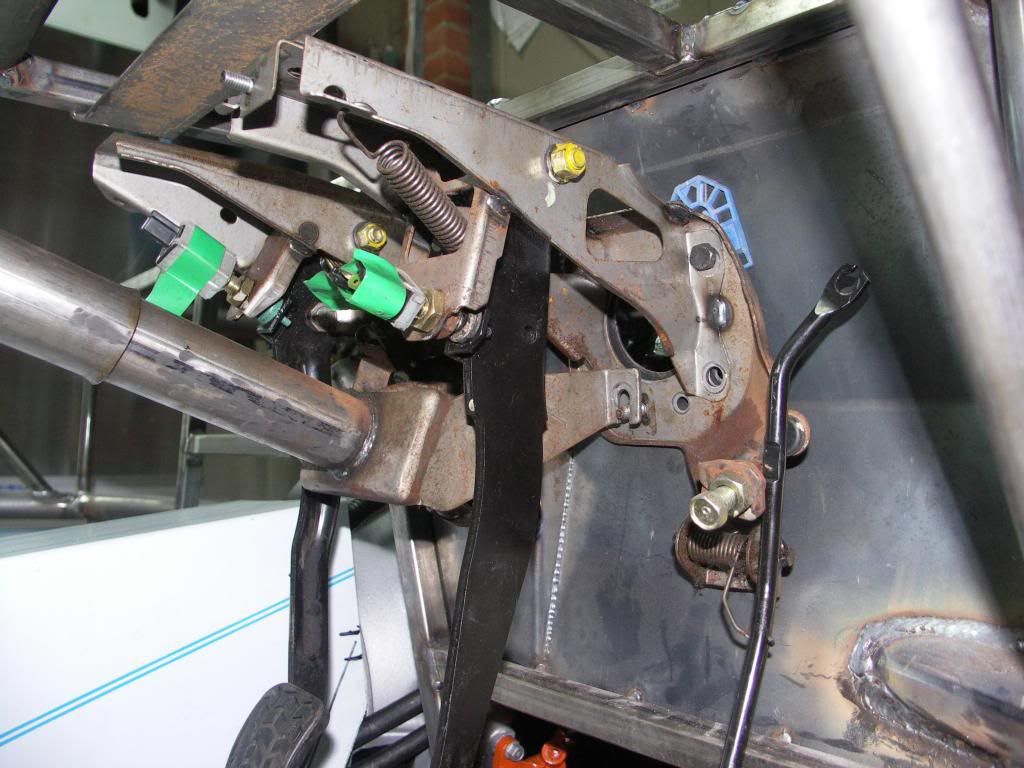 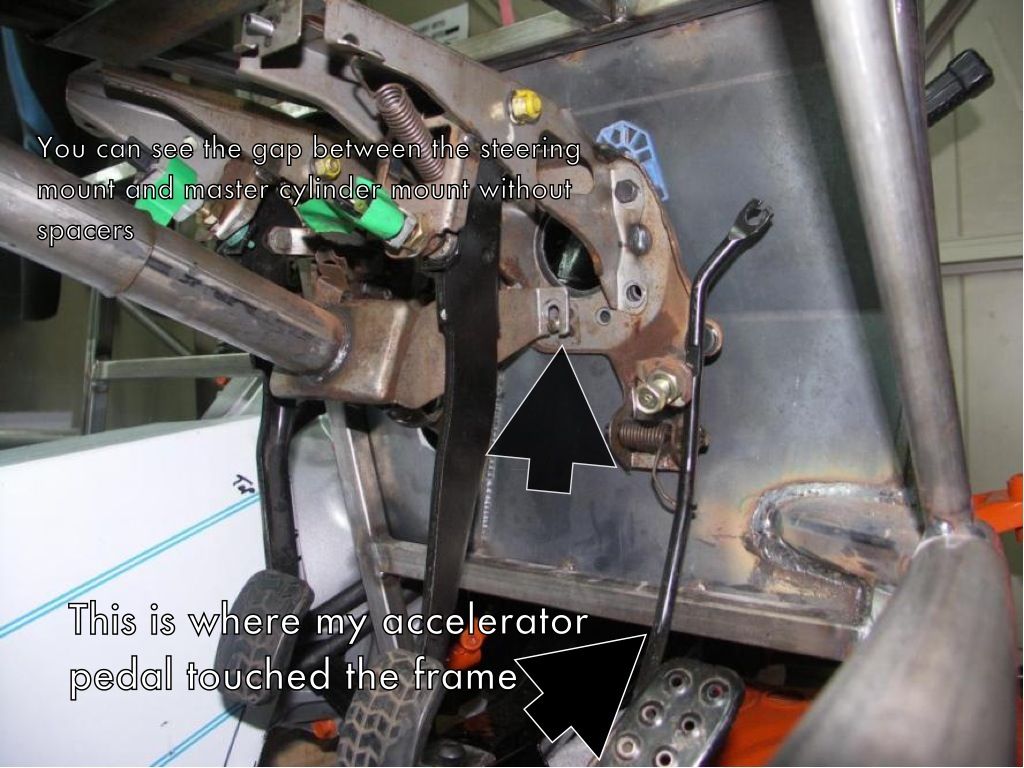 I used the originally removed spacers cut down to 12mm. Spacers cut and held in position and then welded to pedal assembly. 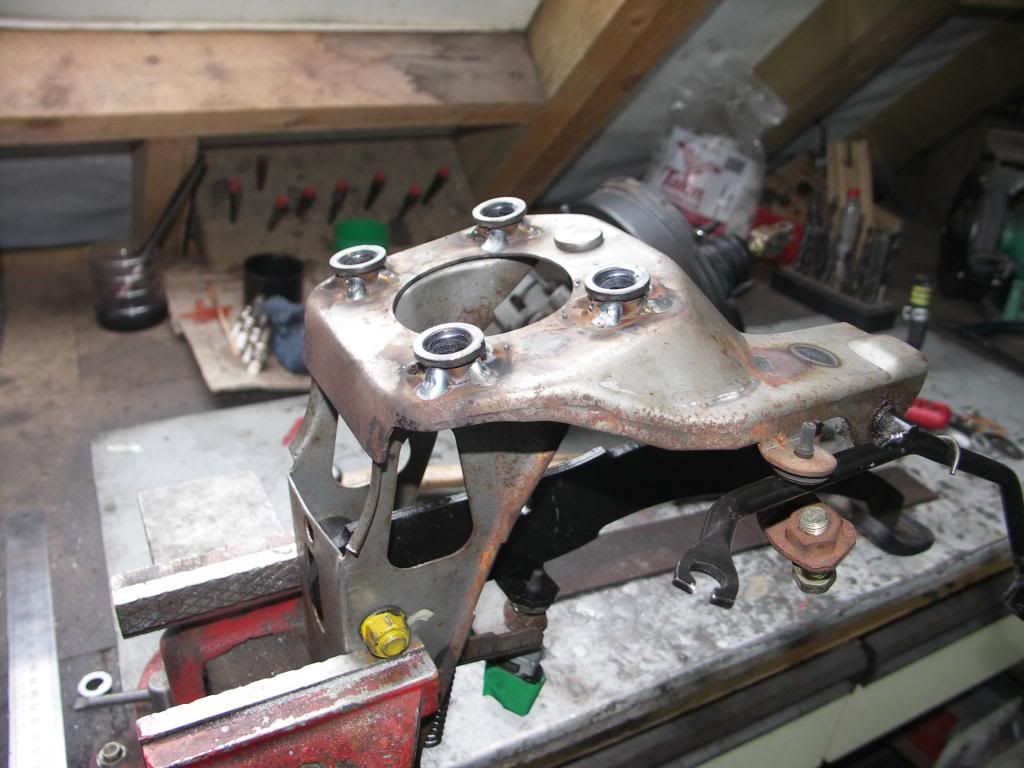 Also looks like I added some spacers to the bulkhead where the servo fitts as well. 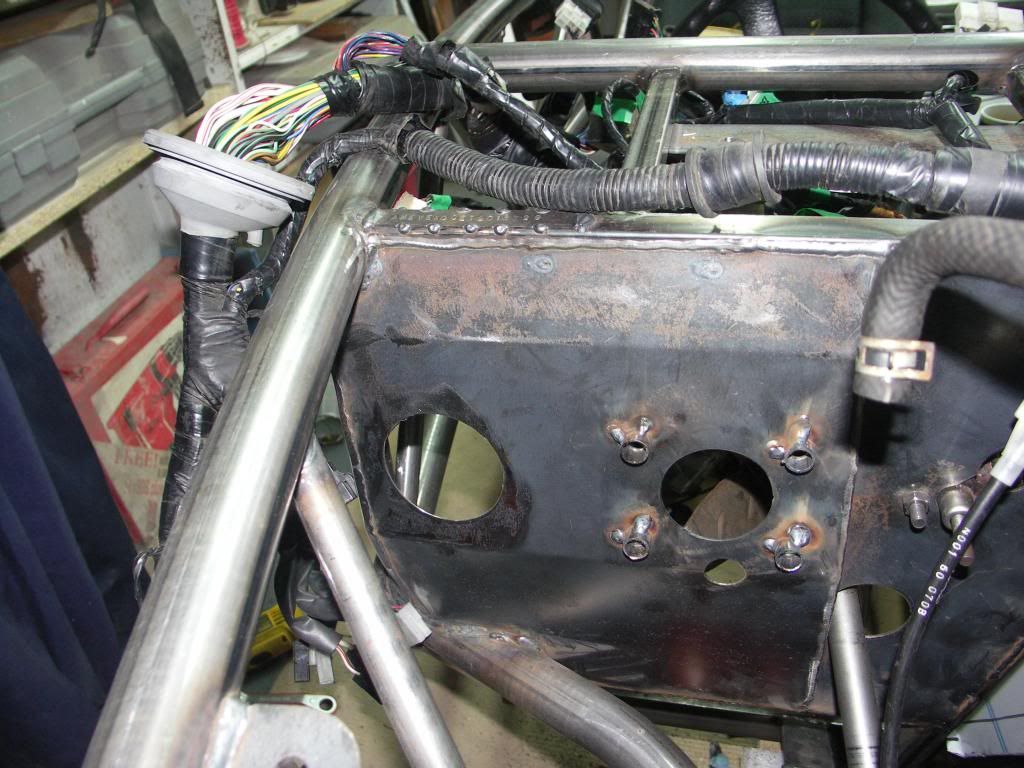 Read more: mevowners.proboards.com/thread/3197/project-exocet-john-lukes-build#ixzz47ErYPCar |
|
|
|
Post by exoRy on May 5, 2016 20:46:18 GMT
ian360 - thanks for posting your servo sertup on your thread jgilbert - thanks every so much for your detailed response - definitely helped me visualise how it should sit Went to Stoneleigh on the Monday - had a really good day. Thought Riot's "live action" setup was a really nice addition to the show - was good to see some kits being driven in anger and nice display of skills and various turns. Had a talk with trident - have to say his build looks even better in the flesh, was also good to see again how the pedals go - although with the "non-2015 exocet" there's a lot more clearance between servo and the frame. So I went off into the main halls, had a wander and spoke with Julie and Stuart - basically as the panels are laser cut - there's pretty much no error - so it should go. Gave myself the rest of Monday off and cracked on again on Tuesday afternoon - filled with a new batch of enthusiasm. Tackled the servo first - Stuart and Julie both said to give it a good shove, and maybe to ever so slightly elongate a few of the holes with a file. I elongated the bottom two slightly and still after pushing with all my weight against the servo it wouldn't go. I removed the master cylinder for more room. Instead of pushing the servo I instead got as much of the bolts (that come out of the servo) through the holes (see picture from a previous post), then attached the nuts and started tightening. 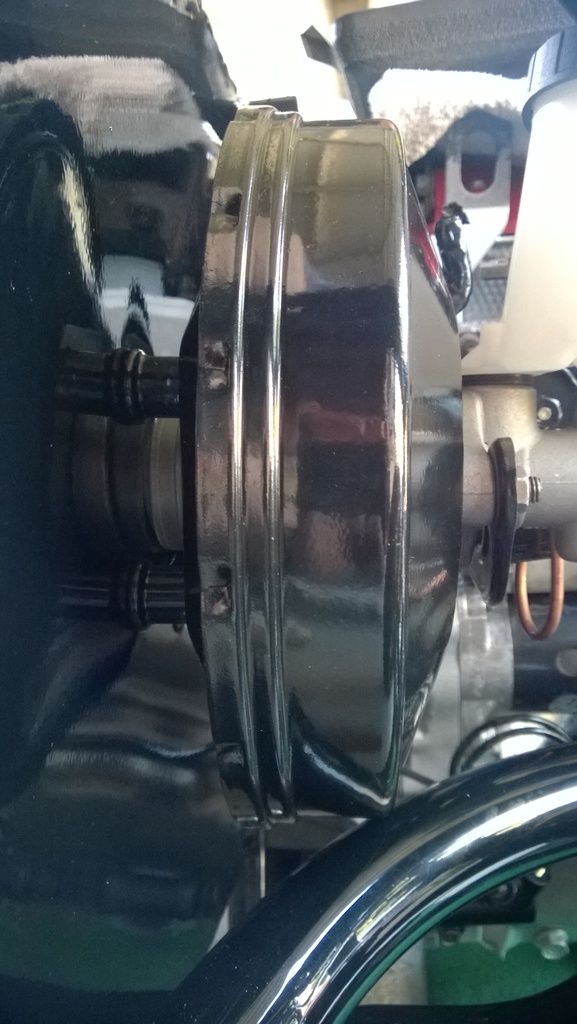 Worked perfectly  chuffed as now I can finish routing the brake lines. Note for future builders of the Exocet 2015 - it is tight but it will go - the servo does rub over the frame and does contact the frame (ever-so slightly) as it sits - but as you can see it doesn't cause it to sit funny against the bulkhead. seems I was being to gentle with the servo/frame. Also got the brake pedal trial fitted in place, will just have to remove shortly to cut the hole for the accelerator cable and bolt the top of the pedal fixture to the bracket coming off the frame. It's sitting further out than the clutch and accelerator. 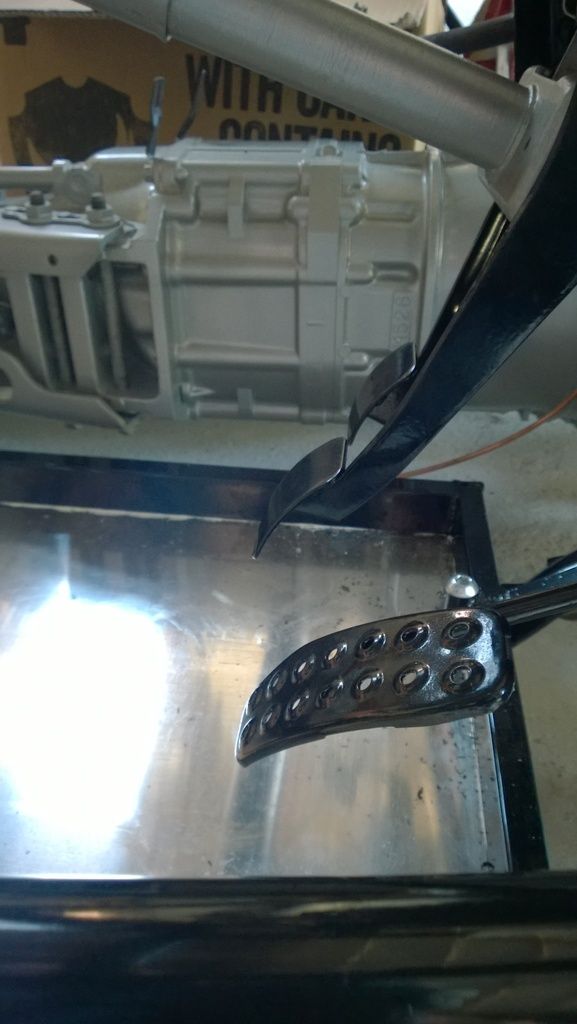 Assuming I just have to losen the lock nut this side of the bulkhead on the threaded rod and wind it in?  ?? I also rebuilt the rear brake calipers, I purchased all the goods for them about a year ago - so fitted all new seals (they were pretty perished) and new pistons as the originals were corroded. Only pain point was removing the hand brake adjuster gizmo that was in the original piston and transferring that to the new one. Just had to remove the spring, c-clip and screw the adjuster back into the hole and pull it out with the adjuster fitting. then transfer over to the new piston, grease it good, and put back the c-clip and spring. Would have been easier with some kind of puller - but I got through with elbow grease and determination  Should be fitting these over the weekend, want to get the fuel tank bolted in too, fuel lines run (got some fuel hose sitting waiting) and finish the brake lines. Still making progress and making use of the good weather we've been having and the evenings which are staying light much longer! |
|
|
|
Post by jgilbert on May 5, 2016 21:08:38 GMT
well done. tick that job off the list and move on.
|
|
|
|
Post by exoRy on May 14, 2016 17:31:36 GMT
finished routing the brake line down the chassis today, just coming to route the brake lines in the engine bay. wondering what this tab is for?? 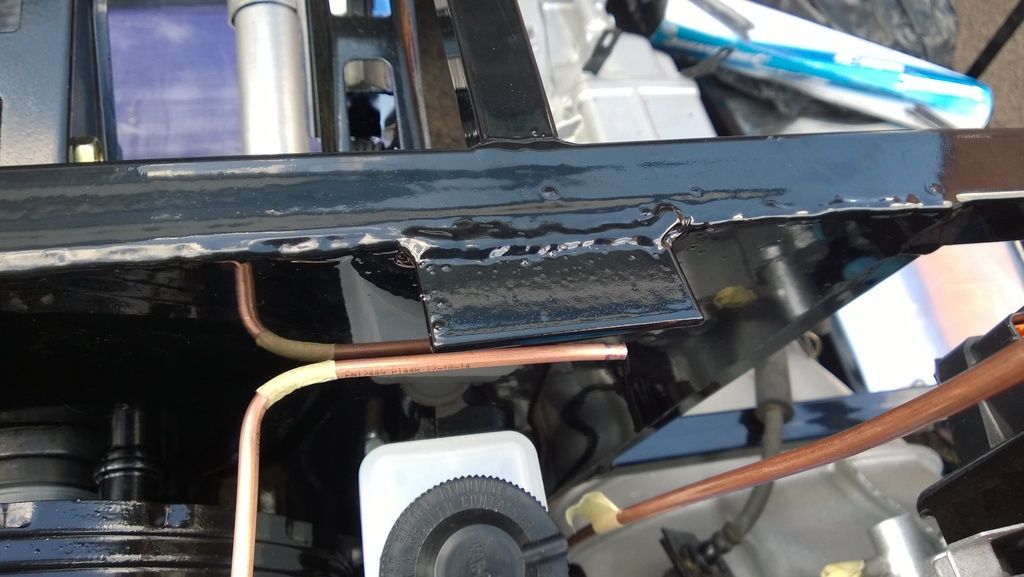 Need to know, as I was hoping to run the lines underneath this?? |
|
|
|
Post by miket on May 15, 2016 17:13:03 GMT
That's new since mine; is the VIN on it but buried under the powder coating or can you see the VIN somewhere else nearby? Is there another tab on the other side - ideal for bonnet pins? ... sorry I can't offer more.
|
|
|
|
Post by sparkyman403 on May 15, 2016 18:56:05 GMT
Hi just looked on mine I've got one too not sure what it's for . It's not vin number that's to the left of brake servo . Might pay to ring Stewart
|
|
|
|
Post by exoRy on May 29, 2016 21:01:06 GMT
Thanks guys, will have a word with Stuart!
I bought the Freaky parts Clutch bypass hose. One of the ends is a M12 female and the other is an M10 - the Clutch Master cylinder and slave are both M10 female.
How should I go about changing the M12 into an M10? are there any reducers I can buy? or do I have to run a short piece of hard line with an M10 on one end and M12 on the other??
Thanks
|
|