|
|
Post by mrjingles705 on Oct 1, 2014 5:23:20 GMT
For what it's worth; I'm just cleaning the hub faces and applying anti-sieze to stop it welding itself together.... only the rear section of the hub 'plate' is getting any paint.
And LM2 frease will be fine for the ballljoint.
|
|
|
|
Post by exoRy on Oct 18, 2014 17:35:11 GMT
Couple of photos of the some of the bushes I fitted about a month ago: 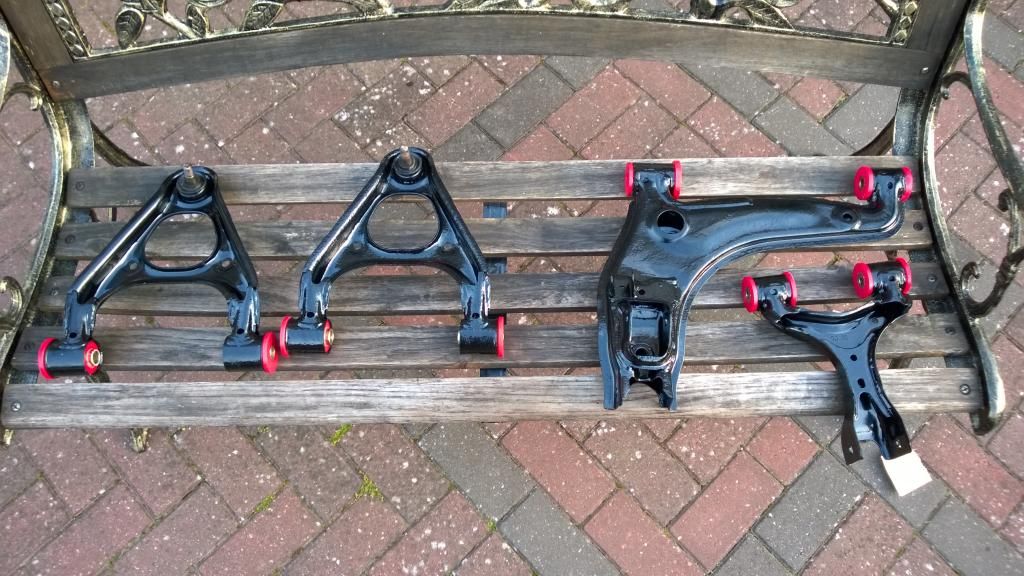
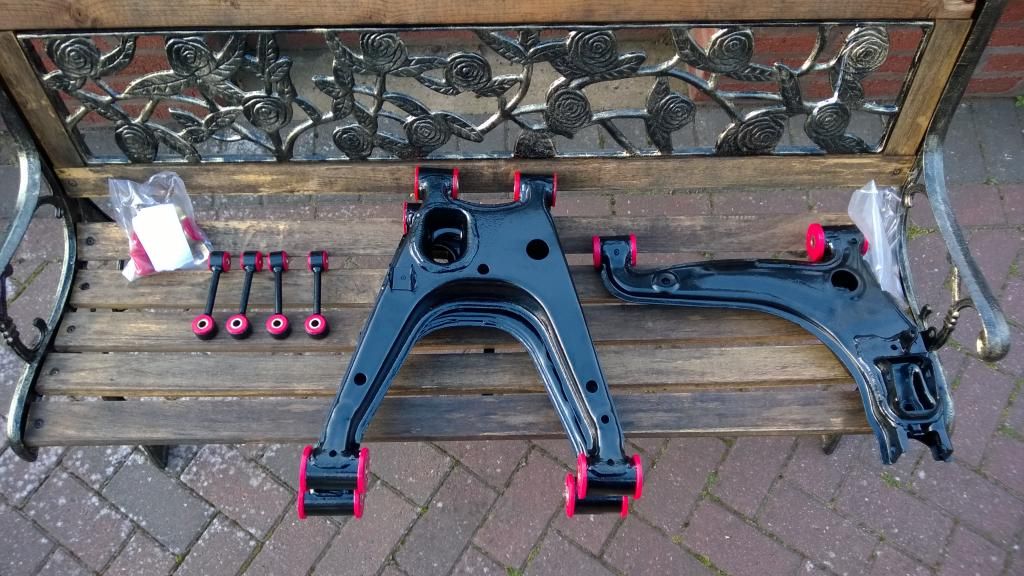
Last week Dad was busy going to a garage to get the stuck drive shaft out of the hub, bearings replaced and the seized lower wishbone bolt pressed out (some of us aren't retired and have to work).
Bearings replaced for the total of £40 (Coventry SM Autos - highly recommended) - I supplied the bearings sojust paid for labour. The mechanic couldn't get the bolt out (which we had cut and tried to drill into), so recommended to get it done at some place in Binley. Dad looked for ages and couldn't see the place, an hour had passed and he was just about to give up then spotted it. Went inside and asked the owner if he could help, the owner replied "Yes, I like a challenge".
They usually cater for mass machinery so was very grateful that they took time out of their day to help out.
30mins later after being on a huge press, they slowly broke the corrosion and pushed it out!
Went to pay and they replied, "What day is it??". Dad: "Friday" Owner: "Ah, well its free on a Friday"
Dead chuffed and restores faith in the population that there are genuine people that like to help others when they can.
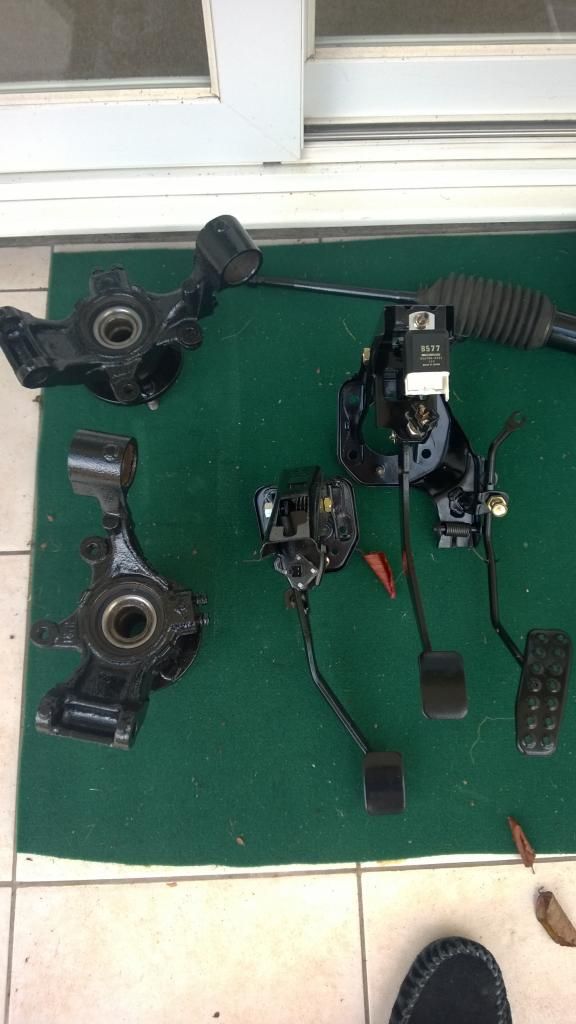
Picture of the reassembled pedals and hubs with new bearings all painted up:
Spent last weekend struggling to get the exhaust manifold off the engine. All but one nut came off without a hitch. This one nut was corroded and after one attempt with the socket - was rounded 
Emptied a can of release fluid and a can of butane trying to heat and get at it with some mole grips.
Eventually got the saw out and started to cut into the nut to try and weaken its structure:
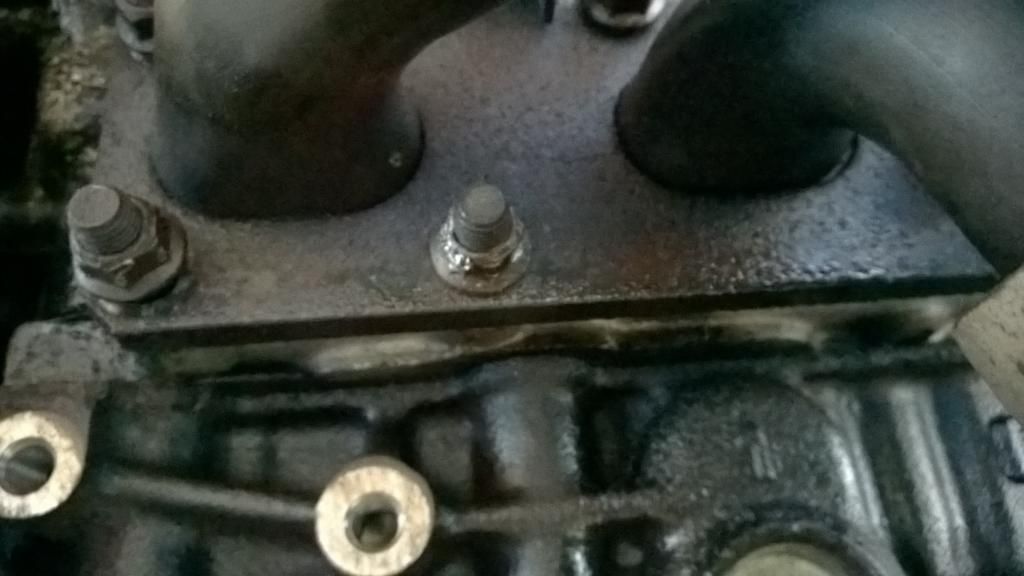
After a good hour, and lots of sawing I tried again with the mole grips and it started to turn, a quick victory dance around the garage and 5 min of flipping the V's at the nut and I was ready to continue.
The loser:
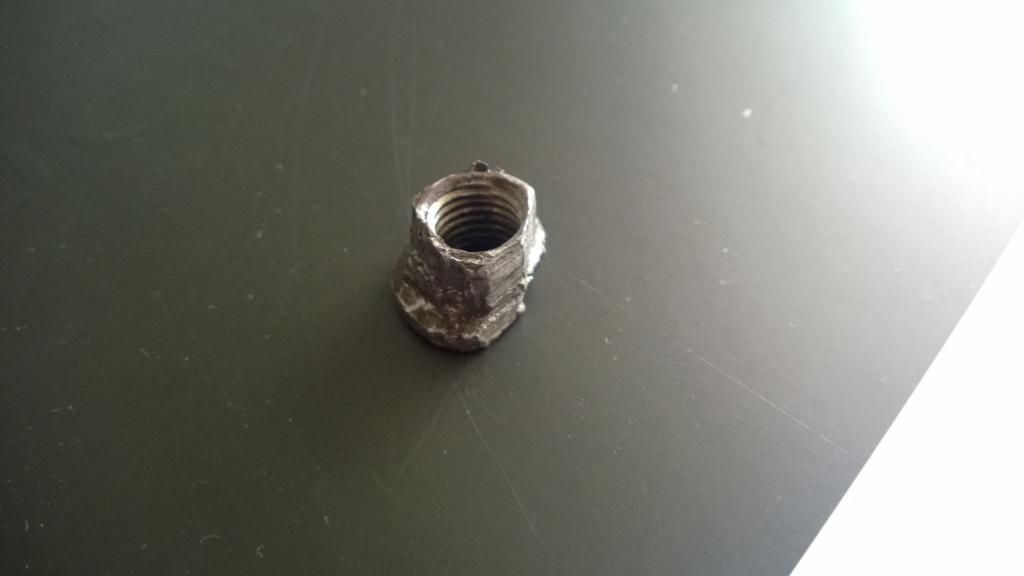
I only spent this amount of time and care because I thought that the bolts came from inside the engine and protruded out (couldn't find any evidence or any piece of information in the enthusiasts manual to suggest otherwise), so really didn't want to ruin the thread and then be left with the task of dismantling the engine to just replace one bolt.
Luckily mazda have thought about this and in fact the bolts are double ended, so one end screws into the engine and you put you nut on the other end - if i'd have known this I would have bought replacements and just went at it with a bigger saw and would have been loads quicker!
Removed the alternator and other bits from the engine.
also got a chance to paint the prop shaft (another POR15 job): 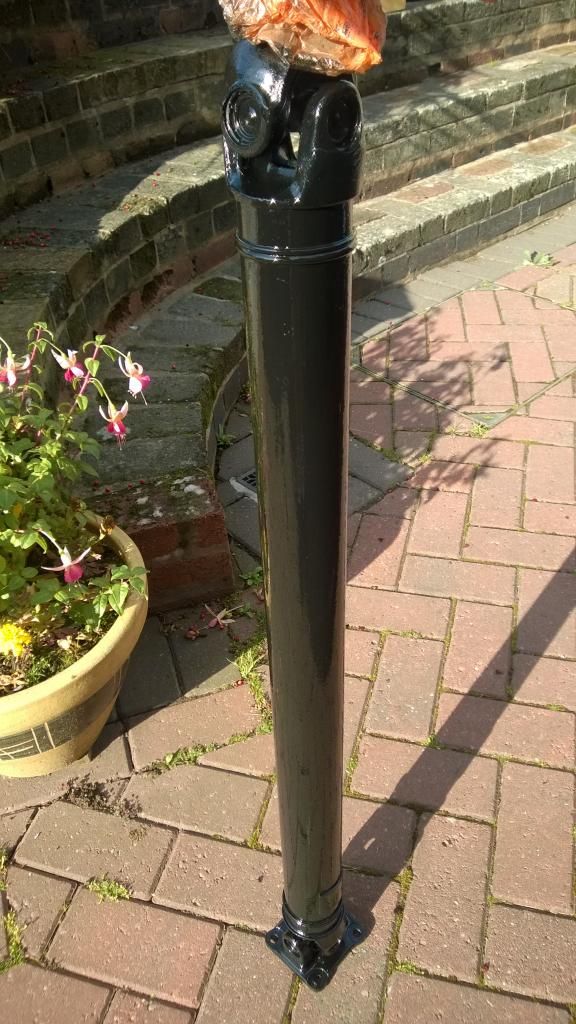
This weekend started with the best intentions, last night recruited a mate to help me loosen the crank shaft bolt.
He used the breaker bar on the bolt and I held the flywheel and clutch in place with a large bit of metal. Unfortunately the metal bent and we had to abandon the task.
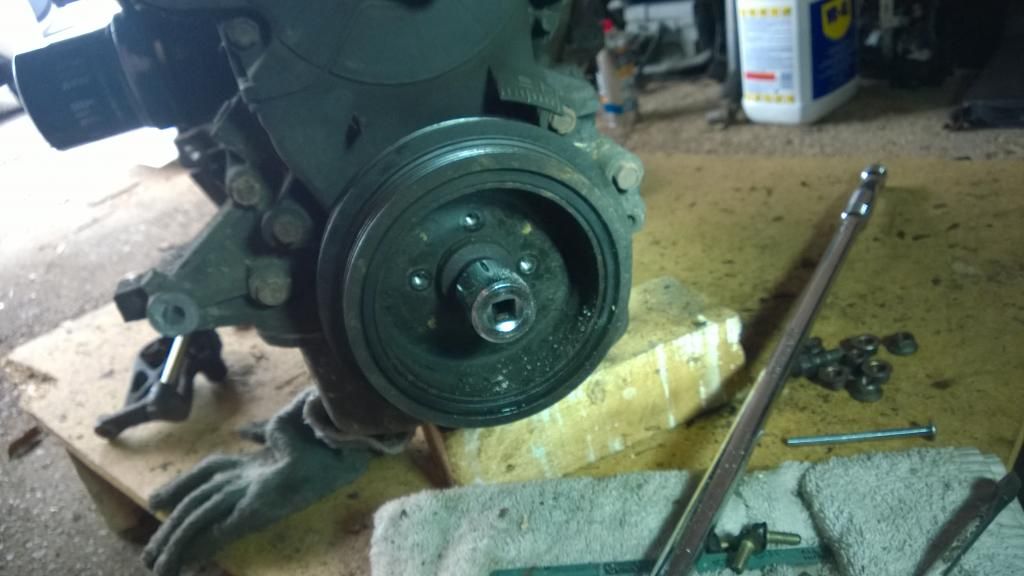
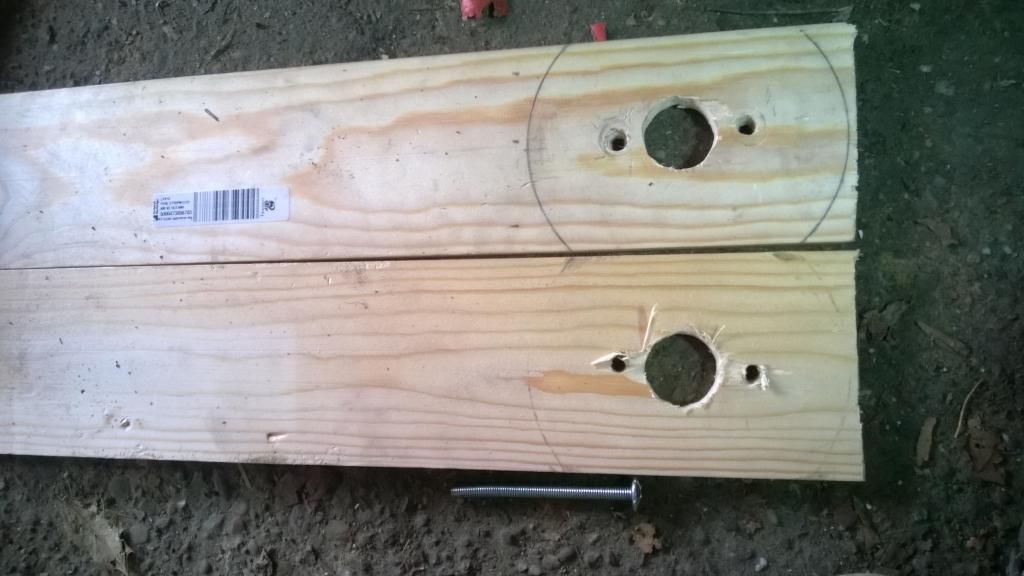
Today I took another go at it, made a support with some wood (essentially bolts to the front of the pulley and meets the ground to stop rotation) and bought some bolts to anchor everything, however the wood began to bend so that was abandoned too!
The crankshaft bolt:
the make-shift anchors:
How have other people got this crankshaft bolt out without having the gearbox attached to stop the engine rotating???
Any input would be a massive help as I just need this off before I start cleaning the engine and painting - this is the one thing that is holding me up now  |
|
|
|
Post by snowbird1 on Oct 18, 2014 19:41:02 GMT
The crank pulley needs to be very tight, I don't think wood is going to do it. This is the tool I made from a bit of aluminium extrusion I had lying around:  I used 1 1/2 inch hole saw to make the large hole. There are a couple of ways to undo a crank pulley bolt, the old trick with the engine in situ is to brace the wrench against the chassis and hit the starter, an impact wrench will usually do the job, but you will still need to hold it when you have to torque it, so you might as well make a solid tool. |
|
|
|
Post by mrjingles705 on Oct 18, 2014 21:16:20 GMT
|
|
|
|
Post by gwnwar on Oct 18, 2014 23:40:18 GMT
|
|
|
|
Post by jgilbert on Oct 18, 2014 23:45:41 GMT
If you have access to a welder you can cut a piece of angle iron that engages into the flywheel teeth. Then weld a bolt onto the angle that will pass through one of the block/gearbox mounting bolt holes and bolt it in position. This will stop the flywheel turning and hence the crank.
|
|
|
|
Post by exoRy on Nov 3, 2014 20:43:26 GMT
Unfortunately I don't have access to a welder and am a bit of a cheapskate so fabrication was the name of the game!
Managed to use one of the blocks of wood as a template and fix 2 lengths of aluminium, first had to remove the pulley as this meant the bolts could be cut down and therefore had much less chance of bending so all the force could go into removing the bolt.
Took about 15 mins on the pulley, a few sprays of PlusGas (thanks Stewart) - cannot recommend it enough. £5 a can from Amazon (sold by eurocarparts). Used the hammer to give it a few smacks to loosen it, used a spare block of wood in-between to minimalise the damage to the pulley. This gave it a slight bit of movement and from then I used a crow bar and gently pryed either side of the back of the pulley bit by bit. Each time spraying a bit of PlusGas in the tiny gaps that were appearing (engine side of pulley).
It eventually came off and was surprised at the amount of rust there, so must remember to protect this before I put it back on.
Then used the homemade anchor to stop the engine turning, this met with the floor and I had to really lean on the breaker bar and it cracked and began to move
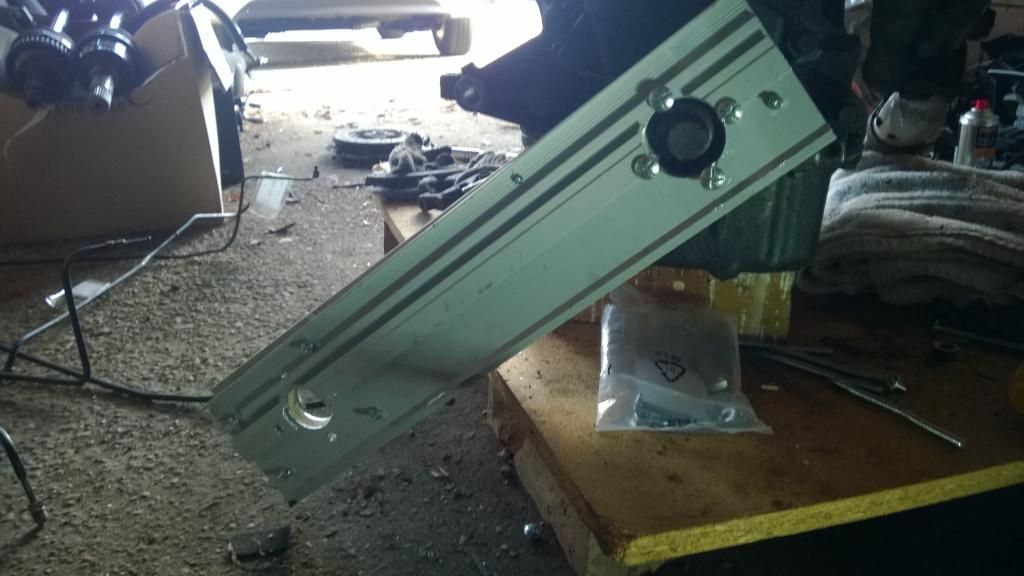
With the anchor still in place (me standing on it as it wants to move the other way) I removed the clutch cover, clutch and flywheel
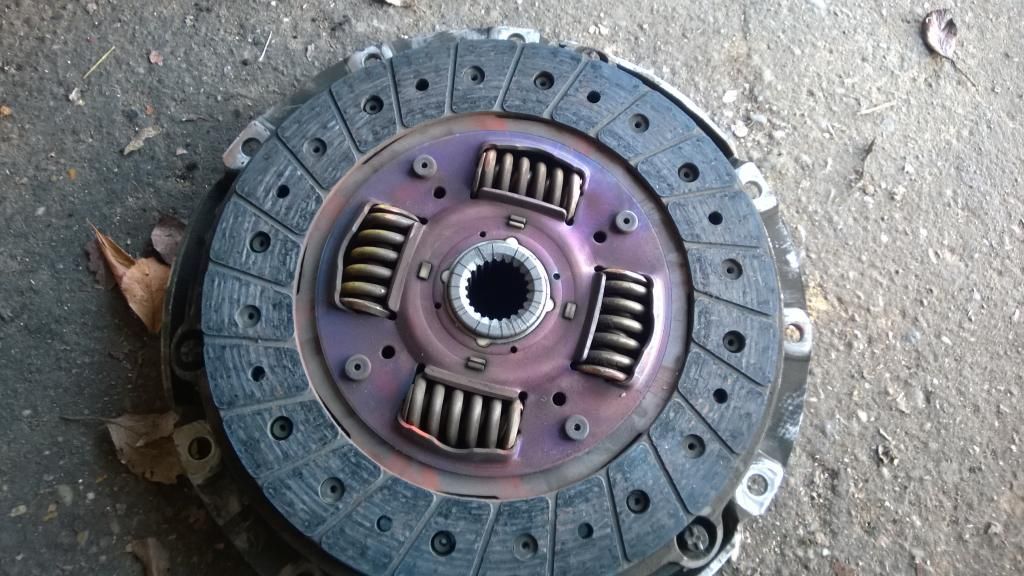
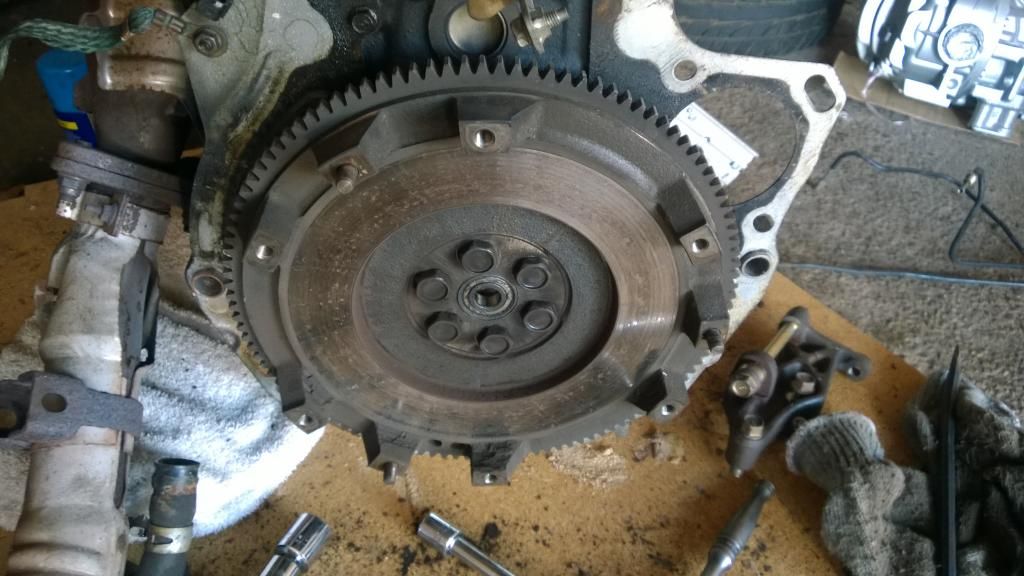
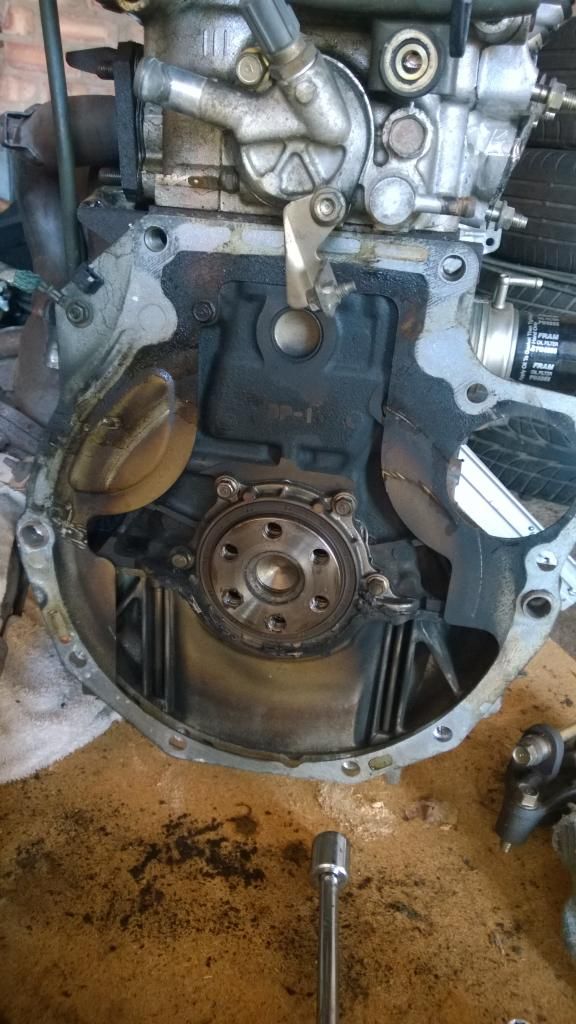
To my un-trained eyes, I don't think the clutch looks too bad (less than 60,000 miles on it). Obviously I'm no mechanic and this is one of the first times I have seen a clutch in real life 
I'm not sure on the tell-tale signs of when a clutch will start to give up, however I'm assuming the fact that the raised sections can still be easily distinguished is a good sign??? Is this about right? Or can someone chime in, tell me I'm an idiot and it needs replacing??
Had to stop myself over the weekend, as the next stage is removing the rocker cover and then prepping the engine for a degrease/clean. I'm off on holiday this sat, so didn't want to leave the engine sitting around in the garage with its top off for 2 weeks (even with a make-shift cover) so just left this till I return.
I'll be in New York from Saturday onwards, does anyone know of any exocets around that area??
Start of December I have a week booked off work, specifically for car work (and I would have lost my holiday if I didn't take it before the new year) so hoping to get the engine cleaned, serviced, put back together with new hoses and mating that to the subframes to have a rolling chassis once more!!
Best laid plans and all that......
|
|
|
|
Post by gwnwar on Nov 4, 2014 5:38:22 GMT
Clutch disc doesn't look bad lots of meat left.. how is the face of the pressure plate. any hot spots or cracks..
If they look ok you could reuse them..rough up the face of flywheel and plate with sandpaper.. Really your call..
Also check throw out bearing for smooth turning.. Engine rear seal looks good no leaking. When you install disc back make sure the disc is installed with the tall spring side is toward the transmission..
|
|
|
|
Post by exoRy on Mar 18, 2015 9:48:15 GMT
Wow, page 10!! Little ashamed of myself - however had a really busy Xmas/New Year! Haven't had time on the car recently - I'm currently waiting to clean/paint the engine - the POR15 paint I've bought says on the tin it can't be applied in temperatures under 10C (I've also emailed - hoping there was a little give in that temp - but they said no! Definitely not recommended to paint in temps underneath 10C). The weather here in Coventry has been picking up recently, but annoyingly it has only seemed to edge above 10C midweek, then when it comes to the weekend where I can get some time at the garage, the temps have been dropping to about 5/6C - sod's law! Have bought more goodies for the car - full set of engine hoses (blue) - so really can't wait to get back on it! Have been keeping up to date and it's great to see the builders on the other side of the pond keeping going - while I'm very envious of some of their "winter temps"  Here's hoping for at least one warm weekend before Stoneleigh!! |
|
|
|
Post by Stiggy on Mar 18, 2015 11:40:26 GMT
can't recommend it but I usually put a socket and bar on the crank bolt and flick the starter motor, gets it undone but stand back!
Coming together nicely exoRy.
|
|
|
|
Post by exoRy on Apr 6, 2015 21:10:50 GMT
Temperatures this weekend soared - which means one thing - I could get to work on the engine!
Started stripping the engine on Friday (got to love bank holiday weekends!), removed the coil pack, HT leads, rocker cover, timing belt, tensioners, water pump etc (basically anything that would get in the way of the clean/paint).
Engine was a bit grubby
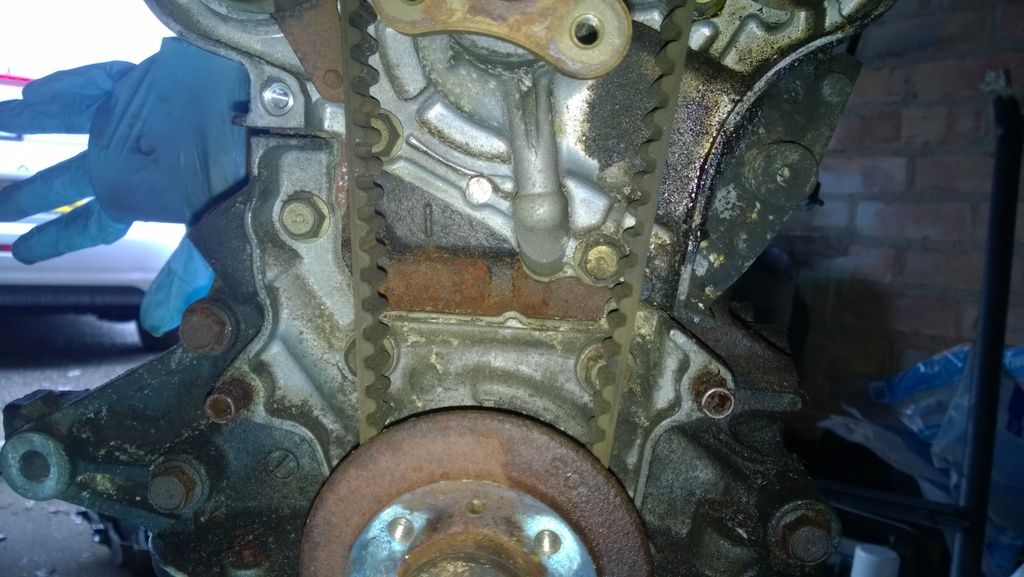
After removal of all the stuff above, I got on with degreasing the engine. I covered all the intake/exhaust ports with Aluminium Ducting Tape, and gave it a coat of Jizer. Used a spray bottle to get good coverage and went round it 2/3 times until it was soaked.
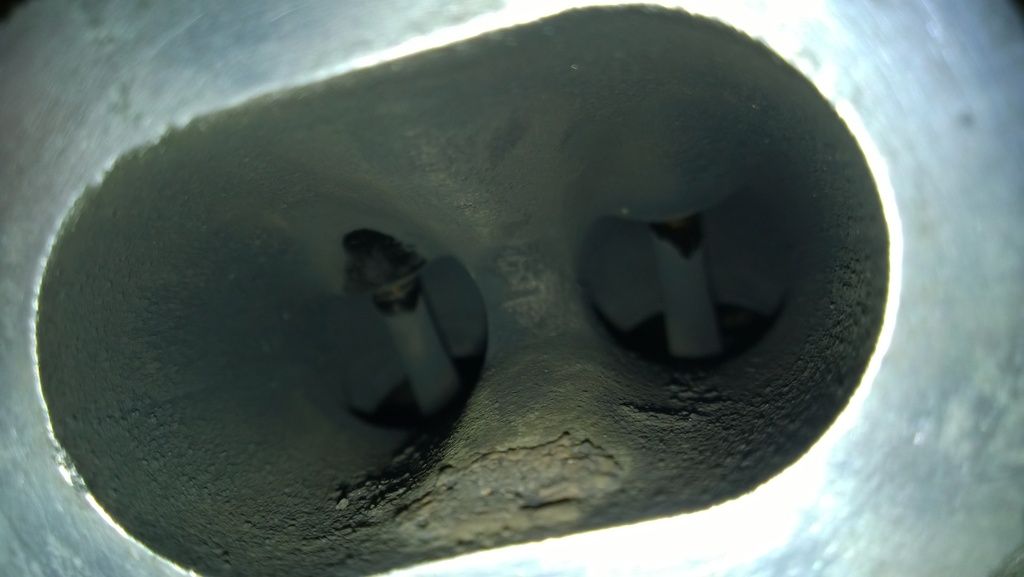
Noticed some "things" when getting close and personal with the engine that I'm not sure about so would appreciate some opinion from some of you.
1) Noticed these marks (maybe oil) on the value stems on the exhaust side of the engine - is this normal?? This is the furthest back (closest to clutch side of engine) of the exhaust manifold ports
2) Also noticed that there was a bit of rust down the spark plug hole (again closest to the back of the engine - as above), wondered if this is the sign of a problem - maybe water had been resting here at some point?
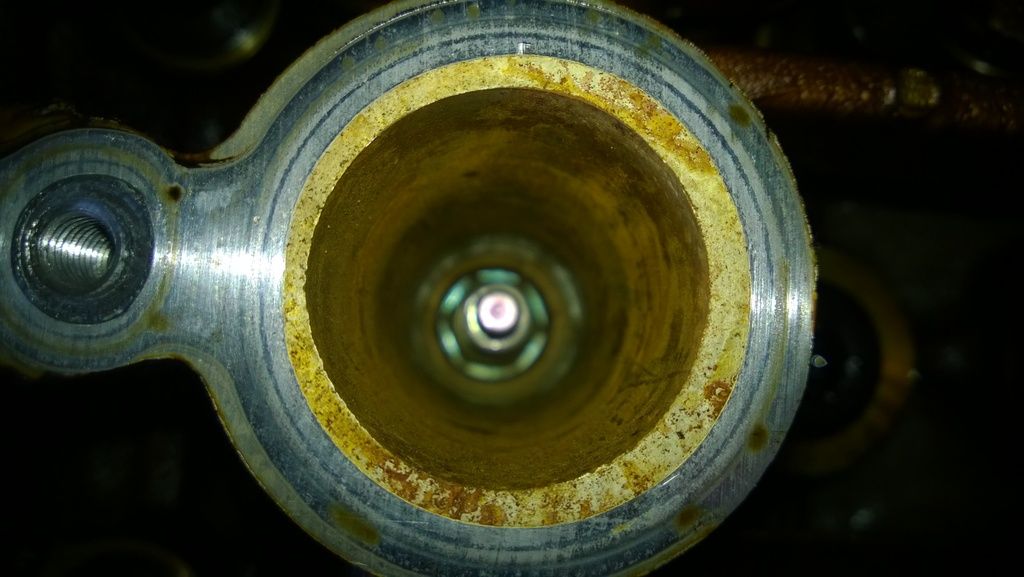
Will this be ok to leave or should I give this a bit of a clean (am slightly apprehensive to cleaning as I don't want any crap/rust falling down into the engine when I remove the spark plug).
Called it a day and saved the scrubbing to Saturday.
Saturday came and I took 20 litres of hot water with washing up liquid and a scrubbing brush to the garage. As my garage is a while away from my house and has no electric/running water I had to transport 20 litres in a fermenting bucket in my car - not ideal!
I gave the engine a good scrub (took me a few hours) with a hard bristled brush and toothbrush, and kept rinsing with water until it looked reasonably clean - no pictures - just imagine a less oily mx5 engine.
Also did the same for the rocker cover.
Fast forward to today, and I got the rocker cover painted with some red VHT Wrinkle Paint, out in the 25C sun (yes, really - had the digital thermometer outside to verify  ). ).
10mins after the first coat:
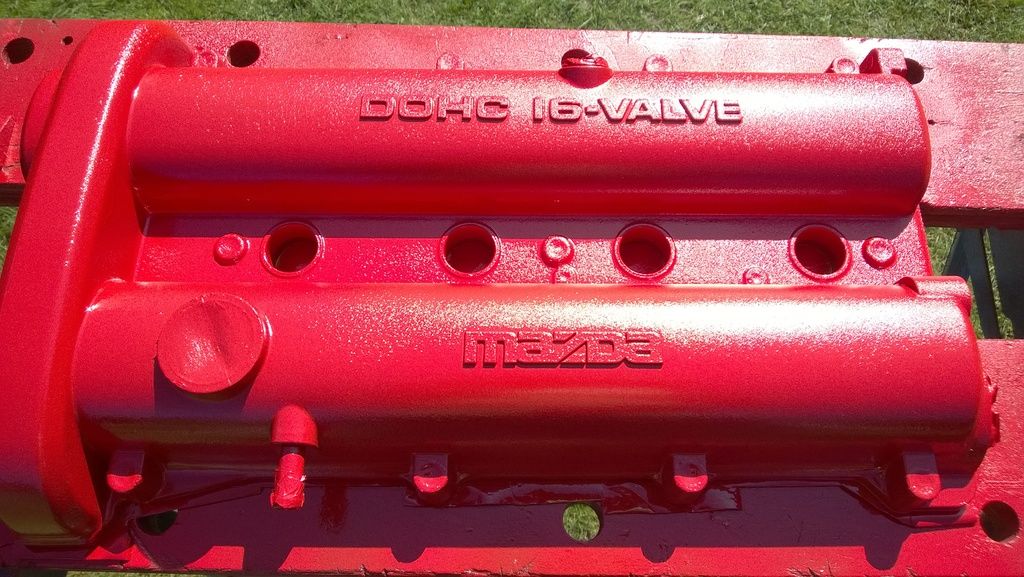
Started to go wrinkly in the sun already!
Couple of hours (after 3 coats) and sitting in the sun, quite pleased with the finish!
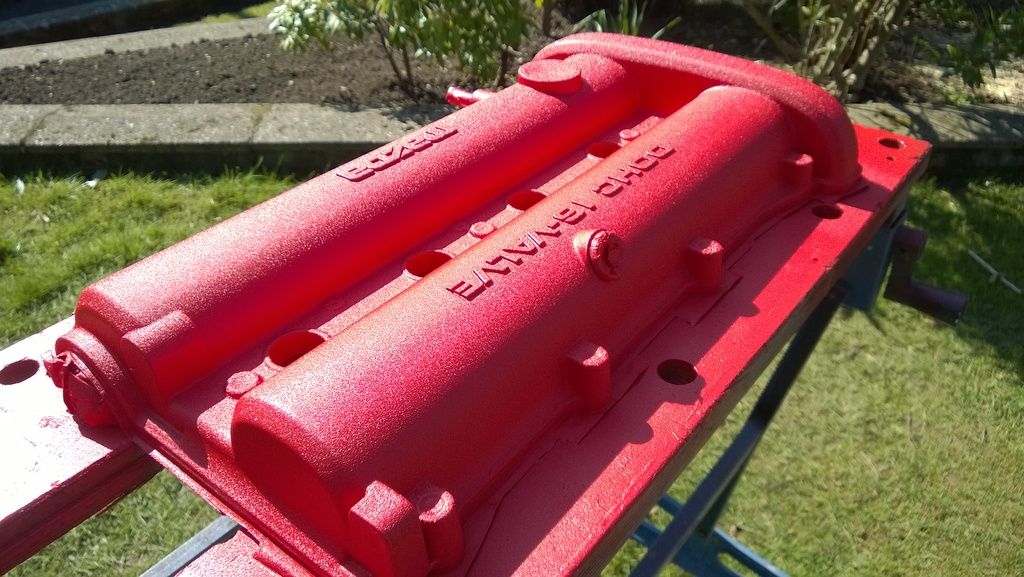
Will take another tomorrow (after some more drying tonight/heat gun treatment tomorrow)
Today saw paint on the engine too
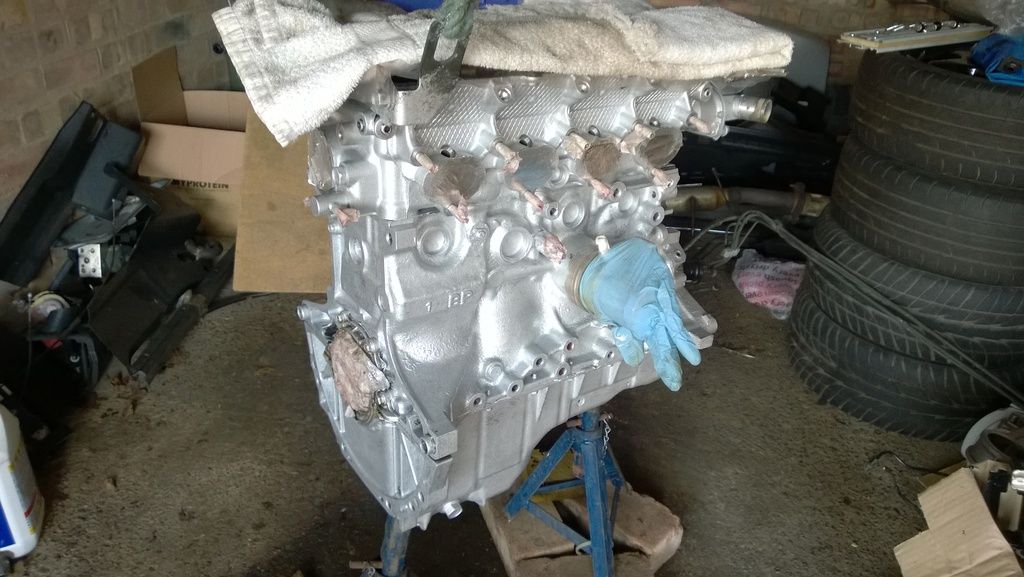
Paint used was POR15 Engine Enamel (Aluminium), wasn't massively pleased with the coat going on (tin says 1/2 coats) however as with the regular POR15 it goes on quite thin/uneven, but then starts to spread when drying.
Only used a tiny amount of the paint in the tin (think the tin is big enough to do 20 engines), I'll probably do 3/4 coats on the engine, the finish looks decent from 1 metre away, however the closer you get the finish is still slightly "patchy" and will require at least another coat!
Will try and do the engine coats after work a few nights this week. In the hope that I can start assembling the engine again and chucking the new service parts on next weekend.
Feels good to be moving again!
|
|
|
|
Post by gwnwar on Apr 7, 2015 1:07:03 GMT
Ryan.. If you need info on a timing belt change and order in which to do things check out www.miata.net/garage/ lots of good reading in the Garage Section.. watch the intake cam it will not stay in place use 2 wrench setup.. need 19 tits between marks on cam gears.. |
|
|
|
Post by exoRy on Apr 12, 2015 19:30:11 GMT
Thanks gwnwar, I've had a good read and think I'm reasonably clued up on the timing belt change. Do you think either of the photos of the valve stems/spark plug hole are anything to worry about?
Interested on hearing people's thoughts.....
This weekend saw more cleaning/painting. I did one more coat of Silver on the engine (Por 15 Engine Enamel) during the week and got the final two on this weekend. That's 4 in total and the colour is looking nice and "full" - quite pleased with the even finish and its looking nice and bright!
This should help spot any inevitable oil leaks that should arise after I've fiddled with the engine (serviced it) some more.
I also cleaned and painted the alternator bracket, alternator, a few radiator pipes, coil pack bracket, water pump pully (was showing signs of rust and wanted to give it a coat).
On observation of the coil pack, one of the contacts (down the tube) looked to be corroded (couldn't see the shiny metal like the other 3), I filled the tube with wire wool and give it a good spin, all brightened up - hopefully should give a better contact for the HT lead.
No pictures - imagine some POR15'd (black) pipes etc, should go nice with the silver engine and red valve cover.
Later in the week/weekend I'll be beginning the servicing of the engine, will get all the usual stuff done, hopefully re-attach the inlet manifold and start getting the engine back into a state where it starts to look like the underpinnings of a car. |
|
|
|
Post by gwnwar on Apr 12, 2015 20:09:43 GMT
exoRy.. I would not worry about the plug tubs just wipe gasket surface clean.. looks like at one time there was a
leaking gasket. When you replace the Cam cover gasket make sure you put a dab of sealant at each (6)
corner of the cam towers.. The valves are carboned up some.. you can leave or small wire brush on a drill
what you can get off.. Just blow pieces out good.. The turning of the crank is a must when setting up the
tension on the belt. And the 19 tits between marks on cam gears.. Any question ask some one will help..
Your build so far looks great..
|
|
|
|
Post by exoRy on May 5, 2015 20:49:29 GMT
Update time.....
Last 2 weekends went well, I've managed to get the engine service parts on.
Got water pump, crack sharft seal, cam seals and CAS-O ring replaced.
Gave the cam sprockets a bit of a spray with the hammerite paint, the original coating looked to be peeling in places, just a quick coat to protect.
Picture of the water pump installed
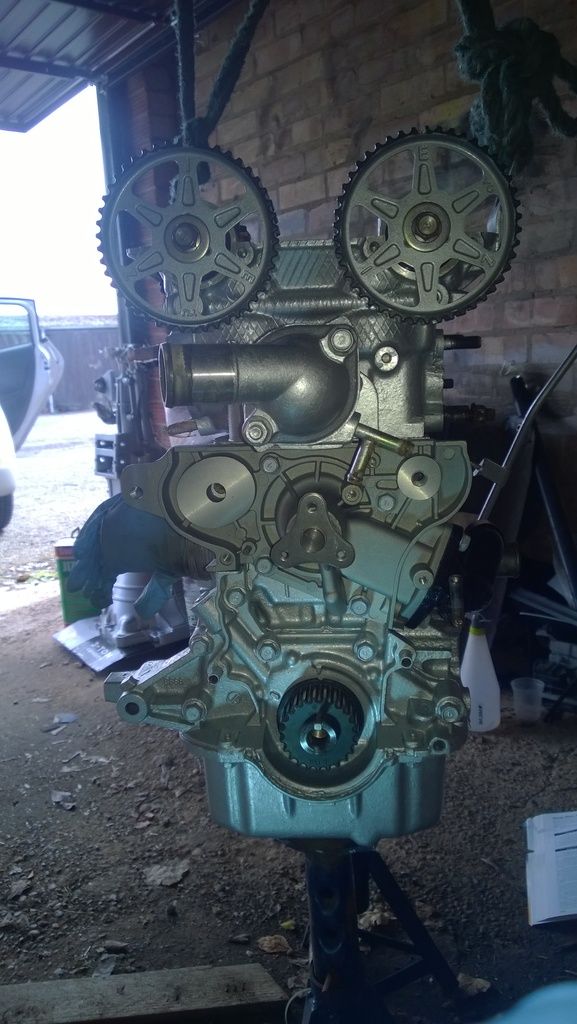
Didn't take any pics of getting the belt installed, to be honest there are plenty of videos on youtube which walk you through this. I tried following the manual (Rod's) however found this to be really difficult. In the manual it says that you must leave the tensioner disengaged until you have rotated the crank shaft 2 or 4 times. However by leaving it loose my belt kept slipping over the teeth and would lose its position.
Instead I followed a couple of youtube tutorials, where they said to allow the tensioner to slightly pull the belt in - just to ensure the belt doesn't slip. This worked brilliantly, then I moved to the crank to the tensioner mark and set the tensioner correctly.
Took me 3 hours (most of that was faffing doing the "manual way"), the "proper" (youtube way) took me probably 20-30 mins.
After doing it once, repeating this job would be simple!
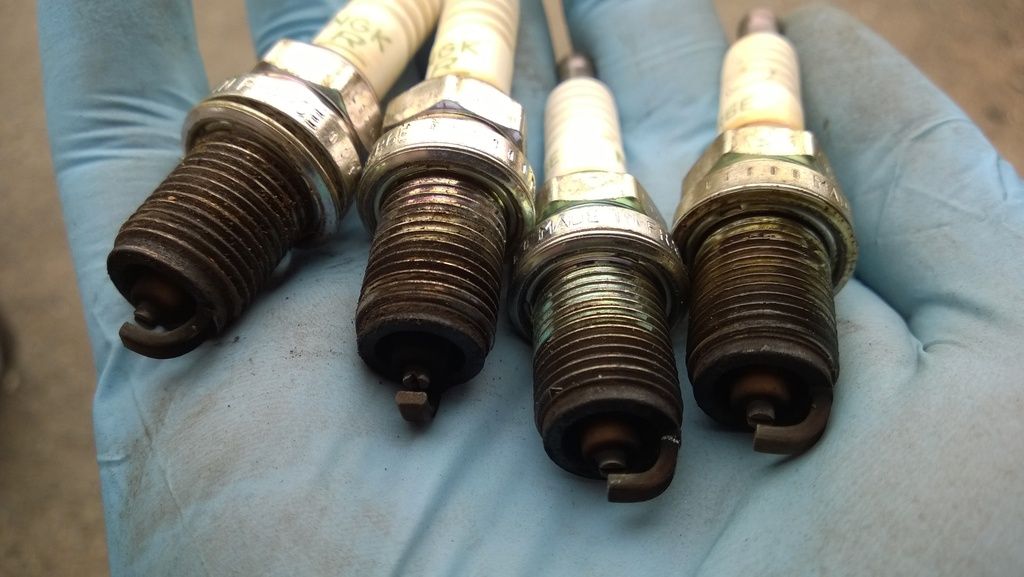
Also replaced the spark plugs, ensured the new ones were gapped correctly, old ones looked a bit grubby.
Changed the CAS-O ring, this was really simple. Sensor came out really simple, gave it a quick clean and replaced the rubber - on inserting it took a bit more effort to go back in as the ring formed a tight seal. The oil on the back of the engine must have been flowing from here as when I came to clean the engine it was really thick at the back. New rubber should ensure the engine remains clean!
Re-installed coil packs and then installed new leads
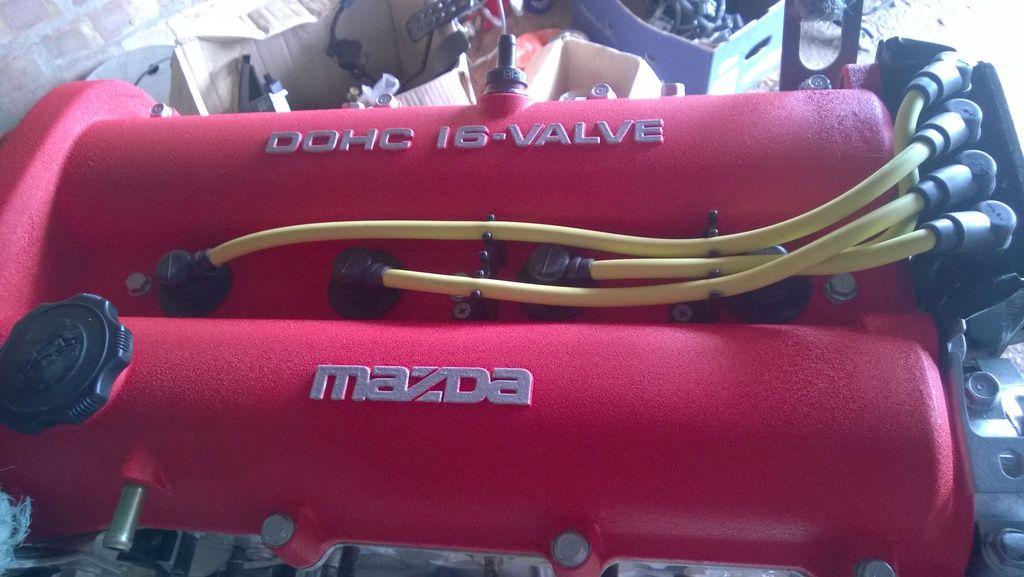
Starting to look reasonably tidy. Spent last weekend cleaning some bolts for the front subframe and suspension parts. Most bolts were ok, needed a quick blast with the wire wheel drill attachment and took a coat of acid etch primer and hammerite.
However some were badly corroded so will be replaced.
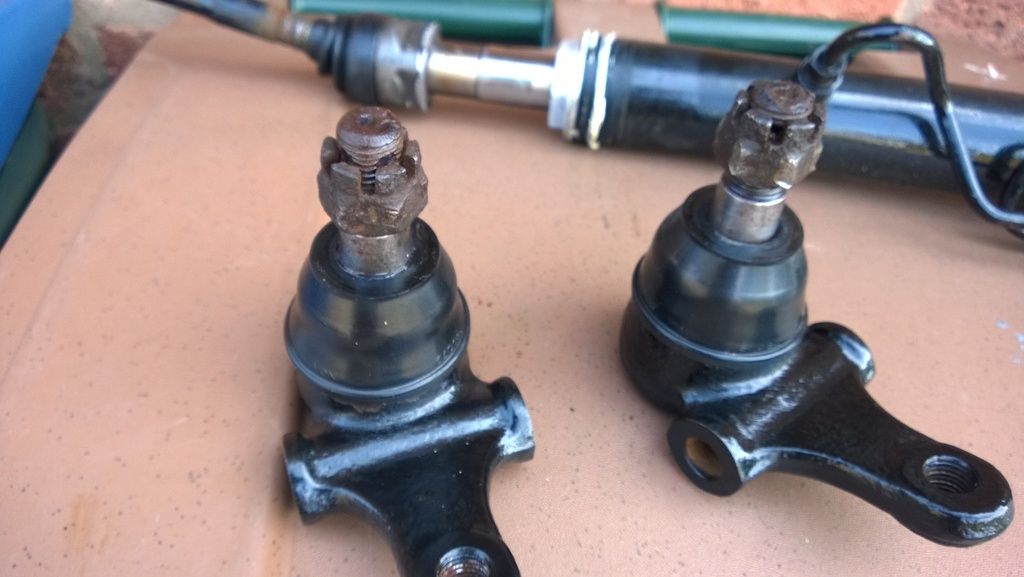
Replaced the boots on the front lower ball joints and front upper ball joints
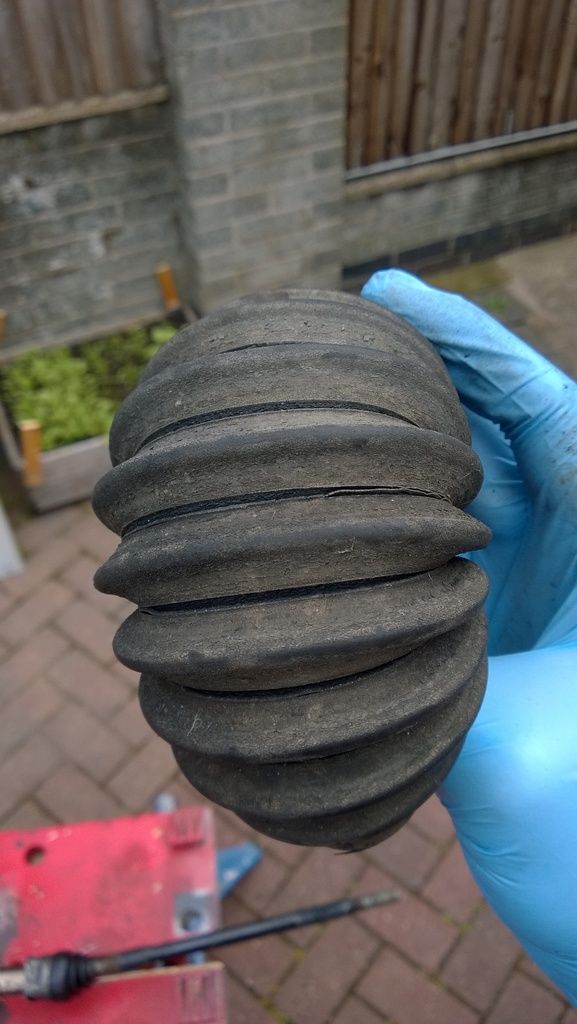
Also came to replace the boots on the steering rack. Don't think the old ones would have lasted much longer.
Unfortunately I think I've lost one of the power steering pipes, I was planning on just looping the power steering pipes and not properly "depowering" the rack. However if it is going to be expensive/a hassle to find another bolt with the pipe on the end then I will depower correctly.
What do people think?? Does anyone know where I can get a cheap bit of pipe (and the bolt) to save me some time??
Went to Stoneleigh on the Sunday, really nice day, weather held out and the sun even made an appearance! Saw the "restyled exocet" really like the change to the nosecone, it seems longer so i'm thinking may provide more space when fitting an intercooler?
Was only one exocet in the members area whilst I was there, all black - looked really smart!
Also got to see a couple of rockets, one was running whilst I was around and the owner gassed it a few times, sounded brilliant!
Also had a peek at the 1020bhp Ultima Evo - absolute monster of a power unit! That might be kit number 2 (if I win a load of cash)!?!?!?!?
Plans for the next couple of weeks, clean some space in the garage, get the front subframe built, ready to mate to the engine, get clutch/flywheel aligned/installed on the engine, once frame and engine are joined I'll fit the intake manifold and other pipes/hoses to the engine
|
|