|
|
Post by tom on Feb 24, 2013 22:32:19 GMT
Looking really good, if mine looks even half as good as that when I get out all painted I'll be happy!
I like the idea of running the brake and fuel lines along the ppf, looks neat.
|
|
|
|
Post by Stimpy on Mar 4, 2013 19:37:54 GMT
Guys, I think your method for running the fuel and brake pipes looks really neat. Your build looks excellent so far. Thanks for posting so many photos for us to follow.  Stimpy |
|
|
|
Post by jgilbert on Mar 10, 2013 23:03:11 GMT
Latest Update. Wednesday, 2 Kits, 1 Van. 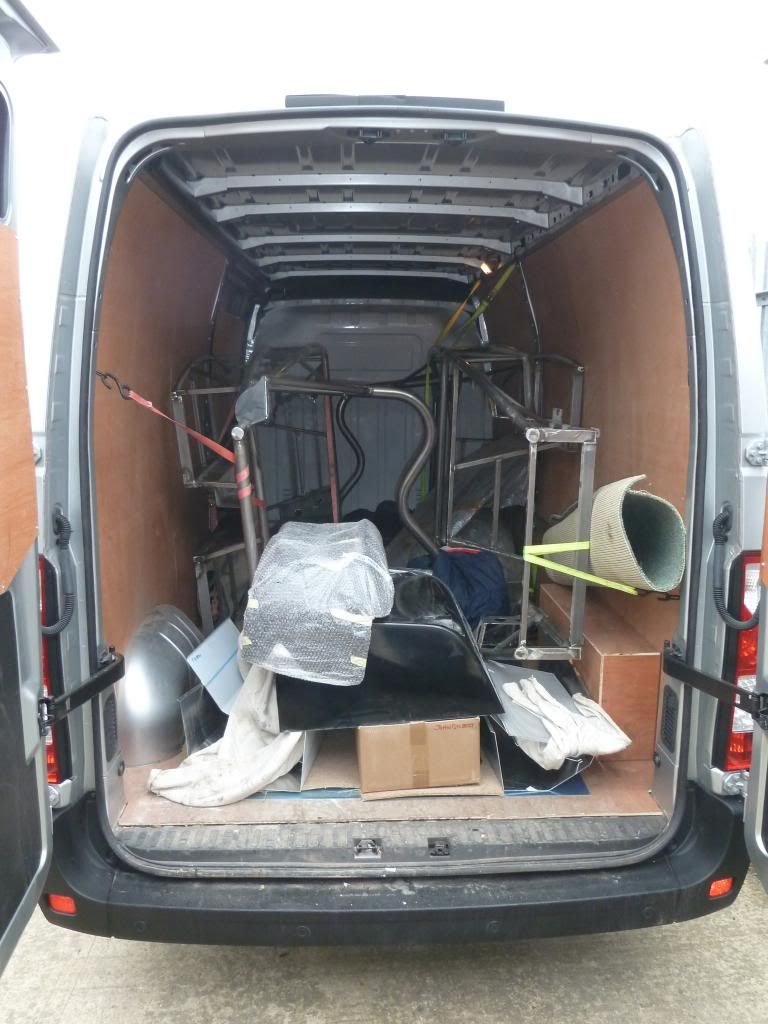 Anyway it finally feels like we are really building an Exocet. PPF and Chassis united for the first time. Landmark moment for us. 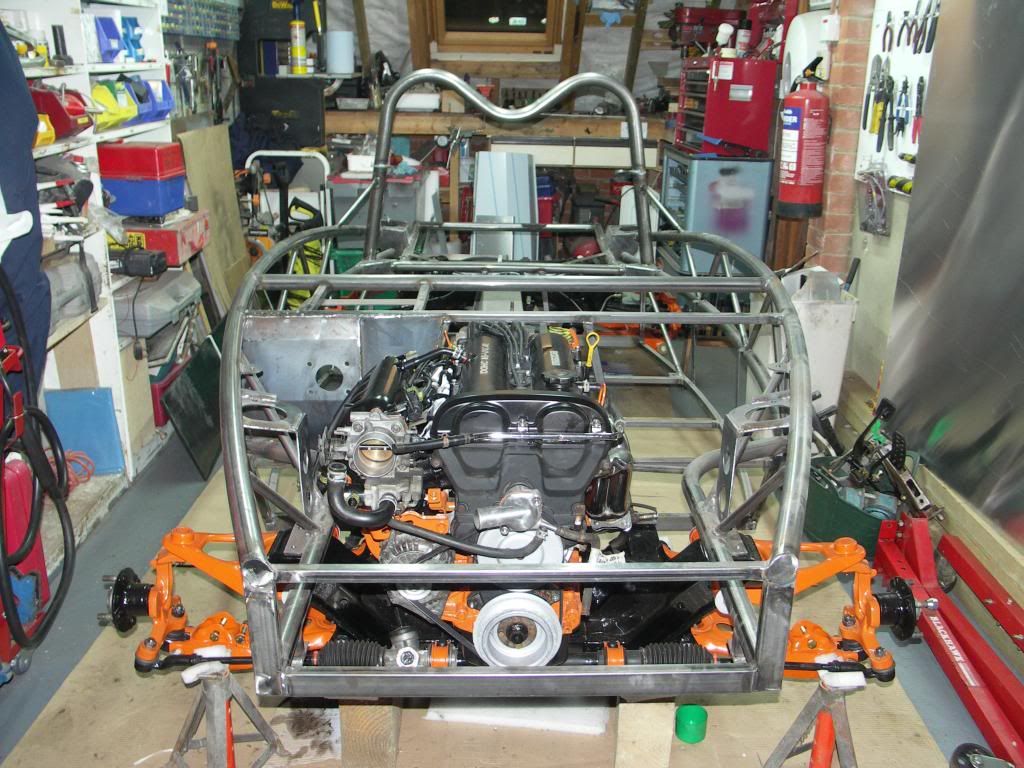 So having read so many posts re the position of the rear lower chassis/subframe mounting tabs and aligning them with subfame, I decided I need to try something different. A trial fit showed the tabs to be more or less in the right position. However, there was no way I was ever going to locate the chassis and subframe together without either damage to the subframe coating or the chassis coating (once its done). So 4" grinder and the bottom tabs were removed. I plan to make a bolt on mounting that can be fitted once the chassis is in position on the subframe. This means the chassis is a straight lift on, lift off, lift on again for the mock build and final build. Once the chassis was fitted I finished off the rear brake lines. Nice neat job in my opinion. 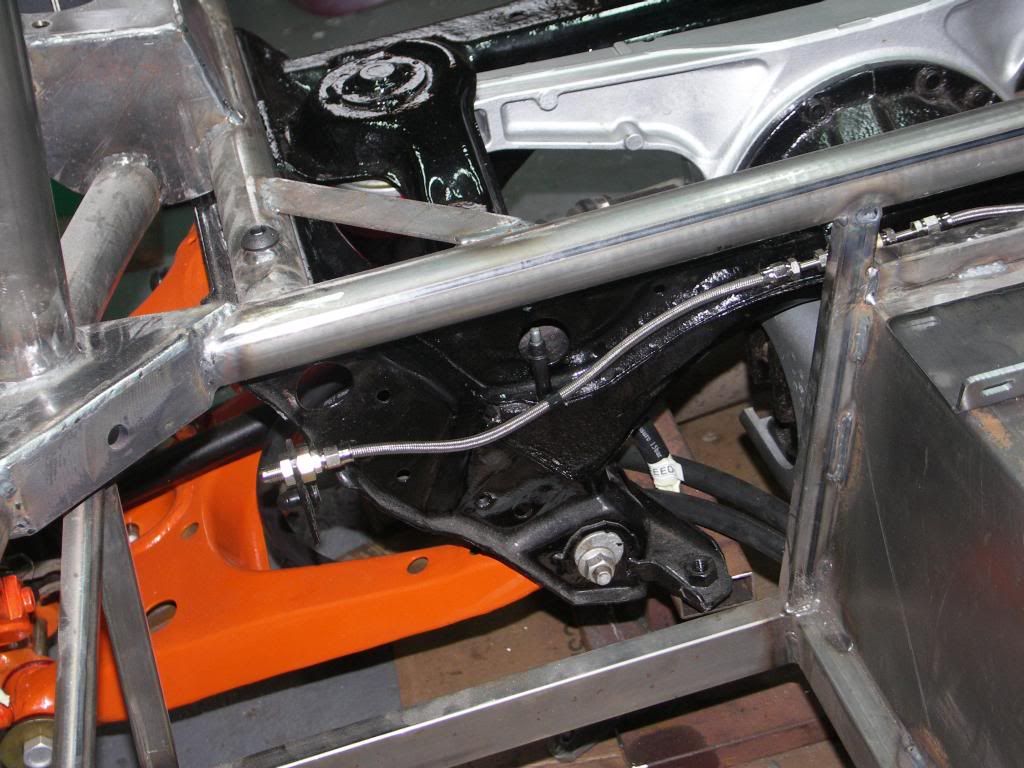 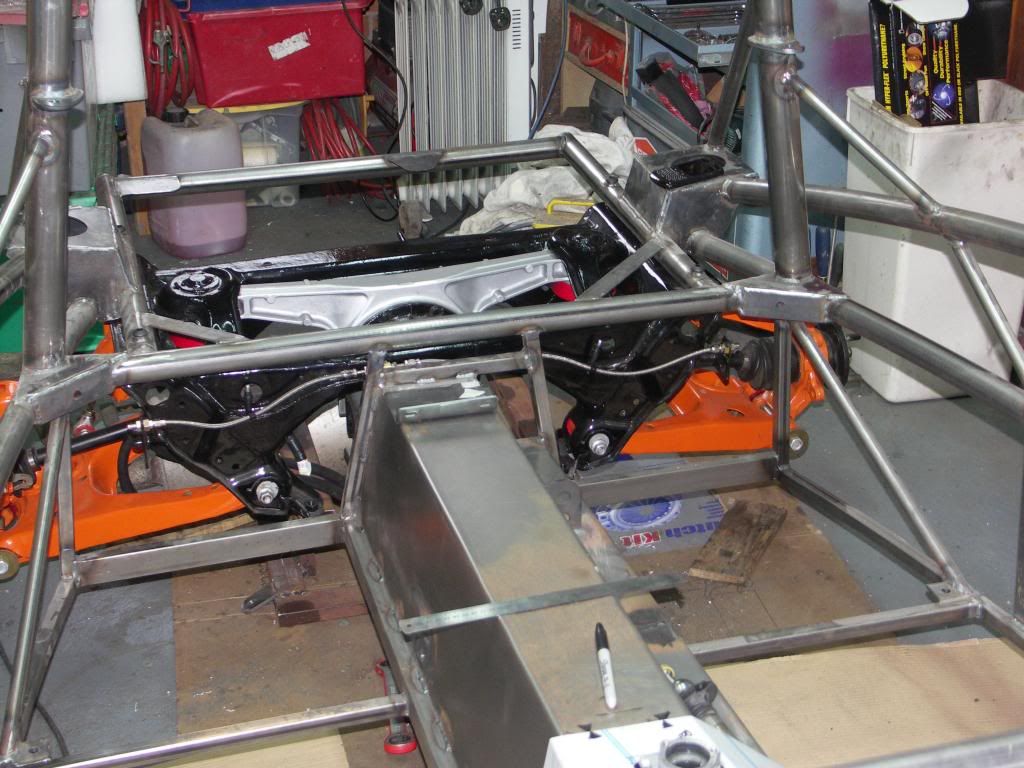 As I'm running the brake and fuel lines on the PPF, I will need to support both of these between the end of the PPF and the engine bay. Simple job but I wanted to make sure the transmission tunnel doesn't interfere with any brackets I make. So cut out the gear stick hole and fitted the tunnel using my new Cleco tool and pins (I hadn't seen these before my build, great idea. An absolute must). You can see one of my fuel line brackets laid on top of the tunnel in the next photo. 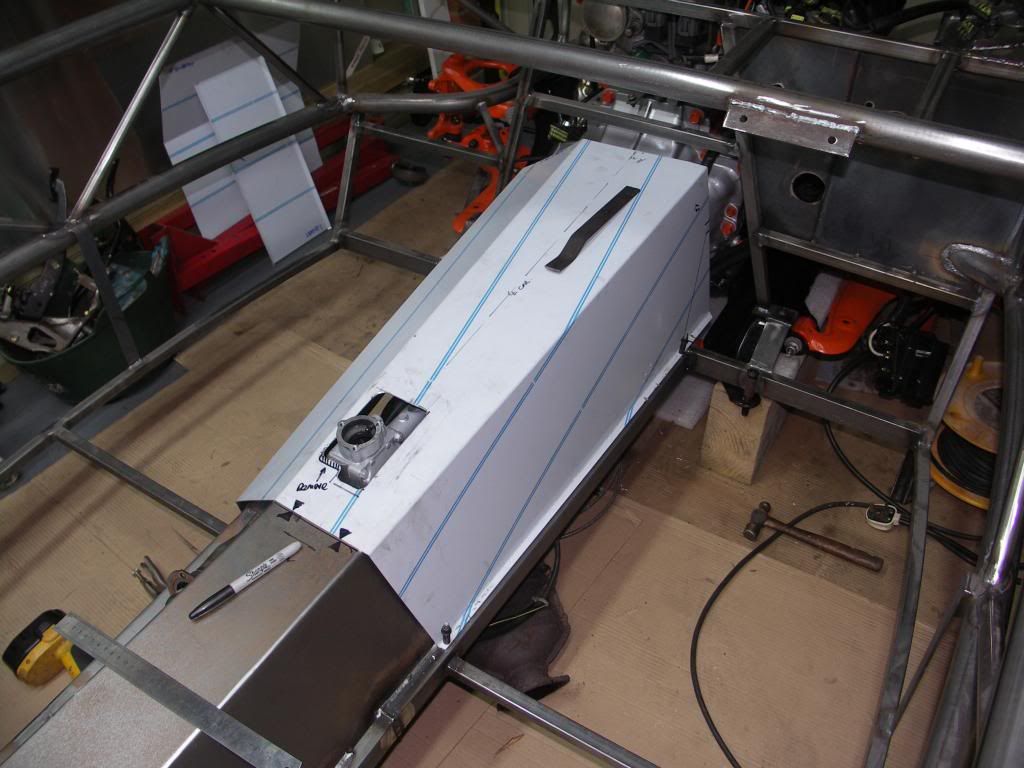 Sunday Roast then stopped play for today. |
|
stubbers
Senior
   Exocet Number 306
Posts: 478
|
Post by stubbers on Mar 11, 2013 8:17:39 GMT
One thing with the Tunnel, make sure its far enough back so it will not form a gap between it and the front bulk head. i had to pull and wrestle with mine for it to fit.
Rich
|
|
|
|
Post by Stewart on Mar 11, 2013 10:18:04 GMT
Another thing we spotted when changing the gearbox, you need space at the back of the turret if you're taking it out as the GB needs to move backwards off the input shaft. Far easier to cut the tunnel at the start of the build and cover with trim/gaitors than mangle it if/when you remove it and have to patch it back up afterwards.
|
|
|
|
Post by jgilbert on Mar 12, 2013 19:10:27 GMT
One thing with the Tunnel, make sure its far enough back so it will not form a gap between it and the front bulk head. i had to pull and wrestle with mine for it to fit. Rich Rich thanks for this comment, yes hopefully spotted that and the top of the tunnel is level with the bulkhead so the vertical panels should mate up ok.  |
|
|
|
Post by jgilbert on Mar 12, 2013 19:13:05 GMT
Another thing we spotted when changing the gearbox, you need space at the back of the turret if you're taking it out as the GB needs to move backwards off the input shaft. Far easier to cut the tunnel at the start of the build and cover with trim/gaitors than mangle it if/when you remove it and have to patch it back up afterwards. Freaky, great call thanks, yes got a bit carried away with neatness. would have caused a problem later on if I ever wanted to remove the gearbox. Job added to the 'to do' list. Thanks |
|
|
|
Post by jgilbert on Mar 19, 2013 9:25:01 GMT
Further update. So finished off the fuel/rear brake line run through to the engine bay over the weekend. This meant fabricating 2 brackets for supporting the lines between the PPF and the engine bay. There is a mounting on the side of the gearbox for the loom but for us the bolt was sheared off in it, and even with a stud extractor the sheard part wasn't moving. Photo shows the two brackets, tack welded to the frame. These will be fully welded once we lift off the frame for powder coating. Rivnuts used to connect the fuel clips. Cleco pins holding the fuel line as a temporary measure. Note the loom will also be held by the front bracket. 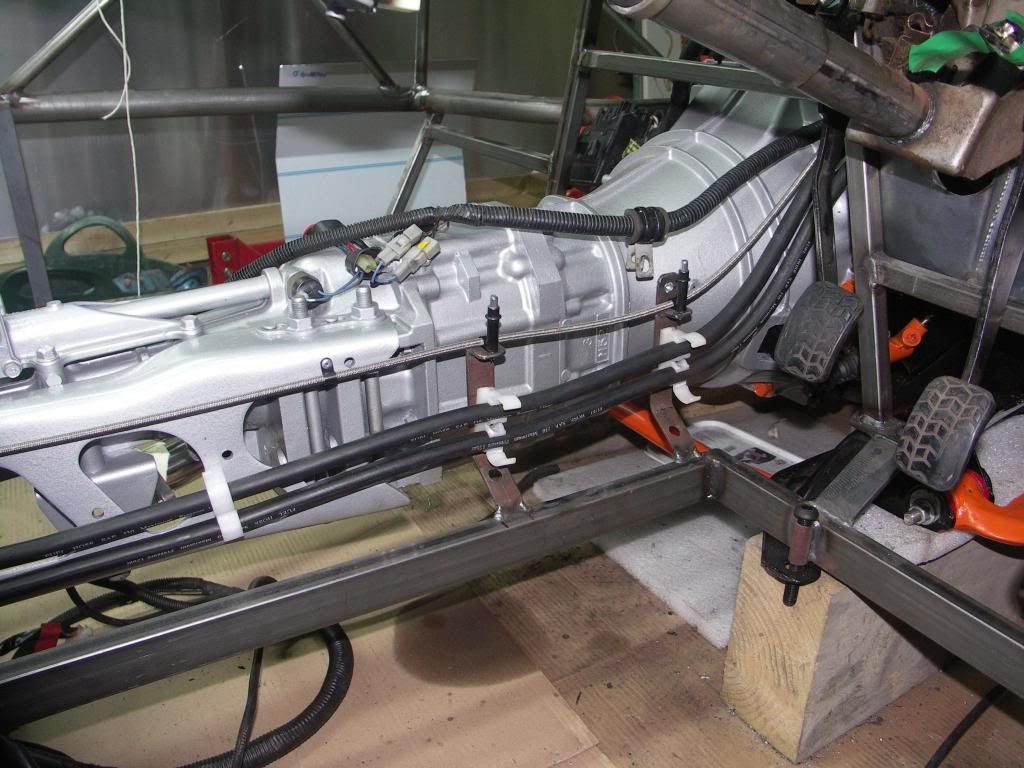 Close up 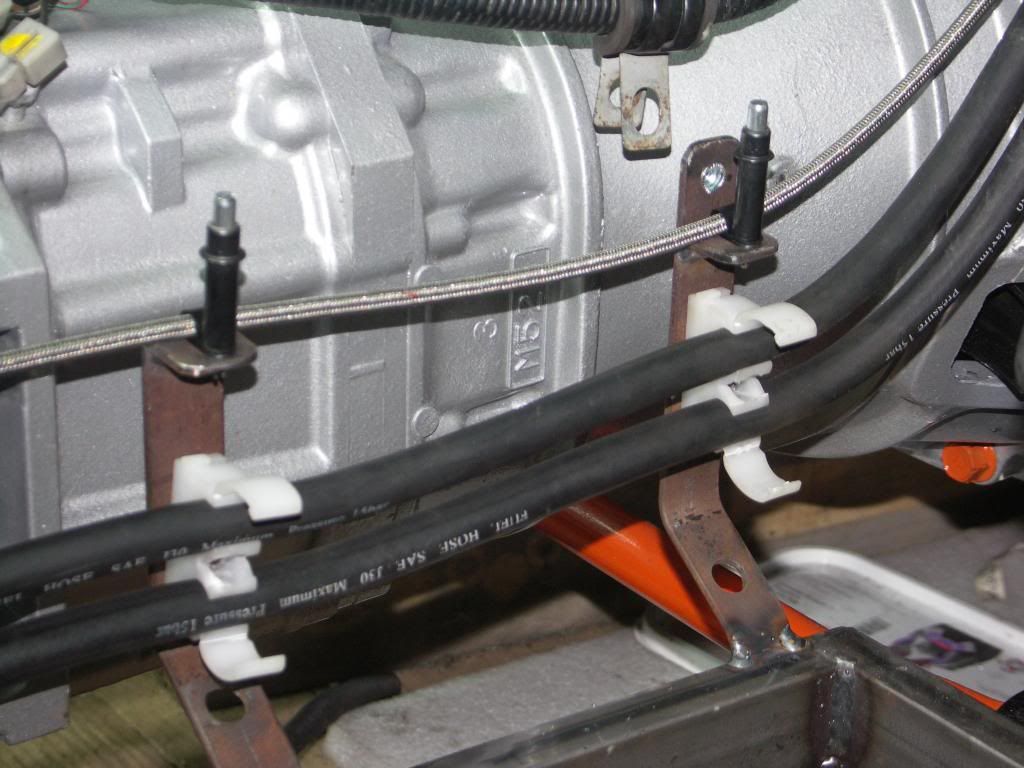 Then we modified one of the engine cable mounting brackets so that the lines were secure in the engine bay. This is a simple plate screwed on to the existing bracket. 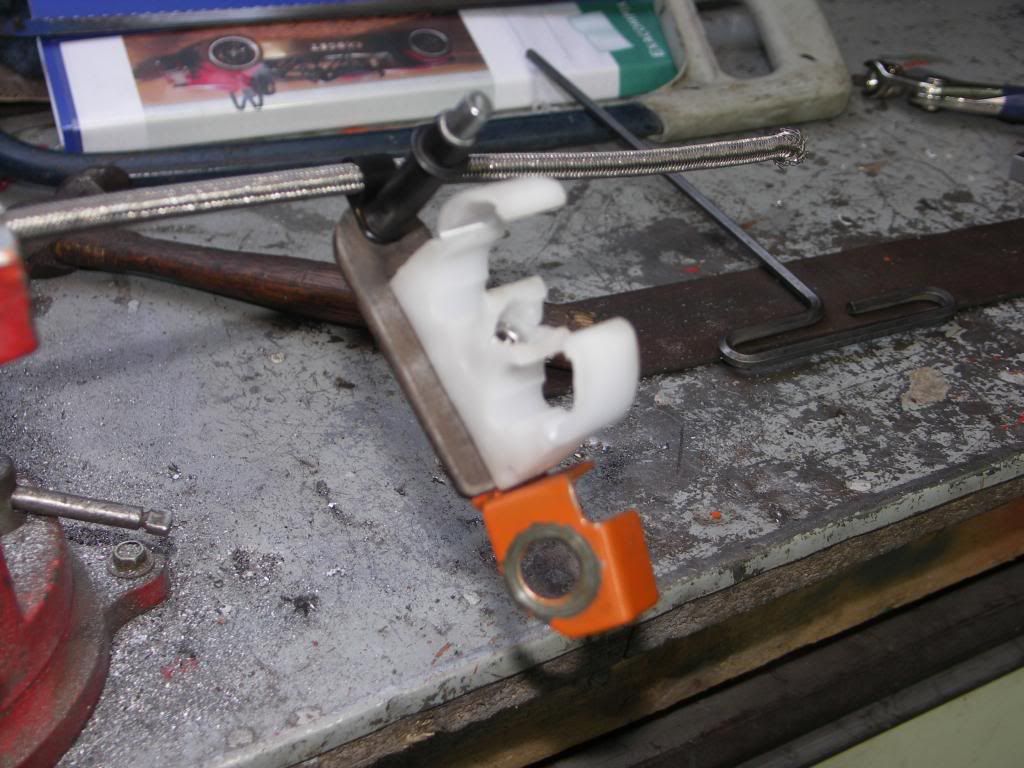 and in position. 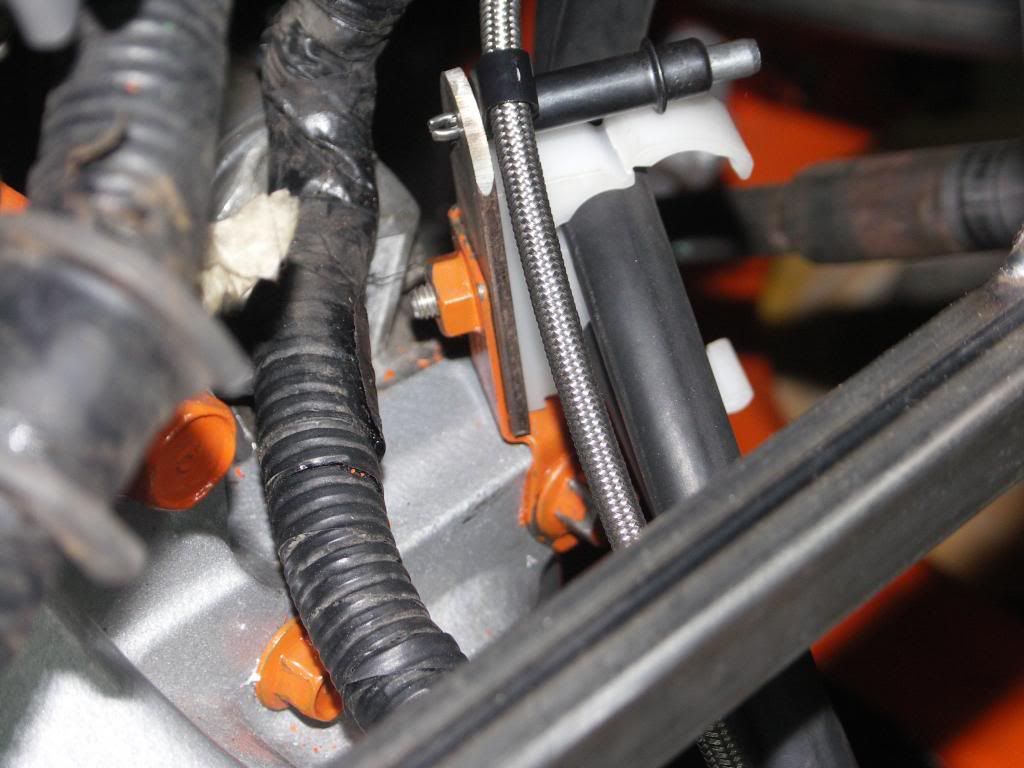 . Next job was to mount the pedals and steering wheel. So like the build guide suggests, I removed the spacers from the back of the brake/accelerate pedal assembly. 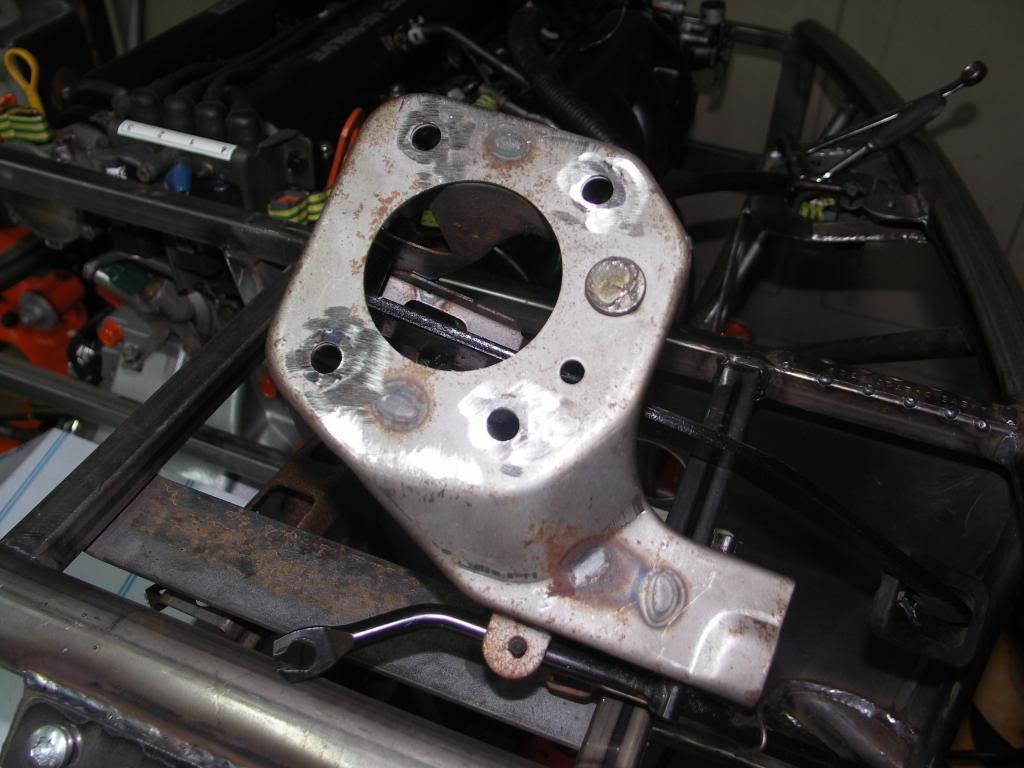 A series of trial fittings left us needing to add back a 12mm spacer between the pedal assembly and the inside of the bulkhead. Trying to fit without this just twisted the steering column mounting and slewed the column out of line. I used the originally removed spacers cut down to 12mm. Spacers cut and held in position and then welded to pedal assembly. 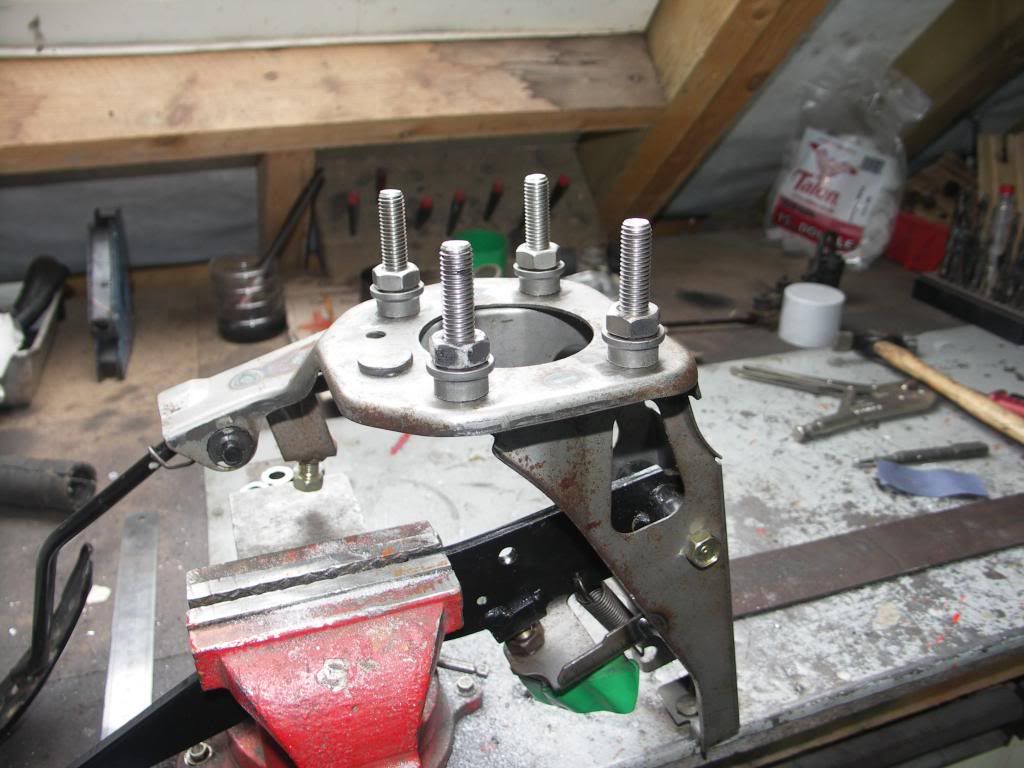 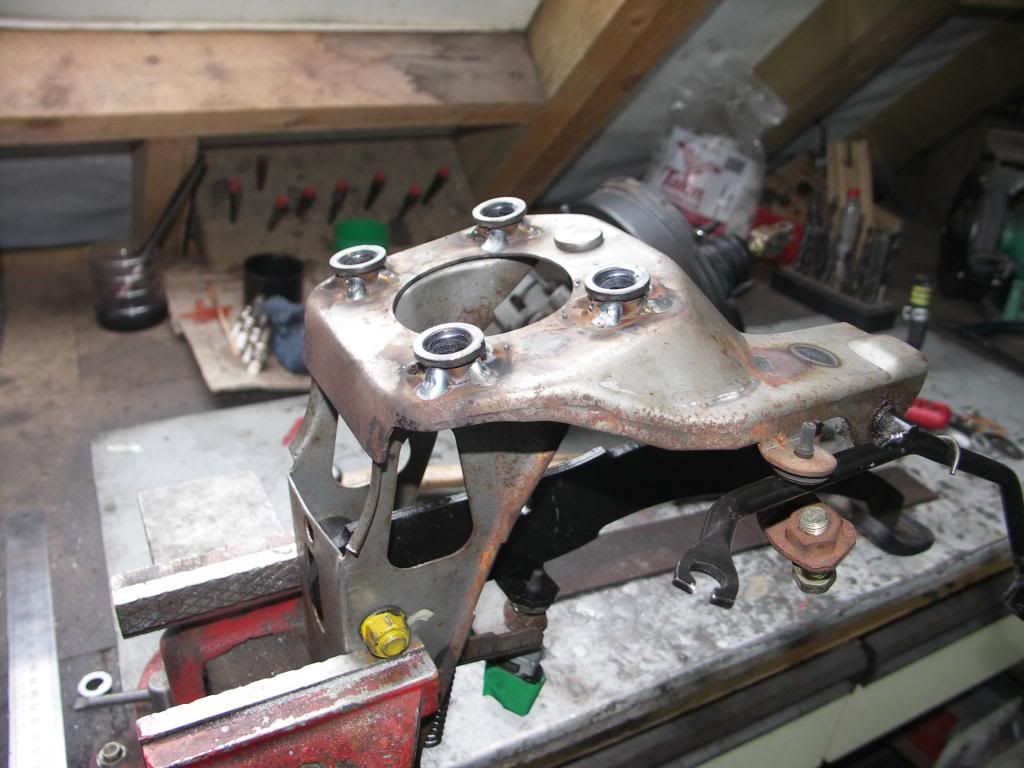 Finished fitment, steering column sits nicely in position through bulkhead hole. 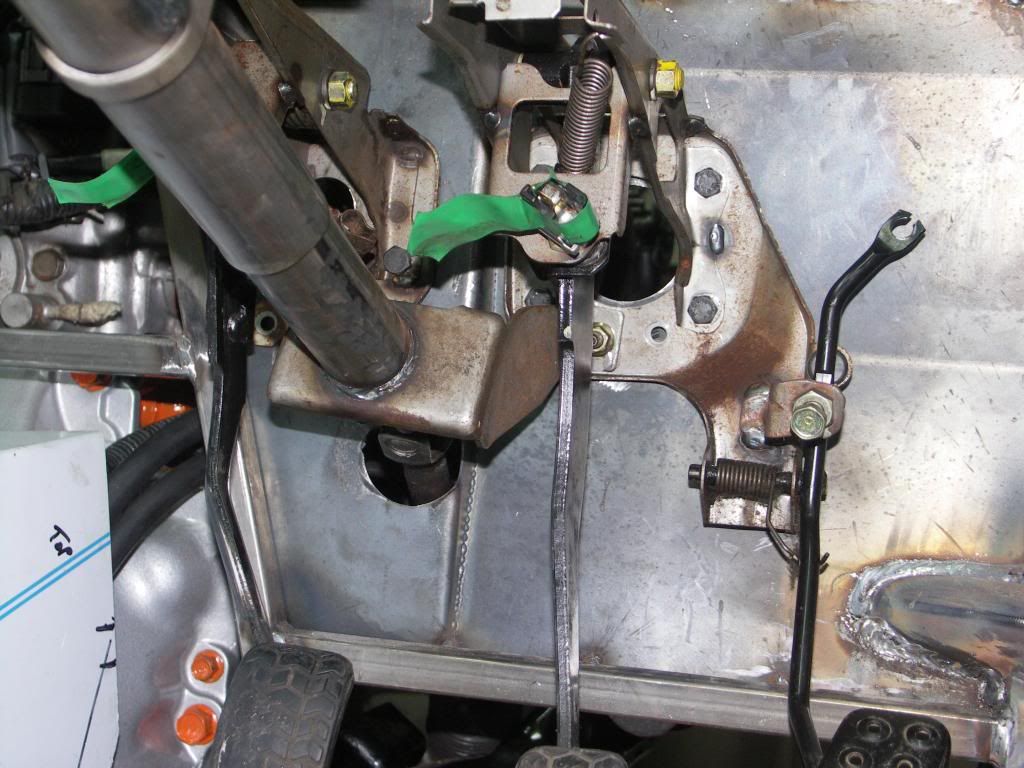 Final picture, MX5 seat g clamped to frame for a 'test drive' 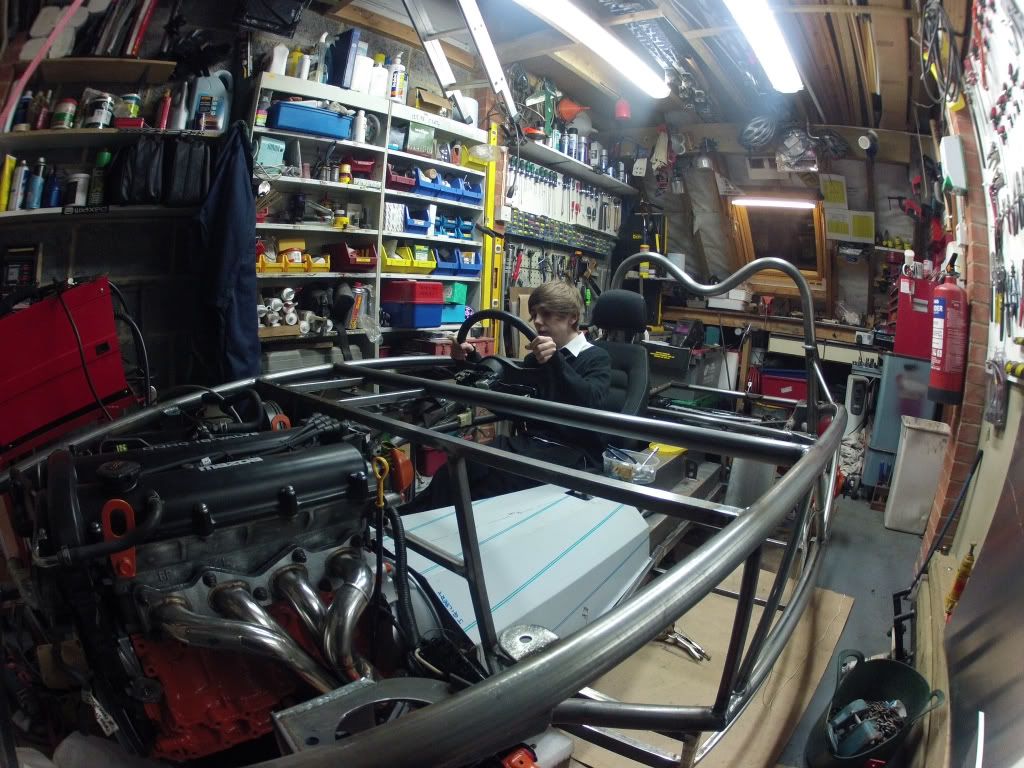 |
|
|
|
Post by scooby1929 on Mar 19, 2013 12:54:52 GMT
Great job guys. Like the fuel brackets. I see you are certainly using the cleco pins.
|
|
|
|
Post by tomaff on Mar 19, 2013 20:47:26 GMT
I hate looking at your build as I then look at mine and think.....wow I should not have rushed it so much. Very impressive. Attention to detail is second to none.
|
|
|
|
Post by jgilbert on Mar 20, 2013 20:40:52 GMT
I hate looking at your build as I then look at mine and think.....wow I should not have rushed it so much. Very impressive. Attention to detail is second to none. Tomaff We hate your thread ;D, your going to be riding around in the summer when we are still faffing around  In all seriousness, we haven't got a deadline we are building to (no way this summer) so we are just taking it steady and trying to get things right. The standard of all the builds is pretty high and just seems to be getting higher. The Exocet is a versatile kit, so it works equally with a minimal build spec as well as a more detailed affair. A resource like this forum will only increase the number of different approaches people take. Making it individual is why, I guess we build kit cars. How long before we see a mega quick build (say a month) updated on a daily basis ? got to be possible. The great thing is, we all seem to enjoy spending hours in a cold garage building, and then sharing our ideas and problems. J&L |
|
|
|
Post by tomaff on Mar 20, 2013 21:46:52 GMT
Ah yes my overwhelmingly in depth build thread full that ended with me taking off the body and then skipping to black pictures of my car in the garage at night and questions about why something is not working.
Well IVA booked today for the 18 April at 9am so might just make it for stoneleigh.
When you come to booking your iva I would book it early and push it back if you need it. It will be 9 weeks to test date since the forms were sent. The test centre were great, but seemed to be the people in the middle that were problematic.
T
|
|
|
|
Post by jgilbert on Apr 6, 2013 19:51:50 GMT
What a great day, sunshine and warmish! This promoted a bit more activity in the garage today. Thanks for the advice on the handbrake cable routing  . So todays job was to run the cables and mount the handbrake. As per the advice drilled a hole in the central tunnel for the drivers side cable to run through. I was originally going to run both cables through this hole (I know its big but it will be hidden - more on that later). Anyway having tried both cables through the hole, the passenger side sat better not being routed through the hole. So I have left this running alongside the tunnel. 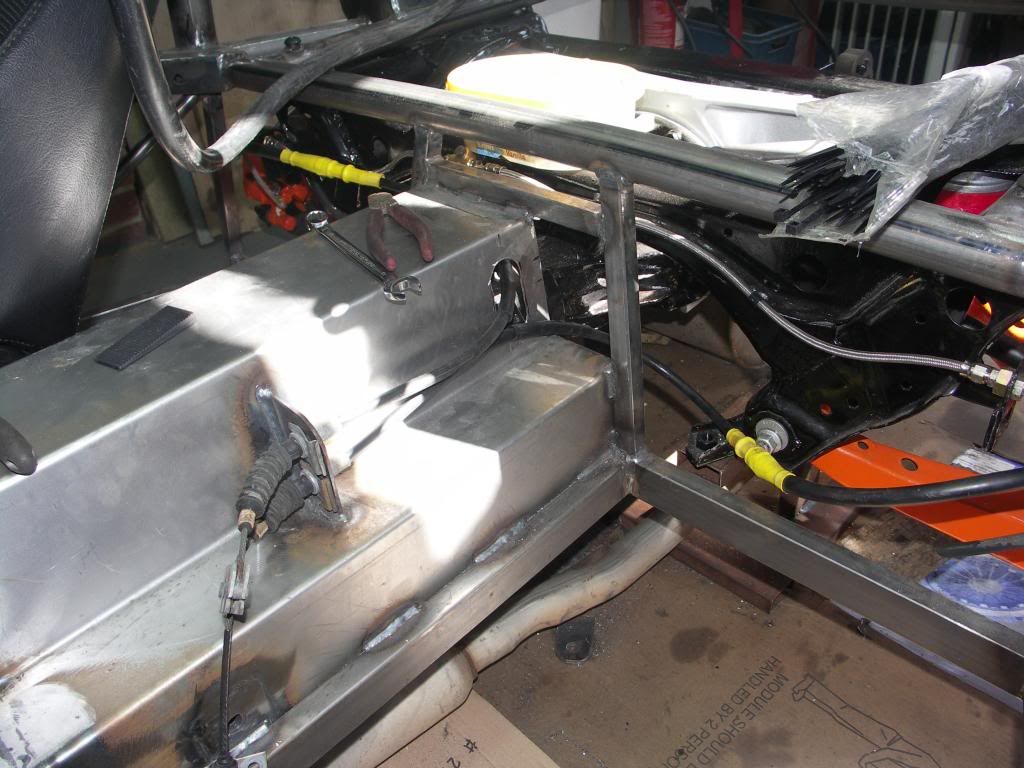 Next job was to mount the actual handbrake. I have seen a number of comments about using Rivnuts for this purpose, I think they would be ok, but as I have access to a MIG welder decided to make some purpose built mounts. 8mm bolts welded to some 25mm flat bar. 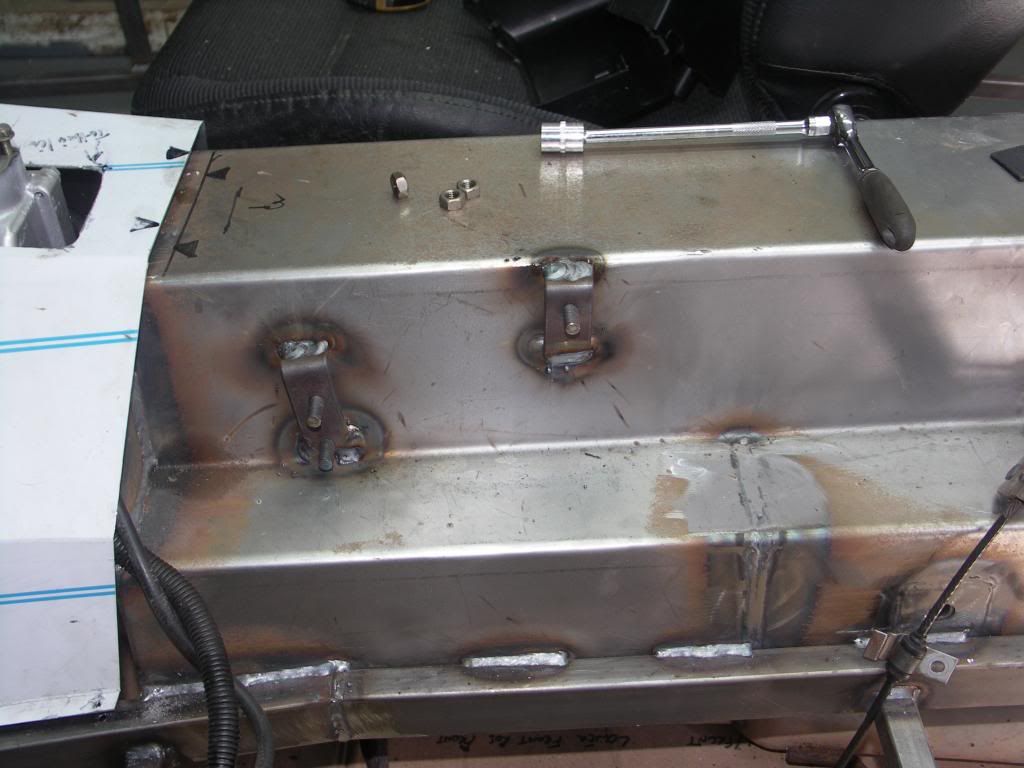 Final photo handbrake and cable guide bolted up. We will use nylocs on the final assembly  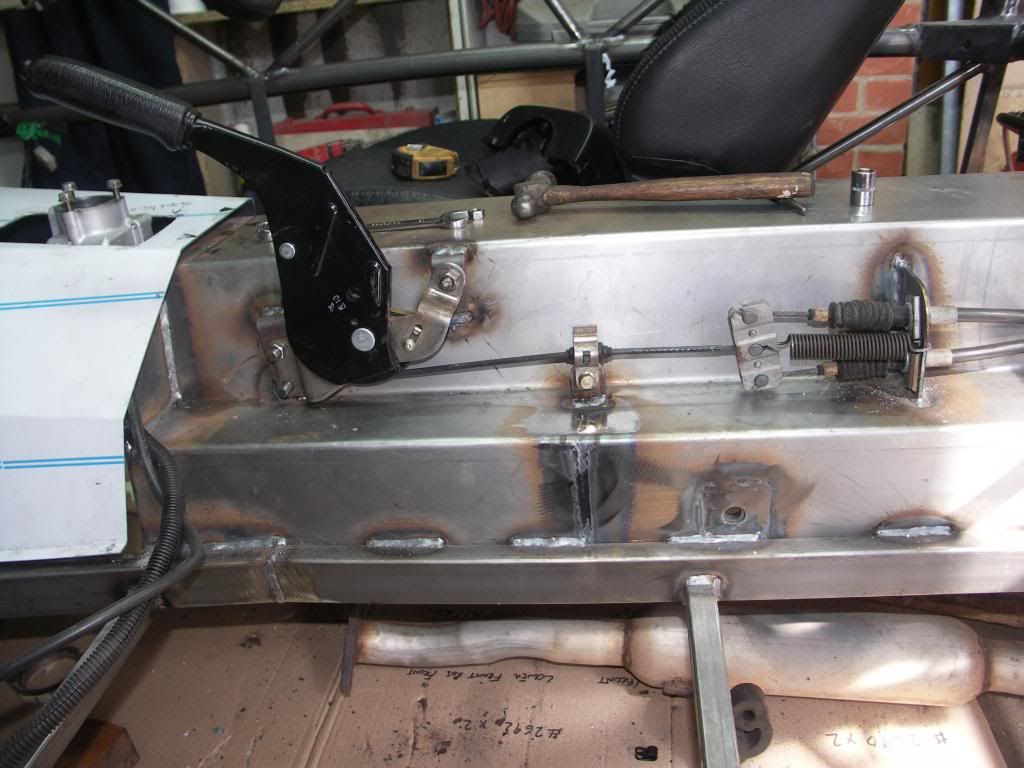 |
|
|
|
Post by welshy1 on Apr 6, 2013 20:16:06 GMT
Just a tip but before stripping it back down drill the holes for the seats, I done it the other way round riveted the floor on the when I fitted the seats drilled through the one rivet.
Apart from that keep up the work.
|
|
|
|
Post by scooby1929 on Apr 6, 2013 20:40:10 GMT
Thats a good point Welshy best to do seats first then floor. 2 of my holes ended up right beside a rivet. For the handbrake regarding rivnuts i just put a bolt thru with nyloc on the back. Nice job John
|
|