|
|
Post by gwnwar on Jul 13, 2014 22:23:11 GMT
Looks a lot better now, need one for other side.. Still going to make a storage bin behind then for small items..
Maybe a cover plate to go on top of rubber shift boot covered in vinyl.. You need to get this car/build written up in a car mag.
|
|
|
|
Post by jgilbert on Aug 2, 2014 18:46:19 GMT
Small update, been to busy for much spanner time. Anyway, I have been refitting all the brakes, hoses and handbrake cable. Ended using a couple of p clips to hold the handbrake in place. Just need some fluid then I can start the process of bleeding the brakes.   Then turned my attention to earthing the fuel tank. Its sat on two strips of 6mm rubber to cushion it from vibration. Although its bolted through tabs welded to the tank (see to the right of the fuel filter) decided I would add a dedicated earth lead. And sticker to please Mr IVA man.  Got carried away with the earthing, found an old spare earthing strap so ran this between the engine and the front subframe bolt.  |
|
|
|
Post by jgilbert on Aug 11, 2014 22:29:49 GMT
So I managed to sort our my clutch pedal arm hitting the lower bulkhead box section problem. First there was lots of adjustment to the length of the master cylinder push rod. With that adjusted, I could see that I just needed to be able to add some means of adjustment to the pedal. The other option was to shim the whole assembly with washers which I didn't fancy. First job was therefore to remove the original rubber bump stop from the pedal and drill a hole for this into the stop bracket on the assembly mounting plate. Photo below. 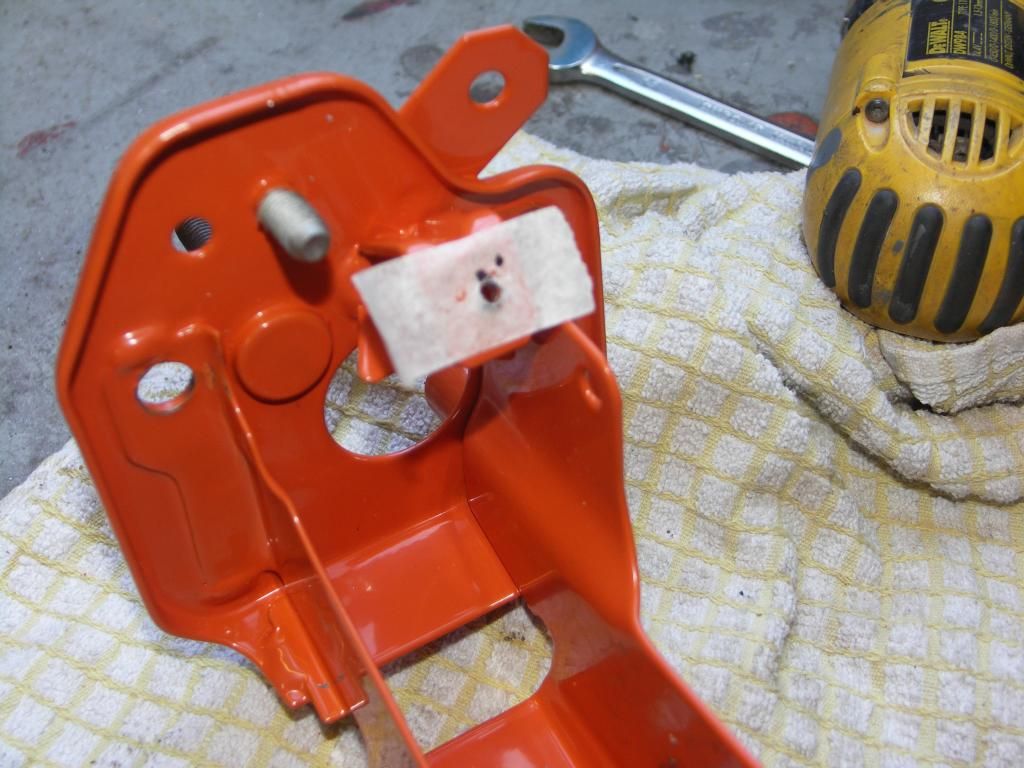 Then bump stop fitted. 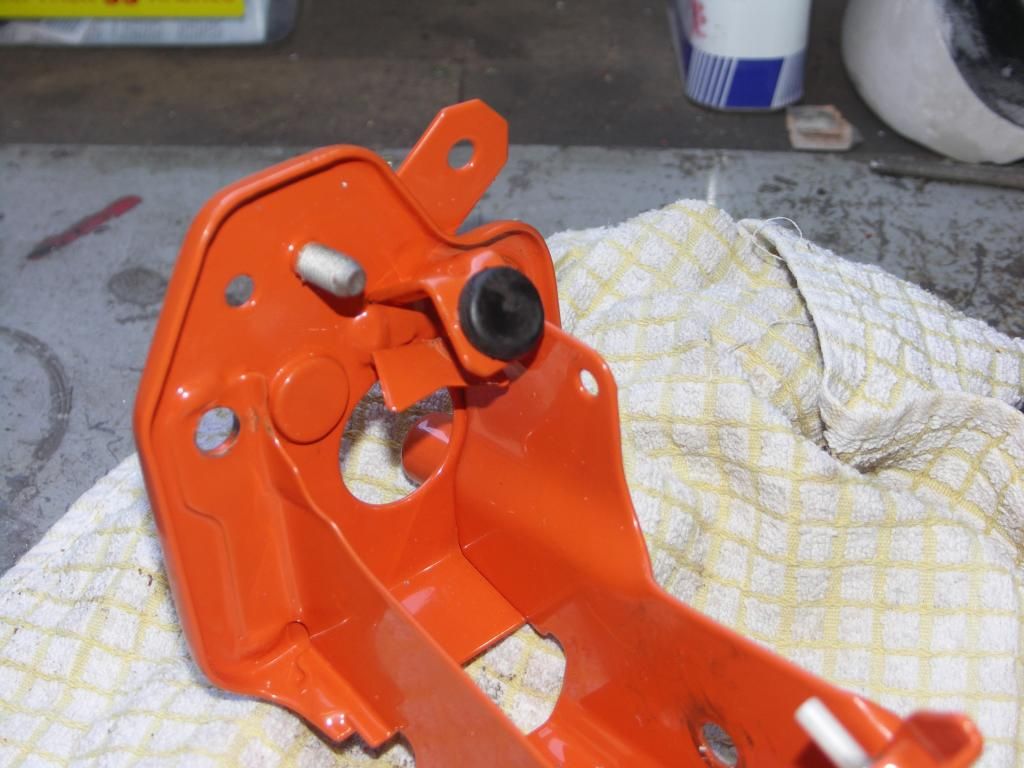 Next job, to drill out the original bump stop hole to accept a M6 bolt. 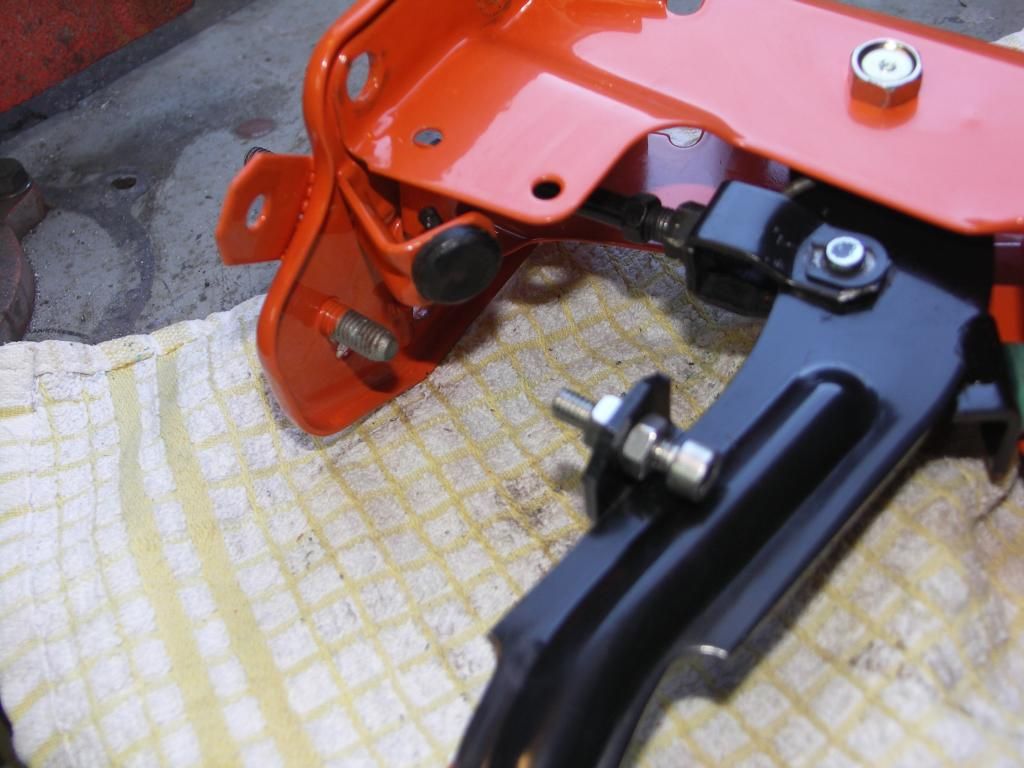 This then provided me with a means of adjustment so that I the pedal movement was controllled by this rather than the bulkhead. And when installed hardly noticeable. 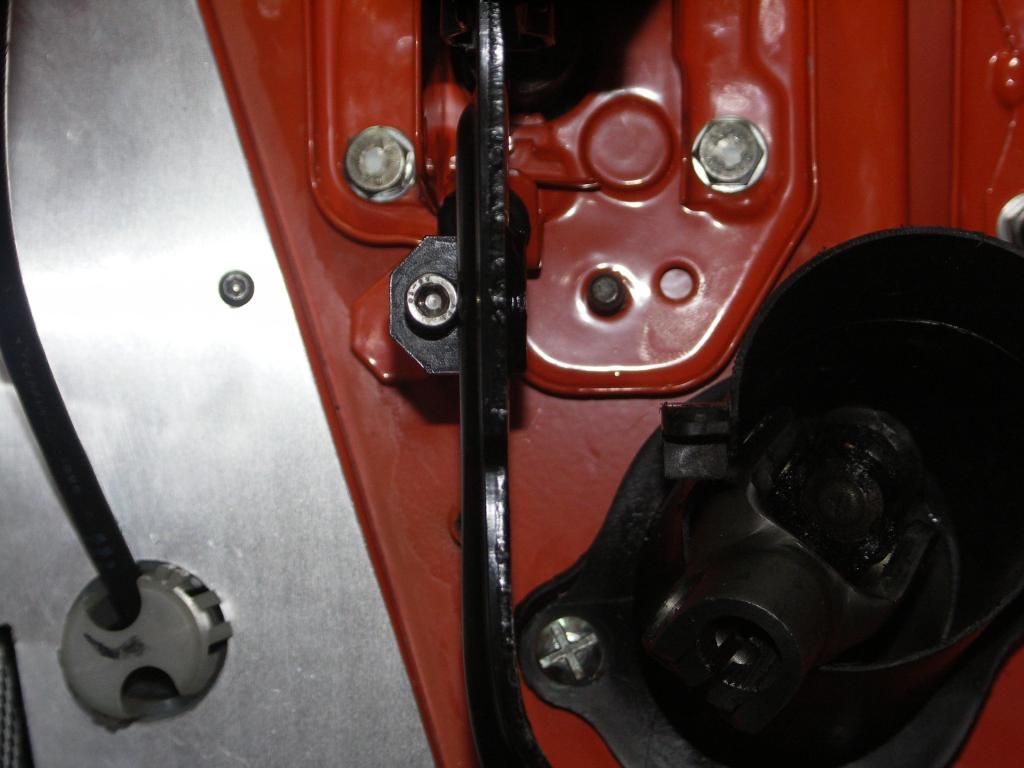 Nice and easy solution. Then fitted a Freaky Part's master to slave stainless steel braided hose. Added the hydraulic fluid before bleeding the system. Job done. Brakes next. |
|
|
|
Post by jgilbert on Sept 3, 2014 20:04:10 GMT
So back from our summer hol's and therefore a bit more spanner time. I've never thought the rear of a Exocet was its best feature, It somehow seems unfinished in my view. So I have been working on a couple of designs to address this (more later). One aspect that has taken a lot of thought and time has been the rear light design. Due to the relatively small rear profile of the Exocet bodywork I think most lights look a bit oversized (my personnel view). Nice rear lights have an enormous effect on defining how the car looks. For the front lights we have gone with Photon's from RTR and with a bit of metal work came up with design we liked. 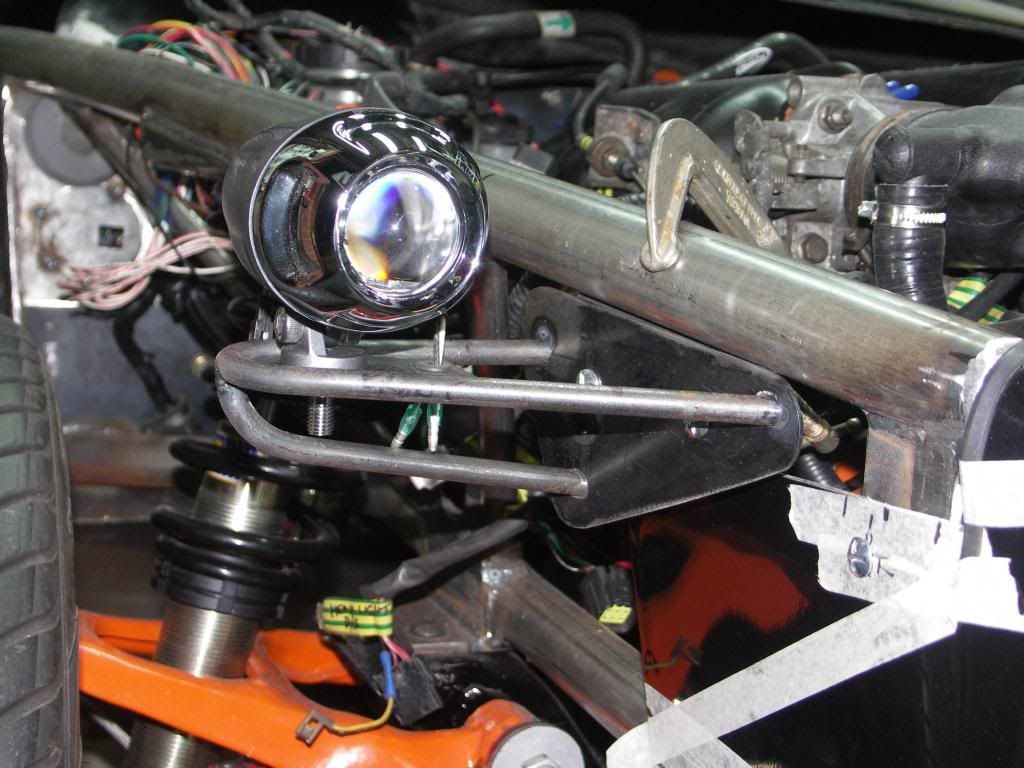 So we have been trying to keep the same theme at the rear. Some time ago we ended up fabricating similar brackets for the rear lights. 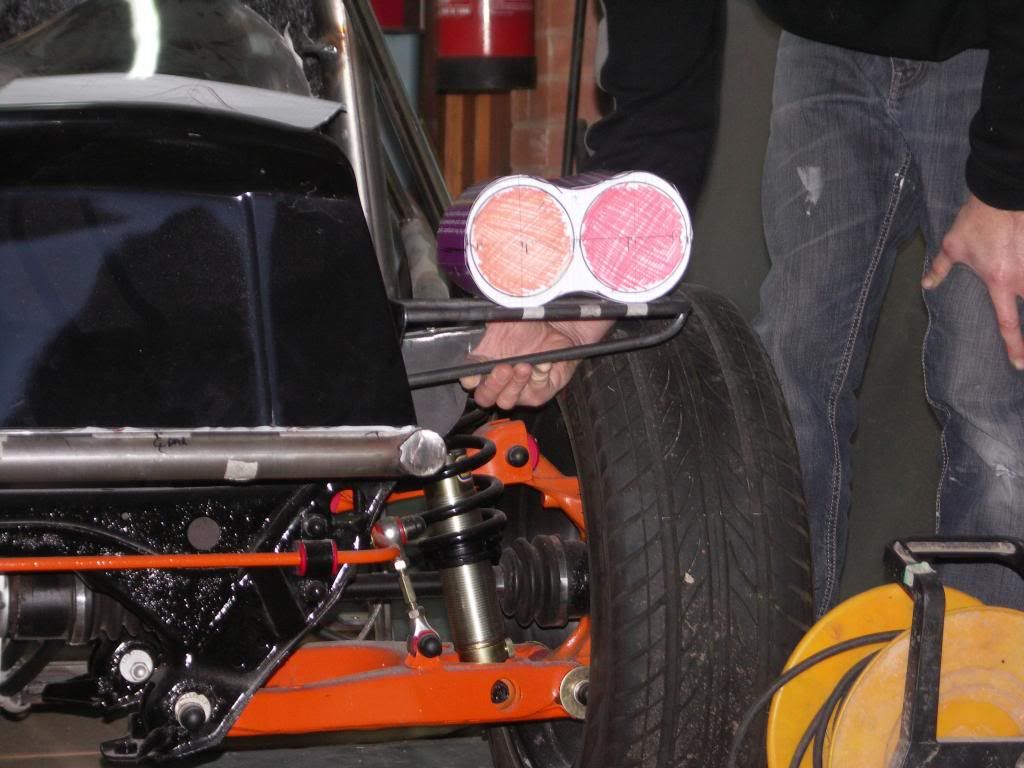 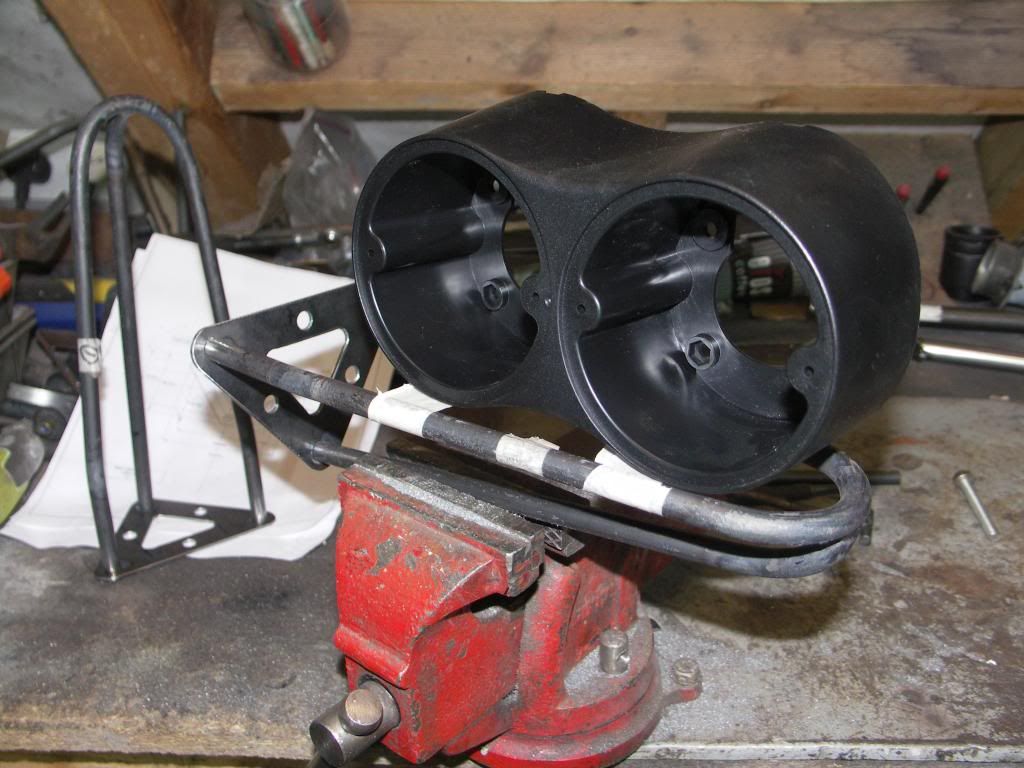 However, every time I looked at this design it just didn't look right. So decided to bin this and start again. I have managed to source some much smaller LED indicator/tail and stop combination units. These need a bit of work to modify as they also have a white light for the number plate. Good news is they are E marked, so hopefully IVA acceptable  So I fab'd a mounting plate and then welded and bent a 8mm rod around the plate to give it an IVA compliant radius. I left the rods running parallel back to the bodywork to act as mounting legs as shown below. 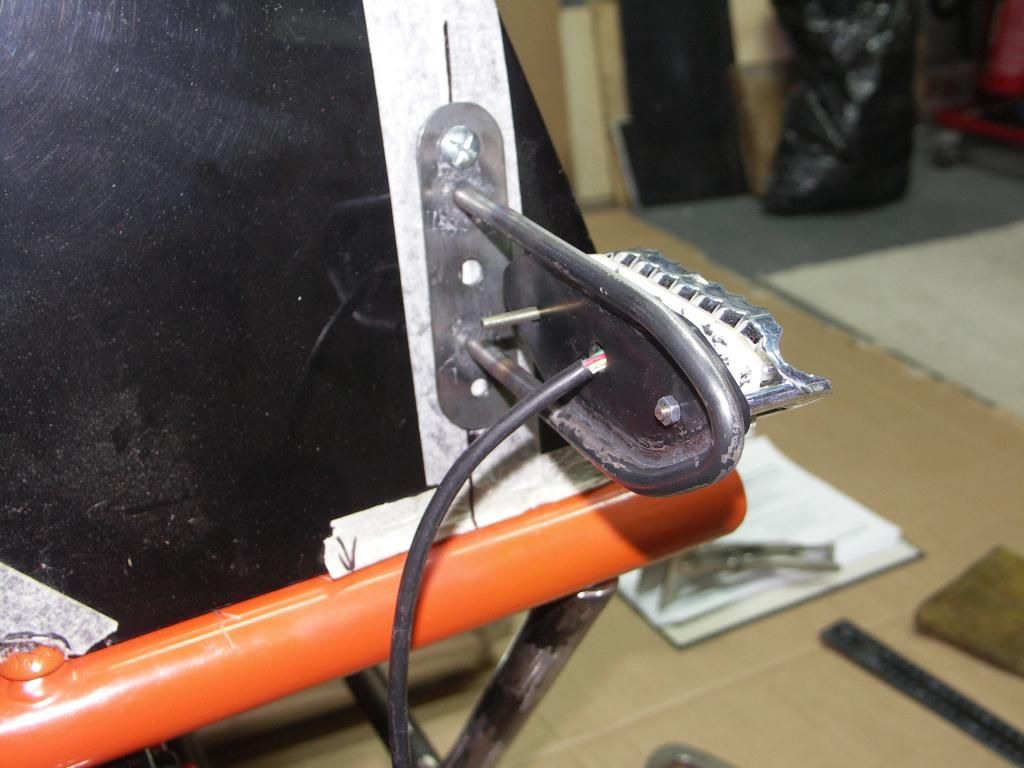 and from the rear. 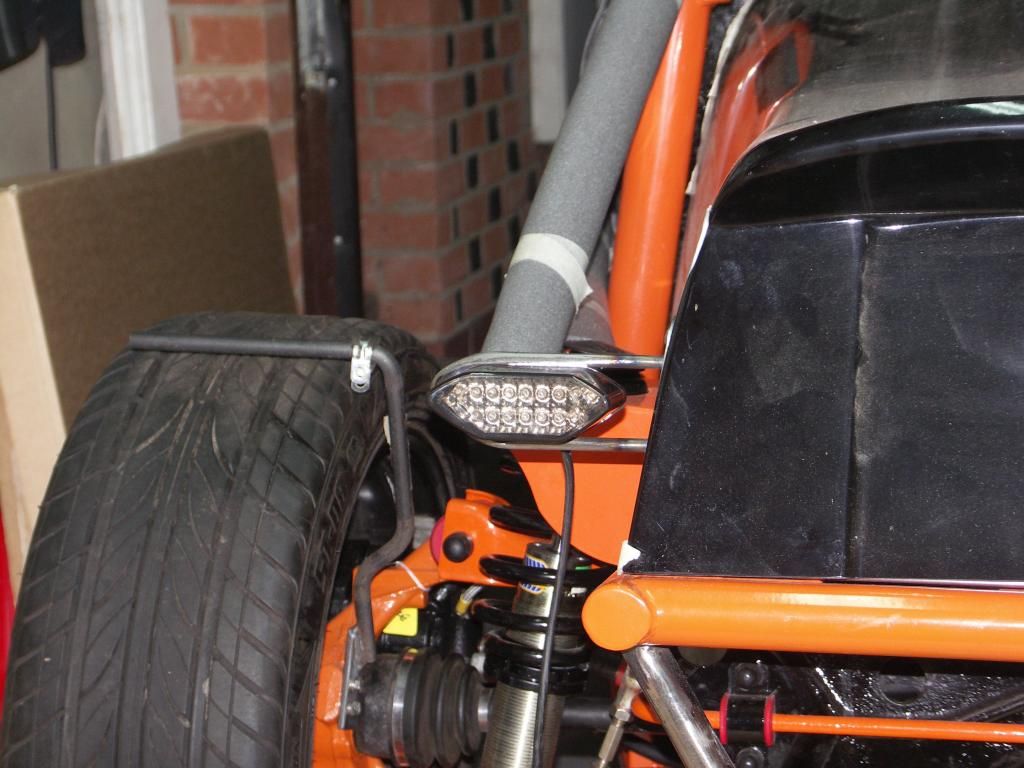 This looks a lot more balanced. I may add a rod running back to the bodywork at say 30 degrees to mimic the front set up. Couple more shots. 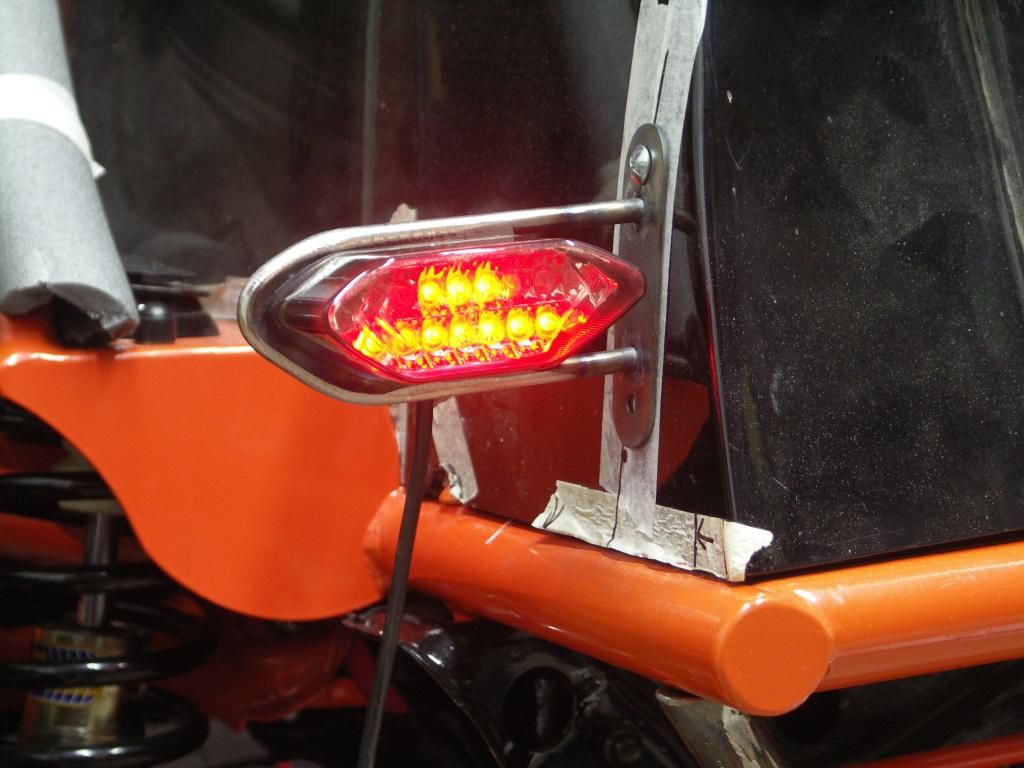 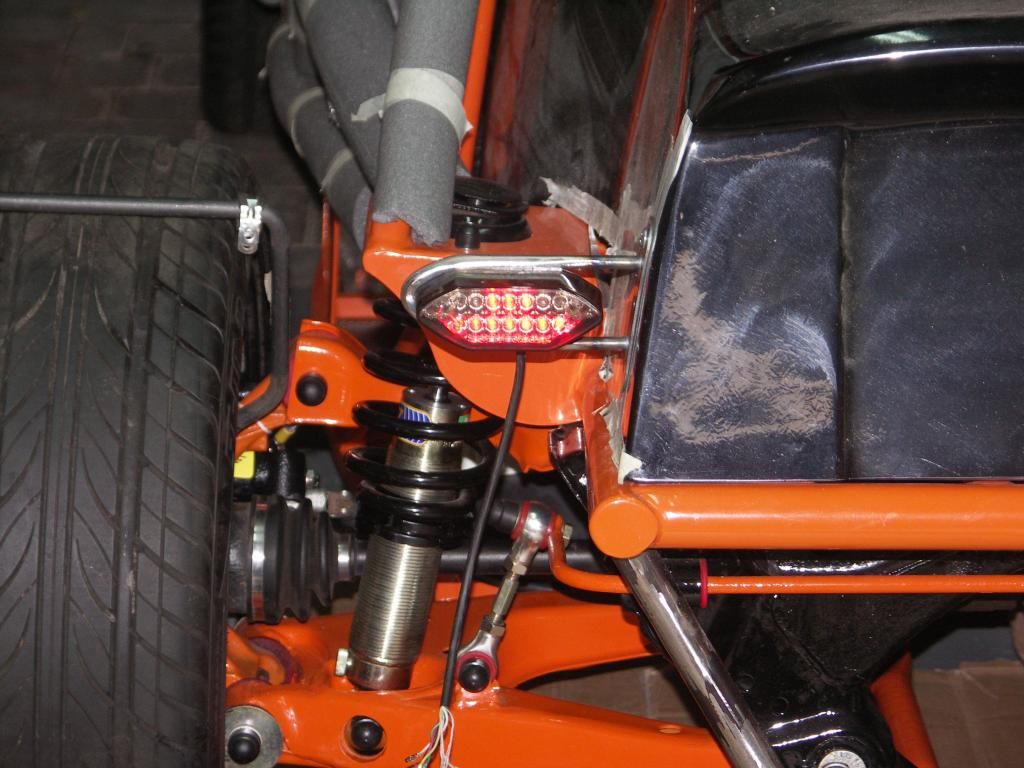 |
|
|
|
Post by mawdo81 on Sept 3, 2014 20:09:16 GMT
I like those lights, they look great. Where did you find them please?
Sent from my iPad using Tapatalk
|
|
|
|
Post by gnc on Sept 3, 2014 20:14:11 GMT
Hope you had a good holiday John. The readily available lights do indeed seem a little large in relation to the rear end. We have even considered small motorcycle LED's so it will be interesting how you fare regarding IVA with your lights. Hopefully everything will be ok !
|
|
|
|
Post by jgilbert on Sept 7, 2014 15:07:45 GMT
3 out of 4 wheel arches drilled and positioned on wheel arch stays today. Nice easy job but makes a big different. Marked the IVA degrees using masking tape on one wheel. 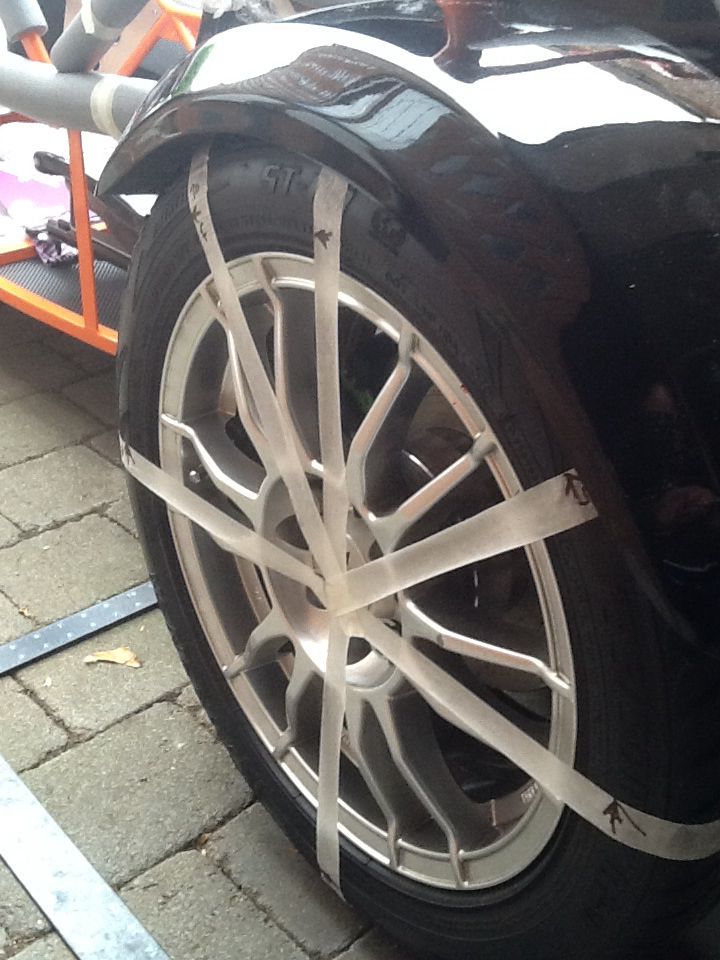 When happy will the position of the arch drilled, then slid into position. 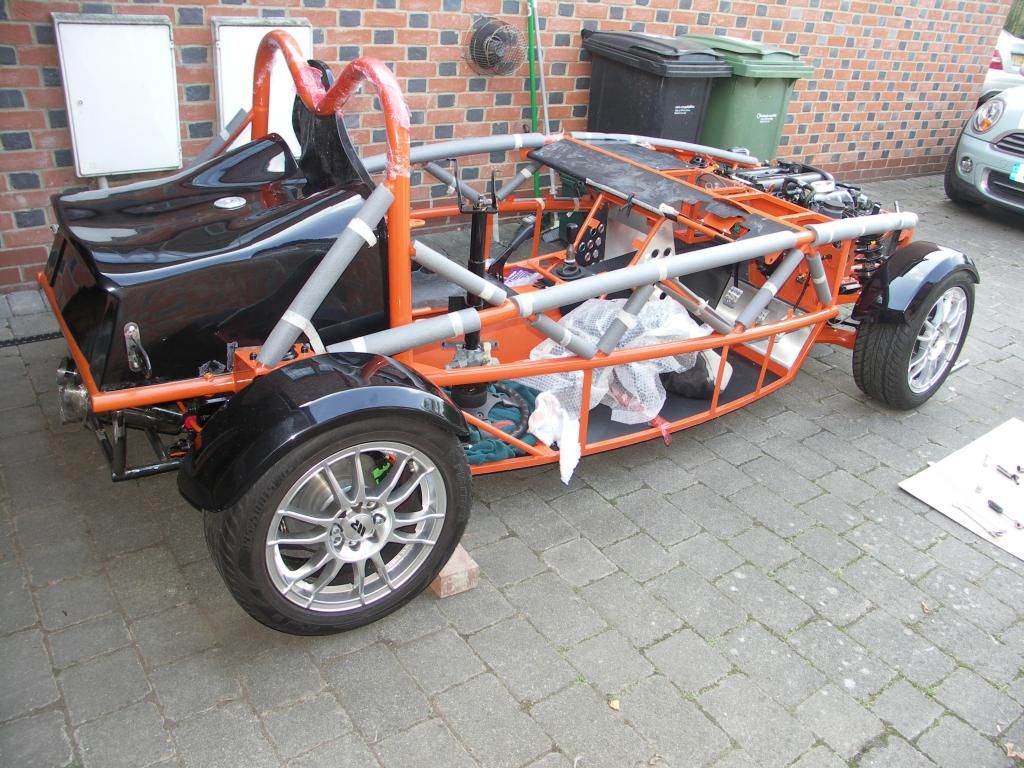 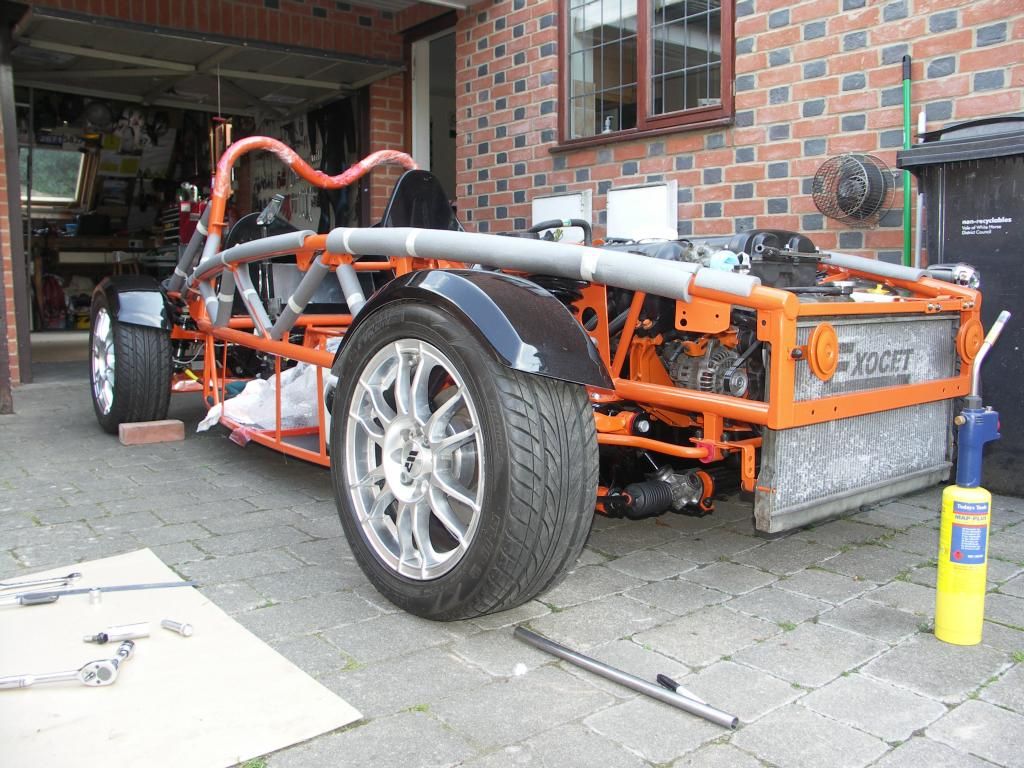 |
|
trident
Senior
   Improvise, Adapt and Overcome
Posts: 629
|
Post by trident on Sept 7, 2014 19:23:24 GMT
Looking very nice mate. Looks like some nice progress being made at the rear end as well..
|
|
|
|
Post by dave on Sept 7, 2014 19:44:37 GMT
Definitely an inspirational build this one, what size wheels and tyres have you chosen to go for?
|
|
|
|
Post by jgilbert on Sept 8, 2014 22:48:47 GMT
Definitely an inspirational build this one, what size wheels and tyres have you chosen to go for? Dave, 195x50x15 tyres on 6.5JJ x 15 wheels. |
|
|
|
Post by pincherrn on Sept 10, 2014 7:33:05 GMT
Hi guys. On the LED rear lights have you seen the Kellermann micro 1000PL lights they do a rear light version. Look brilliant but not sure how the IVA would like them. There is a bloke on ebay called abjoner who sells similar things. I looked at them and the front sidelight/indicator version.
Colin
|
|
|
|
Post by jgilbert on Sept 18, 2014 21:06:11 GMT
Our take on fixing wheel arches. As far as I'm aware there seems to be two methods of attaching the wings to the wing stays; bonding them with tigerbond or drilling through the top of wing and and then using a p clip to secure to the stay. People have reported wings coming lose using the bonding method, I guess the wing can be subject to a lot of vibration. The advantage is that there are no fixings on show. However I discounted this method due to the security of the wing. I also discounted the drill through method as I wanted a 'clean' top surface. So this was the method we developed. First off, I cut and drilled 8 stainless plates. These will be glued using an engineering glue and then fibre glassed to the under side of the wing. 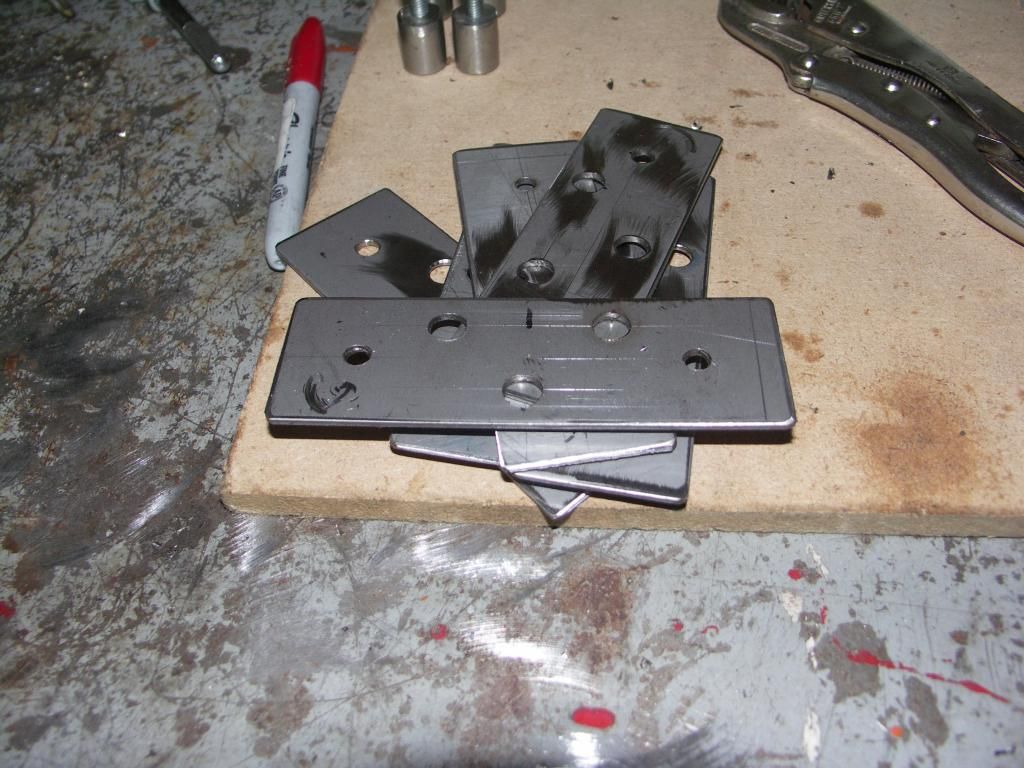 Then I drilled and threaded some 15mm Dia stainless bar and cut off sections 20mm long to make threaded bosses. 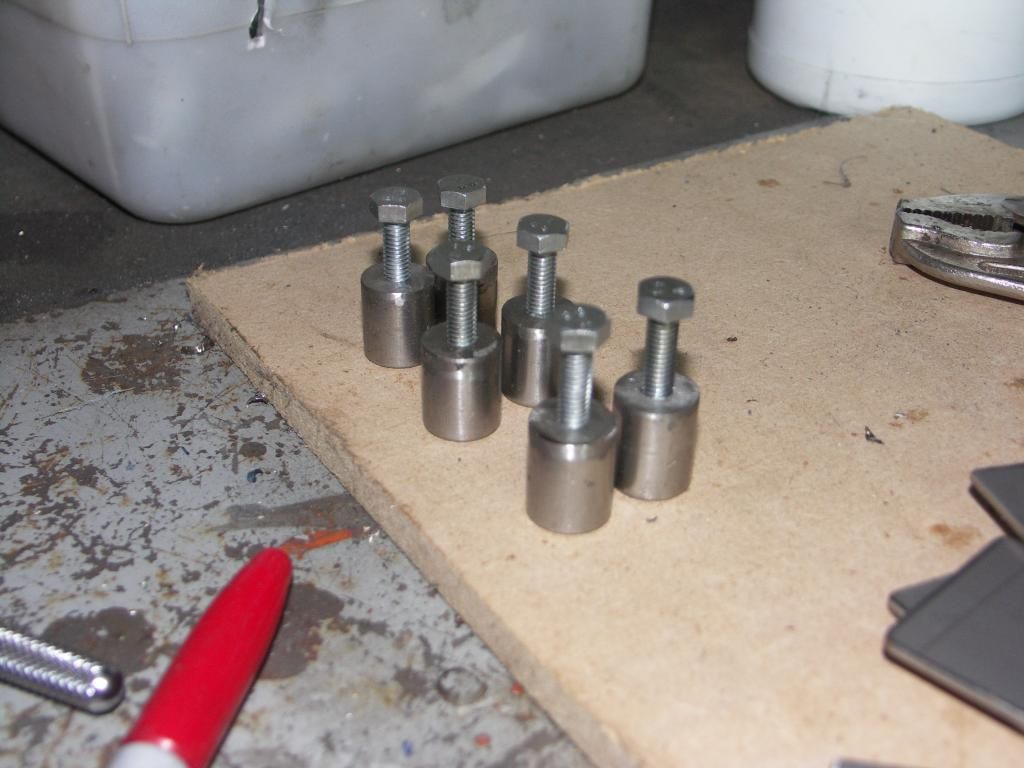 The bosses were then welded onto the plates. 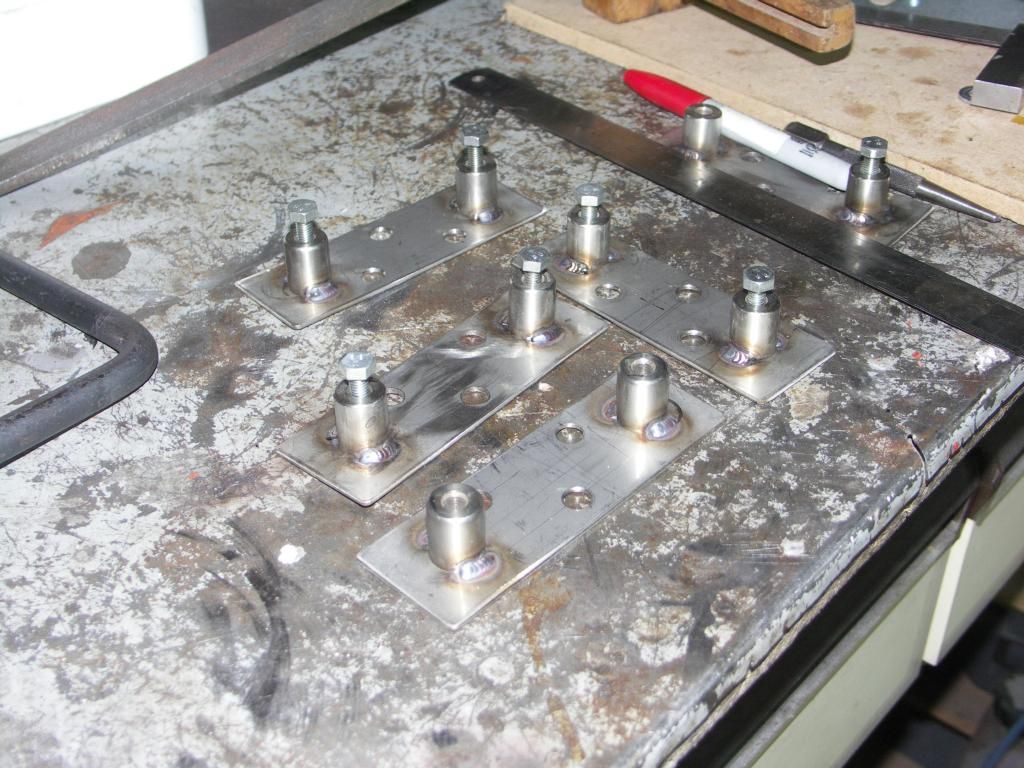 So these are the bits that will attach to the underside of the wing. Next job, to cut drill and weld a corresponding plate onto the wing stays where the stays pass over the tyres. The plates will be welded their full length once the stays are removed for powder coating. Simple process of bolting through the stay plates into the bosses. I will use a spring washer and thread lock when finally securing in place. 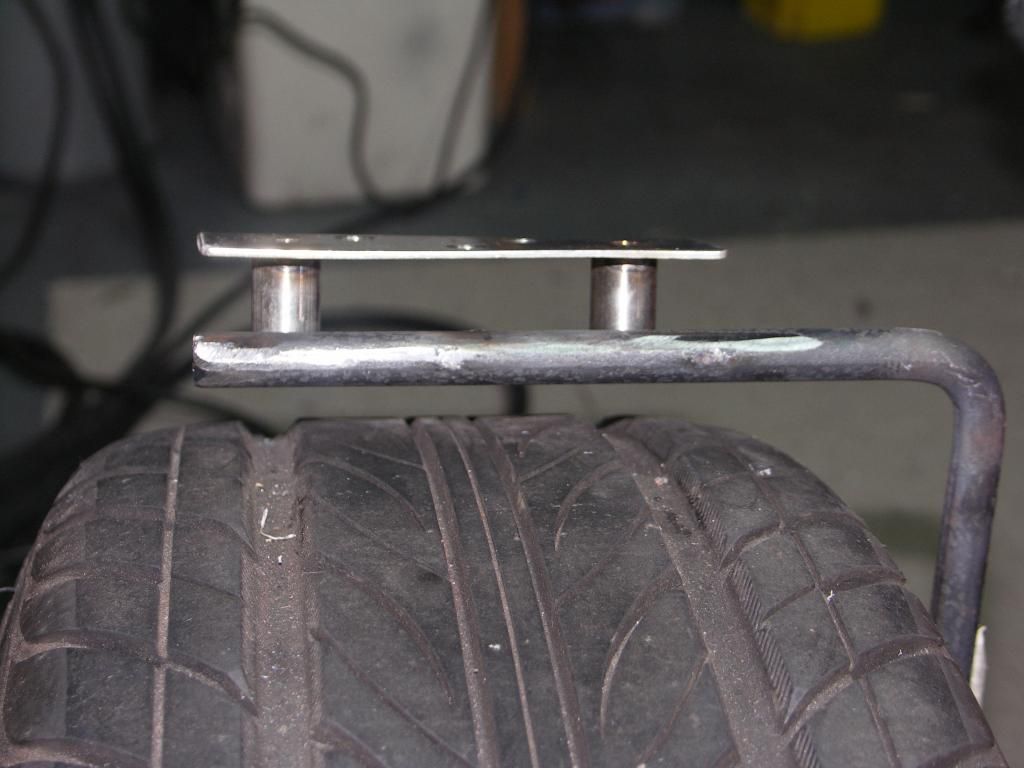 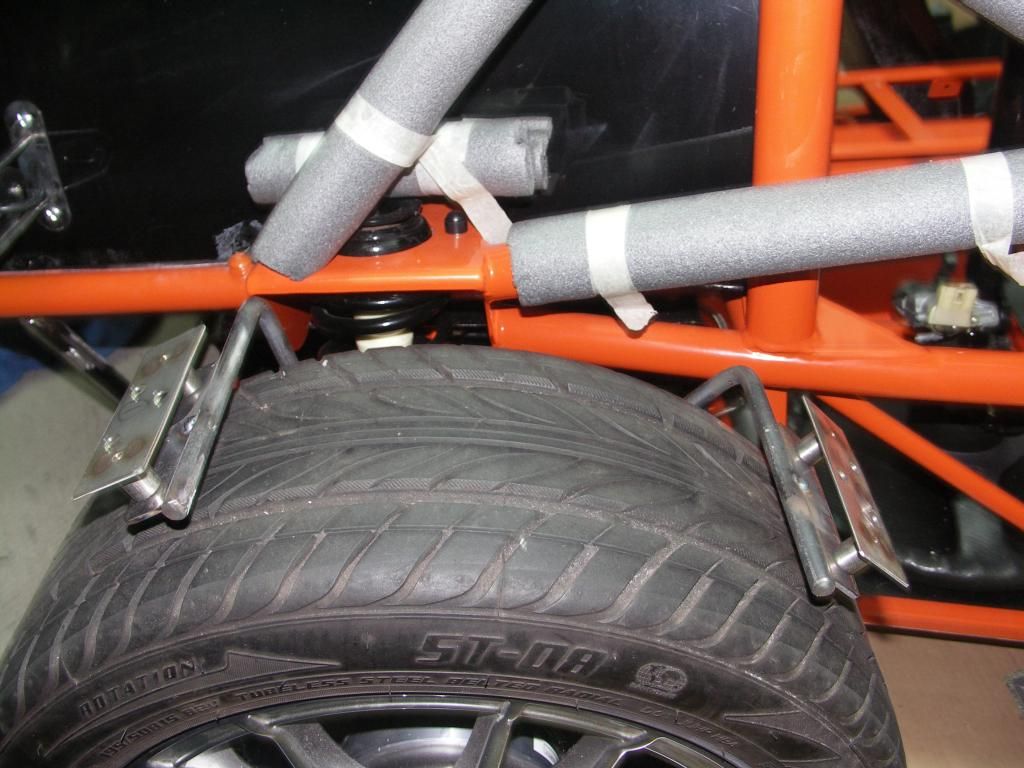 So then a simple process of placing the wings down onto the stainless plates (adding washers between the bosses and the stay plate will give a degree of adjustment but so far I haven't needed this). Last photos with the wheel removed showing the underside of the wing and my mounting. Front. 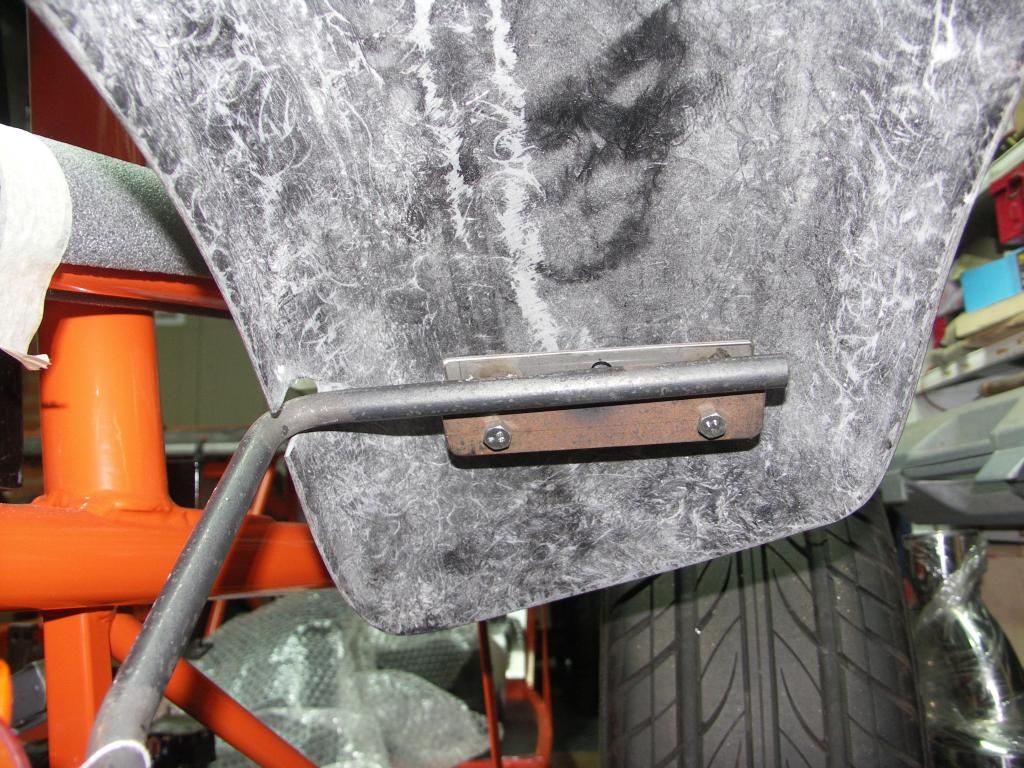 and rear. 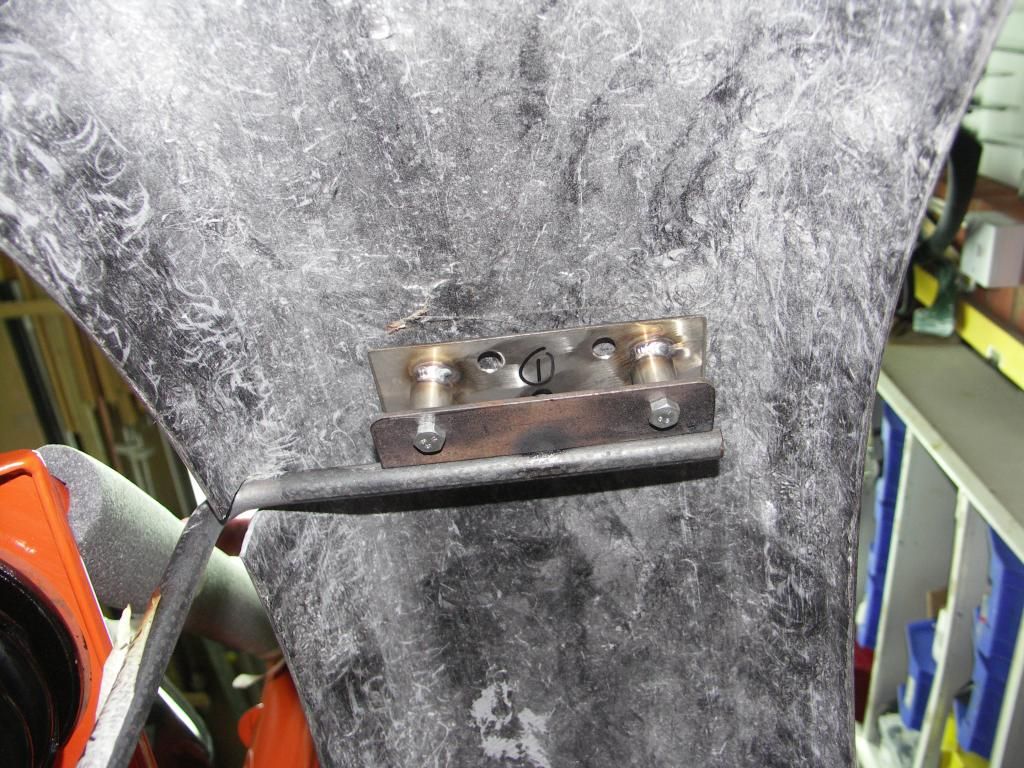 Rears done, frionts next job. Good little exercise, once glued and glassed in place should be nice and secure and no obvious bolt heads showing  |
|
|
|
Post by gwnwar on Sept 18, 2014 23:02:14 GMT
Top rate job usual..as is rest of build..
|
|
|
|
Post by jgilbert on Sept 24, 2014 22:24:34 GMT
Wiring refitted. She's alive! Well I can hear the solenoid clicking but starter not turning. Need to check out my earths, but to late for tonight. 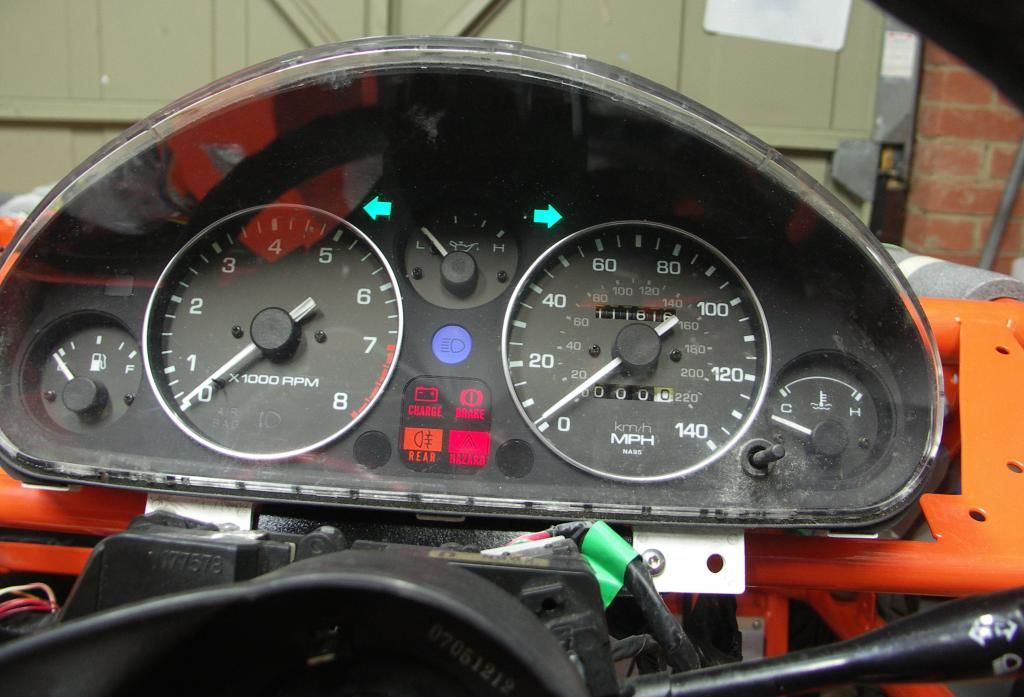 |
|
|
|
Post by gwnwar on Sept 25, 2014 4:44:01 GMT
3 ground points battery, PPF back end by diff, strap from engine to frame.. Have you tried tapping the starter with a hammer while trying to start. make sure both nuts on solenoid are tight..
|
|