|
|
Post by jgilbert on Jan 14, 2014 21:09:36 GMT
How had is the fibreglass stuff? Was thinking of redoing my wing stays with it? Do you buy a kit? Tomaff, should be fine. Tips I would pass on; Source from a good glass fibre company not from eBay. Suppliers keep the resin in the right conditions and turn in over quickly. Use weighting scales when measuring out resin and catalysis. Clean the surface well. 'Activate' the surface your bonding too with acetone before laying up on it. Chopped strand is easier to work with 300gram weight is fine. Woven cloth fibre is stronger but harder to work with on complex surfaces. The inside of arches and wet laying may suit chopped strand better especially as your going round the wing stays. You may find that you need to 'taper out' the edges of the stays so the strand has a more natural line. Buy a fluted roller for laminating to ensure you remove all the air. Air gaps = weakness. Likewise to much resin adds weight and no strength. It takes time, build up layers slowly making sure the resin has wetted out the fibre. Best of luck if you go with it |
|
|
|
Post by jgilbert on Jan 24, 2014 23:07:26 GMT
To cold for fibre glassing at the moment, so in an effort to get another job done I've been playing about with the rear lights. I wanted to mount the lights wider than the rear cover to extenuate the width of the car which also helps make it low low and mean. As I had developed a 'space frame' bar approach with the headlights I wanted to keep this going at the rear. So I made up some lightweight mounting plates and then mucked about with different designs. Used welding wire to mock up the options. Decided to go with this idea. 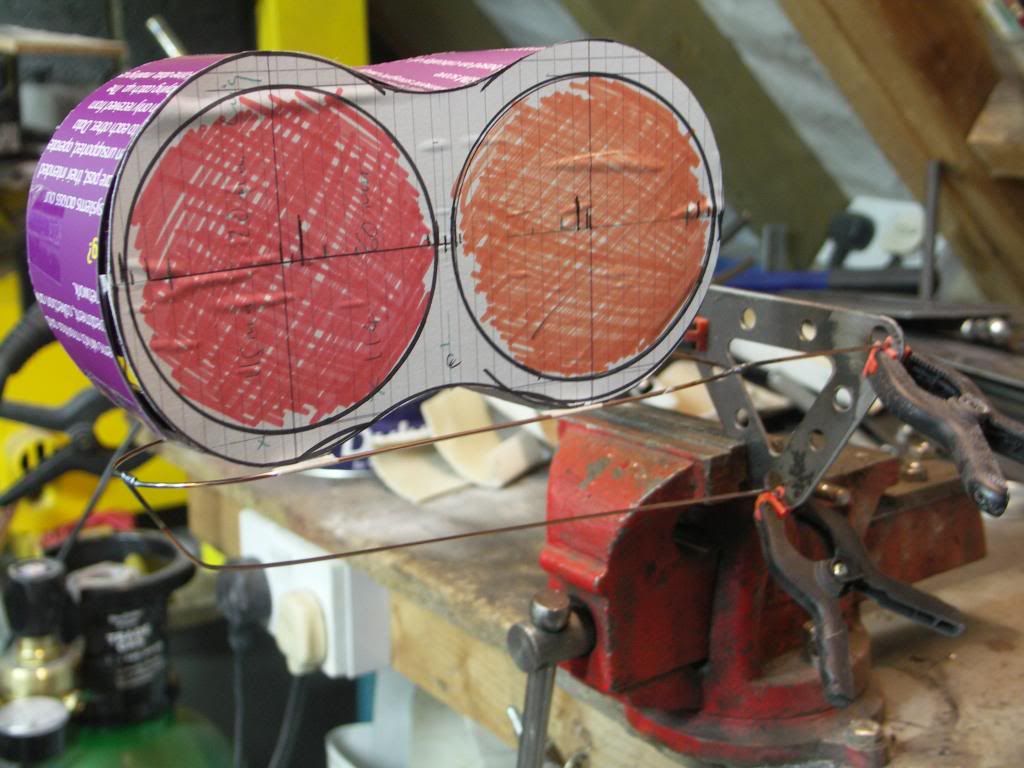 This is the finished article. Slightly different mounting plates. 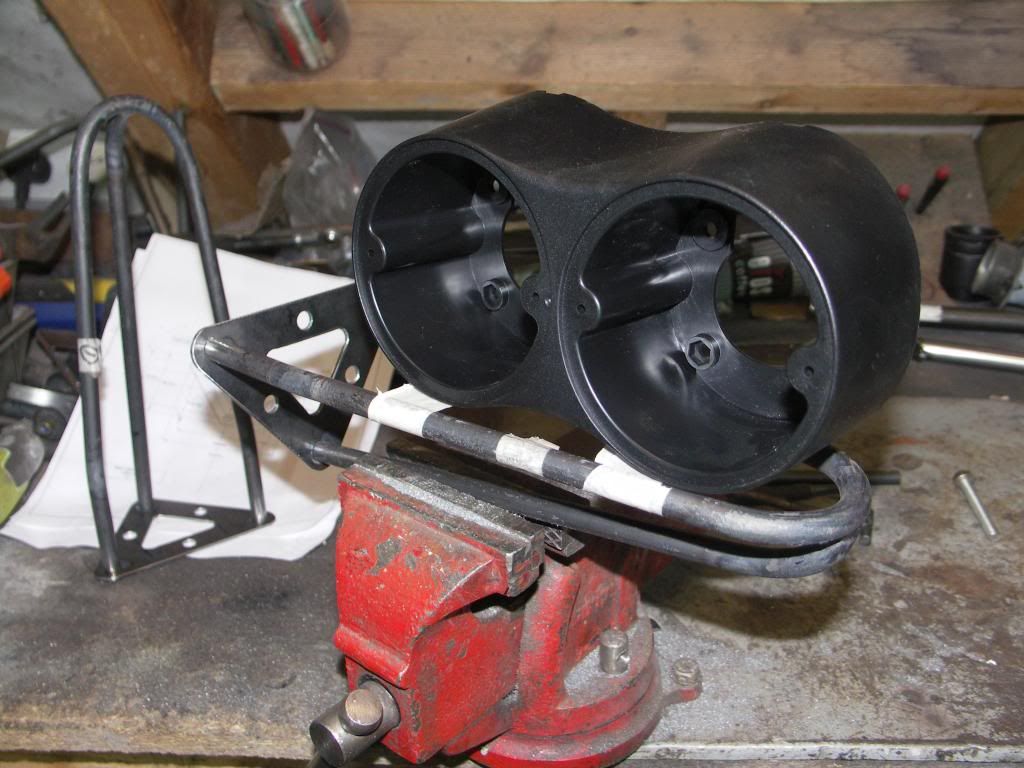 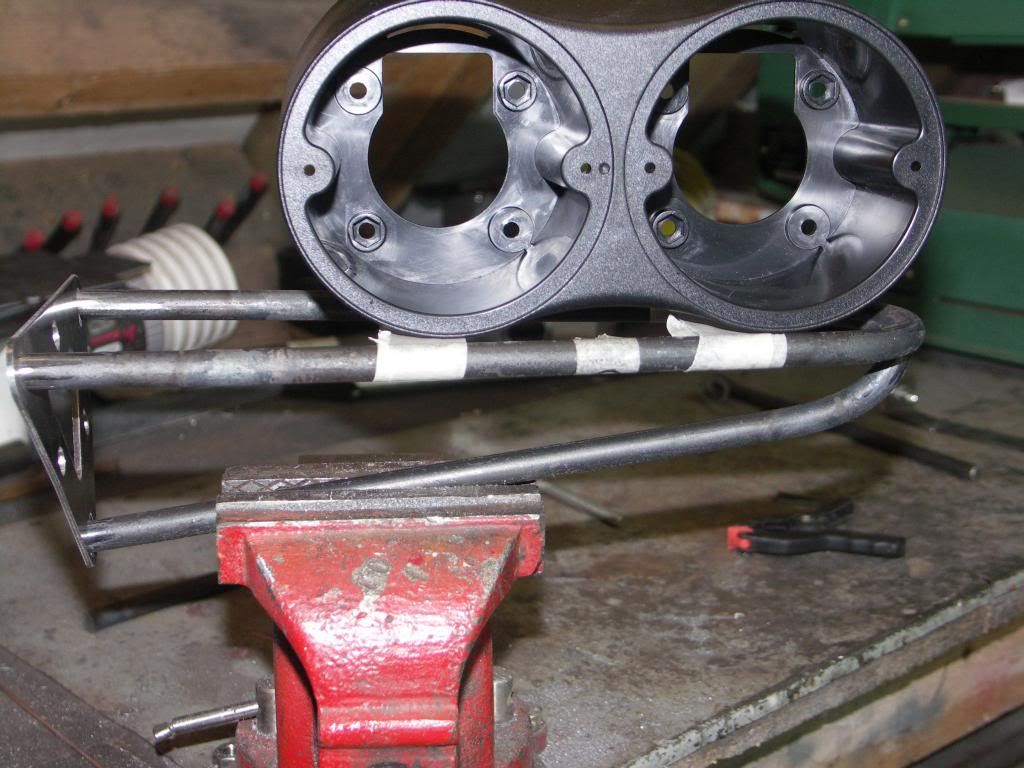 And held up to the car. 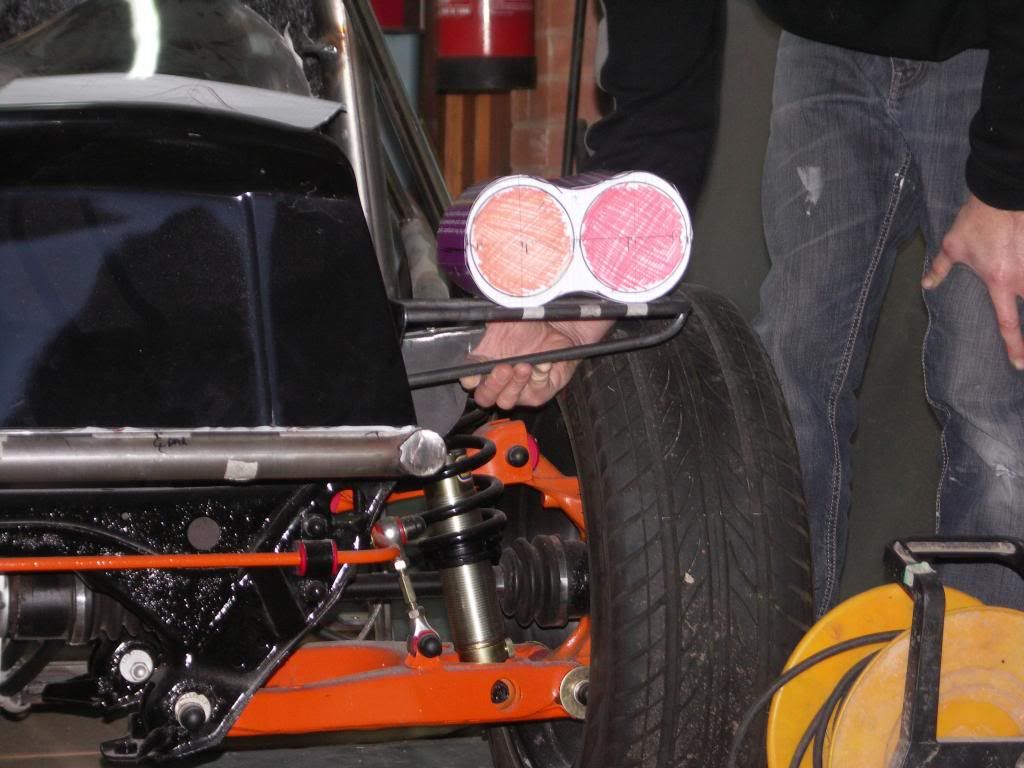 As per the headlights I used 10mm solid round bar so hopefully no IVA issues. Just need to cut a mounting plate to go between the top two bars and then mount the light module. Plan is to have stop/tail and indicator. |
|
|
|
Post by jgilbert on Feb 2, 2014 19:03:58 GMT
Our latest project has been to design and fabricate a full length centre console. I wanted something that 'flowed' from the dash board right the way to the rear bulkhead. I've never been a fan of the unequal PPF tunnel and the exposed handbrake. A centre console would also be useful for any switches and so on. In keeping with the design of the car I decided to use round tube. I originally planned to mimic the curve of the chassis side tubes for the center console. Unfortunately I struggled to fine anyone who was willing to bend the tubes to the right radius for a sensible price. So this design was junked. Still keeping with the tube I decided on 19mm tube and a much simpler design bending the tube in a standard pipe bender. So this is what we have been playing with. First photo shows the main two tubes having been bent. I elected to retain the ally gearbox cover and build the console around this. 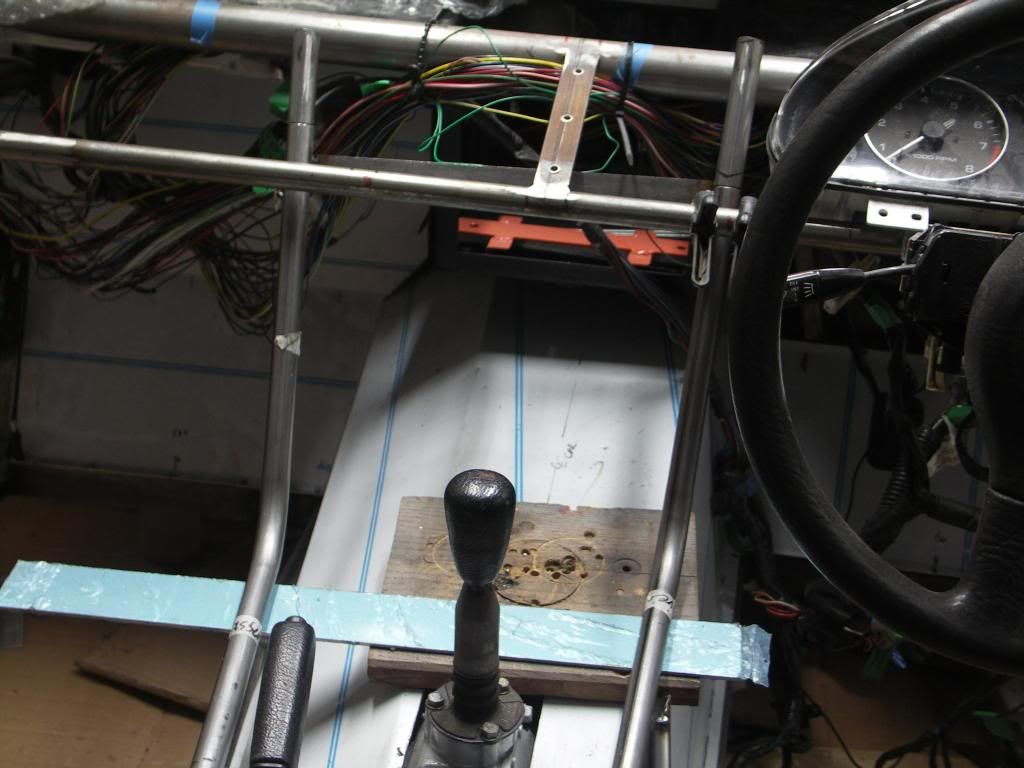 It was surprisingly difficult to follow the lines of the PPF Tunnel and the gearbox cover. Both sides being different. Having got the top two tubes correct I then started to add support legs and cross braces. Again using 19mm tube. For the support legs I set these at an angle to mimic the chassis. 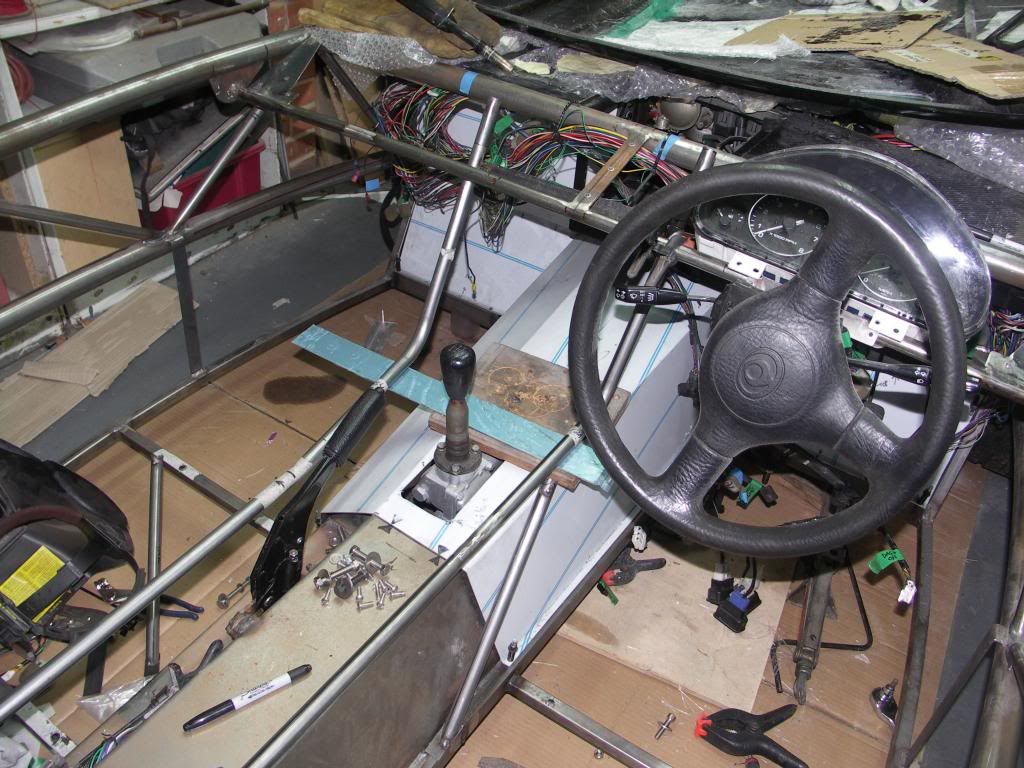 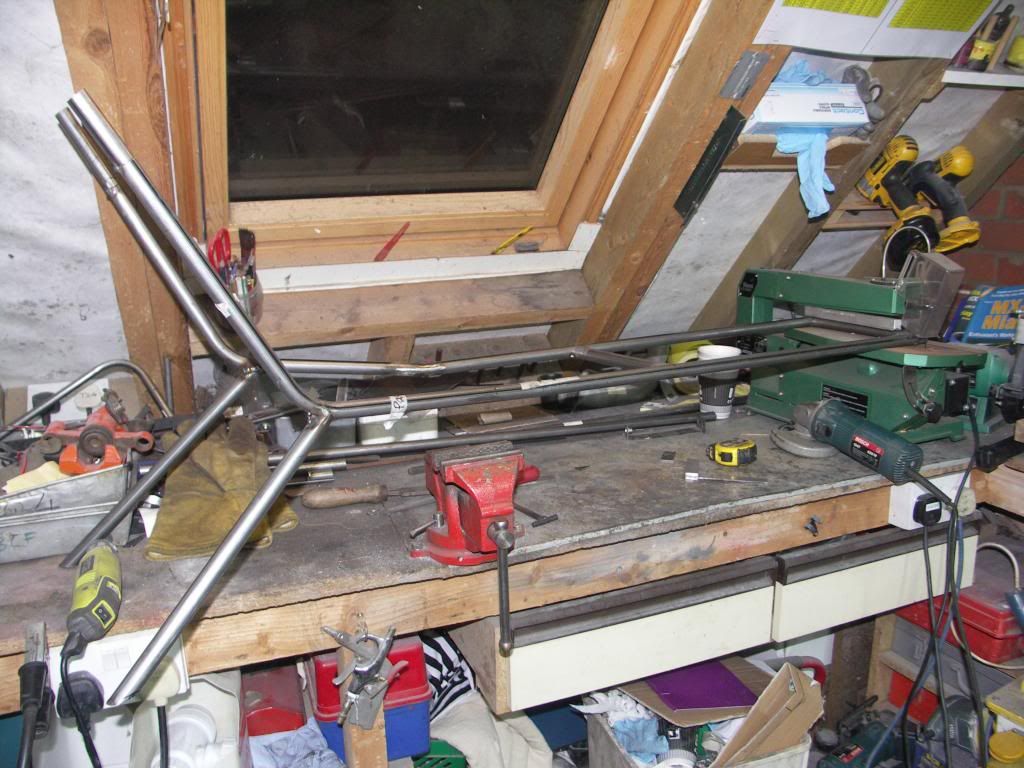 I want to get the centre console powder coated so the tube joints and welding needed to be spot on. Ended up spending hours cutting the ends of the tubes to the right profile using a computer program to print out paper templates for each cut. 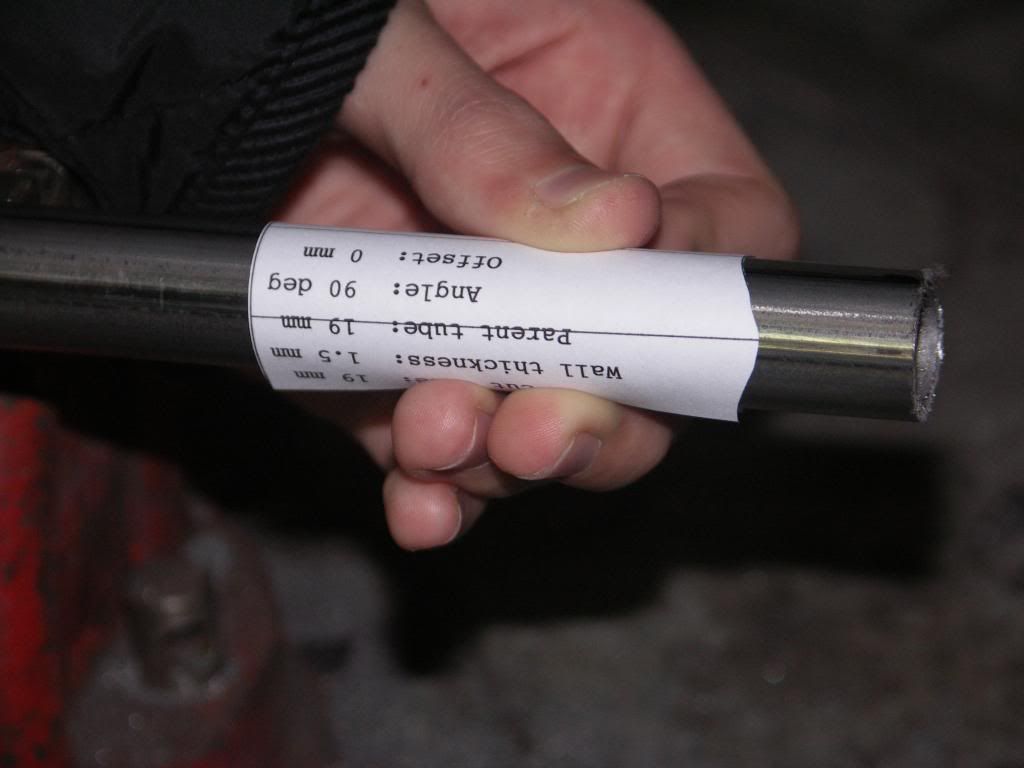 And the finished result. The plan being to infill the top with carbon fibre panels and the sides in ally sheet. Photos from different angles. we are pleased with the result. 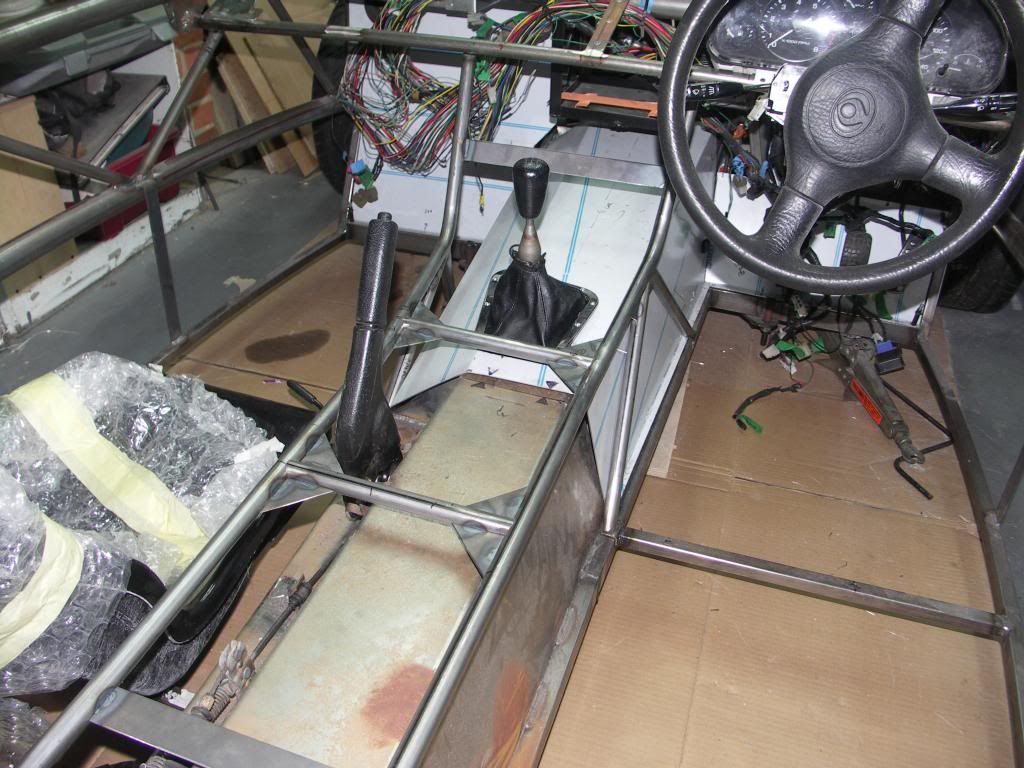 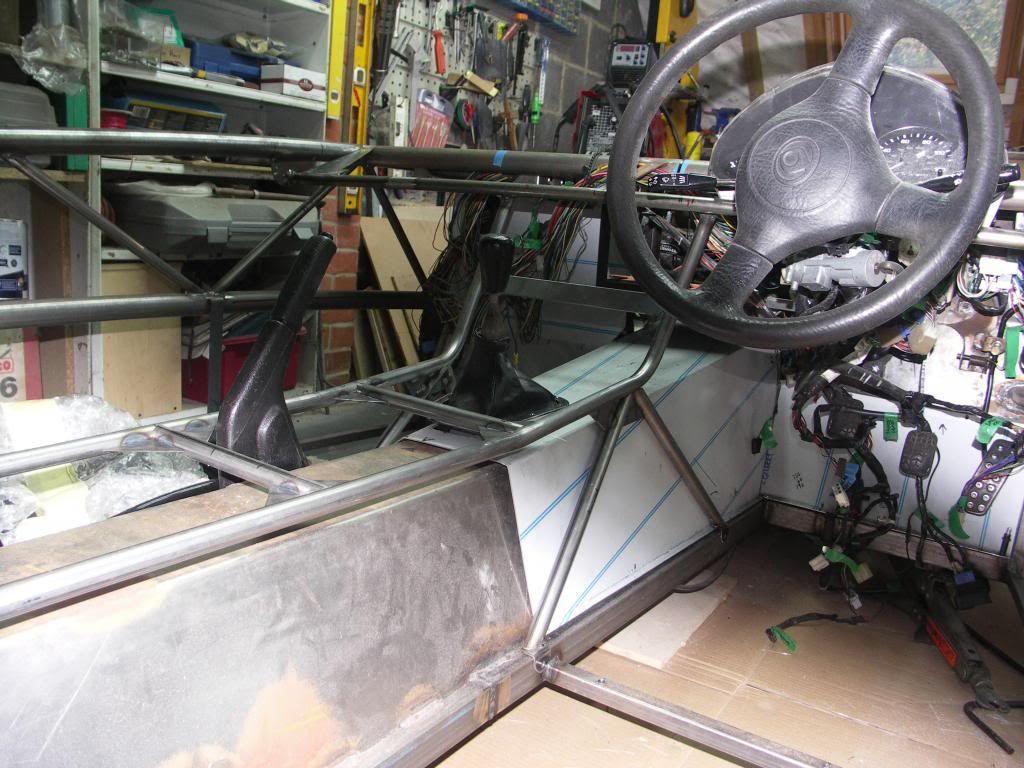 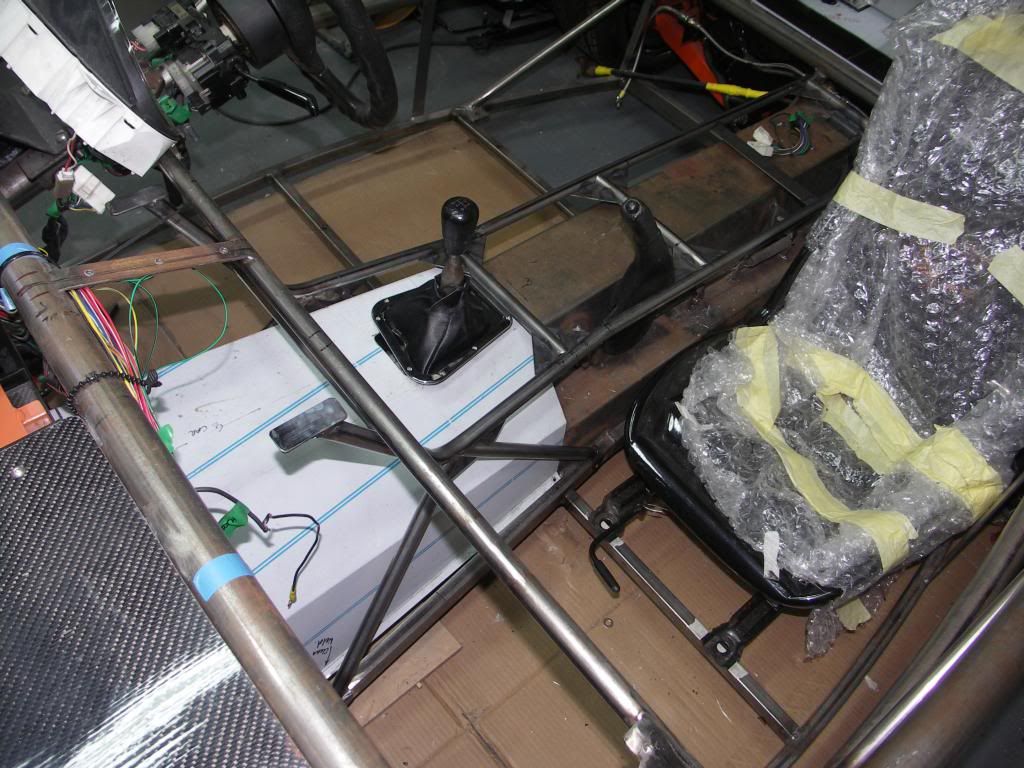 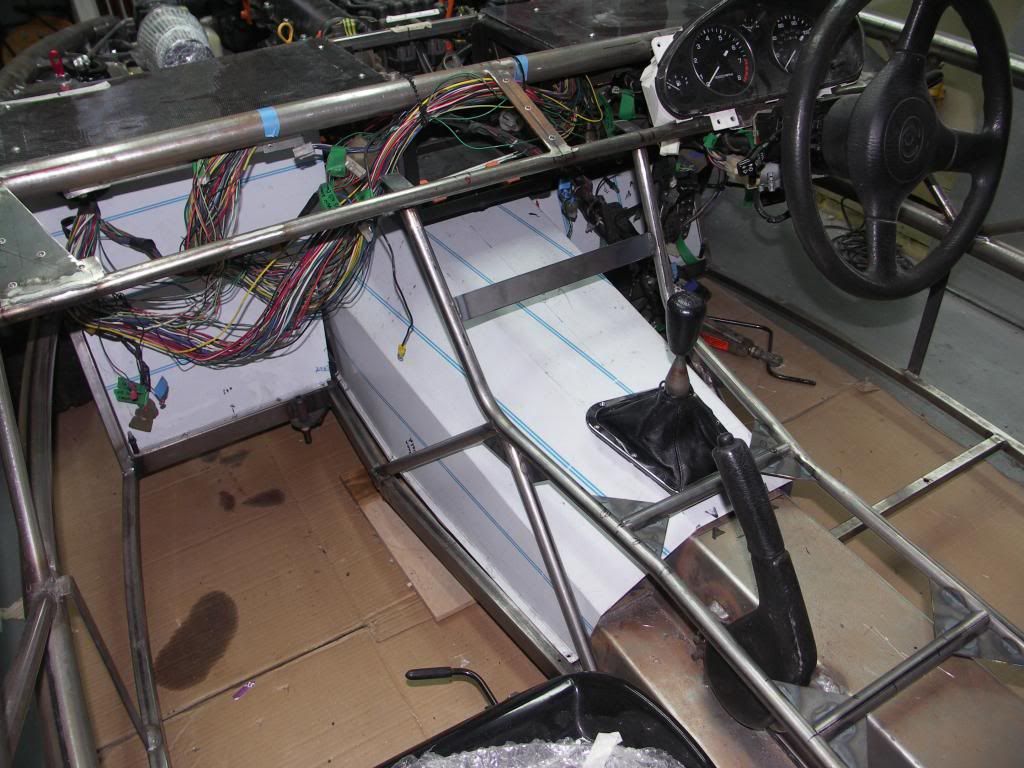 |
|
|
|
Post by red5 on Feb 2, 2014 19:28:29 GMT
Nice work mate - clever innovative solution.
Be aware ive had my trans cover off a number of times to get to the top of the gearbox area ,are you going to retain the original trans cover as well and if so how will you get at the gearbox area?
|
|
|
|
Post by gwnwar on Feb 2, 2014 19:36:57 GMT
John.. You have really outdone yourself again.. That is some nice fab work.. Would it be better to use an OEM rubber boot on the tunnel cover and the nice chrome one on the new unit top..It would keep heat from coming up under the new unit..
Any plans to make a small bin in the top between the seats with a lift top for storage.. Again nice work as usually..
|
|
|
|
Post by biggunz on Feb 2, 2014 20:00:09 GMT
Cracking work guys looks fantastic!
|
|
|
|
Post by driver on Feb 2, 2014 20:02:23 GMT
Great work
|
|
|
|
Post by driver on Feb 2, 2014 20:04:16 GMT
I may do something similar as I'm a gas engineer and have some pipe benders lying around, do you reckon I could use copper pipe to do this, having no joins?
|
|
|
|
Post by jgilbert on Feb 2, 2014 21:35:30 GMT
Nice work mate - clever innovative solution. Be aware ive had my trans cover off a number of times to get to the top of the gearbox area ,are you going to retain the original trans cover as well and if so how will you get at the gearbox area? Red5, yes good point. I didn't say but the console is removable. Bolts to the inside floor rails, tunnel and my dash board tube. Yes plan to keep the ally trans cover under my console. |
|
|
|
Post by jgilbert on Feb 2, 2014 21:38:39 GMT
John.. You have really outdone yourself again.. That is some nice fab work.. Would it be better to use an OEM rubber boot on the tunnel cover and the nice chrome one on the new unit top..It would keep heat from coming up under the new unit.. Any plans to make a small bin in the top between the seats with a lift top for storage.. Again nice work as usually.. George, thanks for comments. Yes some storage would be good. Initially we will stick with plain infill panels. Storage would be a nice winter upgrade. |
|
|
|
Post by jgilbert on Feb 2, 2014 21:45:02 GMT
I may do something similar as I'm a gas engineer and have some pipe benders lying around, do you reckon I could use copper pipe to do this, having no joins? Driver, I was originally going to use copper pipe but to be honest mild steel is stronger and easier to work with. With a standard pipe bender you could bend mild steel. I ended up using a 6 meter length of tube for the console. I ended up joining the tube in three place as the design developed. Not sure I could have done this with copper. Good luck if you have a go. |
|
trident
Senior
   Improvise, Adapt and Overcome
Posts: 629
|
Post by trident on Feb 3, 2014 23:05:12 GMT
I know i had already seen some of it but it looks very good.. I've not made any further progress on my one yet as I have been very busy with no time to work on the car.
|
|
|
|
Post by jgilbert on Feb 8, 2014 19:39:21 GMT
So limited progress, our Frontera 4x4 has decided to play dead so spent most of today in between the rain on that. One job that was done, was an addition to the bonnet to encourage a some convection of heat away from the exhaust manifold area. Added this vent. 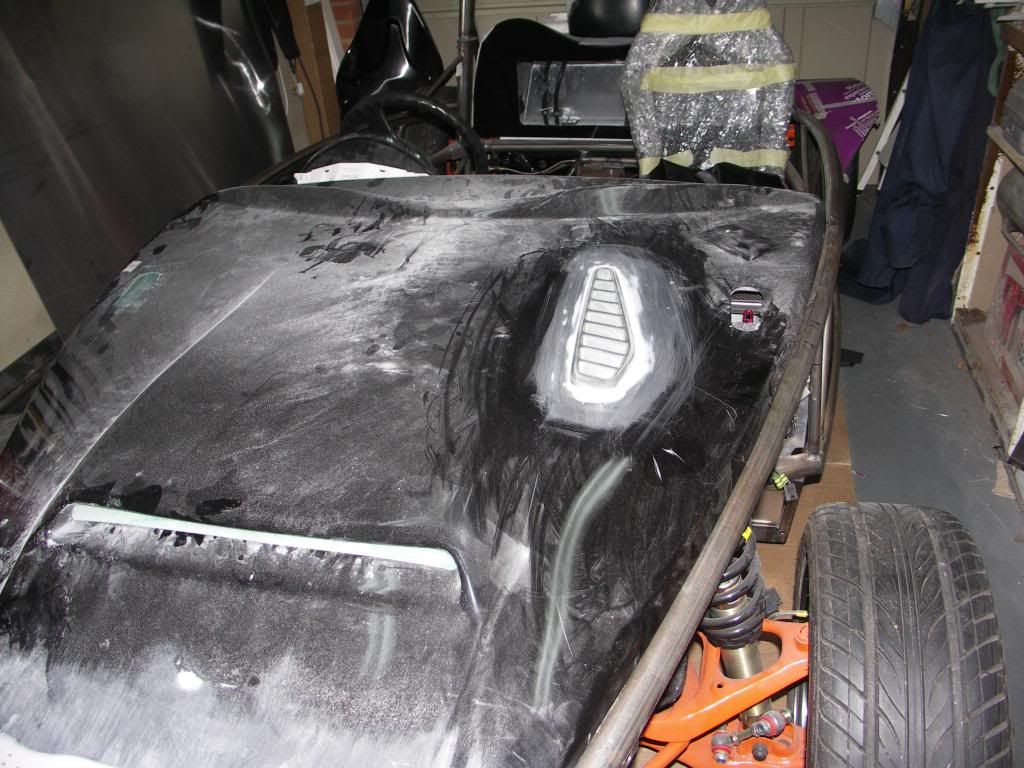 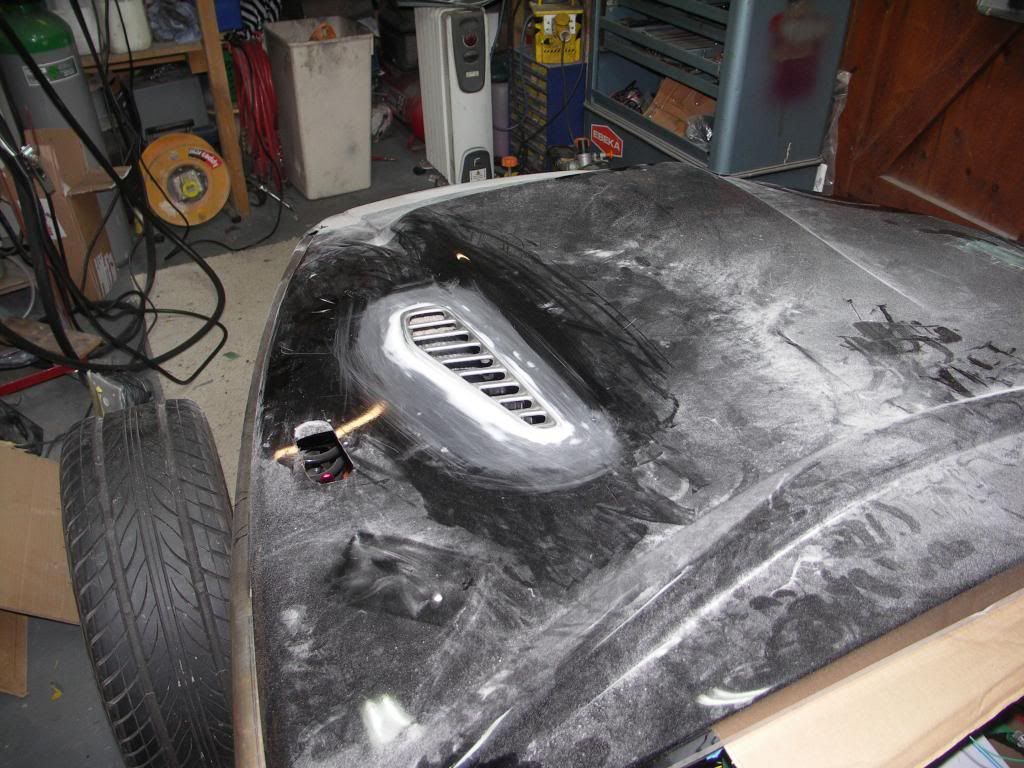 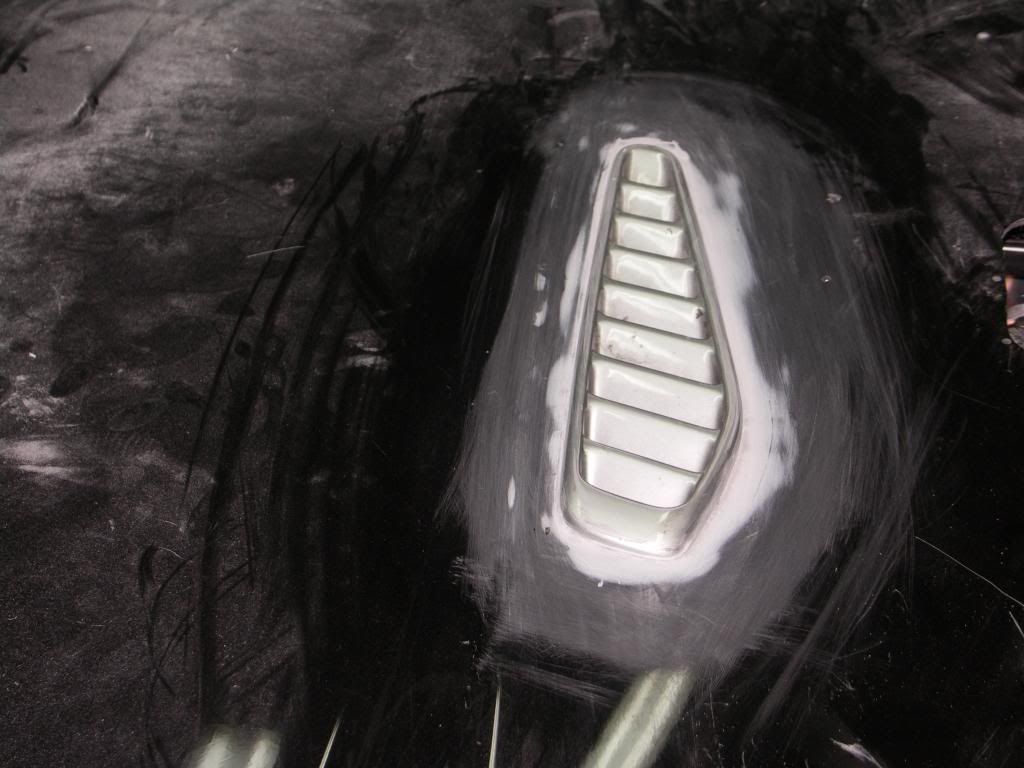 And hopefully tracked down the cause of the Frontera problem (lost of power under load). A cracked exhaust manifold. 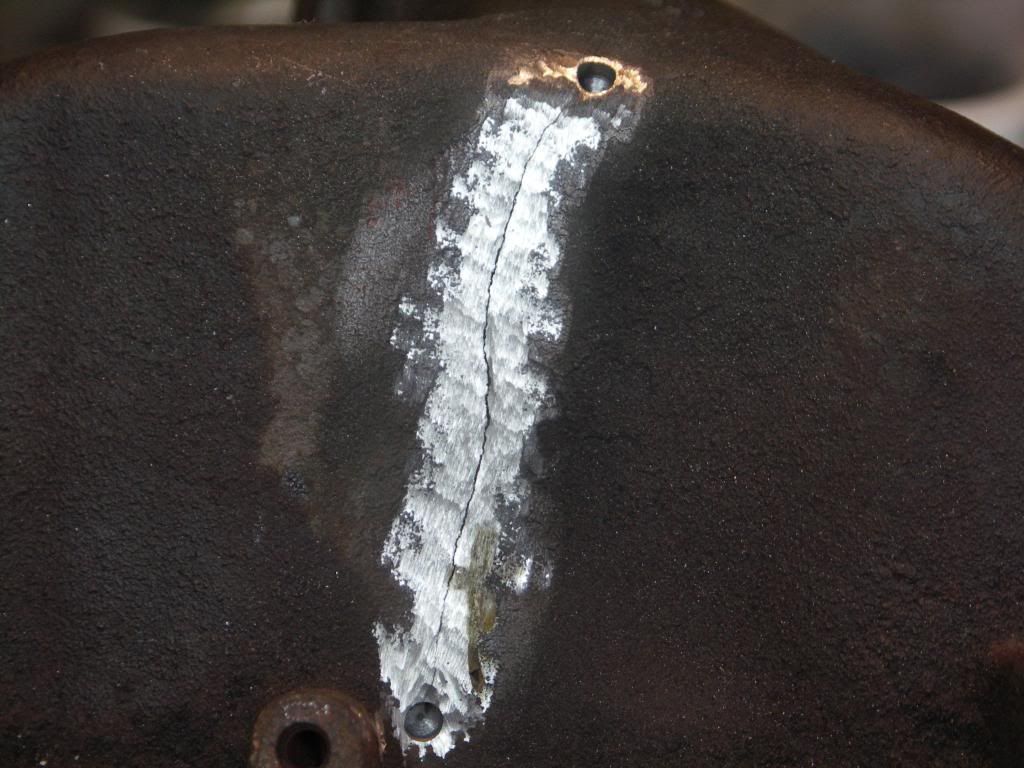 |
|
|
|
Post by h5ngs on Feb 8, 2014 20:19:52 GMT
Good work on your build it will be by the the most modified exocet to date with some very nice features.
|
|
trident
Senior
   Improvise, Adapt and Overcome
Posts: 629
|
Post by trident on Feb 10, 2014 22:50:11 GMT
Another vent on the other side to even up the look?
|
|