|
|
Post by tlight on Dec 8, 2013 20:46:02 GMT
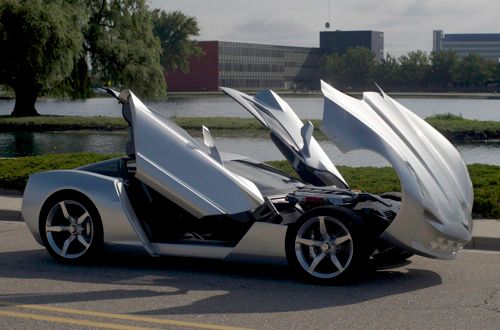
One more idea....it does something like this..,  |
|
|
|
Post by tomaff on Dec 8, 2013 20:47:05 GMT
For the nose cone? But not sure why?
Bend does not look the right shape for the bonnet.
|
|
|
|
Post by jgilbert on Dec 8, 2013 20:49:46 GMT
HaHa, This to be exact.  So I thinking of making a one piece bonnet and nose cone 'flip front'. |
|
|
|
Post by gwnwar on Dec 8, 2013 22:06:03 GMT
You ask why.. To be different and because he can.. A one piece would be heavy and would need a lot of bracing..Go for it..
It will be a hell of a sail on a windy day.. Maybe a hinge at the front edge of the bonnet.. Drop the nose then the bonnet..
|
|
|
|
Post by tomaff on Dec 8, 2013 22:17:25 GMT
I can see why now. But I could not work out the reason behind it when I thought it was just rotating the nose cone and not the bonnet.
|
|
|
|
Post by gwnwar on Dec 8, 2013 23:16:28 GMT
I looked up the head lights all I saw was a pair 1 lamp for high beam and the other lamp unit low beam. Would need a pair per side.. What part number units do you have with 2 beams per unit..
|
|
|
|
Post by jgilbert on Dec 9, 2013 0:09:47 GMT
I looked up the head lights all I saw was a pair 1 lamp for high beam and the other lamp unit low beam. Would need a pair per side.. What part number units do you have with 2 beams per unit.. George, your right in that they only have one bulb and a 'shutter' mechanism to change between main and dipped. I brought them from Road Track and Race in the UK. See info below. Photon dip/main light unit Ref: RTRPHOTON1 Price: £99.00/Euro113.85 (Including VAT at 20%) "Photon" Individual Projector Headlights, with both dipped and main beam in a single unit. These are possibly the smallest road legal lamps available just 86mm wide & 76mm high and 50mm across the lens. The price here is for a single dip/main light. Please order 2 of these lights if you want a pair. More information A diferent description from another source. The housings are the same as our individual dip (low) & main (high) beam Photon units, but now offer both dip & main beam within the one unit. These lights work in the same way as our combined dip & main beam chassis projectors, in that they use a single filament bulb & switch from dip to main beam by the use of a solenoid controlled shutter. |
|
|
|
Post by jgilbert on Dec 10, 2013 0:46:18 GMT
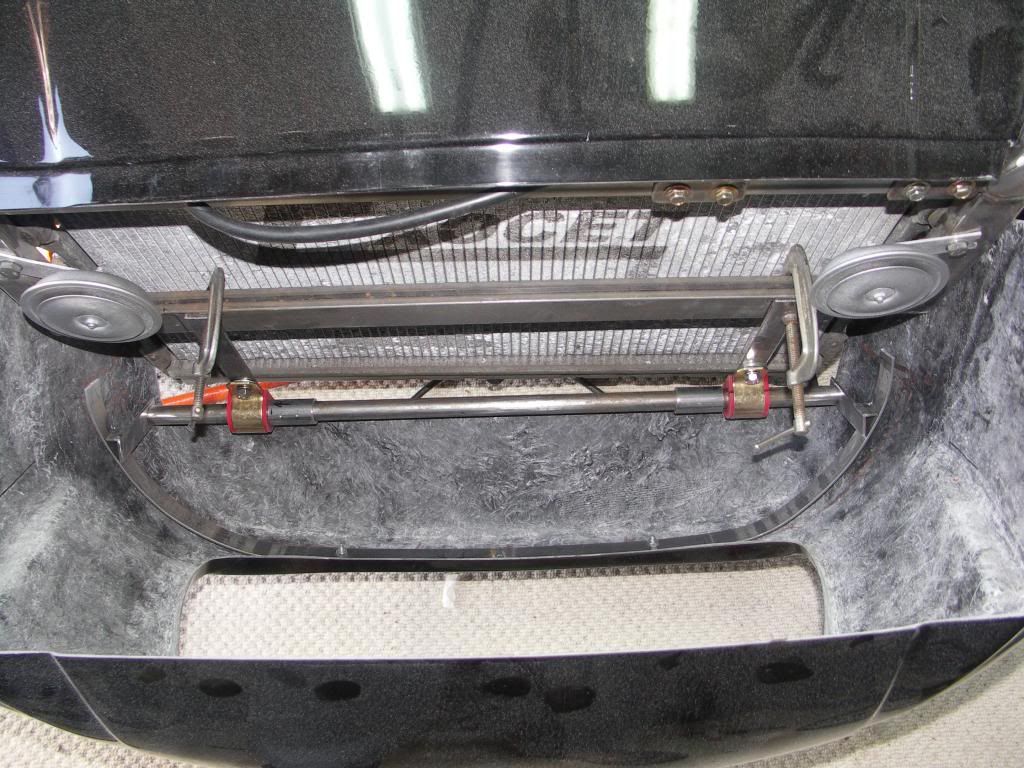
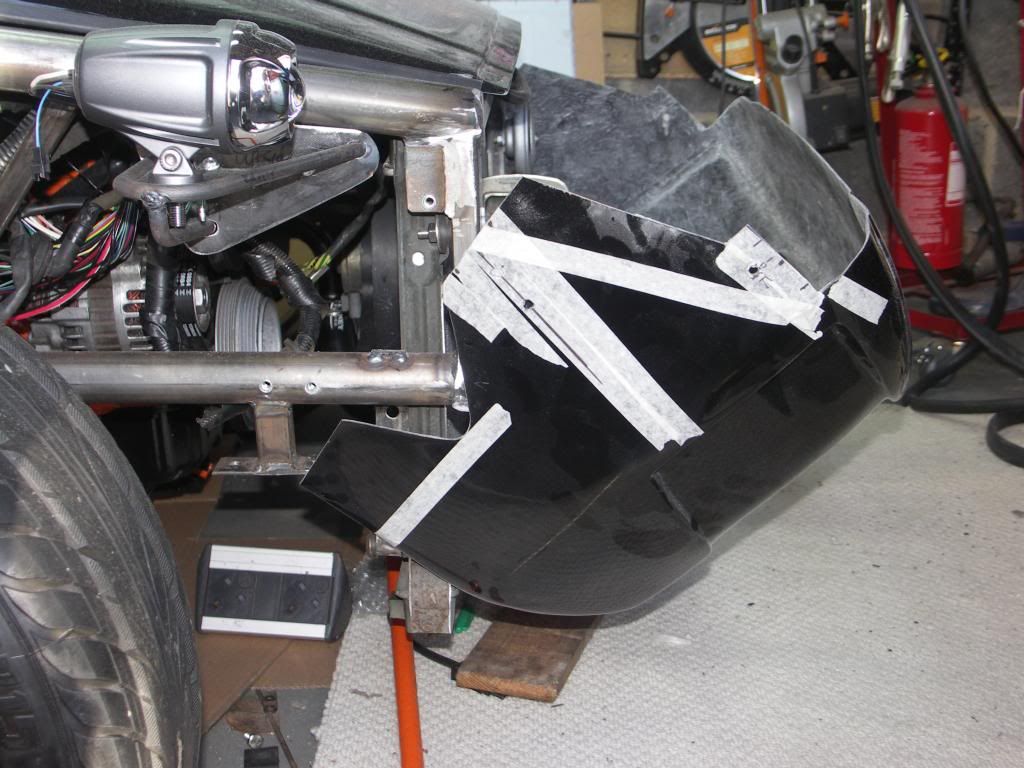
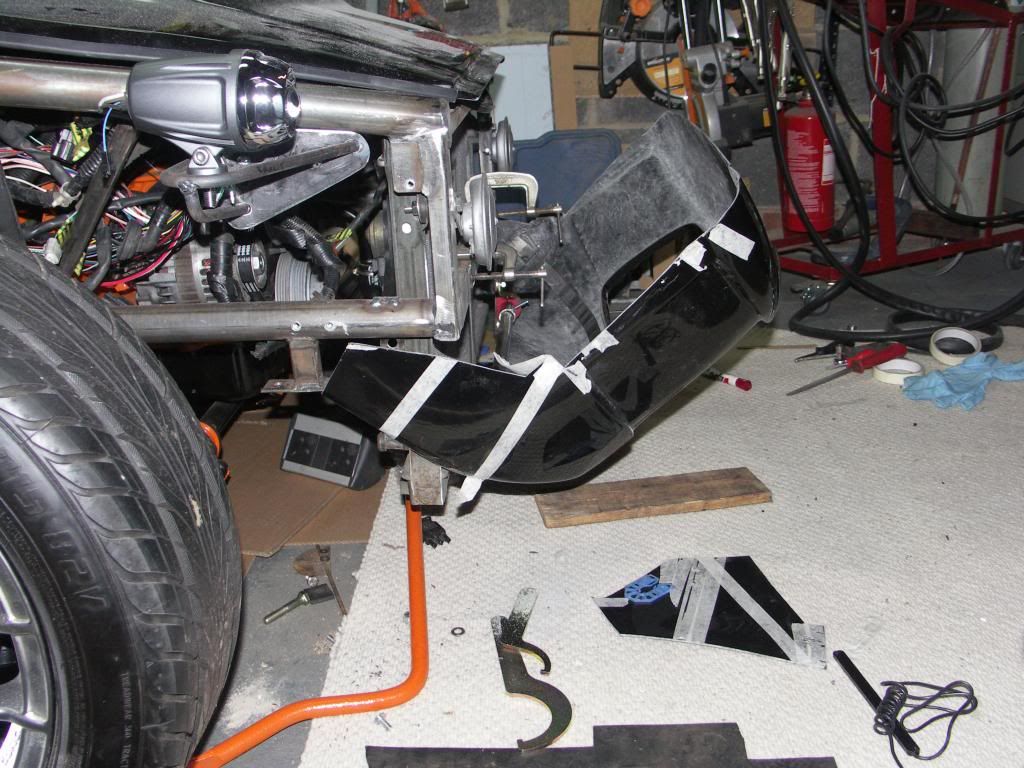
FLIP FRONT - right or wrong ? So started hacking away at the nose cone tonight in order to progress the flip front idea. So why a flip front, The simple answer is I had an idea about a flip front and I also wasn't happy with the fit of the nose cone. For some reason my nose cone is not a perfect mirror image (more of the near side top chassis frame shows than the drivers side. This is not a criticism, its just a thing that I know would bug me. I've always thought that flip front cars look awesome. As shown below.  So I was faced with the following options; 1) ignore the current fit. 2) try to mod the nose to make it a better fit (would involve filler and then paint) or, 3) follow my instinct and try a Flip front The biggest issue I can see is the strength on the bond between the cone and the bonnet. This will need the following mods; 1) 2-3 mm of G/F matting laminated to the underside across the join. 2) a tubular frame mounded to the underside of the bonnet. Running from the nose alone the side of bonnet and a couple of cross braces. 14mm mild steel tube should do the trick I think. 3) 2-3 mm of G/F matting laminated inside the nose cone to beef this up. So in all I will be adding no more that say 5 kg's maybe 10 kgs absolute max. Reckon I will save a couple of kilos with the aluminium fuel tank and carbon sides. So can't see this being a game changer. The advantages are (if I can pull it off), something that is different, no risk of the bonnet flipping up when driving, a redesigned front end. Downside, a month added to the build, the need for it to be painted. I know it won't be everybody's 'cup of tea' but I would welcome any advice anyone is willing to give. And I wouldn't take offence it someone tells me I'm plain stupid (I know that and it will probably inspire me more). Anyway a cut down nose cone.  |
|
|
|
Post by mrjingles705 on Dec 10, 2013 8:23:47 GMT
I think it's going to be an interesting technical challenge, and a good little feature to have. I say go for it  Three ideas that might help to mitigate the weakpoint/creasepoint between nose and bonnet off the top of my head: 1) Some sort of gas ram or similar on the bonnet side to hold some of the weight. 2) Lifting the bonnet/notching the rail to give you enough clearance to get bracing fonr-to-back between bonnet and nose. 3) Thicker GRP lamination on that joint, possibly with some triangle bracing around the sides (bit like the Mevster bonnet shape) - would involve changing your lighting though. It's possible I'm overjudging the weight involved - I'm using the weight of the Mevster bonnet and it's shape as my baseline. The exocet bonnet + cone combined are prob lighter, but they lack the 3D stiffness relatively from the lack of side edges, and the join will be weaker. |
|
|
|
Post by gwnwar on Dec 10, 2013 21:03:09 GMT
I would not use any gas ram for it it will put to much pressure on the bonnet unit when closing and might crack it.. Even with the MX5 bonnet some have bowed trying to close.. And keep and upward force were attached to bonnet when closed..
|
|
|
|
Post by mrjingles705 on Dec 11, 2013 8:33:20 GMT
I was thinking more of attaching to his steel bracing (so the GRP was effectively 'skinning' his bracework) - but yeah, I see what you are saying.
|
|
trident
Senior
   Improvise, Adapt and Overcome
Posts: 629
|
Post by trident on Dec 11, 2013 22:03:27 GMT
An extra month build time is nothing… If any one can pull it off I sure you can… PS When it's made can you make me one
|
|
|
|
Post by tomaff on Dec 11, 2013 22:53:29 GMT
Really interesting concept. I am looking forward to see how you secure the 2 together.
|
|
Deleted
Deleted Member
Posts: 0
|
Post by Deleted on Dec 12, 2013 11:15:12 GMT
Yeah my electrical and fuel lines are on the ppf and then brakeline is on the Exocet chassis. Plently of room for clips on the ppf, I used plumbing fittings for the rubber fuel hose, worked a treat  Rich Is it IVA OK to use rubber for the entire length of the fuel hoses? |
|
|
|
Post by jgilbert on Dec 14, 2013 20:12:11 GMT
Hammy, I've looked through the IVA manual and can't find anything to say it can't be done. Clearly you have to used 'rated' hose and support it adequately. The CBS catalogue recommends fixings every 8" for brake pipe I've applied this to the fuel hose as well.
Hope this helps.
|
|