|
|
Post by snowbird1 on Jan 8, 2014 3:41:32 GMT
John just email a flow chart for a miata engine hope it helps. click on pic or use keys Ctrl + to make large.. Looks like the BP engine relies on the coolant flow through the heater circuit for cooling to the rear cylinders. I considered fitting an auxiliary radiator but then it would need it's own thermostat to achieve even warm up, so we will keep it simple with a bypass hose. |
|
|
|
Post by snowbird1 on Jan 8, 2014 3:24:01 GMT
Have you done away with ABS? Yes, I had already plumbed it for the UK - non ABS donor. Not sure how well it would work, the manufacturer calibrates the system for vehicle weight and tyre size so the operation would be compromised on the Replicar. Having said that it looks like a fairly basic system, 3 channel operation even though it has 4 sensors so it may not be that sensitive. |
|
|
|
Post by snowbird1 on Jan 6, 2014 14:24:43 GMT
I've been offered an Alfa Romeo Milano, apparently a nice car until a tree fell on it! I don't have the facilitys to do anything with it but the specs are interesting - torsion bar suspension, rear transaxle and a De Dion axle, similar specs to the original DBR1 but with a V6 rather than an I6. Does anyone know of any kits that use the Alfa Milano/75 donor?
|
|
|
|
Post by snowbird1 on Jan 6, 2014 14:12:00 GMT
I agree with Paul about not removing material, I use a sharp punch to start a hole then open it up to the required tapping size with a tapered drift, if the material is too thick to punch - drill a small hole then open it up. If you want to sound professional the process is called swaging. Remember to coat the threads with a rust preventer like HS2000 or Dinitrol.
|
|
|
|
Post by snowbird1 on Dec 30, 2013 15:34:16 GMT
I’ve been trying to figure out the coolant flow on the MX5 engine, in most engines the coolant is pumped through the cylinder block then up to the cylinder head through large ports in the rear and forward to the thermostat housing.
Without taking the head off I’m not sure of the flow path on the MX5, apparently it is similar the transverse Protege engine that has the thermostat at the rear of the cylinder head.
It appears the Miata has continuous coolant flow from the rear of the head, bypassing the radiator and then the thermostat controlled flow through the radiator. On many engines the bypass flow is closed off when the thermostat opens.
|
|
|
|
Post by snowbird1 on Dec 28, 2013 14:58:49 GMT
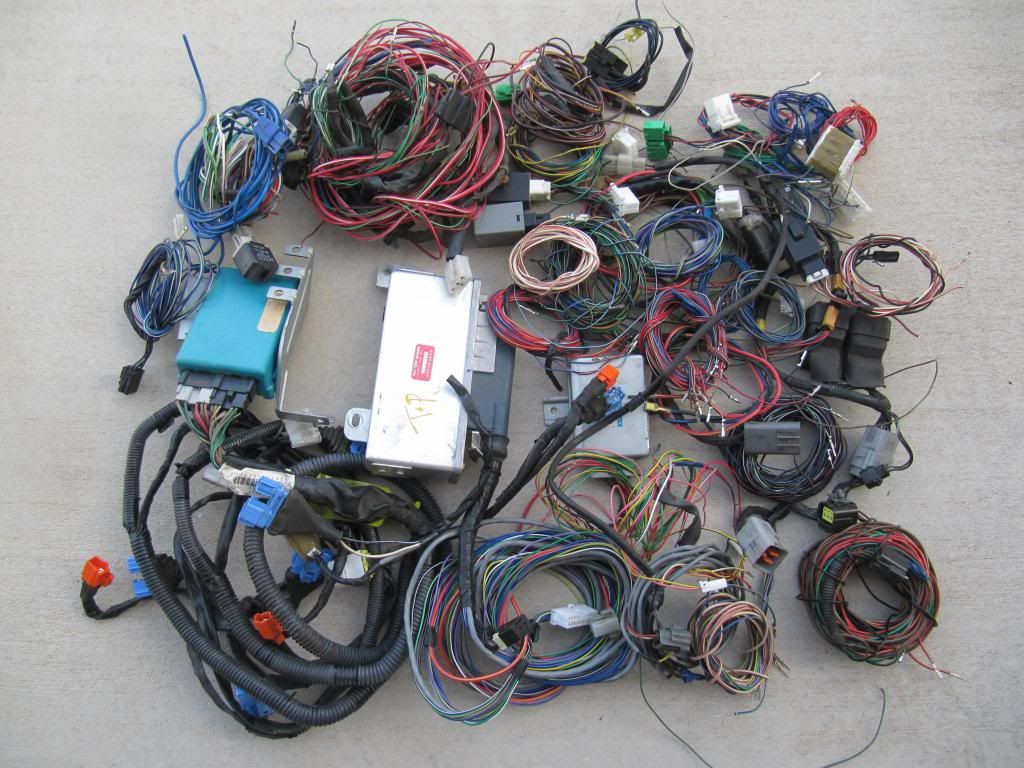
A bit of progress to report, it has been unusually cold and windy in the valley this month, I’ve been working with the garage door closed and not much light (I know – excuses excuses!). Working on the wiring; the car now has a RHD body and dash harness plus a NAS engine harness. A couple of kilos of stripped out wiring:
Still looking a positioning of components, fuse boxes, relays, solenoids etc. Trying body position – I want it to sit as low as possible but need room for the dash so may have to lower the steering column. That means I need to get the seat so I can check knee clearance, I’m looking at a pair of Kirkey vintage class bucket seats.
Also been checking the engine, not doing a full overhaul at the moment, the timing belt cover was missing some bolts, spacers and gaskets, parts of it had been rubbing on the timing belt and in other places it had rubbed through on the water pump belt.
I’m trying to decide if I should blank off the heater connections or fit a bypass hose. I think there should be enough coolant flow through the oil cooler/ISC circuit to operate the thermostat without the heater flow.
Has anyone seen a problem running with the heater circuit blanked off?
|
|
|
|
Post by snowbird1 on Dec 4, 2013 14:32:22 GMT
Thanks Pat, I thought of using the rope and pulley system, my garage in Wales has nice big beams and I can lift a complete car on them, the AZ house is a modern stick built place - I wouldn't want to hang much more then a bicycle from the ceiling here!
The body can sit on the saw horses for now. BTW Lowes sells a folding steel saw horse the will support 1200lbs, I used them to support the car on my last build.
|
|
|
|
Post by snowbird1 on Nov 28, 2013 15:12:47 GMT
Nice work there, good to see you kept the EVAPS system in place, basically that traps the raw hydrocarbon fumes coming of the tank in the carbon canister then burns it off when the engine goes into closed loop. Note that the fuel filler and cap are also part of the system, have you thought about filler mounting, I'm thinking of hiding it behind the dummy headrest.
Nice installation on the ABS, they are calibrated for vehicle weight and tyre size, I'll be interested to see how it works on the Replicar.
|
|
|
|
Post by snowbird1 on Nov 27, 2013 15:17:54 GMT
Another couple of days to completion then? Dark green does look good particularly in the sun, rain and sleet here in NW Derbyshire. Nice job and pictures. Thanks for the encouragement guys, now the car is home and indoors I can relax a bit but need to keep the pressure on for completion this winter  . 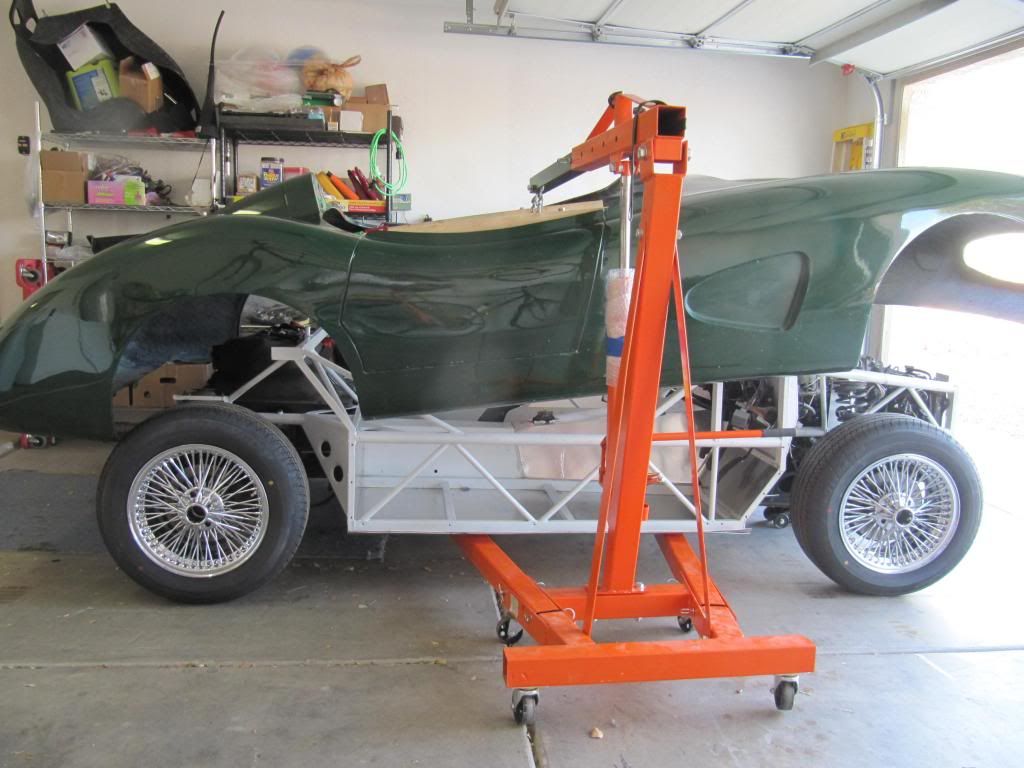 I made a crude 'H' frame so that I can pick up the body with the engine crane. 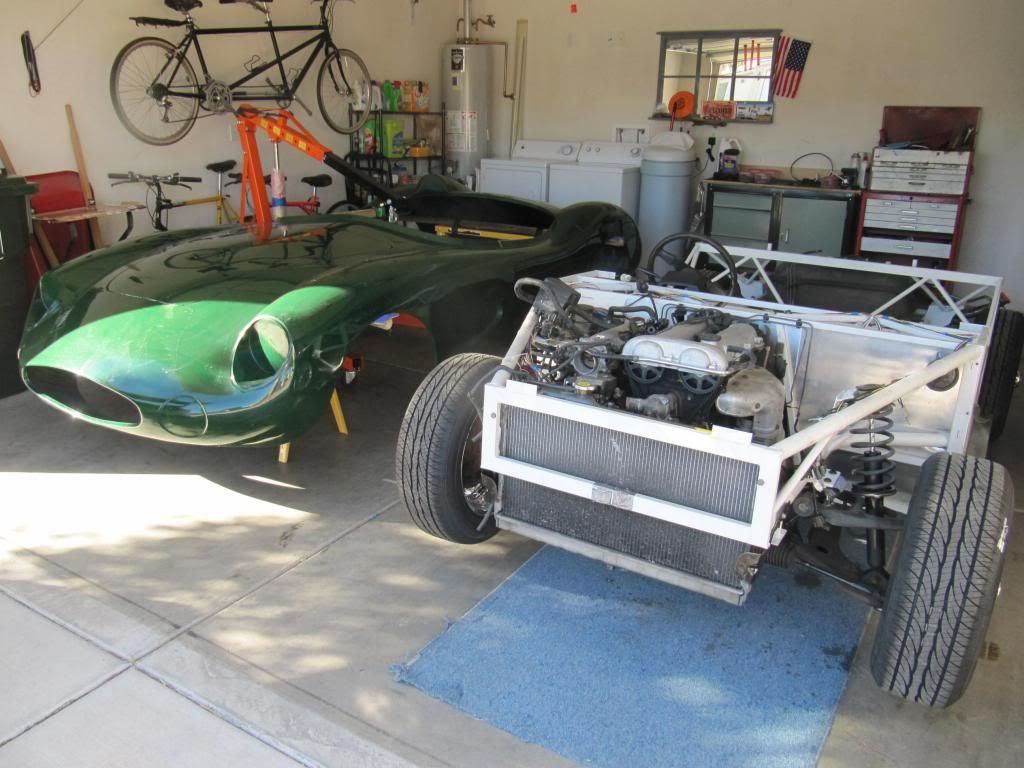 Two car garage is now a one car garage! The tin top will have to live outside for a while. |
|
|
|
Post by snowbird1 on Nov 22, 2013 18:30:37 GMT
Yep, clicking on the right icon, works fine first time, http is highlighted on the first line, second line is empty, http is automatically deleted when I paste the link and insert works fine. But if I try to insert a second image the 'Insert image' box has both lines filled with my text. Strangely if I exit the site then login again I can insert one more image but the same thing happens if I try to insert another image.
Is it just me??
|
|
|
|
Post by snowbird1 on Nov 22, 2013 15:22:48 GMT
Have the neighbors been over yet.. is the body bolted fast.. The tires fill the wheel wells just right and look good.. It certainly attracts attention, even on the trailer people were slowing down to look at it. Haven't bolted the body on yet, realize I need to do a basic geometry check before positioning the body relative to the wheels. Biggest challenge is what to do with the body whilst working on the chassis, I made a 'H' frame to fit in the c**kpit so I can lift it with the engine hoist. Thought of making it a tilt body, like a funny car, but it wouldn't work when the side panels are in place. Thinking of making a structure to support it about a meter above the chassis. |
|
|
|
Post by snowbird1 on Nov 21, 2013 14:33:54 GMT
Finally made it to Arizona, the Replicar's next journey should be under it's own power; 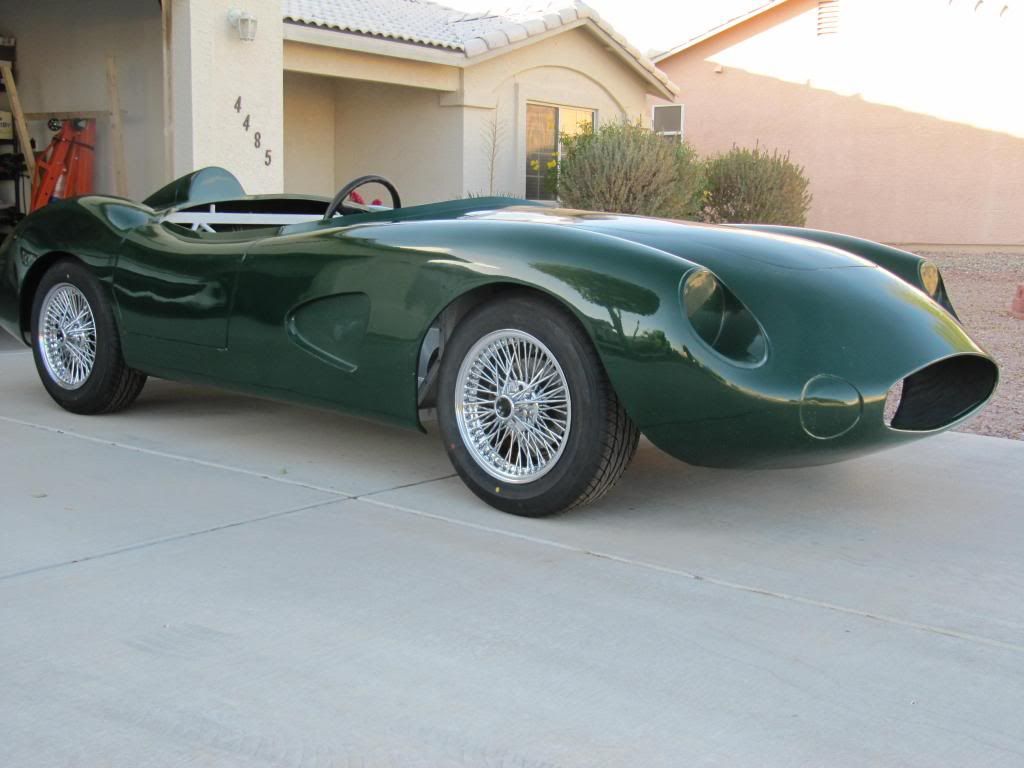 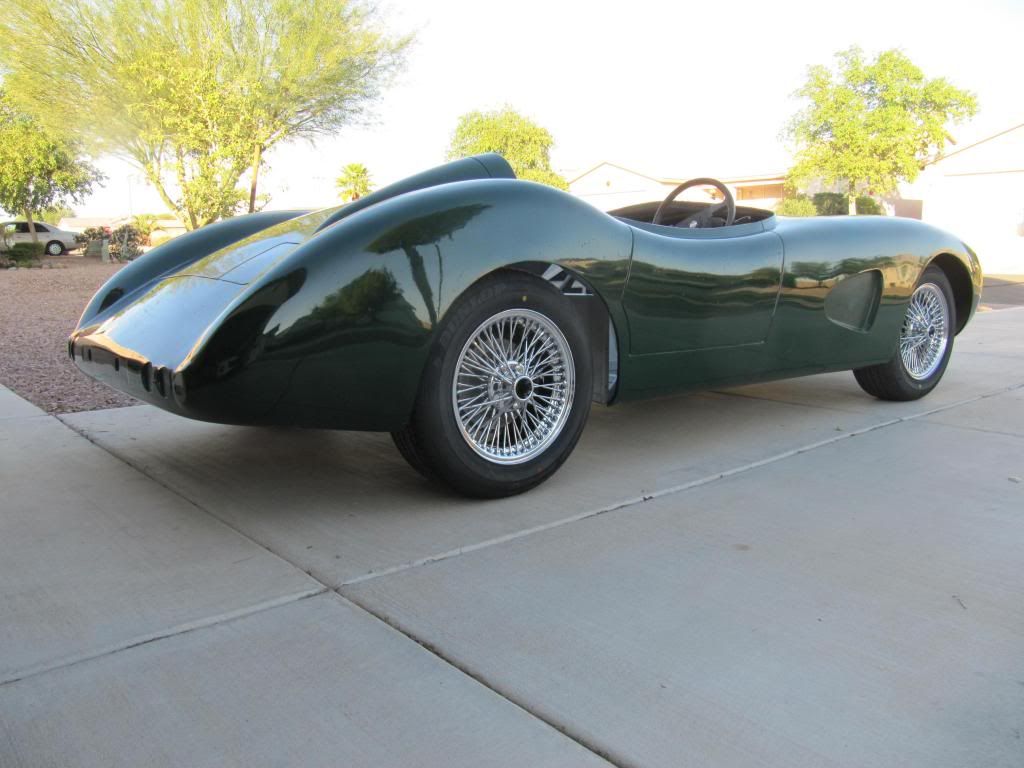 |
|
|
|
Post by snowbird1 on Nov 20, 2013 14:35:42 GMT
It must be me, I have no problem inserting the first image - 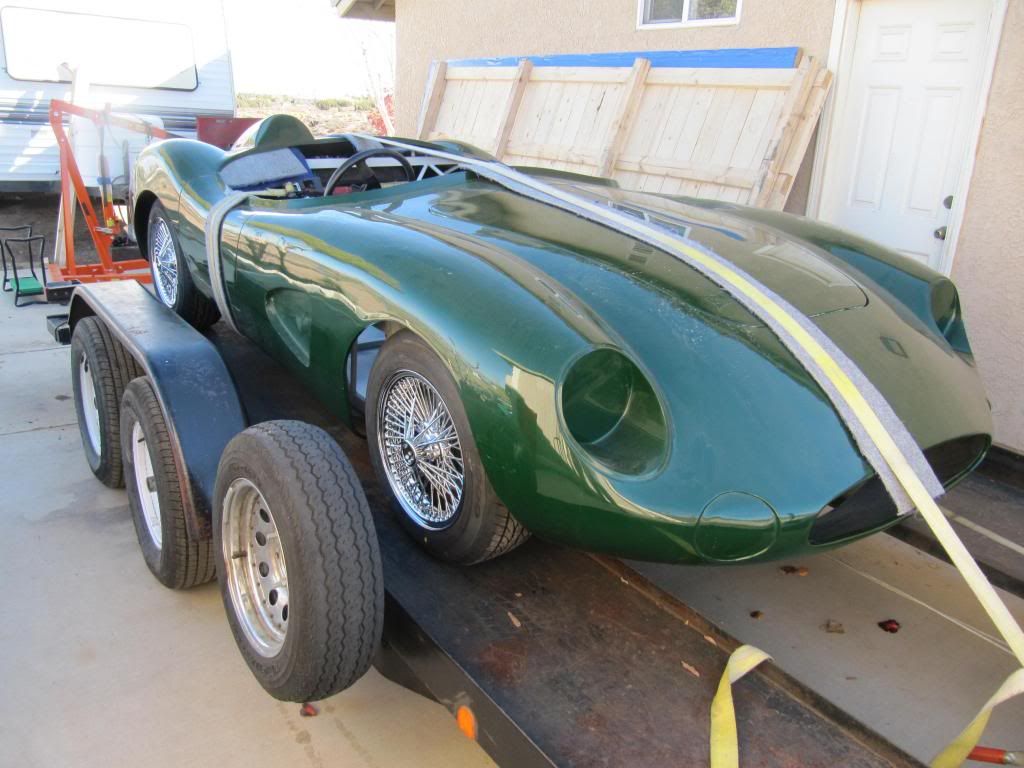 But if I try to insert a second image the 'insert image' box has both lines filled with the first lines of my text, if I try to delete them it deletes the text and first image from my post. 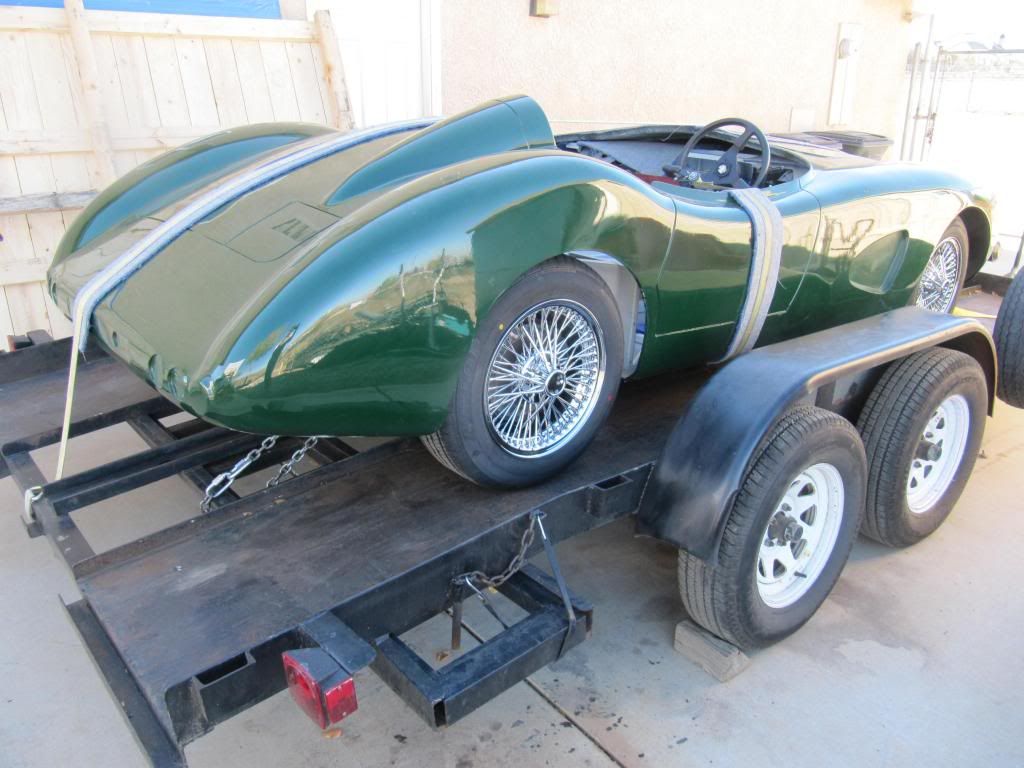 I seem to have found a work around; if I exit the site them login again, I can click 'edit' insert one more image. |
|
|
|
Post by snowbird1 on Nov 20, 2013 14:35:30 GMT
It must be me, I have no problem inserting the first image - But if I try to insert a second image the 'insert image' box has both lines filled with the first lines of my text, if I try to delete them it deletes the text and first image from my post. |
|
|
|
Post by snowbird1 on Nov 18, 2013 23:53:10 GMT
Good advice from 'gwnwar', one addition trick I found - there are 2 long studs on the front and rear sub frame mounts if the exposed thread is rusty, as they were on my UK donor, it makes thing a lot easier if you can clean the threads, I didn't have a 12mm fine thread cleaner so when I got one nut off a short stud I cut 4 groves in it and ran it up the exposed threads. Made things a little easier  . |
|


 .
. .
.