|
|
Post by dgibson on Oct 18, 2016 2:05:01 GMT
I like that solution. Thanks!
|
|
|
|
Post by dgibson on Oct 30, 2016 14:33:16 GMT
Ordered and received a couple of the quick latch things for the hood, and am installing them this weekend.
Added a USB power plug and accessory plug (formerly cigarette lighter) to the tunnel, and then added a mount for the NRG quick release steer wheel lock, so that when I take the steering wheel off, NRG has a little round puck that can be locked on to the steering hub.
Also added a mount for an iPad - which I either use with a BlueDriver bluetooth adaptor or a PLX KiWi wifi adapter.
To do this, had to take out the tunnel - which was tricky, but a bit of fiddling got it done.
Photos follow later today on the tunnel.
|
|
|
|
Post by dgibson on Oct 30, 2016 21:37:22 GMT
Got the hood/bonnet installed today. On Jack's Dad recommendation found some similar products in the US called Quik-Latch. Made some mounts for the pin, and Rivnuted them to the crossbar. if I was doing this again, I would have a few lugs and such welded to the frame before powdercoating. These photos can be found by following this link to Photobucket.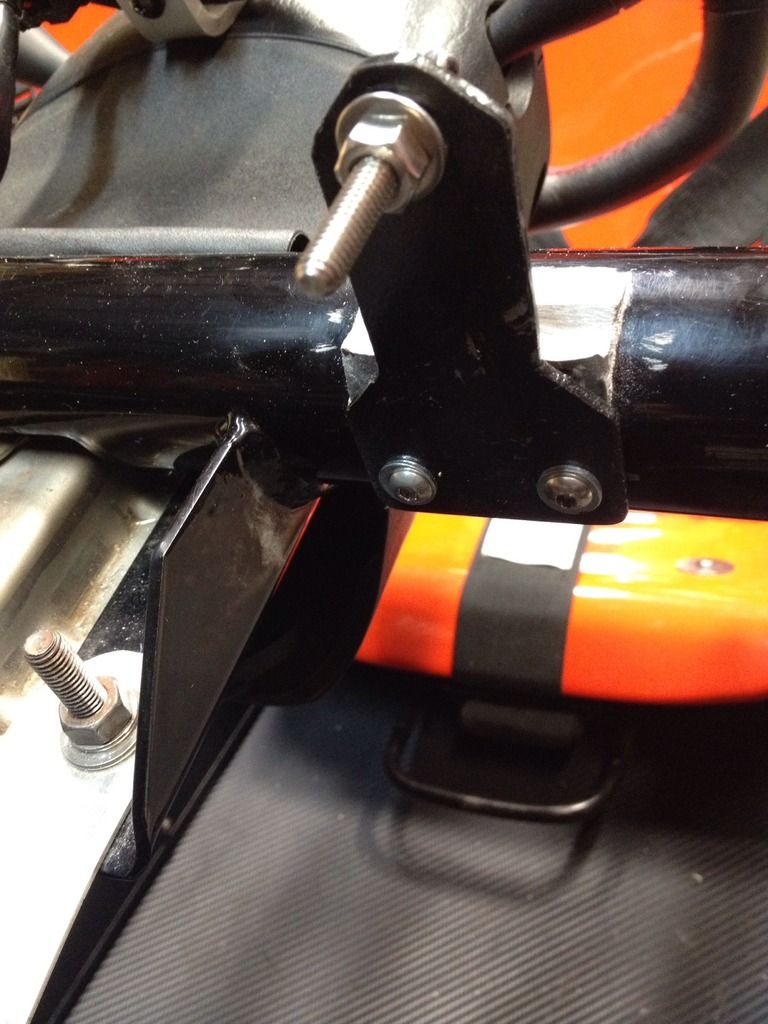 I mounted these first, and then used the pin location to identify the hole I need to drill in the hood dash area for the socket. The ugly black marker was me lying upside down attempting to get a center point for the pin once I had the hood lined up on the car. you can also see here the cut-out for the mount, so the hood can open about 30 degrees or so without taking off the pins. 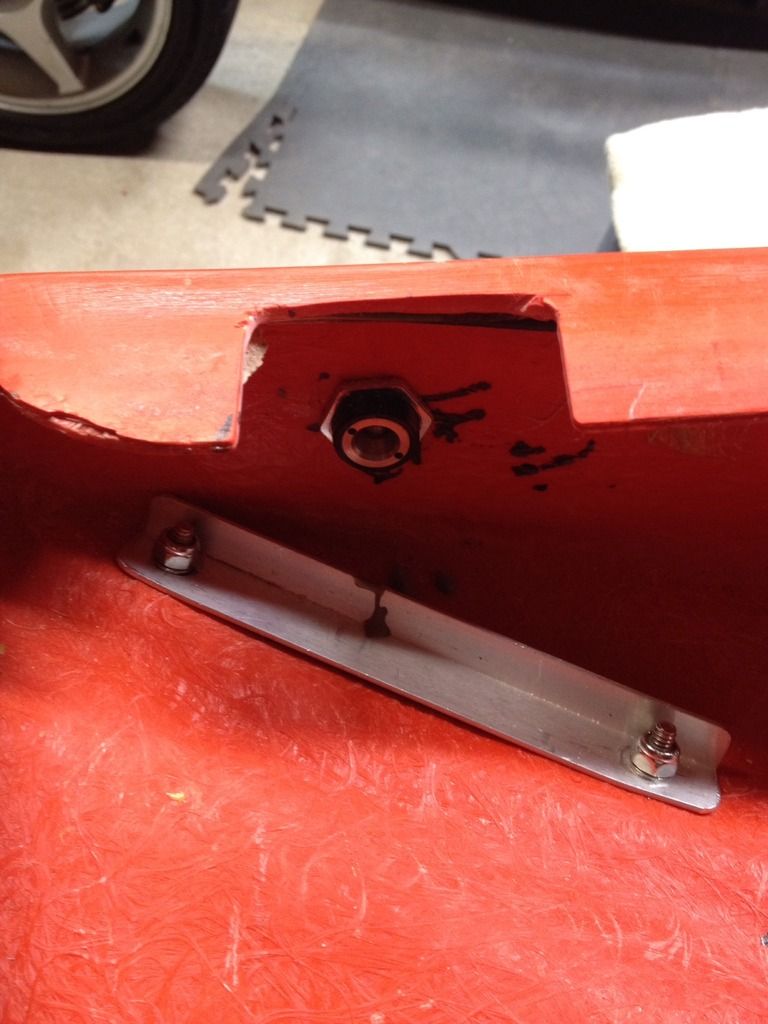 Next was finishing up the tunnel, a 12v aux (previously known as a cigarette lighter!) a USB power socket, an i-Pad mount for the i-Pad used with the OBDI adapter, and the NRG steering wheel lock device. When you remove the steering wheel, you put this on the steering shaft so no-one can drive the car away with another steering wheel. (silly, but it looks pretty anyway!) 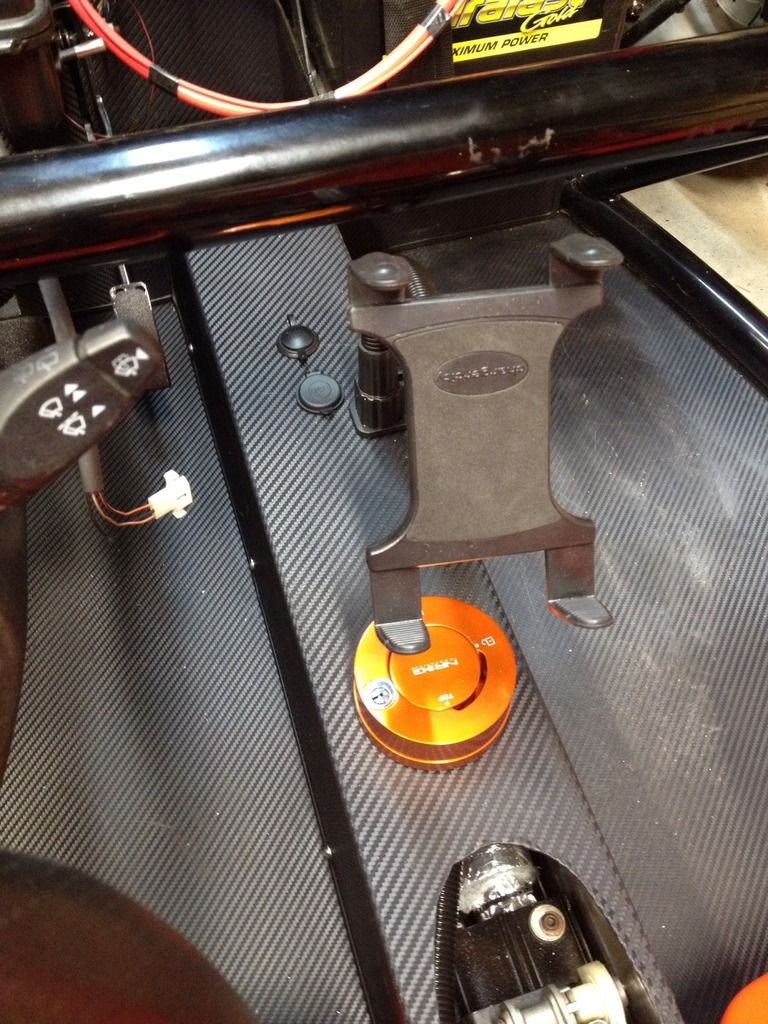 Along the lines of security, I had put the wiring in place from the computer PATS/Anti-Theft light, and found a blinking 12v LED at my local big box electronics store. Works perfectly, sits there and blinks with the engine off, and then when the engine is started, it turns itself off. 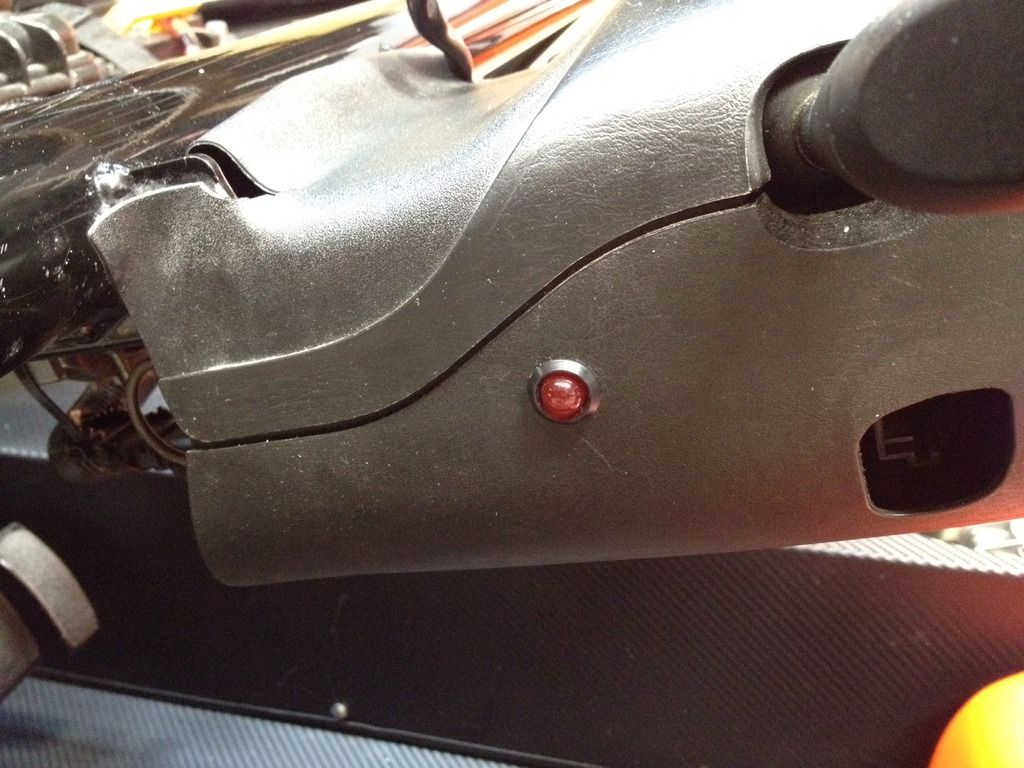 overall - a pretty good weekend! Still have a long list of things to finish up at the back of the car - Firewall - put electronics in a waterproof box and tidy up the wiring through the firewall - Transmission mount - with the engine aligned to the frame the standard mount does not fit well, so needs something done - Engine Cover and third brake light. I might do a light bar for indicators/third brake light and reverse as well. |
|
|
|
Post by dgibson on Oct 30, 2016 22:58:11 GMT
The color is a little off/washed out from the shop lights above, this is the Quik-Latch installed 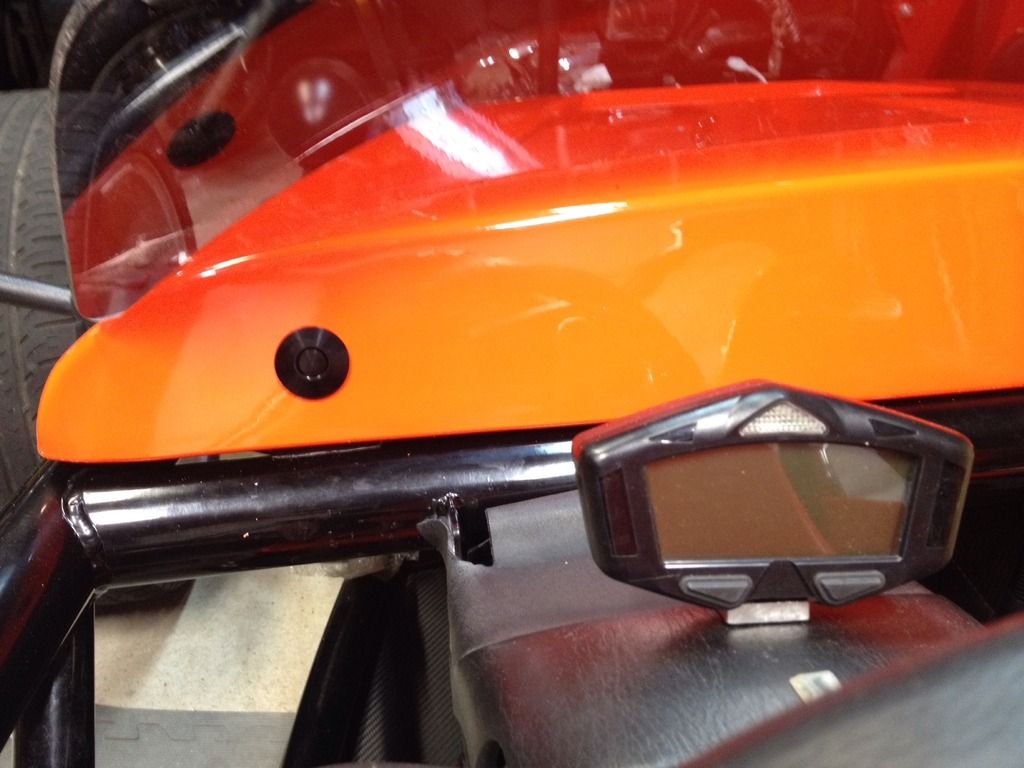 I finally took the plastic wrap off the wind deflector (it's not really a windshield as far I can tell) |
|
|
|
Post by dgibson on Nov 28, 2016 13:44:39 GMT
Spend part of this Thanksgiving weekend working on the car. Spent ages pondering how to make this simple bracket for the Coolant Overflow tank. and mounted it to the Engine Transmission mount. 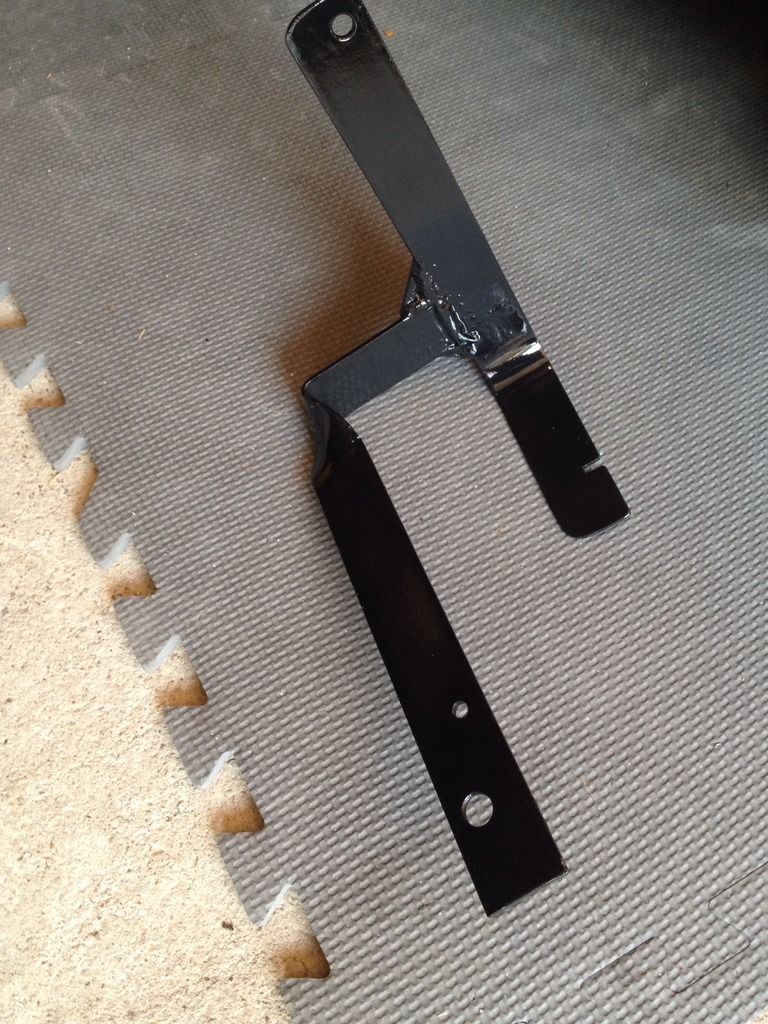 The black paint hides my terrible welding skills! The tank is an odd shape, so the bracket itself is bent at an angle, but fits well. You can see the slot just above the transmission mount in this image. 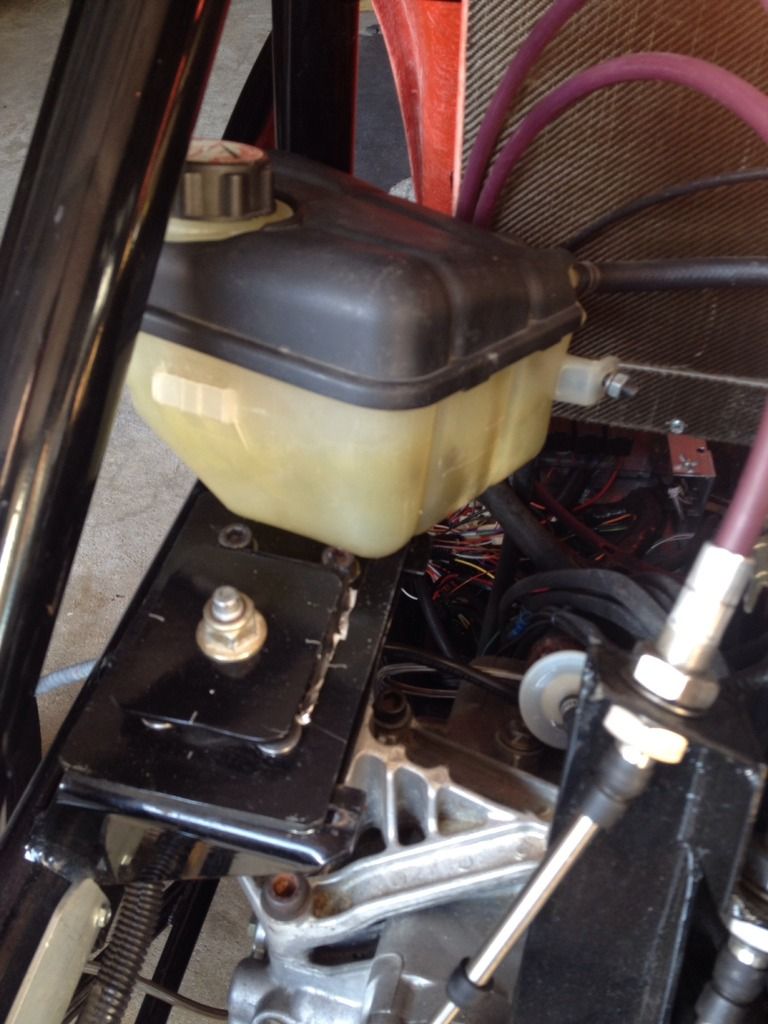 Here is a slightly fuzzy photo of it installed. 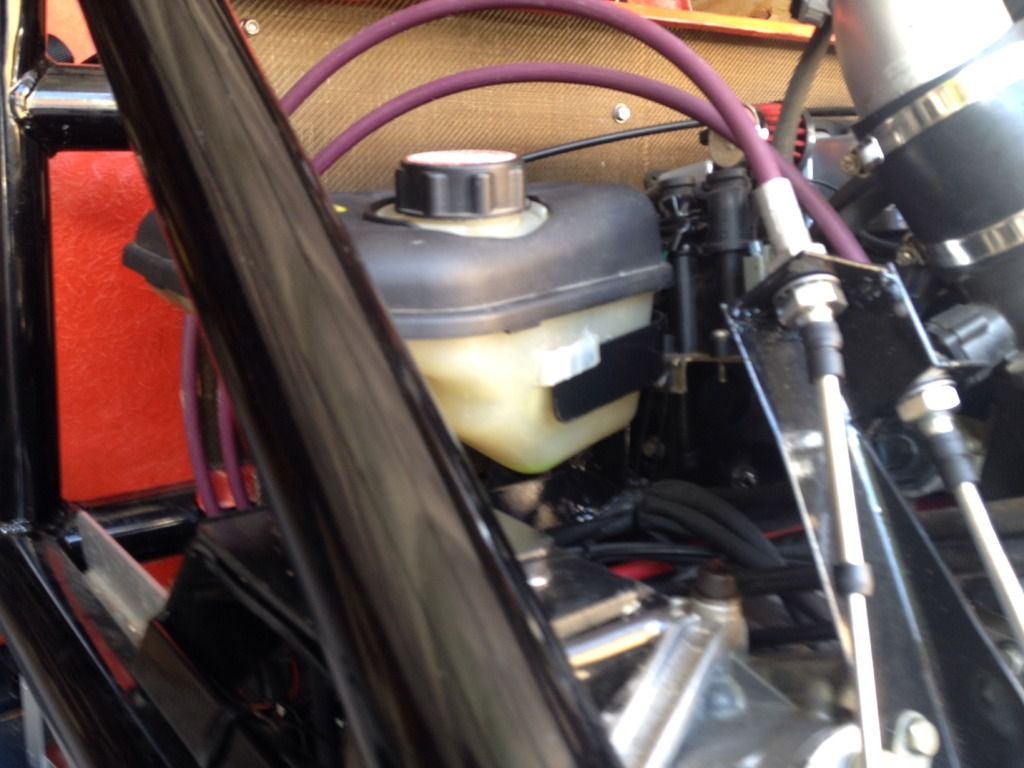 |
|
|
|
Post by dgibson on Feb 12, 2017 23:45:02 GMT
On to the Firewall - something I should have done long ago. We did put a heat shield by the headers, as there is a lot of heat coming out from the headers, and it is VERY close to the fuel filler hose and the fuel tank itself. Used some LavaMat - a heat shield cloth that self sticks to aluminium, and then used some Pyrogel XT material, used for insulating pipes, and we have a heat shield that on one side is the exhaust pipe, and I can put my hand on the other side of the heatshield and it is barely warm. Also was over helping Dr Brian on his Sonic - he has made a lot of progress, such that we are working on the upholstery.  Back to the Rocket - cutting and fitting the firewall is a challenge and required a lot if fiddling around and nibbling here and there. With so much heat, and no room I decided to make the firewall vertical with some short wings to bend back at an angle under the side. This gives some space for the hoses and wiring, to keep it away from the headers. Spent a lot of time measuring, made some cardboard templates, and then cut out everything oversized to then cut it down to final size by continual fitting and marking and cutting some more. 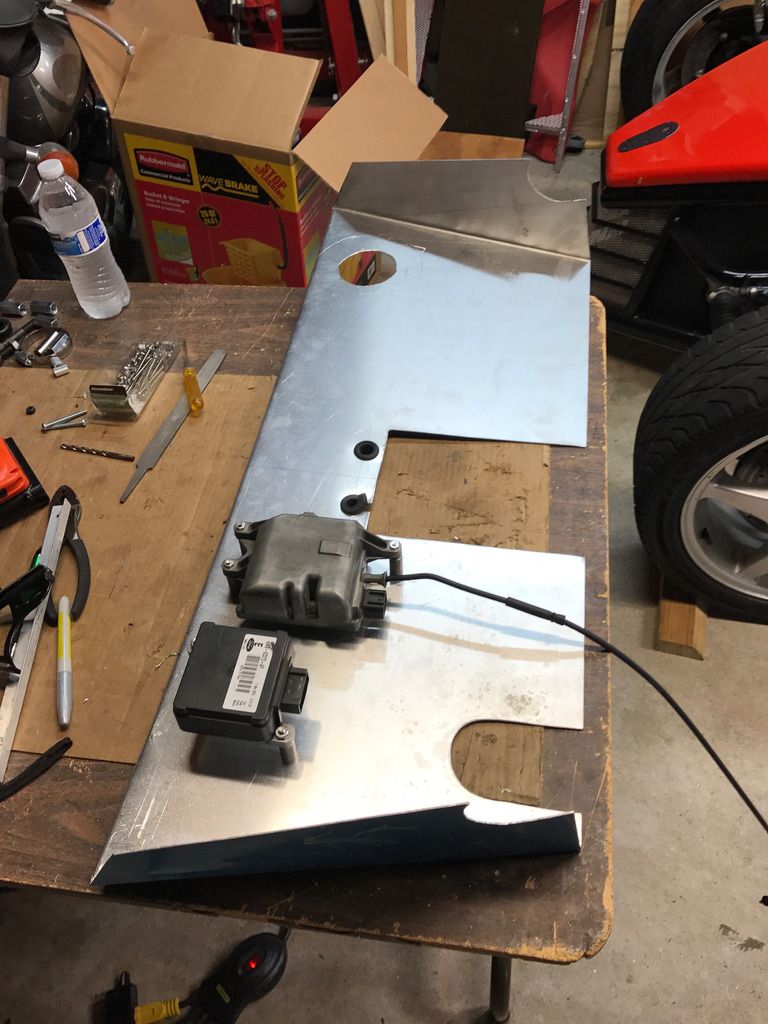 I mounted the Fuel Pump Computer and IMRC Controller (Dual Intake Manifold runner control) up high on the back side of the firewall, with some spacers for the heat and the Pyrogel XT insulation. Few holes here and there for the Fuel Pump wiring and fuel hose, the fuel hose for the gas/petrol tank, and perhaps too big a hole for all the wiring from the engine and other wiring to come on the inside of the firewall. Is there an 'inside' of a Rocket - not really sure? 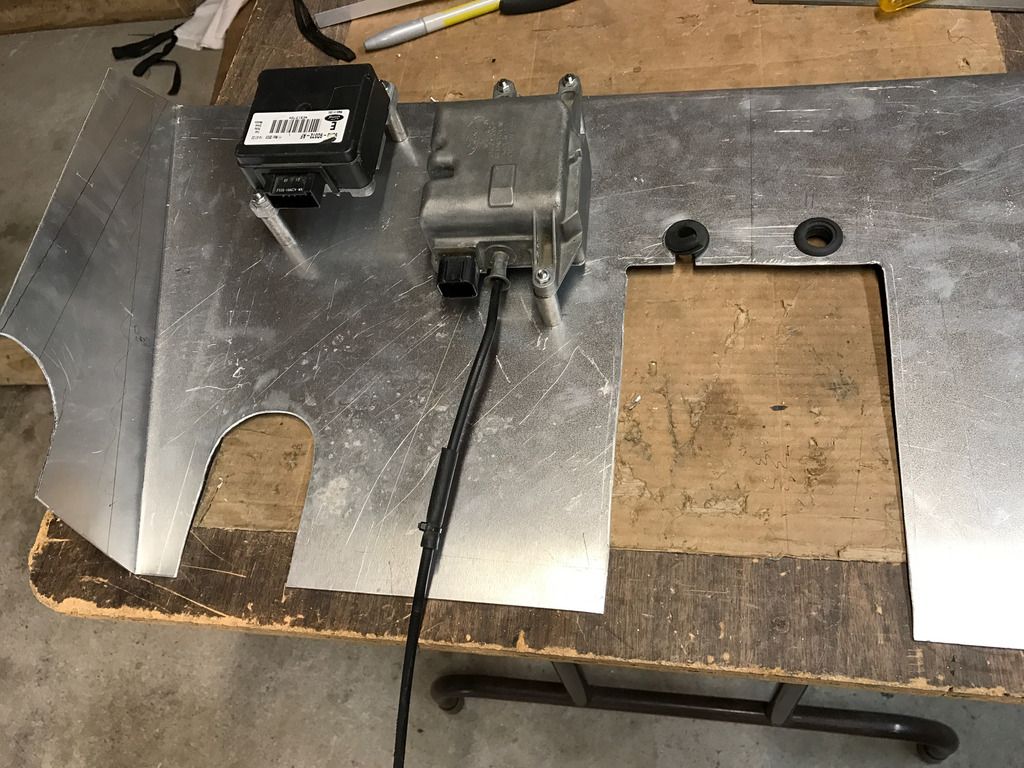 Should be able to wrap this up next weekend. and then reinstall the seats, gas/petrol tank and tunnel portion that is missing. Also, while I had the seats out - spraypainted the backs of the unfinished fibreglass with paint that matches the Orange-Red of the hood and polished all the fibreglass on the shiny side. Have decided to shorten up the hand brake cables as well - there are some good instructions from Petex and there are others found on the web. |
|
|
|
Post by dgibson on Sept 11, 2017 0:25:39 GMT
Been away for a bit - rolling out an SAP (software) implementation. Emissions controls are now required in Texas to register a kit. So, went off to the junk yard to find the needed bits and pieces. it would have been cheap to buy the parts, but the connectors would have killed it. A few hours in a pick-a-part junk yard and I came away with the Evap Canister Purge valve and connectors, the Evap Canister Vent valve, and the evap canister itself (buried up under the rear axel) and the Fuel Tank Vacuum sensor (on TOP of the tank, which meant I had to drop the fuel tank) . Decided to mount it under the Coolant Tank - there is a bit of space there. The Fuel Tank Vacuum sensor fits nicely on the original tank mount for the Fuel pump. Checked all the wiring - twice - the Fuel tank vacuum sensor has two modes of wiring - so check you model carefully. Some pictures posted on this link to PhotoBucket until I can find where to put them. Started the engine - runs smoothly. Need to get it on the road to burn out the kinks. Next Step is a Cat Converter - I have a small one, just need to figure out how to make it fit! |
|
|
|
Post by dgibson on May 4, 2019 23:44:12 GMT
Well, am back after a bit of a break. SAP is up and running! So back to the fun stuff. Catalytic converter and O2 sensors installed.
|
|
|
|
Post by dgibson on Jun 11, 2019 1:31:22 GMT
Off to get an engine inspection on Wednesday to check the engine was bought fair and square.
I have a list of all the current forms required so we will see how it goes!
|
|
|
|
Post by dgibson on Jun 13, 2019 1:41:16 GMT
Texas requirements for title/registration from the TXDOT Assembled and Rebuilt Vehicle manual - you can find it on line
2.1 Application for Title and Supporting Documentation There are two types of assembled vehicles covered in this section. Common items needed to support an
Form 130-U Application for Texas Title and/or Registration (Form 130-U)
Form VTR-64 ASE Safety Inspection for Assembled Vehicles performed by an ASE Certified Master Technician
PRINTOUT ASE Certification Status The printout of the master technician’s ASE Certification Status, showing the master technician has the required A1 through A8 certifications.
Form VTR-63 Title, bill of sale, or Component Part(s) Bill of Sale (Form VTR-63) covering each component part (motor, frame, and body, if applicable) showing on each respective bill of sale the motor number, frame number, and/or body number
Form VTR-61 Rebuilt Vehicle Statement (Form VTR-61); • VIN verification in the form of a pencil tracing or photograph of the frame number, body number, and motor number, as applicable, or a Law EnforcementIdentification Number Inspection (Form VTR-68-A)
Form VTR-68-A Law Enforcement Identification Number Inspection
Form VTR-68-N If an assigned number is obtained, the Notice of Assigned or Reassigned
Identification Number
If an assigned number is obtained, a photocopy of the Law Enforcement Identification Number Inspection (Form VTR-68-A); •
Photograph of the vehicle:
Certified weight certificate:
A current TxDPS vehicle safety inspection (unless eligible and applying for Custom Vehicle or Street Rod license plates, exempt from a vehicle safety inspection, or not obtaining registration);
If the vehicle was previously titled in another state, a Vehicle Inspection Report,
Law Enforcement Identification Number Inspection (Form VTR-68-A), or Vehicle Identification Number Certification (Form VTR-270); •
Vehicle Identification Number Certification (Form VTR-270) can only be used if the applicant is able to certify one of the reasons on the form. Additionally, the record will be marked VIN CERTIFICATION WAIVED. •
FORM Proof of insurance valid proof of financial responsibility covering the described vehicle in the applicant's name
|
|
|
|
Post by dgibson on Jun 13, 2019 1:45:23 GMT
Today I got my
VTR-68 A (Law enforcement number inspection Engine and Frame number)
Certified Weight (from a TXDOT Certified Scale at a nearby truck stop) 1360 lbs. or 617KG -
of course I have photos!
and Proof of insurance.
As a bonus, I found with the insurance and my drivers license I was able to get temporary 30 day plates to let me drive from place to place!
Next week I have the ASE Certified mechanic inspection and TX vehicle safety inspection!
Almost ready to go for a title!
|
|
|
|
Post by dgibson on Jun 13, 2019 2:06:34 GMT
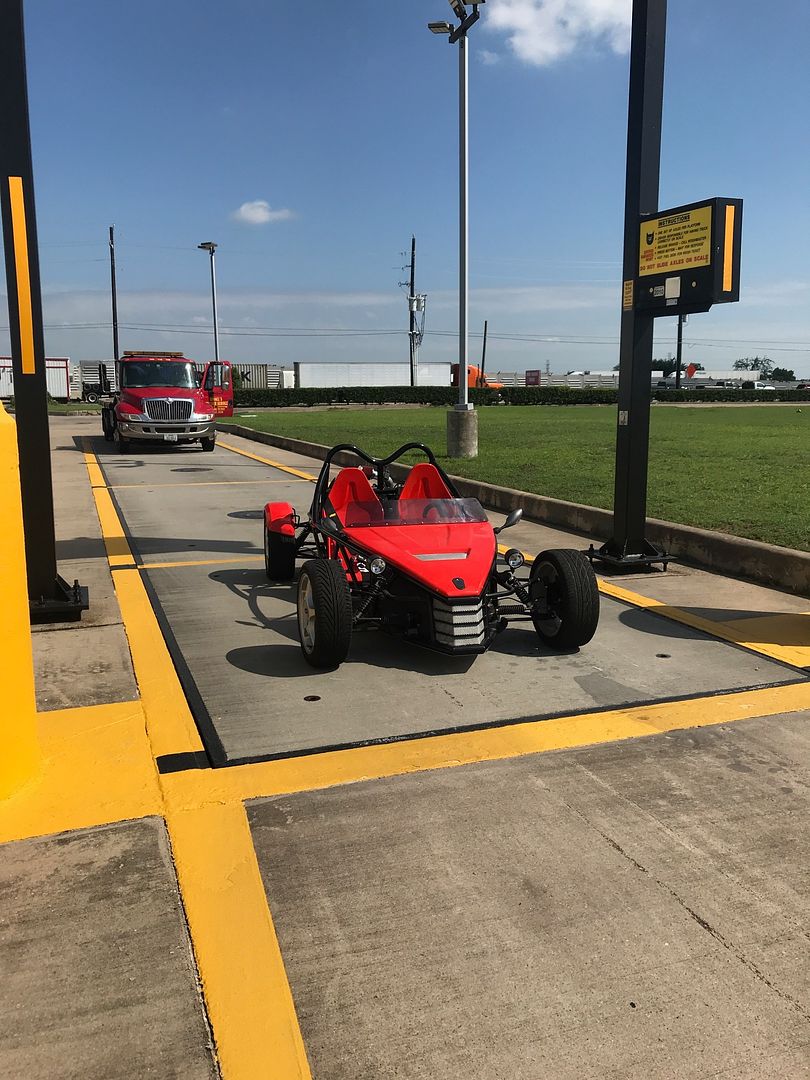 To get the certified weight, I found a certified scale at a truckstop in Rosenburg TX. As the scale had a minimum weight of 2000lbs I put a flat bed wrecker truck on the back scales to trigger the scale to read. |
|
|
|
Post by dgibson on Jul 22, 2019 2:19:14 GMT
I removed the fuel pump to do some work on the gas tank and while I was there switched the fuel level sender to work the other way to satisfy my Koso guages. the normal fuel wire is yellow on the bottom of the sender, and I switched it to be at the top. so now minimum resistance is full and max resistance (about 178 ohms or so) is empty. instead of the other way around. be very gentle with taking the plastic cover off the sender, it is just clipped in, and so much time sitting in fuel probably means it is a bit brittle/weak. 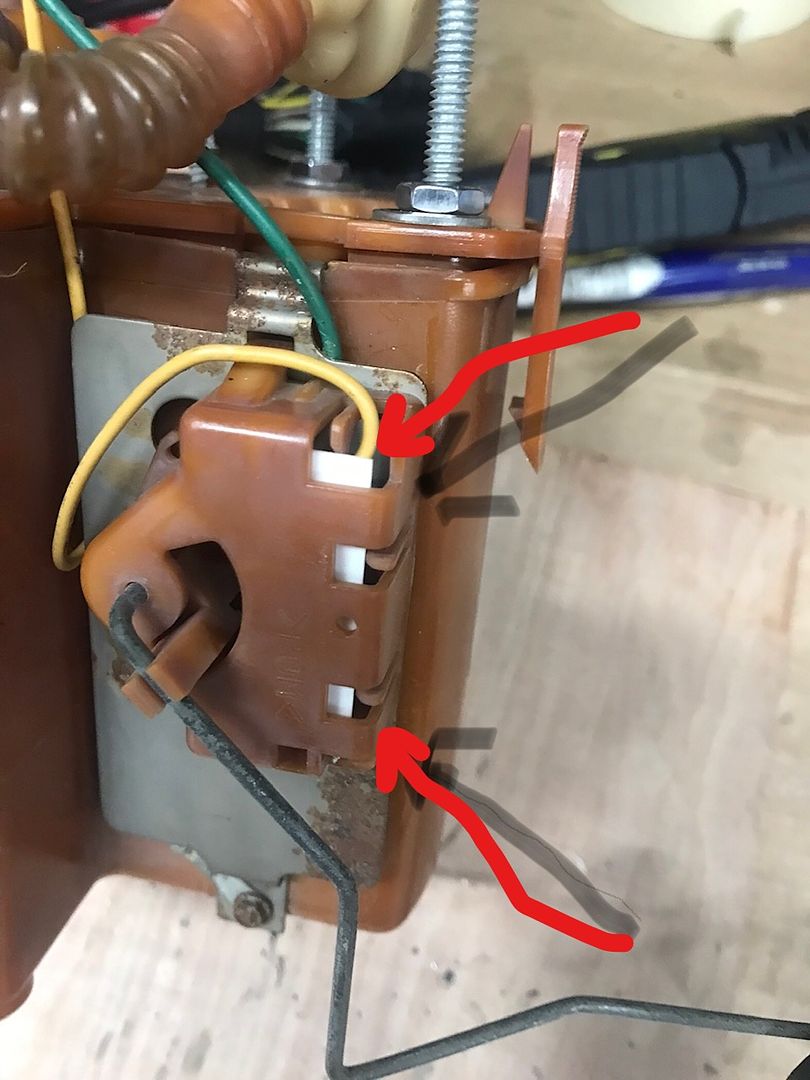 |
|
|
|
Post by dgibson on Mar 21, 2022 17:21:11 GMT
The Rocket is titled and on the road in South Texas with a 2019 Assembled Vehicle title. Have a couple of P codes that I cannot seem to clear, but am able to get an inspection and a low mileage waiver (less than 5k miles/year). Just have to take it to a specific DPS inspection station, and show I spent at least 100 USD on parts.
Has four P codes
P0107 Manifold Abs pressure /Low input
P0113 Intake Air Temp High input
P0193 Fuel Rail Pressure Sensor High input
P0453 Evap Emission Control Pressure Sensor High Input
Changed the applicable parts, and checked the resistance/engine wiring, it seems to be OK, but still get the codes.
|
|
|
|
Post by dgibson on Mar 30, 2022 15:26:59 GMT
A few short videos
Cold Start and short drive up and down the street
Up and down the street
Walk Around
Lights and Indicators
Engine Bay
|
|

