Wow, back after about 6 months away! - some medical conditions all resolved now, and some family things - now getting back to the Rocket.
Pete Dove was kind enough to send out some very useful information on the new TXDOT regulations on registration. Not quite there yet, but much closer.
Was looking at my IMRC Control module (I have a Focus 2003 SVT Donor with the dual runner intake assembly) and I could not find the plug any where in my stack of electrical donor stuff.
Finally found the plug on line, it is a Motorcraft WPT-455 - six pins. Now just have to figure out the wiring.
“Life is not a journey to the grave with the intention of arriving safely in a pretty and well-preserved body. But rather, to skid in broadside, thoroughly used up, totally worn out, and loudly proclaiming .... WOW what a ride.”
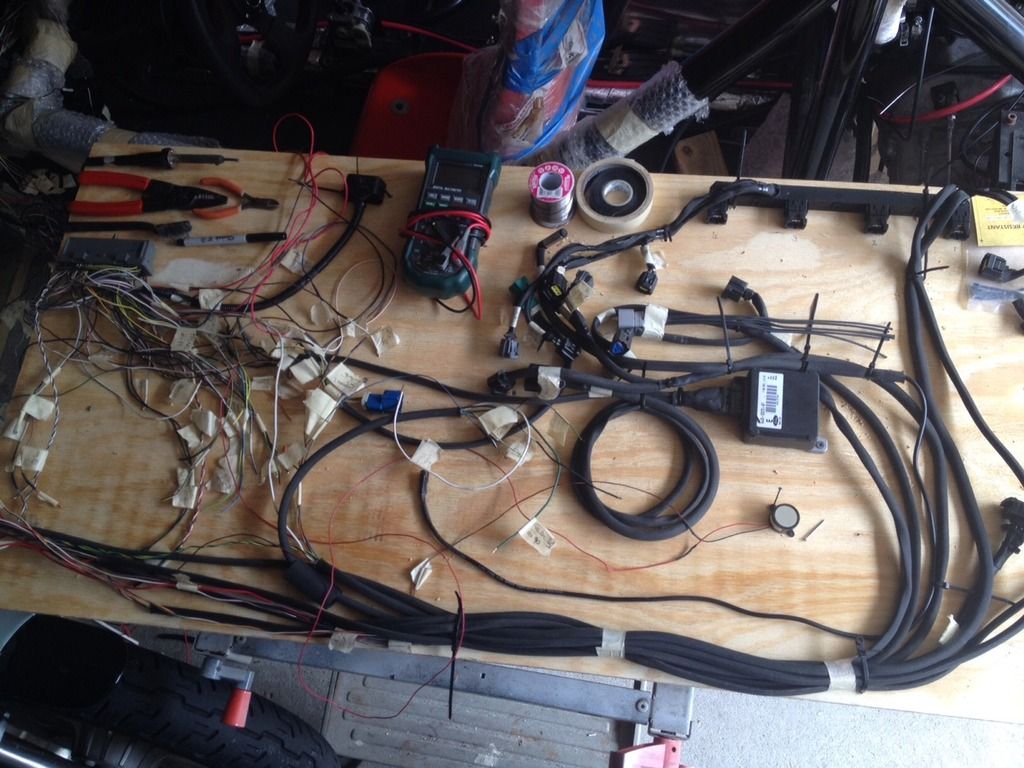
Rather than attempt to wire the engine harness on the engine, I labeled everything and removed the harness from the engine. Then mounted it on a board, and am in the process of pinning out all the connectors to the appropriate wire, label it, and then wire to the ECU connector (104 pins). There is also constant 12v, switched 12v and ground wires. The continuity tester on the meter beeps when I have the right pin/plug. I have found one of the wife's needles is perfect for the female plugs, rather than pushing the tester probe into the connector. Bit tedious, but with the Ford Focus electrical manual, it is not too bad.
Just about done with the engine harness - could not do it without a manual, and a lot of photocopies of the appropriate pages. Double check the pins from the connectors to ECU plug. Then leave it for a couple of days and go back and do it again, just to be sure. Had two pins on my Fuel rail pressure sensor reversed - that was a pain to fix, but these ones have to be right!. Now, just have to find the other end of the Cam sensor! - one pin is perfect, but the other one is not yet found!.
I have an engine relay board already built and tested. and need one more connector for the PATS and some other engine wiring that goes to the front - so I want that to be a plug, so the engine harness can be removed.
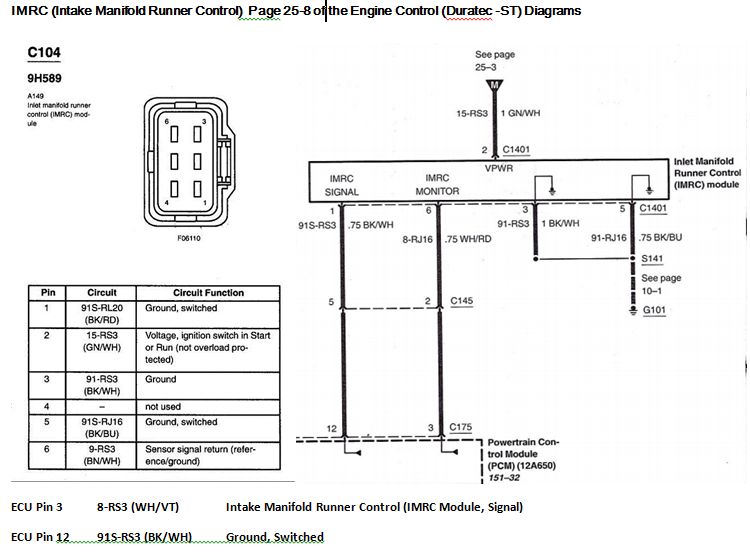
Spent some time over with DrBrian on his Sonic - very productive morning - he got his engine running this morning. And then it died!! He figured it out this morning - we put a plug in the gas tank as it did not have a cap in place, and the plug was airtight - so it was pulling a vacuum. He called this morning, and I heard the sweet sound of Vroom, Vroom. This was VERY encouraging, and got me back on track working on the ECU wiring. One last time through, and I found the details on my IMRC (Intake Manifold Runner Control), the Plug is not shown in the standard manual, but I found it on a focus SVT enthusiast site. so I put this together with the COnnector, the Module (on page 25-8 of the Engine Control Duratec-ST) Diagram, and the ECU pin details all on one diagram. Pin 2 of the module is to 12V via the Power Hold Relay with a 10A fuse.
ok, the weather is great - mid 72F (22C) so back out to the car. Continue to go through the wiring diagrams, and endlessly testing the Harness vs. the diagrams. I am now at the point of wiring in the relays for the engine panel, and double checking my front to back wiring. The PATS controller, and the Start switch are the two needed to get the engine running - but while I am at it, the tach signal (Pin 48), the temperature sensor, Speed sensor wiring, everything needed at the front, is now wired!.
During this, I was turning the key into Start/Run numerous times to ensure the right continuity. (all this with the continuity setting on my multimeter as I did not want to blow anything up just yet.)
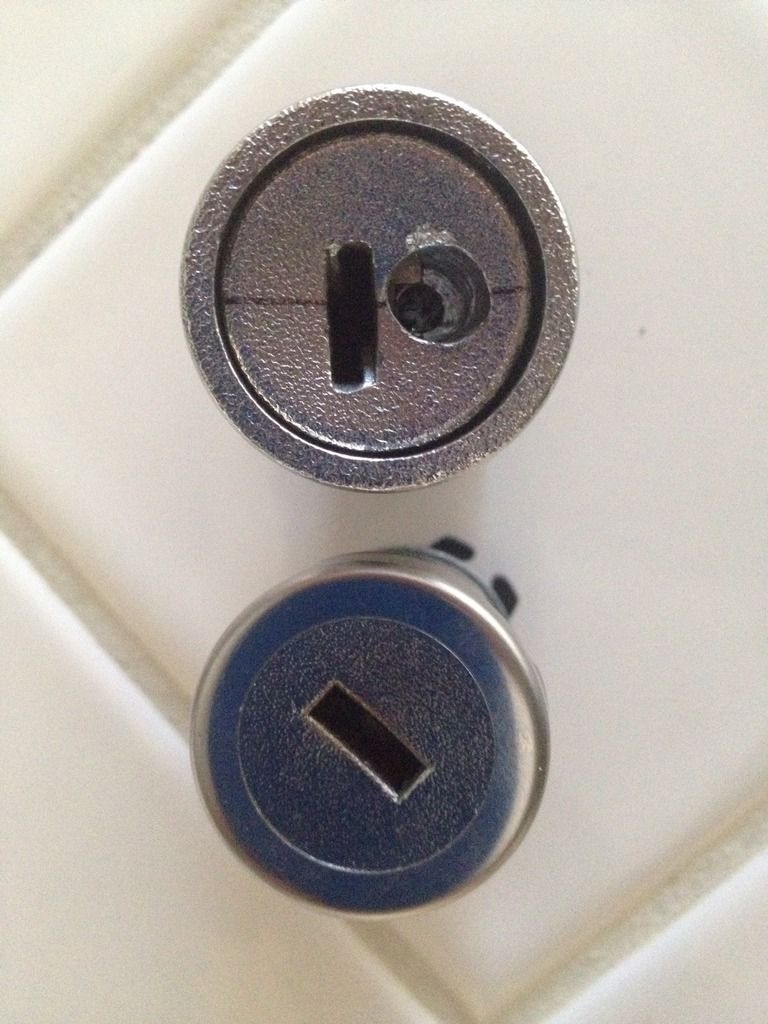
Now, my key does not turn in the lock! Apparently a well known problem with 2003 Foci. Looked around on the net and came across some very good resources on what was needed, and what to do.
Ordered a "Strattec part number 707592" Lock Cylinder" and then an online video on how to build the cylinder using my original key so no need to recode the key.
Back to the Rocket with perfect weather in Houston. The lock cylinder arrived last night - it was keyed already to my key, I sent them a photo and they even cut a dummy key - very good of them to do so. Followed the instructions on drilling out the cylinder, although it was more like 10mm down from the key slot and not 3mm. took my time, drilled in 35mm (1.37in) starting with a small bit and working out to a 10mm or so bit. the bit jammed every now and then, and on one of these jammings, bump, the cylinder turned and could extract it. the new one slipped right in. If you are in the US and need a new lock cylinder - the guys can be highly recommended! PM me for the details.
Started building a little aluminum bracket for the ECU, Fuel Pump controller and IRCM controller and the engine relays.
Took a deep breath and reinstalled the wiring harness after checking each and every connection against the manual at least four times (photocopies with different color check marks). With what amounts to a hand built harness better to check it several times.
Dr Brian swung by today and bought back the fuel tank we used to get his car up and running a few months back. He has be busy with other things since then.
He suggested I have a pre-starting checklist - will work something up this week so I can check things off the list next weekend.
My suggestion for top of the pre-start list is that the Crank Position Sensor is in the correct place.
It should be at the front of the engine (as installed in a Rocket) in a dark place which is both hard to see and find.
Not in the easily spotted somewhat obvious (but wrong) place at the back.
It was the only plug on my harness that has a choice of two positions and cost me a couple of very frustrating days.
“Life is not a journey to the grave with the intention of arriving safely in a pretty and well-preserved body. But rather, to skid in broadside, thoroughly used up, totally worn out, and loudly proclaiming .... WOW what a ride.”
Engine Oil in yesterday, Gearbox (Getrag 6 speed) oil changed this morning. Coolant plumbing finished up as well. Front of the car lifted about a foot (30cm) in the air and filled with 50/50 coolant.
Battery charged overnight. Put the battery terminals on and wow!
Very worthwhile! All the checking and double checking of wiring paid off! Dr Brian was over yesterday, and loaned me his Scan tool and Amp gauge (it replaces the fuse and then you put the fuse in the side and it gives you the amps the circuit is pulling. Both very useful tools!.
Arg...Coolant leak!. it helps if you put clamps on ALL the hoses. With that done, there are no coolant leaks. When first filling the engine with coolant, we jacked up the front of the car about a foot in the air, and then filled it from there. ran it for a while and then topped up the coolant again after cooling down. OBDII gauges show the coolant temp doing what it should, and lo and behold, even the fan relay is kicking in when it should.
Looking at the wiring manual, I might even have another signal for a high temp fan and low temp fan.
Next step is to clean up the wiring front and back and mount the ECU, relays and fuses and the fuel and IMRC modules.
Been starting the engine every night after work and monitoring the temperatures and OBDI with a wifi OBDI connector and DashCommander on my phone. works well, although the form factor is a little small, it is readable. it works a treat on a tablet/iPad. will mount a holder for an tablet at some point.
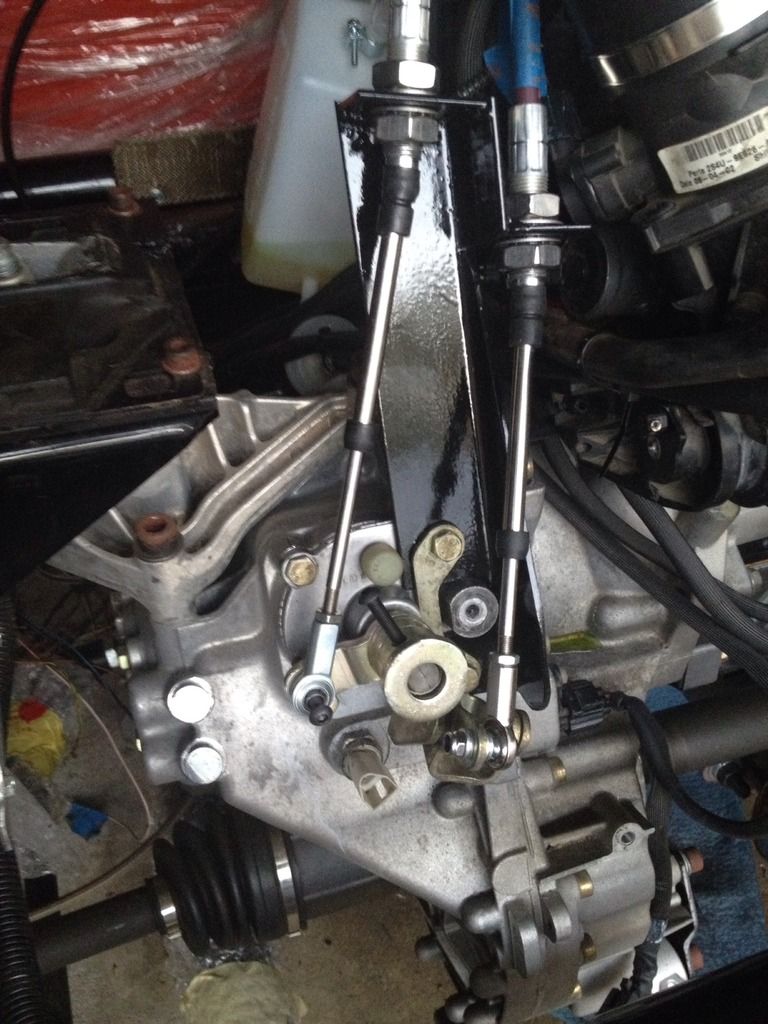
Picked up the gearshift cables from Dove Racing - there are some other places that sell them, but Pete has some in stock so I went that way. Last couple of weekends working on the gear shift, putting the little extension things on the gear shift mount and then figuring out how to turn 90 degrees the shift mechanism on the getrag gearbox and building a mount for the cables to go over the top of the engine.
Where the transmission tunnel (with water pipes and hoses, electrics, handbrake, accelerator cable and now gearshift cables) is getting quite full!
Spent the last two weekends working on the gearshift and gearbox.
Mounted the extensions on the gearshift lever, and then painted it to look nice, even if it under the tunnel.
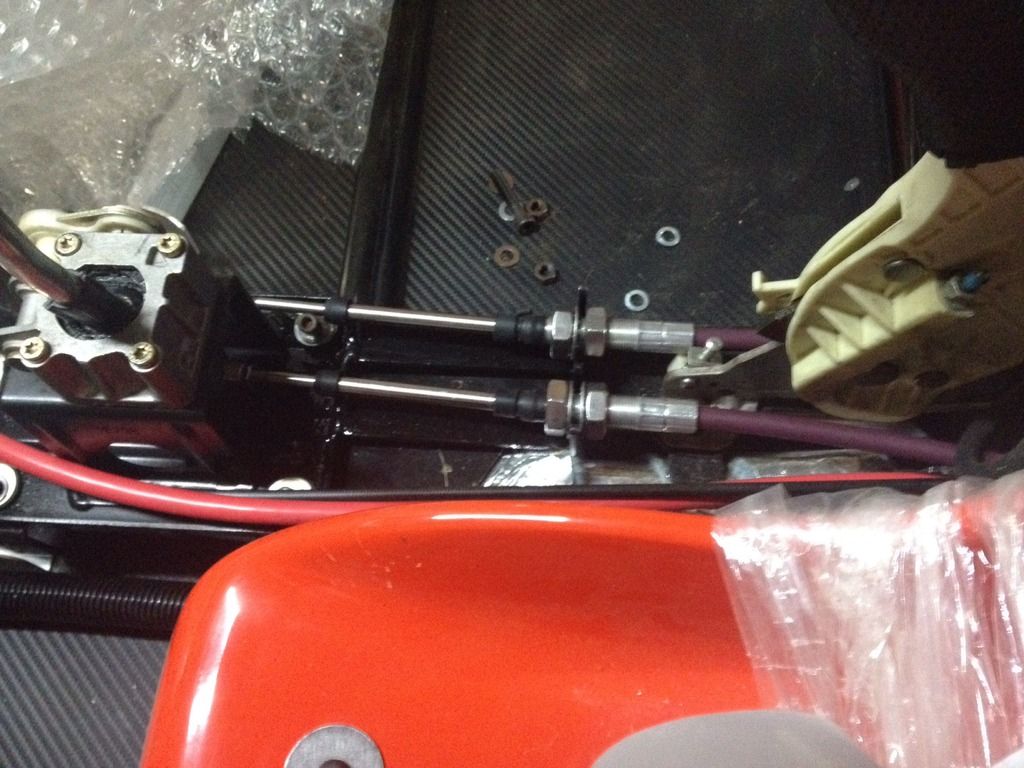
Then started work on the gearbox - had to 'turn over' the levers on the gearbox, as the cables now come from in front of the engine, instead of from 'behind'. After extensive reading and looking at different builds, I cut off the weights, as when the levers are upside down there is interference with the intake manifold (on the Dual intake piece) of the SVT.
Measured the cables from the different positions on the gearbox (actually started with Reverse) and measured the bracket needed and then fabricated it up.
The angle is not quite right, as they should be as straight as possible - so will take this off an redo the mounts for the cables.