|
|
Post by dgibson on Jun 25, 2014 22:25:34 GMT
By lowering the RHS by 6mm (1/4") and raising the Gearbox side by 12mm (1/2") the engine is level. 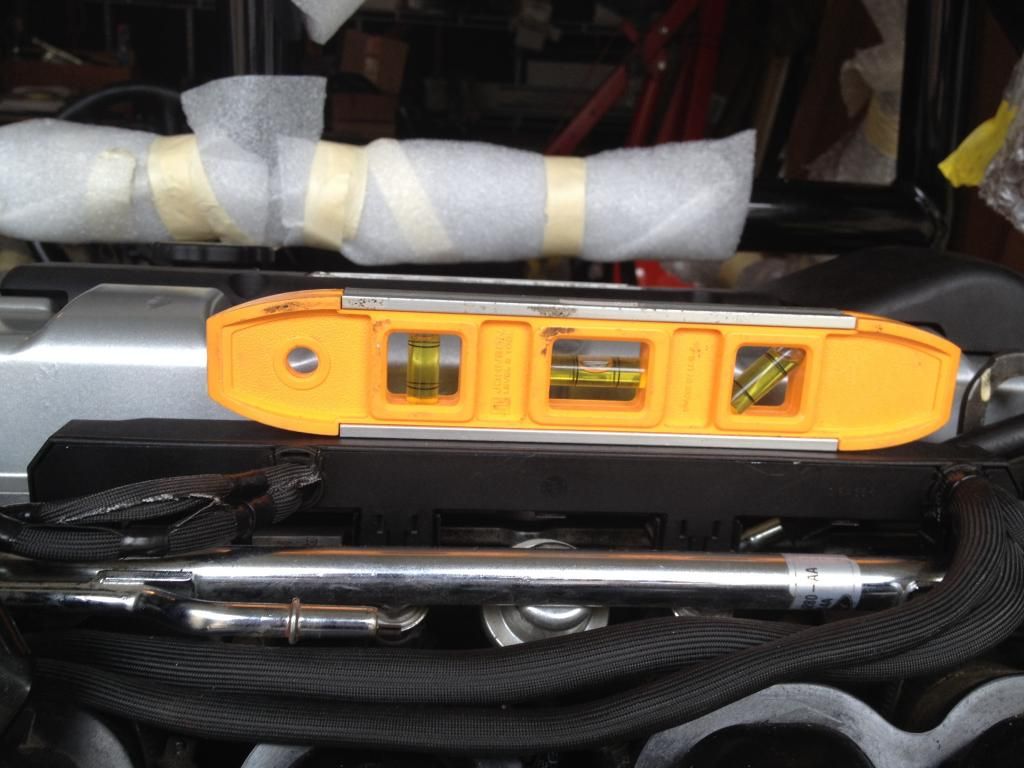 Front to back, had to move the gearbox mount about 50mm backwards to give me a parallel from the Exhaust Header flange to the firewall top tube. There are a number of better solutions on other builds (Carlostheoptimistic) - I will redo this with a plate and some polybushings at some point. |
|
|
|
Post by dgibson on Jun 28, 2014 16:12:27 GMT
Working on my Fuel pump extension - looking at several builds, I decided to go with the blind extension - on the underside of the pump are three vanes and small molded holes. Tapped them with a 10-24 tap and then used threaded rod to extend the tank. On my donor pump there is a small plastic piece (some sort of non-return?) in the middle of the in-tank fuel line - had to unscrew that and let it float, that gave me enough length to extend the pump to the correct length (around 185mm from the top lip to the top of the pump body) The rods on the top right and bottom left use existing holes - so I only had to drill the one hole in the middle left of the photo.  Next is to decide how to mount the top on the tank and extend the float. 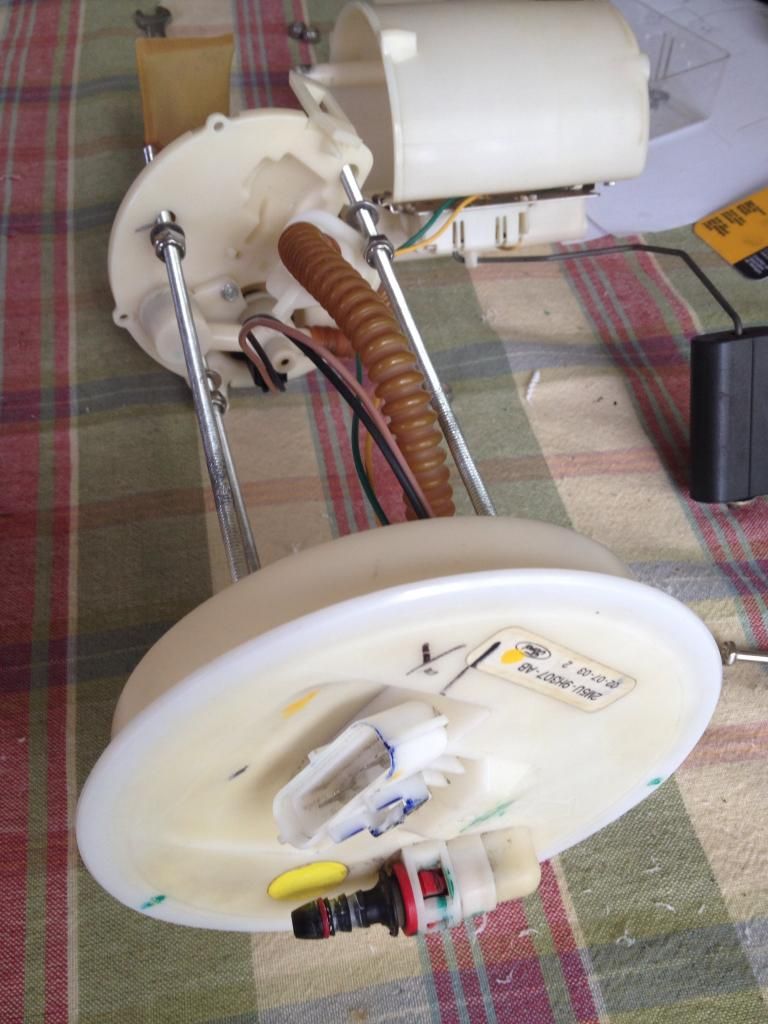 In the technical section, I posted an option to use the donor fuel tank threaded top and bolt and seal that to the tank, it means I need to extend the pump by two cm or an inch or so, so it is close to the bottom of the tank. 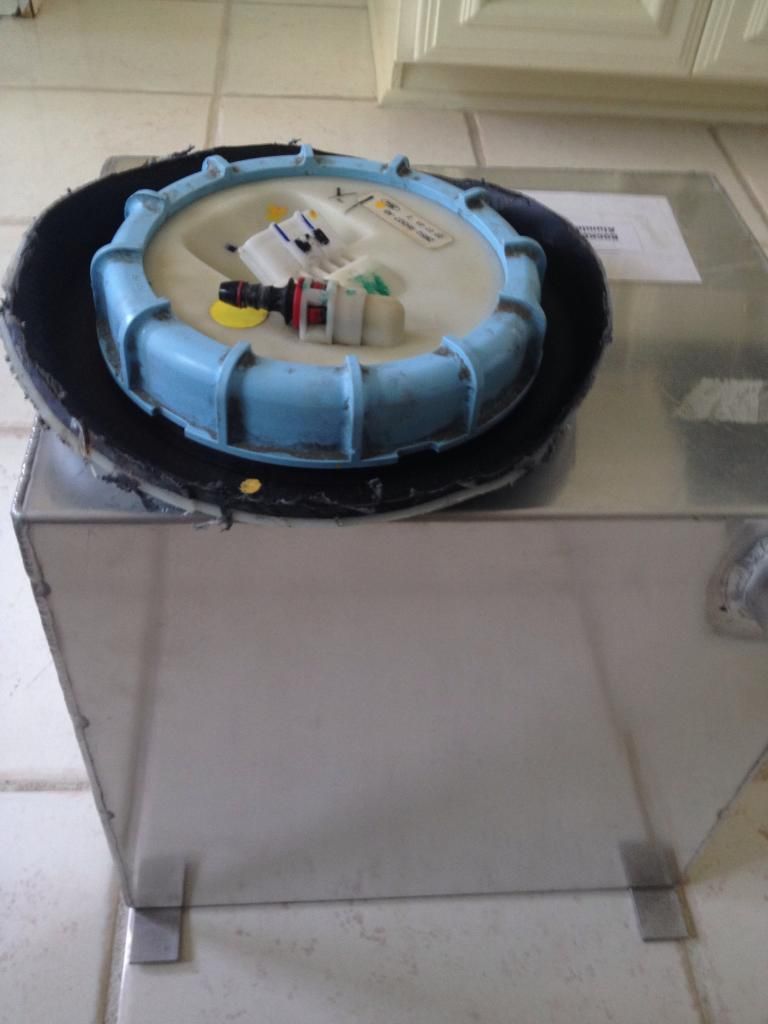 |
|
|
|
Post by bingo on Jun 29, 2014 9:32:18 GMT
Where is the return leg for your pump?
Sent from my SM-N9005 using proboards
|
|
|
|
Post by dgibson on Jun 29, 2014 14:19:24 GMT
Ah, I have a one legged pump. The ST170 has a returnless system with a the ECU monitoring the fuel rail pressure and then the telling the fuel pump driver module to pump more or less to maintain the pressure. I will post the appropriate page from my wiring diagram later today.
|
|
|
|
Post by dgibson on Jul 7, 2014 12:09:11 GMT
Has anyone else put their Battery here? is there any inherent issues that anyone can see? It is up enough out of the way, adds a little weight to the front of the car. I checked the clearance, it fits under the hood/bonnet of the car nicely. I probably won't leave the blocks of wood there, and make up a small battery bracket. 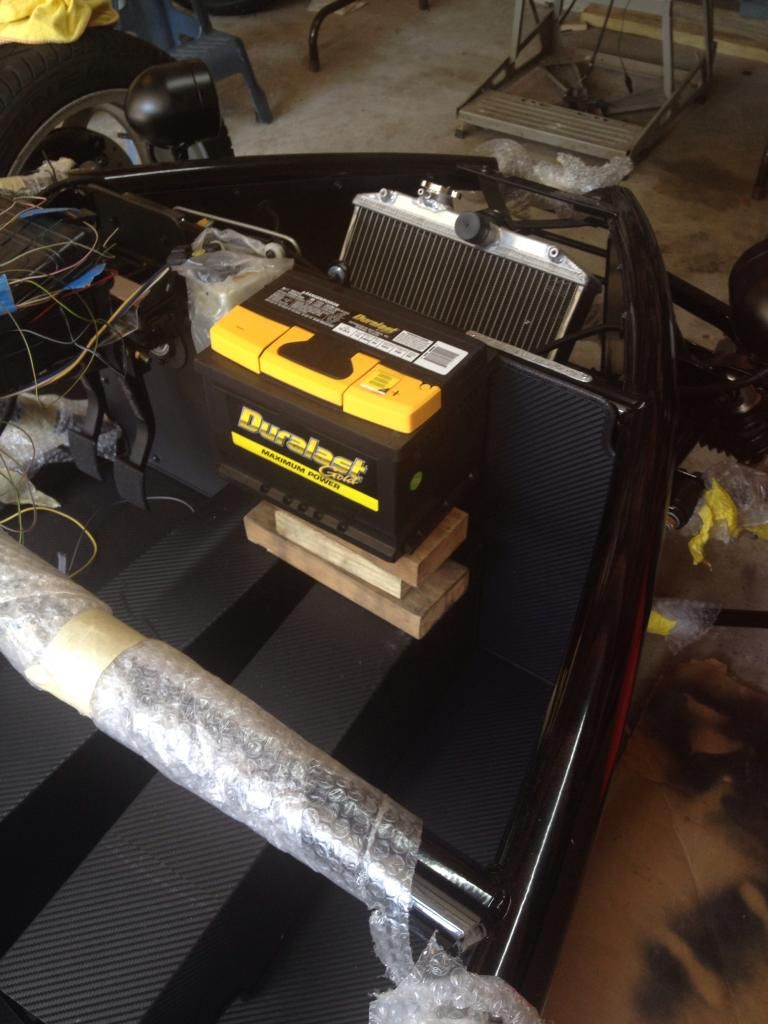 In the spirit of actually finishing something up - I did a bit of an alignment (tracking) of the rear end, making sure the hub is parallel to the rear frame (the only straight bit on the Rocket lower frame) At least it will get me in the ball park for a detailed alignment once the wheels are on. I set the vertical alignment (camber?) at "vertical" for now. 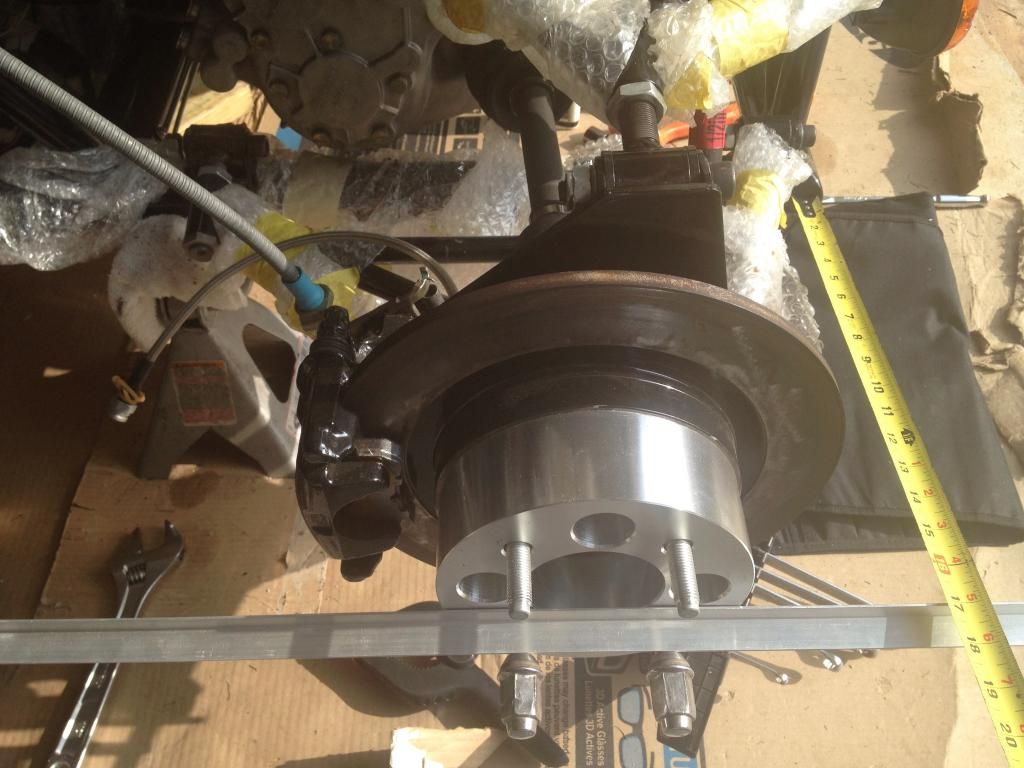 |
|
|
|
Post by petik on Jul 7, 2014 14:51:24 GMT
I don't think there's anything particularly wrong with putting the battery there - I put my fuel tank there to move that weight to the front as well and put the battery on the other side of the firewall (radiator side). I'm guessing the battery you've there is just an example and you're not actually planning on using a battery that size. A lot of people (including myself) use the Odyssey batteries: www.amazon.com/dp/B000EDDQEU. They also sell a bracket to go with them that bolts right up to the firewall: www.odysseybatteries.com/mainpages/accessories.htm |
|
|
|
Post by airforceone on Jul 7, 2014 15:02:55 GMT
If you are using a battery that size I wouldn't put it that high up. The fwd bulkhead isn't
particularly strong.
Even if you use one of the smaller Odyssey style batteries I would consider putting it in
the same position but on the floor in one of the custom battery trays. You then have the
option to put a passenger foot rest in to cover the battery.
|
|
|
|
Post by casesensitive on Jul 10, 2014 13:21:25 GMT
Working on my Fuel pump extension - looking at several builds, I decided to go with the blind extension - on the underside of the pump are three vanes and small molded holes. Tapped them with a 10-24 tap and then used threaded rod to extend the tank. ... Next is to decide how to mount the top on the tank and extend the float. In the technical section, I posted an option to use the donor fuel tank threaded top and bolt and seal that to the tank, it means I need to extend the pump by two cm or an inch or so, so it is close to the bottom of the tank. I extended my ST170 pump with a bit of coat hanger and fuel-proof epoxy www.mevowners.proboards.com/post/43978/threadI think it's a decent solution, as I didn't have to go through the lid with the threaded bar. May need to seal it up, but right now its pretty tight. |
|
|
|
Post by dgibson on Aug 14, 2014 0:46:01 GMT
Am back been out of pocket for a couple of weeks.
Finished up radiator hoses and fan. Pictures to follow. Now starting wiring with something simple like the horn!
|
|
|
|
Post by dgibson on Sept 1, 2014 15:50:33 GMT
Started the ECU Engine Wiring Harness. Looks a bit of a mess, but with each wire labeled from both the sensors and on the ECU connector, it comes together slowly. the Sensors are coming in from the top of the picture, and towards the bottom are the OBDI and O2 Sensors that are already wired up. A wiring manual is definitely required!! 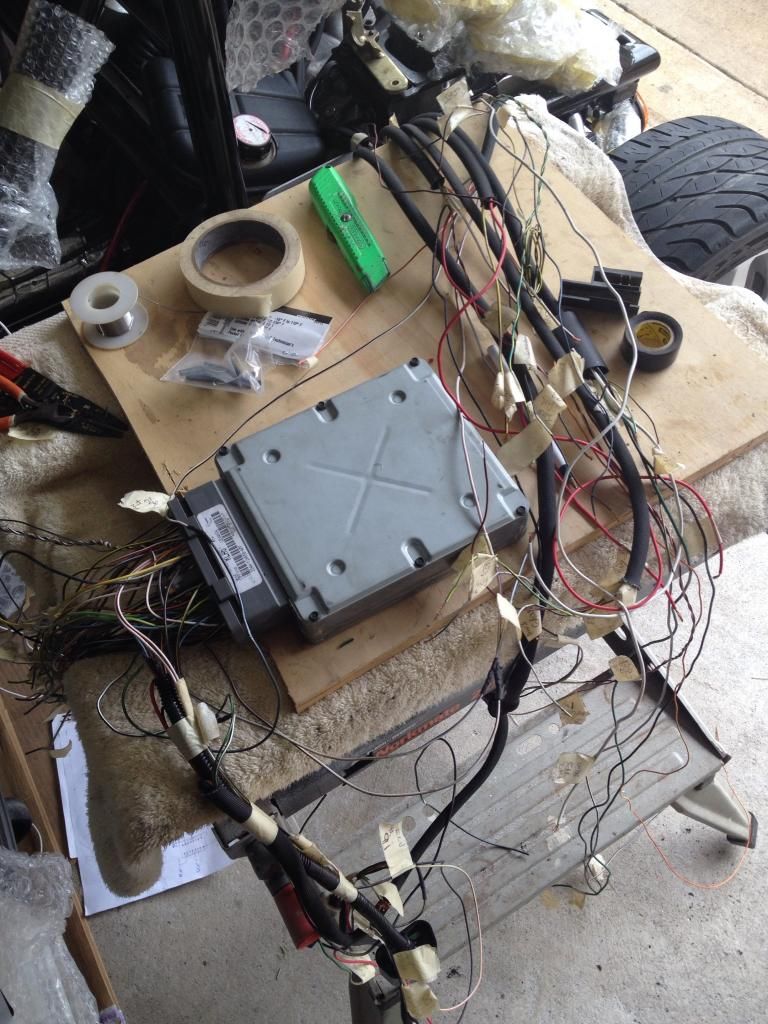 |
|
|
|
Post by dgibson on Oct 12, 2014 0:10:24 GMT
Next steps are accelerator cable. 144 inches long Lokar cable with nice ends.
|
|
|
|
Post by dgibson on Oct 12, 2014 13:56:02 GMT
Picked up a KOSO DB-03R - should arrive in a couple of days. Finished up my gas tank (petrol tank) Have not seen this done this way in any other builds, we will see how it goes. 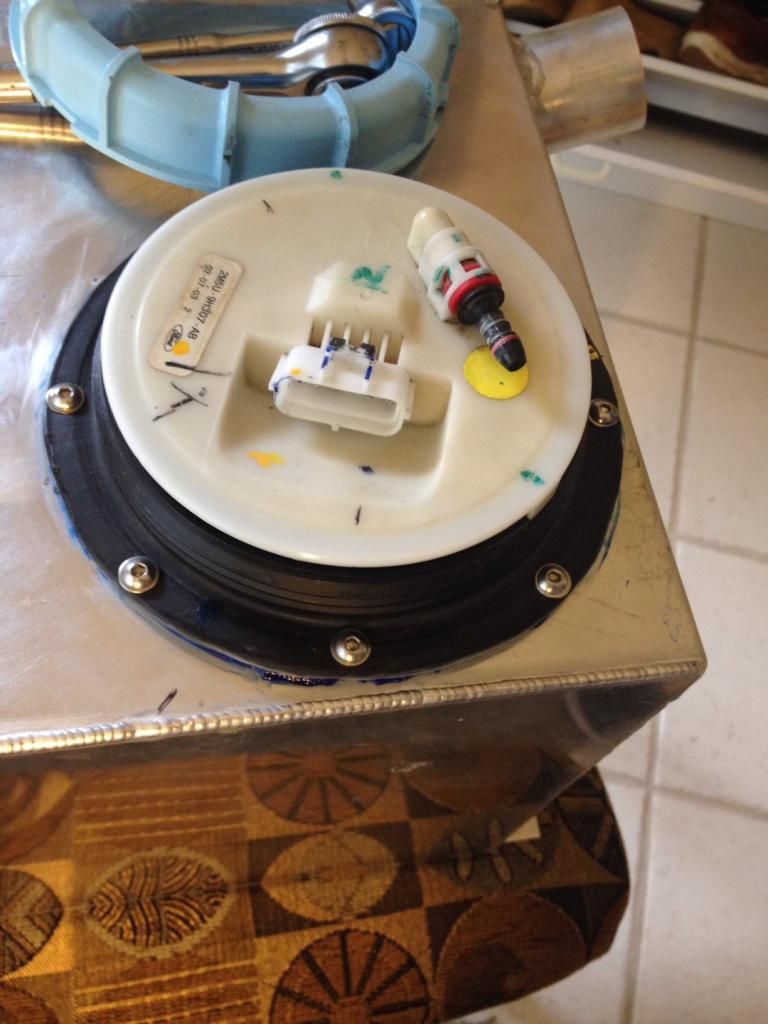 Used some fuel proof gasket/sealant. |
|
|
|
Post by dgibson on Oct 12, 2014 23:57:02 GMT
Rather a fresh rainy day in South Houston - so bought my books and engine harness relays inside and spent a couple of hours following the available diagrams of wiring, and translating pins to the 104 pin ECU, and checking against the wiring manual. I found it helped to wrap a piece of masking tape around the relay holders and label each side of the holders with the pin numbers. As each relay was finished, I checked the pins with a multimeter and then checked off each circuit on the diagram. The relays and fuse holder is mounted on a piece of Lexan picked up from the local home improvement store.. At some point once I figure out how to mount it, will remove the cover paper giving me a clear mount. 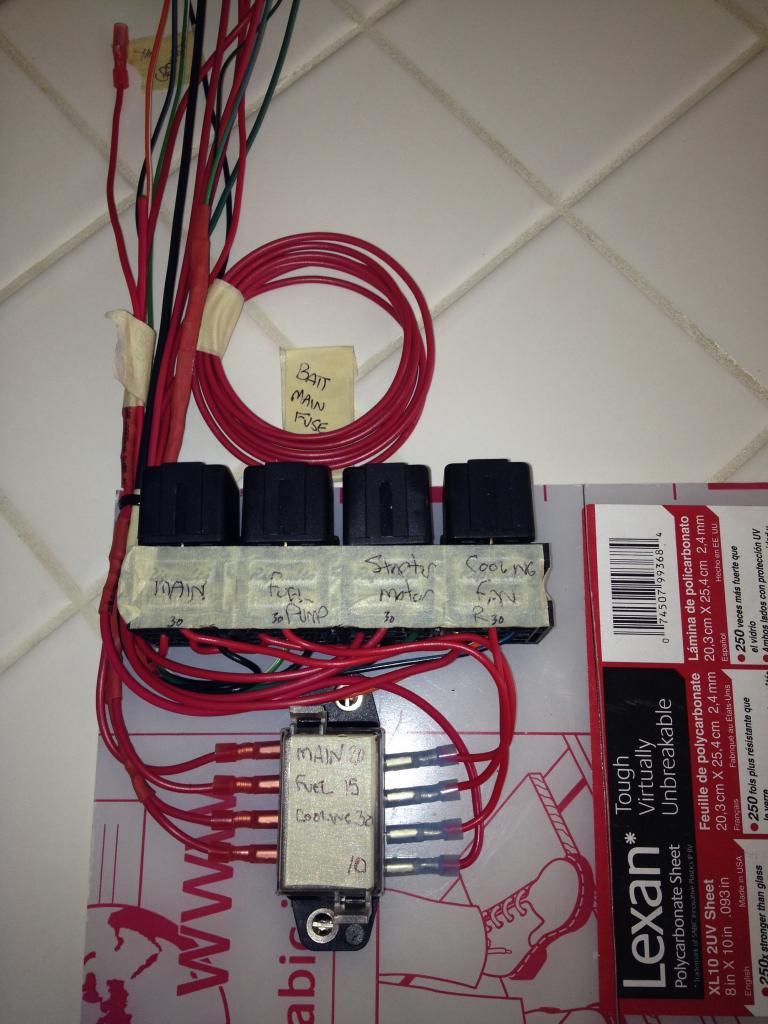 it was great to have son Keith and daughter in law Jacqleen with us for a day or so (they helped us unload the kit back on page 1) , and Dr Brian and his fiance Charisma come over and help out as well. |
|
|
|
Post by petik on Oct 28, 2014 17:44:38 GMT
Next steps are accelerator cable. 144 inches long Lokar cable with nice ends. Personal experience is that Lokar sucks compared to Venhill, and is more expensive. I ran the 144" Lokar cable and it ended up sticking due to the turns required (a 180deg loop at the pedal and a couple of 90deg loops at the back). I greased it with motorcycle throttle cable lube and it got better, but required re-greasing every month or two or it would start sticking again. Switched to the Venhill cable and had no problems whatsoever...go figure. |
|
|
|
Post by Raj'sDad on Dec 22, 2014 19:06:57 GMT
Hi is your tank a standard size as I do like your idea of reusing the screw fitting from the Focus donor car. the top of my tank for the sonic is 365mm X 150mm see the picture below:  |
|