

Post by stevieboy on Apr 7, 2012 18:21:44 GMT
Ok guys, i wont keep this to myself as it will help every exocet owner that wants a full tank of fuel. Stuart may well have to modify any new frames by putting a cross member on the left rear corner to bolt the tank to, and lose the rear middle lug, if he see's this as a good modification to a problem for all.
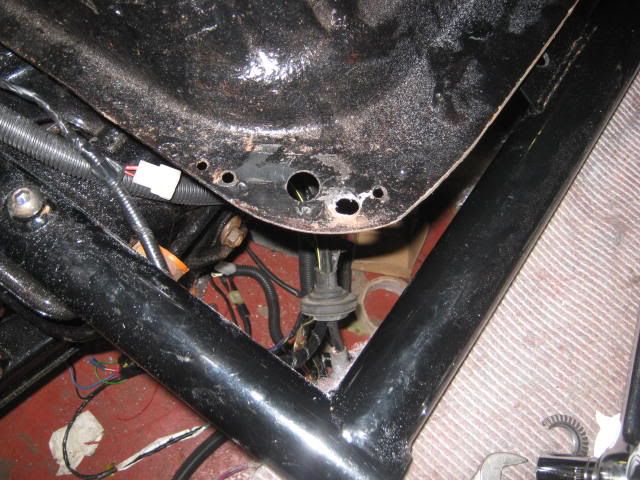
Right then, turn the tank round 180 Degrees so the fuel filler is at the front drivers side. The lower bump on the tank that causes all the problems is then in the rear right corner and is clear of everything. This also gives good access to the tank drain plug. You will have to cut a small corner off the rear offside lug,...pictured.. to clear the tank.

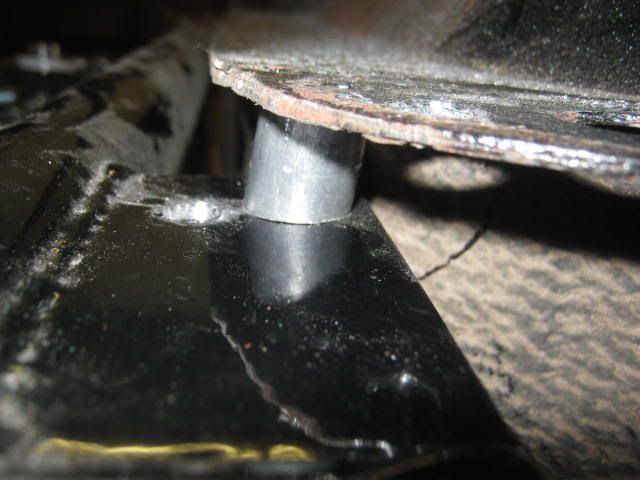
Put 15mm spacers under each corner and bolt the tank down on all but the front filler corner, you will have memfast your own crossmember on the left corner,on the filler corner put some threaded bar about 9" long, this will be used later to clamp the filler to.
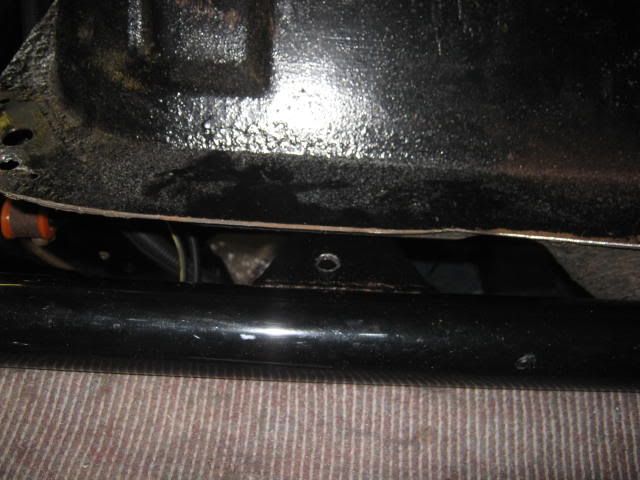
The filler will be somewhere in this position, you will lose the lug when you cut the pipe to length.
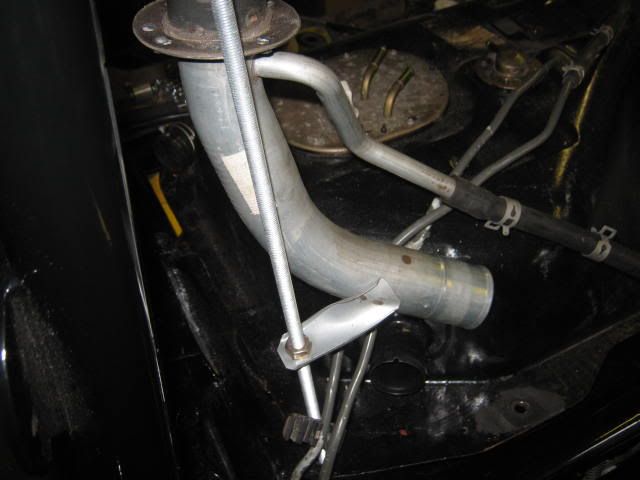
All that is needed is to cut out a section of the metal filler pipe, this is about 40mm from the the breather pipe and just below the lug pictured and rejoin with some of the rubber filler pipe, this is so you can turn the lower end to mate up with the tank filler, it also means you retain the non return valve in the pipe. You then need to buy a 90 degree bend to jointo the tank, the breather is the same, cut and rejoin to original fixing. The filler needs to stick up about 14" from the tank crossmember mount as the rear hood is 15" high internally.
You need to keep the mazda fuel filler flap and the release cable and lever, this can be mounted in the rear behind seat...iva pass...
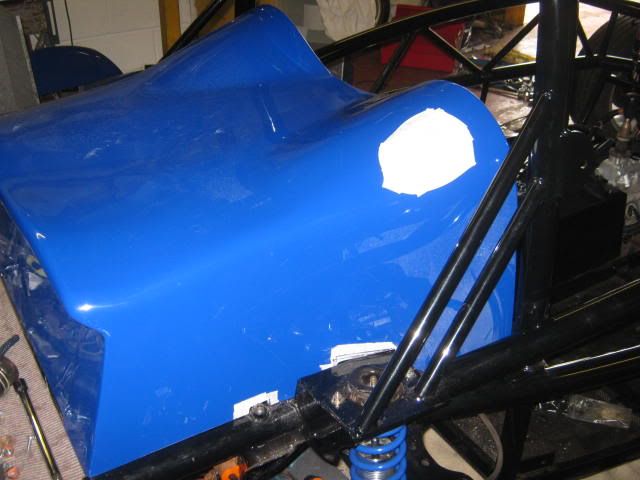
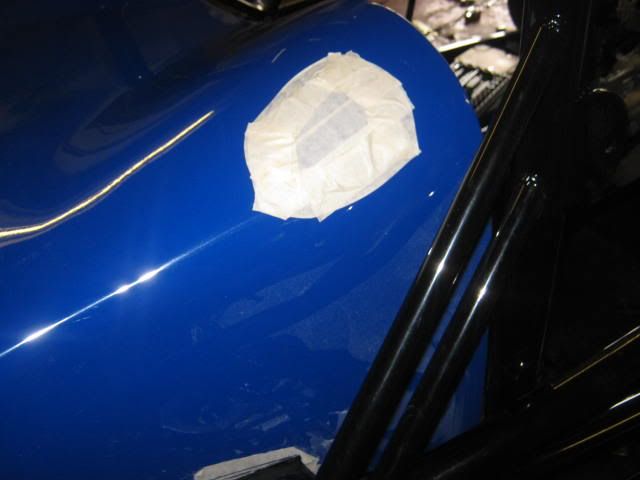
What is then left to do is cut a hole in the top of the hood and fit the fuel flap, this will need a bit of panel beating, or if you get a good cut you can bond the original grp to the flap. Very easy to do, a small cut with a thin grinder/cutter then slide in a craft saw blade and take it out in one.
When you pull the flap release your original filler is just inside and 4" above the tank.
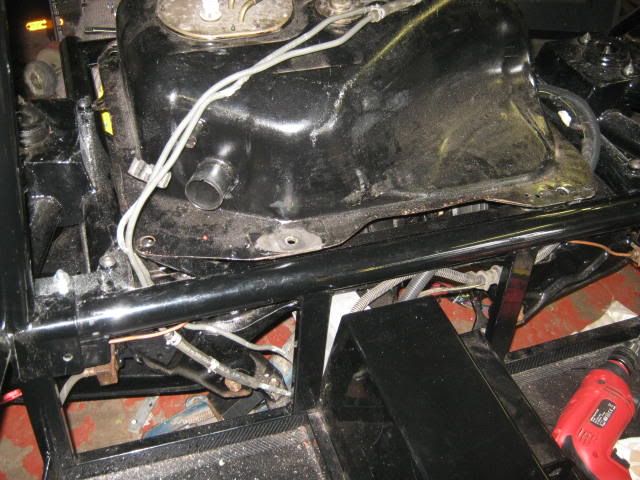
The void in the tank where the spare wheel used to go is now behind the passenger seat which is a great space to now lose all the spare wires in,they can be coiled up and cable tied out the way to save chopping them down. I have also measured this area and found that with a small mod to the battery tray would make it possible to fit in snug, giving more room for a storage locker behind the passenger seat.
There you go lads a full tank everytime.
Please go to page 3 for view of finished job.
Steve
Right then, turn the tank round 180 Degrees so the fuel filler is at the front drivers side. The lower bump on the tank that causes all the problems is then in the rear right corner and is clear of everything. This also gives good access to the tank drain plug. You will have to cut a small corner off the rear offside lug,...pictured.. to clear the tank.
Put 15mm spacers under each corner and bolt the tank down on all but the front filler corner, you will have memfast your own crossmember on the left corner,on the filler corner put some threaded bar about 9" long, this will be used later to clamp the filler to.
The filler will be somewhere in this position, you will lose the lug when you cut the pipe to length.
All that is needed is to cut out a section of the metal filler pipe, this is about 40mm from the the breather pipe and just below the lug pictured and rejoin with some of the rubber filler pipe, this is so you can turn the lower end to mate up with the tank filler, it also means you retain the non return valve in the pipe. You then need to buy a 90 degree bend to jointo the tank, the breather is the same, cut and rejoin to original fixing. The filler needs to stick up about 14" from the tank crossmember mount as the rear hood is 15" high internally.
You need to keep the mazda fuel filler flap and the release cable and lever, this can be mounted in the rear behind seat...iva pass...
What is then left to do is cut a hole in the top of the hood and fit the fuel flap, this will need a bit of panel beating, or if you get a good cut you can bond the original grp to the flap. Very easy to do, a small cut with a thin grinder/cutter then slide in a craft saw blade and take it out in one.
When you pull the flap release your original filler is just inside and 4" above the tank.
The void in the tank where the spare wheel used to go is now behind the passenger seat which is a great space to now lose all the spare wires in,they can be coiled up and cable tied out the way to save chopping them down. I have also measured this area and found that with a small mod to the battery tray would make it possible to fit in snug, giving more room for a storage locker behind the passenger seat.
There you go lads a full tank everytime.
Please go to page 3 for view of finished job.
Steve


 not even from boss Stiggy, its all gone quite
  .
. 