|
|
Post by Kevin Patrick on Apr 25, 2011 22:03:38 GMT
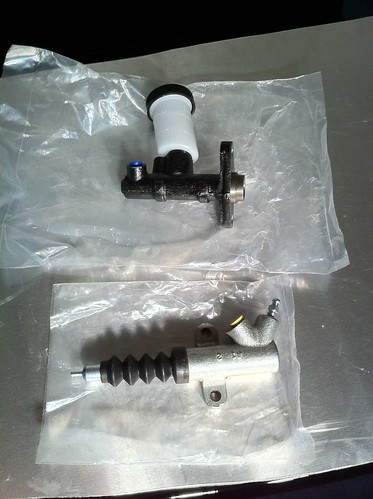
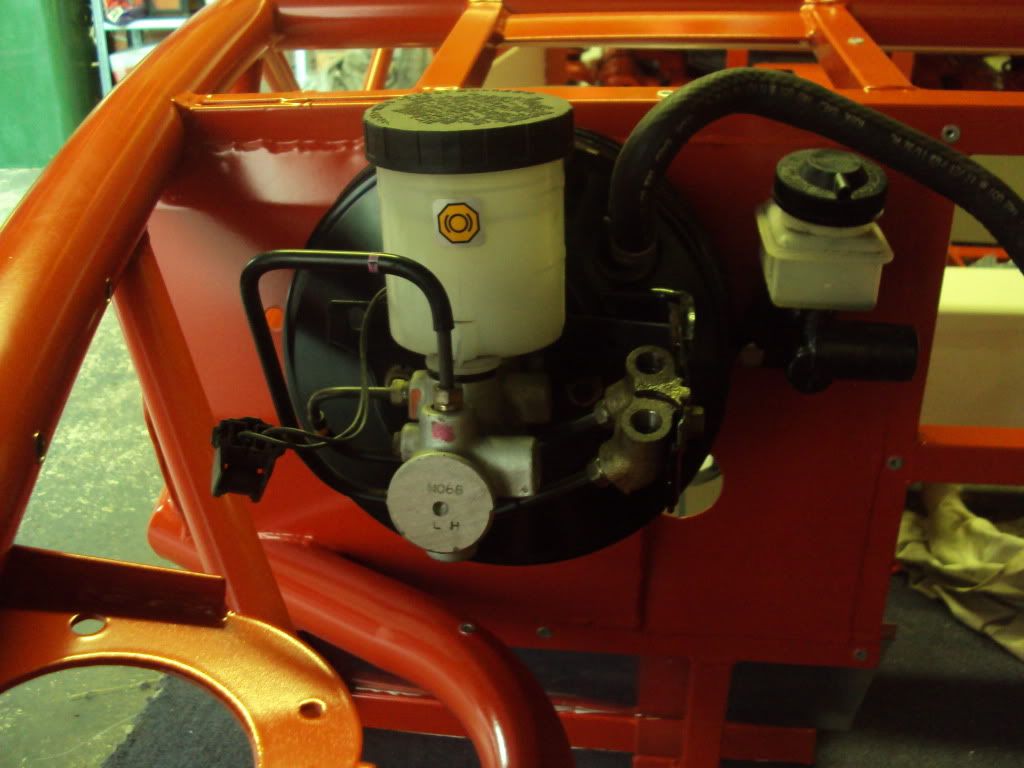
The last two weeks have been busy, but I managed to make a little more progress. After finishing running the brake and fuel lines in the transmission tunnel, my wife and I flipped the chassis over.  Reassembled the clutch pedal assembly  Stripped the brake/gas pedal assembly and cleaned it in the ultrasonic cleaner  Practiced flaring brake lines  Test fit the clutch pedal assembly and clutch master cylinder   I ran into an issue with the clutch master cylinder reservoir not fitting due to the left side chassis tube. Any ideas? I pulled the reservoir off and was able to fit the master cylinder to the pedal assembly. Perhaps I can get a replcement reservoir that will fit? One thing I do notice is that you UK guys seem to have clutch master cylinders with square reservoirs where I have a cylindrical one….  Test fit the brake booster/master cylinder and pedals. I still need to cut the spacers off and paint the brake pedal assembly.   Ran the rear and front right brake lines along the bulkhead. Used two p-clips at each M4 rivnut location. Needs a little more shaping but should work well. However, after seeing what Mabbs has done with his Rocket, ( mevowners.proboards.com/index.cgi?action=display&board=rocket&thread=563&page=6#7817) I think if I did this again I would copy his ideas and use S/S lines.  |
|
Andy888
Full
   Exocet Builder
Posts: 212
|
Post by Andy888 on Apr 26, 2011 9:07:58 GMT
Does look a tight fit in there. Hope the steering column support won't foul that throttle pedal. It's looking tight too!
Why are you and others cutting the spacers off the back off the brake pedal? Surely this just means the pedals won't be in line with each other? thnx!
|
|
|
|
Post by Kevin Patrick on Apr 26, 2011 20:56:39 GMT
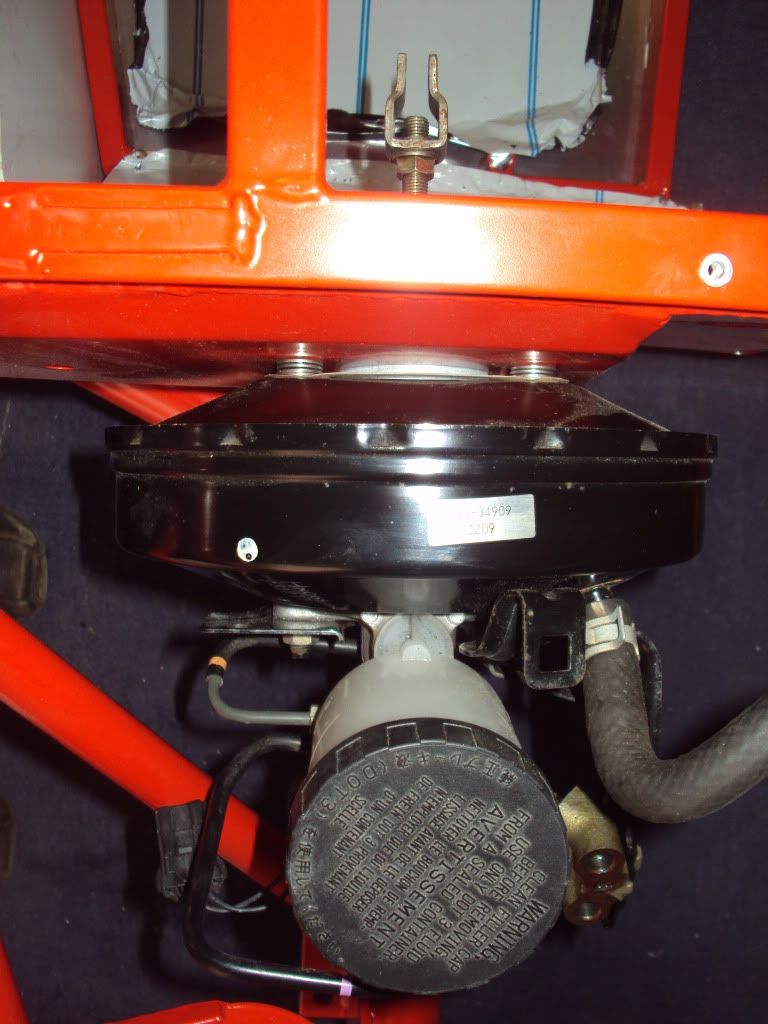
Andy888 - Definitely will be a tight fit, I'll have to reassemble the pedals this weekend to check for clearance. The left side passenger foot area is definitely smaller than the right so I assume it will be much tighter than the RHD examples. Regarding the spacers - I think the issue is due to the angle that the brake booster/master cylinder sits inside the engine compartment. It looks like the reservoir is higher than the hood will sit. Tim took a good photo of it on his build. Master cylinder & pedal box starting to get installed...does anyone know whether its possible to get alternative master cylinder reservoir bottles for the MX-5 that have a lower profile? [UPDATE : Just been informed to add around 6 washers to each of the top 2 Master Cylinder mounting studs, which will crank the unit over sufficiently]  Fitted the Master Cylinder to the bulk head and the reservoir lid fouled on the underside of the bonnet  So fitted 4off stainless steel washers on the top two mounting studs (after trailing 6off);  With the current length of the bolts coming off the brake booster, I do not have enough thread on the studs to add many washers. I think I'll need to cut off somewhere from 50-100% of the spacer and then start test fitting washers until it lines up. Did you not have issues with your top reservoir clearing the hood while retaining washers?
|
|
Deleted
Deleted Member
Posts: 0
|
Post by Deleted on Apr 26, 2011 21:08:56 GMT
Kevin, due to yours being a left hand drive, the clutch master is now on the outside, whereas on a right hand drive its on the inside. as we all drive gas with the right foot, clutch with the left. i doubt this was considered when swapping to a LHD chassis. Also the passenger side on a RHD is significantly narrower, which im assuming has now become your drivers side. again creating issues.
As far as the height of the reservoir. i left the pedal and cluch boxes in tact and didnt remove any studs. this lowers the reservoir slightly and also avoids the pedal backs fouling on the footwell cross member.
Alex
|
|
Andy888
Full
   Exocet Builder
Posts: 212
|
Post by Andy888 on Apr 26, 2011 23:32:29 GMT
Yeah, saw those pics Kevin, but ours clears the bonnet just fine without any modding and using the pre-drilled holes. That's why I was asking in case there was some reason for cutting them off that we didn't know about!
Might be worth checking yours before you start cutting!
Wonder could you lower all that clutch assembly so the reservoir clears that wee diagonal, and then cut a bit off the vertical of the pedal to compensate. Looks like maybe an inch or so of a drop might do it...
|
|
|
|
Post by Kevin Patrick on Apr 28, 2011 15:23:07 GMT
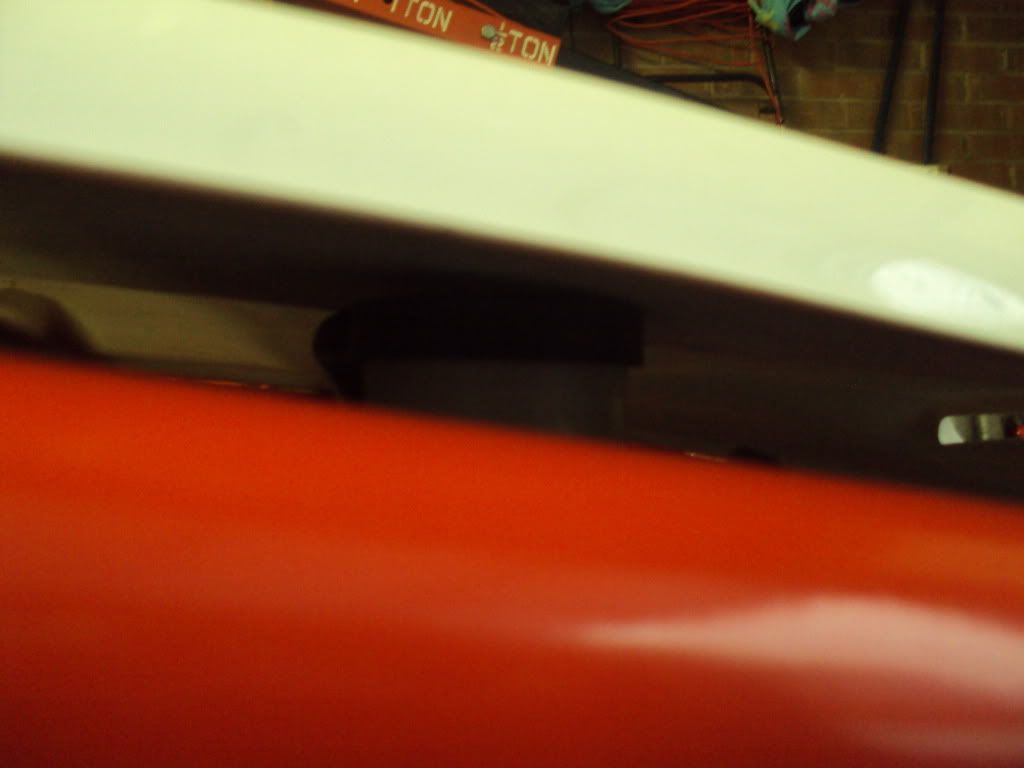
Thanks guys. I made a little more progress over the last two nights. First off was to figure out what if any modifications were needed to the pedal box to ensure the the brake master cylinder reservoir has enough clearance with the hood. After a test fit of the hood, the top of the reservoir was only a couple millimeters too high. I seem to have solved the issue by adding two M8 washers on the top two mounting studs of the brake booster. This method gives me just enough clearance so the reservoir is not rubbing on the underside of the hood.  It also means I don't need to cut/trim any of the spacers on the brake/gas pedal box. So I then painted the brake/gas pedal box and reassembled.   For the clutch pedal box, the two lower mounting holes do not line up, so I am considering cutting off the spacers and studs of the clutch box. This should allow me to move the whole assembly down a few millimeters where the holes will line up. I can then reinstall the cut off spacers on the engine side. Hopefully it will help with the clutch master cylinder fitament issue too as it should give some additional clearance. As you can see in the photo below, the current location of the clutch pedal looks a little high.  Next up was to see how close the gas pedal will be to the tunnel. Short answer: close!  When I get around to trimming the tunnel for installation, I think everything should fit - just barely. Absolute worst case scenario, I'll cut the gas pedal off and move it over a centimeter or two before rewelding. |
|
|
|
Post by Kevin Patrick on May 3, 2011 1:01:29 GMT
Had some more time to work over the weekend. Finished prepping the last items on the PPF assembly including hooking up the parking brake cables, changing the transmission fluid to Mobil 1 75W-90 and removing the old fuel hoses. On the chassis... Drilled and mounted the fuel tank bobbins/mounts  Enlarged holes for mounting the clutch pedal assembly and master cylinder. Instead of cutting off the spacers and refitting, I opted to enlarge the holes since it was less work. Bolts were then installed from the rear so the assembly could be bolted to the bulkhead.    The new location leaves a small issue as the master cylinder reservoir is still sightly tweaked. Think it will be a problem and lead to leaks?  Next, made a square hole for the throttle cable.   Also finished running the brake and clutch lines, including flaring.  Front Left brake  Clutch line  Booster & M/C  |
|
|
|
Post by Kevin Patrick on May 3, 2011 1:02:03 GMT
|
|
Andy888
Full
   Exocet Builder
Posts: 212
|
Post by Andy888 on May 3, 2011 10:29:28 GMT
Love seeing it come together Kevin. We spent most of the weekend arsing about trying to fit pedals too. Initially I had said we didn't need to remove the spacers as the reservoirs fitted under the bonnet... but... we ended up drilling out the holes and sinking the pedal assemblies through the bulkhead as you did.
However, i) our throttle pedal assembly holes were out enough that the side of the pedal fouled that folded piece of metal; and
ii) which I think may be important for you, since you sunk the clutch pedal through the bulkhead, you are going to have to sink the throttle pedal through too otherwise the mounting bracket for the steering rack won't line up and will not sit back far enough to reach the connecting joint in the engine bay. You'll see a hole and hook/slot on the steering rack bracket and all will become clear!
I'm assuming you just have thought of this as you fitted the pedals away from the engine etc.
|
|
|
|
Post by Kevin Patrick on May 4, 2011 1:39:40 GMT
|
|
Deleted
Deleted Member
Posts: 0
|
Post by Deleted on May 4, 2011 11:49:26 GMT
fine choice of colours sir! good job your on the other side of the pond, would be embarrassing to roll up to the traffic lights next to each other!!
Looks great thouhg, not much left now...
|
|
Andy888
Full
   Exocet Builder
Posts: 212
|
Post by Andy888 on May 4, 2011 12:17:40 GMT
Looks soooo good in all black and I usually hate black on black! That front wheel shot is also the first pic I have seen that doesn't make it look chunky nosed!
|
|
|
|
Post by mabbs on May 4, 2011 17:47:16 GMT
Very nice build  |
|
|
|
Post by jamessid on May 4, 2011 19:00:13 GMT
Very Nice, your doing an outstanding job, looks really cool in Black GRP, have not picked my GRP colour yet but i think i'm sold on black.
|
|
|
|
Post by rumbleseat on May 6, 2011 2:42:48 GMT
Do you think having the driver side narrower than the passenger side is going to cause you any problems? From my reading about the Exocet MEV has enough business over in the UK to keep them pumping out RHD chassis for the next year. I'm not sure if they're wanting to put in the time to research what modifications need to be made for the LHD drive train for other parts of the world.
Also where about in the Atlanta area do you live? I live near the Mall of Ga and would love to offer a helping hand just so I can see how this car goes together. I wish I had found this thread earlier because it looks like you're almost done. Also thanks for making such a detailed thread about your build. It looks like you're doing a top notch job.
|
|