|
|
Post by Fin on Aug 7, 2016 9:48:10 GMT
just relied on a trusty breaker bar, penetrating fluid and heat for stubborn bolts/nuts it can be done. I can recommend getting a lazy tong or air riveter when it comes to doing the floors on the new chassis Several people mentioned "breaker bar" and to me, that meant crowbar or pry bar, didn't realise it was a socket extension arm, although I did increase the leverage and doubled my steroid intake! Can I ask why the "lazy tong" is so designed to be telescopic? Is this different to a "rivnut" or Cleco rivets? |
|
|
|
Post by Fin on Aug 7, 2016 9:49:52 GMT
It's 1.6 Mk2.5. You think they look standard, or as a result of a repair? its standard. its to stiffen the body from torsional twist therefore improve handling characteristics regarding any repairs at the rear without seeing further pictures it looks fine so far - more likely the diff's mounting arms may have snapped in the impact which they do so its been replaced quite possibly Thanks. Wonder why the struts were not mentioned in the tear-down guide? |
|
|
|
Post by Fin on Aug 7, 2016 9:54:00 GMT
Thanks for the encouragement and advice gwnwar. Looks as though that last nut was about a 1/4 short, so they bent it out of the way, and opted for a separate nut. If I can't realign, I'll make sure there is a washer inserted. The plan was to strip the PPF from the sub-frames, but I was a bit worried by what I saw.
|
|
|
|
Post by miket on Aug 7, 2016 10:02:11 GMT
Re. your Qs:-
I presume the Lazy Tong telescoping is just a way of leveraging force from an easy long stroke of movement into the strong pulling force over a short movement to set the rivet.
Re, your Qs:-
Rivets are a (almost) permanent fixing.
Cleco's are devices that temporarily fit in place of a rivet to hold things in position whilst working on them. When the riveting is complete then the Cleco's are back in their box for next time.
Rivnuts are nuts that are set in to the material in the same way as rivets (i.e. pulled upwards with force to expand and grip), but once they have been set they are then usable as a nut which has been secured in to place - ie gives you flexibility to bolt things to it and remove it repeatedly once it's been set in place. Often used in place of a self-tapping screw as these tend to come loose with frequent re-fastening.
Hope this helps.
|
|
|
|
Post by Fin on Aug 7, 2016 10:02:27 GMT
the diff looks alright to me, the sealant is normal they don't have gaskets, the gearbox will be the same. Japanese hardware tend to favour the use of sealant rather than gaskets - except Honda who love them and use O-rings everywhere! The nearside half-shaft looks a bit oily, but I'm hoping I can replace the seals without splitting the diff? |
|
|
|
Post by gwnwar on Aug 7, 2016 14:32:37 GMT
Just pull axle pop out seal install new one. Use long screw driver 30"er to remove axle. To install spline shaft start it back in
don't bottom it out..then a quick hard push in so snap ring locks in place. It may take a few tries to seat it..
|
|
|
|
Post by Fin on Aug 8, 2016 16:18:29 GMT
Scrap man taking the shell tomorrow, so what exactly do I need to remove from the shell in terms of the VIN number?
|
|
|
|
Post by miket on Aug 8, 2016 21:48:35 GMT
My VIN number was on bulkhead at back of engine bay - don't know if it's the same on all models.
I understand Miata's also have a number on the dash - don't know if this was adopted on later UK models but have a look?
Oh and you could hang on to the manufacturers plate (small alloy plate on mine) - I don't know that it's actually needed - but better safe than sorry eh.
|
|
|
|
Post by Fin on Aug 10, 2016 11:38:41 GMT
At the stage where I have to decide whether to clean & paint the sub-frames & suspension assemblies in situ, or to strip to component level and get them shot-blasted and coated/painted then re-assemble and replace all the bushes (£90 for PU). Initially favoured the strip, but may be biting off more than I can chew, or I may want to pay.
Any thoughts please? Kit is still 2-3 weeks away.
|
|
|
|
Post by freshp5 on Aug 10, 2016 12:35:10 GMT
Hi fin we just got rust of then brush paint with some good metal paint , we did not go down power coating way
|
|
|
|
Post by freshp5 on Aug 10, 2016 12:50:52 GMT
Where about are you we have a few drive out look at kits
|
|
|
|
Post by Fin on Aug 10, 2016 13:46:19 GMT
Where about are you we have a few drive out look at kits Mickleover in Derby. Shane said I could drop by, but i was going to wait until the kit came. Think there's also Damo in Stoke, James in Derby but I haven't spoken to either yet, and P5curly also offered to drop by soon. One of those "forks in the road" days and I'm really questioning my original plans, so i went an bought a K&N air filter instead, but any advice always welcomed should you ever be passing. |
|
|
|
Post by freshp5 on Aug 10, 2016 14:03:59 GMT
P5curly is my brother we build car together I pm for your address we over Shane Saturday
|
|
|
|
Post by miket on Aug 10, 2016 17:03:38 GMT
On your clean/paint vs shotblast/rebuild dilemma: As a complete rookie at the outset I was wary of taking on too much, but after all these months of building it no longer seems as if it would have been biting off more than I could chew. So just balance the desire for shiny against the cost... so much of kit car building seems to come down to red-n-shiny vs ££/$$.
|
|
|
|
Post by Fin on Aug 11, 2016 18:47:21 GMT
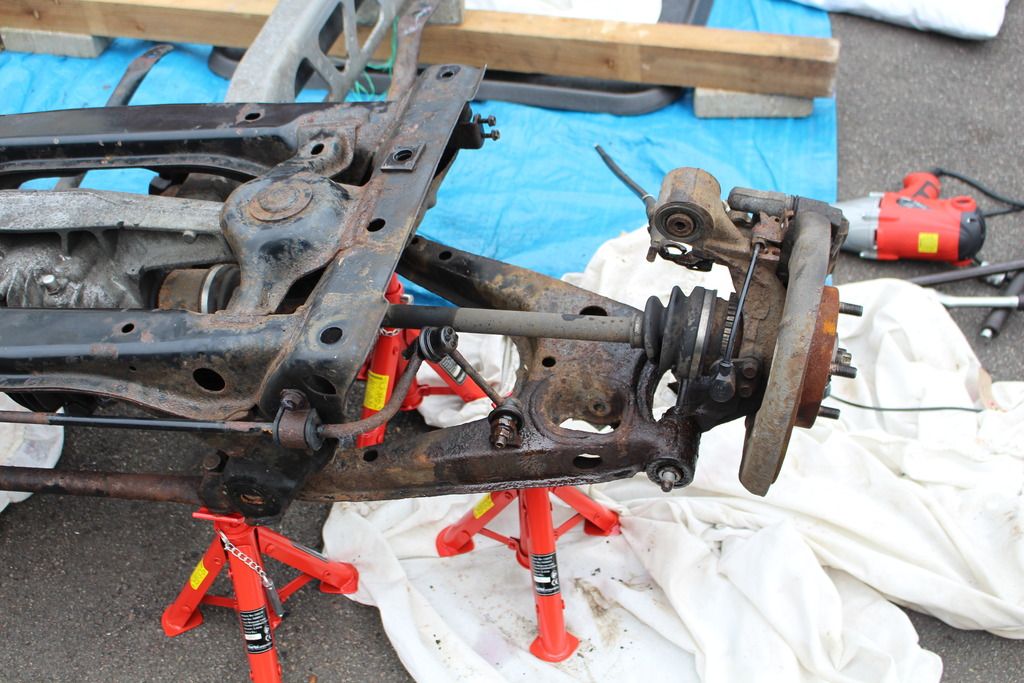
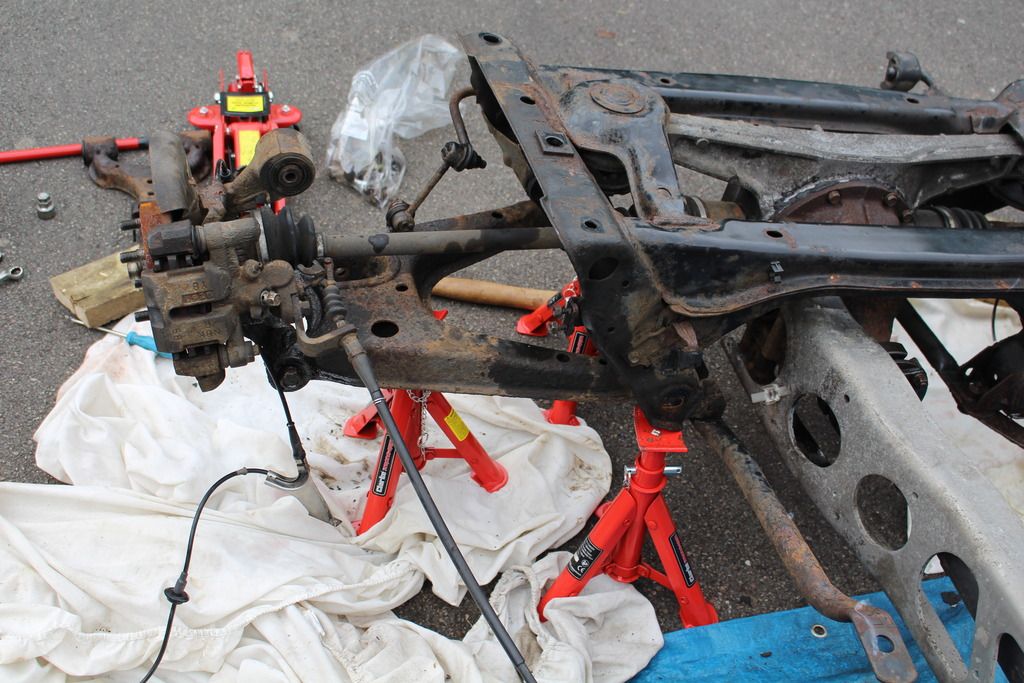
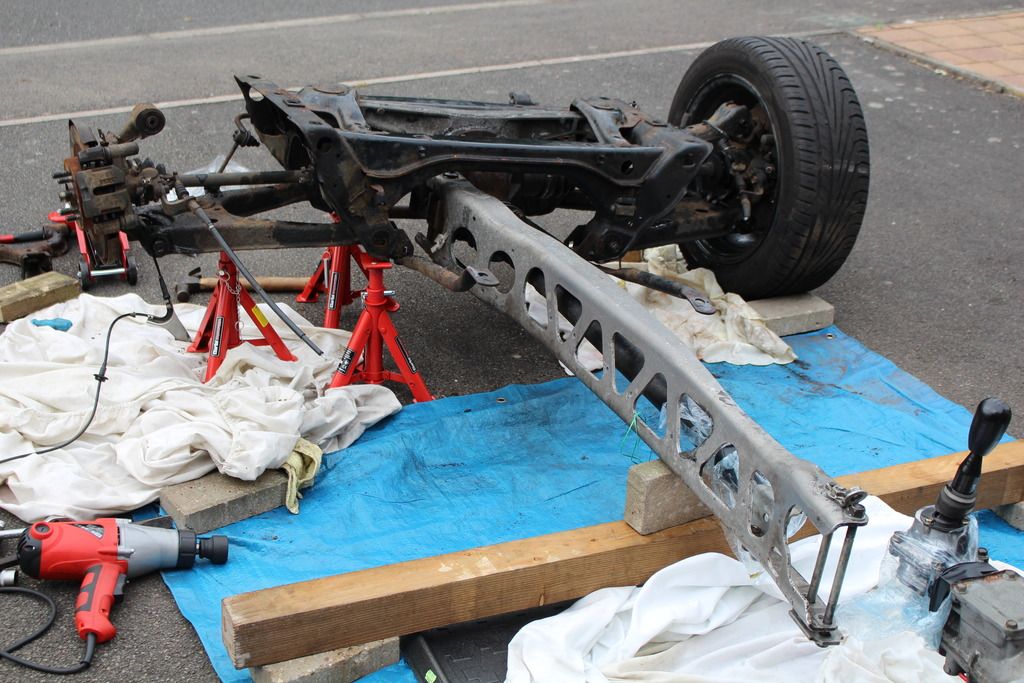
 Old shell finally gone It's a good job I don't have to pay myself an hourly rate, as much of yesterday was spent sat on a wheel, reading manuals, and debating the sequence for dismantling the suspension, and even whether or not to dismantle the suspension! Leave it all intact, and brush it off as best as I can, and then Hammerite was appealing, but I couldn't see me getting as good a finish as Shane seems to have done. Visited Langley Coatings, and got a price for shot-blasting of £80 an hour and powder-coating of £90 per hour + £40 for a second colour. Hoping it comes out less than £200, but we'll have to wait and see. Split the PPF and prop shaft, draining the gearbox oil in the process to prevent spills. Oil had a metallic glint, and the magnetic bottom drain plug had lots of metal stuck onto it. Will a refill with new oil be enough, or should I flush it before re-assembly? I'd made some home-brew 50% Acetone & 50% ATF, and applied liberally as the WD40 didn't seem to be doing too good a job. Eventually, I made a start on the rear offside, and everything came off with little problem. Although, I've still to extract the long bolt on the wheel end of the lower arm (centre of picture, right of jack). Does it unscrew, or do I have to drive it out with a rod?  Also, do I cut the rubber sleeves, or just the metal jubilee (type) clips? Finally, does the half-shaft "pry" out of the diff off some kind of spline attachment? Also had problems with the rear hub nut. Enthusiast's Manual states 29mm for both, but a 30mm was too small on rear. Bought a 32mm impact socket, and that was slightly loose, but whipped it off. Mk2/2.5 must be different sized nuts, but don' yet know about the front one! Finally, got a price for replacement PU bushes, with optional diff bushes, only to read Stuart's early build stating that in building 9, he's not seen one that needed the bushes changing. D'oh! Anyway, the path is now set, and some progress has been made.    |
|