|
|
Post by ancsportscars on Apr 28, 2018 7:03:26 GMT
Looking good, Scott. Don't forget to buy the key-shaped push-in blanking plugs when you get the locks - otherwise they'll fail IVA.  |
|
|
|
Post by tojeiro on Apr 28, 2018 10:22:54 GMT
Cheers Andy. I been reading a few Cobra build blogs as well as the MEV blogs for some tips and ideas and noted suggestion on mounting these to comply with IVA.
Found that S&J you recommended does the locks with IVA caps, had been planning to order these along with some chrome parts but thought I would wait since Stoneleigh show was coming up.
Looking forward to seeing your new demonstrator, been reading your Facebook posts, like some of the small mods you made so far.
|
|
|
|
Post by tojeiro on Apr 29, 2018 22:06:27 GMT
As per previous post I decided to move the fuel tank back towards its original position, however, as I also wanted to move the battery into the boot I needed to create as much space as possible. To achieve this I decided to make a profiled boot tray.
I should probably just have made a boot tray from aluminium sheet but fancied a shot at playing with fibreglass.
Started by designing the fuel tank and boot tray in SketchUp to ensure that I had enough clearance without making stuff 2 or 3 times (like normal)
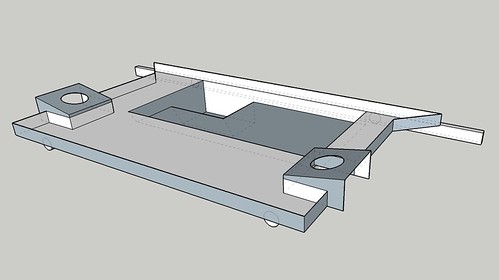 Frame by Scott Graham, on Flickr Frame by Scott Graham, on Flickr
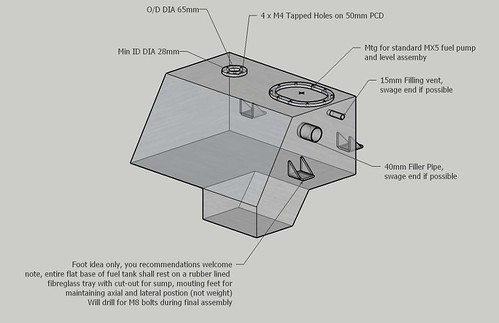 Fuel Tank ISO_2 by Scott Graham, on Flickr Fuel Tank ISO_2 by Scott Graham, on Flickr
Made up some polyboard single use moulds which I covered in polythene sheet.
[b
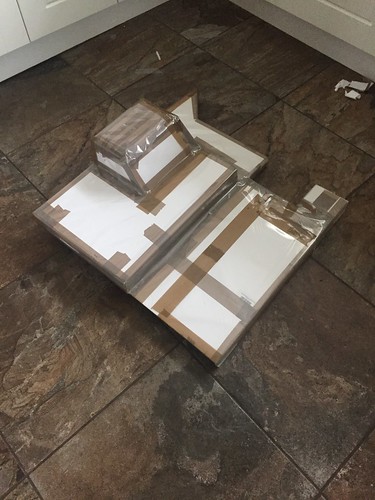 by -Tojeiro 74- by -Tojeiro 74-
Split the tray into 2 pieces so that
1: I could fit it past the cross braces
2: add some strength
After turning it out of the mould I added some additional strength with balsa wood, going to coat the underside with Raptor before final fitting.
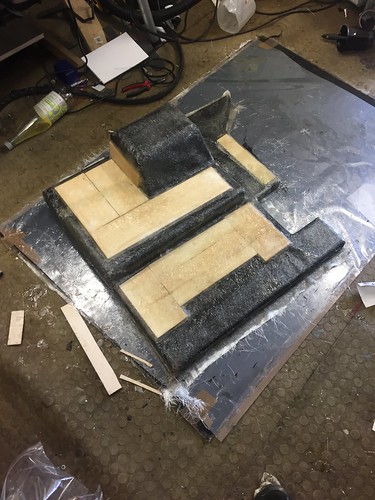 Untitled by Scott Graham, on Flickr Untitled by Scott Graham, on Flickr
Bit of trimming and got both sides fitted.
Surface not perfectly smooth as there was quite a bit of flex in my polyboard mould but not important to me as I am going to trim the boot area with carpet anyway.
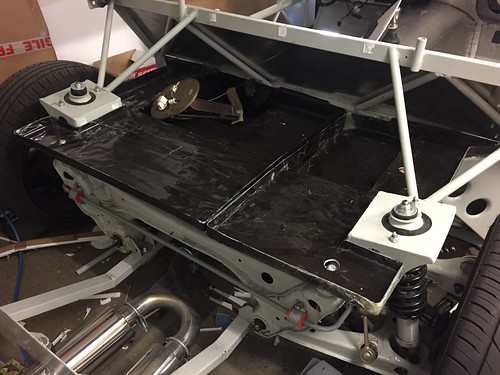 Untitled by Scott Graham, on Flickr Untitled by Scott Graham, on Flickr
With tank mock-up refitted, might look small but part of it is sitting down in the moulded recess. My 3d model give 32.5 litres which is plenty to cover the short runs that I will mainly do. Long runs will have regular stops anyway.
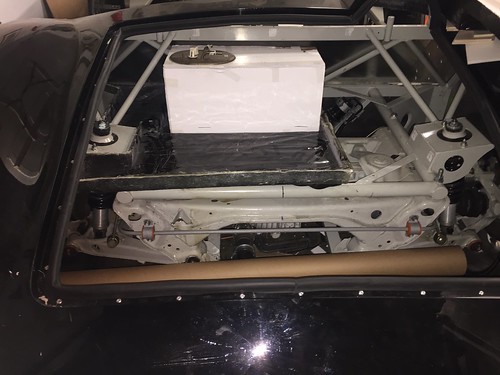 Untitled by Scott Graham, on Flickr Untitled by Scott Graham, on Flickr
Battery side will have this clamp assembly bolted it to secure the battery.
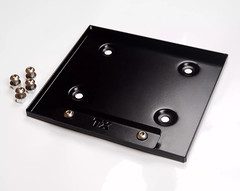 by -Tojeiro 74- by -Tojeiro 74-
The fuel tank will accept the existing pump & rollover breather valve unmodified. Got a price from a trusted fuel tank fabricator, just waiting on some 10mm aluminium plate for the fuel pump mounting flange that I am going to drill and tap first and then post to him for welding to the tank top (since Mazda drill pattern is quite random)
|
|
|
|
Post by tojeiro on May 1, 2018 23:01:42 GMT
Welded in some plates to accept a more standard type striker plate. 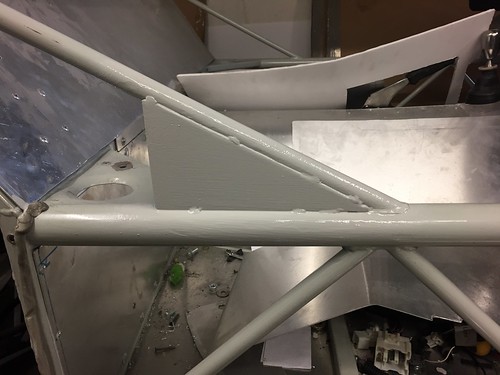 by -Tojeiro 74- by -Tojeiro 74-Skinning the outside and inside of the frame so wanted to leave access for any adjustment of the striker plate. 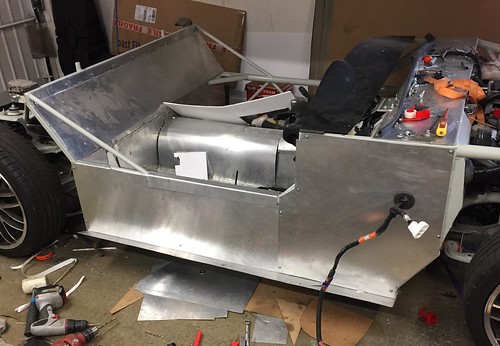 by -Tojeiro 74- by -Tojeiro 74-Looking forward to a great weekend at Stoneleigh, for once weather looks prefect. |
|
|
|
Post by tojeiro on Jun 2, 2018 22:32:25 GMT
Been making most of the great spell of weather recently so not managed much progress since coming back from Stoneleigh. One milestone ticked of the list is completing my bonnet hinges and locks. Hinges took a couple of evolutions but happy with result and nice smooth opening and closing. 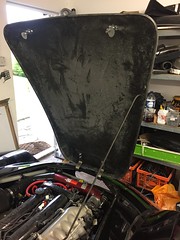 by -Tojeiro 74- by -Tojeiro 74-Going to order a couple of bonnet stays as I want one on each side. Bonnet locks are Cobra style picked up from S&J at Stoneleigh. 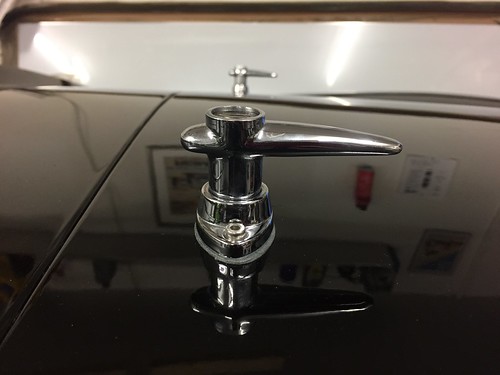 by -Tojeiro 74- by -Tojeiro 74-Nothing to locate the locking cams on the Replicar so back to the welder to fabricate more brackets, more complicated angles ! Benefit it that they are sized to trap between scuttle and the body do add additional support to the body. 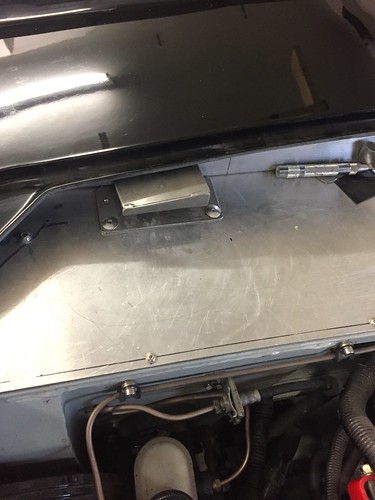 by -Tojeiro 74- by -Tojeiro 74-Just couple of rivers to keep in place at the moment to let me set the lock cam height but going to remove scuttle panel one final time so will then bolt them in properly. 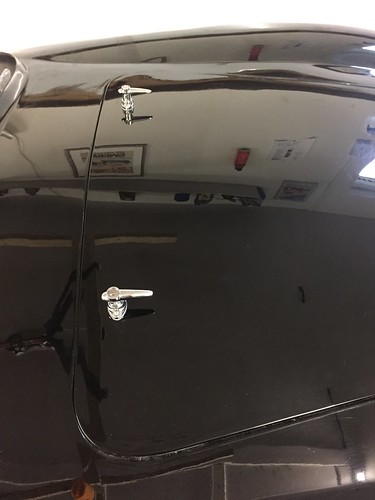 by -Tojeiro 74- by -Tojeiro 74-Need to get some countersunk stainless screws, the locks came with the IVA lock caps, just not fitted yet. |
|
|
|
Post by tojeiro on Jun 5, 2018 23:06:42 GMT
Got news fuel tank is ready, away on business at moment so getting delivered early next week. 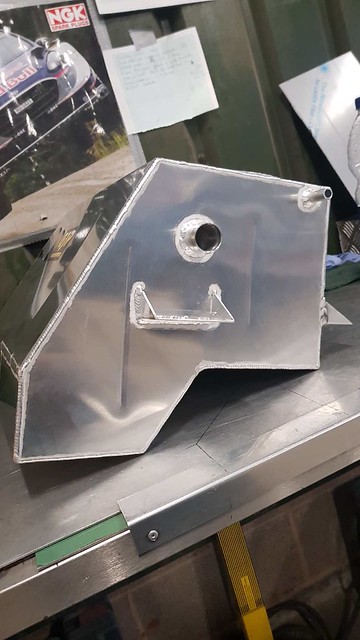 by -Tojeiro 74- by -Tojeiro 74-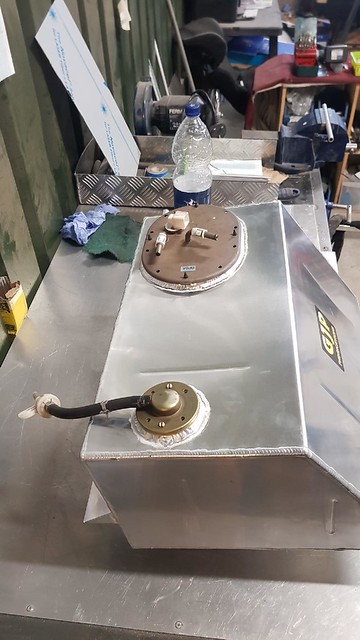 by -Tojeiro 74- by -Tojeiro 74-Happy to share the Sketchup files if anyone wants something similar made using donor pump assembly. Looking forward to being able to drive the car out of the garage, at moment only really able to work on one side. |
|
|
|
Post by tojeiro on Jun 9, 2018 22:22:48 GMT
More shiny bits fitted. 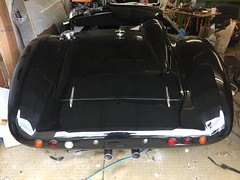 by -Tojeiro 74- by -Tojeiro 74-Word of warning on the Cobra hinges from S&J. While quality seems good the angle on the handed hinges is quite at lot, I expect this is common to all handed hinges and guess Cobra bootlids have more curvature than the Replicar, in the end I have to make some tapered rubber gaskets to flatten the angle and also accommodate the longitudinal curve of the boot (you can see here gaps before tightening. 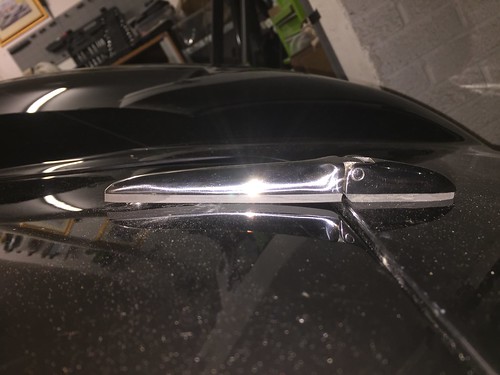 by -Tojeiro 74- by -Tojeiro 74-Fortunately an old rubber flipper provided the perfect piece of tapered rubber needed and meant I could justify to my wife why I don’t throw stuff away 😛 Also got the driver side door lock fitted, mocked up a quick striker and door shuts perfectly.  by -Tojeiro 74- by -Tojeiro 74-You can see the compact size of theses mini bear claw catches, loads of room for pull cables/rods. These also have extra lock mechanism (not fitted yet) which I plan to use with a remote central locking module and actuators hidden in door pockets. 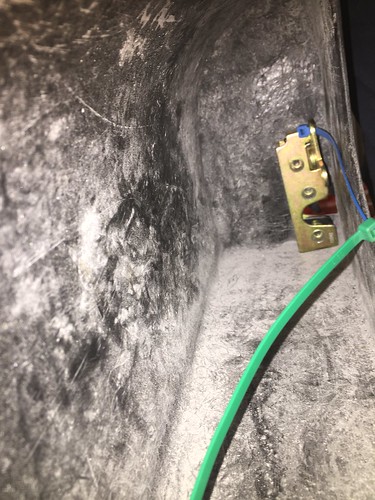 (null) by -Tojeiro 74- (null) by -Tojeiro 74-Need to order some interior door levers for manual release lever, currently consists of couple of cable ties. |
|
|
|
Post by tojeiro on Jul 11, 2018 21:27:54 GMT
Rear inner arches getting finished off which is the final piece in what has been a large boot shaped puzzle. 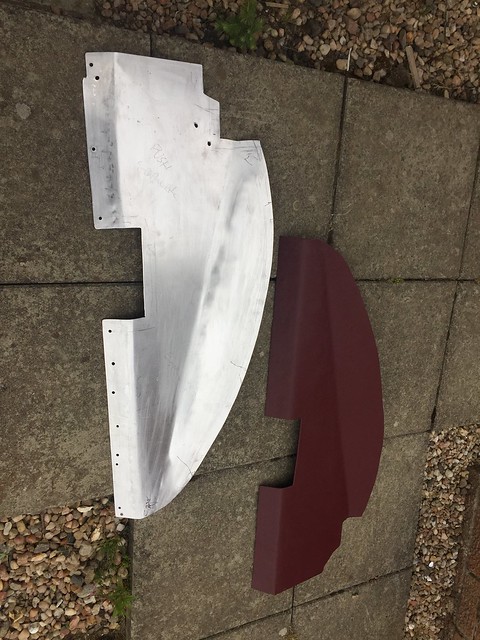 by -Tojeiro 74- by -Tojeiro 74-Happy with final boot result with space for a couple of carry on size suitcases. 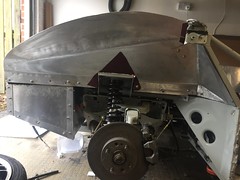 by -Tojeiro 74- by -Tojeiro 74-Fuel tank and all pipes/wiring reconnected, just need to weld in the passenger side door latch plate then I can think about filling the tank with fuel and driving the car out of the garage again. Seats due from Intatrim any day. PROLED back from CAI reprogrammed, fingers crossed all working this time. Will try and post some extra pics and catch up on the build diary this week. |
|
|
|
Post by tojeiro on Jul 12, 2018 21:05:51 GMT
Do here is final boot interior, took quite a bit of fettling to get all fitting and sealing nicely. 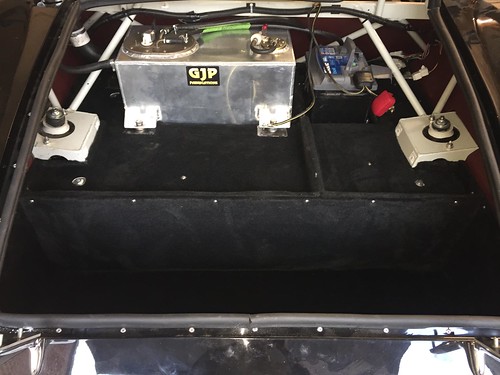 by -Tojeiro 74- by -Tojeiro 74-Loom and fuel pipe routed through rubber grommets to seal and prevent and contact with sharp edges. Used quick connectors on battery which makes easier to disconnect when not needed. Just some basic carpet at moment to cover my fibreglass trays, will look at some nicer trim later. Trimmed sides with some vinyl that will be used in cabin, rear light wiring p-clipped to arches. 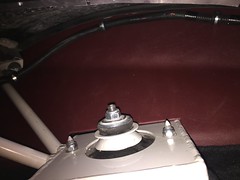 by -Tojeiro 74- by -Tojeiro 74-Fuel tank, filler and breather fitted, used new parts from CBS (fuel grade for IVA) after deciding against my chopped up MX5 parts, don’t fancy a leak inside (liquid or vapour) Meets my need by swallowing a 50L rucksack, 3 man tent and hold-all easily, just what’s needed for trips to Stoneleigh and the like. 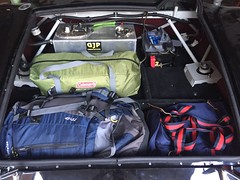 by -Tojeiro 74- by -Tojeiro 74-Finished up my welding today so was able to fill the tank with a couple of fuel cans. Gave dash a first coat of gloss black and hope to reconnect wiring tomorrow and get it out for a clean. |
|
|
|
Post by ancsportscars on Jul 13, 2018 7:37:12 GMT
Excellent work as always, Scott. Well Done. Just one thing I noticed is that the fuel check/breather valve should be vertically mounted and in the correct orientation (see white arrow on valve body) so that in the event of a roll (God forbid!) the ball bearing inside will shut off the fuel properly.  |
|
|
|
Post by R2S on Jul 13, 2018 10:10:54 GMT
Scott
interesting jig saw and well worth the effort, really neat.
how have you sealed the ali edges where they meet the glass body (not just here but across the build)? Next step for me is the various infill panels (somewhat different on the non door body)?
|
|
|
|
Post by ancsportscars on Jul 13, 2018 10:50:24 GMT
Scott interesting jig saw and well worth the effort, really neat. how have you sealed the ali edges where they meet the glass body (not just here but across the build)? Next step for me is the various infill panels (somewhat different on the non door body)? Don't know what Scott used, but on the demonstrator, I've used this small dia. seal to take up any slight gap between the ally infill panel edges and body. www.ebay.co.uk/itm/Car-BOOT-SEAL-Rubber-EDGE-TRIM-Door-Bonnet/231766425592?ssPageName=STRK%3AMEBIDX%3AIT&_trksid=p2057872.m2749.l2649You don't want the edges of the ally panels to be in direct contact with the underside of the body as otherwise, over a period of time a ridgeline will become visible on the outside of the body where the two meet. |
|
|
|
Post by tojeiro on Jul 13, 2018 19:05:33 GMT
On the aluminium arches I used the donor MX5 boot seal Earlier photo below shows better, also shows the saddle clamp on the triangulation bar that gives good support higher up. 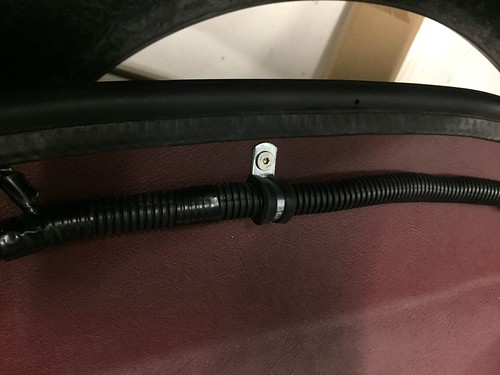 by -Tojeiro 74- by -Tojeiro 74-Considered bonding some angle on to the body and bolting together but as is it gives a nice seal and enough flex in the aluminium to create a slight spring effect which keeps a good seal. As mentioned wiring and fuel lines sealed with rubber grommets, you can’t see the fuel ones under the carpet, but trust me they are there as they are the last ones I want to get chaffed, I even made a special grommet plate in aluminium that clamps the fuel line grommets to the fibreglass tray so they cant possibly come loose. Have a photo somewhere for mr IVA. 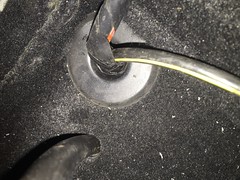 by -Tojeiro 74- by -Tojeiro 74-—————— Andy, regards rollover valve I used the standard MX5 one bronze part with standard check valve (white part). I mounted these similar to donor, the red piece on the end of mine is just a simple breather. If I got something wrong here good to know do that I can adjust, I did forget to ask for a tab welded on tank for bolting check valve which is why I fixed as shown. I did test it when I flushed the tank before fitting and seemed to be working OK. |
|
|
|
Post by R2S on Jul 13, 2018 19:13:23 GMT
For my horizontal side pieces from to back (you dont have them on your door bodies), I thought about bonding ali beam and fastening outer edge to these but would use slots rather than holes to allow some 'flex'.
Id always planned on separating wheels from boot area (remembering I dont have a boot lid!), and same at front as even without a roof I dont plan on being a fair-weather driver (I live in the Peaks it rains A LOT) and want to minimise water ingress as much as possible. Only thing is for the panels I dont have a bender and as such will have to search out a local firm that can shape the pieces for me.
|
|
|
|
Post by tojeiro on Jul 14, 2018 22:00:51 GMT
One thing I wished I’d invested in is a bender, only have 2mm aluminium sheet left and it’s a pain to bend in my homemade vice mounted contraption, Anyway, passenger door hung and gauge wiring reconnected (and 95% working) and drove the Car out of the garage for first time in months. 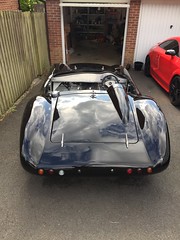 by -Tojeiro 74- by -Tojeiro 74- by -Tojeiro 74- by -Tojeiro 74-Happy to be out in the sunlight again, not to happy about the mess left in the garage but that can wait for a rainy day. Feels like a big step closer to IVA |
|