Deleted
Deleted Member
Posts: 0
|
Post by Deleted on Jan 8, 2018 17:11:40 GMT
Only thing I would look into is these hinges are iva ok when fitted to the boot, you could probably fit spikes to the rear of the car and meet iva requirements. It is forward facing parts that get all the scrutiny. Obviously if anyone has used them on a bonnet without issue then the radius must be ok but might be worth some extra checks. On my build I have gone simple for the iva and will change the bonnet fittings at a later date.
|
|
|
|
Post by tojeiro on Jan 15, 2018 21:33:38 GMT
Been doing lots of small bits and pieces which can be a bit frustrating as there is no significant visual change. First on my to-do list was to fit the front and side indicators, was not really keen on the kit supplied fronts, but could not find any alternative 21w options. I fortunately had the perfect holesaw size so only needed some minor dressing. I resealed the cut joint with some black gloss touch-up paint I had left from my previous Dodge Charger which is perfect match for the gel coat. Pushing right down to the lense gives a very tight fit with no other support needed and looks OK considering the size. 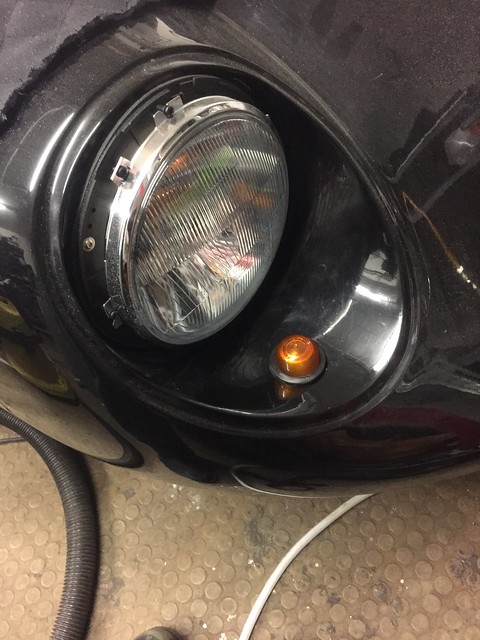 by -Tojeiro 74- by -Tojeiro 74-Side indicators were another frustration, picked up LED lights from the Birmingham classic car show only to find after wiring that they are red and not orange despite explaining to the seller what they were for, I can’t even remember what stall I bought them from (I bought a lot of stuff) so they are in the spares box and replaced with some Fiat Seicento ones which I managed to get with plugs and flying leads for £10 and are also fully e-marked for good measure. 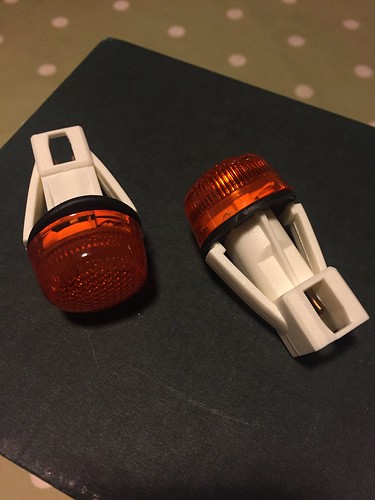 by -Tojeiro 74- by -Tojeiro 74-Dash lights now fully wired and working, issues with the fuel and water temp readings on my PROLED gauge may need a different sender but Steve didn’t mention anything in his Norfolk build. Also on the dash I decided to make a removable front cover from aluminium, was very pleased with result as I tried to match the curve on the base of the dash and it came out exact and straight, my metal bashing skills must getting better. Going to trim this with leather later, but now I can now take everything on and off easily without pulling full dash out. 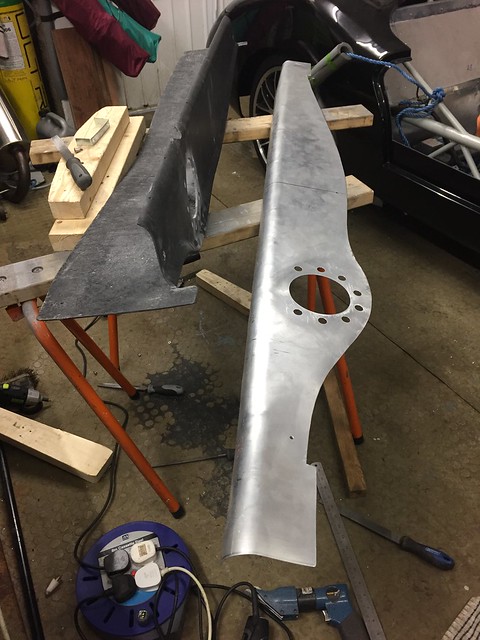 by -Tojeiro 74- by -Tojeiro 74-All instruments connected by multiplugs so can be disconnected and removed. Probably go for black gloss finish on remaining exposed dash areas but need to wait on garage temp coming up before any painting. 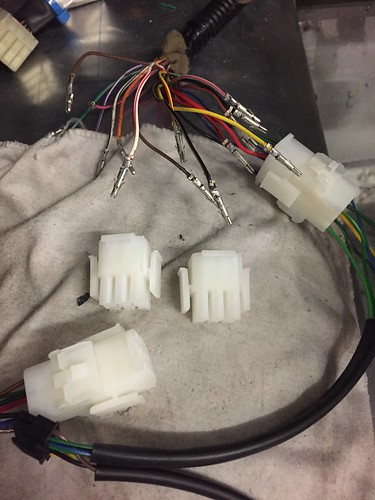 by -Tojeiro 74- by -Tojeiro 74-Next headache came when fitting the boot seal. Initially was happy that I finished this quick job one lunchtime only to discover that after fitting the seal that the boot lid would not sit down flush as it seal fouled the edge. 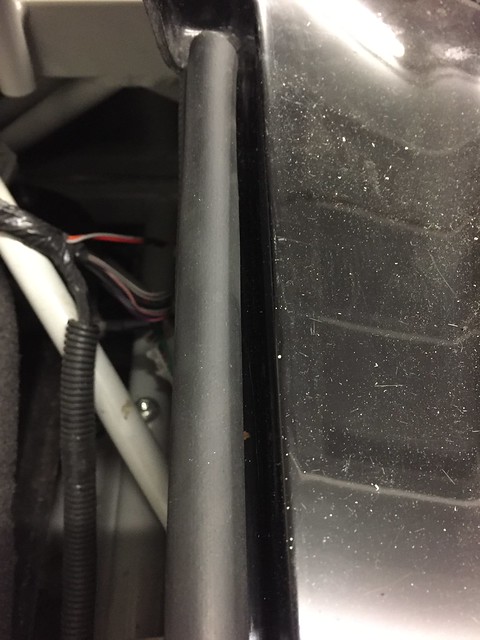 by -Tojeiro 74- by -Tojeiro 74-Not sure if this is just the way my boot cut out was trimmed or the size of seal I used but I think you need a decent size seal due to thickness of the fibreglass. Anyway, rather and chuck away my brand new 4 metres of seal I cut some spare 1.5mm aluminium sheet and folded half the width over to create a set of stepped strips that I then riveted to the existing lip.  by -Tojeiro 74- by -Tojeiro 74-This gave me the extra width required to refit the seal in a position that allows the boot lid to sit flush with the body. 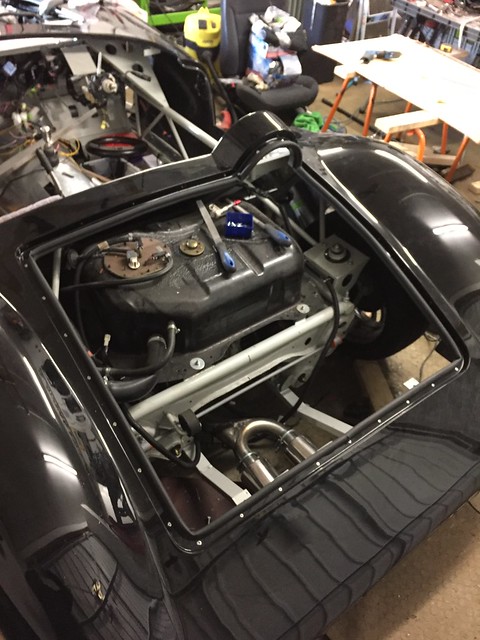 by -Tojeiro 74- by -Tojeiro 74-One for Andy to look at, maybe just leave a bit extra lip when you cut out the boot aperture. I am going to call S&J motors tomorrow regarding the hinges, thanks Andy for that tip. I do see many recommendations online, they must do something right to survive without a website. Ready to lift body off for hopefully last time to tidy up final wiring runs but business trips to France, India and US in next 4 weeks is going to limit progress, might manage some small jobs in between. |
|
|
|
Post by ancsportscars on Jan 15, 2018 22:50:59 GMT
With regard to the Cobra hinges, be aware that they are chamfered to take into account the transverse curvature of the boot (or in your case the bonnet) and therefore are handed.
|
|
Deleted
Deleted Member
Posts: 0
|
Post by Deleted on Jan 16, 2018 15:19:00 GMT
Your solution for the boot seal looks good. Have you tried it with the boot on? On mine the lip of the lid catches as it closed and damages the seal. Obviously might just be the seal I am using.
|
|
|
|
Post by stevednorris on Jan 17, 2018 13:11:45 GMT
I had no problems with my engine temp on the PROLED, I did have to wire in a resistor in the fuel gauge wiring to get that to read correctly.
|
|
|
|
Post by tojeiro on Jan 17, 2018 17:16:56 GMT
Hi Steve, thanks for input. Do you remember what setting you used? I tried different ones but same result, gauge was reading OK before in Mazda cluster which is why I am sure sender is OK. 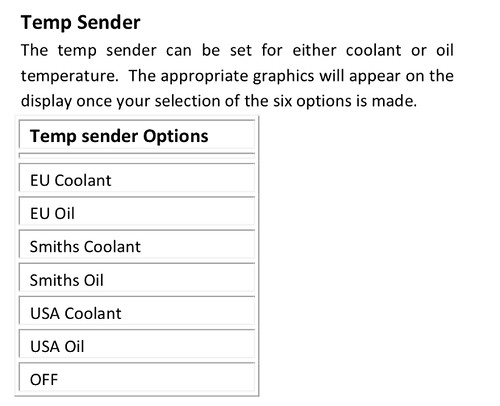 by -Tojeiro 74- by -Tojeiro 74-Fuel may also be reading incorrectly but tank is nearly empty and I don’t plan to fil the tank no as it is going to be replaced soon with a fabricated aluminium one. AG least that one I know the required values to adjust to. |
|
|
|
Post by tojeiro on Jan 17, 2018 17:22:23 GMT
Hi westie, Another benefit of moving the seal inwards is that there is space for it to open without rubbing the seal.
Never thought of this before the modification but it is clear that it would have fouled as even now it just clears.
|
|
|
|
Post by stevednorris on Jan 17, 2018 17:23:27 GMT
Pretty sure I used EU Coolant as it is then in degrees centigrade.
|
|
|
|
Post by stevednorris on Jan 17, 2018 17:40:57 GMT
|
|
|
|
Post by tojeiro on Feb 1, 2018 14:41:27 GMT
Starting to think keeping receipts for everything might not be such a great idea. At least they are locked in my office drawer away from prying wife eyes. 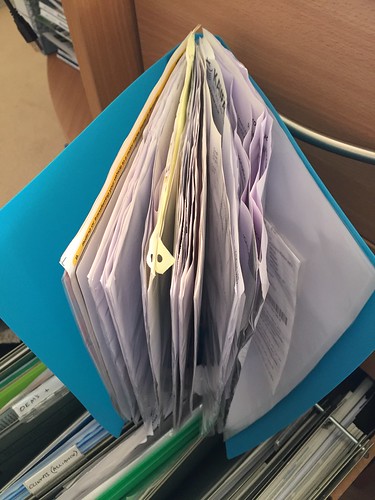 by -Tojeiro 74- by -Tojeiro 74-Haven’t even considered to start counting 🤑 |
|
|
|
Post by R2S on Feb 1, 2018 15:00:45 GMT
I have  but still k's less than a Cobra (and better looking  ) |
|
|
|
Post by tojeiro on Feb 9, 2018 23:04:01 GMT
Seem to have spent many more hours in the garage with not much to show. Focus has been on final fit of loom and dash plus lots of small final adjustments on tunnel and kick panels. Added some extra bracing on my round transmission tunnel as it’s my main leaning point when I get in and out of the car. Also added some bracing to my kick panels and figured out a new location for the general fuse box. Earlier I had mounted this on the brace under the dash but realised that I would have to remove kick panels if a small fuse blew. 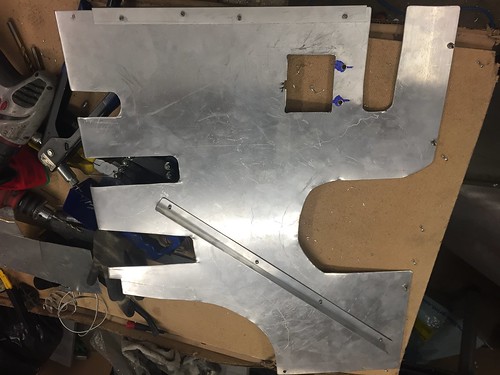 by -Tojeiro 74- by -Tojeiro 74-To do this I chopped off the plastic legs from the fuse holder and made a small alum bracket that bolts thro the kick panel, It locks in using the original plastic lug on the other side. My interior is all going to be covered in carpet or leather so not so concern on my surface finishes at the moment. 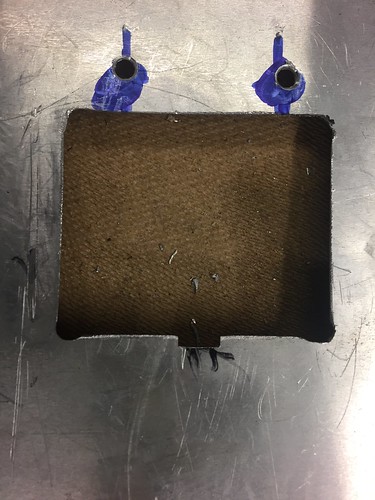 by -Tojeiro 74- by -Tojeiro 74-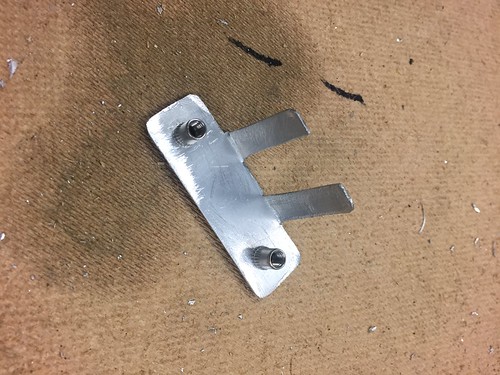 by -Tojeiro 74- by -Tojeiro 74-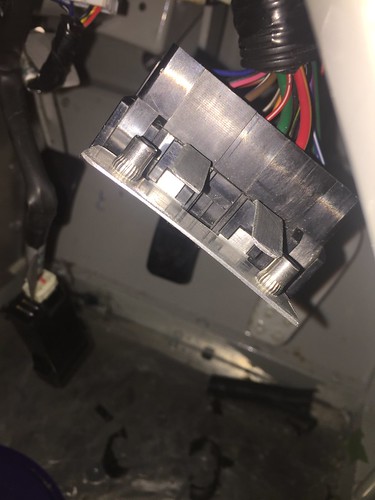 by -Tojeiro 74- by -Tojeiro 74-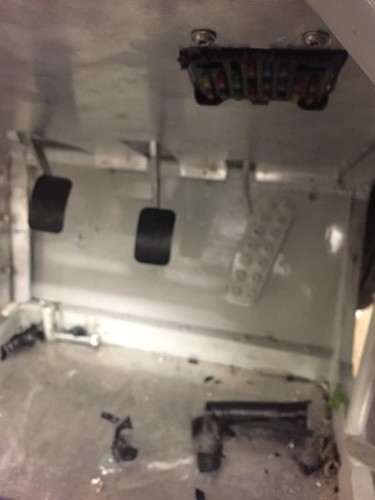 by -Tojeiro 74- by -Tojeiro 74-Also received my new stainless material for fabricating my MKII version of my internal door hinge. Ordered some precision machined 3mm thick wall tube, stainless steel plate and flat bar. As I already have a rough working prototype I hope to fire up the tig and get at least one side finished this week. Might need to wait for a bit warmer weather however before I bond anything to the body. Want to finish the hinges at this stage beacuse after I start fitting interior aluminium side panelling access will be more difficult. Sold the donor wheels and SS backbox for £100 which helped camouflage some of this months parts spend and free up space in the garage. |
|
|
|
Post by tojeiro on Feb 27, 2018 9:46:50 GMT
Both door hinges now finished and working perfectly. MkII version in all stainless went in the scrap metal box as I could not get required rigidity in all planes using the flat bar I bought. MKIII uses steel tube with stainless door and body mounting plates. 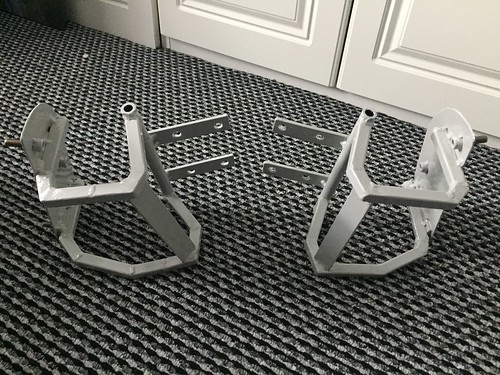 by -Tojeiro 74- by -Tojeiro 74-Hinges will be hidden by alum sheet cover so not 100% concerned on appearance, focus was on strength and function. Hinge body support is self supporting with load transferred vertically onto my previously bonded and bolted aluminium sill channels. I will still be bonding the perforated plate to the body but doors work OK as is with detachable brace added between body and frame. 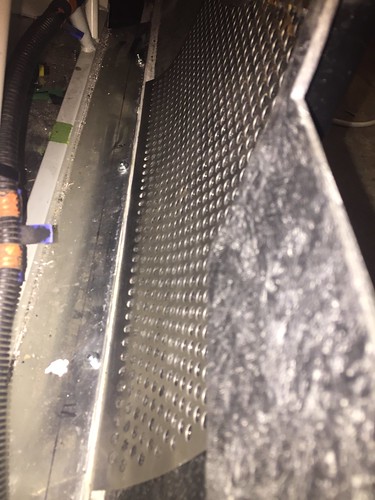 Once I get all installed and pictures loaded I’ll post a full how-to in a Replicar door thread. Don’t have any door latches with my donor so planning to buy some mini bear claw catches from CBS. |
|
|
|
Post by tojeiro on Mar 2, 2018 23:32:10 GMT
Bit cold up here at the moment, so moved to the kitchen table. Not sure where we are eating breakfast tomorrow. 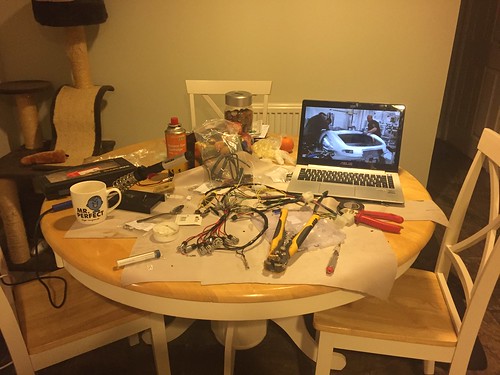 by -Tojeiro 74- by -Tojeiro 74-Last of the wiring connection now complete, will try and do a test fit to the dash to figure the final best conduit runs. |
|
|
|
Post by tojeiro on Mar 13, 2018 15:23:38 GMT
Finally finished connecting and tidying all dash wiring, I hardly touched my loom and it almost drove me mad, I feel a lot of respect (and sympathy) for those that strip it to back to basics and build it back up again.
One issue found is that my Brake Fluid Level sensor is faulty (I get resistance reading open and closed).
I even took the float out completely but still cant get a zero reading.
Handbrake switch (same circuit) is working fine and lamp goes out if I disconnect fluid sensor. Also check wining from sensor plug to dash it is OK.
Question is can you buy the sensor anywhere, been googling without luck. Suppose Mazda might sell one but probably the double the price of a complete 2nd hand reservoir assembly.
|
|