|
|
Post by tojeiro on Sept 25, 2017 23:00:46 GMT
In my normal random build process I decided to make a start on fitting the lights while I am waiting on some bits coming in the post for remaining body mounts and exhuast. Headlights went really smoothly, bought a large hole saw for just £9 on eBay and it worked great. Deliberately bought a size just a couple of mm smaller than the lights and did the final sizing with a bobbin sander on my drill. 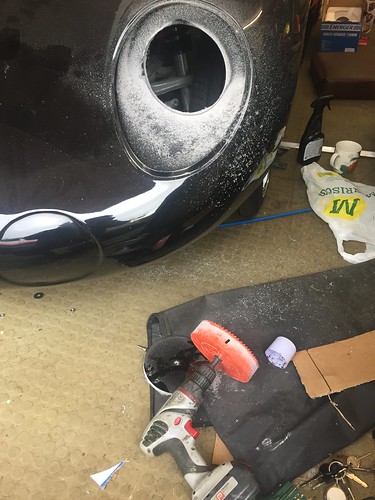 by -Tojeiro 74- by -Tojeiro 74-Loads dust but properly suited up. 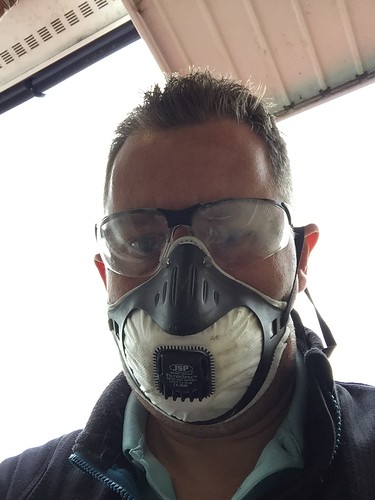 by -Tojeiro 74- by -Tojeiro 74-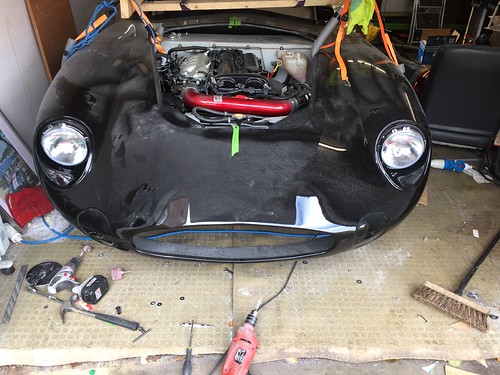 by -Tojeiro 74- by -Tojeiro 74-For the rear lights I faced the same issues as others regarding the tight fit. I did consider using the bobbin sander to open the recess a little but decided to try something else first. 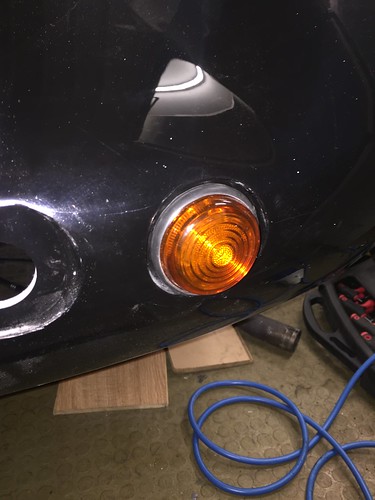 by -Tojeiro 74- by -Tojeiro 74-Basically ditched the chrome ring and trimmed the outer rubber lip, it now fits really nice and the lense still feels very secure. Only did one to test but think for sure I will go this direction unless someone points out an issue with this. Not travelling now for a few weeks so hope to make a bit more regular progress. |
|
|
|
Post by tojeiro on Oct 12, 2017 14:19:04 GMT
OK, time for long overdue update. Been working on a few areas at once, generally because I have to keep taking on and off the related bit and pieces. Body Mounting:- Got all brackets made up now, quite a job to work out all of the angles to match the body mounting points. Fronts – glued some pieces cut from non-slip rubber mat on top of the bracket, but felt it would just give a little isolation between steel bracket and body but still very compressible and thin so that I get a nice face to face clamp, just to drill final mounting bolt holes 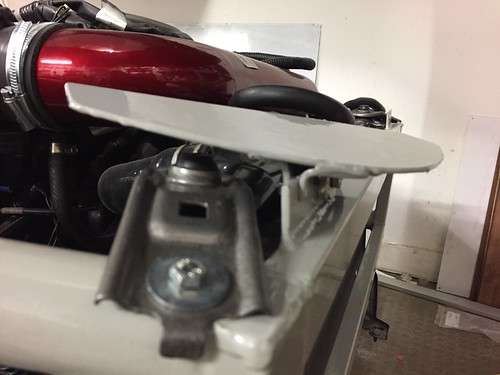 by -Tojeiro 74- by -Tojeiro 74-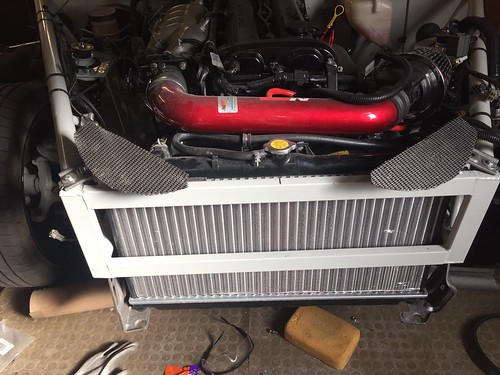 by -Tojeiro 74- by -Tojeiro 74- Front scuttle – fabricated up some plates cut from some B&Q brackets, will remake both front brackets with a better finish from stainless sheet later. 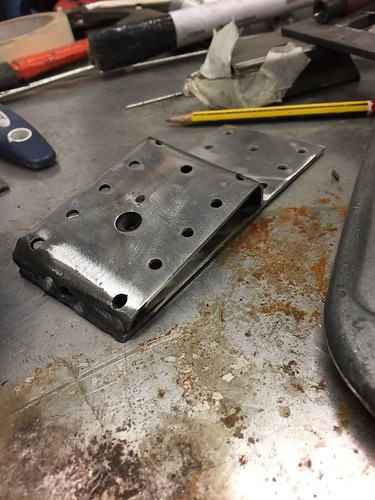 by -Tojeiro 74- by -Tojeiro 74- Sills – as previously mentioned I went with a method involving some aluminium angle and adhesive, see below. 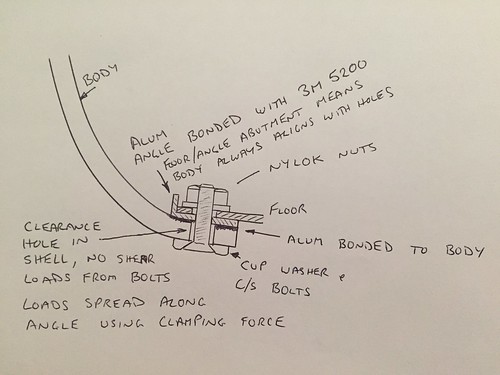 (null) by -Tojeiro 74- (null) by -Tojeiro 74-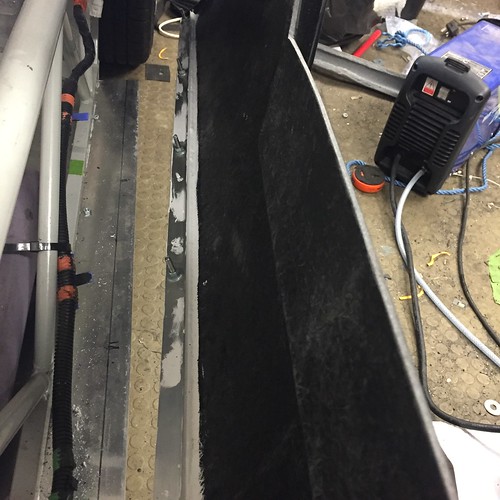 (null) by -Tojeiro 74- (null) by -Tojeiro 74- That 3M 5200 stuff is awesome, I made some trial pieces using the headlight cowls cut outs and after leaving a few days to cure fully I tried to pull it off, given that the only result was actually bending the aluminium angle I suspect it’s going to be strong enough. 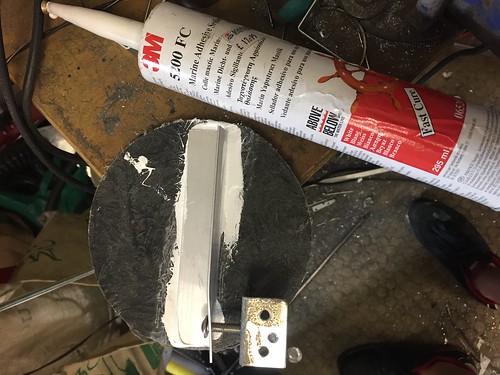 by -Tojeiro 74- by -Tojeiro 74-Rear arch support – B&Q adjustable bracket + Landover bump stop + tube of Tigerseal Basically Tigersealed the cut down bump stop to the suitable prepped steel bracket, then added layers of Tigerseal on top. 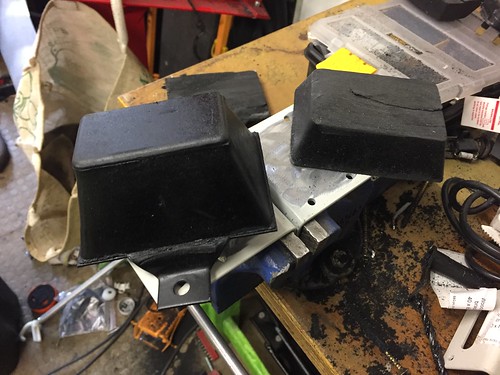 by -Tojeiro 74- by -Tojeiro 74-By dropping the body down during each layer and giving time to set (thank god for my hoist) I have built up a profile that matches the arch shape on the inside. Used clear plastic sheet to isolate the body from the Tigerseal which I could easily peel off before adding next layer. 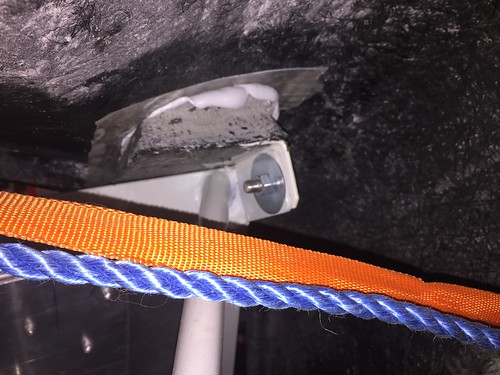 by -Tojeiro 74- by -Tojeiro 74- Rear – As per previous posts I went with a new fabricated outrigger, again it lets me lift the body on and off quickly while always maintaining the correct position when lowered back down. It’s going to double up as my rear exhaust hanger, just got a couple of new brackets to weld on and then I will bolt up permanently to the sub frame, had to make a slight profile adjustment to clear my exhausts. 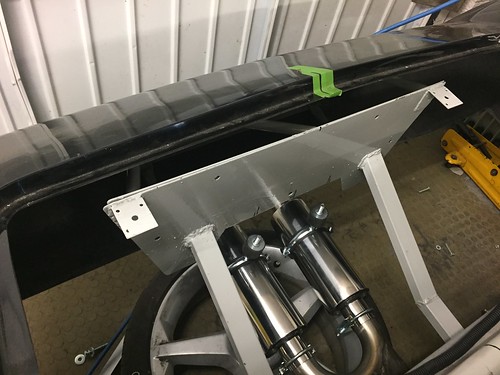 by -Tojeiro 74- by -Tojeiro 74- Other jobs include fabricating rear boot hinges and mounting plates (more bonding), exhaust fabrication and finishing the headlight mounting, also go these waterproof automotive plugs to make the loom connections for all of the lights. 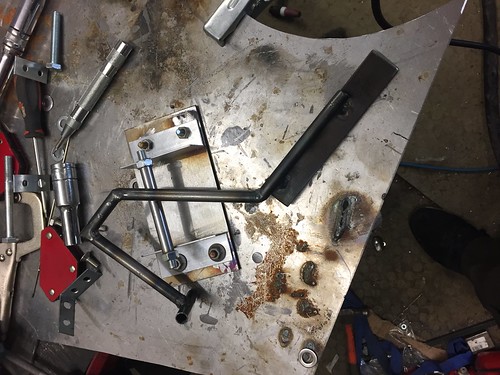 by -Tojeiro 74- by -Tojeiro 74-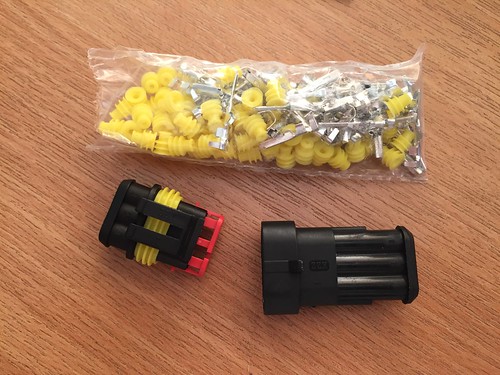 by -Tojeiro 74- by -Tojeiro 74- |
|
|
|
Post by R2S on Oct 12, 2017 21:19:47 GMT
Pleased to say body fitting is closing in rapidly on my build so the timing of your photos couldn't be better.
As a matter of interest where does dash sit relative to chassis and body both in terms of length and width (my dash sits way over to the drivers side if I want instruments to line up with steering and seat)
On the floor lower body fixing how much does floor pan overlap body?
You could have used ali bonding strip on outside thereby providing continuous compression rather than countersunk washers applying outer face loads (assume thats what you mean rather than cup washers which only give outer edge bearing and would therefore likely cut into grp).
|
|
|
|
Post by tojeiro on Oct 12, 2017 22:01:10 GMT
On dash I have it mounted centrally on the chassis, I adjusted the position of the steering column slightly to align with dash hump. Going to use Smiths ProLED dash so not to concerned on matching profile perfectly which maybe more important if using MX5 dash. Regard front to back it is currently pushed firmly against the mounting tabs. 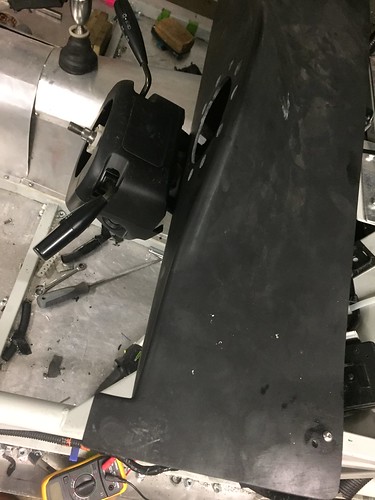 by -Tojeiro 74- by -Tojeiro 74-You are right on the washers, using solid aluminium black anodised countersunk washers. I did think about using an exterior strip but was trying to keep the lines as clean as possible, sill is also not completely straight so exterior strip would highlight any slight fluctuations. 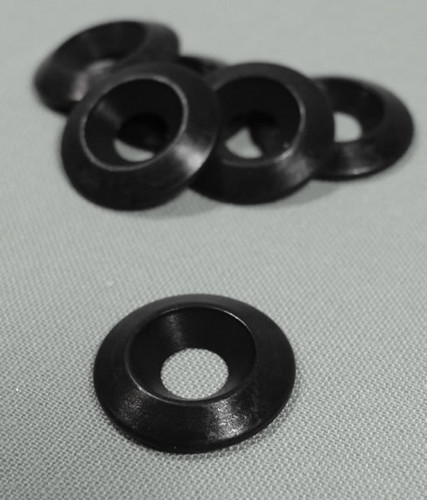 by -Tojeiro 74- by -Tojeiro 74-I cut floor as build instruction (75mm overlap). Aluminium angle on sill is 25mm wide so basically that is the overlap between floor and body that I am using, need to pull body in a little at front which was another reason I didn’t want the load going directly from sill bolts into the body. |
|
|
|
Post by tojeiro on Oct 23, 2017 19:43:34 GMT
Exhuast finished, not had time to mock up a noise test but with no mid resonator and only two 4” diameter rear mufflers it was never going to be the quietest but does sound awesome, nice deep burble with no raspy noise on revs. Donor came with stainless centre pipe so just fabricated a split connector out of some stainless tube, took a bit of fettling to get balanced flow through each exhuast but got there in the end and gave me plenty of practice with my Tig welding. 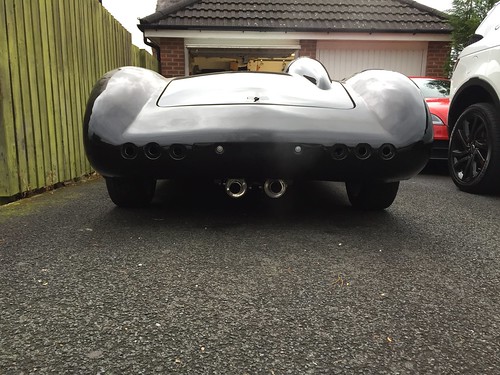 by -Tojeiro 74- by -Tojeiro 74-May need to replace for IVA but reckon I can easily switch out for a cheap backbox for test if it is going to be marginal but I wanted to fit this at this stage so that I could finish all welding on my rear outrigger. It was dead centre when bolted up, this was after running up to temp and seems from photo to have settled a bit to left, got some adjustment on my support brackets so can realign as these things really bug me. If I did use for IVA, do I need to fit some trim or edging on the exhaust end, currently it’s just 2mm thick stainless tube with no rolled edge. |
|
|
|
Post by tojeiro on Nov 4, 2017 0:01:15 GMT
Rear lights installed and wired, all working no problem. 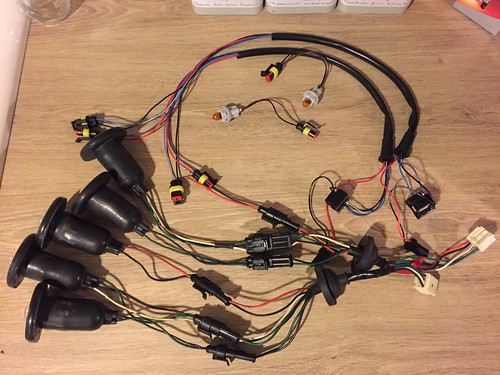 (null) by -Tojeiro 74- (null) by -Tojeiro 74-Pleased with my waterproof connectors, makes disconnecting nice and easy when removing shell. Will wrap in loom tape during final fit up. 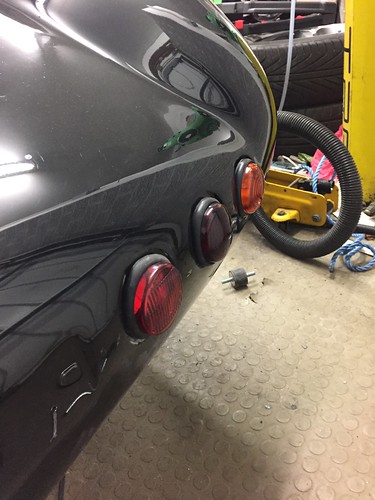 by -Tojeiro 74- by -Tojeiro 74-As mentioned before I decided to trim rubber holders and fit without chrome rings, certainly made fitting easy but definitely no chance of lenses falling out. Fittted fog light recessed to match level of other lights, method already posted here. mevowners.proboards.com/thread/5165/iva-compliance |
|
|
|
Post by tojeiro on Nov 12, 2017 16:09:25 GMT
Had a great day yesterday at the NEC Lancaster Classic. Picked up a lot of stuff for my kit, so much I could hardly carry it back to the car, needless to say my other half was at home. Among purchases was a Smiths PROLED dial for which I got 10% off from Digital Speedos, also picked up the dash warning lights and switches, and wiring odds and ends so that I can work on this in the house over winter to save some garage heating bills. Hoped that Intratrim were going to be there but no luck, will need to get a colour swatch sent to my house as I want to order the leather for the tunnel and side panels so that I can also start to work on this in the evenings. Did buy some carpet as I was not so concerned here on grain/colour match. Using this as my inspiration 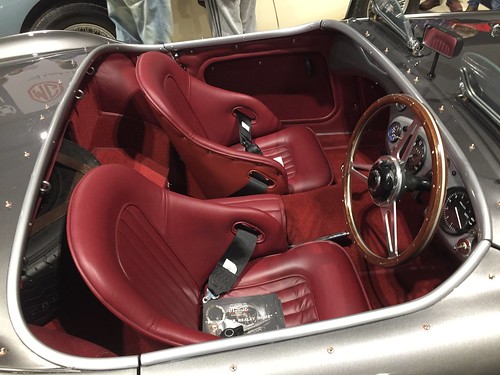 by -Tojeiro 74- by -Tojeiro 74-Also picked up some suitably e-marked small side repeaters, but both SVC and CBS advised me that the older type of universal indicator I think others have used on the front has been discontinued, the ones that came with the kit are huge and couldn’t figure out any easy way to fit. The show did give me some alternative ideas but need to see what can be made to work while staying in the regulations. Stopped by to see Stuart and the new Excocet, it is a real step forward and looks very striking, sure it will sell even better than the last version. The only problem no is that I am super busy with work until Christmas so might not get much done. Going to need to negotiate some extra garage time next year if I am to make Stoneleigh. |
|
Deleted
Deleted Member
Posts: 0
|
Post by Deleted on Nov 22, 2017 20:57:57 GMT
Was wondering how you feel about the protech shocks now you have had them on for a while. My list of jobs left before IVA is short but at the top is a suspension change to get some adjustment above what I have. I know you reduced the height a little from standard mx5, are you happy with that option. Also have you had it out to get a feel for those spring weights?
|
|
|
|
Post by tojeiro on Nov 24, 2017 12:04:34 GMT
Still happy with my choice, however after playing about a bit with settings I would suggest standard spring length, at least on rear.
I have no issue whatsoever getting ride height but there does seem to be quite a lot of spring compression on rear which means pushing up the platform close to top.
Front seems perfect although if you just order standard MX5 length then the extra 1” wouldn’t be an issue as there is lots of spring platform adjustment.
Where I live there is not much scope for any kind of test drive but certainly moving over the bumps on driveway and garage entrance does not send any jarring bumps.
Just have shocks set in middle for now, feels firm yet compliant which was what I was looking for.
What I liked about Protech is they have dozens of spring options, so I can always change the spring length or rating later if I want the longer ones for only a few pounds.
Been in India for 2 weeks but will be back in the garage sometime over the weekend so will try and get a photo or two of the spring platform positions.
|
|
Deleted
Deleted Member
Posts: 0
|
Post by Deleted on Nov 28, 2017 10:25:42 GMT
Thanks for the update, going to give them a call now and see if I can get an order in.
|
|
|
|
Post by tojeiro on Nov 28, 2017 18:54:13 GMT
Here are the rear shocks with spring platform positions. 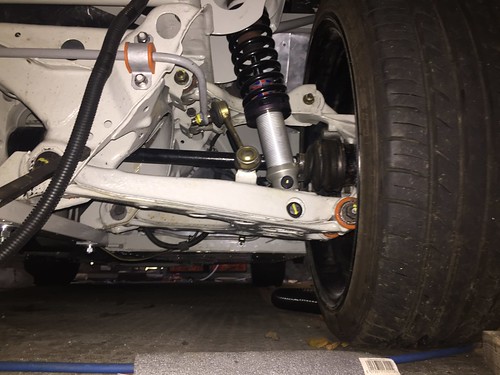 by -Tojeiro 74- by -Tojeiro 74-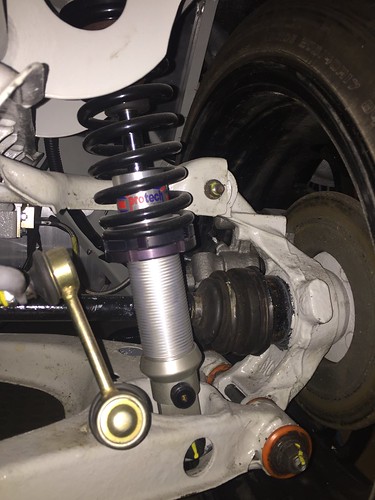 by -Tojeiro 74- by -Tojeiro 74-Got 360mm height to rear lights with driver and 1/4 tank, could probably squeeze another 5-10mm if needed. |
|
Deleted
Deleted Member
Posts: 0
|
Post by Deleted on Nov 29, 2017 9:04:42 GMT
Thanks for the extra pics. I put an order in with protech, should be about two weeks for delivery.
I did some research on the locost forum for spring weights and ended up going for the same but went with the full height for MX5.
Once I have made the change the car will be going for a Geo setup, dummy MOT mainly to get lights set right and then no reason not to book IVA.
|
|
|
|
Post by tojeiro on Dec 1, 2017 22:59:58 GMT
Waiting on an order from CBS for some more bits and pieces that I need to wire up the dashboard so decided as normal to start on a completely different area altogether. As mentioned before I was really determined to go with internal hinges (wife thinks I am just stubborn) Anyway after what was a much simpler process than expected I have a properly working concept. I just temporarily bonded the hinge pin mounting plate to the body with a couple of blobs of PU so that I can remove again. Given that just a small amount of PU worked for the mock-up I am confident that I can mount the hinge firmly enough on final fit. Plan to use a large piece of perforated stainless sheet bonded to the inside of the body with epoxy and then encased with fibreglass matting. The plate will have studs welded to it which allows me to have adjustment. Same as what I did for movk-up but will use a large piece to spread the load as widely as possible. 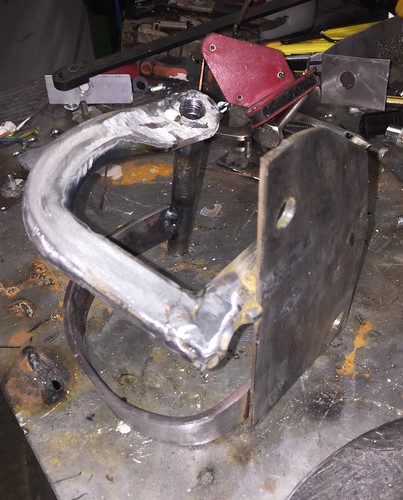 by -Tojeiro 74- by -Tojeiro 74-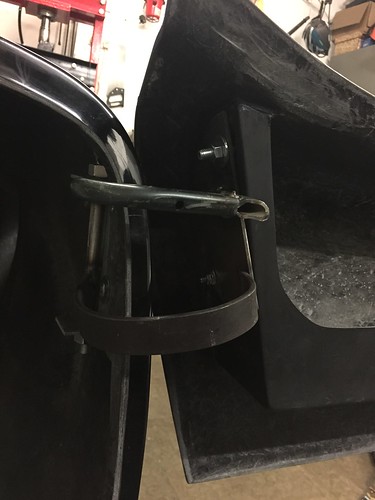 by -Tojeiro 74- by -Tojeiro 74-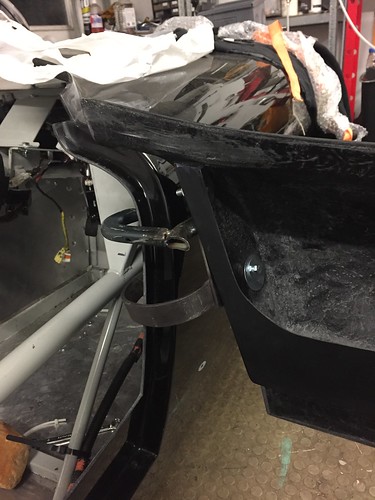 by -Tojeiro 74- by -Tojeiro 74-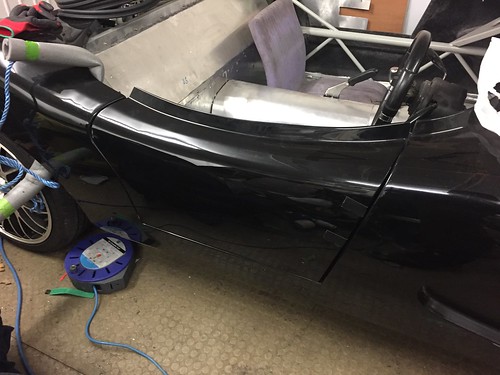 by -Tojeiro 74- by -Tojeiro 74-Mocked up in off cuts I had lying around the garage but now I have the dimensions, angles and clearances figured out I will make a cosmetically pleasing pair in stainless for each side. Also going to add some extra matting to the door pocket to make sure the door mounting is strong enough also. Going to trim the compete door so can cover up any rough edges. |
|
|
|
Post by tojeiro on Jan 8, 2018 15:45:55 GMT
Happy new year to all. Been busy travelling and a bout of pneumonia over Christmas meant so not so much done on the car. I have got my PROLED dash and warning lights wired and almost working properly. The only weird issue is the water temp on the PROLED shows maximum only. Temp sendor and gauge was working fine in the original cluster and I have double checked my wiring but always shows maximum even on cold start, more investigation needed. On another subject is there any IVA issue to use these Cobra IVA boot hinges for the bonnet of my Replicar. Was thinking to mount the short side to the scuttle and sort out a bonnet catch or lock at the front. 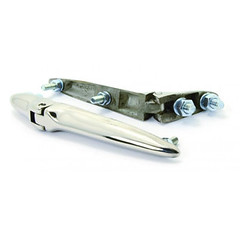 by -Tojeiro 74- by -Tojeiro 74-Read through IVA and couldn’t see a reason why as long as they have correct radius. |
|
|
|
Post by ancsportscars on Jan 8, 2018 16:47:00 GMT
As you suspect, They're perfectly okay to use with IVA in mind.
However, I'd suggest to save a significant amount of money, you try S&J Motors to purchase them (they specialise in all Cobra brightwork.) Their ad in the latest edition of Snake Torque (Cobra mag) lists them at £48.00 (inc. VAT.) and will be correctly radiused for IVA.
They are a very old-school company and don't have a website or even an email address! so you need to call them on their landline 01257 262881
HTH,
Andy.
|
|