|
|
Post by miket on Aug 24, 2016 6:51:19 GMT
I think they're always a, er, challenge one way or another. Looks like you're referring to a potential gap at the front?...
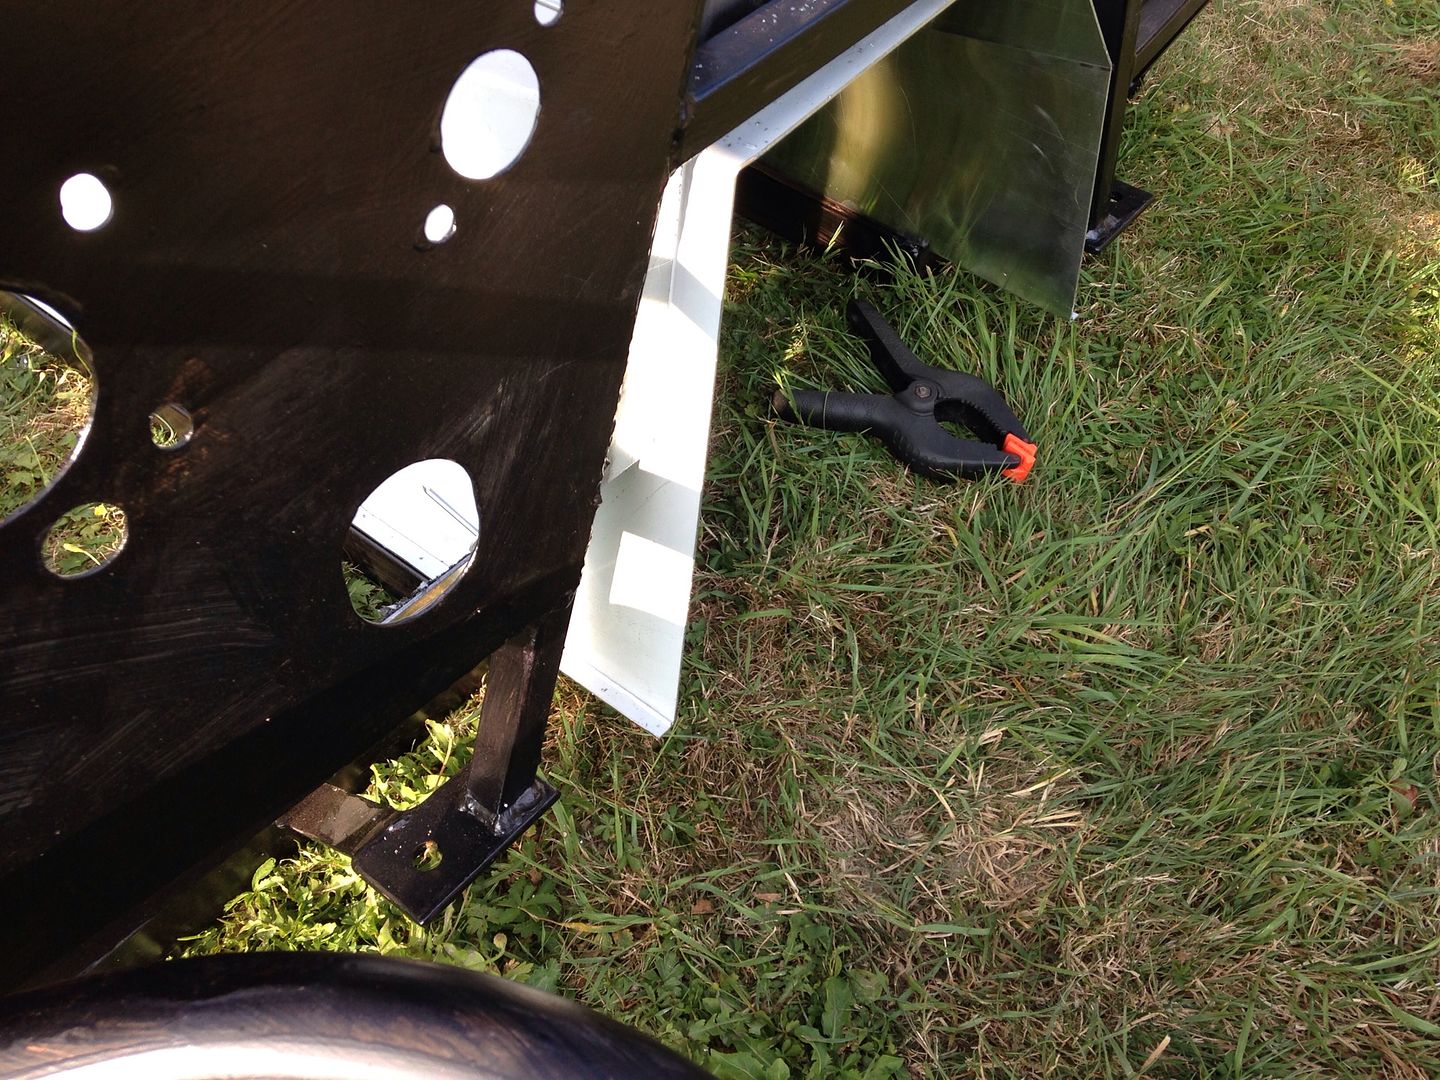
My tunnel panel was only just long enough to reach front-to-back, but I positioned it as far forward as I could without leaving a gap at it's back edge and then made the bulkhead panels have tabs folded from them that reach backward inside the tunnel panel - to ensure any gap at the front of the tunnel panel was closed off. More detail in my Yorkie Novice Build thread if it helps.
|
|
|
|
Post by hutchey on Aug 24, 2016 7:32:13 GMT
That's what I was thinking of doing but it seemed too silly as the foot panels are too wide and the wrong cut shape anyway and the top of the centre isn't high enough to reach the frame.
Oh - what width wheel spacers are you all using?
|
|
|
|
Post by miket on Aug 24, 2016 8:00:53 GMT
Try not to think of the panels as parts to fit; but as flat ally sheet you've been given that happen to have bends in the right place... you're right that doesn't help a lot. Might be worth flattening any generous welds at seams that are in the way before starting.
On my Mk1 with stock donor wheels - 32mm spacers (from Freakyparts on this forum).
|
|
|
|
Post by hutchey on Aug 24, 2016 10:37:48 GMT
|
|
|
|
Post by hutchey on Aug 29, 2016 20:38:59 GMT
Hi, need some help please folks! 1) Do we cut the front bottom edges off at an angle.  2) Im about to run my flexible fuel lines down the PPF, any issues with this method? 3) Same with a copper brake line and rest of rear wiring loom, can the brake T piece be connected onto the centre of the rear subframe just off the PPF? 4) the charcoal canister, it's got a few connections both electrical and vents, what to do with all these? 5) I'm having to adapt the fuel tank mounts for my MK2 tank and am wondering if I need to put something underneath where it sits to deflect heat or divert any leaks? 6) I cut off the existing wiring grommets where they went through the bulkheads so now have to try and find big enough replacements to allow the loom through the firewall panels or to cut larger and then make 2 smaller semicircle ones that just then rivet around the loom with a smaller grommet? 7) How did anyone cut through the welded in panel above the drivers footwell to get that side of the loom through? 8) my wheels don't fit back on without 20mm worth of washers due to the wheel arch brackets. I'm currently on 185/60/14 but may go to 185/45/15 or similar but with the standard ET45 I will need to change to ET 10 without spacers or Et20 with 25mm? Has anyone had problems with mounting the arches and then not being able to remove the wheels later? Sorry for the questions, I'm having to use a mobile device as my laptop is dead and searching through all the topics is so much harder. Thanks |
|
|
|
Post by timbo on Aug 30, 2016 6:51:09 GMT
Electrical cable attached to PPF holds battery wires, leave it on the PPF and it's in the right place for mounting the battery behind the driver's seat. (Watch the earthing point near the rear though, it's very hard to access once the PPF and chassis are united).
I ran the remainder of the rear loom down the N/S of the tunnel - there is a spare wire on there which you don't need which can then be used for the hand brake connection via a small hole in the tunnel. The loom then comes out behind the rear bulkhead so no grommets needed though I have used some plastic conduit along its length. Wish I had drilled the holes for mounting this at the same time as doing the brake/fuel lines.
There is enough room in front of the front bulkhead for the loom - no need to cut through welded in panel. Make a tray with the rear edge radius of at least 19mm.
HTH
Tim
|
|
|
|
Post by miket on Aug 30, 2016 14:11:36 GMT
In case any of these helps your Qs:-
1. Are you meaning just the lip at the bottom of the front edge of the tunnel - I think you just have to make a call on what you need to keep and what can be cut off based on how your butting or overlapping the panels & chassis framework - one of the many things that has no 'right' way. Sharp edge jutting forward that your fuel hoses go near might be bad.
2.Mainly space I should think - but it's certainly been done. The bend towards the R rear of the ppf girder leaves just millimetres between the ppf and the tunnel and a shedload of stuff passes through that area. Connection of earth to ppf can even be a tight fit.
3. Sounds reasonable (if you're not reusing the donor T-piece-with-attached-hose-to-caliper - tho' mine's a Mk1).
4. Keep, plumb-in, use and be green. Or delete and cap off at engine and can leave open at the tank after the valve (per current Build Guide) and remove wires (with usual care).
5. At some stage in history one or more IVA tests wanted to see something to keep drips from the tank hitting the hot exhaust - people've been putting them in since then - some very basic ones seems to have been fine.
6. Knock-on edge trim around hole? From what I read I wouldn't worry about keeping water out so it's only cable protection - if it rains it's coming in one way or another!
7. Step drill bit.
8. I've not faced this but never read of it being a problem either.
Good luck with all.
|
|
|
|
Post by NJ. on Sept 2, 2016 12:28:04 GMT
Hi Rich, Just been reading your thread re the trouble fitting the Mk2 tank. Mine is a mk2 and also doesn't line up with the tabs....  Anyways, a more important issue is this statement from Stuart - "The MKII tank is larger capacity than the MKI" I took this as meaning the mk2 tank is larger in size. This means when I put the mk2 tank in place, rotated 180 deg with the filler on the right - the rear GRP panel becomes *nearly* impossible to fit due to the height of the tank and the angle of the two down tubes from the M hoop to the shock plate. You can't drop the cover on vertically I don't think, it has to go on horizontally from the rear, just above the tank and just below the two down tubes if that makes sense. I imagine fitting the rear cover on the Mk1 tank (if smaller) is easier... Just bear this in mind when routing the fuel lines etc, as any height/thickness above the tank or between the tank and the M will need to be cleared by the rear cover when fitting. We found you can just about get the cover on, but its a 3 minute two man game of high stakes (scratched cover) tetris.... Nick |
|
|
|
Post by hutchey on Sept 5, 2016 13:13:54 GMT
Hi Rich, Just been reading your thread re the trouble fitting the Mk2 tank. Mine is a mk2 and also doesn't line up with the tabs....  Anyways, a more important issue is this statement from Stuart - "The MKII tank is larger capacity than the MKI" I took this as meaning the mk2 tank is larger in size. This means when I put the mk2 tank in place, rotated 180 deg with the filler on the right - the rear GRP panel becomes *nearly* impossible to fit due to the height of the tank and the angle of the two down tubes from the M hoop to the shock plate. You can't drop the cover on vertically I don't think, it has to go on horizontally from the rear, just above the tank and just below the two down tubes if that makes sense. I imagine fitting the rear cover on the Mk1 tank (if smaller) is easier... Just bear this in mind when routing the fuel lines etc, as any height/thickness above the tank or between the tank and the M will need to be cleared by the rear cover when fitting. We found you can just about get the cover on, but its a 3 minute two man game of high stakes (scratched cover) tetris.... Nick Thanks Nick, that's useful info indeed at the right time for us. |
|
|
|
Post by hutchey on Sept 11, 2016 19:58:44 GMT
Finally got to lifting the frame onto the PPF and had no end of problems.
1) We can't seem to align the suspension properly and the front still scrapes on the front wishbones (We've cut out and fitted the banana bars for our after-market coilovers)
2) Can't align all 4 corners on the main mounting points, the front right is 2 inches off
3) Rear won't align either
4) The suspension turrets with the 2 screw tops - only 1 of each corner pokes through enough to get a nut on
5) I'm still having to use wooden blocks on the suspension to lift the wishbones so as to move it around.
6) It needed 20mm wheel spacers to stop the wheels fouling on the wheel arch brackets
BUT my biggest problems are the exhaust now.
We got a replacement manifold and downpipe but have now noticed that the Lambda sensor is too long to fit into the manifold's hole for it.
Do they do shorter sesnors?
Will one work with my ECU and so on or have I now got to spend out on another manifold?
I'm checking with the supplier but it said it was compatible with the version I have and it's all gasket sealed etc in place now.
Help greatly appreciated
|
|
|
|
Post by hutchey on Sept 13, 2016 21:39:27 GMT
Hi folks, anyone able to cast an eye over the above and put me right please.
Seems that every build is different and my lad and I are stuck.
Thanks
|
|
|
|
Post by gwnwar on Sept 13, 2016 22:50:04 GMT
O2 sensors go into the down pipe before cat not the manifold.. that spot most likely is for the EGR tube..Check your downpipe for hole.
Loosen a little the 4 long bolts and small bracket on trans tail section of trans that secure the PPF to the diff and trans.
The top hats fort he shocks can be rotated use a screwdriver between the studs..
You may want to remove the shocks from the control arm till you get frame onto subs.
All shocks should clear control arms with wheels on ground and full weight on them.
Some builders have used a come along to move subs in to line.
Walk away for a while come back with a clear head..
|
|
|
|
Post by hutchey on Sept 14, 2016 11:45:16 GMT
O2 sensors go into the down pipe before cat not the manifold.. that spot most likely is for the EGR tube..Check your downpipe for hole. Loosen a little the 4 long bolts and small bracket on trans tail section of trans that secure the PPF to the diff and trans. The top hats fort he shocks can be rotated use a screwdriver between the studs.. You may want to remove the shocks from the control arm till you get frame onto subs. All shocks should clear control arms with wheels on ground and full weight on them. Some builders have used a come along to move subs in to line. Walk away for a while come back with a clear head.. Thanks, it's definitely the lambda sensor that was in the old one. I checked my photos back. Looks like it may be a different exhaust manifold then sadly. My coilovers don't yet have any compression I them so I guess that's why it's not sitting on the turrets and frames properly. Been too tired to check it all out. |
|
|
|
Post by hutchey on Oct 2, 2016 19:31:29 GMT
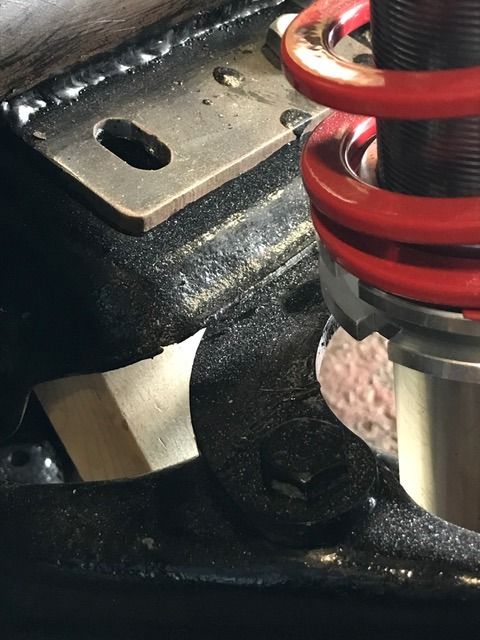
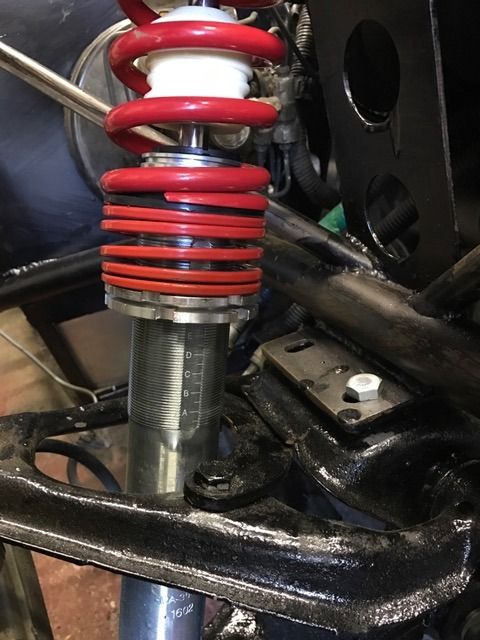
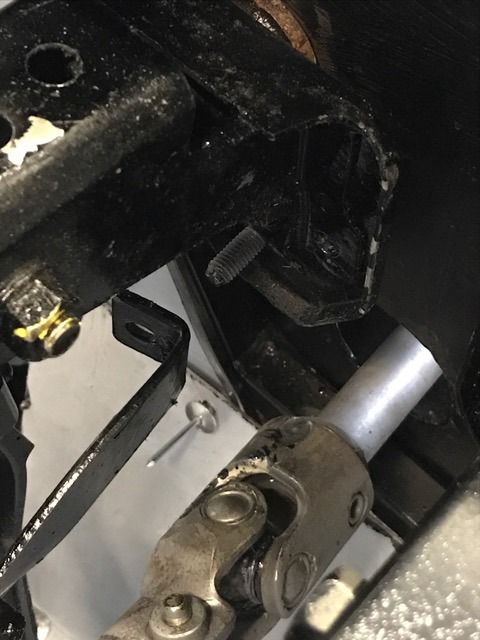
Hi folks, Finally got back on the car after a while. I have a few problems come to light now: 1) Looks like my banana bit is still fouling on the subframe with my coilovers (stated to be a direct replacement for the MX5) 1b) With these on the front, I can't get enough ride height but not much left to wind these up as per pic 2   No idea how to resolve this ride height now - the bottom edge of the front of the side tube is 10cm from the floor. However, there are the 4 bolt heads underneath for the cross brace that stick down lower. 2) My steering column somehow doesn't reach the thread stud on the pedal assembly (if i chop the back off the pedal brackets then I can't fit them on the other side or washer out the master cylinder as the frame tube is really tight against the MC)  Finally got the bolt holes to all align but it took some pulling and pushing about!  Going to try and get the tank all aligned up next - still looks like the tabs aren't in the right place. |
|
|
|
Post by mikeeyboy on Oct 3, 2016 7:49:01 GMT
I just managed to get the front suspension to clear on mine, it was a faff though.
1. Put a jack under the front subframe and lowered that down with wheels on. This caused the wishbones to move up once the wheels hit the floor.
2. Used my small crane to hold the the front of the Exocet chassis in the air.
3. Fitted suspension to wishbones.
4. Slowly lowered the Exocet frame down and fiddled with the shocks to make them sit right.
A lot of cursing and bleeding hands in the process. The front dampers are VERY close to the subframe on it. I am not sure whether this is a difference in the mk1 and 2 and Stuart hasn't realised how tight it actually is!
|
|