|
|
Post by mawdo81 on Jul 4, 2015 21:11:07 GMT
Yeah thanks for coming. Was great to see your build and meet the pair of you.
See you ina couple of weeks.
Sent from my GT-I8190N using proboards
|
|
|
|
Post by mawdo81 on Jul 8, 2015 14:50:56 GMT
Short shifter arrived today:  Will look into adding the mtx75 reverse protection to this ib5 shifter. |
|
|
|
Post by mawdo81 on Jul 14, 2015 20:41:21 GMT
So my bolts arrived on Friday, and as I finished rivnutting the floor I thought I'd treat myself to assembling one of the front uprights... Bugger they've sent me the wrong bolts, 12.9 instead of 10.9 grr!
On a separate note, for the bulkheads and side panels should I be spacing at 100mm still as per the floor or is it safe to go wider seeing as they aren't load bearing?
|
|
|
|
Post by mawdo81 on Jul 16, 2015 20:14:43 GMT
Having re read the manual it states 100mm for the top side panels, so I'll stick with that all round. Did realise that the chassis isn't nice multiples of 100mm so whilst my first attempt (at measuring) was 100mm my ocd decided that didn't look right, cue measuring out multiples of 89.65 etc! Thank goodness for calipers!
Next question then please guys, I've trawled the threads and can't find how you attach the gearstick to the chassis bars at the rear...are people bolting through, using rivnuts or tapping? If bolting through did you use crush tubes? By the time you've made an 8mm hole and widened it to take a crush tube from the top, there doesn't seem like there'd be much left, all for the sake of gear lever...
|
|
|
|
Post by Johnsto on Jul 17, 2015 6:15:27 GMT
Mine is Rivnut'd. It has plenty of strength to withstand a gear throw in anger  |
|
|
|
Post by mawdo81 on Jul 17, 2015 11:40:12 GMT
Thanks what size did you go for?
Sent from my GT-I8190N using proboards
|
|
|
|
Post by p5curly on Aug 9, 2015 16:11:53 GMT
How's the build mate I passed your place yesterday and wondered how you where getting on
|
|
|
|
Post by mawdo81 on Aug 9, 2015 16:13:50 GMT
Need to take pictures! Floor is on and 3/4 bolted down, that's the job for this pm but the weekends been taken up with a family wedding. Then it's a quick job to trial fit the front floor, and mark for drilling and rivnuts. Hope to flip the chassis right way up once and for all this week  ? |
|
|
|
Post by mawdo81 on Aug 13, 2015 21:58:41 GMT
Floor on and bolted down. Gone round the whole thing, plus inside each rail with silicon sealant to keep the water out.
Are people using drain holes? No rush except maybe under the seats...
Front uprights assembled. Plan to fit side panels for final time tomorrow but bolts are turning up too so it might be pedal box and steering column :-)
|
|
|
|
Post by mawdo81 on Aug 14, 2015 20:38:36 GMT
Pedal box and steering column it was ;-)
|
|
|
|
Post by mawdo81 on Aug 16, 2015 20:22:01 GMT
Got the engine, roughly, in. Good news is the box looks like it fits without issue, bad news is the dog bone link is not going to fit. It's oem but the bush seems fractionally to large for the gap...do I hope it's just the thickness of the powder coat and take a flapper wheel to it, or do I grind down the bush in the mount to fit?
|
|
|
|
Post by mawdo81 on Aug 18, 2015 7:42:11 GMT
Engine is in and although not touching the sump is tight up to the chassis rail, so tight that I can't get the padding out easily: 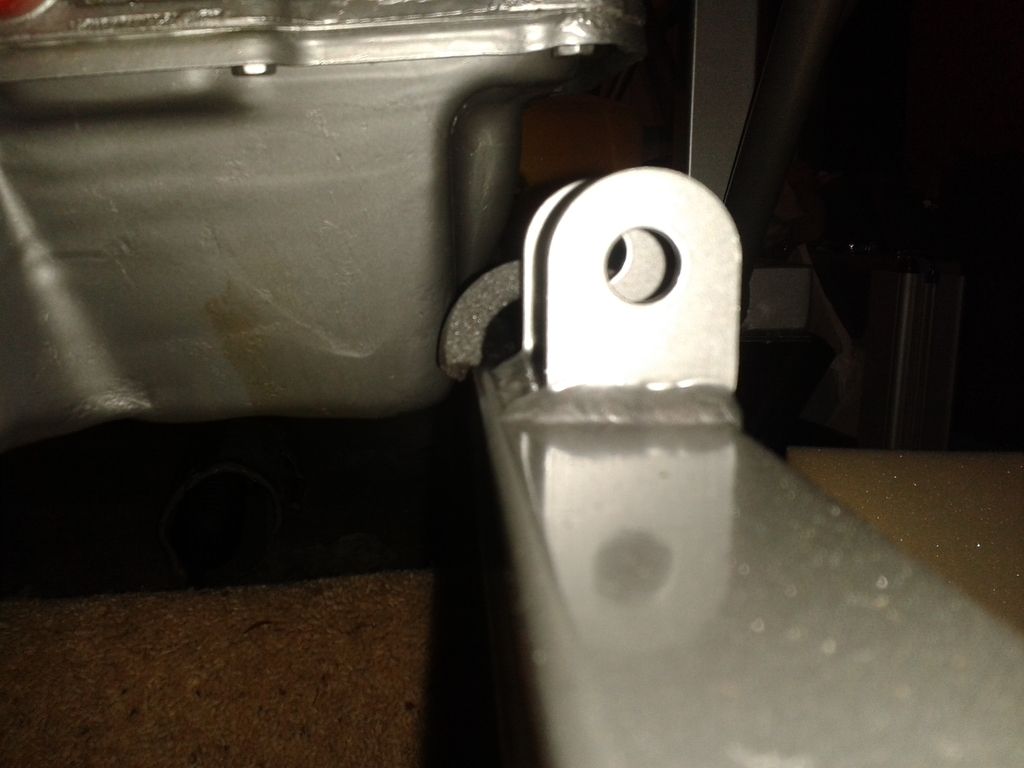 The engine side mount would appear that the engine is too low on the box side: 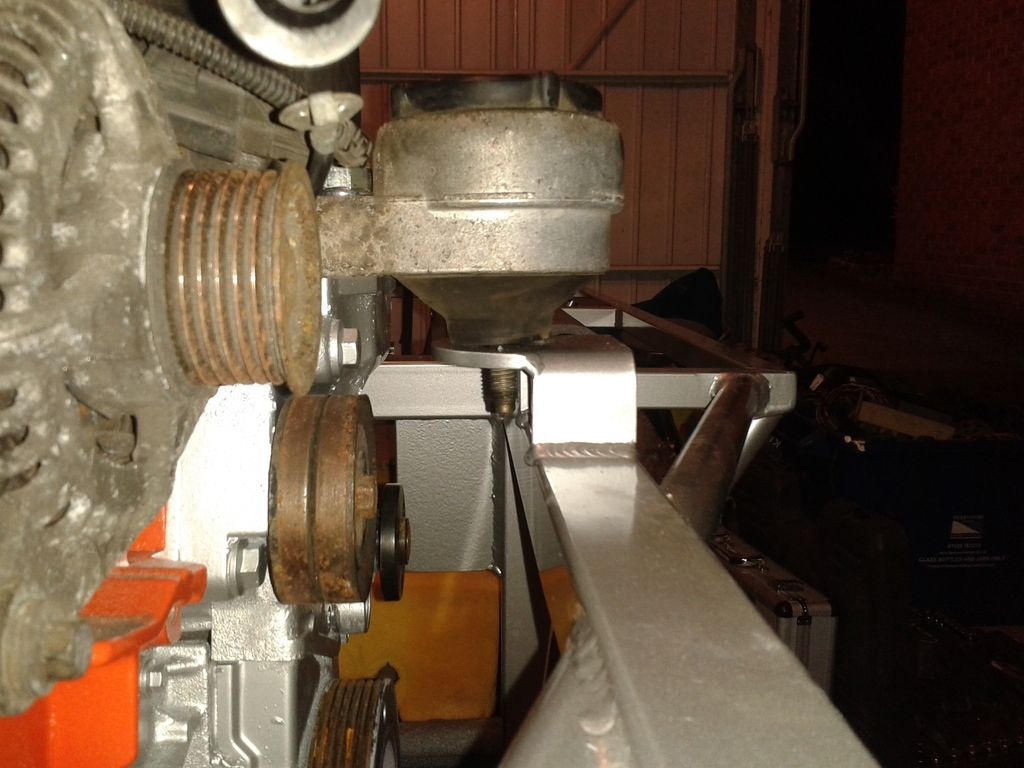 And a comparative check with a level on the valve cover compared to the rear upper chassis rail would agree with that. There is currently a bit of padding under the box mounting: 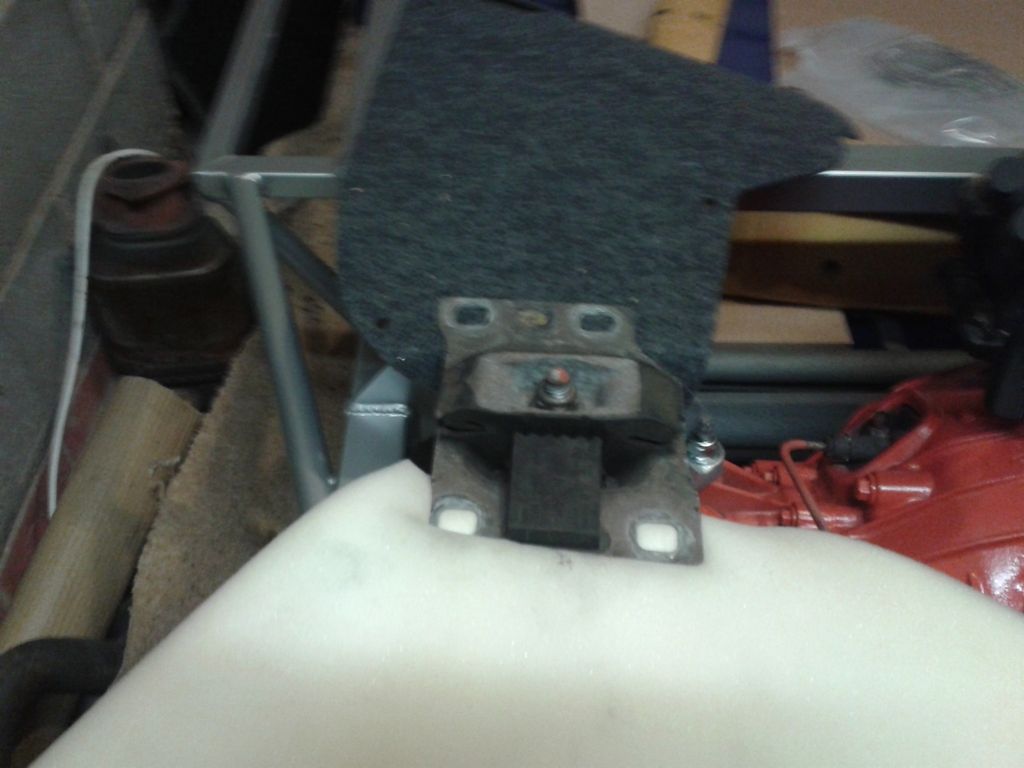 But the centre nut is torqued to spec and so there is no scope to raise that side with the existing hardware. FYI the dog link is looking like: 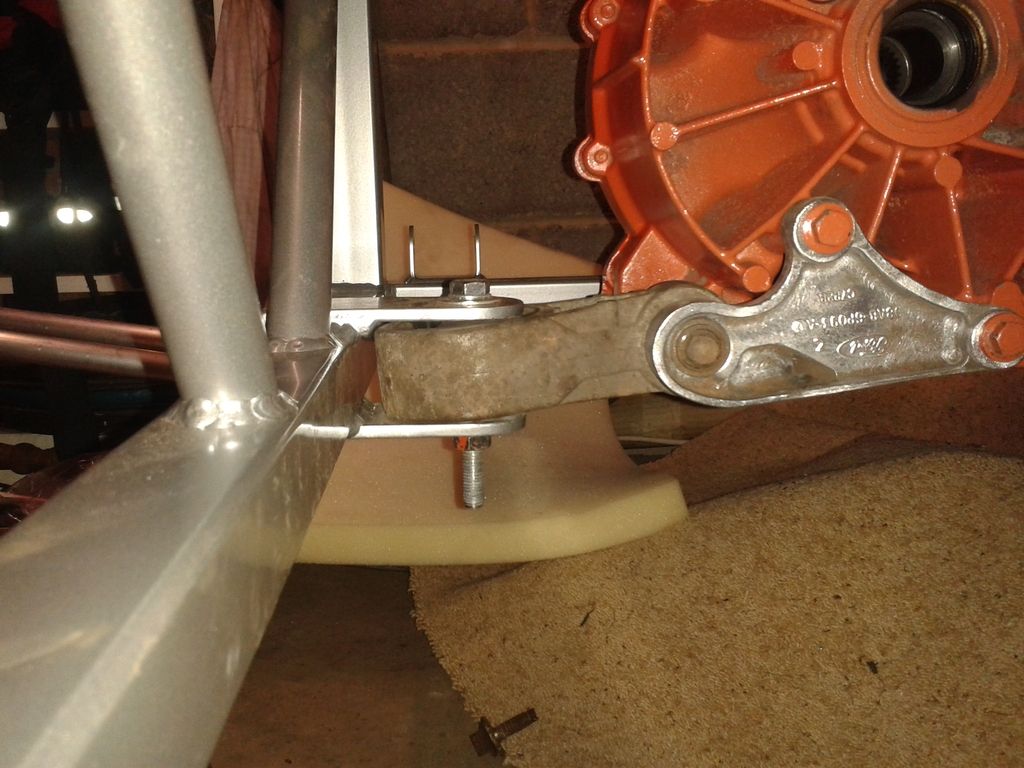 So my options appear to be, increase the strain on the dog link and raise the gearbox mount - I was thinking of maybe 6mm plate? Or will cutting that be "Interesting"? Or drop the engine side down but that would probably involve new studs and I'm not sure it would solve the clearance issues. Any advice either way please? |
|
|
|
Post by carlostheoptimistic on Aug 19, 2015 9:08:46 GMT
I would raise the gearbox mount to get engine level etc. and then make a new bracket for the dog link. You can use the old bracket (silver part attached to gearbox with 3 bolts) as a template for fixings to gearbox and then hold the engine in place and measure where the bolt to the dog link needs to go, then make the new bracket out of nice think alloy plate. Remember, ideally when the engine is positioned and the rear wheels are in a nominal position i.e. suspension in normally loaded position (bottom wishbones level) then there should be a straight line through the rear hubs and the holes in the gearbox for the drive shafts. I ended up making 3 new engine mounts to get my engine in a position I was happy with, see this thread engine mounting. |
|
|
|
Post by mawdo81 on Aug 19, 2015 12:13:25 GMT
Thanks, Going to position the gearbox with the shafts etc first then look at the dog bone bracket/link.
The bracket is complicated (there is another bolt horizontally from the rear pointing forwatds) whilst the link is more straight forwards - I might chop the link in half and then weld it back up, offset as needed.
|
|
|
|
Post by mawdo81 on Aug 21, 2015 19:34:48 GMT
Rear bones m18 tapped for toe and camber adjusters.
Rear bearings pushed in, looking to assemble rear suspension early next week.
|
|


 ?
?


