|
|
Post by exoRy on May 30, 2014 8:25:05 GMT
driver - not sure of the price of just the disks. I ordered disks, pads (EBC Red stuff) and braided brake hoses (HEL) from Stewart. The disks are "MTEC", probably best to speak to thefreak so that he can give you a quote on what you need. I bought them cos the disks that were on the car were shot (due to rust) so thought I might as well upgrade while I'm here! Have read your build thread....Any more updates on your build recently?? I'm going for the same "philosophy" as you, do it once - do it right! gwnwar doubletrouble - thanks, will get my muscles out at the weekend and give it a go! When it comes to blasting and coating, have people removed the upper wishbone ball joints?? or have they left them in and protected them?? I can't see much evidence of how or if people have done this.
|
|
|
|
Post by driver on May 30, 2014 20:55:50 GMT
I didn't follow my own philosophy unfortunately lol, I have now purchased a diy powder coating system, a powerful compressor and shot blasting equipment. All wishbones, calipers, were slowly sanded to a smooth finish and painted, but I like powder coating now so doing it all again, it's very addictive. I'll take some pics soon I've been lazy! Ye I'm upgrading my disks too I like the groove style.
|
|
|
|
Post by doubletrouble on Jun 9, 2014 23:07:08 GMT
driver - not sure of the price of just the disks. I ordered disks, pads (EBC Red stuff) and braided brake hoses (HEL) from Stewart. The disks are "MTEC", probably best to speak to thefreak so that he can give you a quote on what you need. I bought them cos the disks that were on the car were shot (due to rust) so thought I might as well upgrade while I'm here! Have read your build thread....Any more updates on your build recently?? I'm going for the same "philosophy" as you, do it once - do it right! gwnwar doubletrouble - thanks, will get my muscles out at the weekend and give it a go! When it comes to blasting and coating, have people removed the upper wishbone ball joints?? or have they left them in and protected them?? I can't see much evidence of how or if people have done this. Ryan, left the ball joints as is. Gonna put new rubber boots on so did not worry about protecting them. |
|
|
|
Post by exoRy on Jun 10, 2014 20:34:34 GMT
doubletrouble - thanks, will need new boots on mine too by the looks of things - the rubber has receded and the top (near the threaded end) is very near its own base! what kind of grease do these need packing with???
Was filled with good intentions before the weekend, had made a mental note of everything I wanted to get done (all of the rear separated) - guess what? ?? didn't happen!! ?? didn't happen!!
Spent most of Saturday morning dodging the thunderous storms and getting a refil butane can for the blow-torch and some primer (for gearbox and diff).
About 3pm my socket adapter (reducer) completely sheared (was a Sealey part cost ~£4 delivered) when attempting the first rear wishbone to hub bolt, so was a bit gutted and that ended the days progress. Was very difficult, then I thought I felt it begin to loosen  Culprit below: Culprit below:
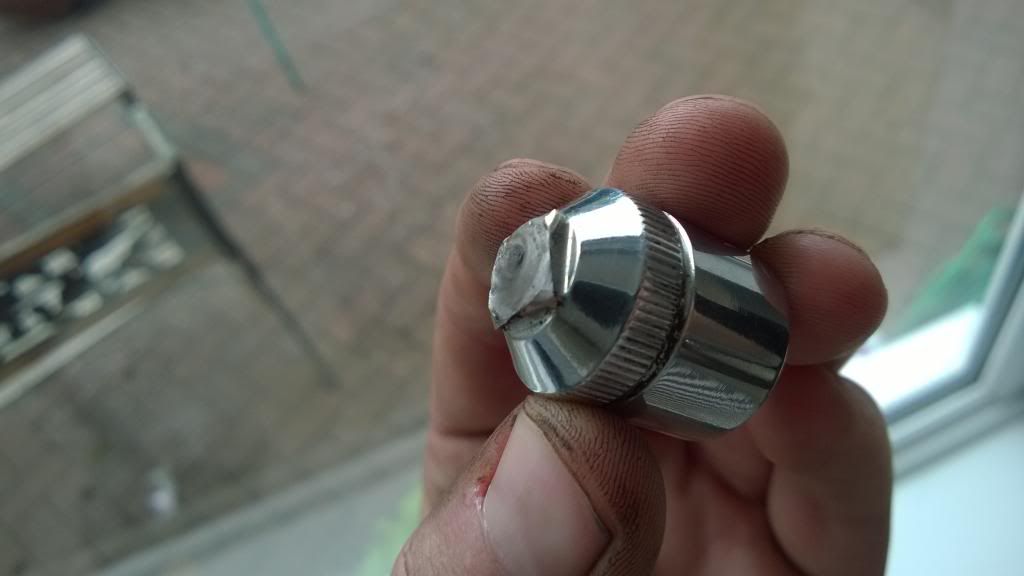
Quick trip to Halfords after seeing their "Lifetime Guarantee" on their adaptors (£4.99) - will give this a test in a few weekends time!
The new:

Am off to Download Festival this weekend and its a mates birthday the next so progress will be non-existent.....unless I can make the most of these light evenings and get in a few hours here and there!
|
|
|
|
Post by exoRy on Jun 23, 2014 20:29:41 GMT
So, back from my weekends away and thought I'd hit the garage yesterday.
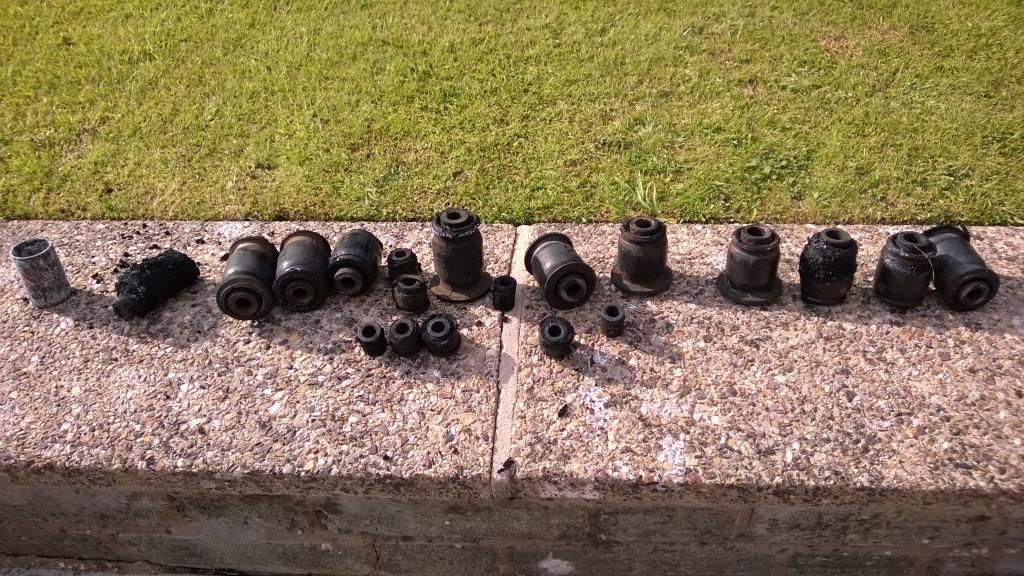
Spent most of the day heating, hitting, soaking, ruining the above halfords adapter (was replaced no quibble to be fair) on the rear lower wishbone to hub bolts. Nuts came off fine, however the bolts did not want to budge. Tried using a decent set of spanners too but it wouldn't move! Burnt out most of the rubber bushes with the amount of heating i did too.
Took a trip up the garage this evening with the old man - he thought he could get them out in 5 mins - thankfully i didn't waste sunday and these bolts still did not budge. Turning the rear frame over i can see where they are rusted onto the hub. They have welded themselves together and I've been using the wire brush to no effect.
What have others done to get these out?
I think I'll cut the bolt in two places; in between the hub and either side of the wishbones. Then drill out the remaining pieces of the bolt inside the hub, does seem like the only way to get them out!
|
|
|
|
Post by danpollitt on Jun 23, 2014 20:51:29 GMT
I put the hubs in a vice used lots of wd40 where I could get it in. Using a 750 mm breaker bar it slowly worked loose bug took about 30 mins each bolt!!
|
|
|
|
Post by exoRy on Jun 30, 2014 17:58:37 GMT
Yesterday saw more progress, had to quickly re-arrange the garage as I've got a new garage door coming on Thursday, the current one is very old and very broke - the door that bolts into the frame is currently being held shut by a bottle cap. There's not much in there to nick, mainly grubby car parts, but still........shhhhhh, keep it to yourselves 
Had to pick up and move the engine with my Dad, from the front of the garage to the rear, which was a nice start to the day after a night out and a night on my mates sofa 
Solved (kind of) the problem of one of the rear lower hub bolts -> managed to get it free at least, with one of these:
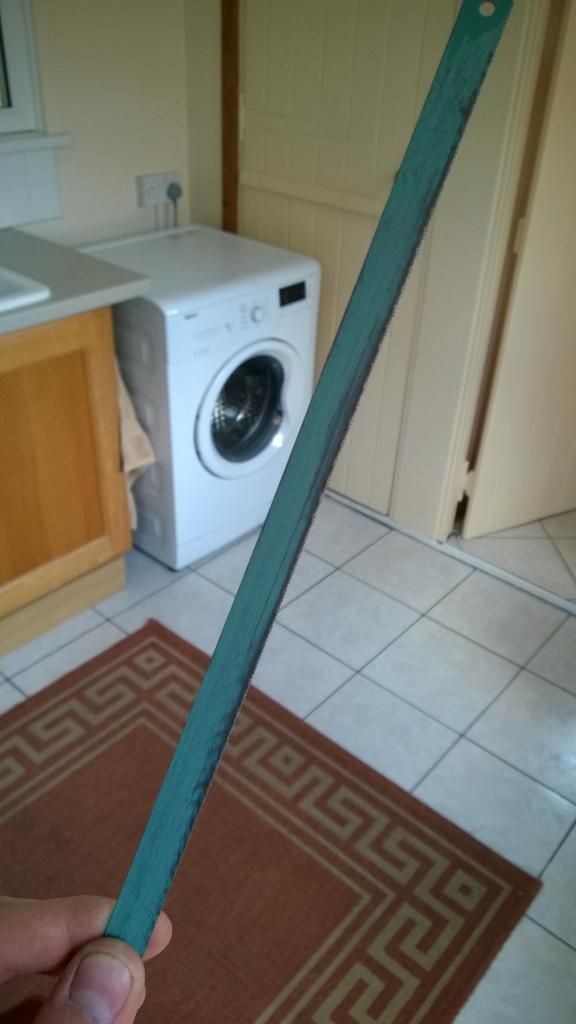
I went this way as I kept ruining converters for the breaker bar, didn't want to buy a new one/new sockets with the correct size drive and they were really really seized (after being really really soaked in WD40 every 5-10 mins for most of the morning).
Went through 3 of these blades, unfortunately the actual saw (holds the blade) was too big and wouldn't allow access to the bolt, so I sawed by hand. 1 hr, lots of sweat, a "claw-like" hand and many swear words later, the wishbone was free.
Took this and the fronts I had done a few weeks ago home and lit the BBQ. Result:
And the wishbones:
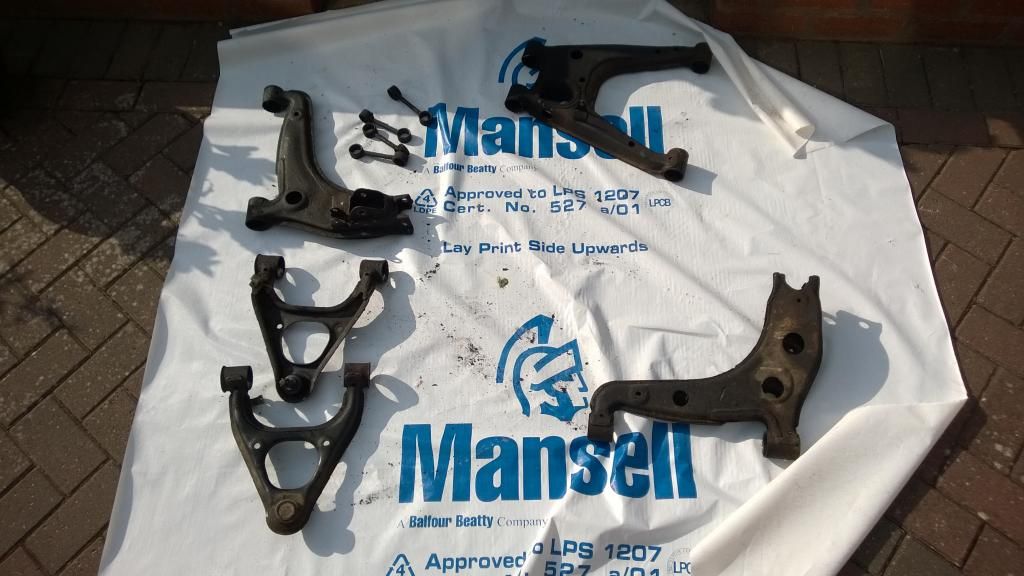
Apologies for the accidental product placement, if this gets enough views I might give Mansell a phone and ask them to buy me the Gaz Gold Pros I want 
So this weekend will be more of the same, will get the other rear lower wishbone out and separated from the hub, then remove both driveshafts from the diff and bring the diff and gearbox home for cleaning/painting! Might get a chance to bring all the hubs back and wirebrush/wirewheel them clean and prep ready for painting - if I'm really on the ball! |
|
|
|
Post by exoRy on Jul 12, 2014 14:02:59 GMT
|
|
|
|
Post by gwnwar on Jul 13, 2014 3:09:15 GMT
Try this.. Get and turn a M14x1.5 bolt (long) into the sleeve from the bottom.(there are threads in the sleeve) Twist and pull the sleeve down (hammer and punch sometimes needed). after it is down and free install a bolt M6x1 into the hole in the side of the block/spacer to hold the sleeve in place so you can remove/turn out the long bolt M14x1.5.. After long bolt removed remove the small bolt you put in block to hold sleeve..
Is the upper control arm still good after the crash??
|
|
|
|
Post by exoRy on Jul 18, 2014 21:04:13 GMT
|
|
|
|
Post by exoRy on Jul 20, 2014 21:03:01 GMT
|
|
|
|
Post by jgilbert on Jul 20, 2014 23:44:57 GMT
Ryan, nice work. I wouldn't paint the inside. If the paint comes off it's just something else that can contaminate the clutch plate. It maybe unlikely but just a thought.
|
|
|
|
Post by Stewart on Jul 21, 2014 13:53:10 GMT
Trying to remember if that collar actually comes out? I thought it had 2 big collars which pry out, or you leave the bolt in but loose and give the head of the bolt a tap to free the collar.
It's interference fit so just needs persuading.
A bit of heat never hurts either.
Oh, and chuck that WD40 in the bin. It's good for cleaning stainless steel and making things look nice. Get yourself some plusgas. Much better for freeing seized components.
|
|
|
|
Post by exoRy on Jul 21, 2014 18:37:22 GMT
@jgilbert - thanks, makes sense - the less "stuff" in there the better! when dismantling, the clutch fork boot was twisted and not flush with the box, and it made an opening. Sure that didn't help with the inside of it being so dirty, will give it a good clean with some wire wool etc and leave it be! Will get a new boot on order too! Stewart - thanks, just googled that and got a can from amazon for £4.34 - the reviews say this stuff is the dog's nuts. Wish I'd known about this when tackling some more of the bigger seized bolts  today got the gearbox painted: 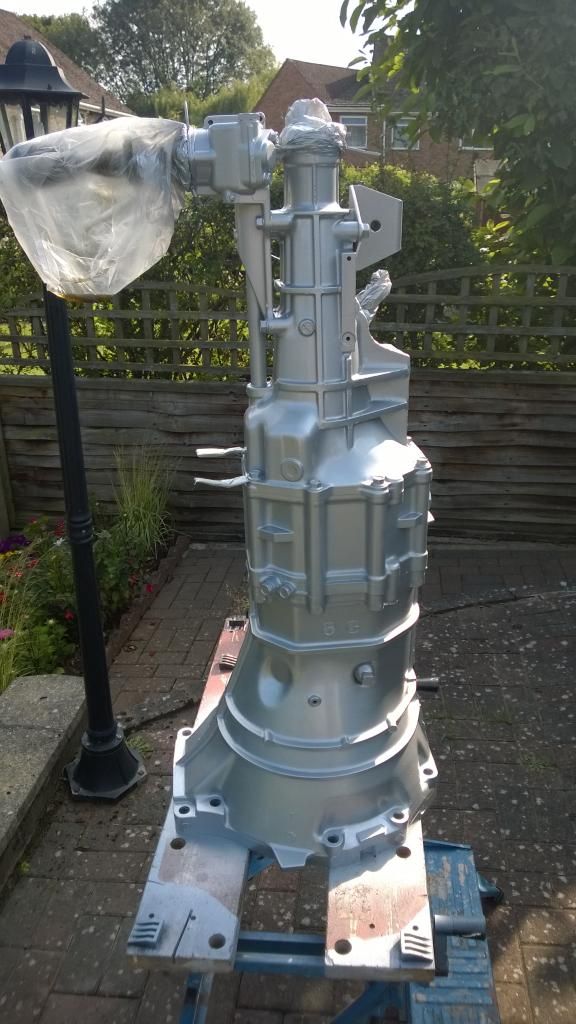 looks brand new!! Very chuffed with the finish; Hammerite spray can - Hammered Silver Also rang through a few blasting/powder coating companies and today I got a replacement rear upper wishbone! Spot the difference: 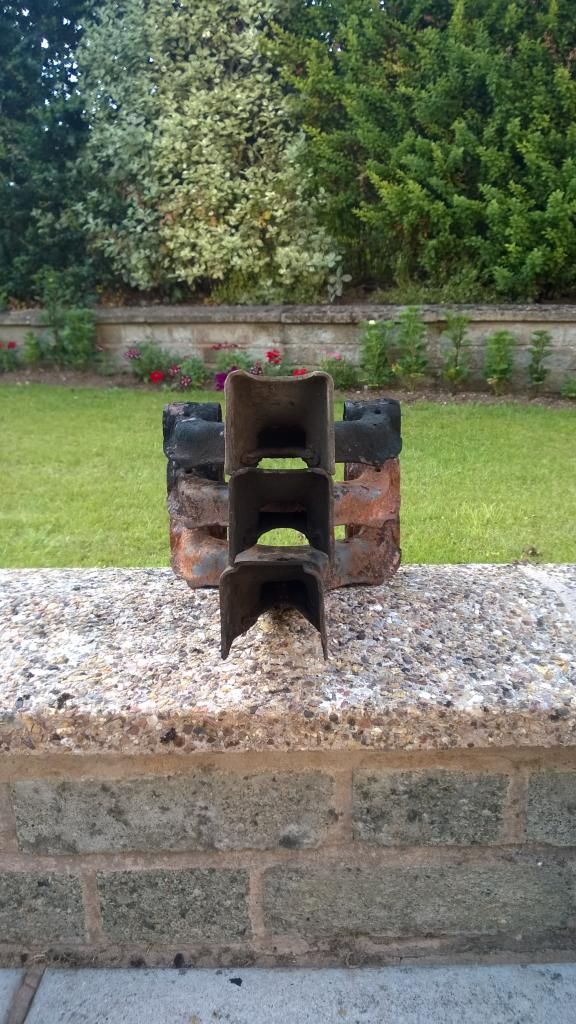 Jobs for this week (the list is ever growing and I don't feel like I'm making a dent); - paint front hubs in por-15 - send stuff off for blasting/coating - reassemble brakes (have all the service parts ready - just need to fit) - look into painting the air intake manifold in por-15, the grey/dull silver metal is looking a bit dingy and don't want it to spoil the rocker cover |
|
|
|
Post by ashneyder on Jul 21, 2014 18:55:36 GMT
Progress has been steady over the last few weeks.
Got all the bits ready for blasting/coating (just awaiting a quote off a company not too far from me!)

What are you planning to do about the front upper control arm ball joint for powder coating? It sounds like it is not meant to come out and degreasing it before and regreasing it after coating might be a hassle as well. |
|