|
|
Post by tomaff on Apr 25, 2014 21:12:10 GMT
Glad you had fun Ryan.
If you need any help let me know and I will drop over. Going to stoneleigh on the Monday now so might see you there.
|
|
|
|
Post by gwnwar on Apr 25, 2014 21:18:15 GMT
Like Stubbers cut 4 2x4s 8" long to block the control arms.. Put them in on the top and at the shock or sway bar links lower end..
|
|
|
|
Post by bauer on Apr 25, 2014 22:39:02 GMT
o/t question
why do you have 3 different coloured lids on your wheelie bins? Garbage, recycling and ??. garden waste maybe?
|
|
|
|
Post by exoRy on Apr 29, 2014 12:24:00 GMT
tomaff - yep, I'll give you a shout on Monday when I set off  gwnwar gwnwar - thanks, got them all cut out and ready for the big lift on the 10th! bauer - lol, yep that's bang on! Coventry Bin Lids  Will be popping down to Stoneleigh on the Monday, so will hopefully see a few people there and ask(bug) people with questions about their builds!! I always look forward to this time of year.......I pass Stoneleigh everyday to/from work and like seeing all the kit cars buzzing around the country roads leading up to the weekend!!
|
|
|
|
Post by tomaff on May 3, 2014 20:48:36 GMT
Me and a friend will leave ours about 10 on Monday. Should be there about 10.30-11 and will be around for most of the day. Give me a text and we'll meet for a beer.
|
|
|
|
Post by exoRy on May 14, 2014 21:30:13 GMT
So big progress since the last post.
Went to Stoneleigh on the Monday; think I must be the unluckiest person ever - hung round the MEV stand for about 15 mins and didn't bump into any owners. Went and tried the Mev Owners Club outside, hung around there for about 20-25 mins and there was only one guy there who owned a rocket and was talking to another chap so didn't but in. 
I remember there being a stunt show last year (went on the Monday then too) however didn't see anything of the sort this year so was a little disappointed. Did however get to look around the gold and black Exocet parked - recognised it from a thread I've seen quite a few times (jpsjay). Have to say its a real quality build! Seeing another quality example up close has made me realise the work ahead of me!
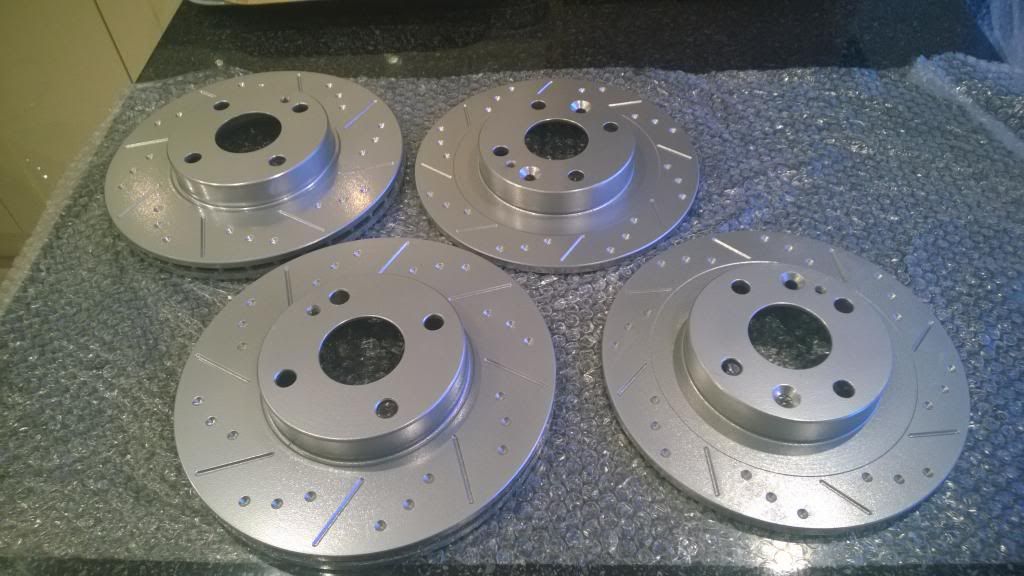
Anyways; received a full brake package from @freakyparts through the post (HEL: Stainless steel braided brake hoses, drilled and grooved discs and EBC Redstuff pads). Is the first "real purchase" (minus the MX5) of the build and am chuffed with the look and quality, they will be a great improvement on the rusty discs on it now!
So last weekend I rallied a few friends and the old man to lift the body off!
Was aiming for a 12 o'clock lift so got down there nice and early to start taking off the front and back nuts which hold everything together. Fast forward to 3pm and still no lift, spent most of the morning filing down the longer nuts on both the front and back as the shallow sockets I have would not reach the nut.
Then moved on to the 4 bolts which attach the rear of the front subframe to the body. As these were coming undone I could hear the sound of metal moving - good news as I realised that was the car telling me it was coming apart!
With the wheels jacked, I inserted the wooden blocks to stop the sinkage! (as per the advice from stubbers and gwnwar), worked a treat!!!
And we have:
 4 happy helpers and one very happy cameraman!
As others have said, this really is a big stage in the build and for a newbie like me is really good to see it progressing. Does feel more like a kit car build now, rather than just a strip down of an MX5!
The great feeling of getting the body off was also mixed with a realisation of how much work I've got in front of me!
Here's another one from the back
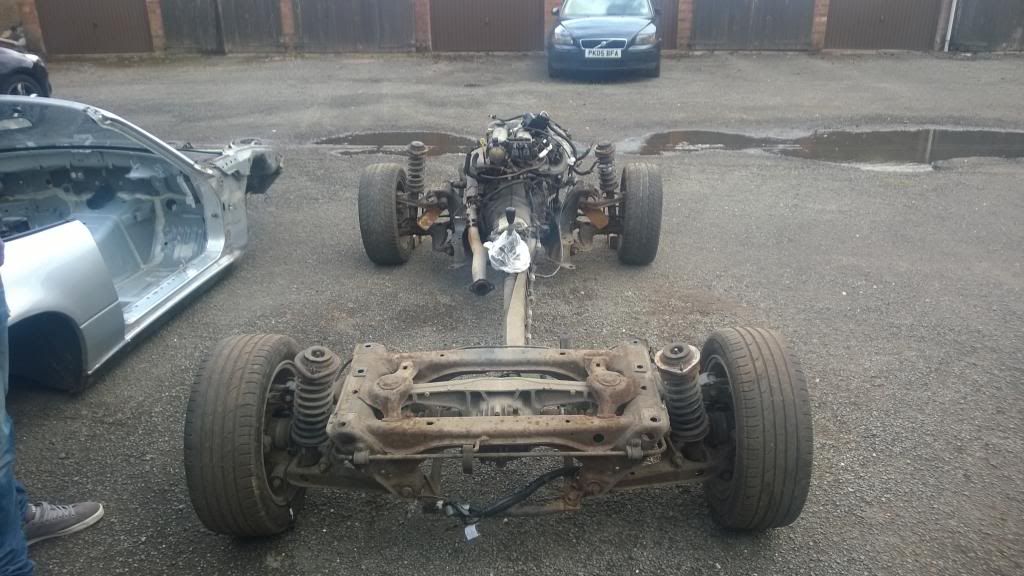
Left the body in front of the garage on Saturday, ready to phone a scrappy on Monday to come and collect.
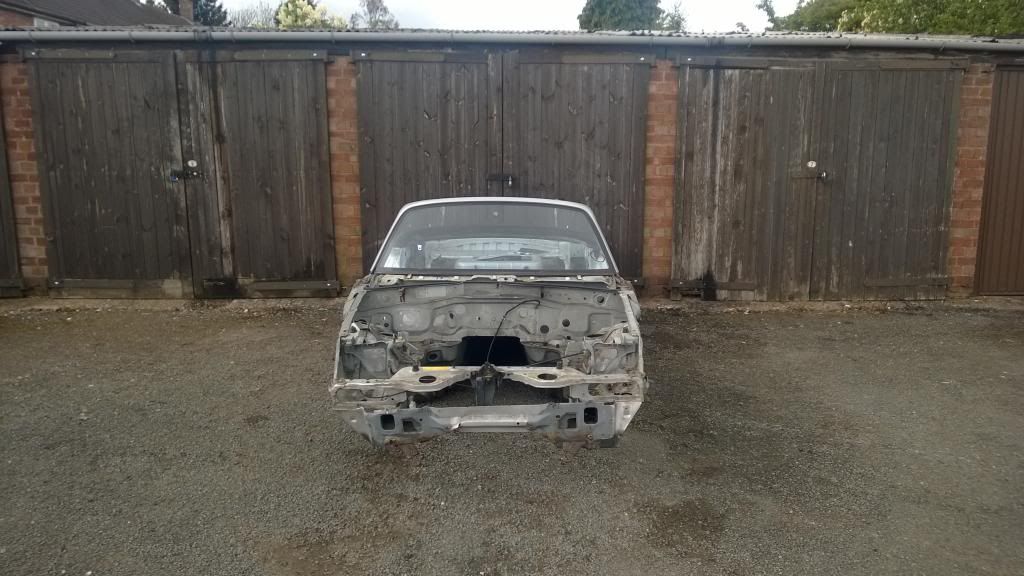
Here's the leftovers ready to be collected on the Monday. Phoned up one guy who offered to come and collect it for £20. He said he charged as "there's not much money to be made on these things and they're really light", he then told me he'd need a day to get his lifting truck. I replied: if they're that light you shouldn't need it and come and lift it yourself!
He wasn't pleased and I declined his offer! Phoned another guy to come and collect it for free. I knew I wouldn't get any cash for this as its really really rusty, most of the metal above both front wheel arches is rusted through!
Anyways, ordered some red caliper paint (Hycote) from ebay. Arrived for the grand total of £6.85 and have done the front calipers. Couldn't find many photos on google of it actually being applied so wasn't sure if it'd be nice and glossy or just look matte.
4/5 coats and the calipers now look like this: (the sun didn't help the camera and the red paint does look quite strange, will try and get a better picture - might have to take one in the shade), but they do look nice and red in real life  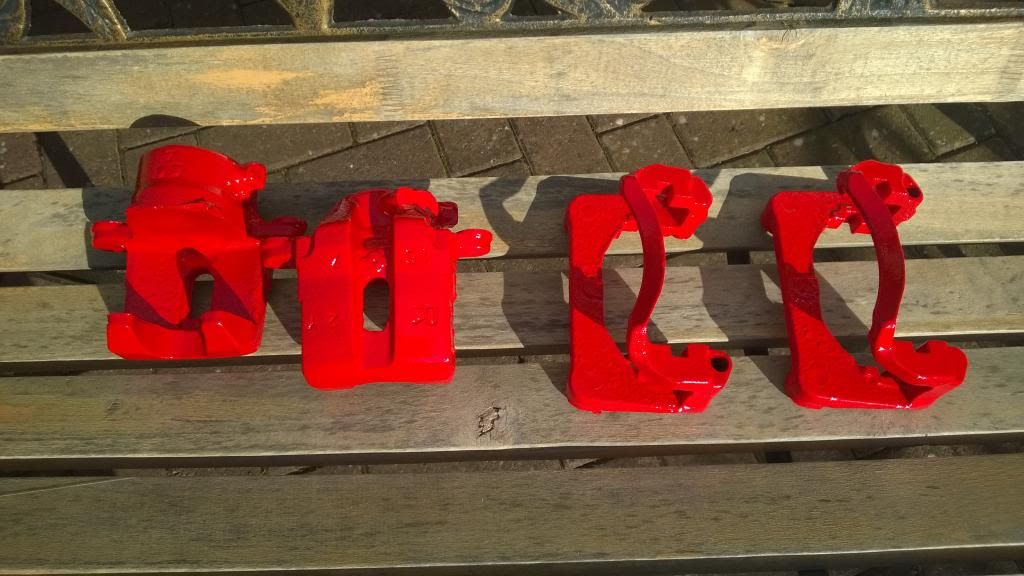
Also ordered some bushes (thanks for the ebay tip doubletrouble) for £232 delivered.
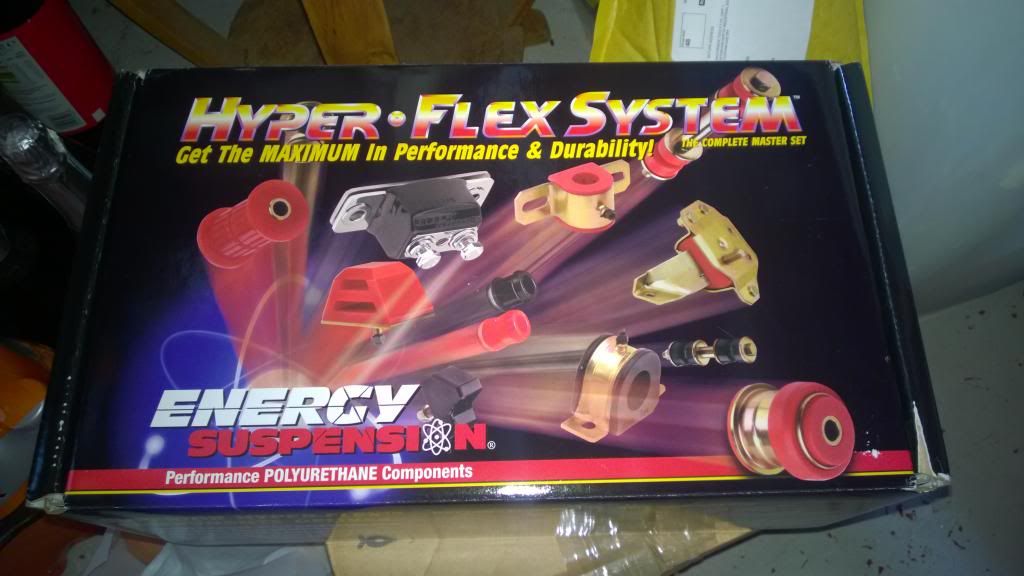
Will be stripping down the subframes further this weekend, to get ready for blasting/powder coating and then looking at ordering the kit in the coming weeks!
|
|
|
|
Post by jgilbert on May 14, 2014 22:00:37 GMT
Exciting times. Are you going to change the water pump and cam belt? Easy to do with the engine exposed. It's nice when you start receiving new bits for the build. Give the PPF and subframes a good power wash and then start soaking at the nuts and threads that you intend to undo in good quality release oil.
|
|
|
|
Post by exoRy on May 15, 2014 8:52:20 GMT
@jgilbert - Yes, will be giving it a full service while its all out and easy to get to! It's not done 60,000 miles yet so is due a new pump and cam belt! will also be going with new HT leads and spark plugs as I recall the idle being the tiniest bit jumpy before I took it apart! Was also wondering about de-greasing the engine, is there a method for this that doesn't involve a hose/pressure washer?? I'm renting a garage that doesn't have electricity and I don't have access to water there either  |
|
|
|
Post by gwnwar on May 15, 2014 16:56:14 GMT
You are going to at least need water hose.. Can you break unit down to smaller bits and take to a self car wash. friend have pickup or small trailer.. Best to have a gallon or two of clean water in case you have to wash out your eyes or cut also clean cloth..
|
|
|
|
Post by jgilbert on May 15, 2014 20:28:58 GMT
@jgilbert - Yes, will be giving it a full service while its all out and easy to get to! It's not done 60,000 miles yet so is due a new pump and cam belt! will also be going with new HT leads and spark plugs as I recall the idle being the tiniest bit jumpy before I took it apart! Was also wondering about de-greasing the engine, is there a method for this that doesn't involve a hose/pressure washer?? I'm renting a garage that doesn't have electricity and I don't have access to water there either  Ryan, check out page 4 of our build thread for how we cleaned the engine. Most important, make sure you seal up all the intake/exhaust ports before you start the cleaning process. If you can let the cleaning agent sit on the surface for 24hrs it helps. Also and engine stand makes cleaning easier. Good luck |
|
|
|
Post by mark1978 on May 16, 2014 18:09:03 GMT
So big progress since the last post.
Went to Stoneleigh on the Monday; think I must be the unluckiest person ever - hung round the MEV stand for about 15 mins and didn't bump into any owners. Went and tried the Mev Owners Club outside, hung around there for about 20-25 mins and there was only one guy there who owned a rocket and was talking to another chap so didn't but in. 
I remember there being a stunt show last year (went on the Monday then too) however didn't see anything of the sort this year so was a little disappointed. Did however get to look around the gold and black Exocet parked - recognised it from a thread I've seen quite a few times (jpsjay). Have to say its a real quality build! Seeing another quality example up close has made me realise the work ahead of me!
Anyways; received a full brake package from @freakyparts through the post (HEL: Stainless steel braided brake hoses, drilled and grooved discs and EBC Redstuff pads). Is the first "real purchase" (minus the MX5) of the build and am chuffed with the look and quality, they will be a great improvement on the rusty discs on it now!

So last weekend I rallied a few friends and the old man to lift the body off!
Was aiming for a 12 o'clock lift so got down there nice and early to start taking off the front and back nuts which hold everything together. Fast forward to 3pm and still no lift, spent most of the morning filing down the longer nuts on both the front and back as the shallow sockets I have would not reach the nut.
Then moved on to the 4 bolts which attach the rear of the front subframe to the body. As these were coming undone I could hear the sound of metal moving - good news as I realised that was the car telling me it was coming apart!
With the wheels jacked, I inserted the wooden blocks to stop the sinkage! (as per the advice from stubbers and gwnwar), worked a treat!!!
And we have:
 4 happy helpers and one very happy cameraman!
As others have said, this really is a big stage in the build and for a newbie like me is really good to see it progressing. Does feel more like a kit car build now, rather than just a strip down of an MX5!
The great feeling of getting the body off was also mixed with a realisation of how much work I've got in front of me!
Here's another one from the back

Left the body in front of the garage on Saturday, ready to phone a scrappy on Monday to come and collect.

Here's the leftovers ready to be collected on the Monday. Phoned up one guy who offered to come and collect it for £20. He said he charged as "there's not much money to be made on these things and they're really light", he then told me he'd need a day to get his lifting truck. I replied: if they're that light you shouldn't need it and come and lift it yourself!
He wasn't pleased and I declined his offer! Phoned another guy to come and collect it for free. I knew I wouldn't get any cash for this as its really really rusty, most of the metal above both front wheel arches is rusted through!
Anyways, ordered some red caliper paint (Hycote) from ebay. Arrived for the grand total of £6.85 and have done the front calipers. Couldn't find many photos on google of it actually being applied so wasn't sure if it'd be nice and glossy or just look matte.
4/5 coats and the calipers now look like this: (the sun didn't help the camera and the red paint does look quite strange, will try and get a better picture - might have to take one in the shade), but they do look nice and red in real life  
Also ordered some bushes (thanks for the ebay tip doubletrouble) for £232 delivered.

Will be stripping down the subframes further this weekend, to get ready for blasting/powder coating and then looking at ordering the kit in the coming weeks!
|
|
|
|
Post by exoRy on May 26, 2014 19:50:15 GMT
@jgilbert - thanks, really informative and that'll be the way I'll go when I clean/service it!
mark1978 - I think something's gone wrong, looks like your comment has vanished and only the quote is left :S
Better shot of the painted brakes from the last post:

Another, weekend of progress was had!!
Got the old man and the uncle round, to help separate the frames, engine and gearbox.
Don't have many shots as we were doing it, it really is pretty simple. Undo bolts and pull it apart!
Getting the engine off it's subframe wasn't too difficult. I think it weighs about 120kg, so between 2 people its do-able, the only thing is there's no proper places to grab, so we made a little hoist to help steady the engine when it was in the air. The roof seemed strong enough to hold the weight, but we didn't risk trying to raise it only using the ropes.
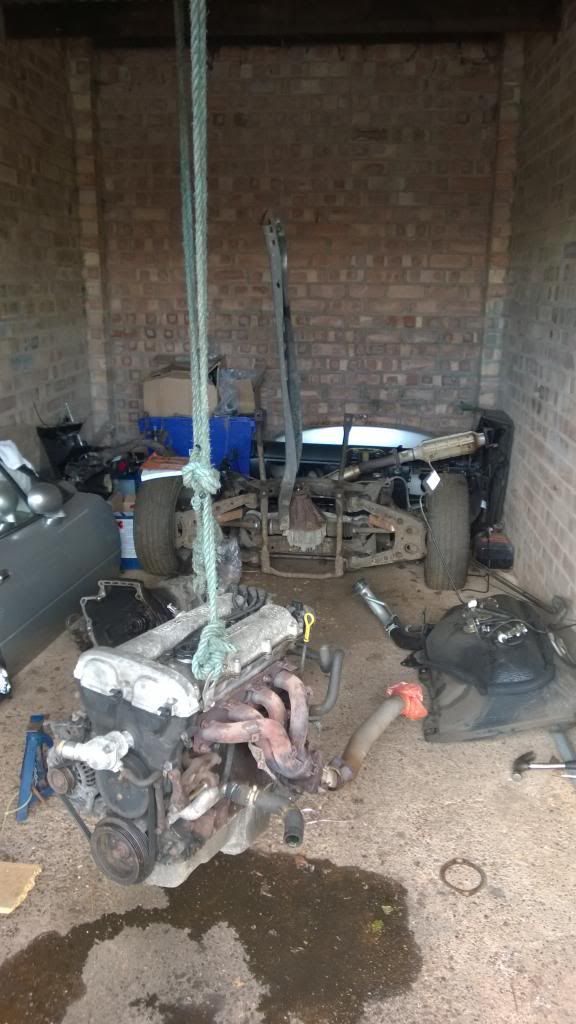
We moved it to the side of the garage to give me enough room to work on the frames as it really rained over the weekend!
Left the rear subframe with the gearbox at the back of the garage
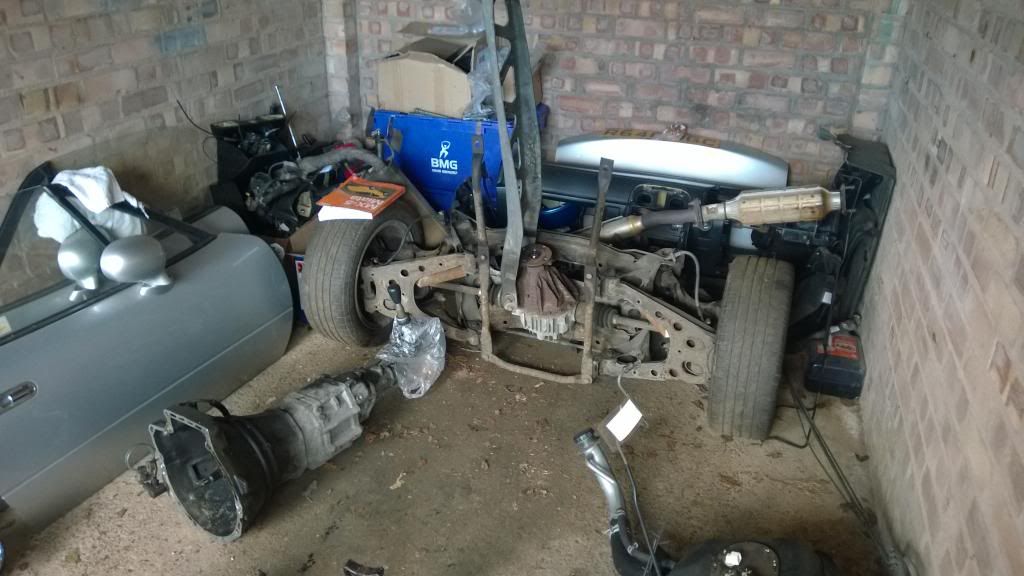
I stripped 99% of the fron sub frame and got things ready for blasting/powder coating. However struggled to get the track rod ends off. Turned to the bible (sitting on the wheel in the photo above), used Rod's method of turning the castle nut over and screwing it back on to the bolt then using a hammer to "tap" it so the tapered bold frees itself from the lower wishbone. Seemed easy enough from what the book was saying - I think they did it on a relatively new car with very little rust!!
I have been soaking all the bolts on both frames frequently with WD40 to try and make them a little easier to undo.
When I came to "have a go", I stood "tapping" the upside-down nut on the bolt (has to be flush to protect the threads........so they say) for about 1 min, nothing would give to started increasing the power of the tap very very gradually. A series of taps later nothing was happening, I began to increase the force of the taps more and more until it freed itself. Chuffed!!!
Went to take of the upside-down castle nut and that wouldn't budge, instead it would just spin with the bolt!
Some head scratching later and I resorted to seating the tapered bolt again (so the bolt wouldn't spin with the nut), managed to get it seated and had one hell of a battle getting the nut off. Then a few taps on the top of the bolt and a little wiggle and it came loose no problem!
A quick inspection of why the nut was so difficult to get off revealed that as I was "tapping" away at the nut and bolt, the bolt had actually bent so a portion of the thread was ruined which made it a nightmare. I tried to hit it as square as I could (given the amount of room I had to manoeuvre the hammer in, however I think the age/condition of the "bolt and nut combo" didn't help the situation.
Saturday night ordered 2 new track rod ends (£18) delivered ebay - EuroCarParts, so when I came to the other side today I just sacrificed it and went at it with a hammer. As sod's law would have it, this one popped out no problem and no damage to the nut or bolt?!?!?!?
Apologies for the 1/2 minutes you've wasted reading me vent on a bolt and a nut!
Has anyone else had this trouble??
When I came to the ball joints on the top and bottom of the wheel hub, I was a little reluctant to start going at these with a hammer as reading the manual it says if you knacker the top ball joint, you'll have to replace the wishbone (as they are attached)!
Can anyone recommend any methods for separating these? Is there a tool which can save me the trouble or a certain method others have used? ? ?
Here are the offenders
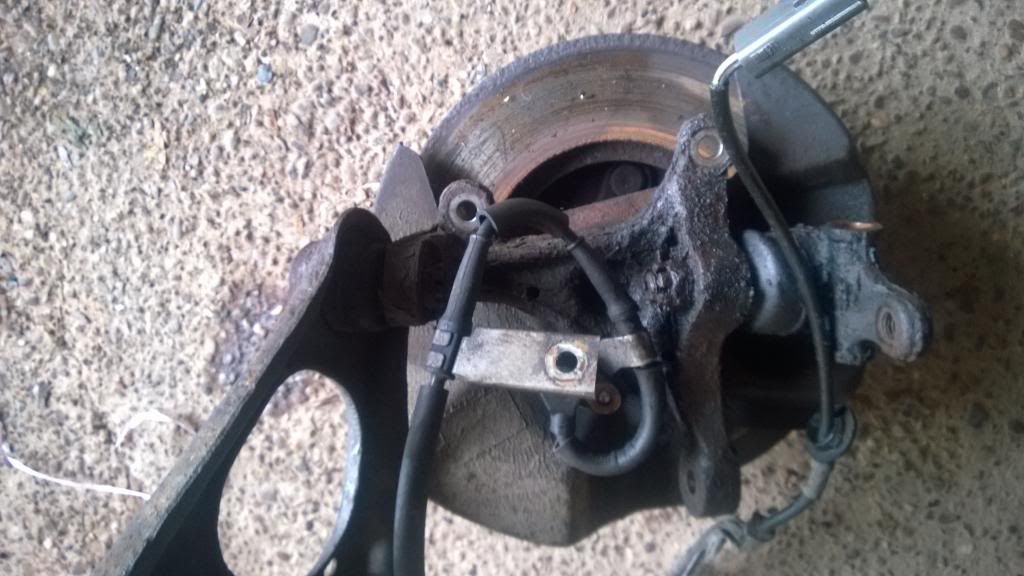
Note the abs sensor still firmly attached, both bolts (one on each side) sheared under the slightest bit of pressure trying to get them undone.
Original plan for this weekend was to degrease and paint the engine. Decided against this as I haven't bought any service parts for it yet and was thinking it would be a good idea to just do all that together then I can forget it and put it aside ready for the rebuild!
Progress was good and am happy-ish with the end result (would have liked 100% on the front frame), but next week will involve me doing the rear sub frame!
|
|
|
|
Post by gwnwar on May 26, 2014 23:57:54 GMT
Pull the carter key from both nuts. wire brush rust away.. loosen nuts all the way off. once off put them back on about 3/4 of the nut height.. this is to save the threads if you miss with the hammer..Now with a BFH hit the side of the knuckle were the joint goes through.. it will take a few hits.. the shock will break joints loose.. I like using a large ball peen hammer against the knuckle and hitting it with another big hammer..It helps to hang the unit by the koint you are working on so there is some weight pulling down.. It would have been easier still mounted in the car..
|
|
|
|
Post by doubletrouble on May 27, 2014 0:01:57 GMT
Pull the carter key from both nuts. wire brush rust away.. loosen nuts all the way off. once off put them back on about 3/4 of the nut height.. this is to save the threads if you miss with the hammer..Now with a BFH hit the side of the knuckle were the joint goes through.. it will take a few hits.. the shock will break joints loose.. I like using a large ball peen hammer against the knuckle and hitting it with another big hammer..It helps to hang the unit by the koint you are working on so there is some weight pulling down.. It would have been easier still mounted in the car.. I second that. Nut on sharp hit or two and bobs your unk. I am at a similar stage. Hoping to get grit blasting and painting done in June then the fun of rebuilding! |
|
|
|
Post by driver on May 29, 2014 20:55:07 GMT
What make are the disks and price mate? Looks good
|
|