|
|
Post by miket on Mar 25, 2014 21:09:57 GMT
Yeah going well - I recognise that feeling having spend hours to no great effect as far as the eye can tell.
Heater pipes just get joined together to allow flow around them - i.e. going nowhere.
PPF bolts are 8 at the front and 6 at the back. On each side at the front there's a pair, 1 set further back and a smaller one right at the back of the subframe 'arms'. At the rear there's a pair at each side and 1 set in a little (if I remember rightly).
|
|
|
|
Post by tomaff on Mar 25, 2014 22:08:20 GMT
Just saw you are Coventry way. I am just outside Coventry (a46 past stratford - about 20-30mins) with a finished exocet if you want any help/spin.
|
|
|
|
Post by gwnwar on Mar 26, 2014 5:18:21 GMT
Connect the 2 heater tubes together.. doing that will allow coolant to flow through the head and back forward to the water pump. It is a must do thing.. While you are taking subs off the body mount don't forget to remove the front sway bar..
|
|
|
|
Post by exoRy on Mar 27, 2014 21:16:58 GMT
@hammy - yeh, really like the colour scheme on yours, however I couldn't copy so close to your build. Think I may have to re-learn photoshop and knock up a few colour schemes!! Any idea, who had the yellow/blue one? miket - thanks, will look out for those this weekend. I'm going to take a trip to the garden centre this weekend to get myself some clear hose to syphon some fuel. if I get the hang of it - watch out neighbours!!! tomaff - that'd be great mate!!! I had a fair amount of questions before I started the build, but that number has increased loads, would be great to see/sit in a finished one to get a picture of what I'm working towards! And obviously pick your brains  gwnwar gwnwar - thanks, were the heater pipes part of the radiator system?? I should be getting round to bleeding most of the fluids out this weekend, so am trying to get a better picture of how its all connected! |
|
|
|
Post by gwnwar on Mar 28, 2014 0:29:24 GMT
The hoses went to the heater core on inside of car..There was constant flow through the heater core.. By looping it on the engine you complete the flow through the head to cool it.. So yes it is part of the coolant system.. I hope you are labeling all connectors as you remove the harness.. If you don't have one get a repair manual even a Haynes is better then none..Put the year of your doner in your profile it will help answer questions..Also start your questions with year and engine size..
|
|
Deleted
Deleted Member
Posts: 0
|
Post by Deleted on Mar 28, 2014 8:46:50 GMT
@hammy - yeh, really like the colour scheme on yours, however I couldn't copy so close to your build. Think I may have to re-learn photoshop and knock up a few colour schemes!! Any idea, who had the yellow/blue one? miket - thanks, will look out for those this weekend. I'm going to take a trip to the garden centre this weekend to get myself some clear hose to syphon some fuel. if I get the hang of it - watch out neighbours!!! tomaff - that'd be great mate!!! I had a fair amount of questions before I started the build, but that number has increased loads, would be great to see/sit in a finished one to get a picture of what I'm working towards! And obviously pick your brains  gwnwar gwnwar - thanks, were the heater pipes part of the radiator system?? I should be getting round to bleeding most of the fluids out this weekend, so am trying to get a better picture of how its all connected! Manxman is the one you are looking for on here. BTW It doesn't bother me if you went for the same colour scheme as me mate. I haven't trademarked it... ;-) |
|
|
|
Post by doubletrouble on Mar 31, 2014 17:04:36 GMT
It is far more fun that I thought it would be pulling apart a car!
yes, we are at similar stages, you posted on mine and Sams build thread. We are planing to get ready for lifting the top off this weekend. I have someone who wants to buy the whole body off mine!!!
|
|
|
|
Post by exoRy on Apr 7, 2014 20:56:30 GMT
doubletrouble - very nice, did you manage to get it off and get rid?
Right, so weekend of the 29th was a little slow going, again felt like I did loads, but it was more lots of little jobs and didn't really warrant any photo opportunities  So this post covers the last 2 weekends. So this post covers the last 2 weekends.
Managed to get the front brakes off, got the piston on the right side out, however the left piston kind of got stuck at an angle as it was coming out of the calliper (was left unattended whilst my friend pumped the brake, caught on the rubber seal)......and to add to the misery of what I now call the "Left front brake fiasco" the banjo bolt head has rounded and does not want to budge! adding to that, the bracket which connects the brake line to the brake hose is being a stubborn "bar-steward" also!
Soaked in plenty of WD40 and have left to sit, will have to attack this next weekend!
Here is a pic of the discs and pads. Think no amount of re-furb will bring the discs back so was wondering where others have got theirs? 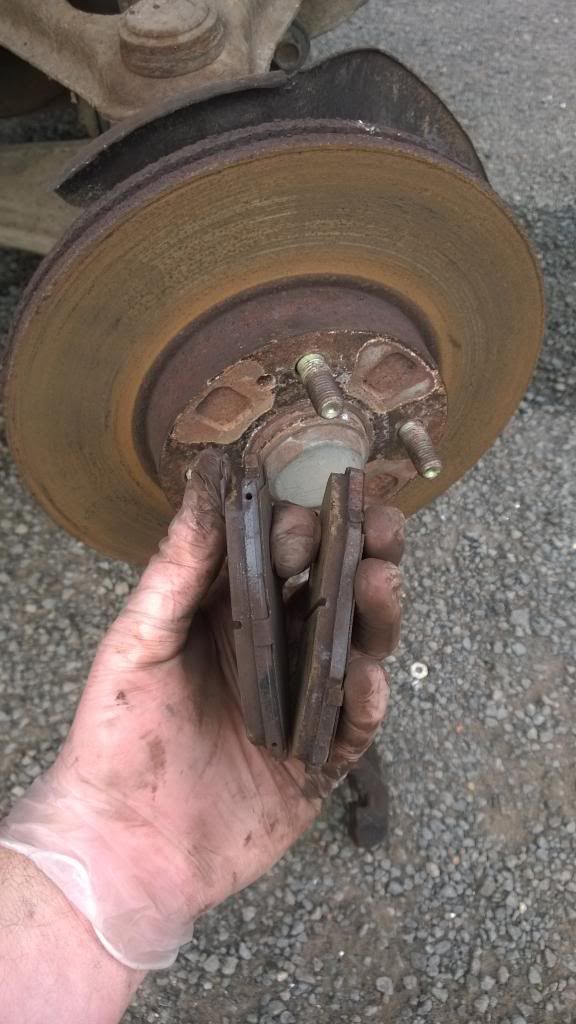
However, did manage to get the loom out (**crowd cheers**), picture proof below:
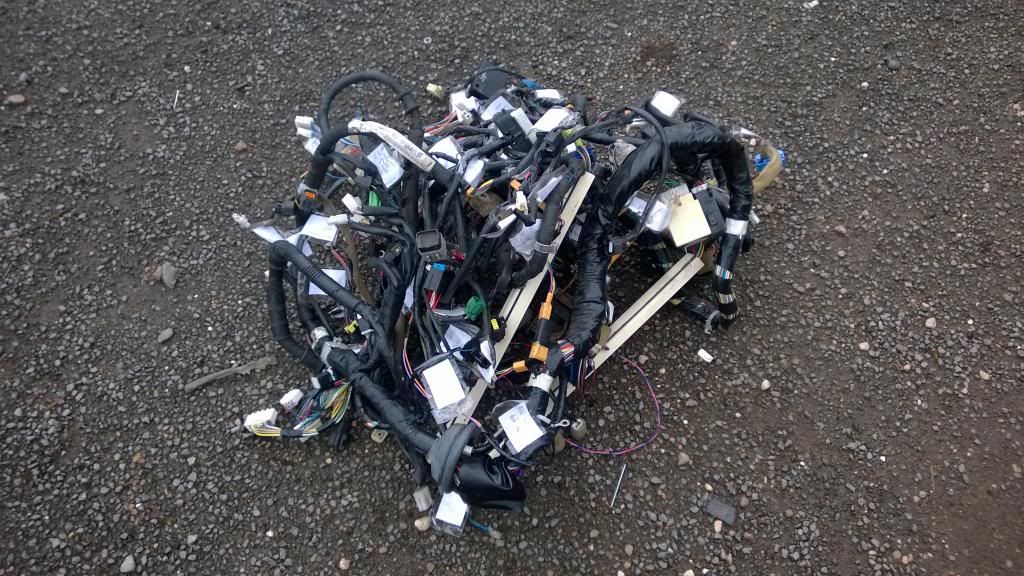
Also got the pedals out, accelerator cable and speedo cable!
Didn't take a picture of the interior after I'd done all of the above, however it was looking bare before and now looks like it'll be time to get the body off soon.
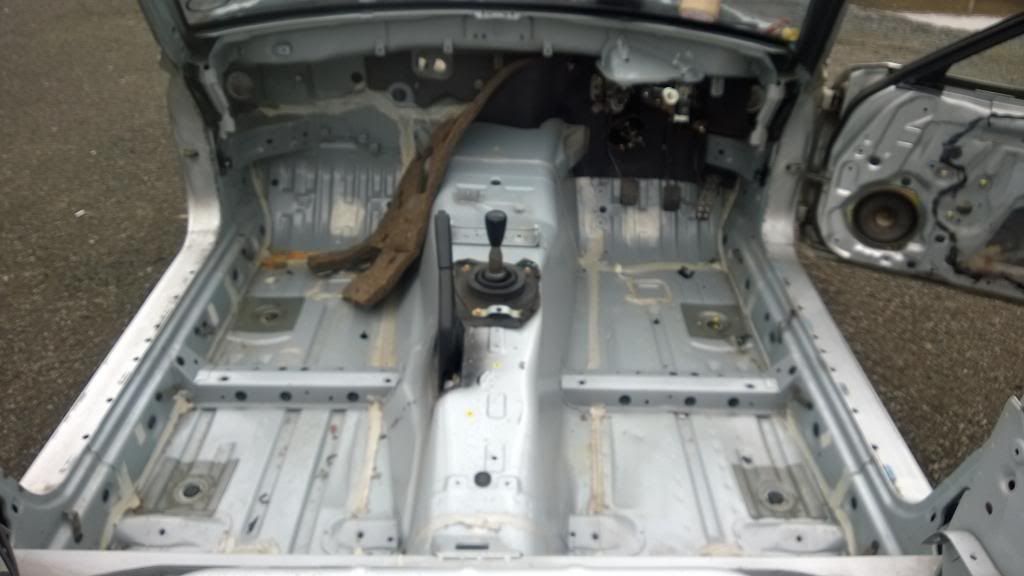
Continued to clear down the engine bay, removed charcoal canister (does this go back in???), ABS unit, clutch unit, brake master cylinder.
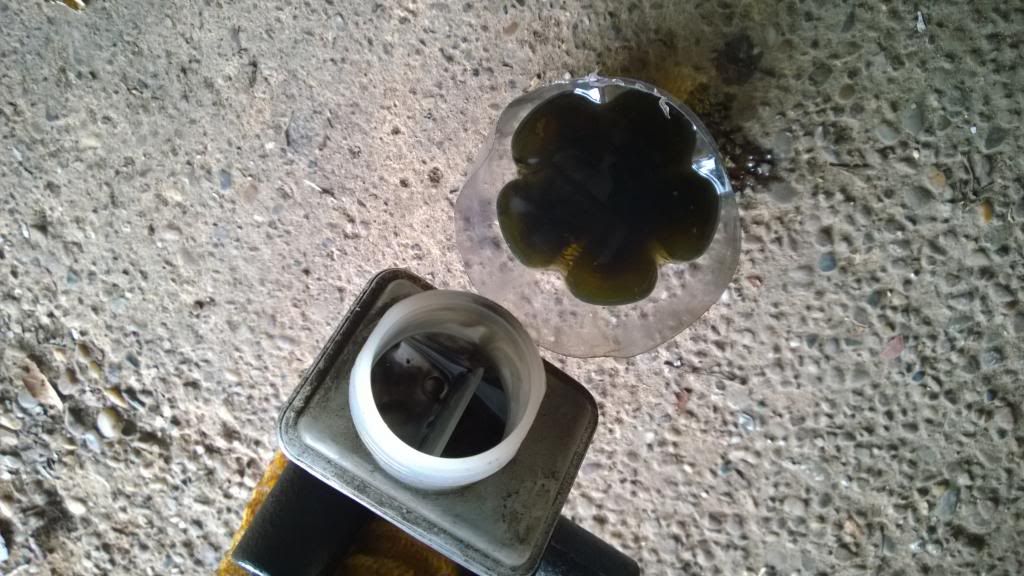
When emptying the clutch fluid I noticed that there was a lot of dark grey (almost metallic) slush in the bottom, does anyone know what this is and if this means something's faulty?? I'm not sure where this has come from...
Still need to remove the fuel/brake lines from the body in the engine bay area, remove power steering, loosen hub nuts (realised after spilling brake fluid everywhere that these should have been loosened when the foot brakes were still functional)...but now I'll have to do with the handbrake and some chocks on the wheels.
Highlight of the weekend had to be my Saturday AM trip to Pets@Home for car related stuff:
Sales Assistant: Good morning sir, how can I help you?
Me: Hi, I need some clear plastic tubing.
Sales Assistant: ok, is this for a water feature or an air filter for you aquarium?
Me: To be honest mate I need to syphon fuel
Sales Assistant: ok, this is the only one we do (points to 1.8m of hose of about 1cm diameter)
Me: This'll have to do!
Got back to the car with the 20l jerry can and tubing in hand, tried to insert the pipe all the way down from the fuel filler but the pipe was that flimsy it kept catching on something. I tried sucking fuel out only to find the end wasn't in the fuel and I took a massive lungful of fuel vapour! Could taste it for the rest of the day and made the takeaway in the evening taste dodgy! So I eventually loosened the big tube on the tank, stuck the pipe in and found fuel!
After an hour and a bit I'd syphoned 18 litres out of the car. The fuel gauge has read just under half full since I got it (but thought it might be faulty), stored the tank in the garage (checked the law and it seems to be ok storing that much as long as the location is 6m away from a residential building......I think).
So I should be looking at removing the shell soon... any last minute tips would be great, I'm going to get soaking stuff in WD40 to make this slightly easier!
Engine bay as it stands:
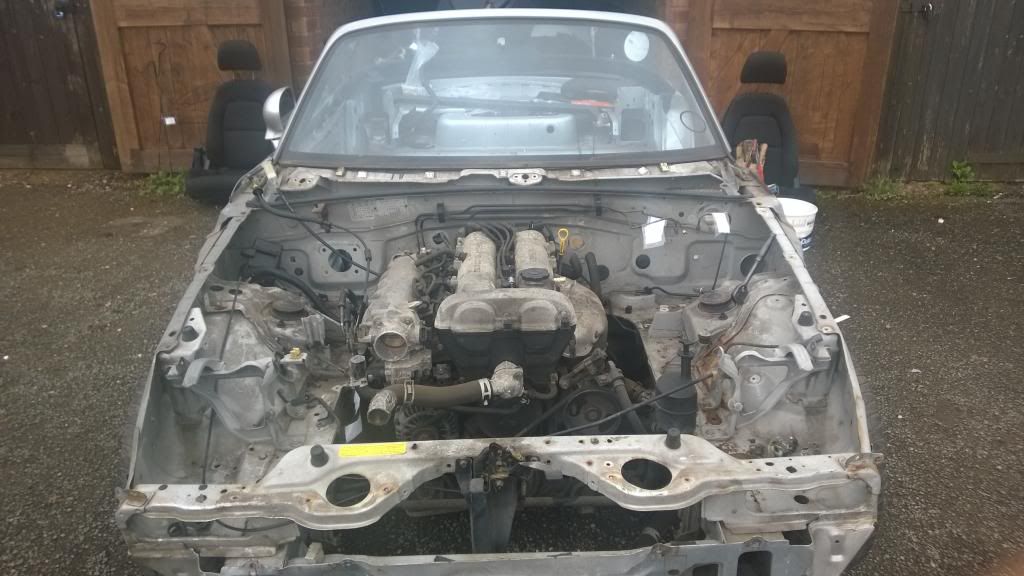
I do have a few questions which I'm hoping some of you will be able to shed some light on....
Noob Corner:
- I've removed the ABS unit, are people putting this back in when they rebuild or does the fact that the car is so light mean that ABS isn't needed?
- I've seen people have removed the power steering completely, have people removed the pump/belt from the engine too? Also I'm assuming you'd have to loop the two pipes on the steering rack? Do the pipes need to be filled with fluid before looping?
- as above - brake discs? where have others got theirs from?
- and braided brake hoses? have others gone this route as the ones on the Mazda are looking tired (and looking like they want to go down swinging with the body)
- hub nuts - I'll be buying the appropriate socket this week, I've got a 60cm Sealey breaker bar with a 1/2" drive (no idea why these companies can't just stick with one unit of measurement for the whole bar???), was thinking about extending with some pipe, however not sure if this is going to bend the pipe once force is applied? how have other's tackled this?
Apologies for the 21 questions, feel like I'm getting close to getting the body off and want it to go as smooth as possible (my optimism amuses me!) and that'll be a massive milestone - will then have to start getting things sorted for sand blasting and powder coating..
Thanks in advance guys 
|
|
|
|
Post by gwnwar on Apr 8, 2014 5:31:19 GMT
Looking good.. Why didn't you use the drain plug for the fuel tank?? Wipe the master cly out and bench bleed to clean out or just pull it apart to clean maybe put in a rebuild kit(cheap).. Remove front sway bar from body if still attached.. I would remove the ABS unit and parts. and depower the steering rack.. loose all the parts but the rack. You can loop the rack don't have to drain it.. That is the cheap way or you can check this out for another way www.flyinmiata.com/tech/depower.php you might need a pipe on the breaker.. make sure you unstake the axle nut before turning them..Socket 1 1/8" 6 point one is best.. |
|
|
|
Post by exoRy on Apr 13, 2014 20:56:24 GMT
gwnwar - thanks again, I didn't use the drain plug as in Rod's manual it says it is easily damaged and didn't want to risk being too heavy handed and breaking anything. In hindsight I should probably have used that as my lungs wont have thanked me for filling them with fumes!!
1 1/8" 6 point socket ordered Thursday, arrived Saturday morning ready to get the dreaded hub nuts off!
Saturday saw the removal of the power steering reservoir and associated piping, some more fuel/brake/clutch lines from the engine bay. And disconnecting the brake lines from the body to the rear brakes and removed the exhaust. Also pushed the PPF loom through the hole in the body.
This got delivered in the week, probably a little over kill, however it lasts and will be used in this build and the next 
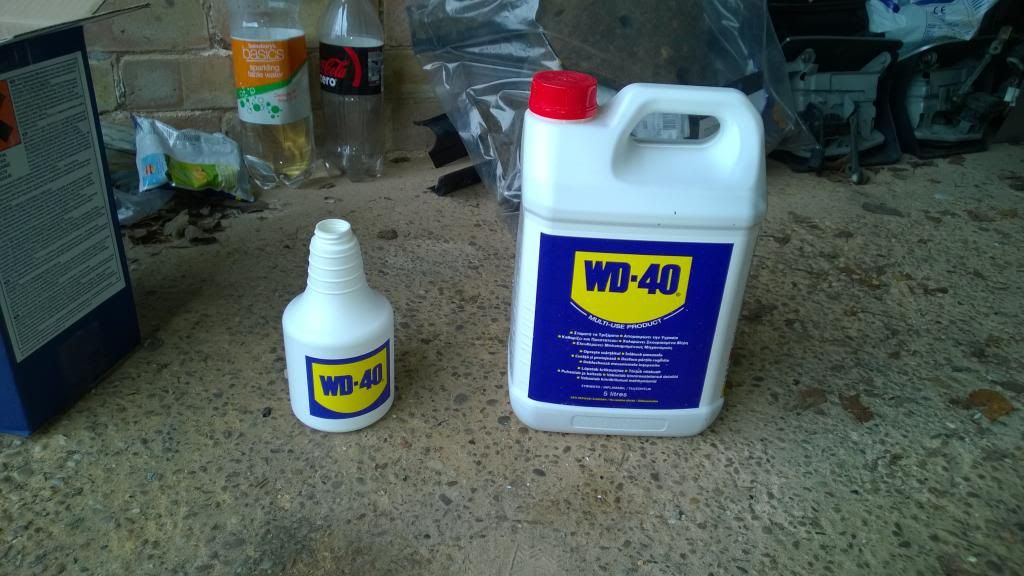
Gave the hub nuts a good soaking over night too!
Woke up this morning ready to tackle the hub nuts. Only have a 60cm 1/2" drive breaker bar (Sealey ~£12 from amazon) so was quite sceptical about it staying straight and being up to the task!
Unstaked the nut and gave it a go with just the breaker bar and could feel it flexing so backed off and gave another soak.
Then my dad turned up with this
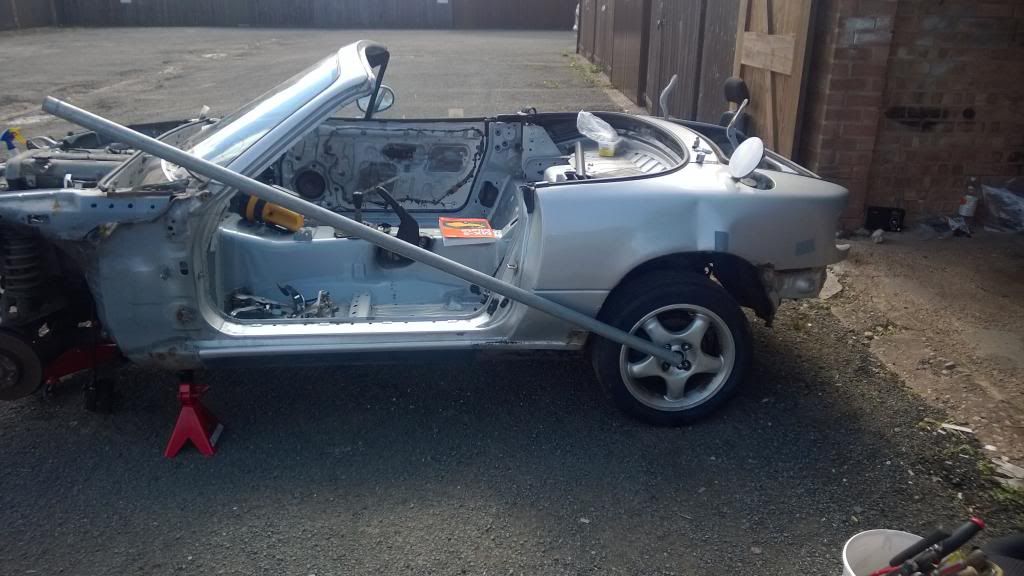
Applied force from the very end, could still feel the breaker bar flexing and the join to the drive did look a little suspect, however just kept applying progressively more force (no jerking and rocking) until I heard an almighty CRACK - the nut moved!
With a smile on my face I went and tackled the other one, much of the same, however this one was a little more difficult and required a bit more force.
Looking back - should probably not have tackled this while it was on axle stands, but wasn't thinking at the time. However made sure that the hand brake was on really tight (the back wheels weren't going to move) and that I didn't jerk/rock the car and made sure the force I applied was downwards!
I spent a few minutes locating and soaking the bolts in WD40 ready for when I take the shell off (wont be next weekend as I'm away), will probably be the last weekend in April. Think I've removed most of the stuff that's attached to the body that needs to be removed. Unless I've missed anything glaringly obvious??
I've left the hand brake on until the day I take the shell off as my garage has a slight slope and I want the car to stay in there for the time being.
With that pretty much wrapped up until lifting day (I think), I returned home with the brake calliper and piston which got wedged at an angle a few weeks back and decided to not come out!
Saw miket's post (using gwnwar's advice) for using compressed air to get the piston out. Thought I'd give this a go, went and got the car tyre pump (runs off the 12v lighter in the car) hooked everything up (used the airbed adapter too). Saw miket's came out at about 40psi - checked the rating of this thing and it does 100psi so thought it was definitely coming out today.
Here's the setup...
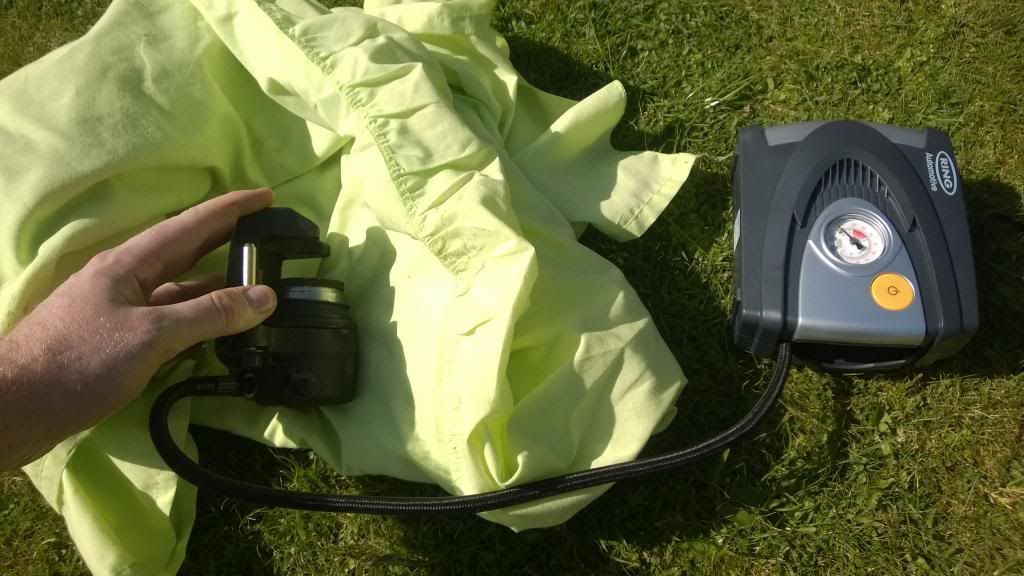
Wrapped it all up in old bed sheets to stop things flying around once it comes out. Turned the pump on, the needle shot up to 70psi followed by a massive BANG. Opened the sheets to find the piston had come out!!!
Saw the neighbours looking out of their windows trying to locate the gun fire! My Dad was at the back of the back garden and I was on the front lawn, he heard the bang as clear as day and rushed round to make sure I didn't have a piston sticking out of my face!
Just a future note to anyone who may need to attempt this....this piston absolutely shot out, at speed and with great force! Any fingers or anything in the way and it'd crush it no problem. Just make sure you take your time and protect yourself!
So that was the weekend, think I'm ready to take the body off, was thinking of getting an engine crane/mates to help. Benefit with the engine crane is that I can re-use it when I separate the engine from the front sub frame and it doesn't have to be bribed with beer/food. Am leaning more towards the engine crane as I can sell it when I'm done with it!
Really looking forward to getting the body off, will mark a big stage in the build and then have to start getting everything ready for blasting/powder coating and also order the kit!! |
|
|
|
Post by miket on Apr 13, 2014 21:52:55 GMT
Hah, outdone me on hub nut removal tool size and piston exit velocity - like your style and enjoyed the update.
I'm afraid I missed your earlier post, so delayed answers:
Mine doesn't have ABS, but I'd have thought more lightness (!) meant ABS'd be more useful rather than less - the brakes are more likely to lock up with less weight on them? Or just dust off old-skool cadence braking skills.
I got my discs/pads as the aftermarket bundle from mx5parts - not used the parts yet, but seemed a good deal... but do a really thorough audit of your brakes components; spring clips, sliders etc - I ended up placing more than one order as I realised I needed more bits in stages. The aftermarket set's Ultimax pads had (newfangled / fibrous) shims one one set (front or back) but not the others - so I needed to order some (newfangled / fibrous) shims separately. Let me know if you're going down this route and I'll dig out the details.
As part of my 'budget' ethos I'm reusing the brake hoses. I had to saw off the front brackets and loosen the hoses from the brackets in the vice, but they came quietly when faced with a vice. The hoses cleaned up okay.
One belated thought thought for general consideration; does soaking hub nuts risk getting solvent in to the actual bearings? It feels there's some risk, but that it's minimal?
|
|
|
|
Post by gwnwar on Apr 13, 2014 22:01:15 GMT
Remember to take the emer. brake cables off the rear calipers.. and rubber donuts holding exhaust to body at the rear and under center of car.. and ground strap from engine to frame (save to be reinstalled on kit) before lifting body..
Cut the VIN off the firewall behind the coils before trashing body you will need it later..
Go slow.. be safe.. don't get under body without stands if you forget to release something..
|
|
|
|
Post by Stewart on Apr 16, 2014 16:44:56 GMT
If you need some new discs and pads, drop me a PM. I can sort them out for you for less than most places.
That also goes for the bolt on spacers and braided brake hoses if you like.
|
|
|
|
Post by exoRy on Apr 25, 2014 18:46:48 GMT
miket - would have preferred less drama/exit velocity!! I've seen a few of the brake bits and bobs (the rubbers and all metal clips) on eBay as a set for about £15 (per brake), however (below) think I might need new pistons as the ones I have out look worn!
You've got me thinking about the bearings now, will do a bit of reading up on it - will give them a good proper grease when I come to stripping down the sub frames (if I haven't ruined them!). So thanks for the spot 
gwnwar - thanks, will probably be taking the body off in a few weeks time (am away the next few weekends). Was thinking about going along the lines of "Mates coming to help" rather than the engine crane. But still undecided how I'll move the engine off the front sub frame on my own when it comes to further stripping (if I don't have the crane)
Quick update, spent last Friday refurbing the front brake calipers. Started out like:
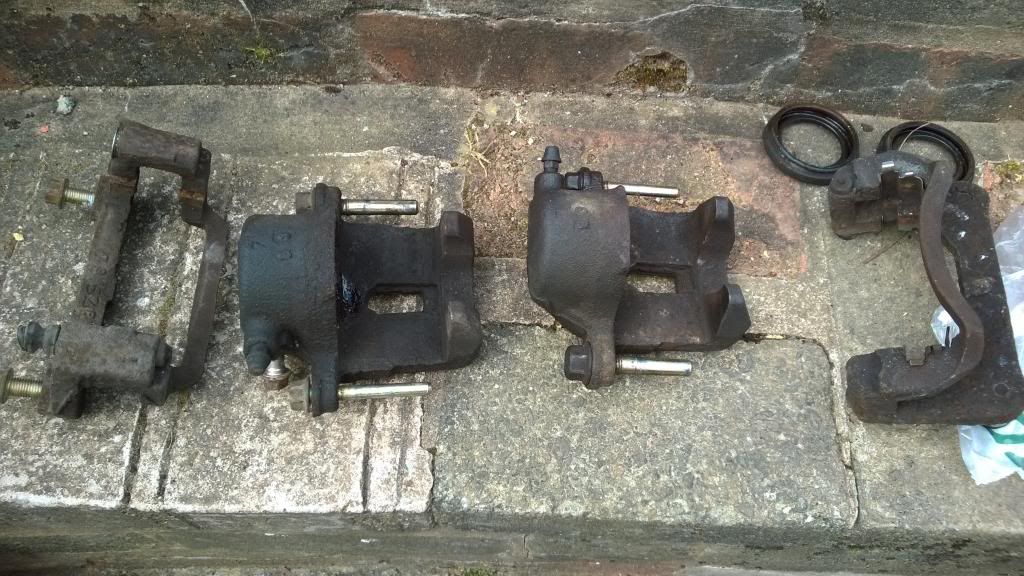 Gave them a good going over with the wire wheel attachment on the drill (dust mask over the mouth was a great idea - these things were filthy), which transformed them to:
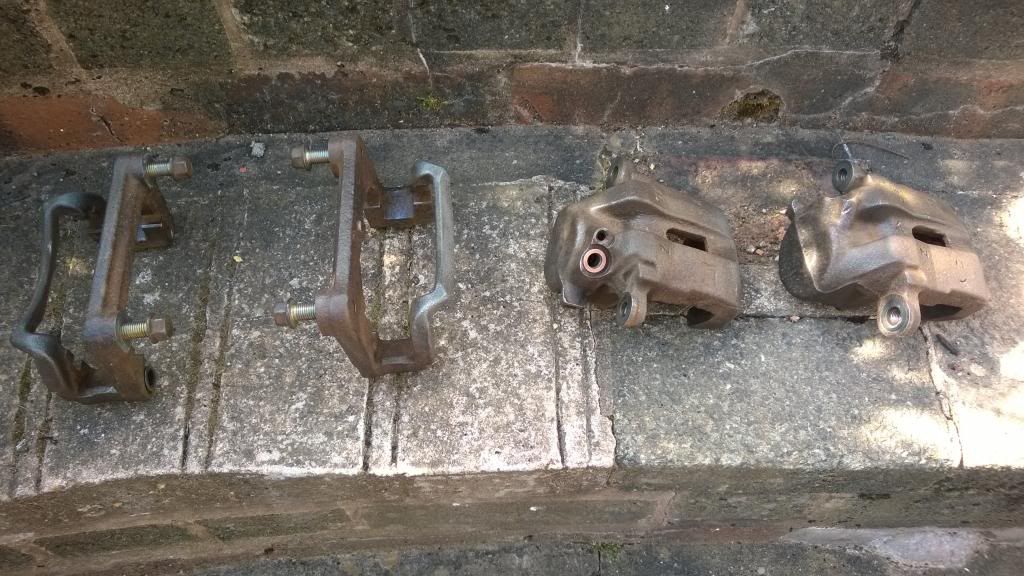
Then went over with some red-oxide paint, covered all the holes, and will get some brake paint (colour still undecided) when I've actually decided on the colour of the kit: 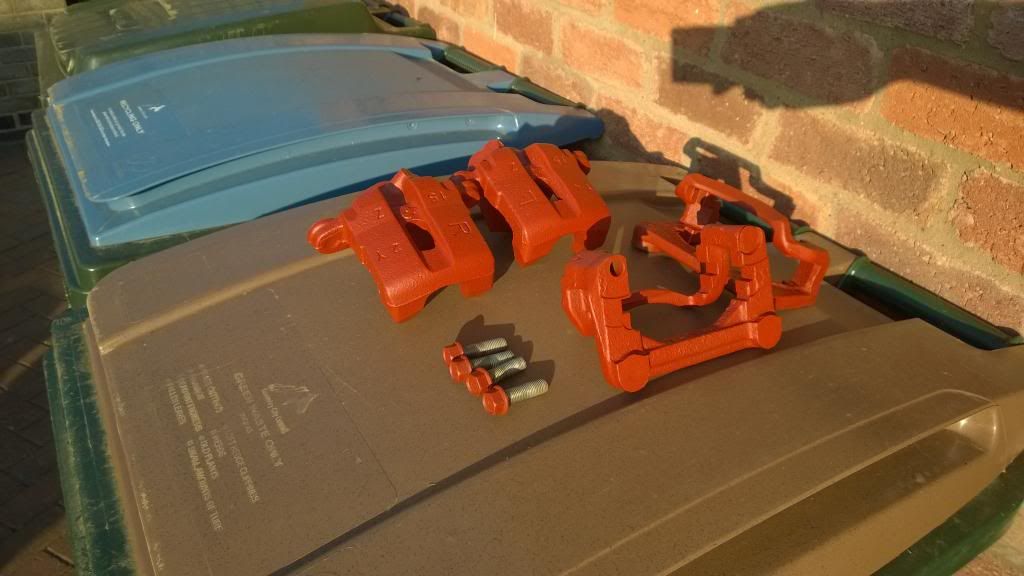
In other news, went to see tomaff last night, brilliant guy; answered all of my questions and gave me loads of good pointers on various bits of the build that will be immensely helpful!
Took me out for a spin in his Exocet; CHRIST - that thing is an absolute monster! No other word for it! Grips like hell to the road and just takes off when the accelerator/bomb pedal is pushed!
Seeing as that was my first ride in one I was very impressed by the amount of room, I'm not small and thought I'd be struggling for room - but it was brilliant. The car was so calm, cruising along at 50/60, but when you provoked it; it just came alive and went for the horizon!
Had an experience ride in the Ariel Atom last October - and left a bit disappointed; with the dual controls and the guy not liking me putting my foot to the floor. Definitely think the atom I was in had been de-tuned to allow the public to go and have a go. But yesterday was properly quick and everything the atom experience should have been. Turbo-ing will definitely be an upgrade for the future!
|
|
stubbers
Senior
   Exocet Number 306
Posts: 478
|
Post by stubbers on Apr 25, 2014 19:38:47 GMT
I kept the ABS and have also gone for full braided hoses all round. Are you going to Stoneleigh?
Im based in Halesowen if you ever need a look at finished Exocet
Regarding lifting the body, you will need to prop the subframes up from the wishbones or they will just drop.
Rich
|
|