|
|
Post by miket on Mar 21, 2014 7:55:28 GMT
Milestone day yesterday - only painting some POR15 on suspension parts, but it feels like turning the corner on to building something rather than dismantling something (once I've got those pesky front calliper pistons out).
I found POR15 (black semi gloss) a pleasure to use - it's very runny in appearance in the tin, goes on nice and liquid and yet doesn't seem to run particularly. I found it was ready for second coat after about 3 hours (the tin suggest 3 to 6 hours) - so I mention it in case it helps anyone plan how much to tackle at one go. The brush started to feel 'clogged up after about 2 - 3 hours too, which I guess is related, but improved for cleaning on a rag and filling with fresh paint.
I found meths cleaned up the bowl I'd used ok, but I didn't need to clean the stuff off anything else.
|
|
|
|
Post by miket on Mar 21, 2014 18:21:08 GMT
Thanks Gwnwar, the tip to use compressed air to get the calliper pistons out worked using just my (pedal) bike track pump and the accessory for inflating airbeds! I think one took about 40 psi then came out like a bullet.
One of them looks to be chrome plated and is pitted and the other looks like a machined grey metal and is fine.
|
|
|
|
Post by gwnwar on Mar 21, 2014 22:27:25 GMT
Pistons can be cleaned up.. How is the bore if pitted and not smooth you can try to clean it up with a cly. hone.
If not replace unit. Clean the slide good before lubing. And clean/scrap out the hole it goes into.. They tend to hold dry lube and dirt.
|
|
|
|
Post by miket on Mar 25, 2014 18:12:42 GMT
Cheers gwnwar; I got a replacement piston and did the rest of the cleaning prep, but don't plan to rebuild the callipers until I'm closer to being able to plumb them in.
Today I've prepped the top hats and loosely put the springs/dampers on their lower mounts. Tomorrow I'll try to persuade the rear lower bolts to mate with the no-longer-captive square nuts through the ridiculously small space available to introduce them to each other. I can feel the cursing coming on already.
I noticed my gear lever/shift's lower boot is trashed and I recall that the upper one was too when I took it off the donor. I think they were aimed at keeping muck out of the turret and keeping heat, noise and fumes out of the MX5 cabin, but I guess these latter issues aren't quite the same with an Exocet? What have others done with these - do these boots have any role to play in an Exocet?
|
|
|
|
Post by gwnwar on Mar 26, 2014 4:49:00 GMT
Replace the lower boot..Suck out all fluid from the turret and refill..Before filling check that all bits of trash and maybe lower bushing is removed..replace lower bushing and slide bushing (front of shifter ball)if worn or missing.. Are your rear lower control arms off the car now.. if off weld the nuts in place.. Take them to a welder if you don't weld..
then weld up the underside some..
|
|
|
|
Post by miket on Mar 26, 2014 16:40:04 GMT
Thanks as always for the info. A note for future novices changing the gear lever lower boot on an early donor - the replacement part I bought looked just like the rubber part of the original metal/rubber lower boot - so I spent time trying to separate the original's rubber bit from its metal bit. Time wasted; the replacement boot doesn't look the same as the original fitting, but replaces it as is. The original has a metal lip that curves down over the turret; the replacement doesn't have this at all. As planned; tried to mate the rear lower damper bolts with their no-longer-captive square nuts. I was expecting to spend hours frustrated and cursing at the poor access (they're on the car), but with the creation of the special tool all went well...  |
|
|
|
Post by gwnwar on Mar 26, 2014 18:15:36 GMT
The lower boot replacement should be a one piece unit..a rubber boot bonded to the metal plate that is bolted to the turret.. The early units had the wrap around/down metal base.. This was replaced with a flat bonded unit.. Was your just a piece of rubber?? A new unit slips over from the top.. tight but it will go.. remove knob first,, How are the plastic bushings on shifter rod?? FYI a dry turret takes about 3 oz. of gear oil..
|
|
|
|
Post by miket on Mar 27, 2014 20:42:10 GMT
The lower boot was as you describe gwnwar - it was just that I didn't expect it to be different so I went astray for a while. The boot did indeed slip on easily with some silicone lube and the plastics seemed fine.
Now I need to get to grips with brake unions and flaring ready to install front-to-rear run before putting body on.
|
|
|
|
Post by gwnwar on Mar 27, 2014 21:20:46 GMT
Just remember to double flare the brake tubes..Get a good flaring tool and practice on some short pieces..Remember to put on the nut before flaring the tube end..
|
|
|
|
Post by miket on Mar 28, 2014 20:00:55 GMT
Thanks gwnwar; I'm absolutely confident that I'll make at least one flare before putting a nut on... as I'm sure nearly everyone else has at some time.
Well just to continue to share my mistakes for the benefit of fellow novices who may follow; having managed to install the rear lower damper no-longer-captive nuts with the special tool above; I now see it looks like I need the rear dampers off again so as to drill the holes for the rear wing stays. Doh! Time for a bit more reading ahead and a bit less wanting to see refurbed bits back on the car.
|
|
|
|
Post by miket on Apr 7, 2014 9:31:05 GMT
Since last update I've cleaned up the old MX5 fuel lines with view to reuse 'cos they seem corrosion free, bought a workbench to provide a home for the mahoosive vice my daughter bought me for Christmas and had a therapeutic clean of the garage. Then I tackled my first timing belt change with some trepidation because the way articles are written all suggest it's going to be a trial. Dismantling went fairly smoothly and time was spent on a bit of tarting up of the bits that came off before they go back on. Having read up on the process in Rod's and from Miata.net, I adopted Rod's 'extra marking up' and Miata's 'clamped-spanners cam locking'. As far as I can tell all has gone smoothly, but a couple of things that hadn't occurred to me induced some doubt so I'll mention them here for others to be ready for... 1. Having put the belt on (with the tensioner still out of play) and my alignment marks all nicely in place, I was surprised how slack the belt was between the cam pulleys. It was tight enough to rotate the pulleys without slipping as it turned out, but just surprised me that it wasn't tighter. This made me recheck the belt had the same number of teeth as the original! 2. Subconsciously I guess I expected to see my whitened alignment marks all align up again after a few turns of the crank (ie. 2 or 4 turns I guess), but that wasn't the case and I guess that alignment only recurs once on some larger number of revolutions. It just meant that the security blanket of those marks is lost once I started rotating the crank ahead of tensioning. If anyone has a minute I'd be interested in why it's important that the crank is turned to the timing-marker to set the tension - on the face of it I can't see why it would matter where in its cycle the belt is when it's tensioned. The only other issue is that I have a bit left over! My replacement spring came with its expected shroud, but also a little whitish nylon 'cup with a hole' about the same diameter as the shroud - see pic below. I didn't take one of these off the car and it didn't readily sit on the spring anywhere so I have no idea what to do with it. Does anyone recognise it and know of its importance? 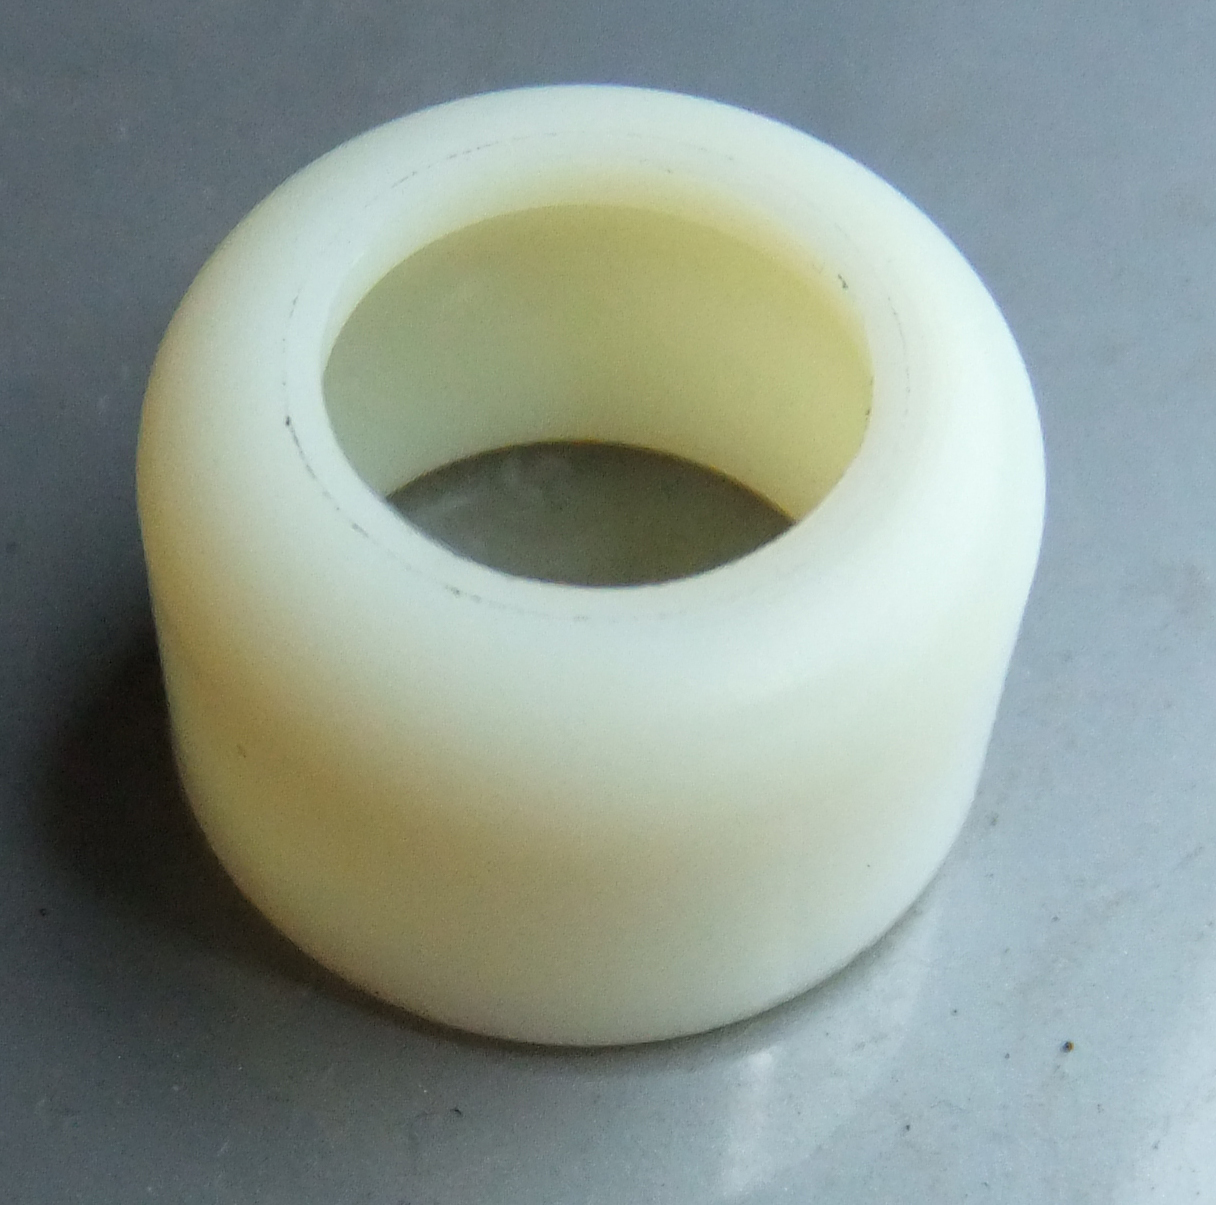 Cheers all. |
|
|
|
Post by miket on Apr 7, 2014 9:53:23 GMT
Ahhhhh - it could have been a gearlever nylon cup that had been bagged in with the spring when I had a larger delivery. Fooled me by being in the little bag with the spring.
|
|
|
|
Post by gwnwar on Apr 8, 2014 4:37:25 GMT
After putting the belt on with all marks (pulleys 2 and crank gear)all lined up did you turn the crank 2 turns clockwise and end up with all marks again lining up?? If not lined up remove belt and start over again.. Intake cam will not stay in place with marks alined if not held in place with wrench.. If they were all matched after the 2 turns
turn crank clockwise again only 1 and 5/6 turns.. Crank gear mark should be 60deg.(see mark on engine) before stright up..Now release the tensioner lock bolt and let it put tension on belt.. don't push it any more let the spring to its work.. Tighten the lock bolt.. Then turn the crank clockwise 2 and 1/6 turns all marks pulley and crank gear should be lined up again..
If not start over again.. Belt should have a deflection down 9.0-11.5mm with 22flb down force.
That looks like the shifter lower bushing..
|
|
|
|
Post by miket on Apr 8, 2014 6:50:02 GMT
Yes all done and went well thanks (subject to being proven when the engine runs again). The marks on the cam & crank pulleys lined up fine after every 2 turns of the crank. The bit that threw me was that the marks I'd made from the cam pulleys on to the belt itself didn't come back in to alignment with every two revolutions as well. There's no real reason why they should of course; I just hadn't foreseen them not doing.
|
|
|
|
Post by miket on Apr 9, 2014 11:31:38 GMT
A new day and new twists. I started out thinking I was going to be drilling holes in rear hub uprights for wing stays, but unwrapped my stays and found they weren't the same as the version of the build .pdf I've got (from Exocet / Build Gallery DC). I checked in the CKC build articles, found h5ngs' "Wings Stays" forum thread and found references to the updated front stays, but my rear stays are apparently newer still. Here's my front stay - as referred to elsewhere - fits in place of dust covers: 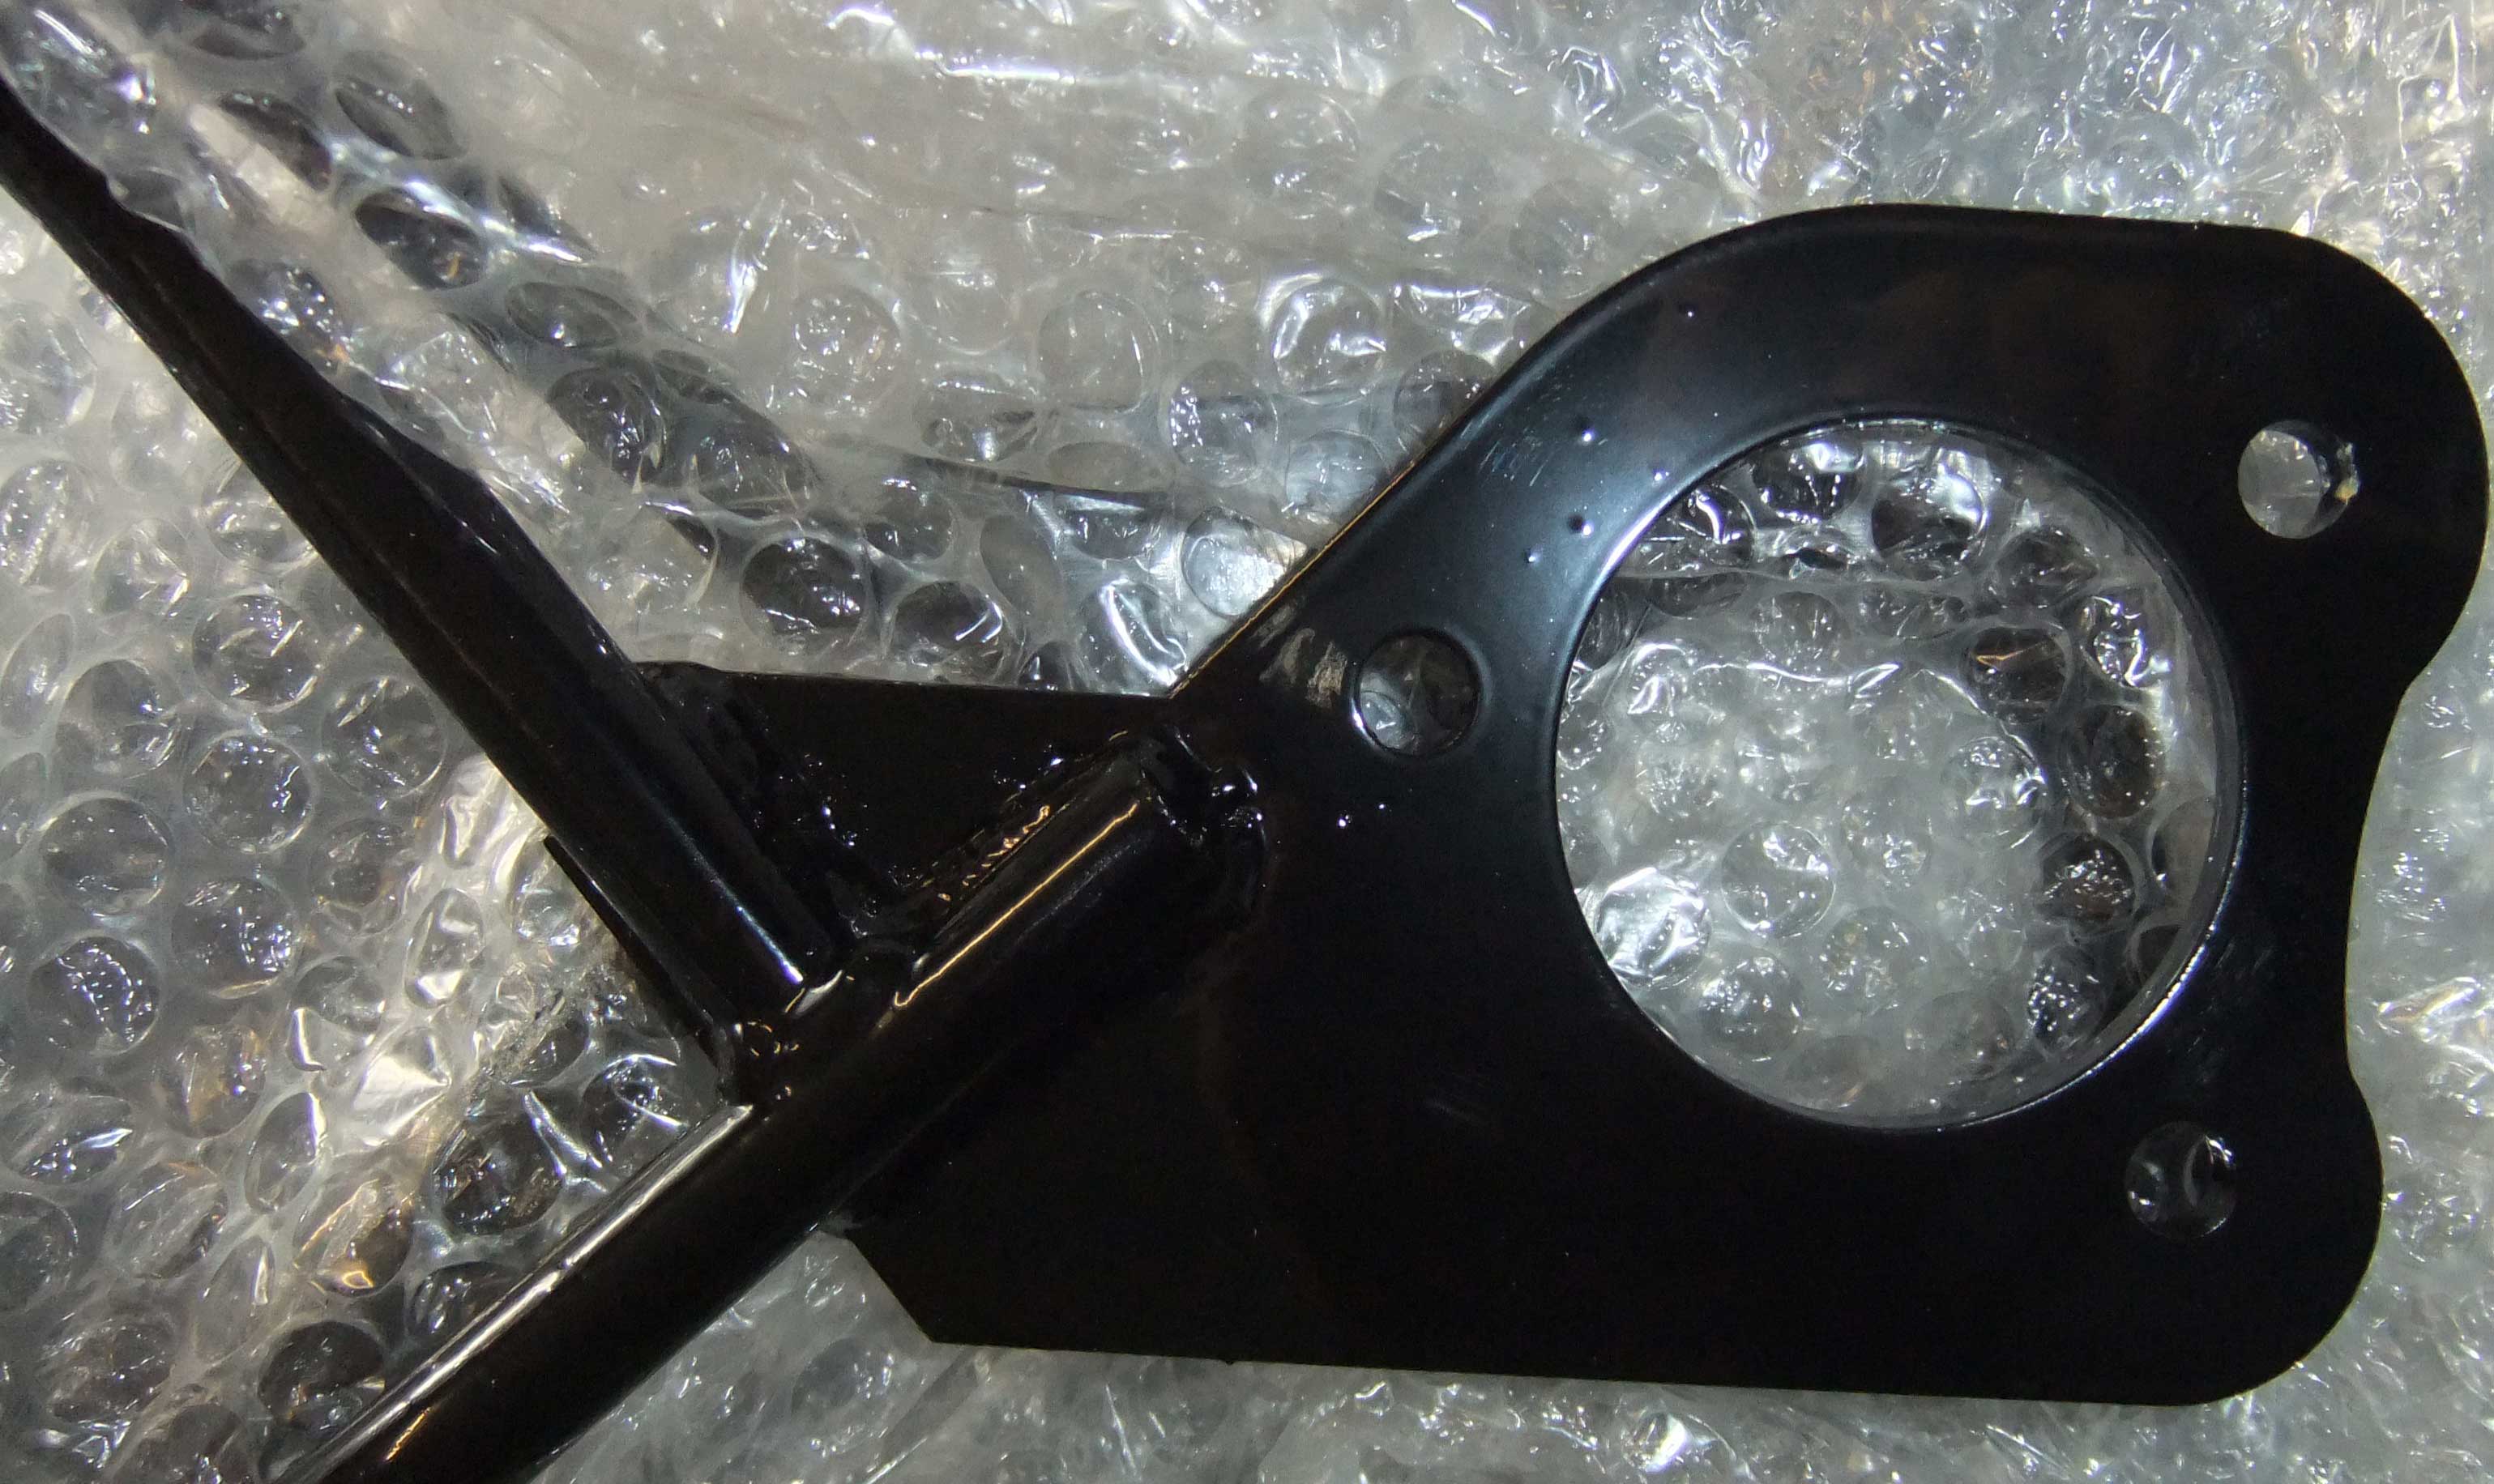 and here's the rear - I've yet to determine how it fits, but it might be obvious once offered up:- 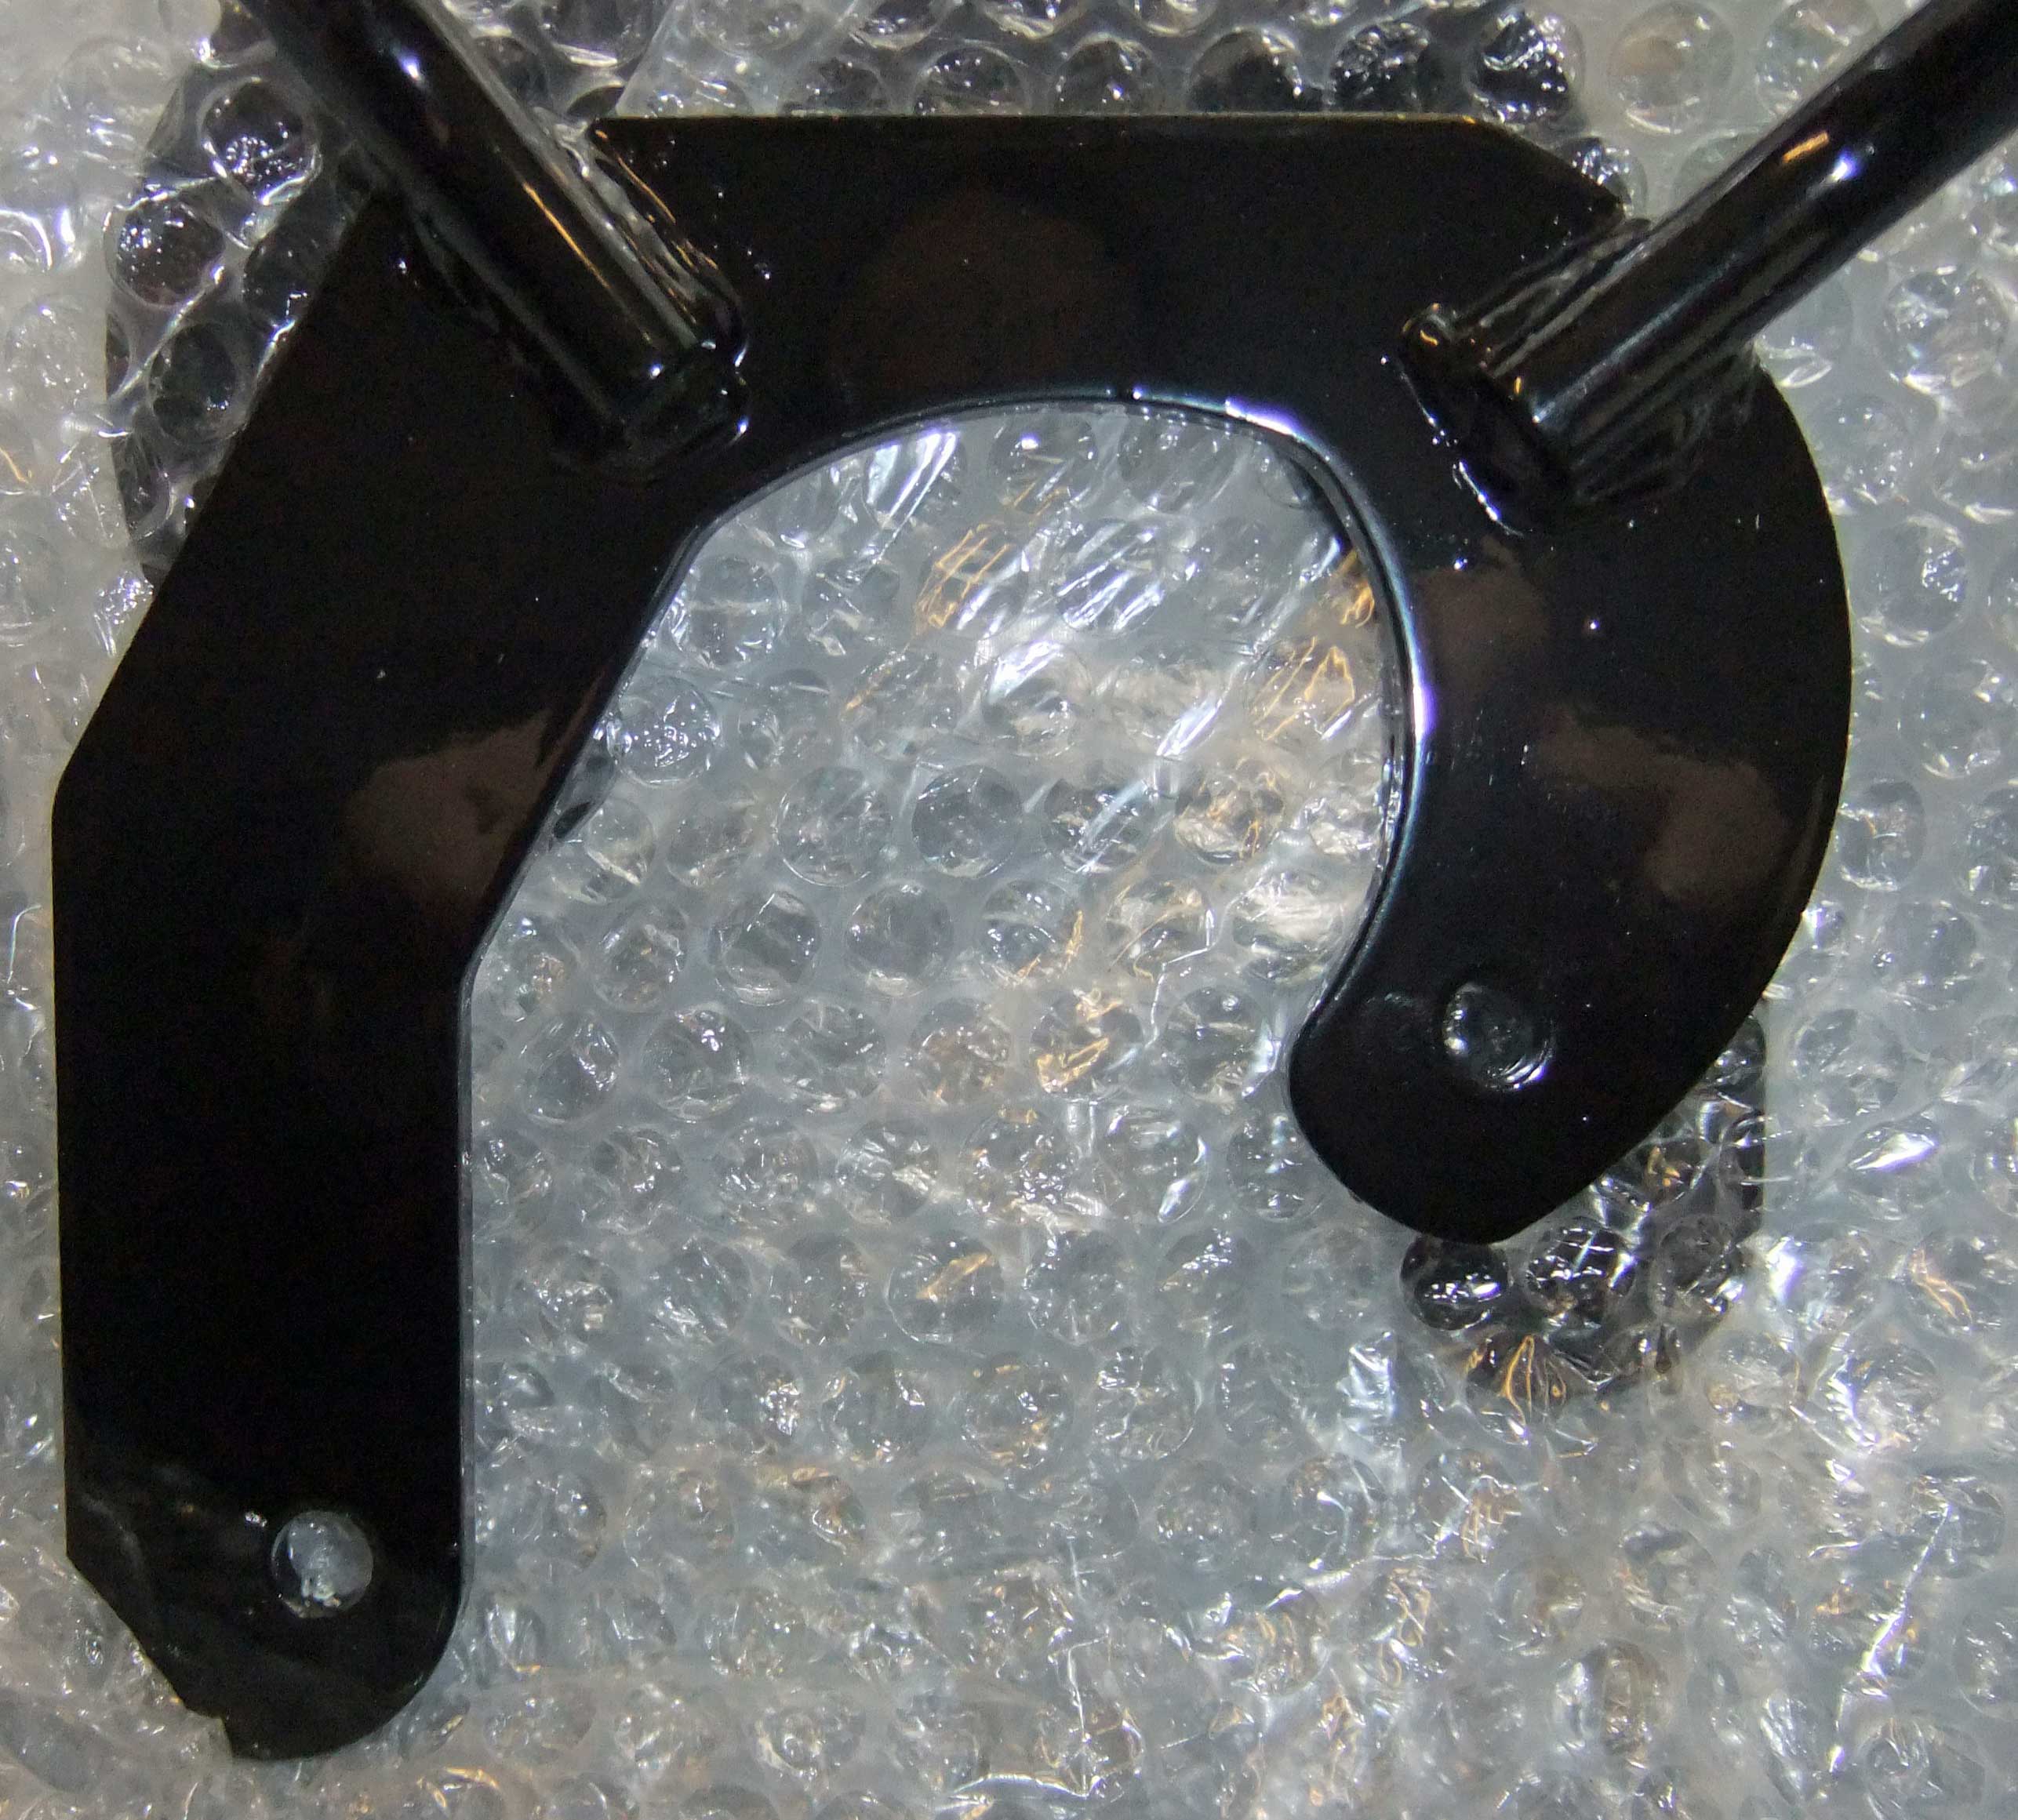 So it looked like rear-upright drilling was off-the-cards until I found out more about them when back in the house. I thought I'd crack the front hub nuts to put the front stays on. Brother-in-law-the-farmer's "proper" socket set and a bit of scaffold he uses made light work of it:-  But then with the hub nuts off I found that my two front hubs/stubs appeared different from each other... This one I think is normal:- 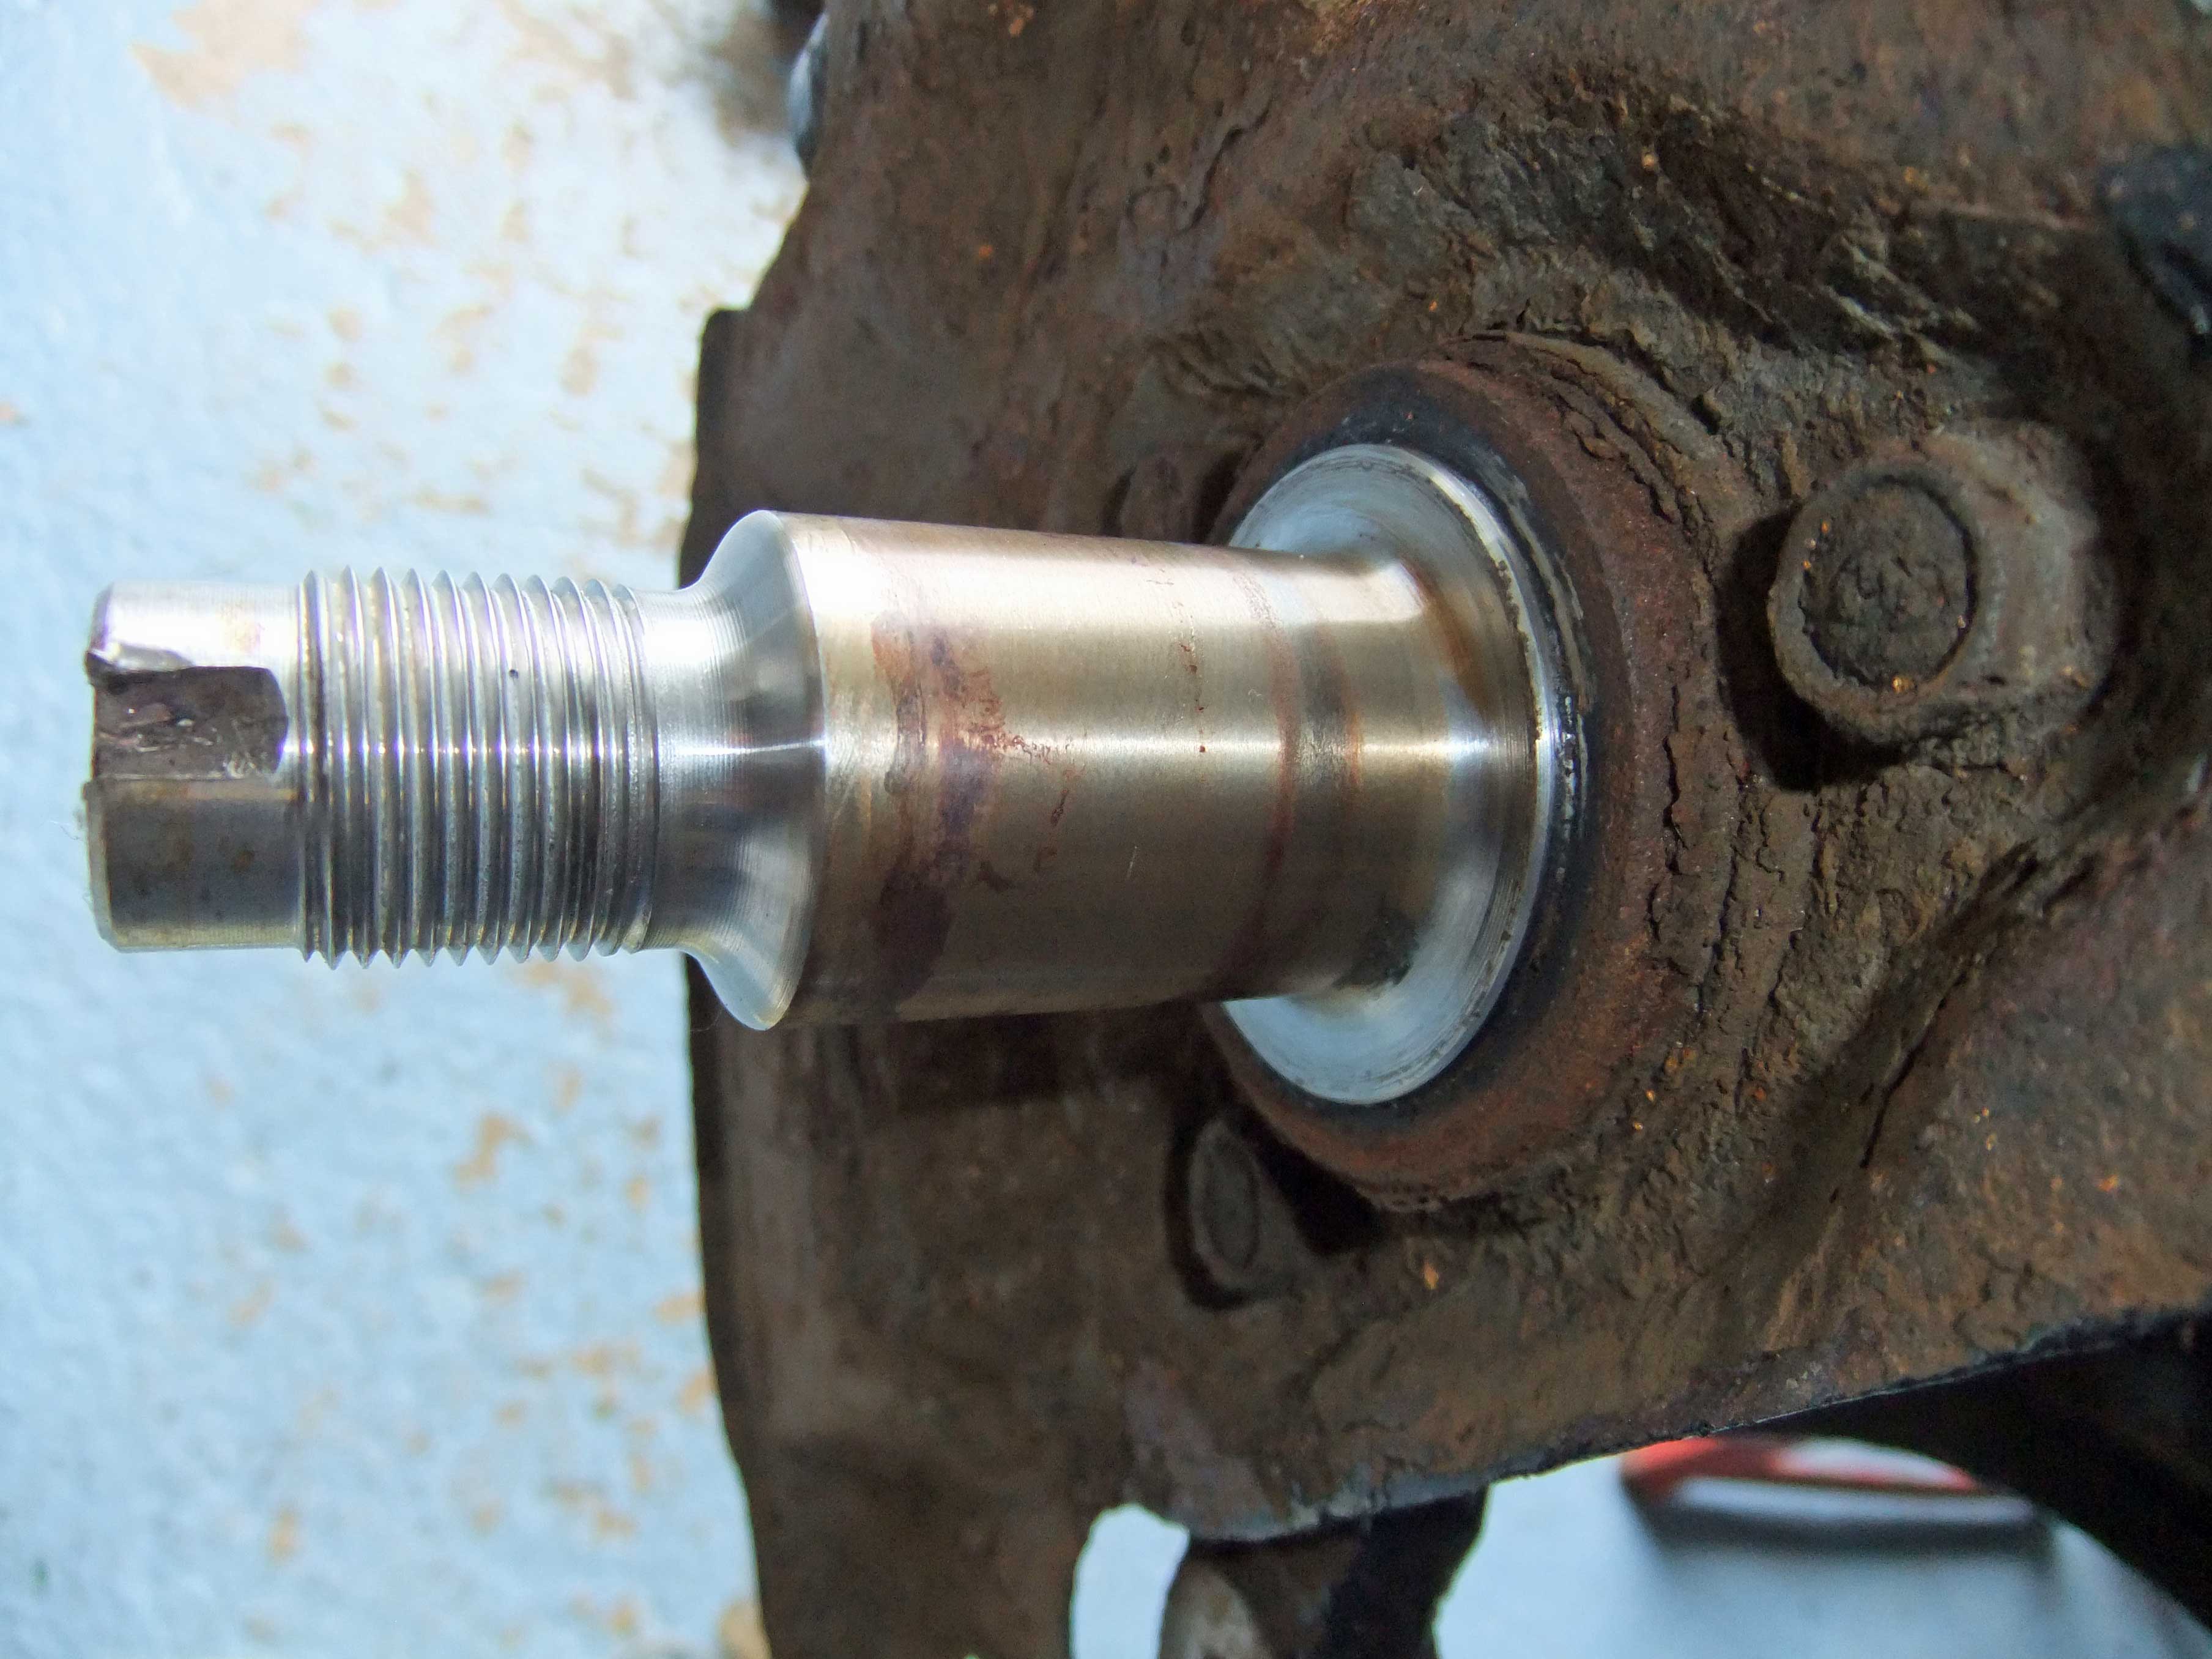 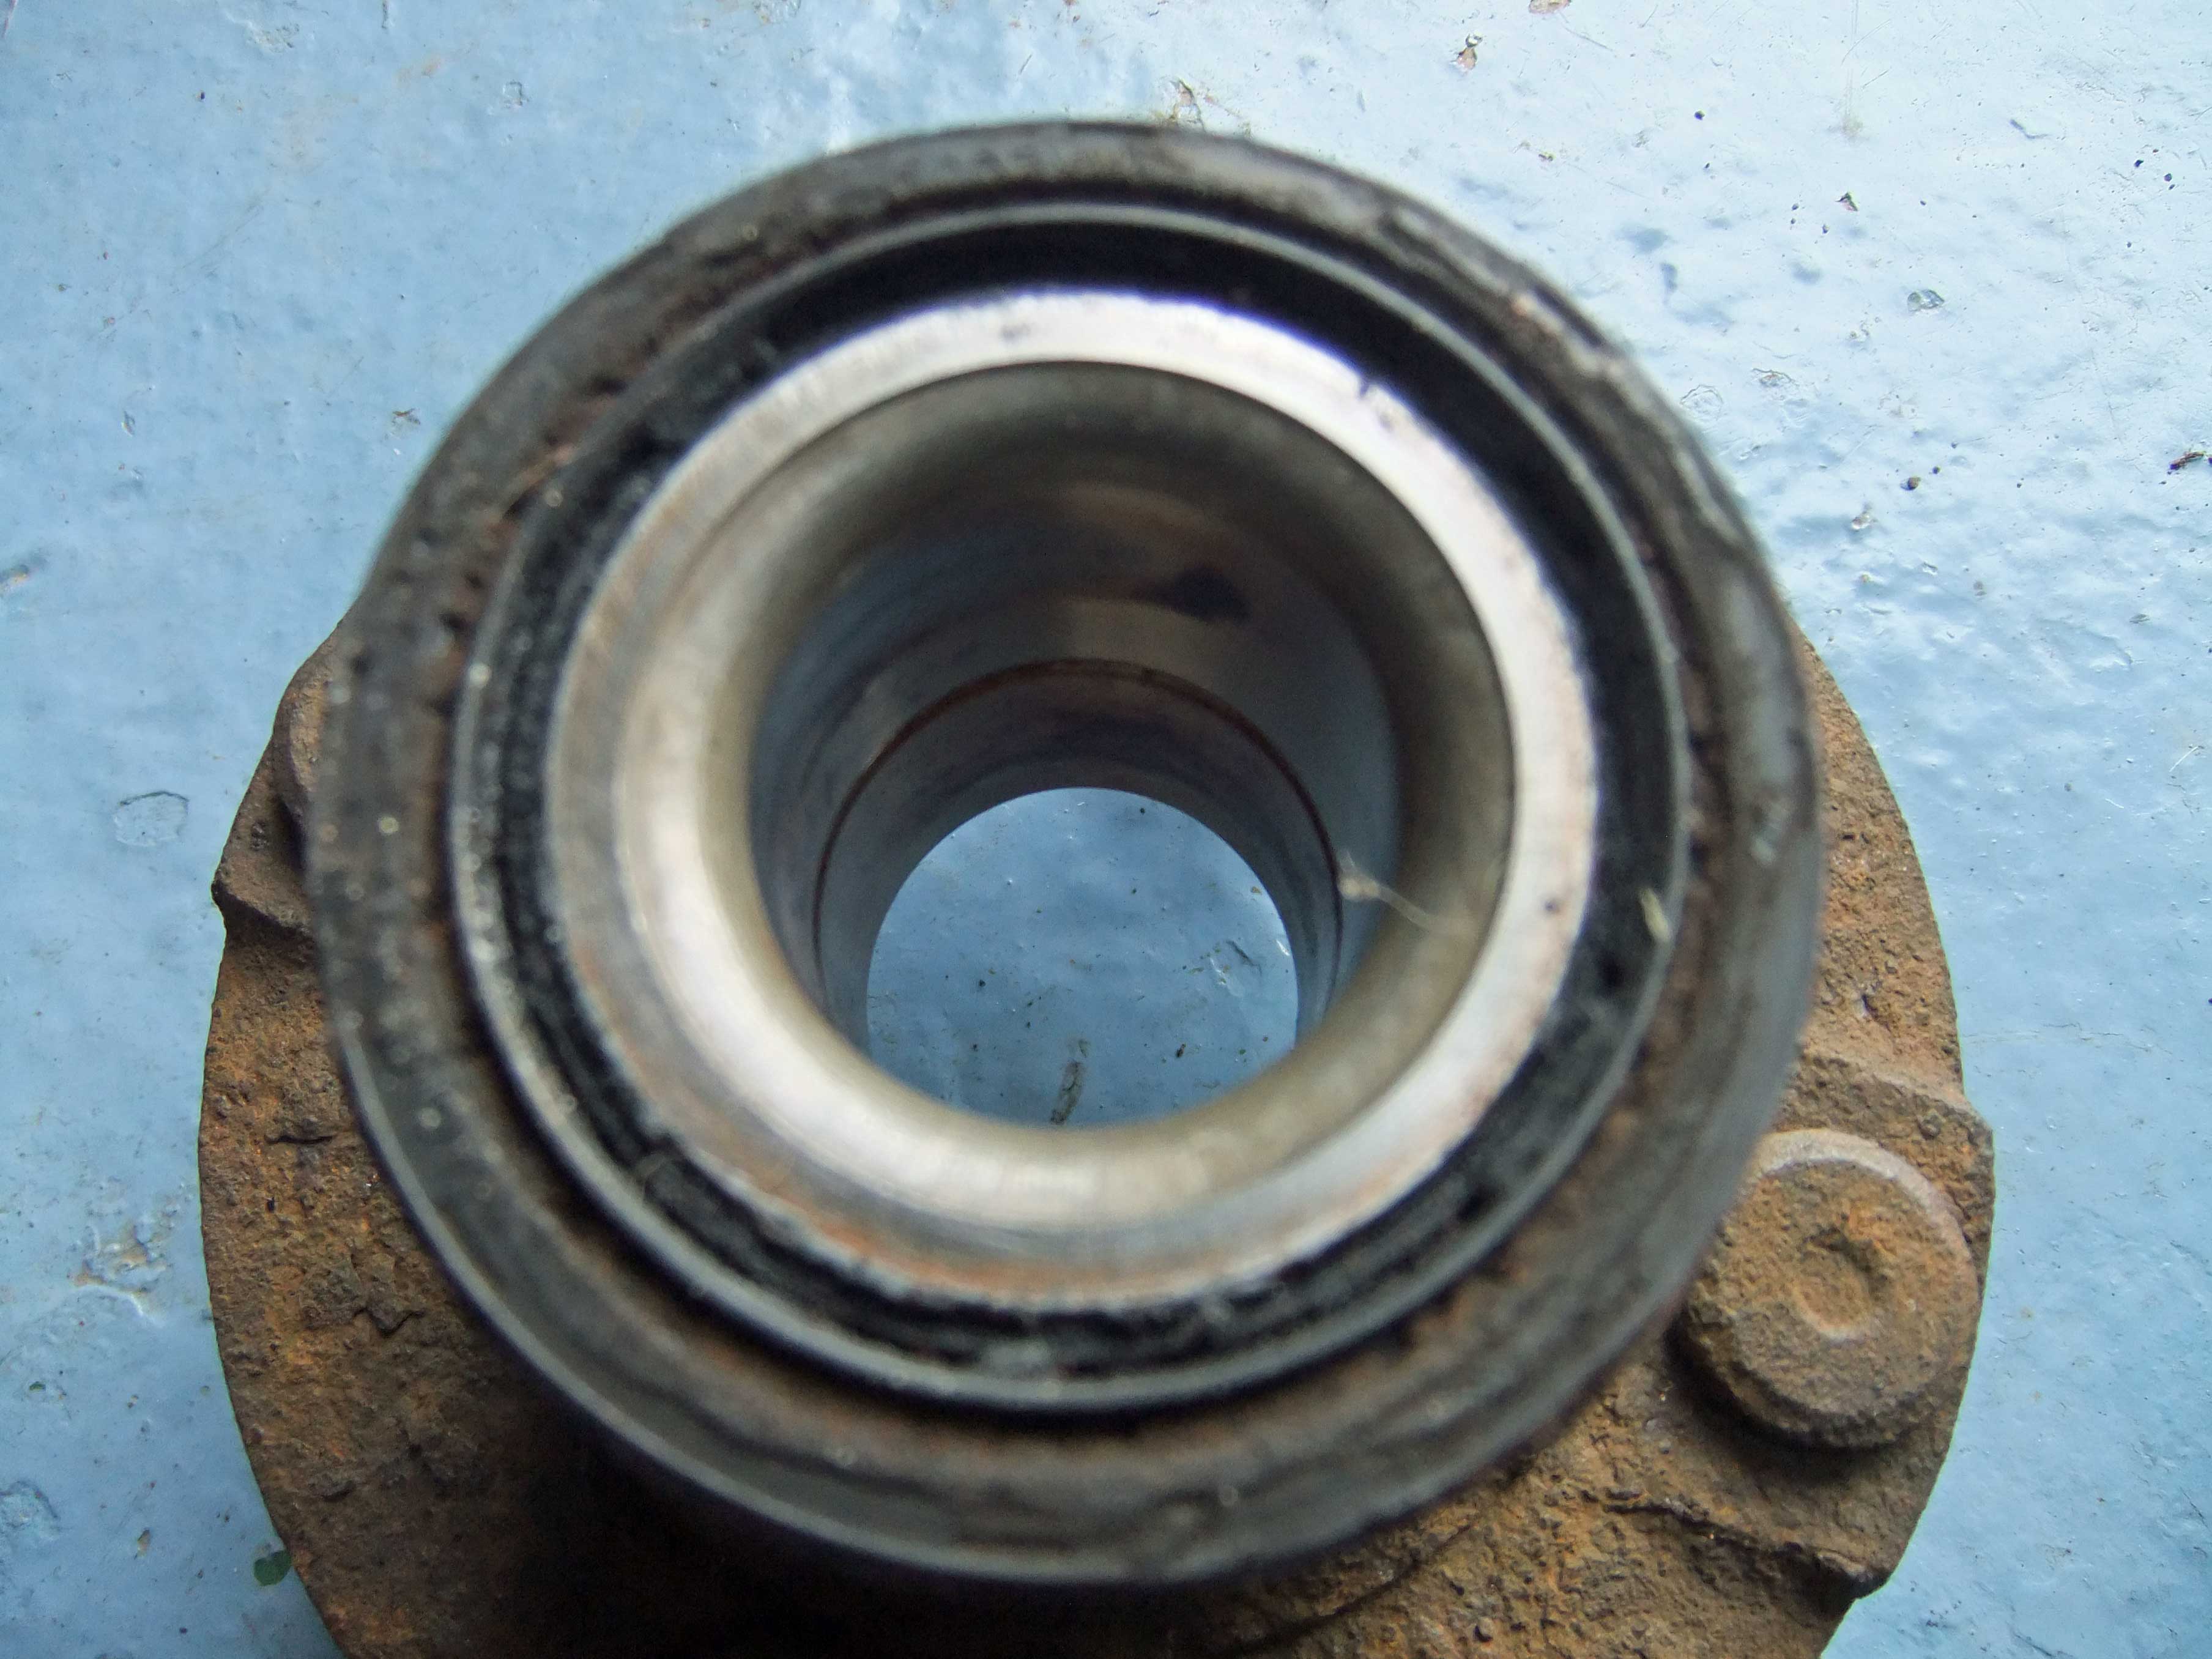 but the other is different & looks nasty:- 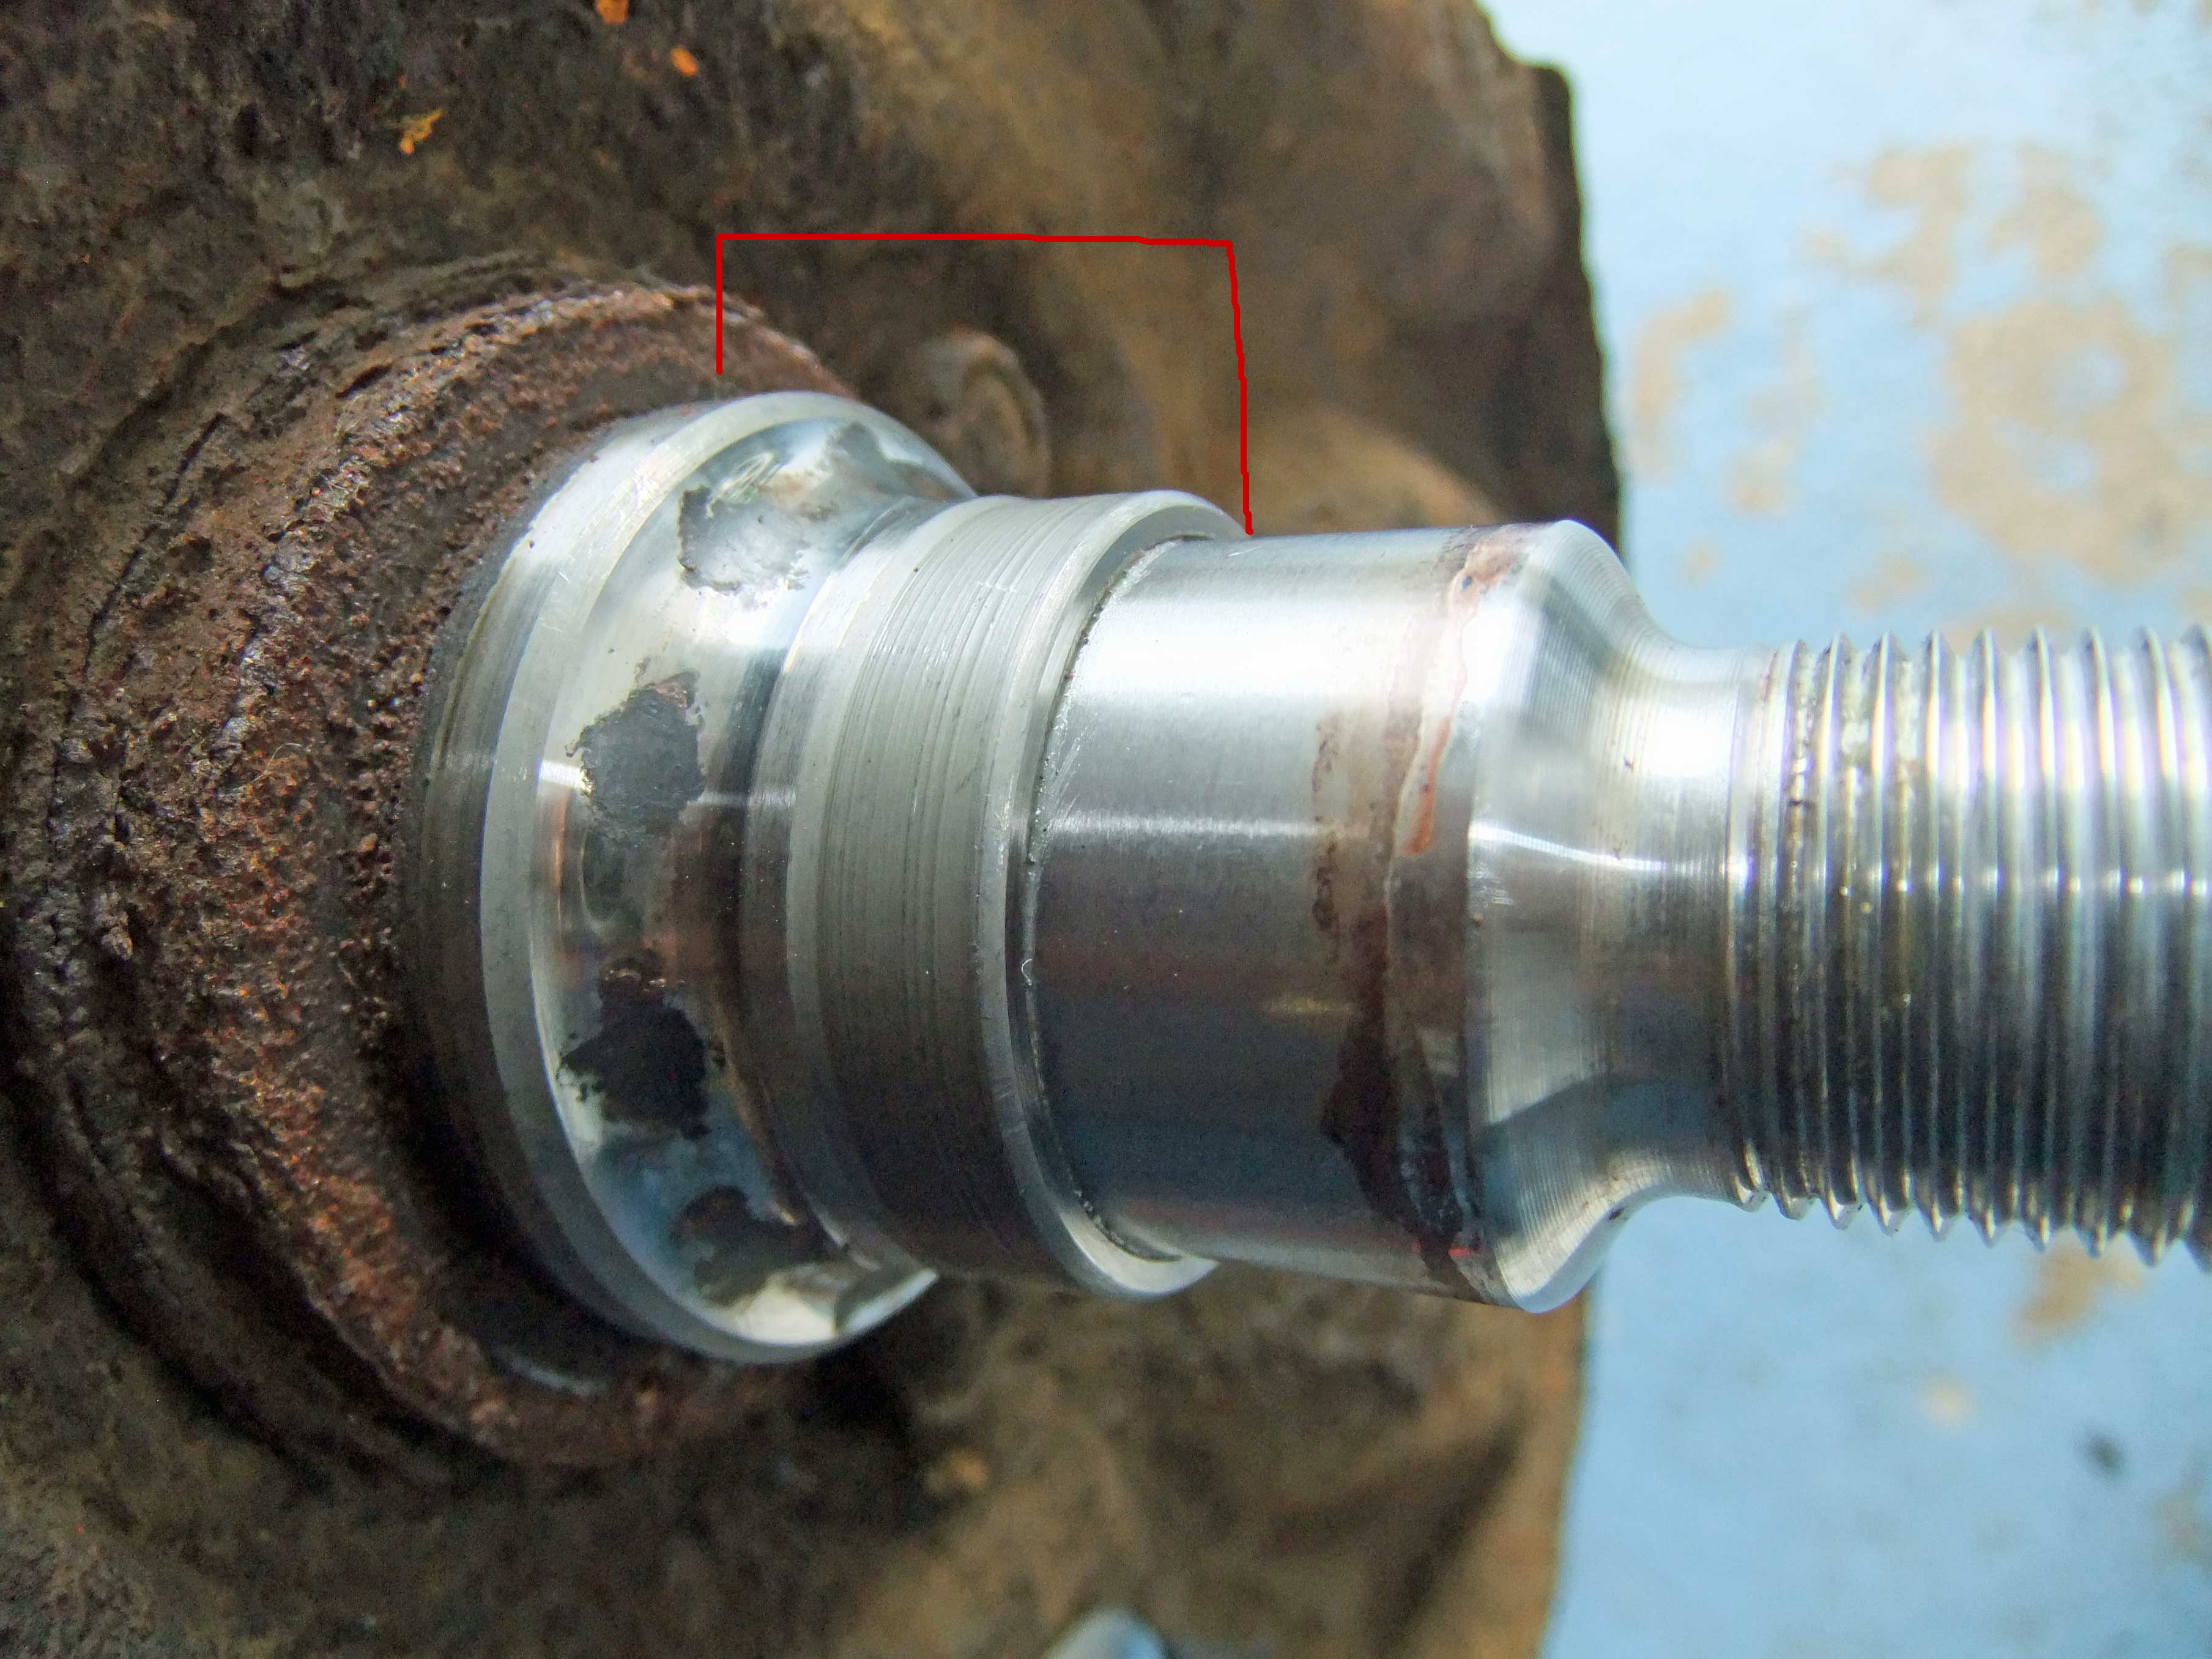 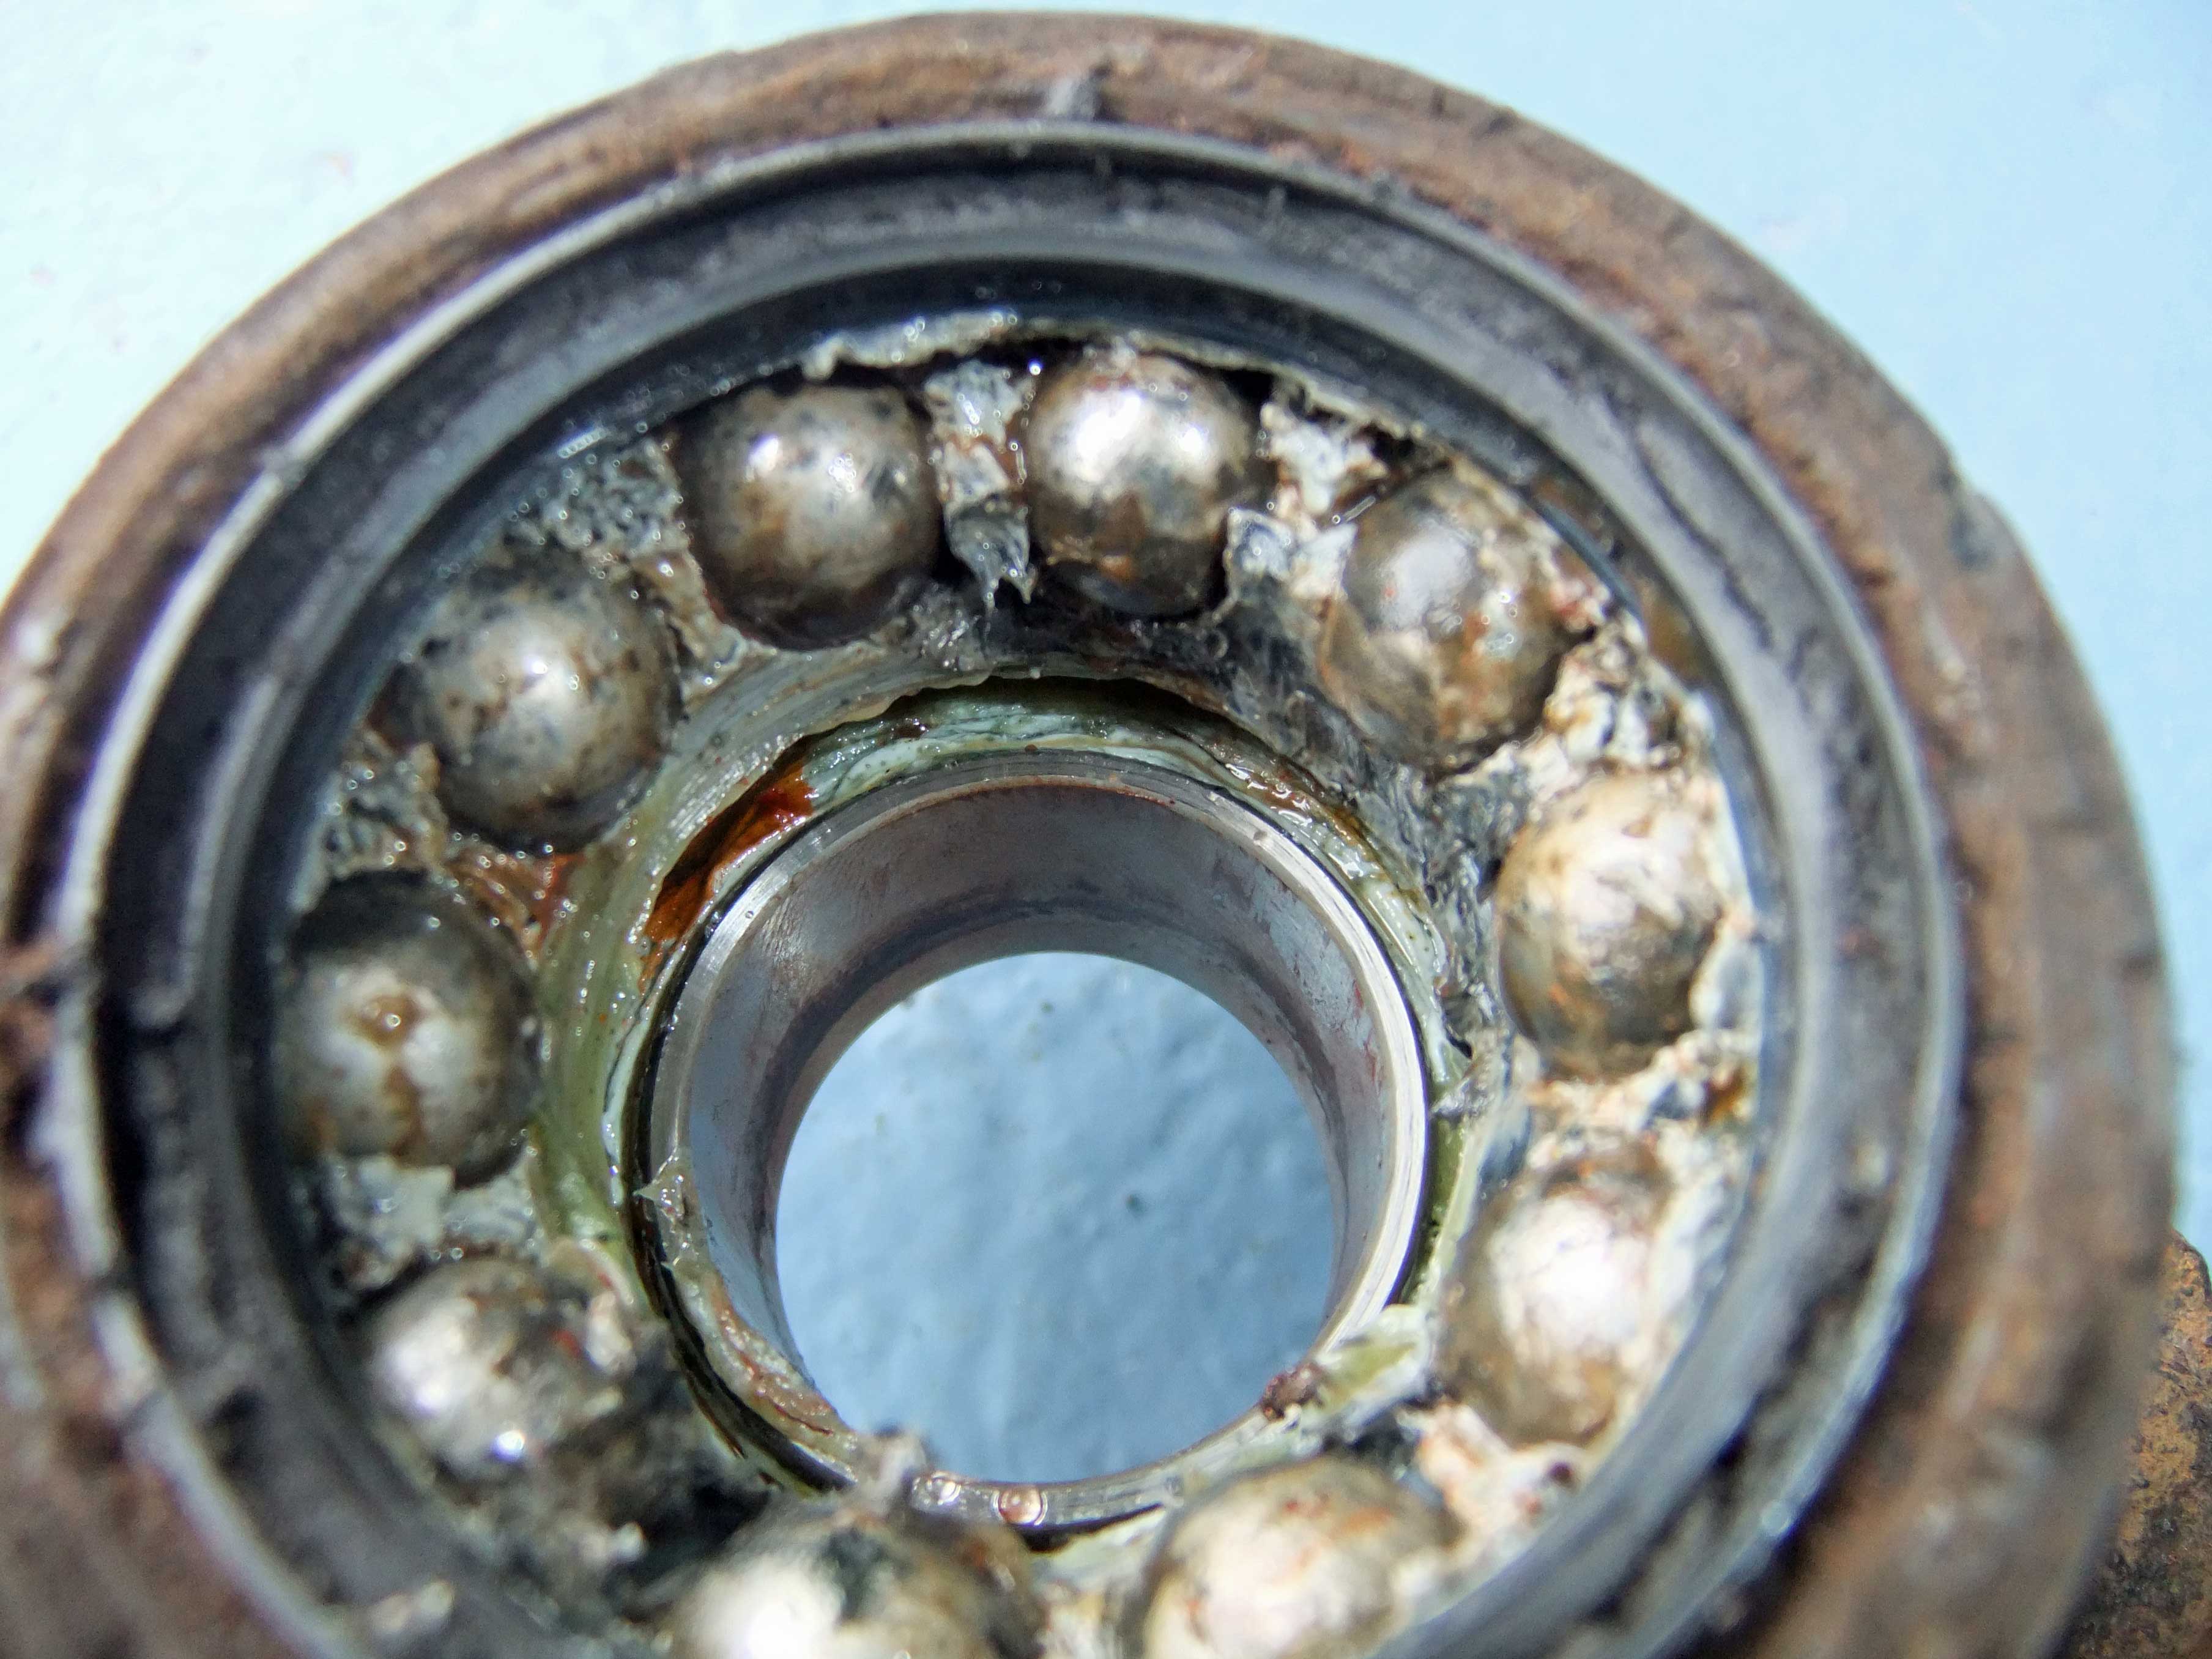 To me it looks like: 1. the hub has left a part of itself on the stub in a way that it shouldn't have (marked with red lines above), and 2. these larger now-exposed bearings look to be in something that may have been grease once but doesn't look to be any more. Can anyone confirm that this apparent separation of the hub, leaving a bit on the stub, is what has happened here? It feels that the chances of getting this bit off the stub are low, but if you know of a way I'd be very interested if it means I need to replace less bits for my budget-build. Every day an adventure! Now to work out what replacement parts I might need. |
|


