|
|
Post by miket on Aug 18, 2016 16:25:44 GMT
timbo - I was in the garage this aft so I tried the tail/brake wires on the battery - red gave the brightest and is presumably the brake.
|
|
|
|
Post by timbo on Aug 18, 2016 17:33:50 GMT
That's great, thank you!!
Tim
|
|
|
|
Post by timbo on Aug 18, 2016 17:37:27 GMT
Sorry, read your last post before the previous two.
Yes, they need an earth wire, I drilled a small hole into the metal rim, took the spring-loaded plastic retainer out and soldered an earth wire into the hole. Haven't had chance to test it yet mind.
Cheers.
|
|
|
|
Post by miket on Aug 20, 2016 10:20:29 GMT
I was just having a look at the latest Build Guide and noticed the text around the charcoal canister has changed a little:-
Earlier: There is a pipe that feeds from it back to the tank. This can be blanked off. The pipe from the cam shaft cover to the canister will also need blocking off.
Current: If you do [take the canister out] then you can leave the pipe open after the check valve (see below) on the tank to allow for evaporation without a vacuum forming.
… I wonder if the check valve is still in my box of donor bits.
|
|
|
|
Post by miket on Sept 6, 2016 16:16:16 GMT
I've just done a few (notionally) 'quick n easy' jobs over the last few day:- * Found my old tank check valve and reinstalled it for venting per latest build guide. * The engraved build plate from ebay fixed on bulkhead. * Ally bulkhead panels re-installed (hopefully now permanently but we'll see!) * "Interior" mirror installed for IVA purposes. Even tho' we know it'll only show us the tank cover I found that it couldn't be tilted far enough to even do that convincingly if mounted the way round I expected to do it, so it ended up the other way round to expected. It kinda fits nicely in to the lower centre part of the bonnet moulding for the flyscreen, but completely gets in the way if I ever want to install a flyscreen. Never mind - IVA is 1st job:- 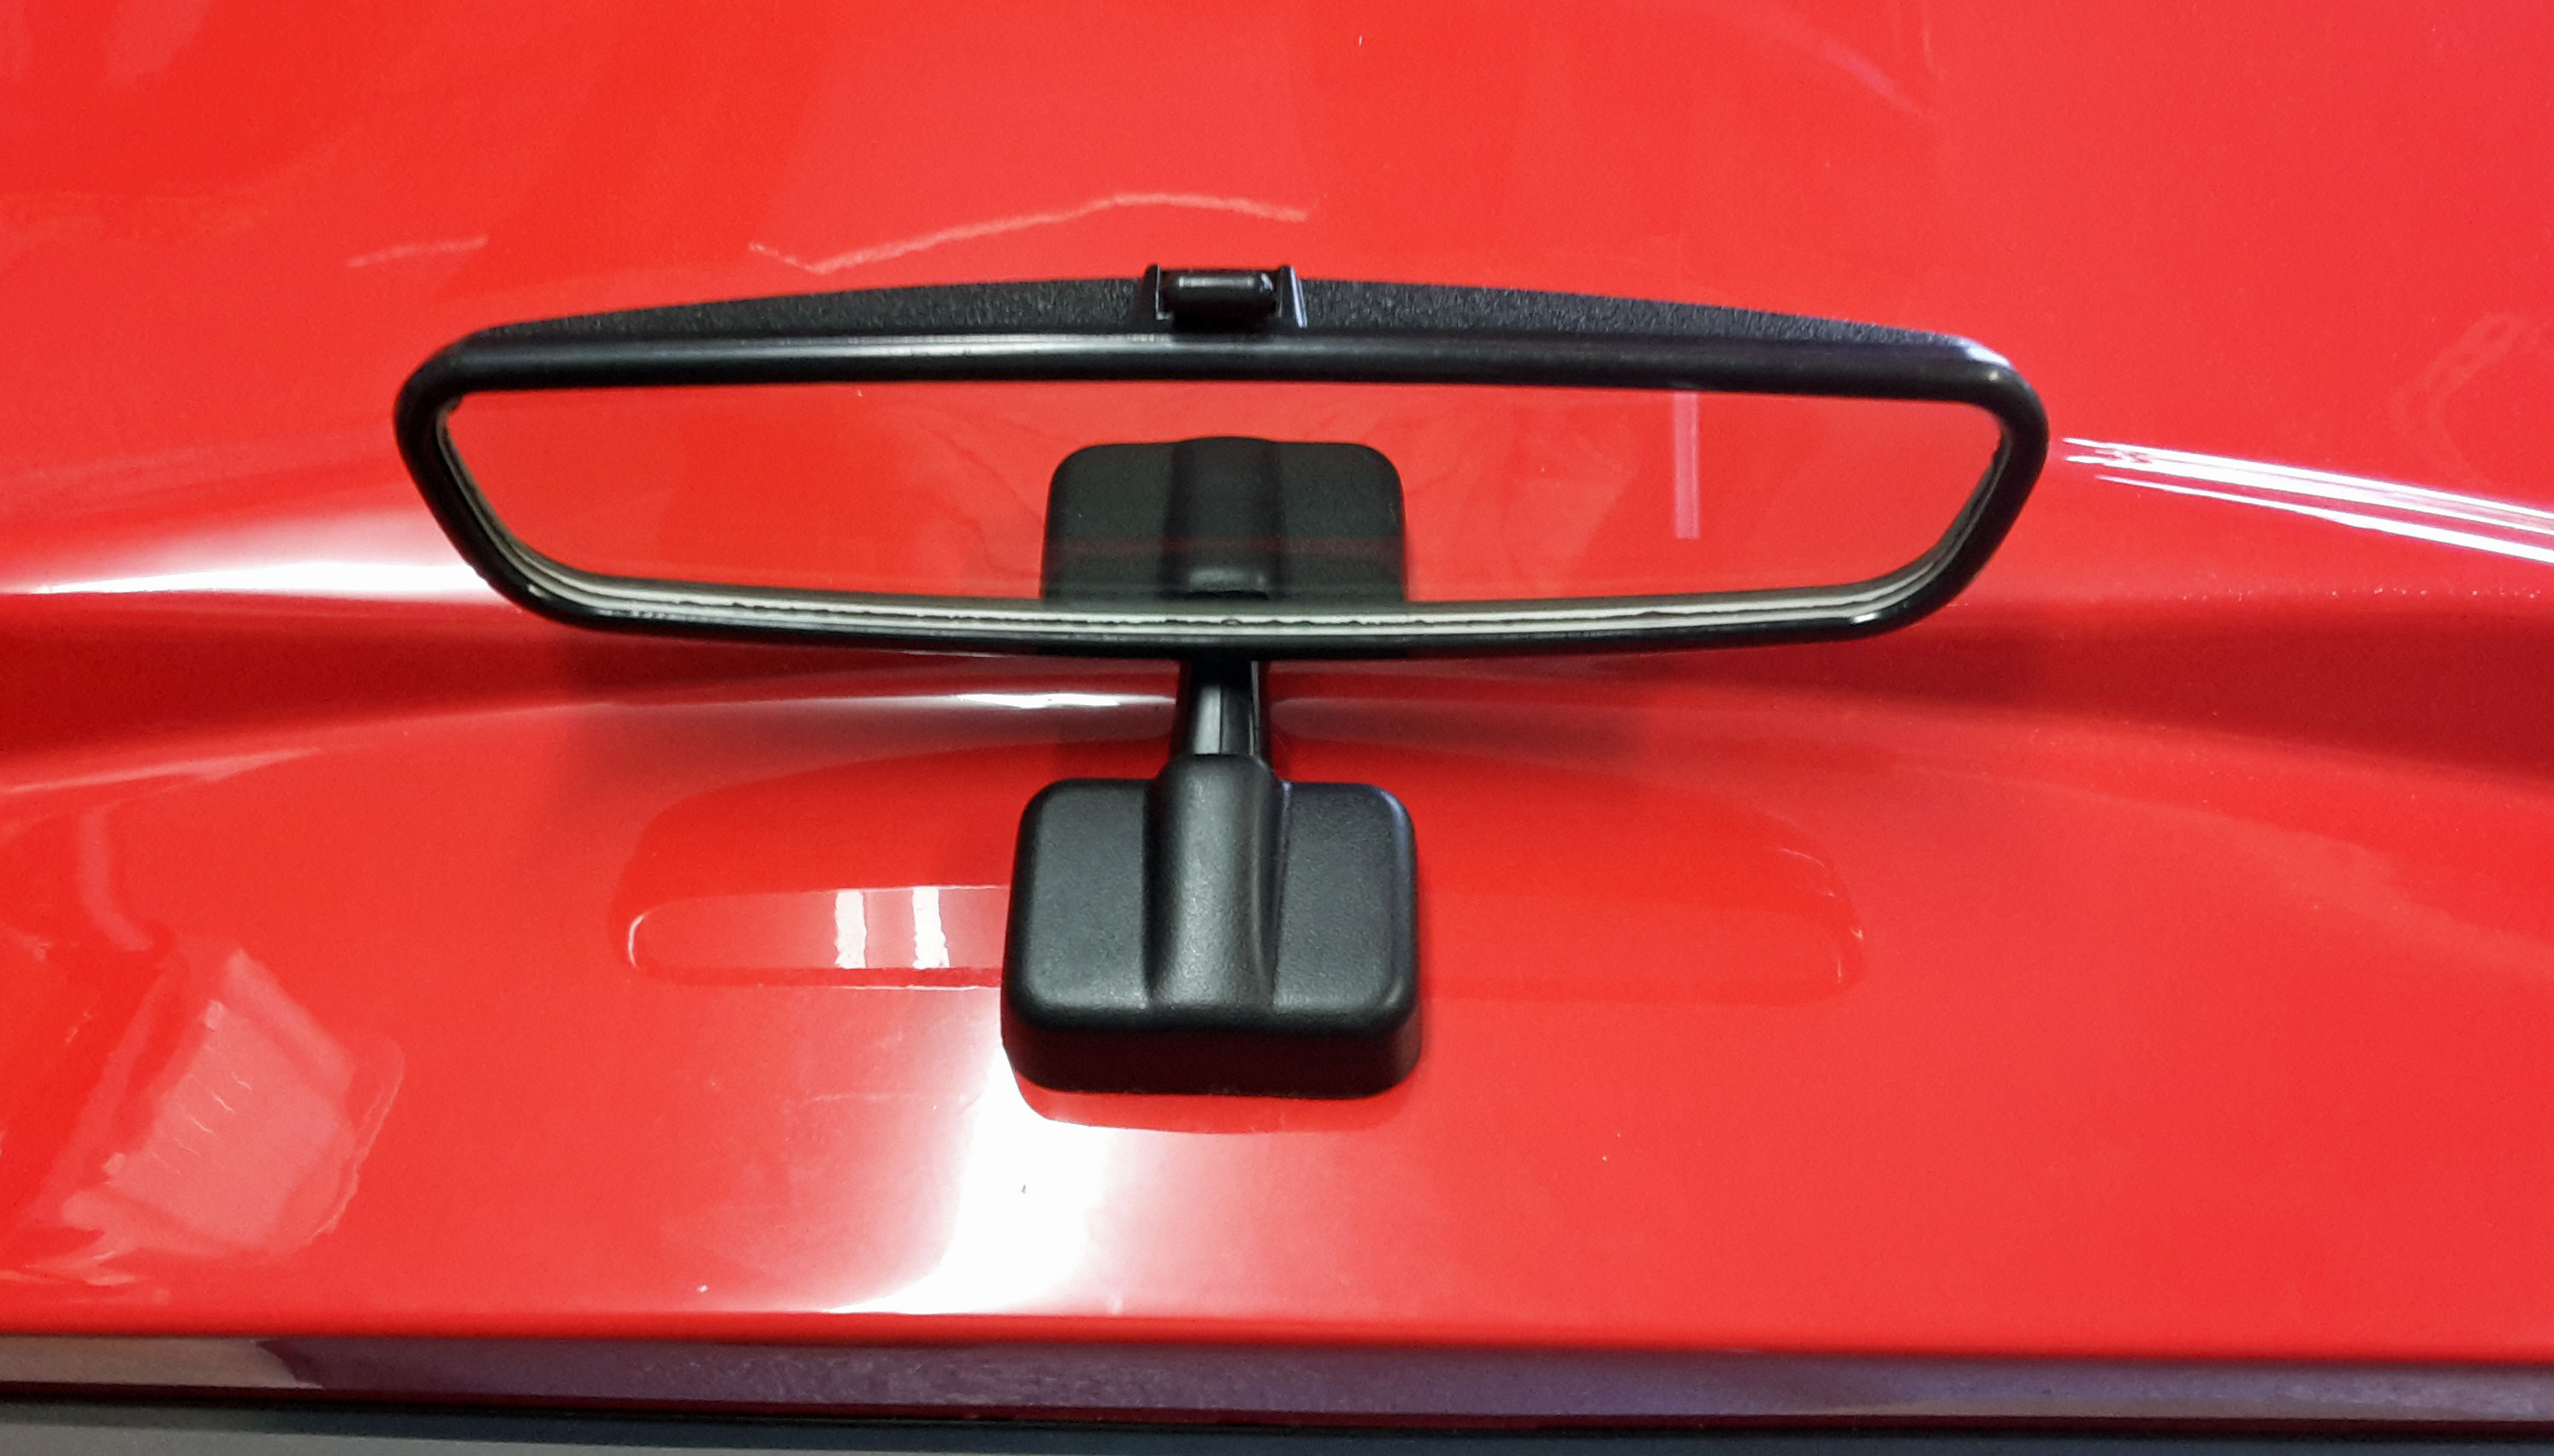 |
|
|
|
Post by miket on Oct 23, 2016 16:10:25 GMT
Back to the Exo after a few weeks away from it.
"Final" install of tranny tunnel - I originally made it fit and then stored it away for safe keeping. On its return for 'final' fit it no longer quite interfaces with all the other panel the same way and needed some fettling ... using a bit too much force on one bolt has caused my first spinning rivnut. So now it's time to search the forum for the least bad way of resolving that.
|
|
|
|
Post by miket on Oct 24, 2016 16:48:35 GMT
The spinning rivnut was fairly easily resolved. Held collar in mole-grips, tapped the rivnut thru, used a long hex bolt with nut & washers to nip up the rivnut enough to be able to further set the rivnut with the rivnut tool. Tranny tunnel on at last.
|
|
|
|
Post by miket on Nov 23, 2016 20:33:46 GMT
Went out to finish the thingypit bits:-
Seatbelts - my crush-tubes/spacers (to allow the fixings to pivot) had an OD just too small and when torqued up they crushed in to the washers' holes - fail. More shopping. Work-in-progress.
Instrument cluster cowl - some trim needed gluing on. Work-in-progress.
So I offered up the side panels to start shaping them. I don't remember ever reading about this in a build (I read them a long time ago) so I wasn't expecting it, but when the panel mates up to the 2 vertical bars you can see the top edge of the panel and a gap to the ground. So there's a bit more to it than I anticipated to get it at its best with the top edge hidden under the chassis tube. Fabbed up some temporary spacers to use at the top of the vertical bars to push the top edge of the panel further outboard. Work-in-progress.
So no finished thingypit just yet.
|
|
|
|
Post by miket on Dec 8, 2016 15:01:47 GMT
Got the side panels shaped to fit using 20mm spacers at the top of each of the vertical bars to get the panel top edge hidden under the chassis tube. With only 2 screws either end of the panel (for the moment) the front of the panel has a bit of a gap:- 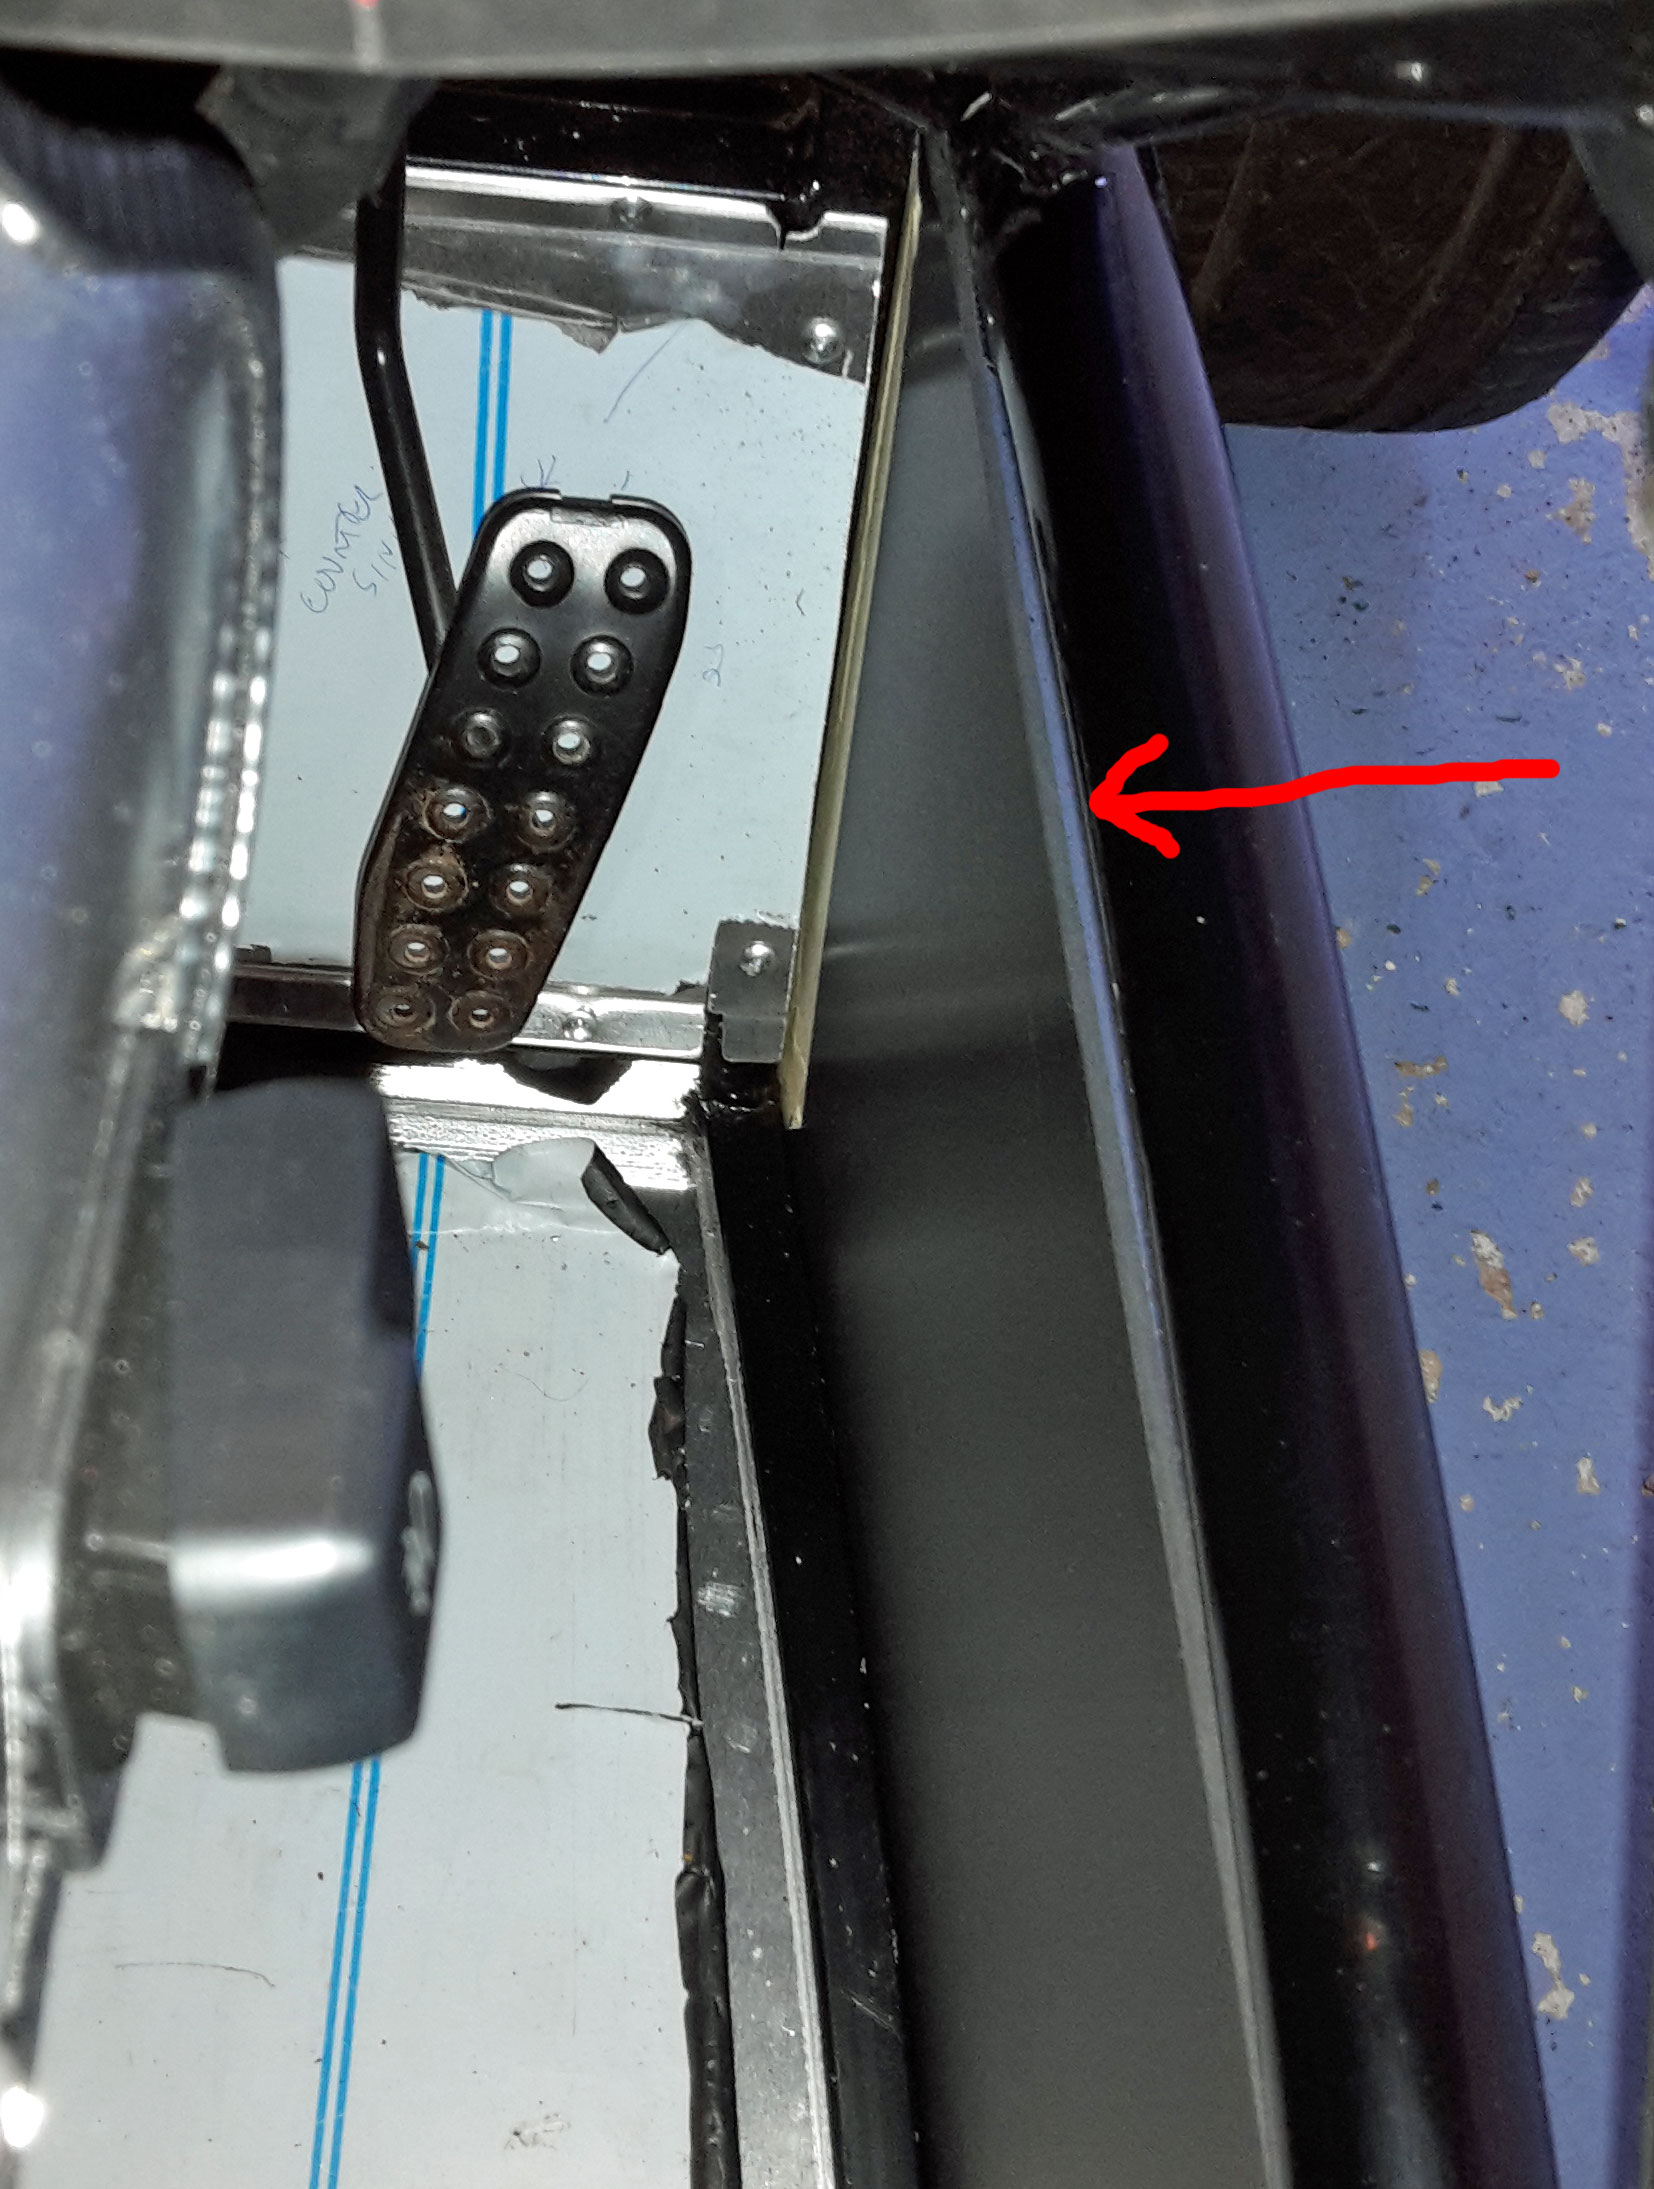 So when I come to final fix I think it's going to involve PU, but I might need to find a way of pressing the panel out under the chassis tube to close this gap. Used a couple of memory-foam type pillows under the bottom edge of the side panels to help push them upwards whilst offering them up for shaping. Rounded the edges per IVA test. It's too late for me to try it, but one option for fitting the side panels would have been to let the floor panels project 3 or 4 mm out from the sides to support the side panels and perhaps remove the need for extensive screwing or PUing. |
|
|
|
Post by miket on Jan 15, 2017 13:19:31 GMT
I think I've finished the cockpit apart from removing protective ally coverings and maybe some mats (and putting the steering wheel's IVA-friendly cover on of course  ... 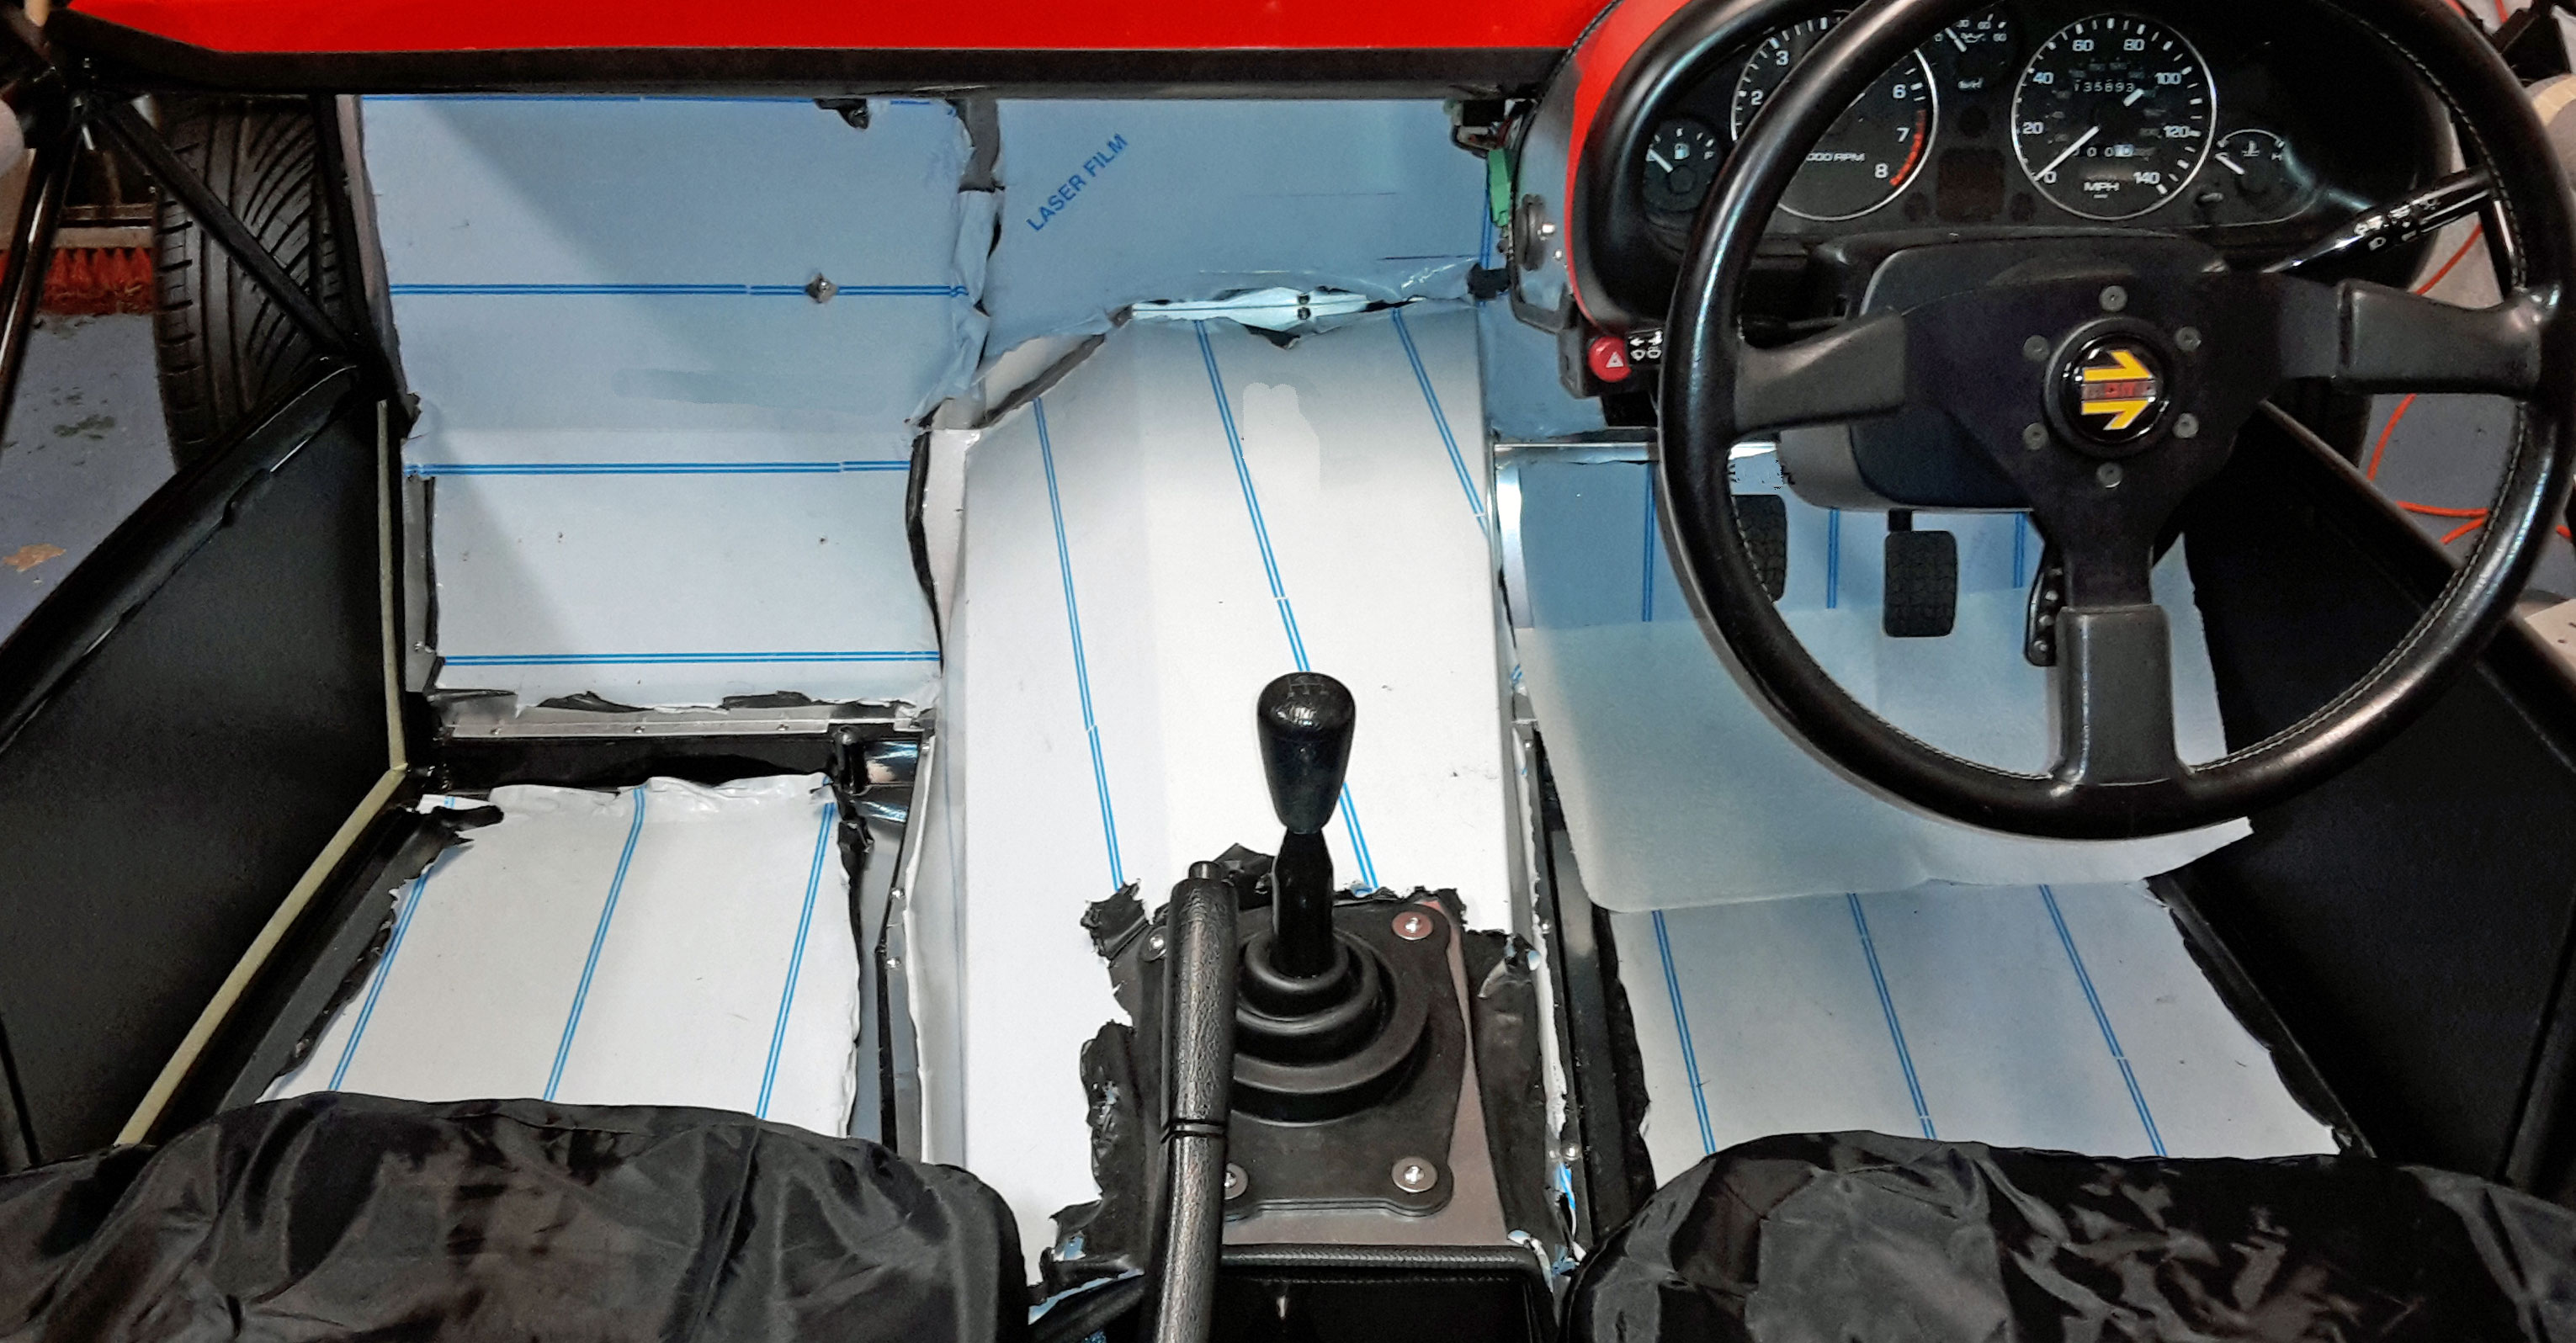 I mounted the hazard and fog switches in the IVA exempt area behind the steering wheel to keep it simple, though I had to turn the hazard button thru 180 to keep the symbol the right way up, OCD? Or IVA need ...?:- 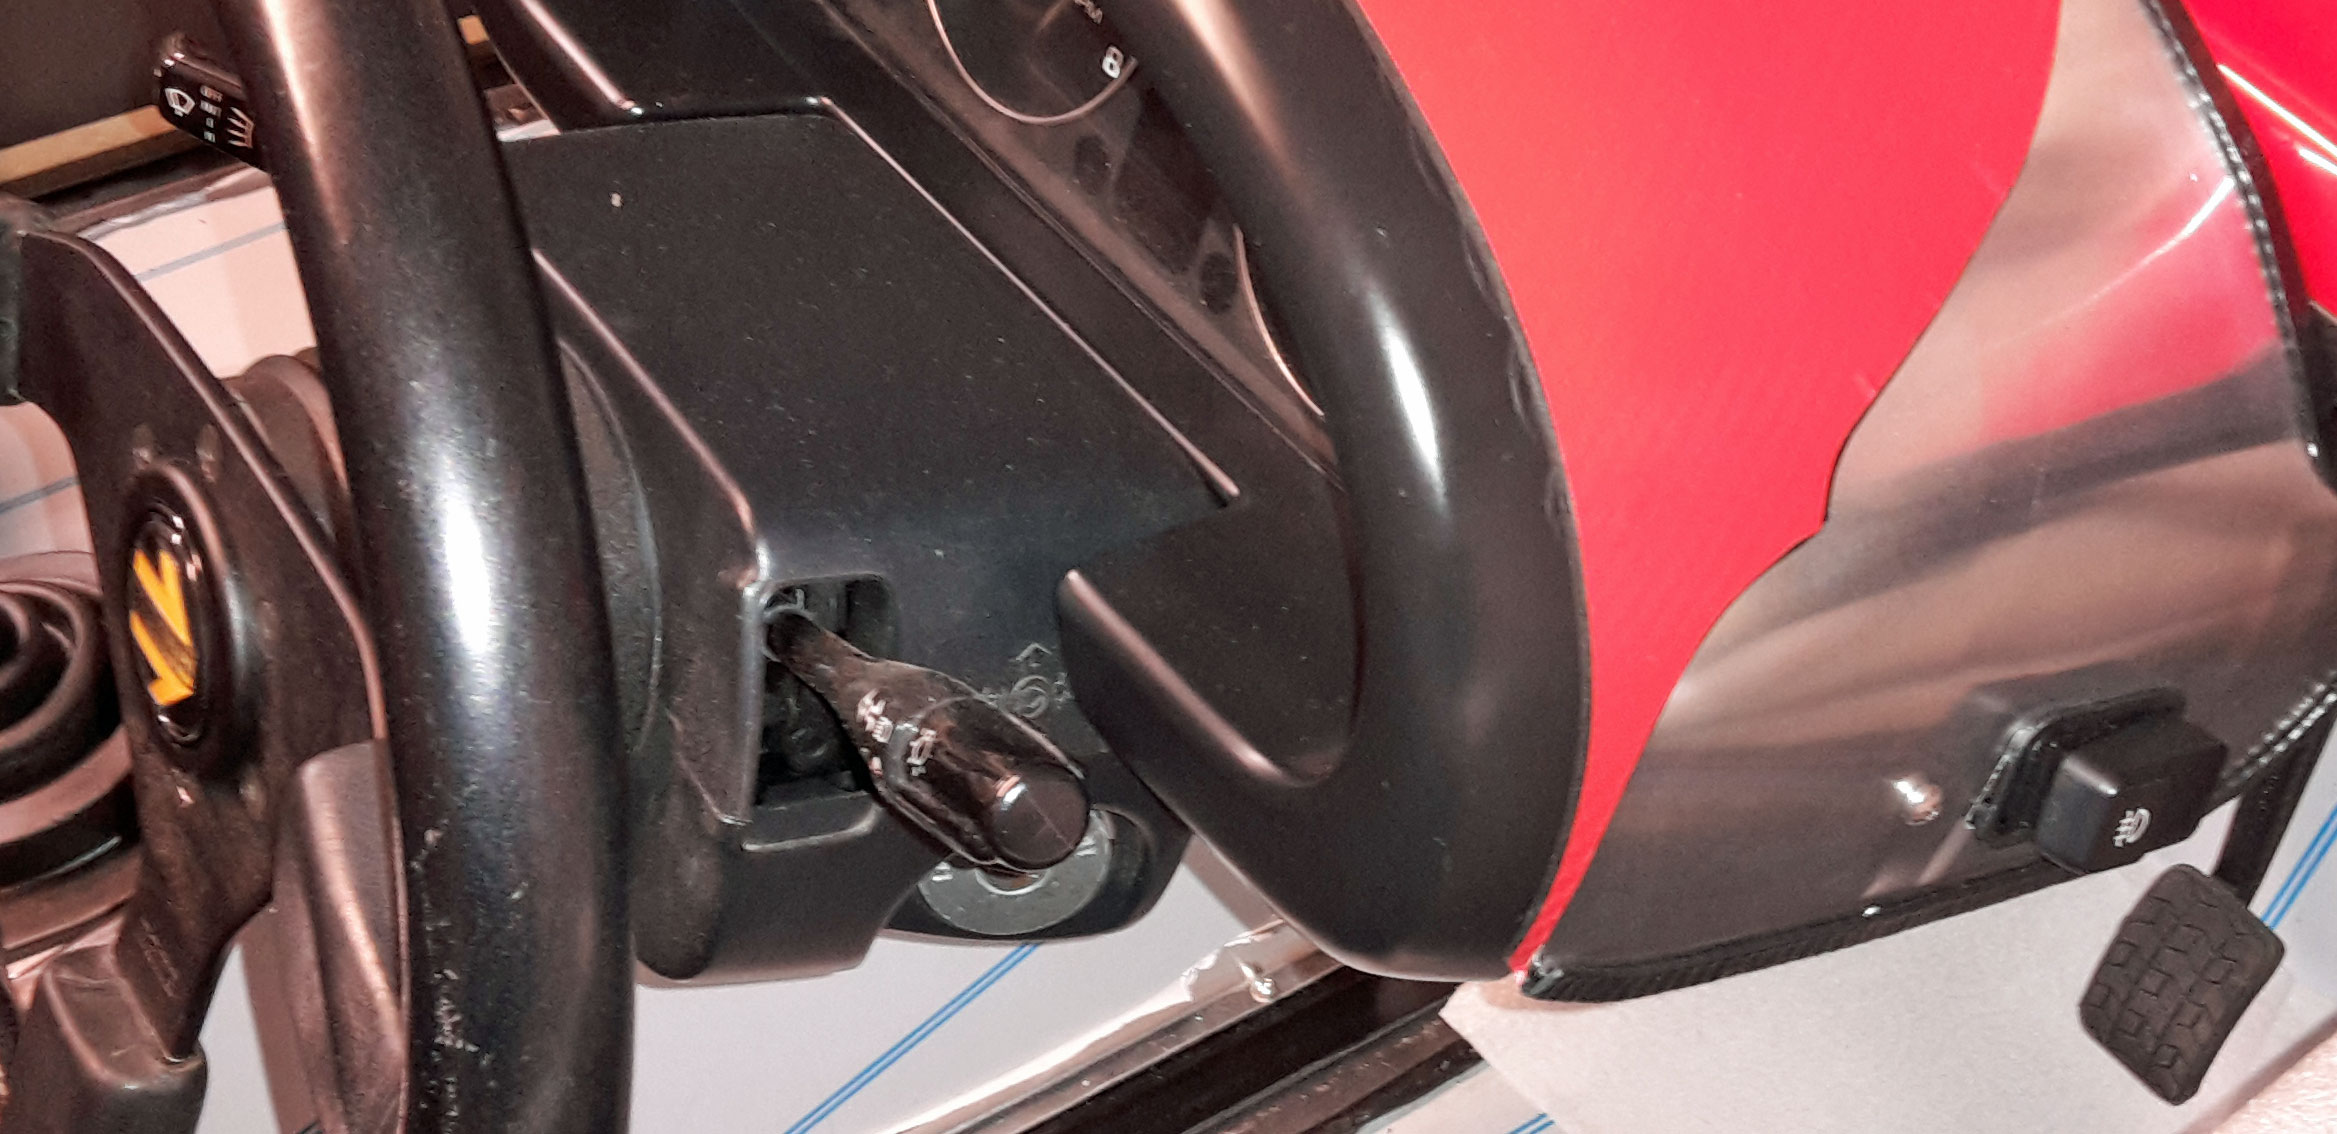 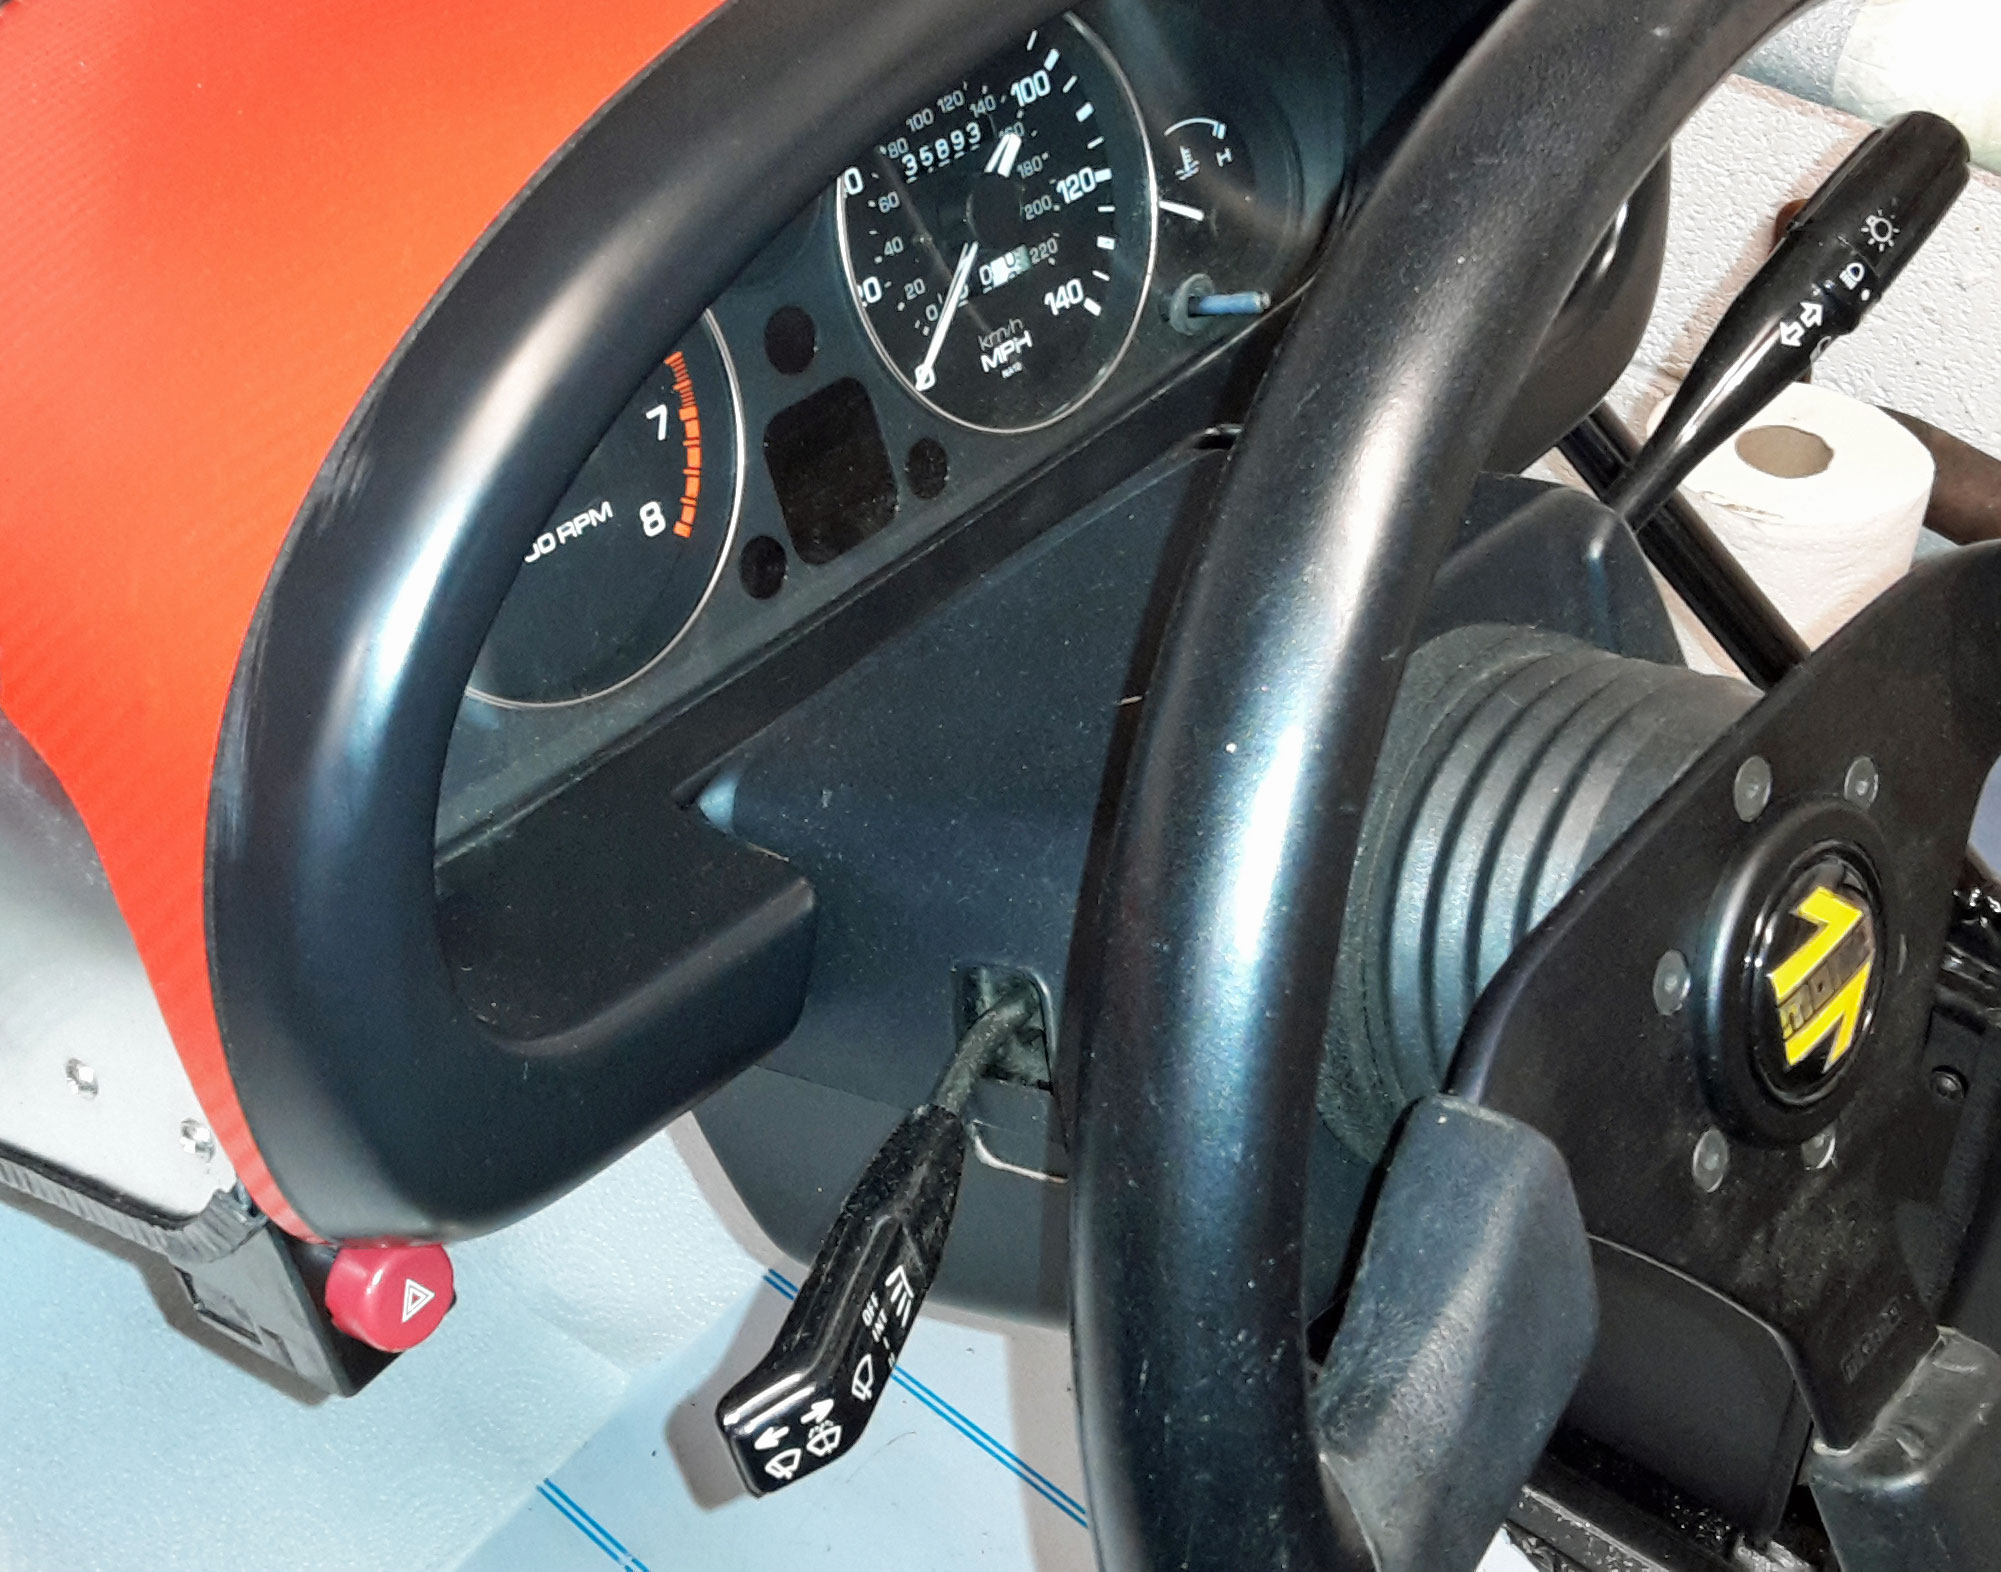 Used clamps to mount IVA friendly mirrors and raised side repeaters:- 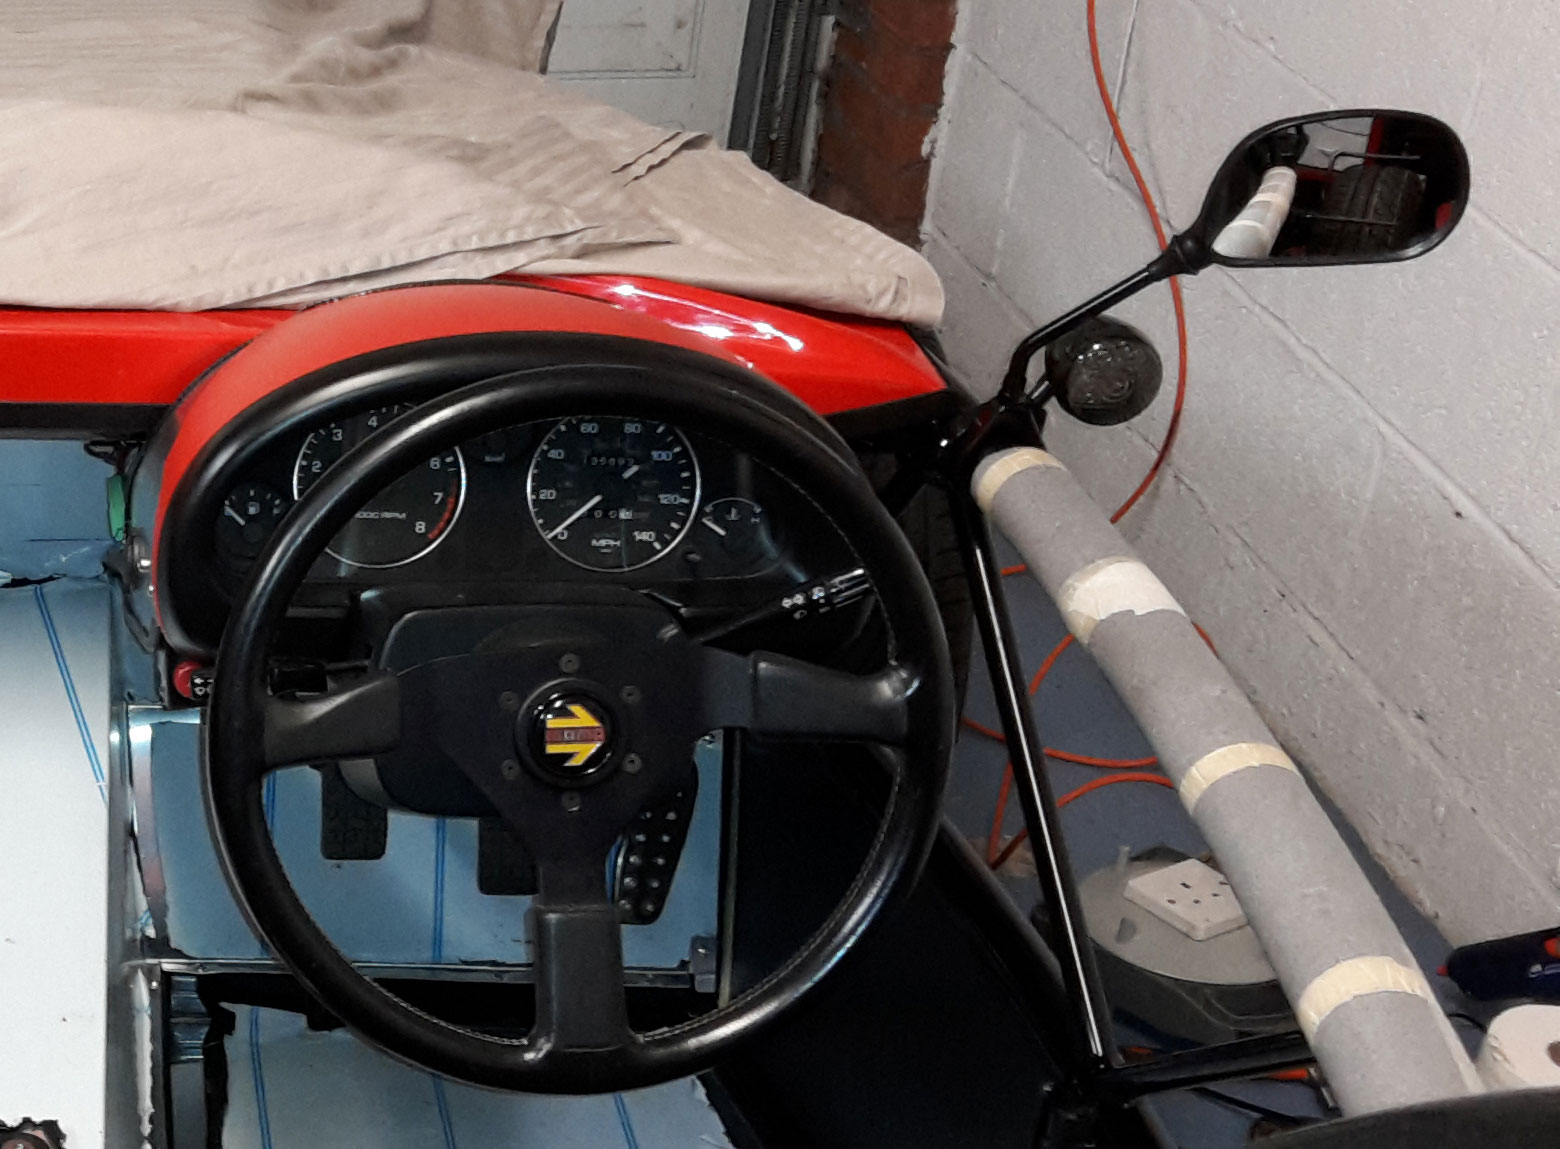 I eventually got the side panels mounted so that their top edges were neatly under the chassis tubes:- 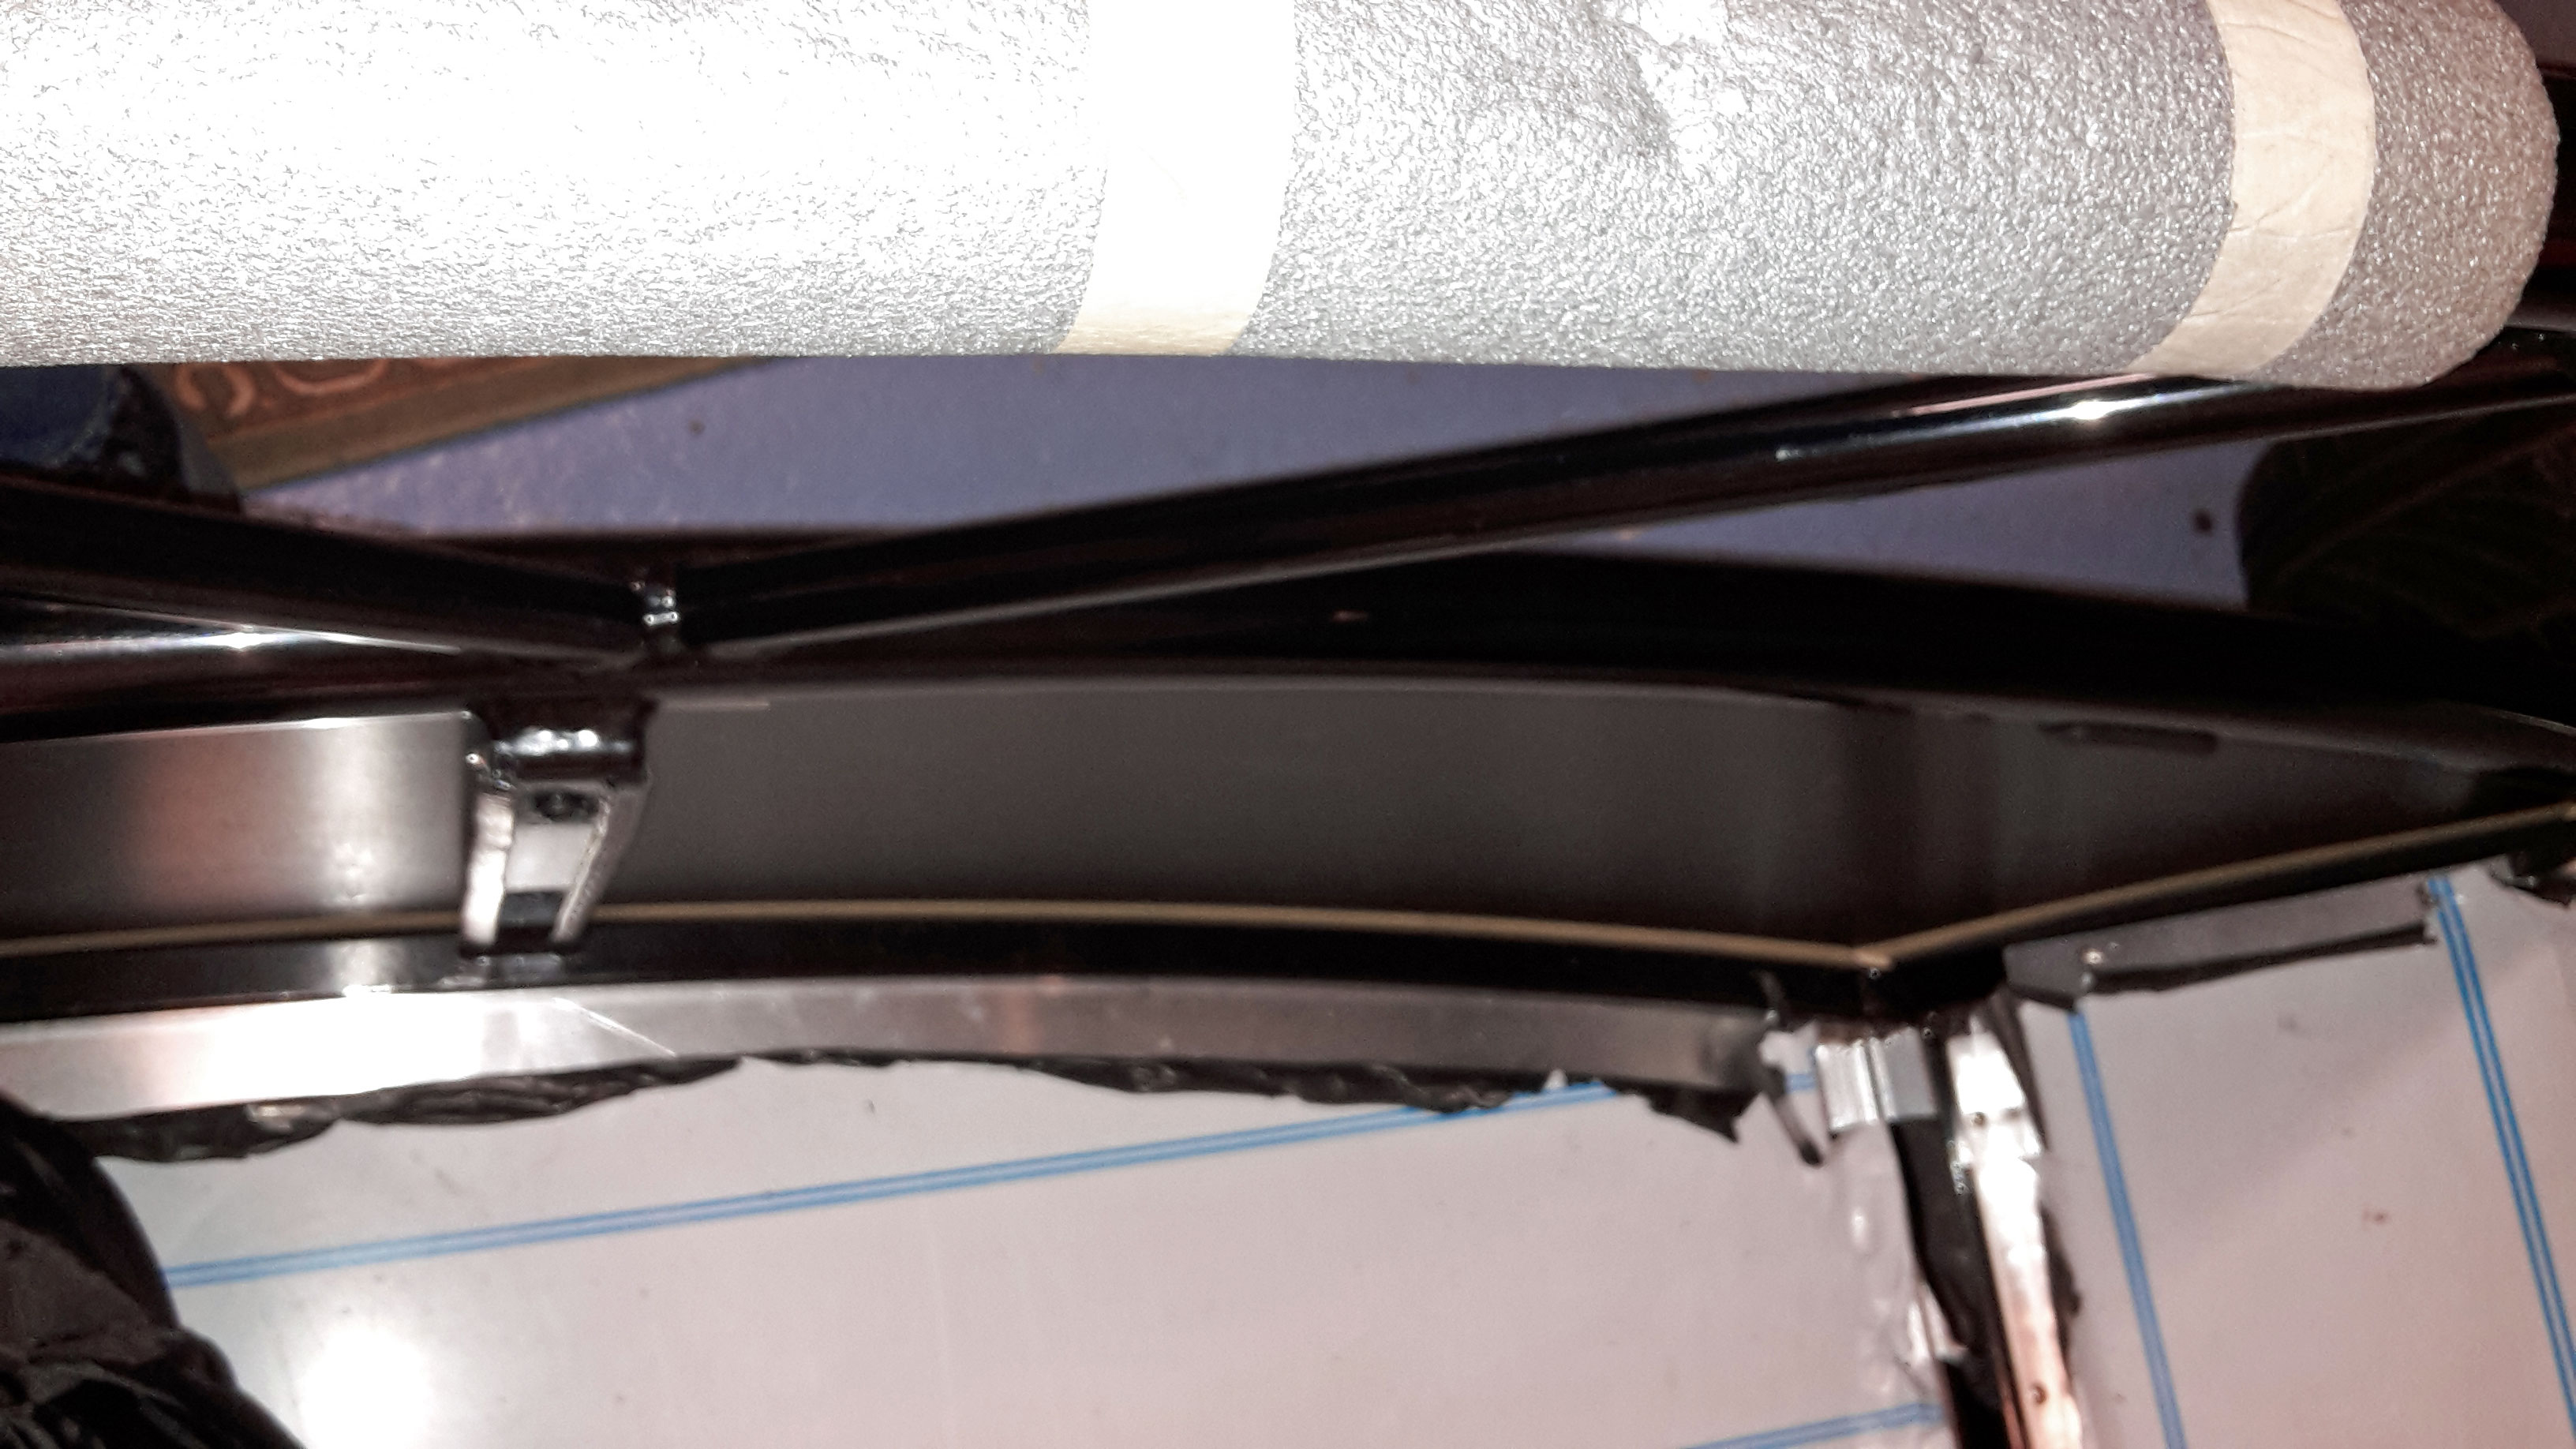 Used a couple of spacers at the top of the vertical bars to push the panels out - using 8mm tube tapped out to M5 and black bolts from each side. 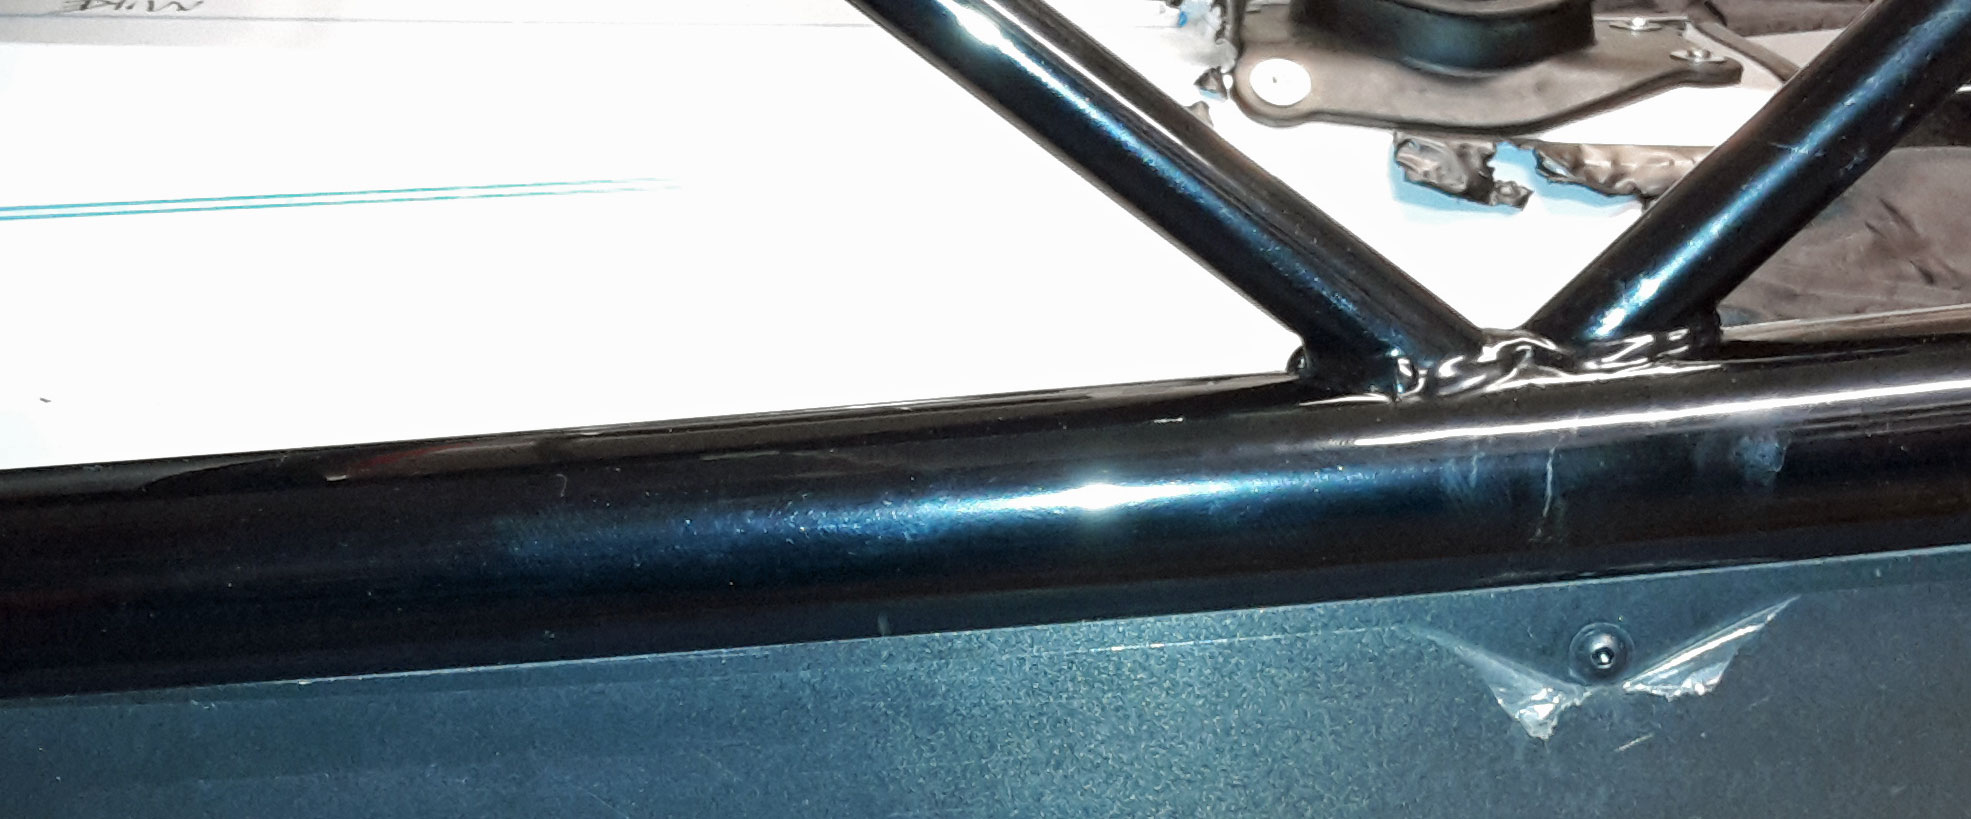 Panels just needed a little support towards the front to push them out under the chassis tubes:- 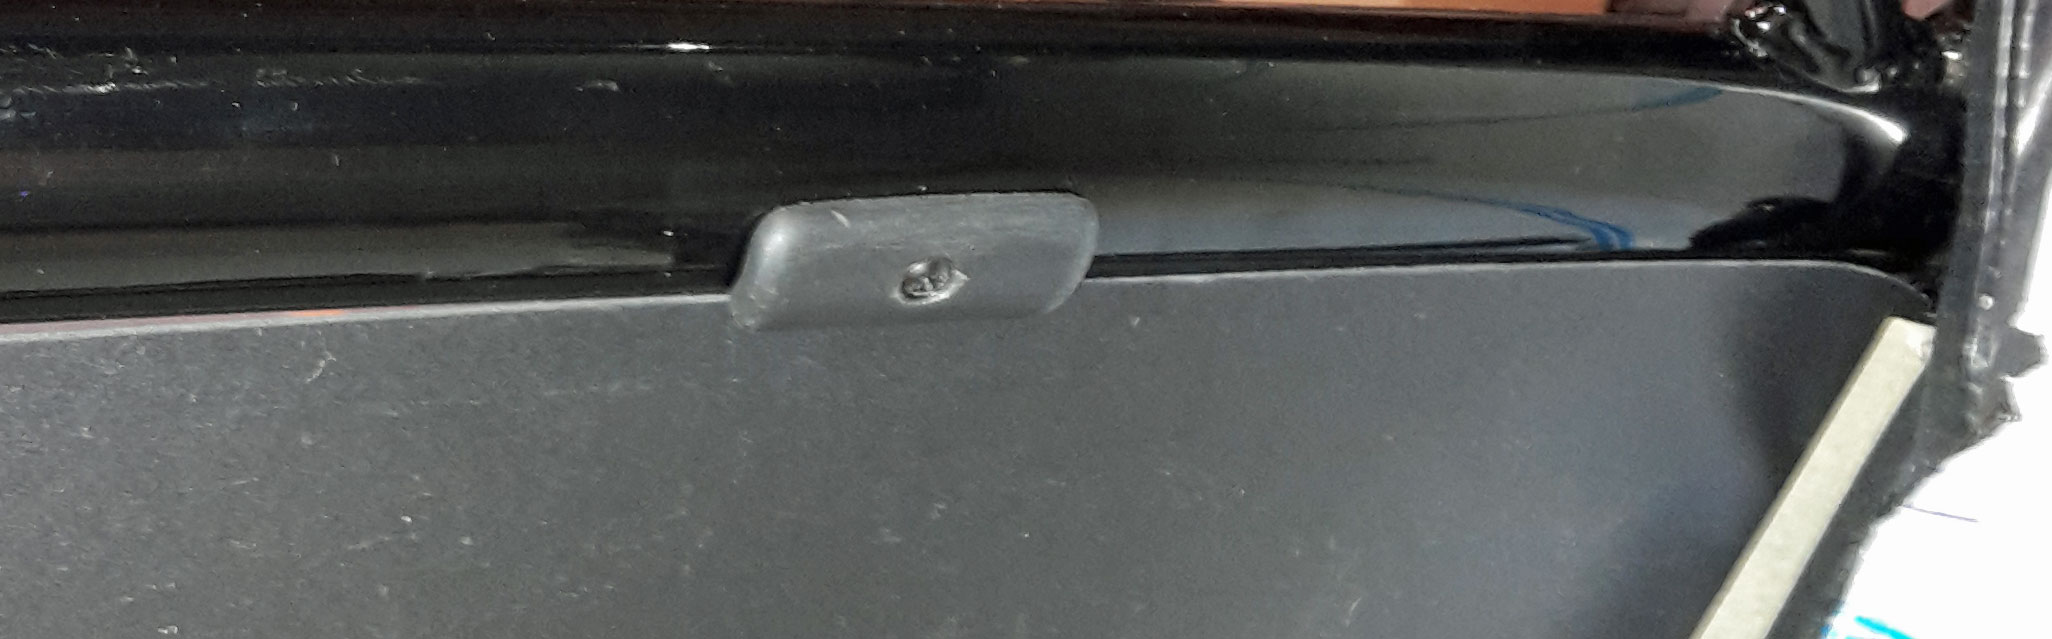 IVA Qs:- Has anyone heard of the need to 'cover' any of these three items to protect them from the IVA man's spheres? 1. Front footwell chassis bolts have edges proud of the crush tubes:- 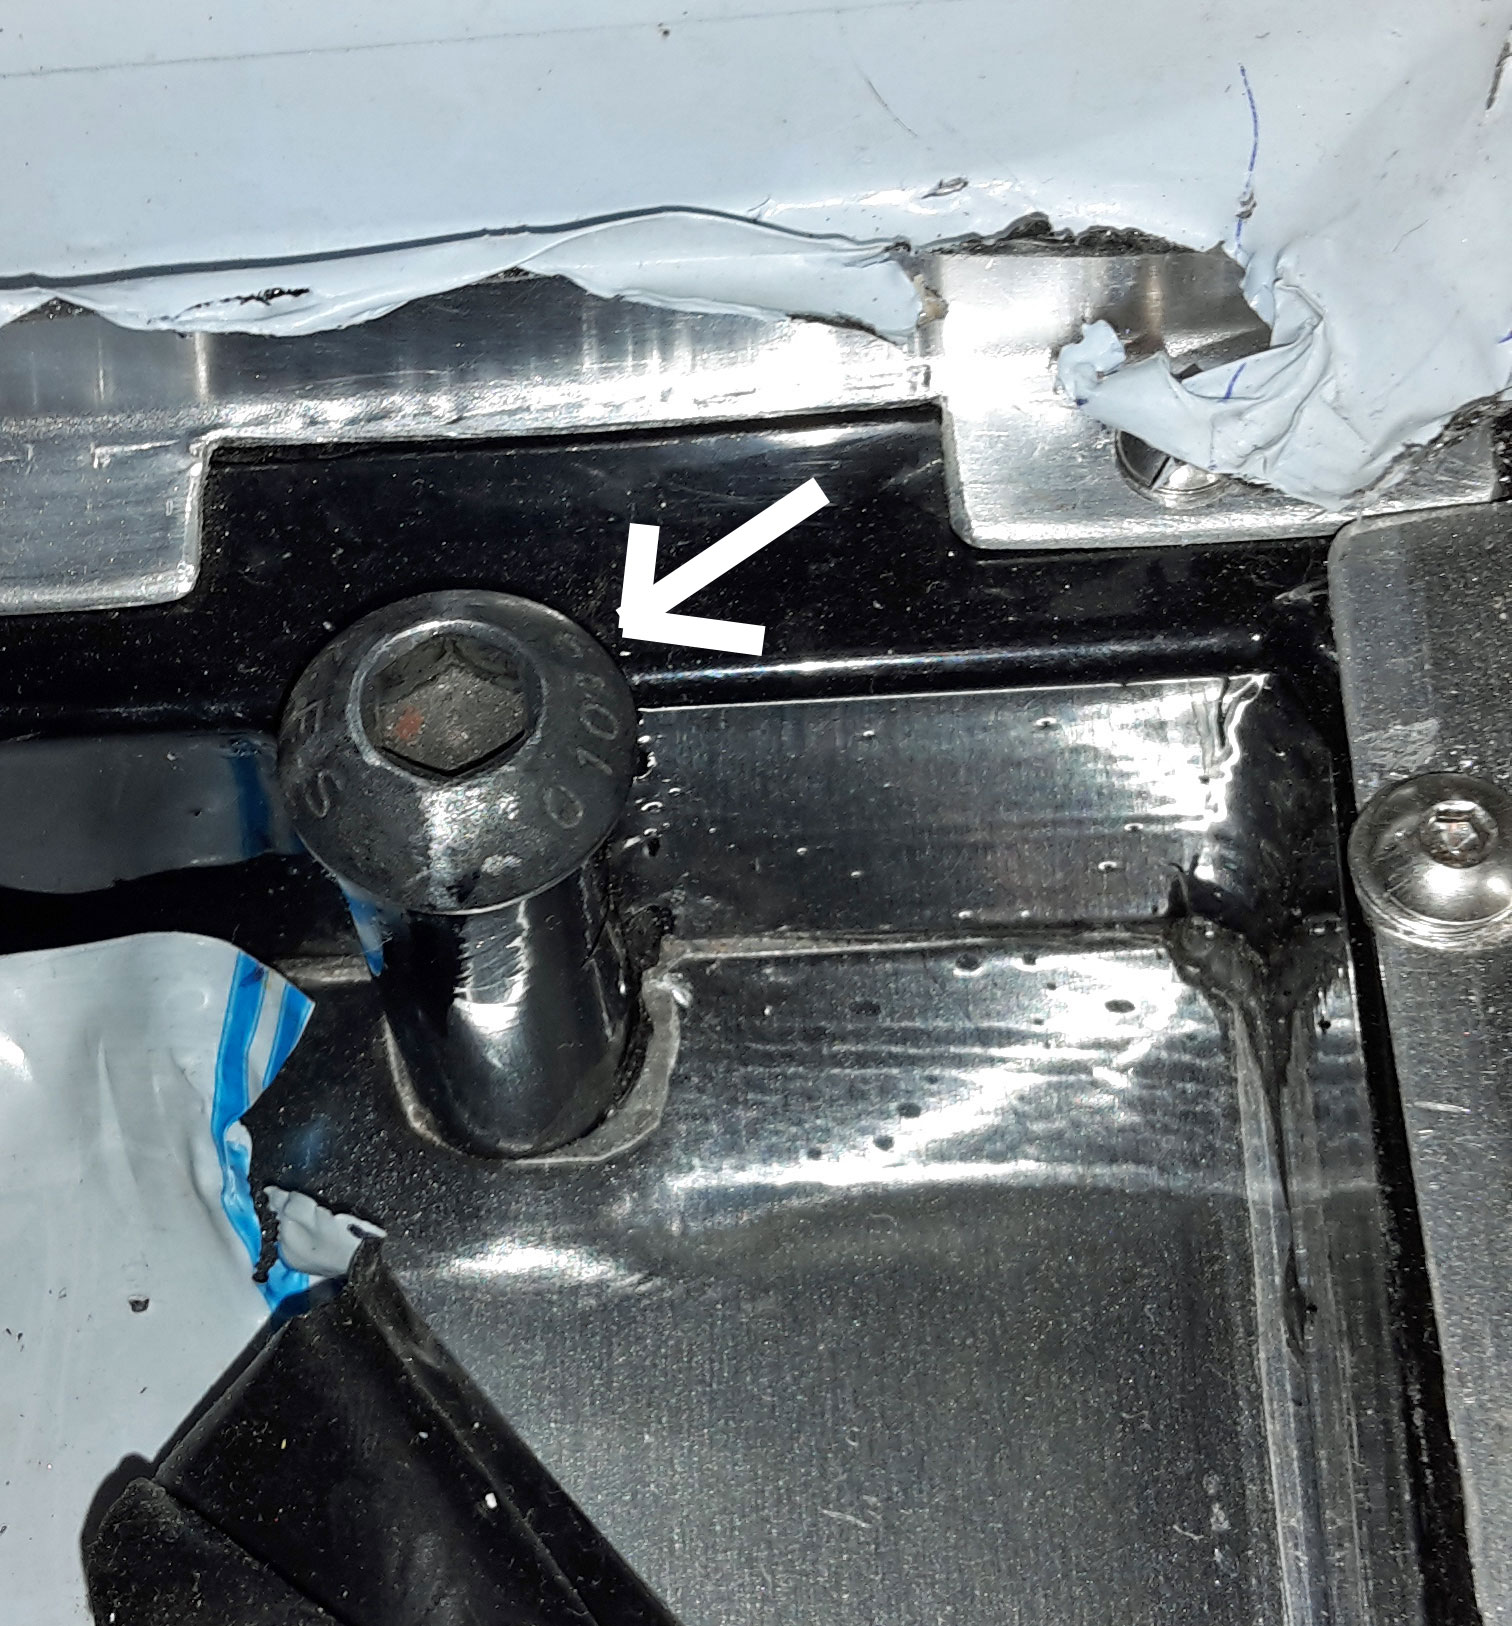 2. Handbrake mounting bolt can be touched if seatbelt socket moved out of the way (as if seatbelt fastened):- 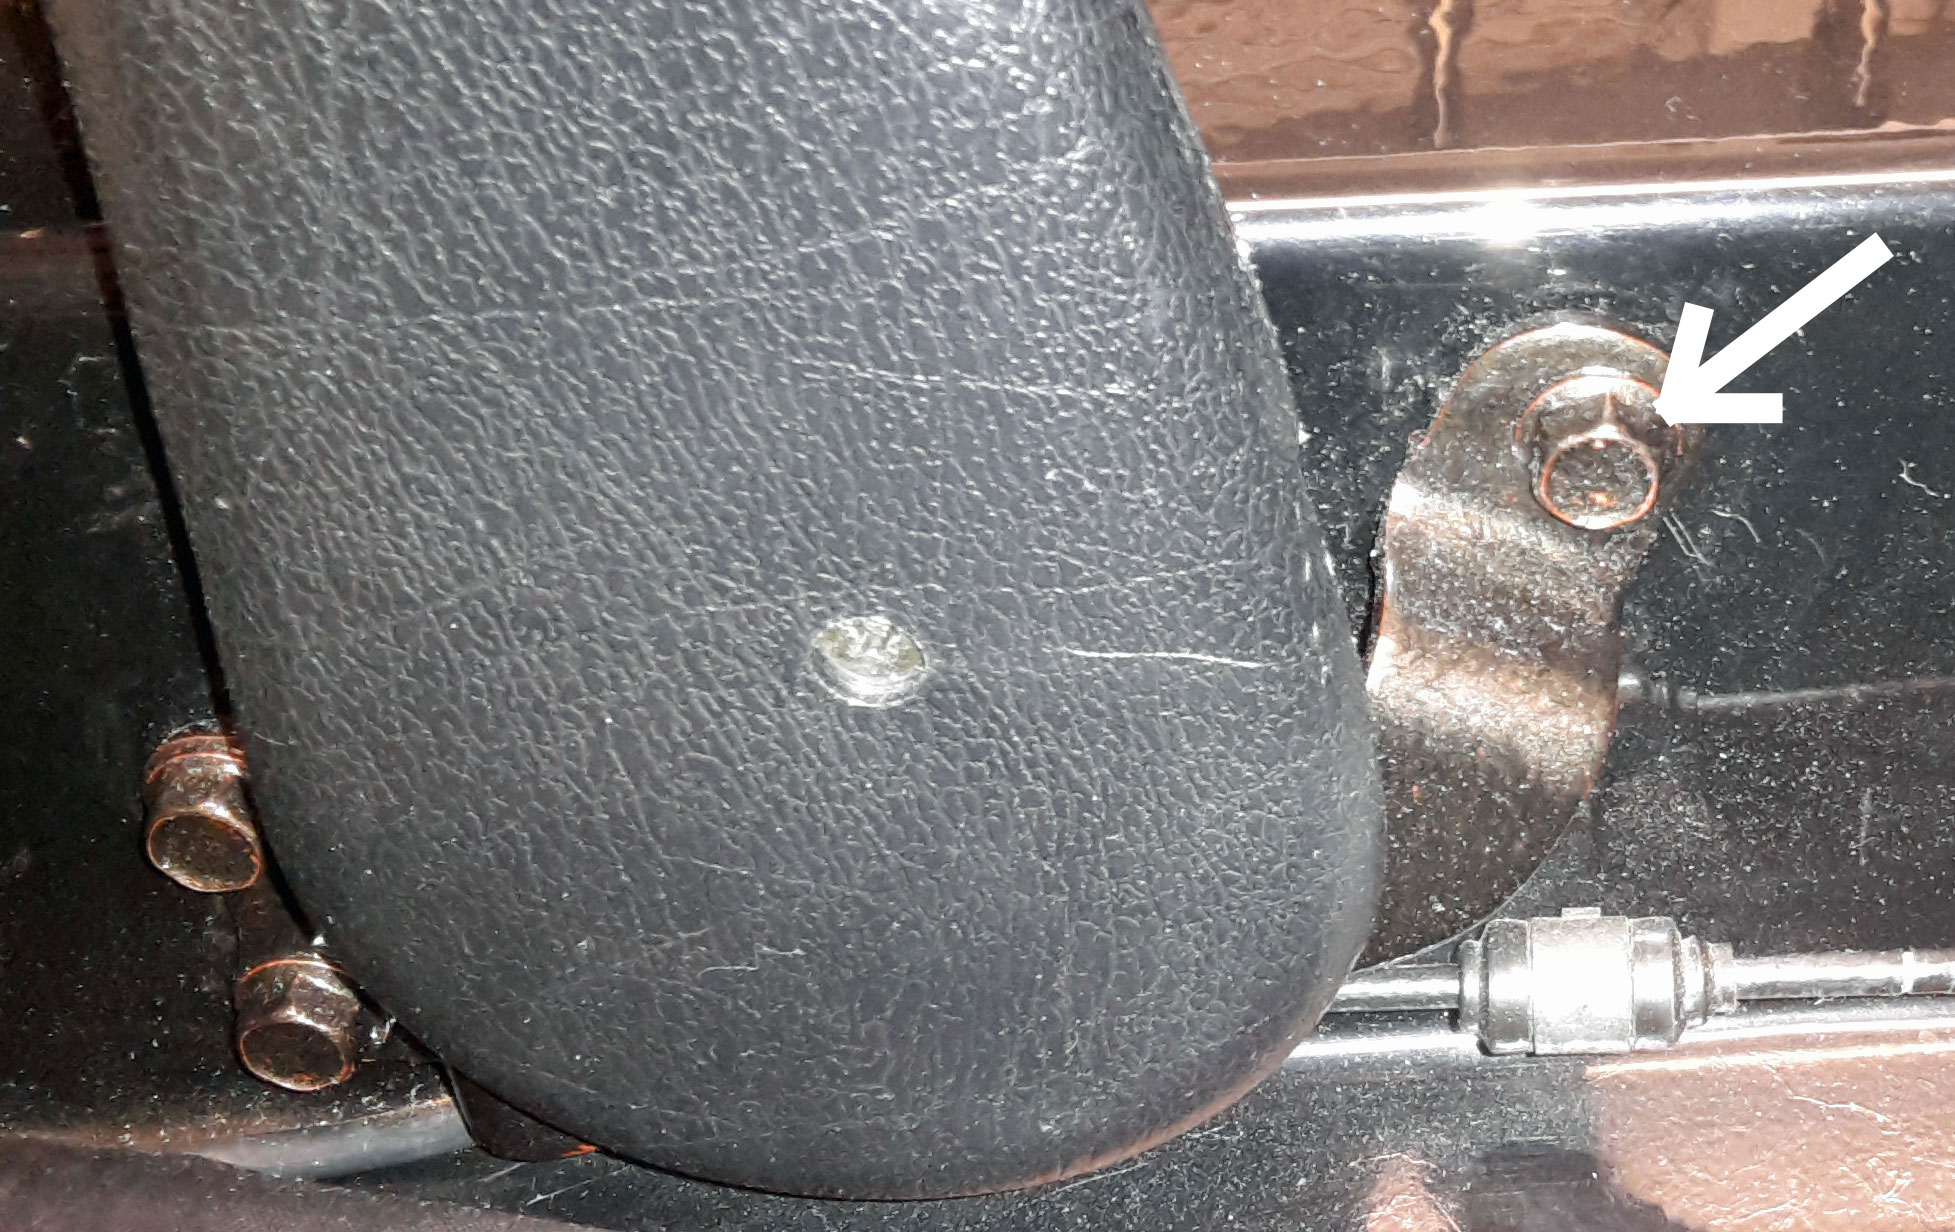 3. Handbrake cable mounting plate edges which I think can be deemed to be ahead of the vertical line of the specified zone, but which are behind the seat back and so could be deemed to be exempt:- 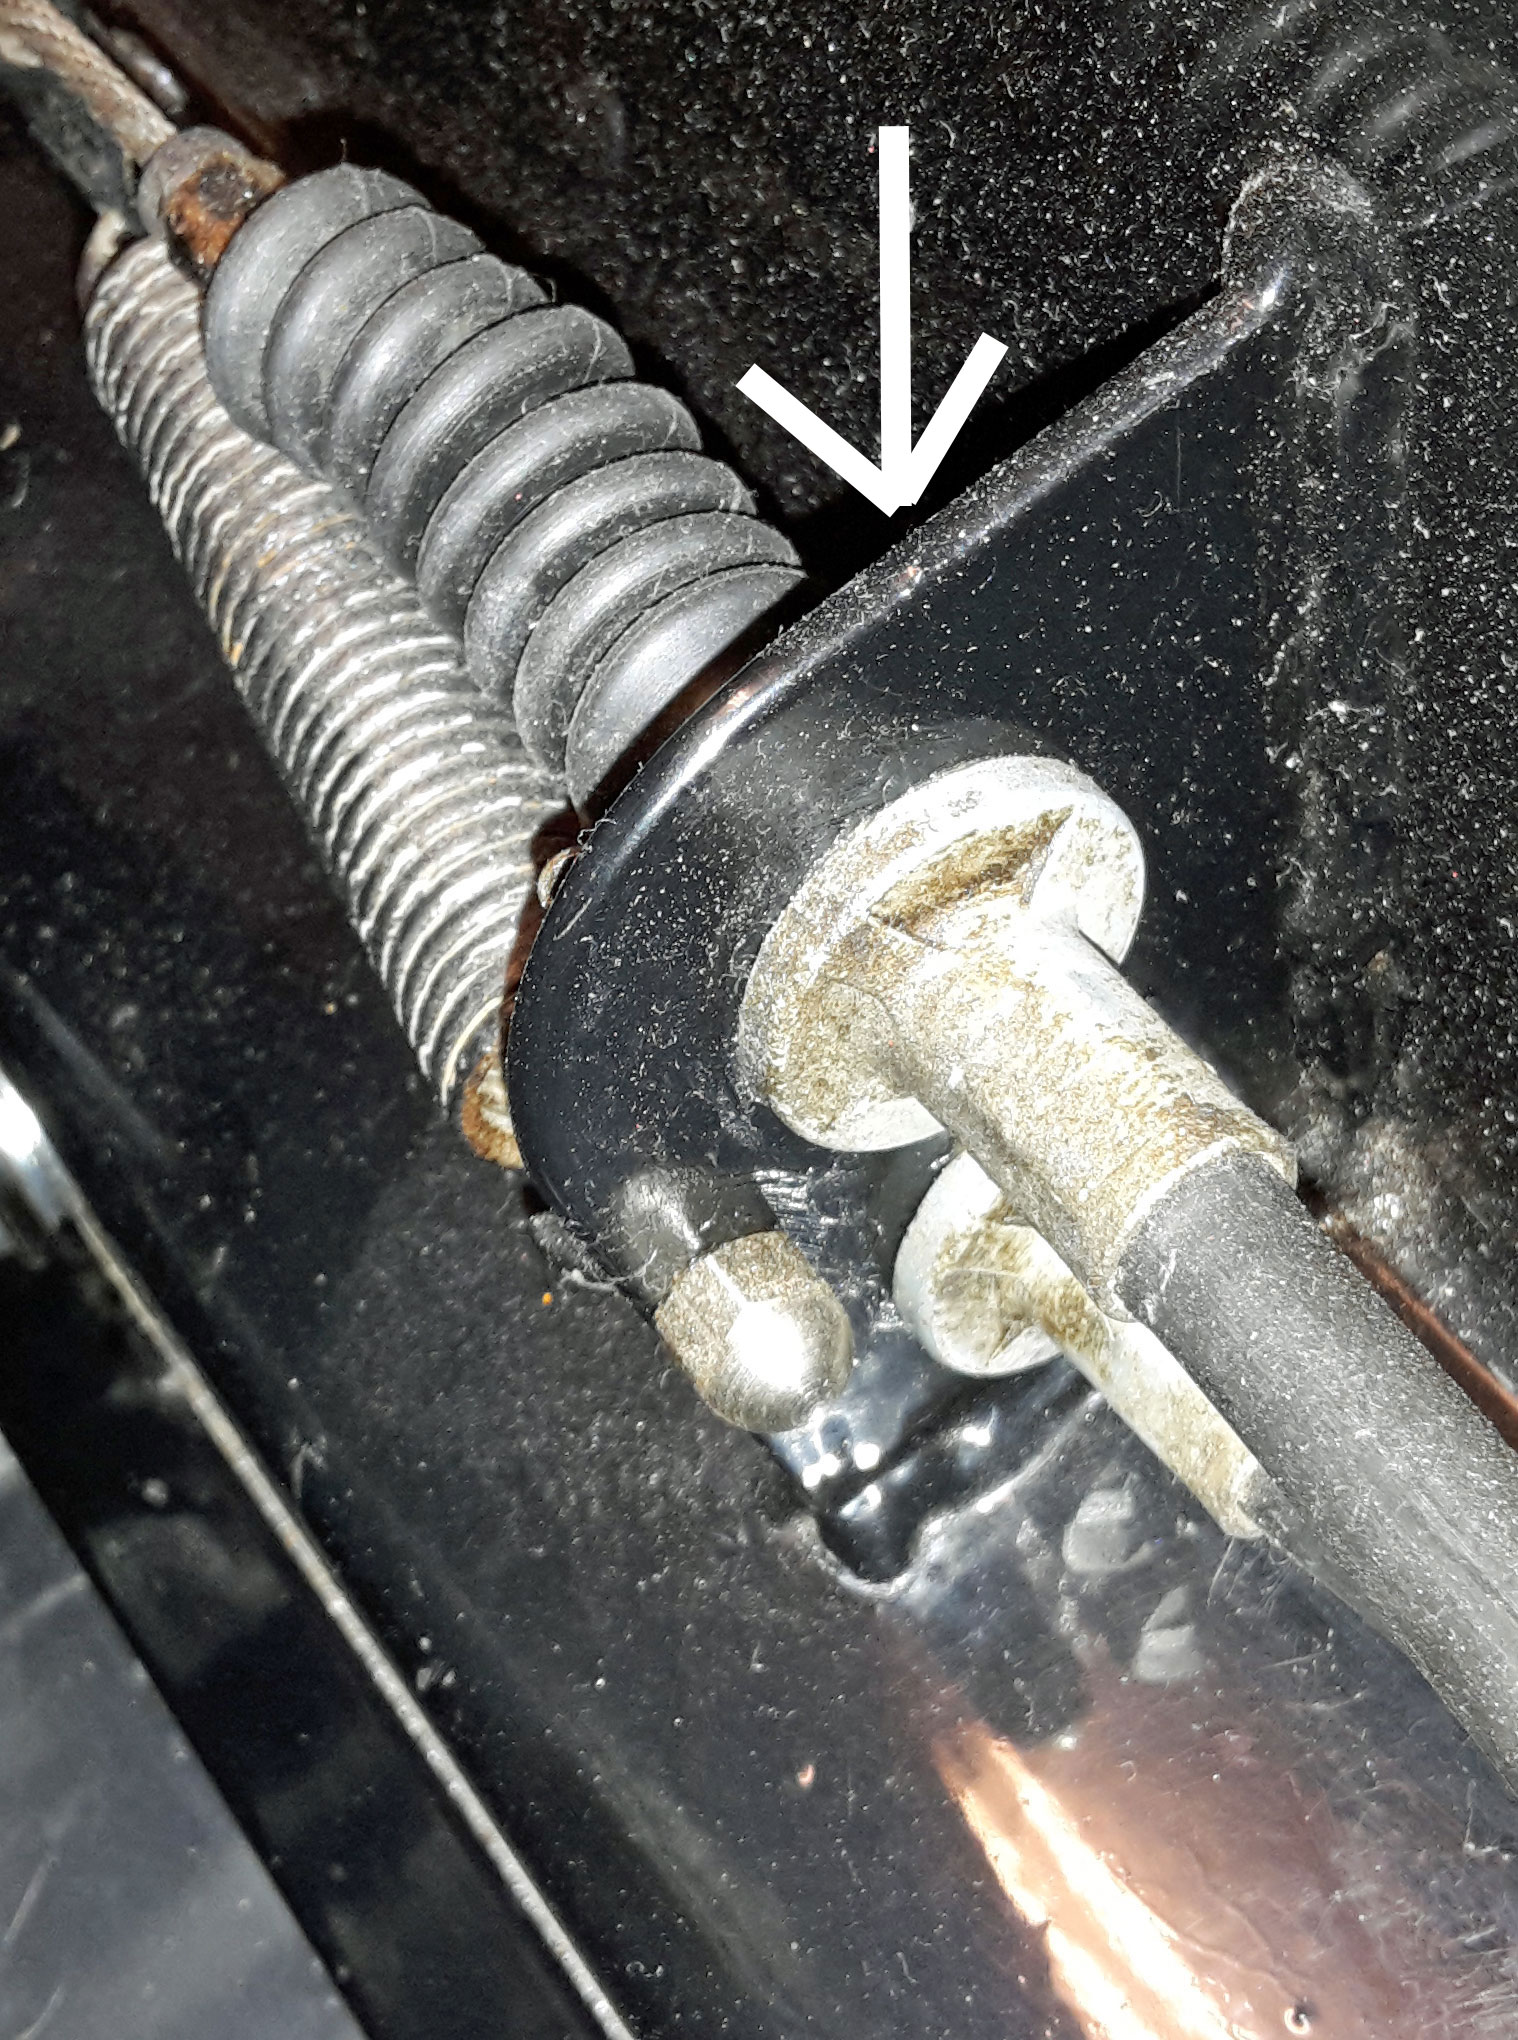 |
|
|
|
Post by miket on Feb 17, 2017 10:27:26 GMT
Time to fix on the front wings. From various threads I knew people have previously gone with every permutation of: PU, clips, fibreglass etc . Also aware that there’s not been a lot of forum stories of failed wings, but that some wings have come loose where the PU hadn’t failed but the paint/powdercoat around the stays had, or surface corrosion of the stays had become a weakness. My life experience of glues is that they are largely unsatisfactory with the exception of two part epoxy (Araldite) and that preparation is key. Another factor was that UK TV mechanic Edd China had advised against using clips with wings (on a ‘7’ clone) and Edd knows stuff. I decided to stick (sorry) with just PU in the form of Tigerseal, but prepare as best I knew how. I worked with the stays still on the car. This is trickier working upside down, but allows weight to be applied without it getting in the way of work. Scored the wings’ PU area with a dremel disk and cleaned. Also took the powdercoat off the relevant part of the stays, scored them and cleaned. 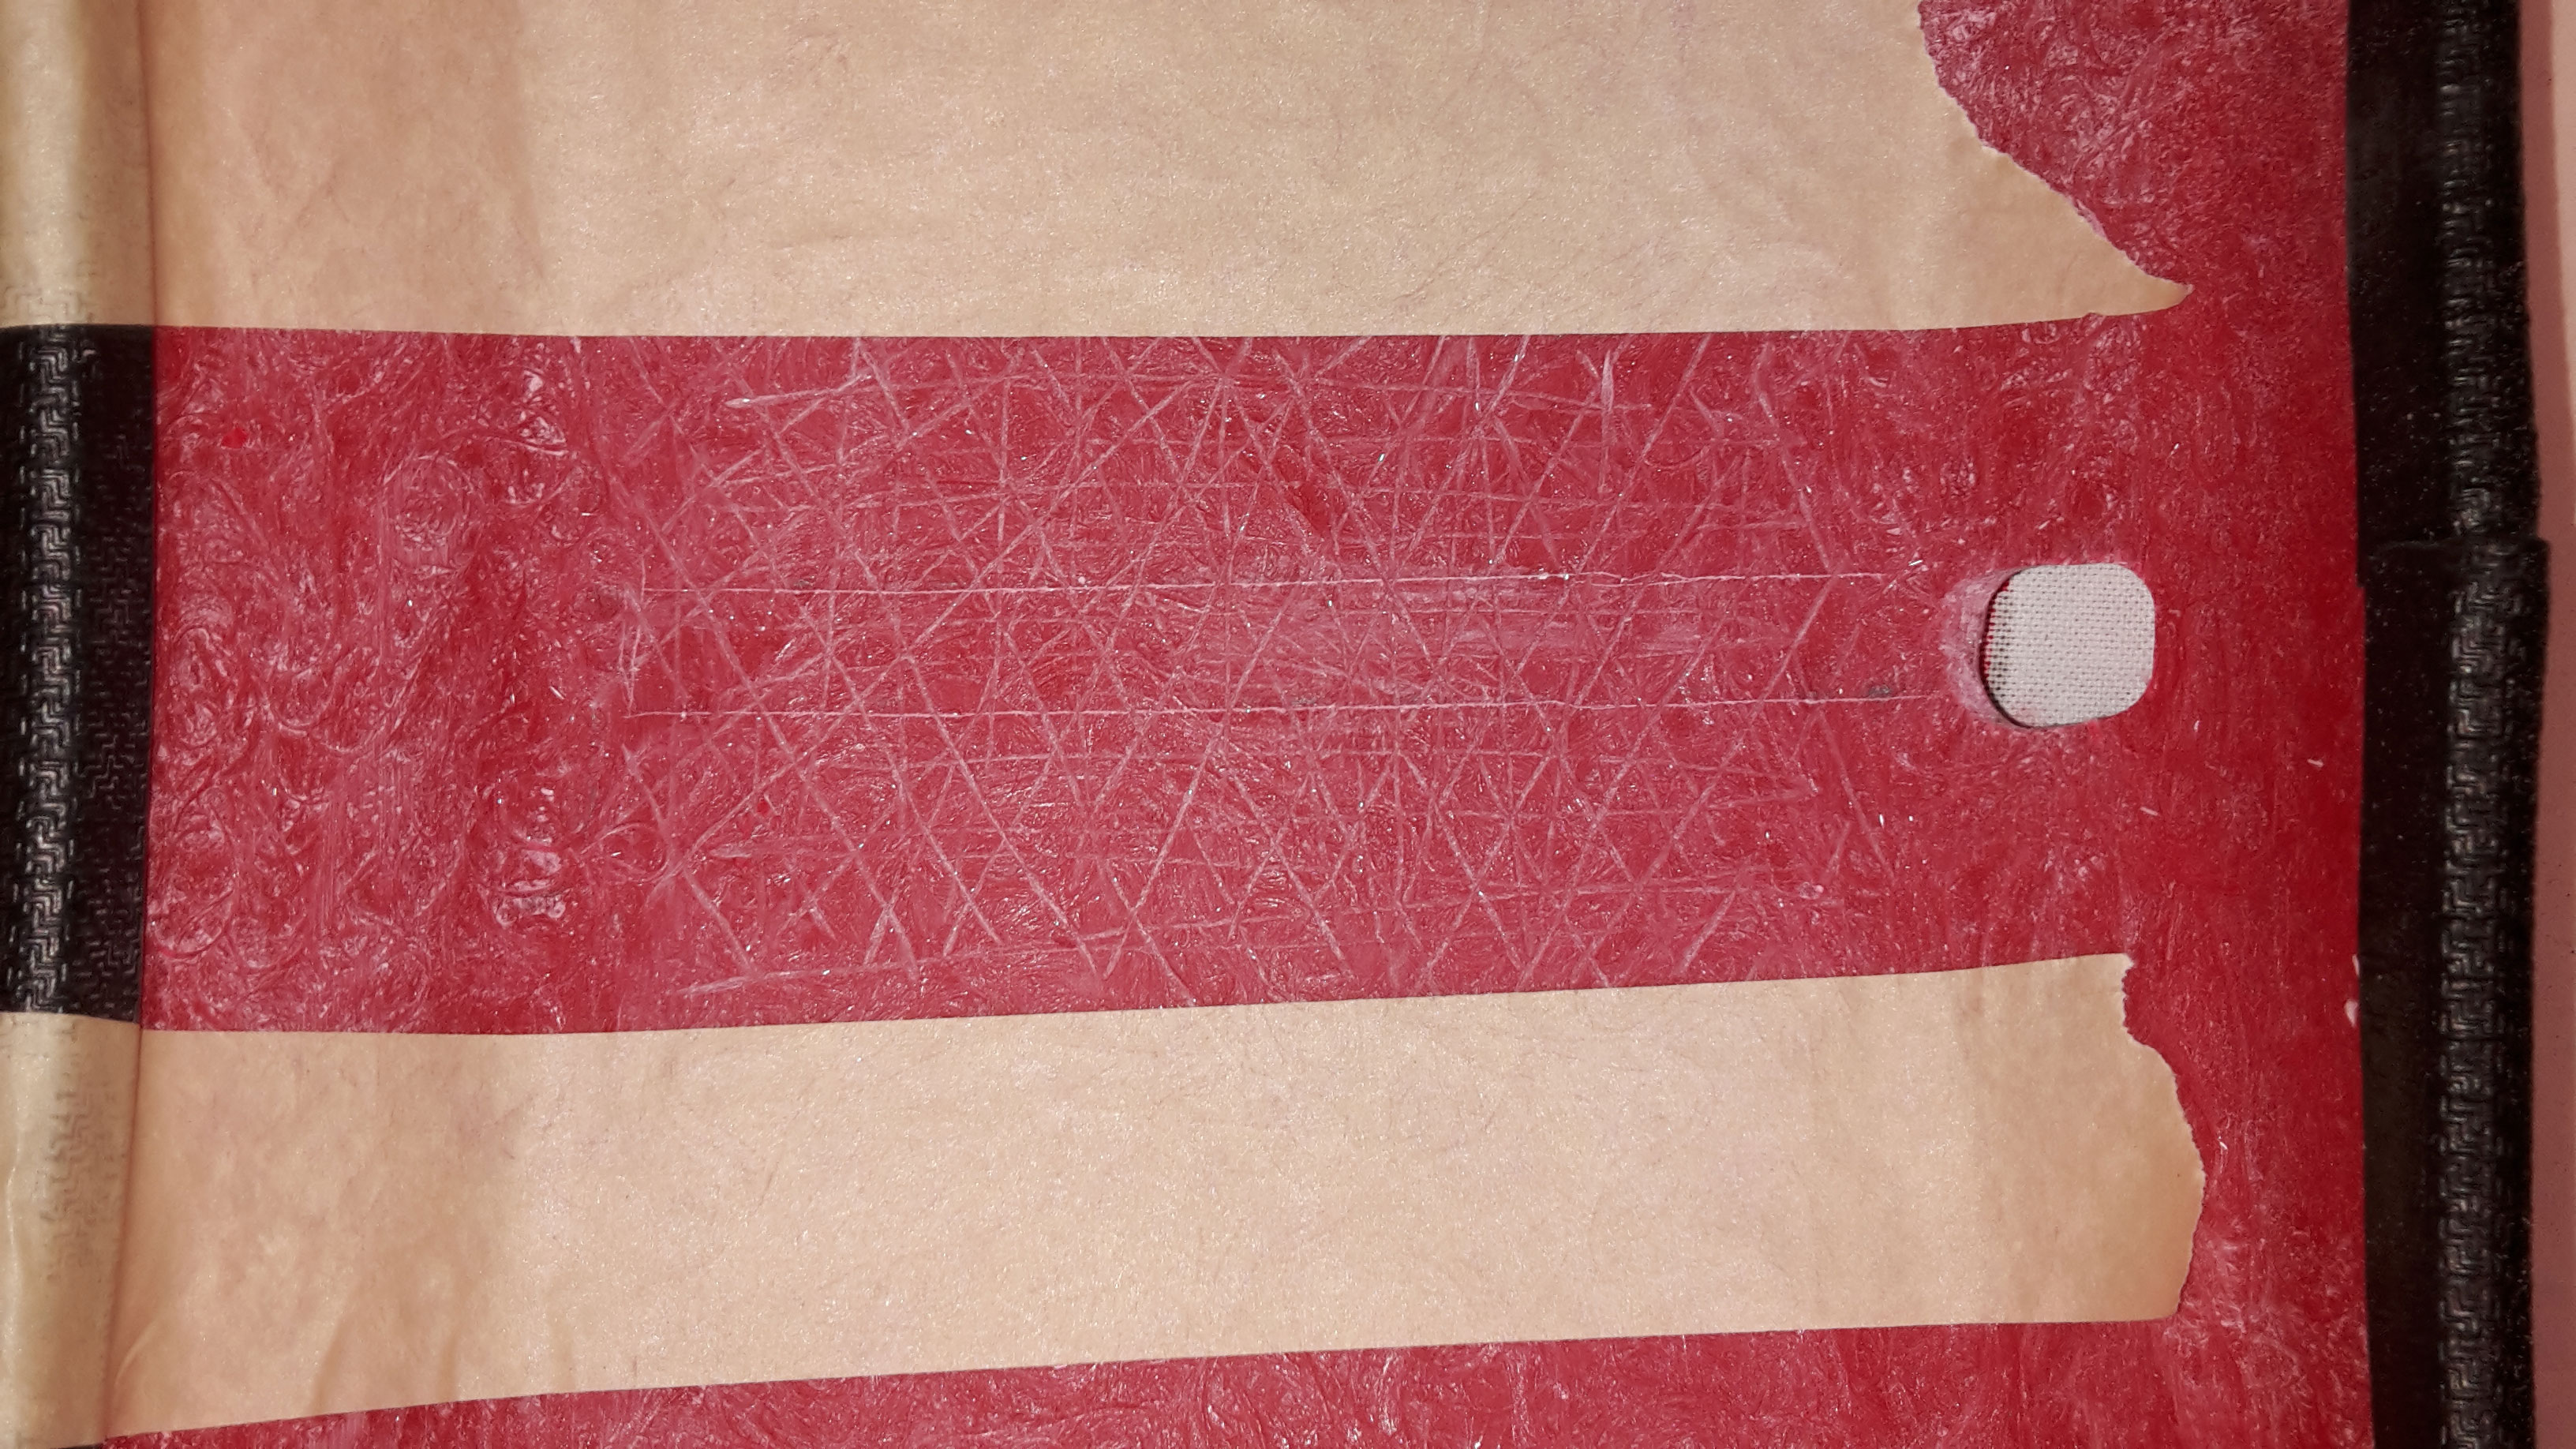 With my stock wheels/tyres these front wings needed to be on the stays as far as they would go, but in other cases it might need something to make sure they’re in the right place before PUing. Made some spatulas from plastic to work the PU:- 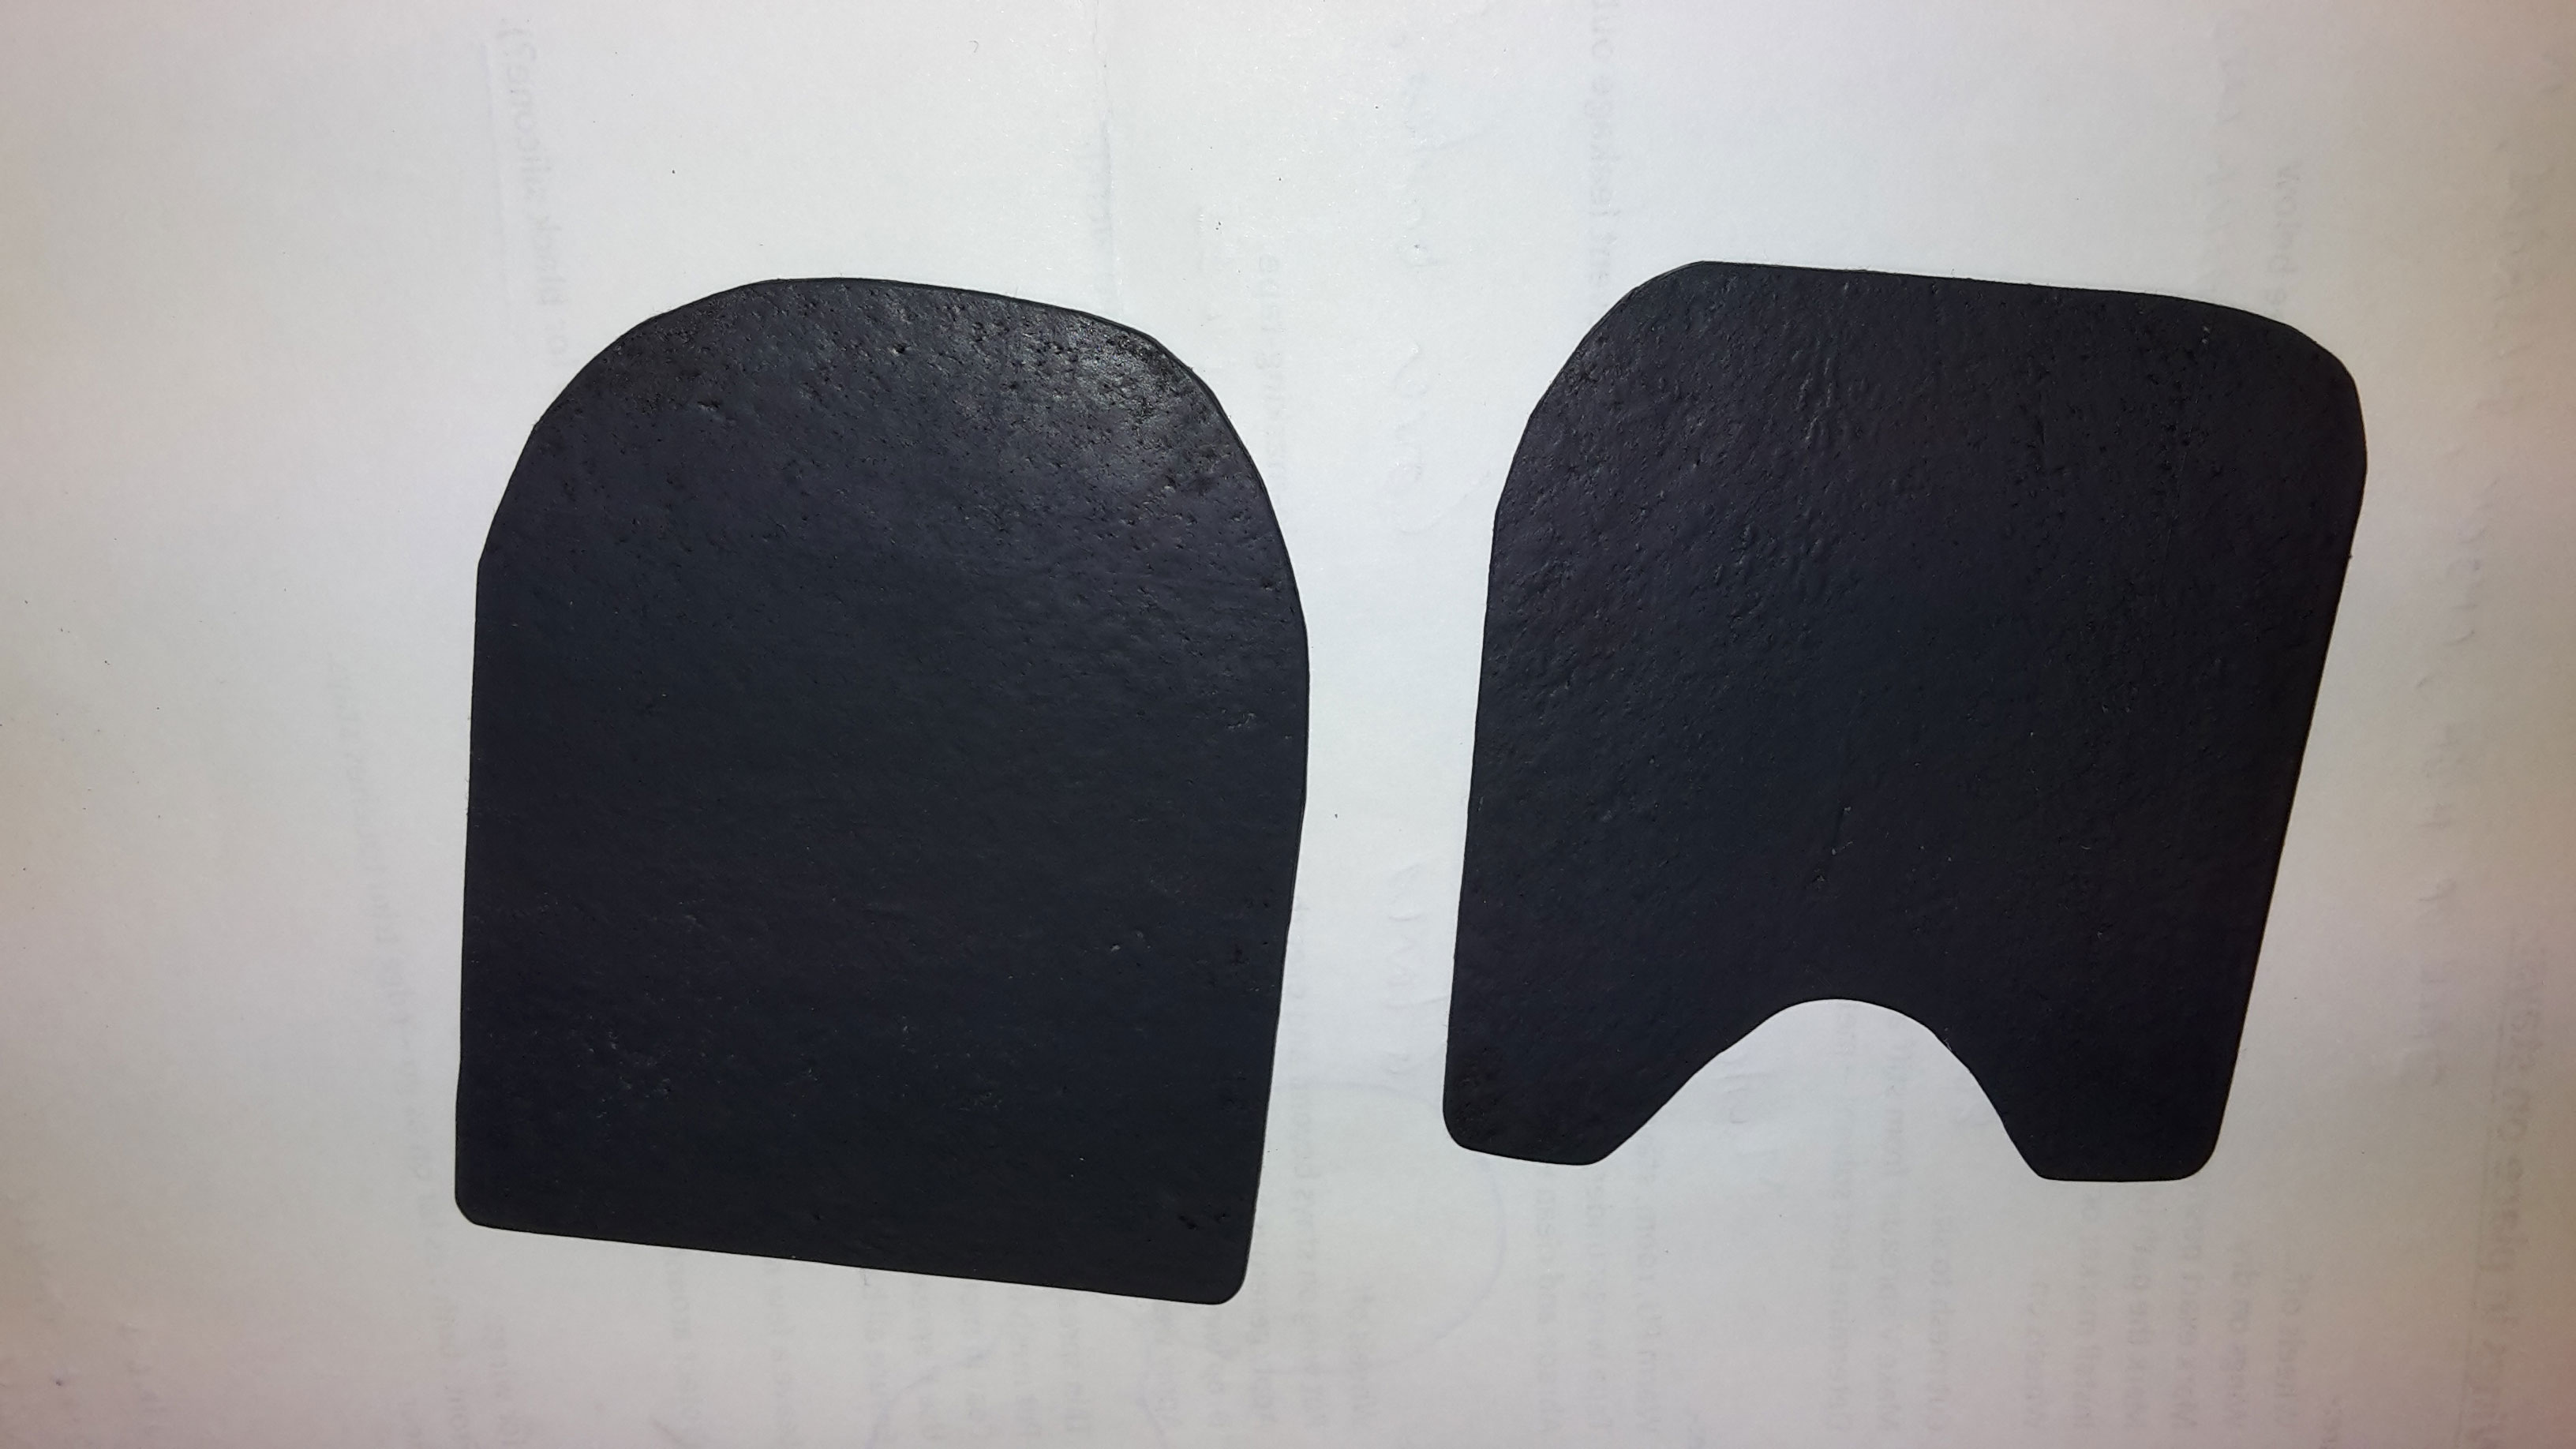 Put generous PU in the top of the stays, lowered the wings on to the stays and put weights on the wings to hold them in the right place and apply pressure. 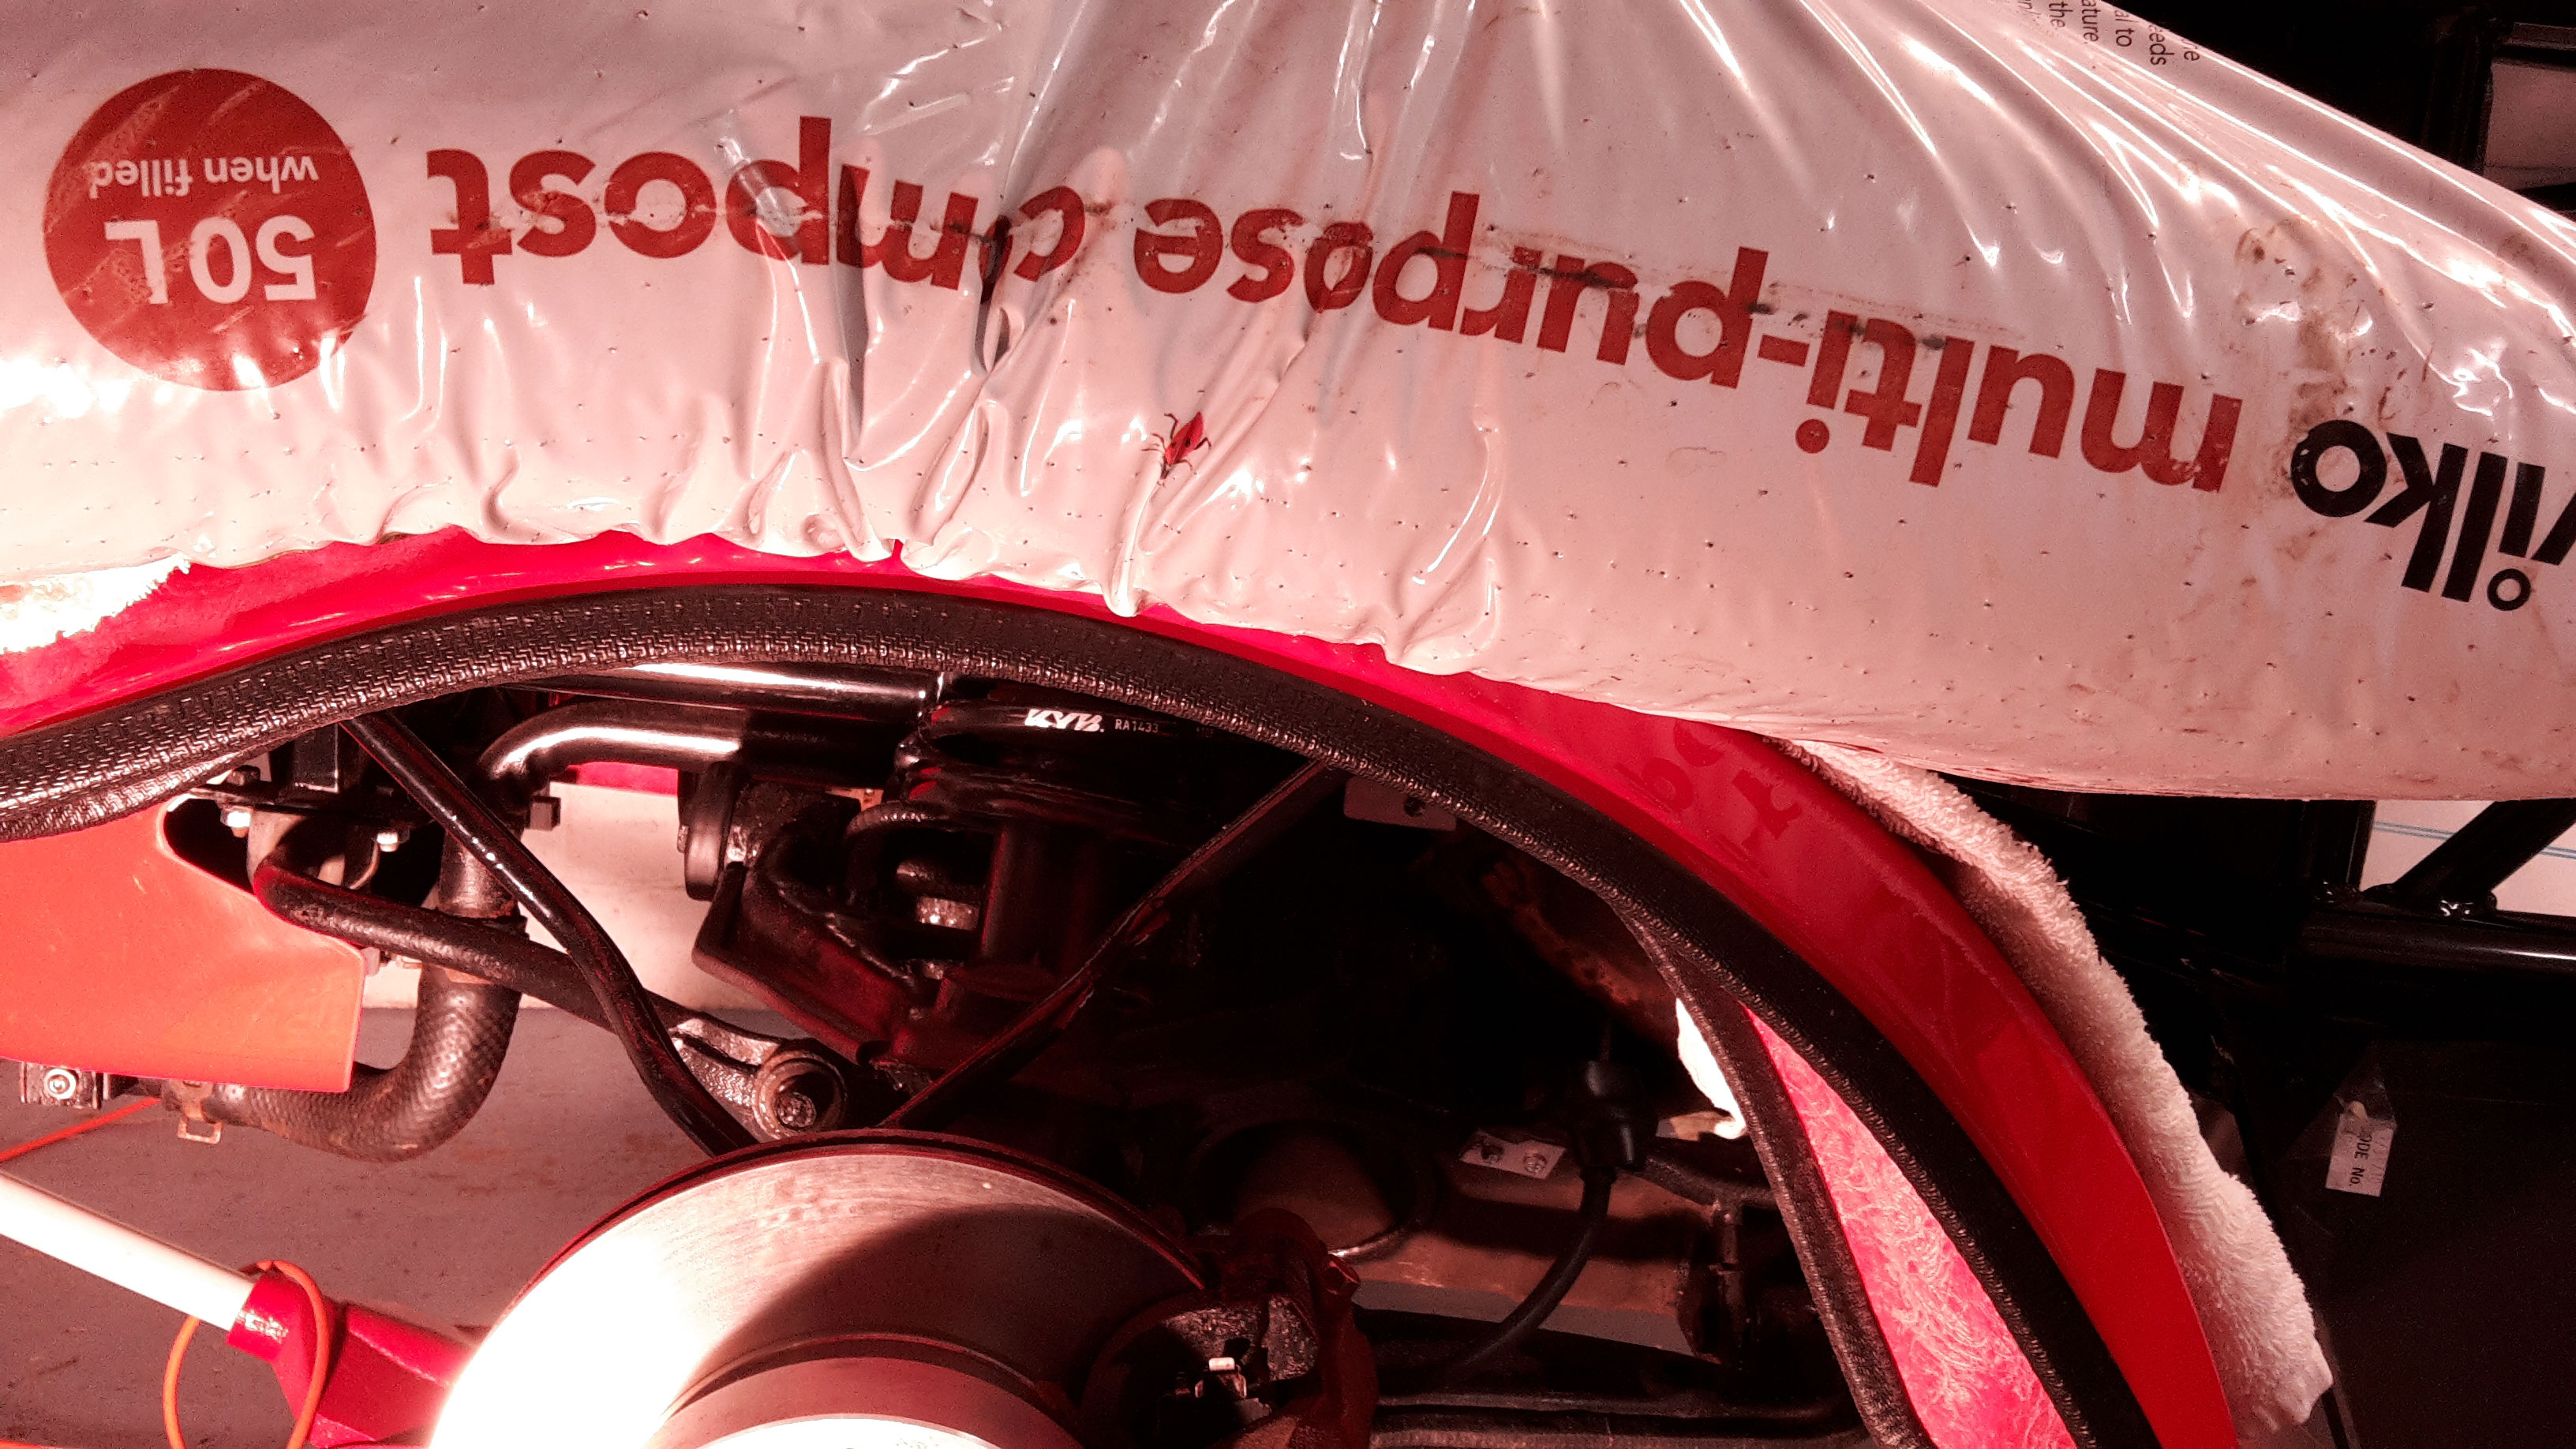 Then put PU around the stays (to prevent corrosion - I hope) and ran the ‘spatula’-with-an-arch-cut-out between the tracks of masking tape to get a uniform(ish) finish. This last bit was over optimistic ‘cos PU does not like to be ‘worked’ for long and quickly pulls. I’m okay with the results until proven otherwise. 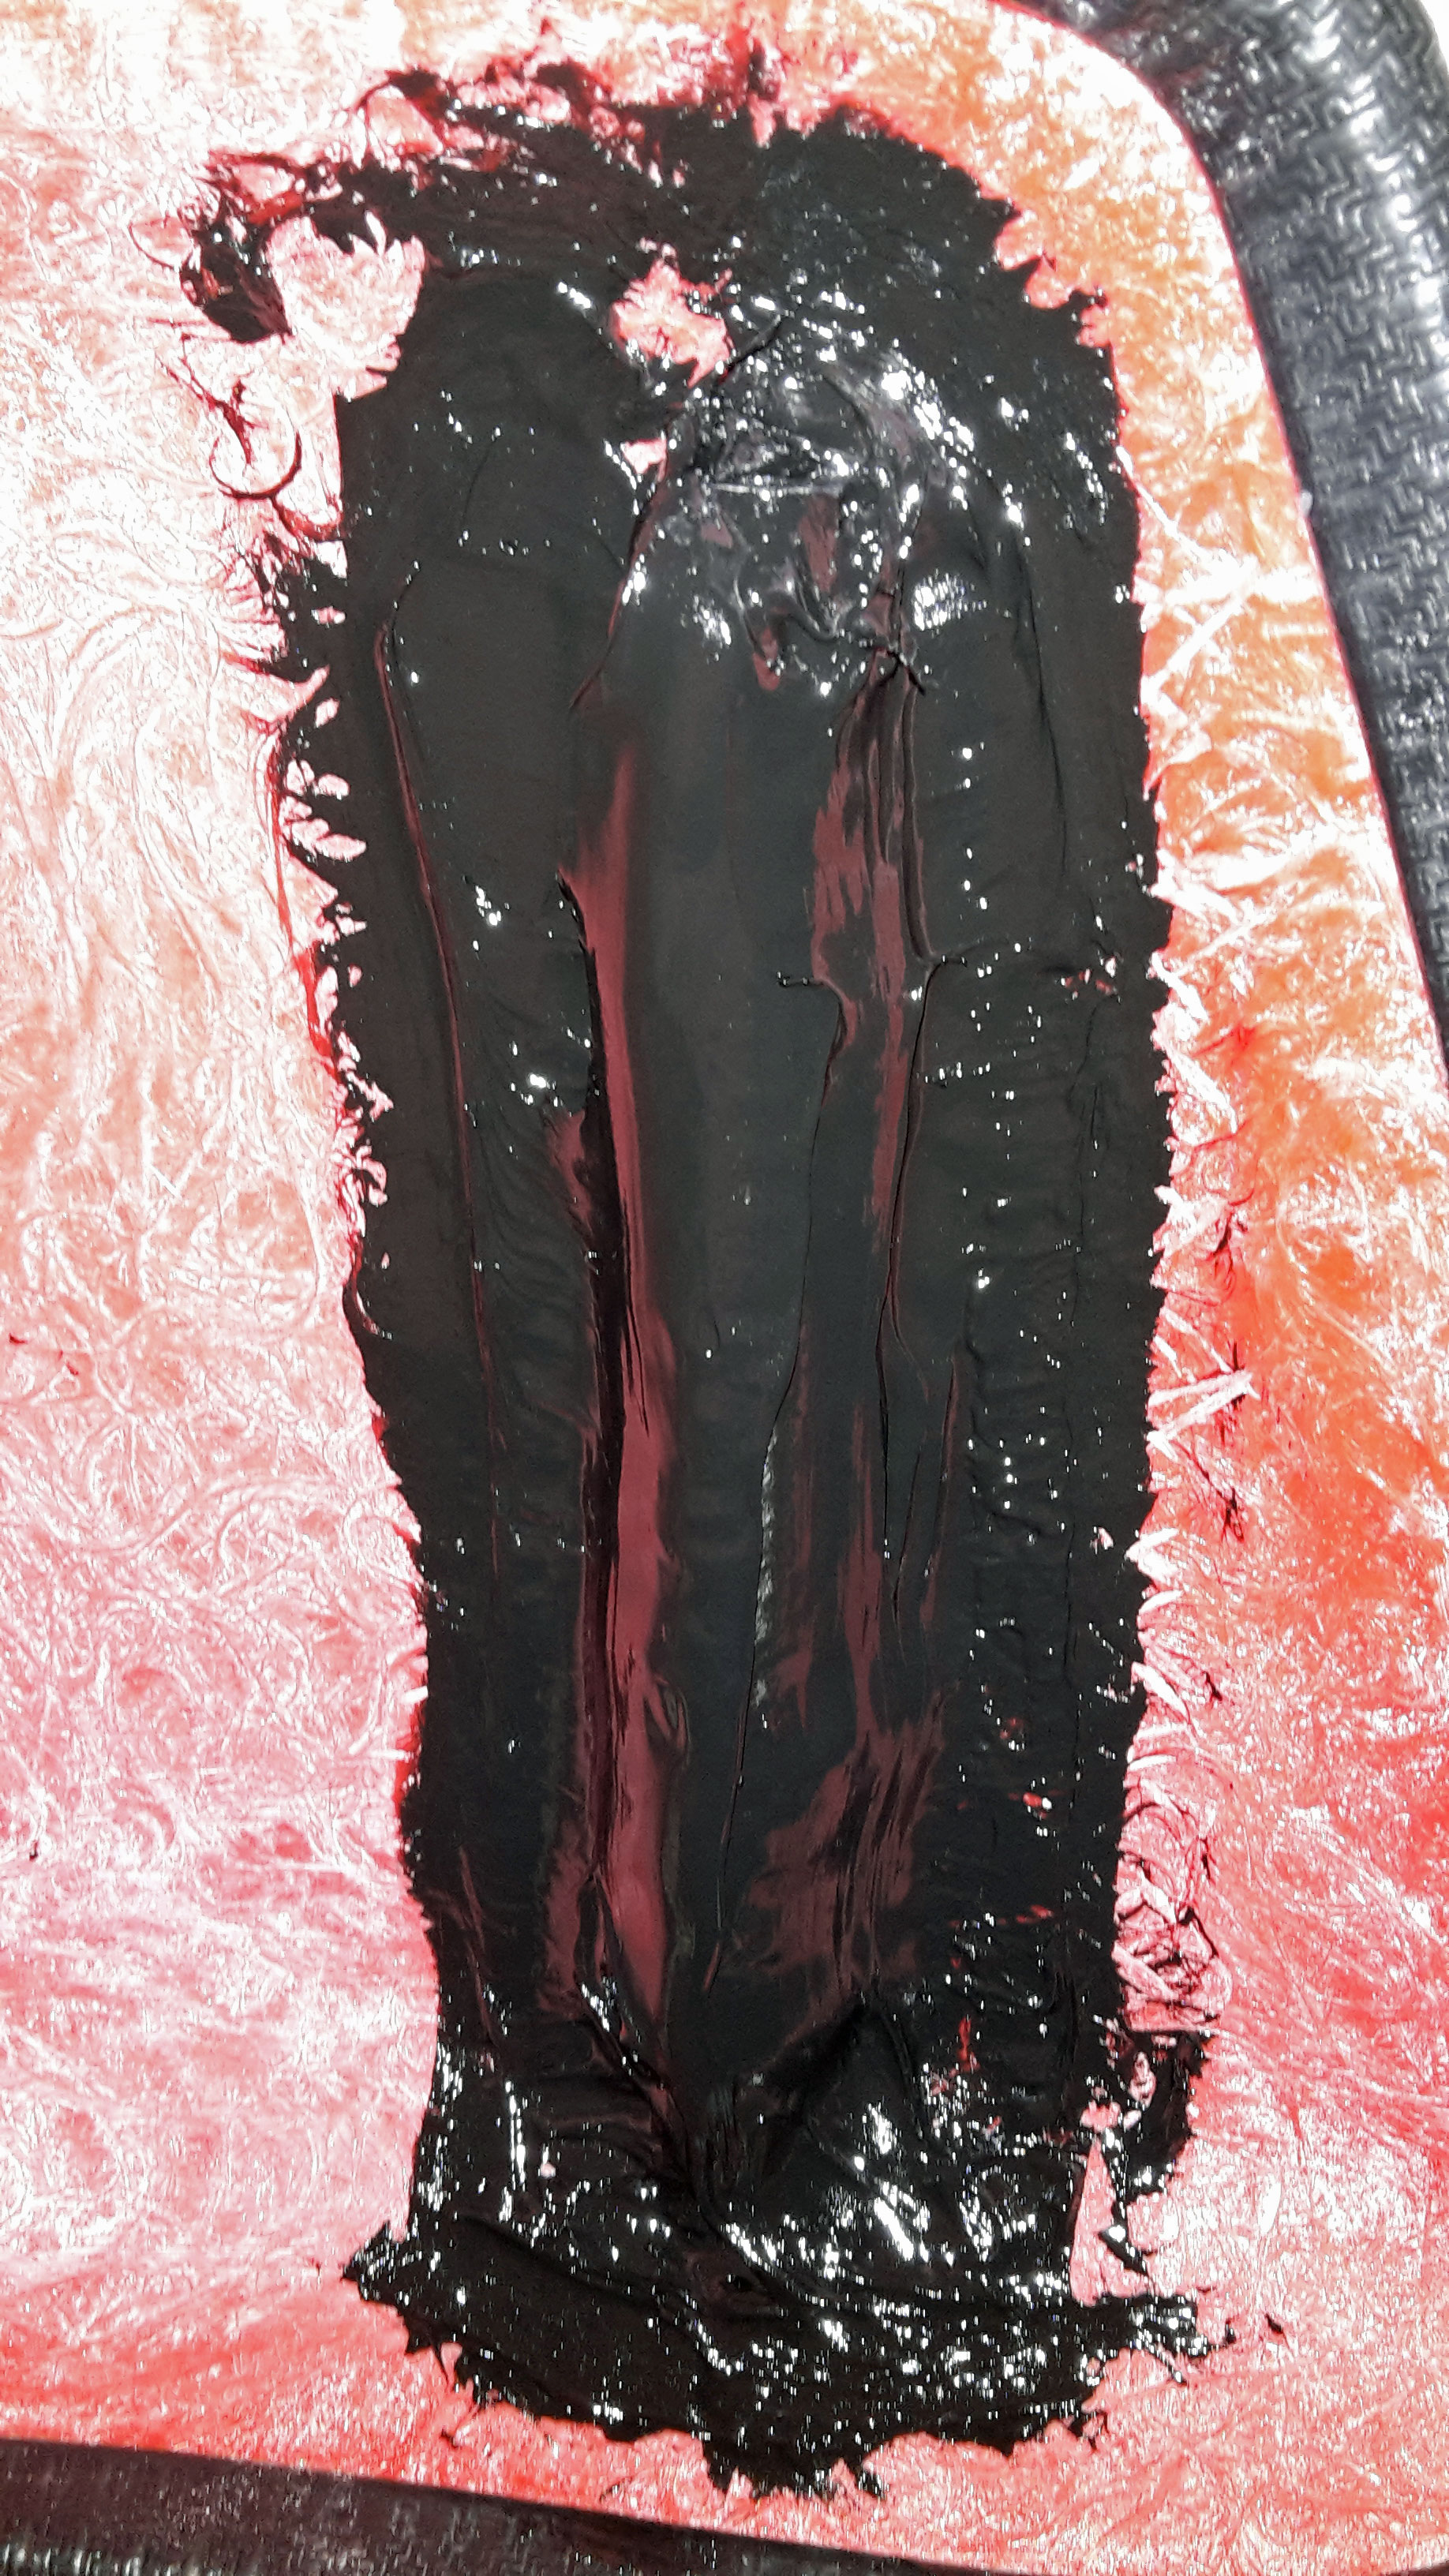 Suggestions:- Jacking the car as high as possible helps with access. Make sure PU is newly opened, within expiry-date and used in right temperature range. A cartridge of Tigerseal did the 2 front wings with a little to spare. Tigerseal will want to sag/drip given a chance – so worth covering the brakes up. It will also want to get on your hands and transfer to every other surface within 2 yards. You need more rags than you have and plenty of solvent (meths works). |
|
|
|
Post by jgilbert on Feb 17, 2017 21:30:52 GMT
You could always glass resin over the PU for additional strength if you wanted. P40 is fibre reinforced resin and workable.
|
|
|
|
Post by miket on Feb 21, 2017 16:52:19 GMT
Added a smudge of PU over any part of the bare-metal stays and to fill the holes around the stays - great to see my Exo with some front wings on at last:- 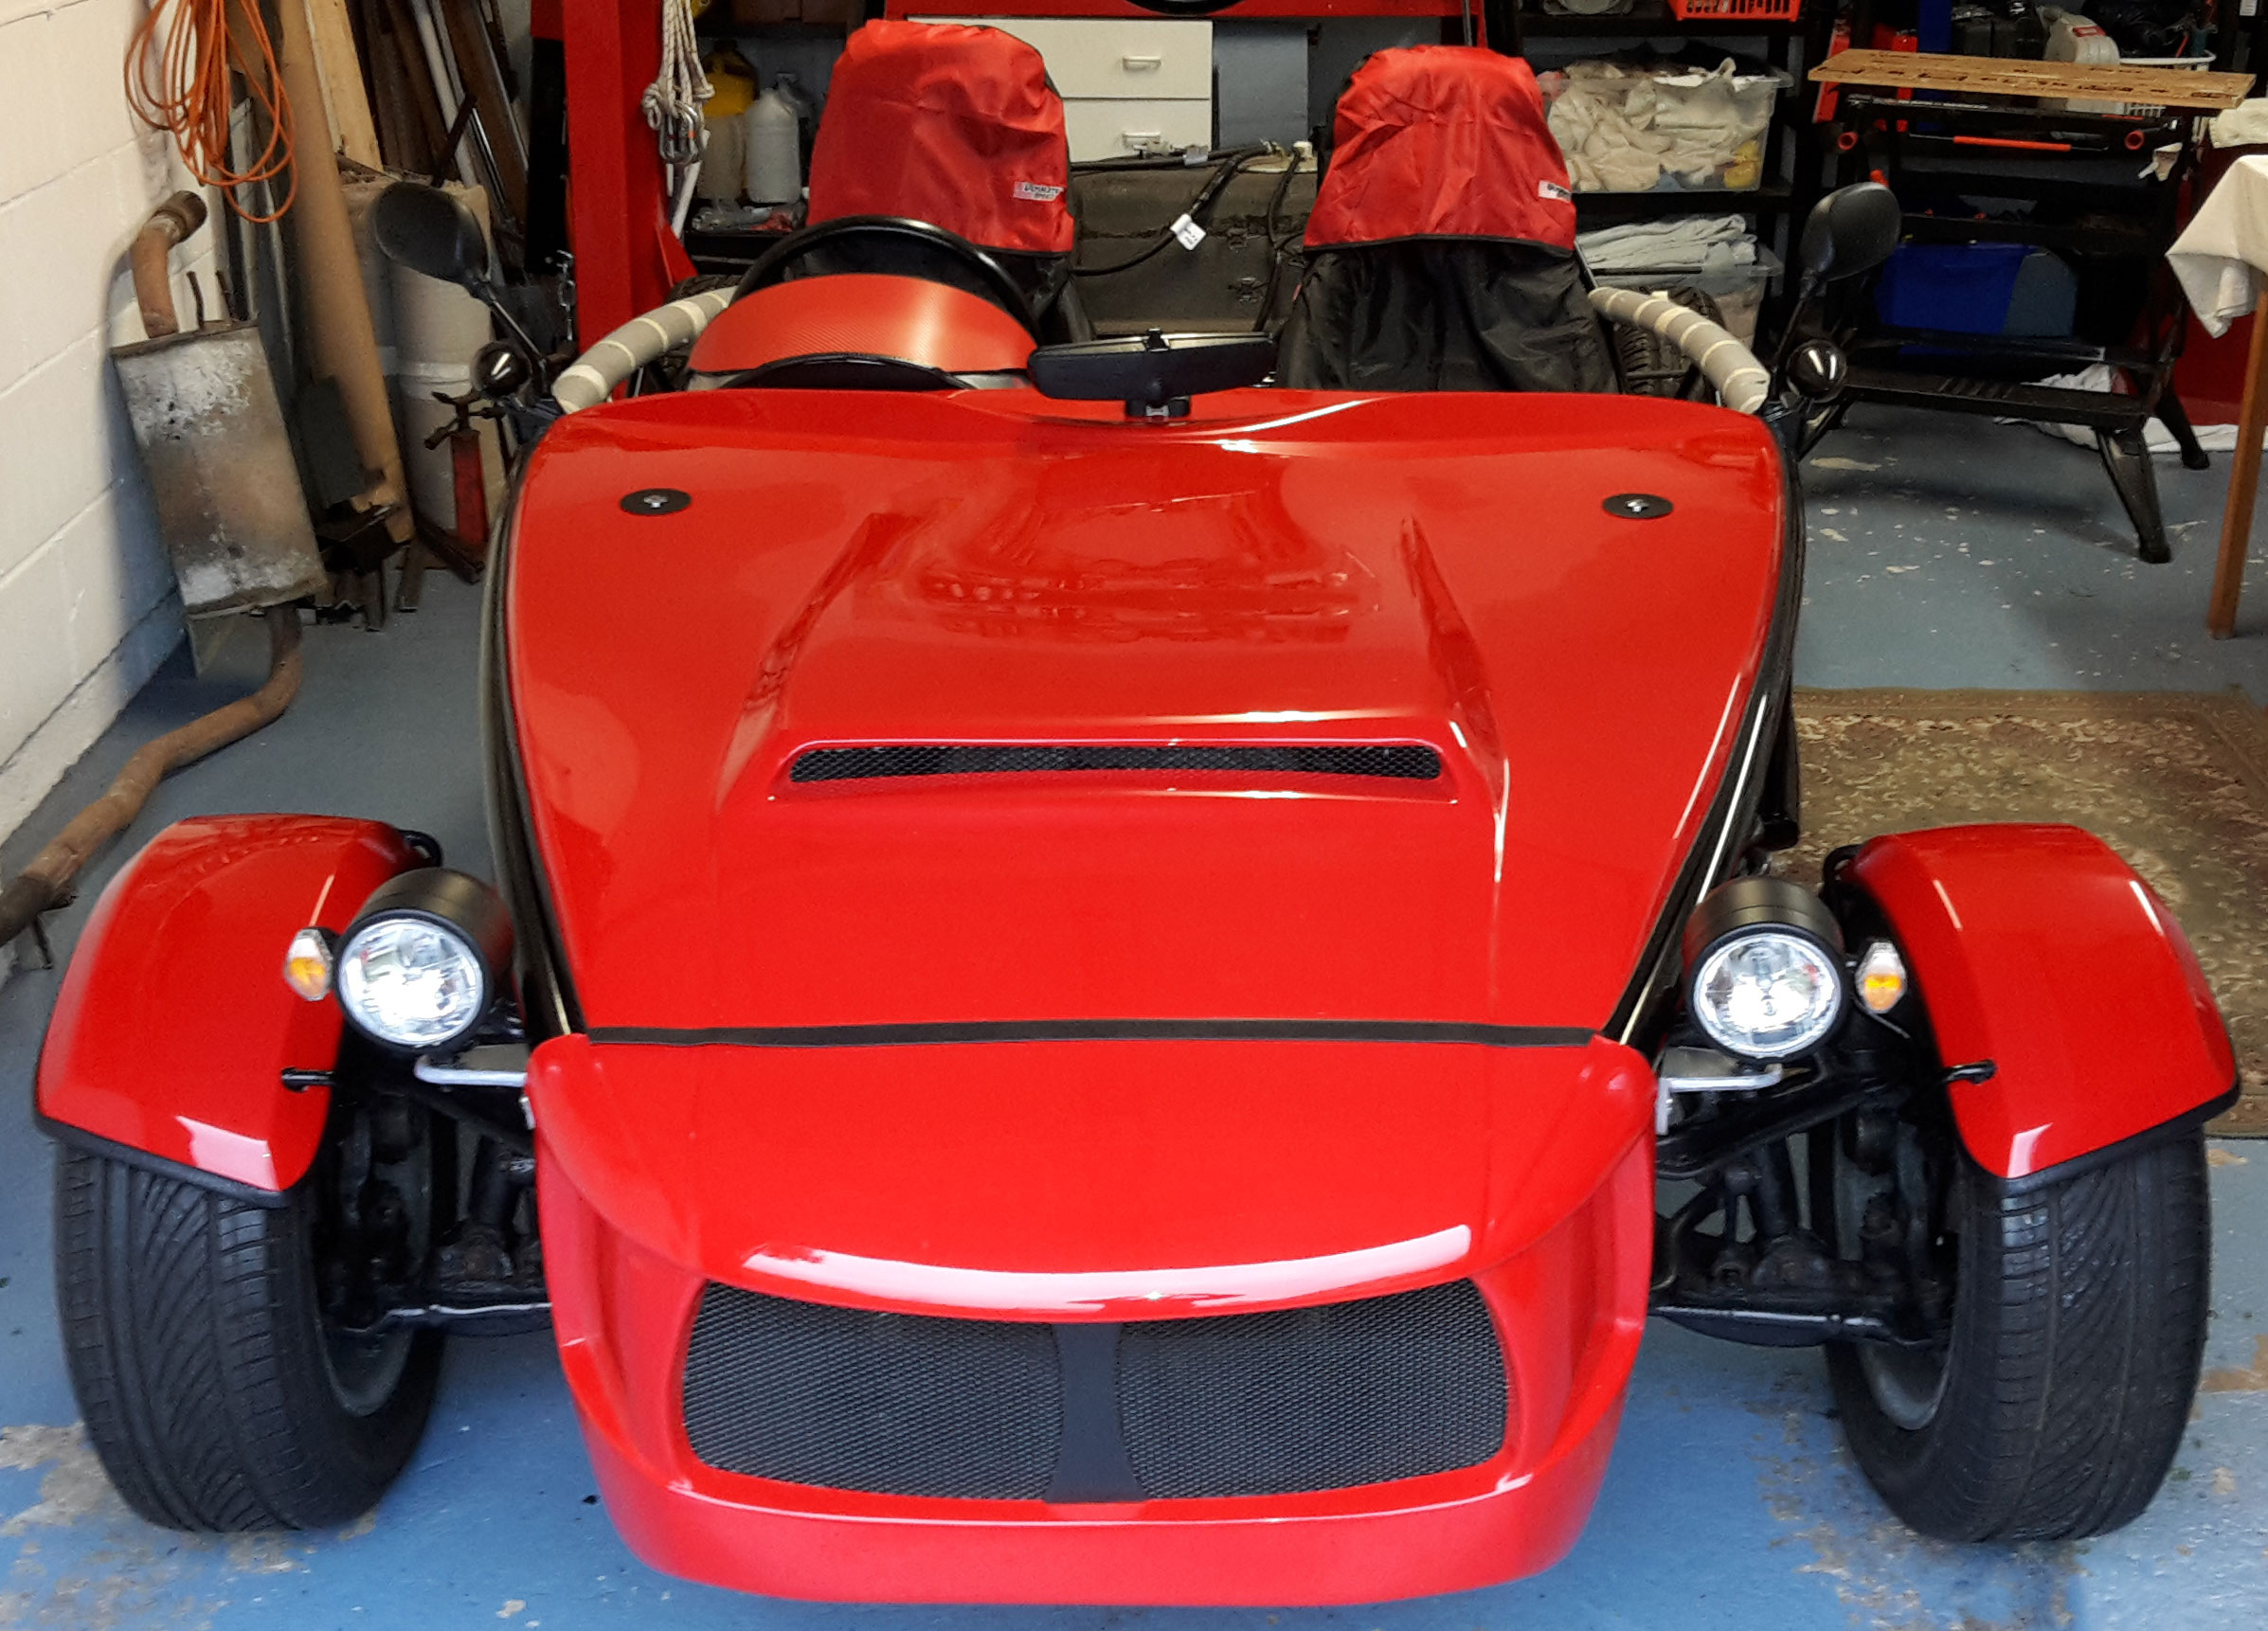 That means the front and cockpit of the Exo are as completed as parts of a kit car ever are. Next rear lights and finalising the fuel filler. |
|
|
|
Post by hutchey on Mar 13, 2017 14:00:49 GMT
Moving forward a little I need to decide what to do with the battery cables...  I.e. there's a lot of excess cable and I need to decide where best to pass it thru to a battery behind the driver's seat. Need to find out whether people normally go through the rear bulkhead and what they do with several inches of excess thick cable. I put the battery under the passenger  :  Hi, how did you get your handbrake to be so far back along the tunnell? Mine Is further forward and I'm not sure if it's going to foul until I trial fit the driver's seat but it's not got a lot of adjustment left and I still need to allow for it to work. |
|
|
|
Post by miket on Mar 14, 2017 9:18:55 GMT
hutchey - sorry about the late response - my build's dormant for a few weeks, but it looks like you might be querying of rauf 's picture in my build thread? If your cables from the rear brakes arrive at the bracket with two holes in on the tunnel okay, then I think the only variation in handbrake cable length is at the adjuster within the handbrake lever. Perhaps a photo of the issue in your thread might help get some wider thoughts if you don't get any info here.
|
|


 ...
...


