|
|
Post by Toed64 on Mar 21, 2015 10:33:05 GMT
I didn't do any cutting, to reduce the possibility of causing a leak.
|
|
|
|
Post by miket on Mar 21, 2015 11:21:16 GMT
Thanks - just had a quick measure and I only have 7mm between current tank edge and inner front of the tank cover so I'll have to check it out in detail next time I'm working on the car and see if bending would give me enough room for hoses. In the meantime I used a bit of tape to mark out what shape the fuel tank cover's suspension cut-out looks like it should have been in order to provide a close fit... but if you're about to cut your own, convince yourself of your preferred cut first! 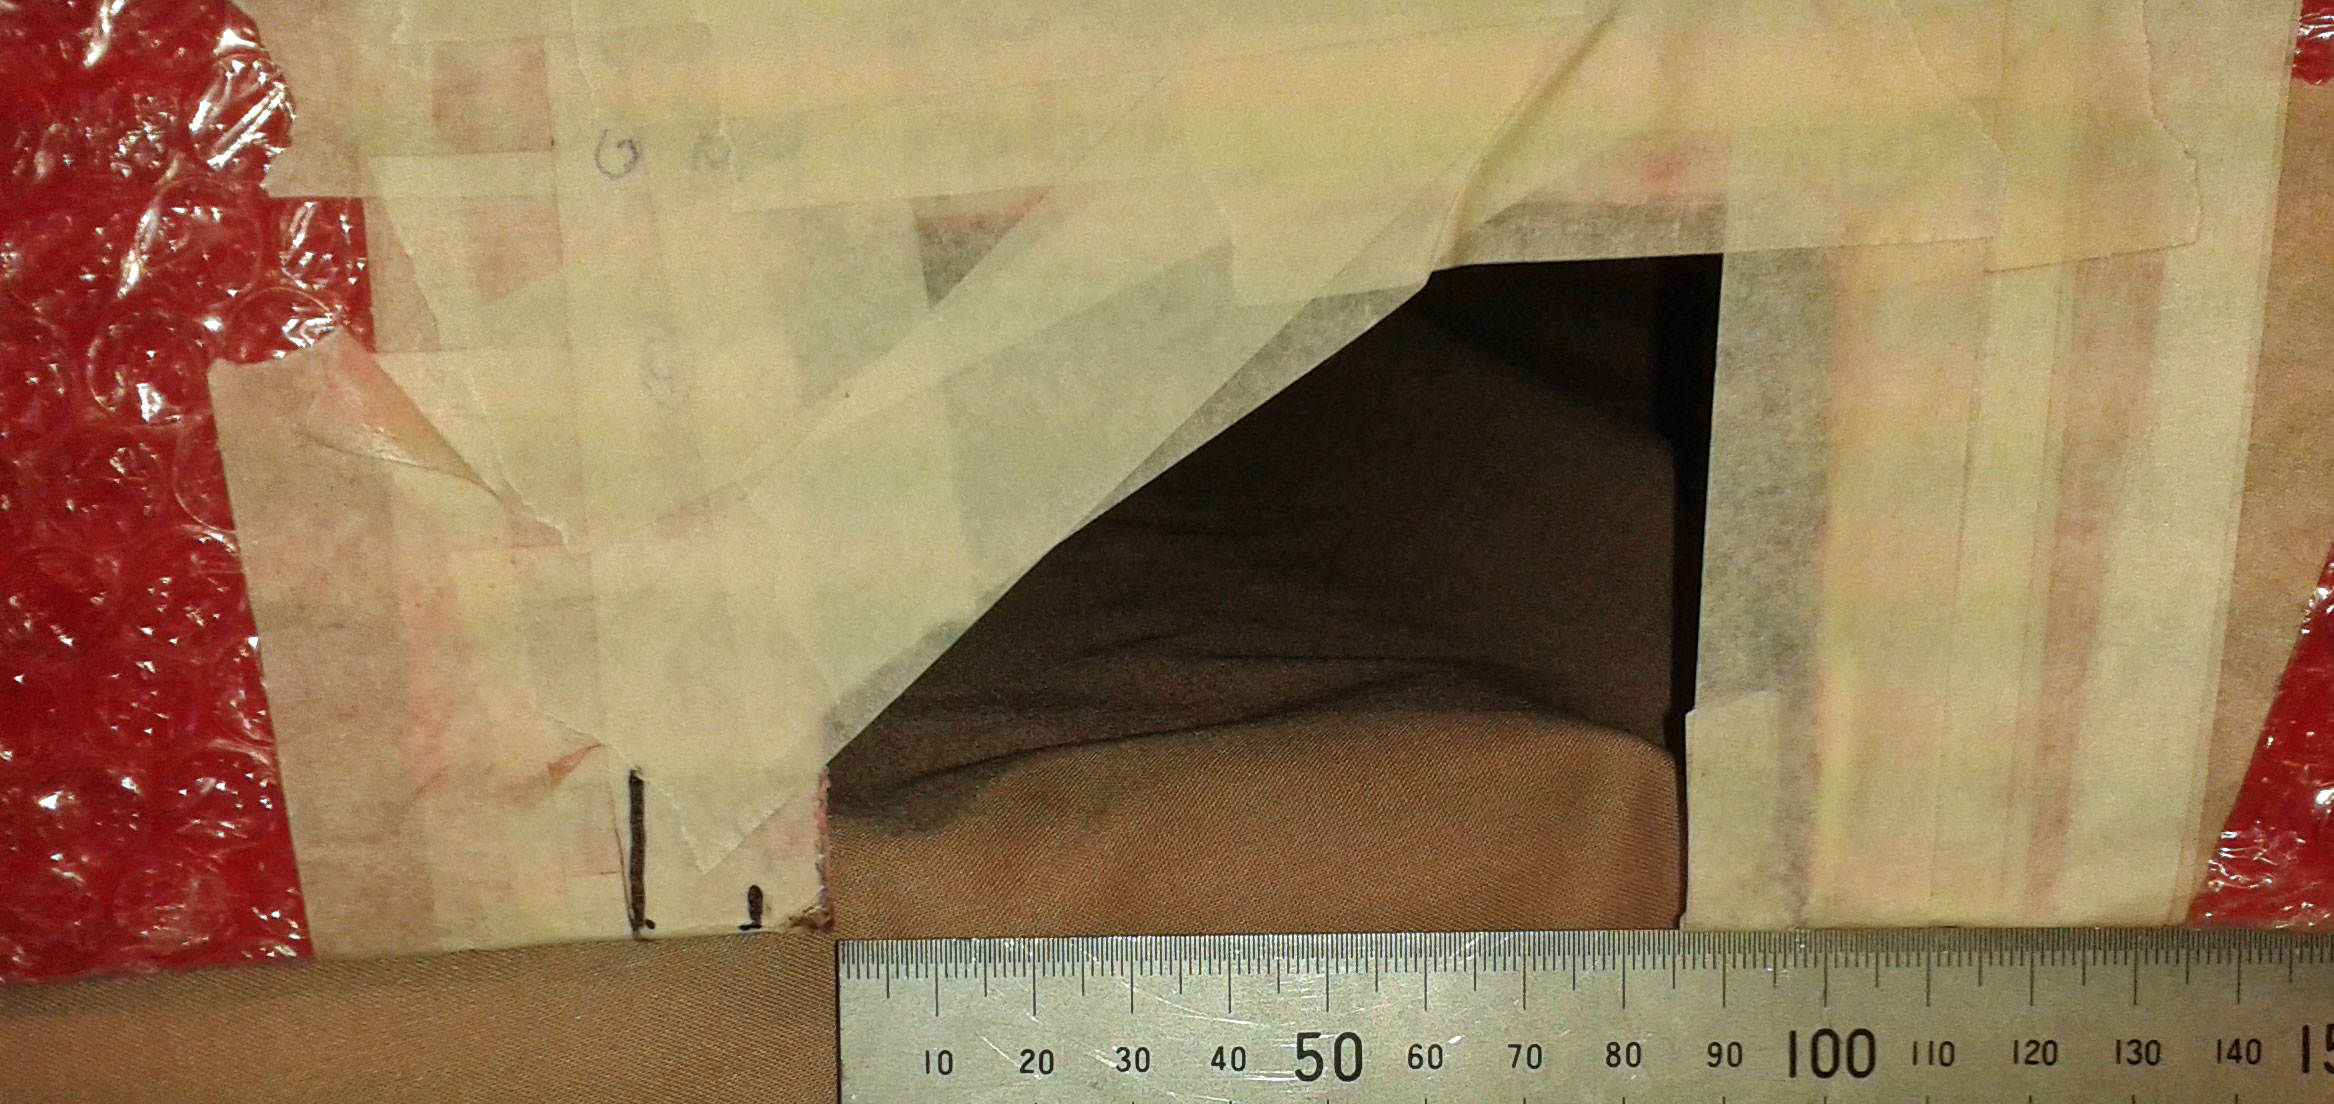 I've just ended up with some additional ventilation for my tank  |
|
|
|
Post by Toed64 on Mar 21, 2015 23:22:13 GMT
Edge trim is marvellous stuff!
|
|
|
|
Post by pincherrn on Mar 22, 2015 12:32:54 GMT
Missed your updates. Yes difficult job to cut the rear cover. Point to note for MEV maybe. Weather is getting better, big last push to a summer drive. It is another one of those things we all have to do so it would be nice if MEV would make the cutouts as part of the moulding. I think the floors should come pre-cut and drilled like the US version. We all have to do them. Colin |
|
|
|
Post by mawdo81 on Mar 22, 2015 15:29:50 GMT
I suppose there's a balance to be had between keeping costs down and the build involved v adding manufacturing cost and the build becoming a mechano set.
No one can please everyone all the time.
|
|
|
|
Post by pincherrn on Mar 23, 2015 9:17:51 GMT
I just think things that are the same on everybody's build could be done at the kit production stage. It doesn't affect the individualism of the car. When you see what Kevin and Warren are doing in the States with extra brackets for mirrors and bodywork too. It just makes things less fiddly and less room for errors. It could save people a lot of time and possibly money.
|
|
|
|
Post by miket on Mar 23, 2015 17:53:18 GMT
Today I was aiming to get the fuel tank cover to a stage where I could go on to sort out some mounting brackets and know where I stand on routing fuel hoses (i.e. gap sizes).
I want to be consistent in edge-trimming my f/glass so had my first ever attempt at using knock on trim. On sideways corners trimmed out the metal bits and some of the plastic from the interior-angle's side of the trim to make it easier. Tapped it on with a pin hammer and closed the trim's 'jaws' with pliers.
On sharp corners where the trim needed to go back on itself open-side-inwards, the radius I wanted for the suspension cut-outs made the trim flare out. So I ended up using a separate piece for each of the cut-outs and settled for having butt joints there - given that their pretty well hidden away. Any tips for doing this bend properly welcomed.
I guess with some planning ahead any cuts made in the f/g could be done with a wider radius, but I've taken way to much f/g out already to change them now!
I don't think I'll PU the cover's trim on as it's not for the IVA and has the weight of the cover to keep it on.
As noted elsewhere - the f/g thickness varies from 2.6mm to 5.8mm, but the trim coped without having to sand down any thicker parts.
I had a quick/very-rough measure to see how much edging trim all the f/g panels would need to do all their edges and it came out at about 17 to 18 mtrs - ouch. ... and then there's the IVA needs re. other sharp bits. I'll have to do a careful measure and see if that makes it look cheaper.
I need to clean masking tape 'gum' off the f/g - I'm presuming that f/g withstands petrol and hence a rub with white spirit wouldn't harm the finish ... but if anyone knows of anything not to clean f/g with (other than abrasives!) please shout.
The other thing I should mention for future builders is that the 2 humps on the tank cover take quite a pounding as the cover's moved around and worked on so it's worth protecting them well as soon as you take delivery - bubble wrap just doesn't cut it.
I'd better start thinking about an IVA-friendly heatshield/drips-away-from-exhaust for under the tank too. I've just read IVA 3A again and can't really see that one's an explicit requirement, so it seems the need has been inferred at some Centres - either way I'd better do something.
The aim seems to be to minimise risk of fuel drips on heat/exhaust so I'm thinking perhaps a T shaped sheet with the head of the T at the rear to cover any rear-silencer options and the stem of the T running front-to-back which can then avoid all the higher parts of the sub-frame and not need panel-beating. I'd bend the front edge upwards and the rest a small drip-strip bent downwards. Any guidance welcomed.
|
|
|
|
Post by miket on Mar 30, 2015 17:07:13 GMT
Back to the Exo after a diversion to fix the pressure washer's oil leak - why does everything break at the same time.
Today I just knocked up brackets to fasten the fuel tank cover on and riveted them to the chassis.
Next step is to drill the tank cover... A metal bolt directly up against the grp hole-sides and subject to vibration sounds like a risk of cracks or enlargement? ... I don't remember anyone referencing it, but do people put some sort of grommet in the grp panels' holes first or take any other precautions?
|
|
|
|
Post by miket on Apr 16, 2015 14:13:39 GMT
Fuel tank and GRP cover mountings now completed so as to see what room I'd been able to keep for the flexible hoses to sneak up the inside of the GRP-front bulkhead above the tranny tunnel ... no chance still - the gap's too small to allow for a flexible fuel hose and some protection for it.
A look at the tank's front edge from above looks like there's loads of spare metal to remove, but the underside shows there's only a few mm to the seam - so I bottled-out of bending or cutting away the tank edge and opted to redirect the copper fuel lines to point off to the side. I'll put on the flexible hose and then work out how best to secure the joints so they're not floating.
So for any future builders using (at least a) Mk1 tank the MEV-way-round, I strongly recommend taking or pointing the rear end of your copper lines off to the side, allowing the flexible hoses on them to then run through the triangle formed by the front tank mounting bracket.
I'd originally put the copper lines vertically at the back above the tunnel because I'd seen it on a picture of a kit car magazine's Exocet build ... not sure what they did to get it to work later! In fact, similarly, I'd earlier put an exhaust mounting bracket under the floor whilst the chassis was off as shown in their article... useless and just in the way now.
To make room to work I had to slightly lift the rear end of the chassis off the subframe ... always remember to undo the brake splitter joint first! ... me?, no 'course I didn't make that mistake. Ahem.
Next; forcing fuel hoses over flared copper whilst doing my back in leaning over. I'm presuming there's no advantage in having any more copper/rubber overlap then is needed to fit a clip on, so please shout if you know otherwise.
And I presume the clips to prevent the joint of copper/rubber from 'floating' can be on the copper or the rubber hose?
|
|
|
|
Post by miket on May 3, 2015 9:11:11 GMT
Back to the Exo at last.
Started to fabricate the fuel tank drip-catching / heat-shield sometime-IVA-requirment thing out of 1mm alloy - fairly easy to work with just standard tools and doesn't look too bad so far.
I'd intended to keep it simple, but I'm rapidly heading towards something looking suspiciously like a proper (shallow) drip-tray, so I've started thinking about putting a flexible drain hose from it. Currently thinking about using a rivnut to be the hole and provide a short neck to clip a drain hose on to, but I need to look for a smallish bore hose with a 90 degree elbow in it as space is tight at the lowest part of the tray. Then I can run the drain tube off to the side well away from exhaust.
|
|
|
|
Post by miket on May 6, 2015 18:26:32 GMT
Moved back to doing the tranny tunnel today. A while back I trimmed off the bits that stopped it sitting far enough forward and made the hole for the gear lever; today was all about getting it fixed down.
Based on guidance received earlier (thanks) and other reading, I positioned the tunnel as far forward as I could without a hole appearing between the ally and the chassis-permanent tunnel on the L side. Put a rivnut in at the rear of the tunnel on the L & R so as to have a fixed and repeatable point to work from. Drilled the tunnel then marked thru to the chassis rail - and on subsequent holes also elongated the ally holes front-to-back to allow a little play.
Then rivnutted (?!) the rest of the R side to see what would need to be done to the nick-and-bend in the L side. With the R side fixed down I pulled the fixed tunnel over to the Left whilst pressing down on the tunnel to get the tunnel to meet the chassis rail on the L side. This showed that I needed to trim a bit more from the gear lever hole to allow it to move further left and that the tunnel needed bending more at the nick-and-bend on the L side - held the L side of the tunnel by the ends and pressed the nick-and-bend down over a metal bar covered in a towel - seemed to do the trick.
Marked and rivnutted the front part of the L side, fastened it down and then marked and rivnutted the rear part of the L side.
Next I think I'll get the separate bulkhead panels to fit and then work out where I can bend panel edges to allow some overlap at joins ... could be tricky - all tips welcomed.
|
|
|
|
Post by miket on May 24, 2015 14:00:51 GMT
Back to trying to fit the L & R footwell panels. It seems that the chassis can't actually receive bent flat panels in a way that lets the bent bottom edges follow the bottom chassis rails for consistent fixing along the bottom edge. Rather the chassis side rails push the panels towards the rear of the car so that the bent lip starts to diverge from the bottom chassis rail. Either I'm doing it wrong or people only fix the panels where there's good contact? I've got a further issue with the larger panel:- 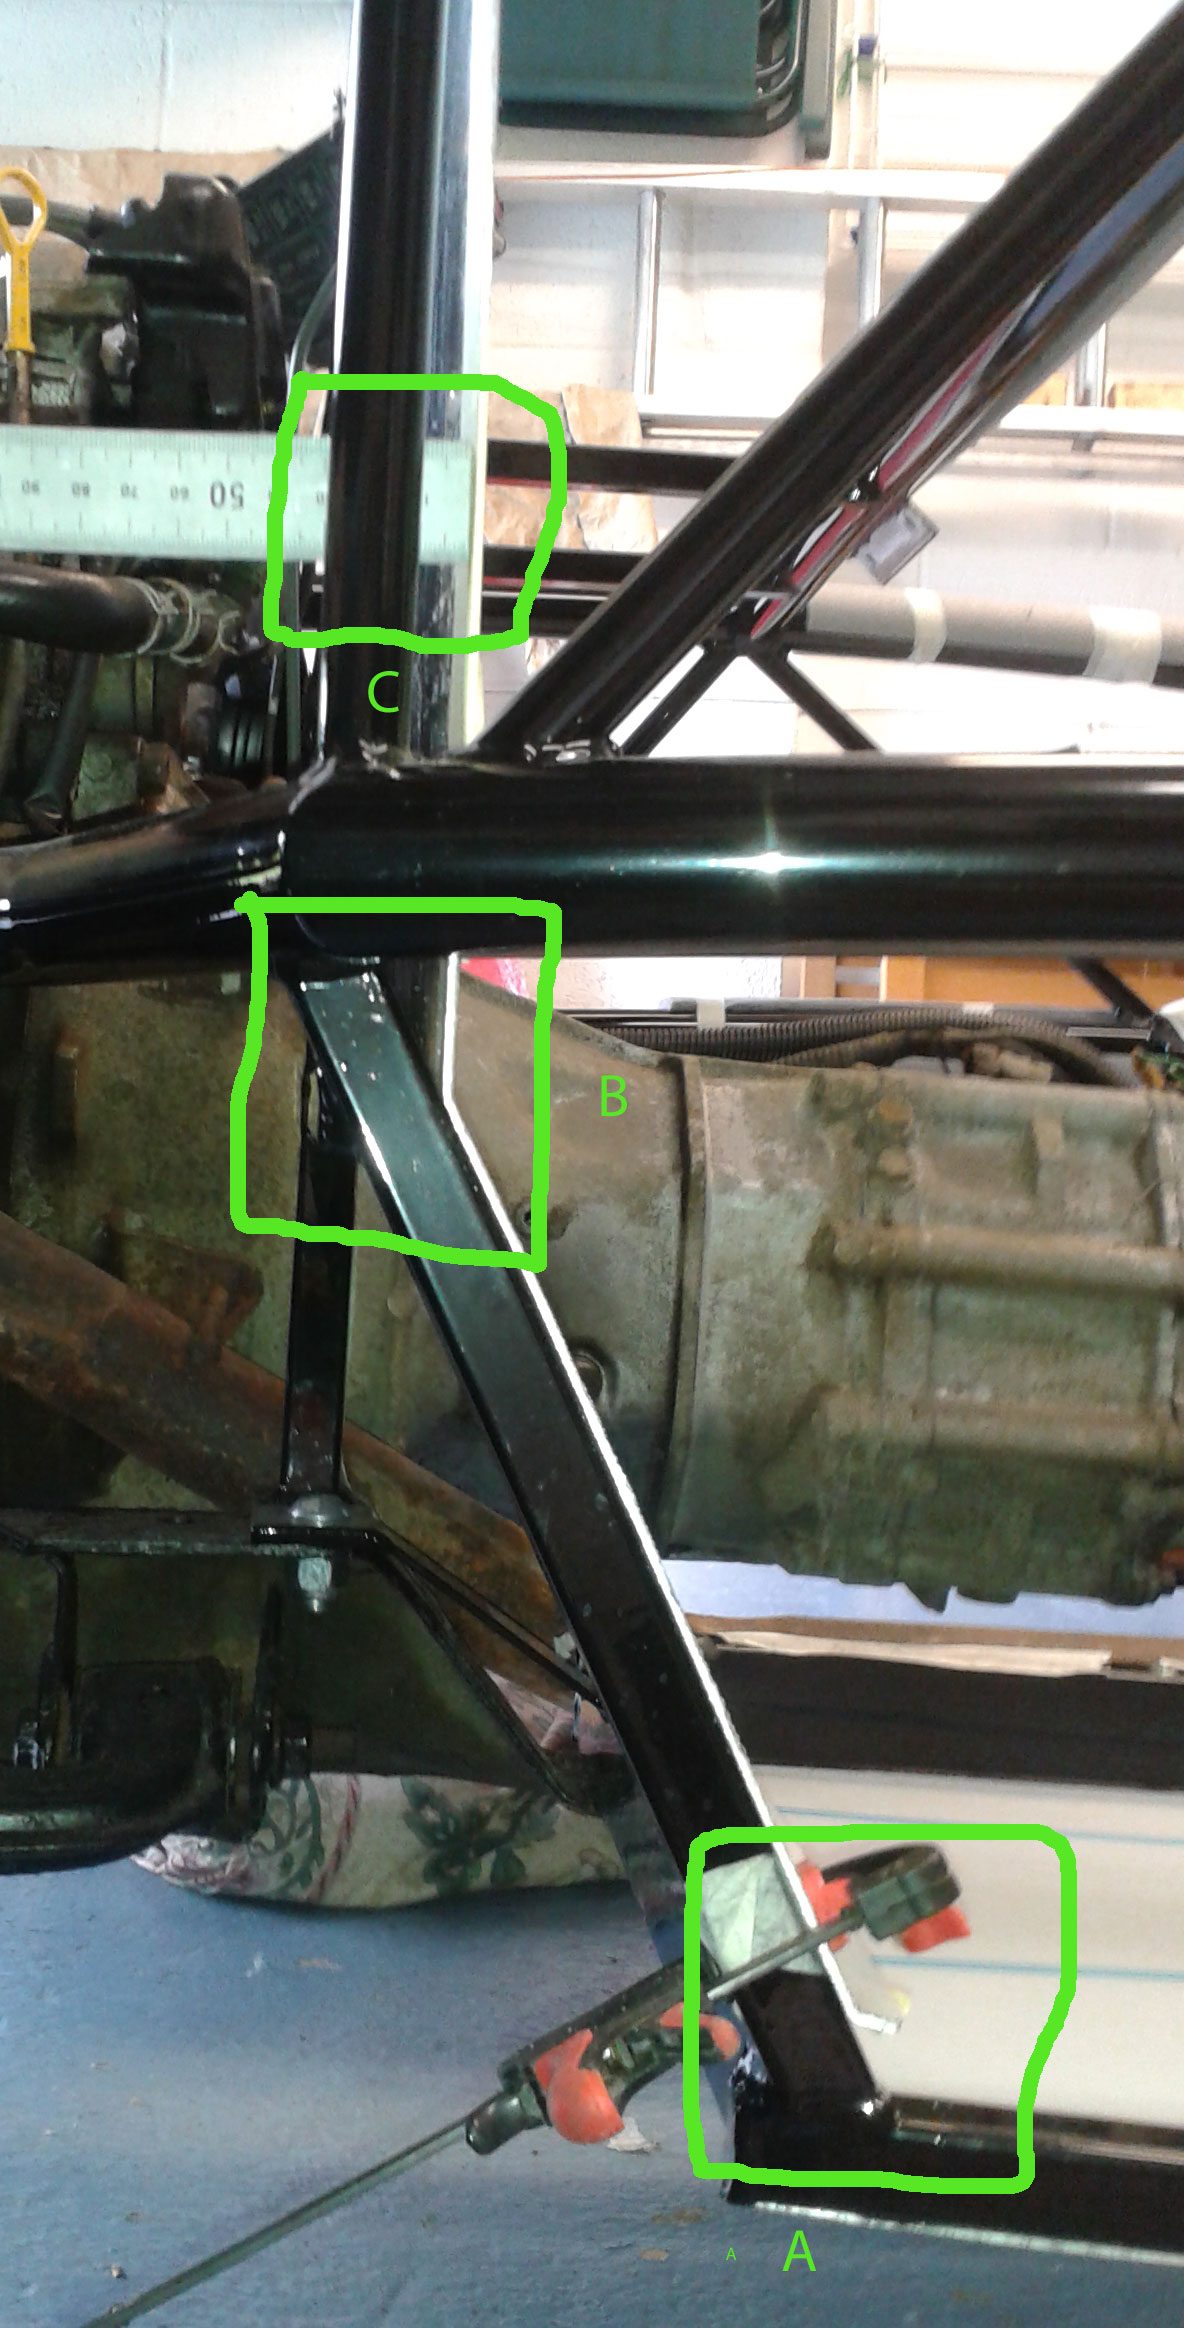 With the panel's bottom bent lip on the bottom chassis rail (A) and the panel following the diagonal chassis square section up to (B), the panel goes vertical and leaves a 10 mm gap between the vertical chassis round section and the panel (C). Given that the entire side is open at that level I guess it has no material affect, but is it normal and if so what have people done to make it look prettier? |
|
|
|
Post by miket on Jun 1, 2015 16:32:30 GMT
Further work on the Lhs firewall panel today. There's not enough length (top to bottom) in the panel to fit nicely to the top chassis rail and still allow the bottom lip of the panel to be fastened to the top face of the bottom chassis rail. So I've moved the panel up a bit, straightened out the lip at the bottom and will have to secure the bottom edge with some angle alloy or similar.
Moving the panel up a little helped with the gap (C) above but didn't close it. So I ended up bending the outer edge of the panel forward so that it'll meet the vertical round section rail and look tidier.
Then spent some time measuring several times for how much I need to cut off the front edge of the tranny tunnel to mate up to the firewall panel ... then stepped away for some more measuring tomorrow. Chicken? Me? Maybe.
|
|
|
|
Post by Toed64 on Jun 1, 2015 17:25:09 GMT
I've just been out to look at mine.
A - the lip riveted down to the top surface of the bottom tube.
B - fairly similar
C - I do have a gap between the panel and the round section tube, but I put some edge trim on the panel and squirted a bit of PU between the panel and tube and clamped up till it dried.
Just thinking... have you riveted up yet? If not, it might be cleaner to leave the gap at the top of the bulkhead where the bonnet covers it up. If it's too short, you could angle bracket off the lower edge of the frame top tube to mount the bulkhead panel.
Good luck.
|
|
|
|
Post by miket on Jun 2, 2015 6:32:37 GMT
Thanks for the info from yours - appreciated. Good idea about working up from the more visible lower join - I nearly followed my 2nd attempted solution that (nearly) works rather than stepping back and considering the overall best solution.
|
|


