|
|
Post by edvb on Jan 5, 2014 14:29:16 GMT
Hi Erik
I also did not want to use the rivnuts but had to slide the bulkhead past the rivnut flushed in the frame in order to fasten from the inside. I had no other choice so that is what I had to do. Mine are either stainless or Monel and have at least .250 of threads. They are hard to find but have ribbed edges to prevent turning and are heavy duty construction.
As for getting under the bonnet for maintenance the main part is the brake reservoir as there is only one spot that it will fit well under the bonnet. That will be your main clearance issue so locating and installing that early on will help on the location of the other components needed to fit under the bonnet.
Roger also ended up very close to where I have my brake reservoir mounted.
It looks like you are moving right along. Keep up the good work.
Edward
|
|
|
|
Post by erik on Jan 10, 2014 21:07:14 GMT
|
|
|
|
Post by roger32849 on Jan 11, 2014 13:27:05 GMT
Erik
I have been very busy getting my project through the inspection system and have not had much time to dedicate to following other builds. You have made very good progress so far and your build is really taking shape. I still like your seat choice and I took your advice and I looked at the Kreidler kart. It is amazing to have a street legal go kart but I chose not to buy the Kreidler seat but I did change to a Fiberglas Tillett style semi recumbent type.
I do have a question about the location you chose to mount the battery and stock ignition switch. What prompted you to place them on the rear engine support rail beneath the tank cover. The reason I am asking is because there is a potential for fuel vapor from the tank vent building up under the cover. Any loose connection on the battery or switch might result in a rather unpleasant reaction... Not to mention the battery in close or direct contact with the fuel tank. If you check the engine connections on the stock harness they are all sealed. This not only prevents intrusion of contaminants it also reduces potential arcing from loose connections. If you are comfortable with it, then great!! Building a kit vehicle gives a great deal of latitude in design and component placement and in the end, it is the builders choice. The most difficult part of my build was figuring out what to place where and I am still not 100% satisfied where I "HAD" place certain components.
I have to say your TR1KE is stunning..... And I am sure the Eco-Exo project will equal or surpass your benchmark in the TR1KE. I look forward to seeing your progress and reading your blog. When the weather allows, I will be doing a video or two of my Eco-Exo-R test drive. Good luck with your efforts, I know you will make a masterpiece from the metal and GRP components.
Roger
|
|
|
|
Post by erik on Jan 11, 2014 16:45:26 GMT
Hi Roger! I didn't go for the Tillet because track seats don't fit me. The width is about 1" too narrow for me. The Kreidler has an universal seat which fit european size. I think the track seats are intended for the little people. The road seat brings comfort and easy mounting rails attachement. Good thing about the tank vent. I haven't noticed any vapour coming from the tank to date and the cover is close to an open construction and I doubt vapour under the cover is something to deal with at all. On the an400 the tank is fully covered in plastics and in theory the vapour could go to the dash area and cause ignition. Because of this I doubt if it makes sense to place the hardware far away from the tank or against it in a semi open cover. But I need to isolate wiring from metal as good as it gets. Fuel spilling on to the fuel catch cover could be redirected to the ground surface. I am reconsidering to add some glass cloth+resin on the tank for additional isolation on the batterie top side. It's a job to do when the chasis is to the powder coater. Trimming serveal items will be done later too. On my Tr1ke I build the loom after coating the chasis which bit me. i wasn't able to place solenoids profesionally without drilling on the chasis and get rust later. I'll make the loom on the Exo-r before coating and may have to weld more fixing points to the chasis. Too bad the 1st build is never perfect but the forum helps a lot to understand what to expect and deal with it in advance. Not sure if all the hardware under the cover will obstruct the loom routing. If lucky I could cancell out a box and bottom sheet behind the seat floor which really makes a clean appearance. It takes several extra miles to get me there but on the tR1ke project it showed value could be increased by 200% of money spend in it. on the otherside I try to make shortcuts on the seat mounts, An400 switches etc to save some time, complexity and cash. thx for liking my projects  |
|
|
|
Post by roger32849 on Jan 11, 2014 21:32:51 GMT
Erik
When I bought the Kart seat I chose a sturdy heavy XXL Tillett clone. I am not a thin person and it fits me comfortably, but still, it is about choices. I like the style of yours and love the fit of mine. It is wide, low and it fits on the adjustment rails like it was made for the chassis.
I went to an inspection station today to see when I could have my motorcycles inspected. The 2014 inspection cycle starts around the 20th of January, so will be getting everything done before the riding season. Including the Eco-Exo-R. Yes, even though it was inspected for the assignment of the VIN it still needs the annual walk around by a mechanic that has the computerized inspection equipment. Not a huge deal. It is more of a safety check... Lights, brakes, suspension, tires and that is about it on a motorcycle. It has nothing to do with the certification process, ..... That is a one time thing.
Monday is to be a cold day, but sunny and dry. I will be heading down the road and getting the trike up to speed. Just because it will go 65 MPH + doesn't mean I will be putting the pedal to the medal. Mondays ride will be more of a shakedown to see how it handles at different speeds on a variety of roads... Turns, hills, straight and so on. I will cruise at about 55 MPH and see what happens.
Happy building on your Eco-Exo-R.
Roger
Worcester, Massachusetts
|
|
|
|
Post by erik on Jan 11, 2014 22:58:30 GMT
Over here we are lucky not having an annual checkup on motorbikes and trikes. Doesn't mean they need to be in good condition but that's up to the owner. Perhaps this makes me motivated to raise the build qty because it is for my own safety.
Take great care on your test drives. Small steps...
for this moment the llist is quite short. Need to place a batterie cut off switch, mirrors and place the An400 steer on the steering column cover stalk openings (somehow). Need to extend the throttle pedal leverage. I haven't planned much more for now.
|
|
|
|
Post by edvb on Jan 12, 2014 0:46:51 GMT
Looking good Erik! You sure move fast. I like your headlights and turn signal combo. I would of liked to have mine smaller but what I have are the smallest legal size here in WI at 4.5" wide. Once the loom is cut open it is pretty easy to work with. All the colors are coded so it is pretty easy to move things around. Once done rewrapping with silicone tape make a nice and neat tidy bundle. Getting another used loom to use for donor parts and wire helped Roger and I quite a bit in getting our looms ship shape. Roger liked a regular switch instead of a pressure switch for the brake lights. I thought that also was a great idea and incorporated one in mine. Here is what that looks like in case you want to go the same route. It is cheaper and hopefully more reliable. Keep up the good work! Edward  IMG_1815 IMG_1815 by evanbelkom, on Flickr |
|
|
|
Post by erik on Jan 13, 2014 21:09:42 GMT
Hi Edward, Thanks for liking my progress. Too bad these lights cannot be used in the US. They look like they have been designed for this kit. I think I'll be using the pressure brake switch like I did on my tr1ke.I feel very comfortable with that route. Added the batterie cut off switch and relocated the lights. It took me a while to word why I disliked the original position but to me it's too similar like Lomax/ 2CV/ Burton old fashioned style which doesn't match the Exo design IMO. Right now the light units and mirrors are a great combo. Note most brackets in this project have been welded in strange angles. many have been angled and rotated in 3 axis which takes up a lot of time and patience. br, Erik 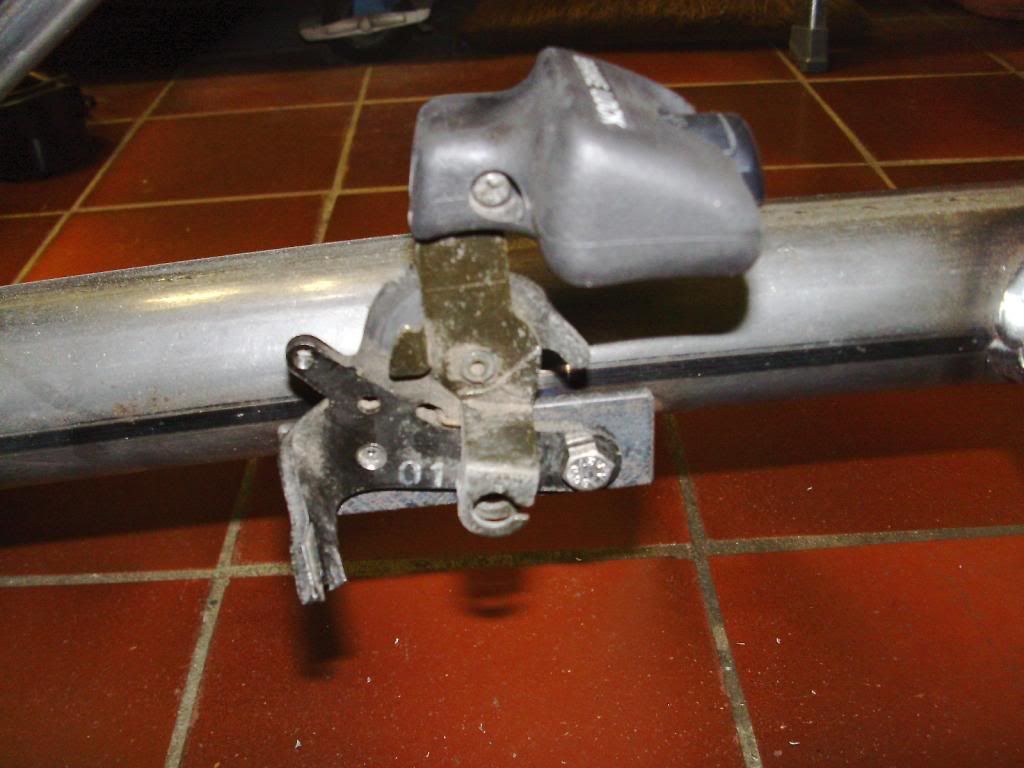 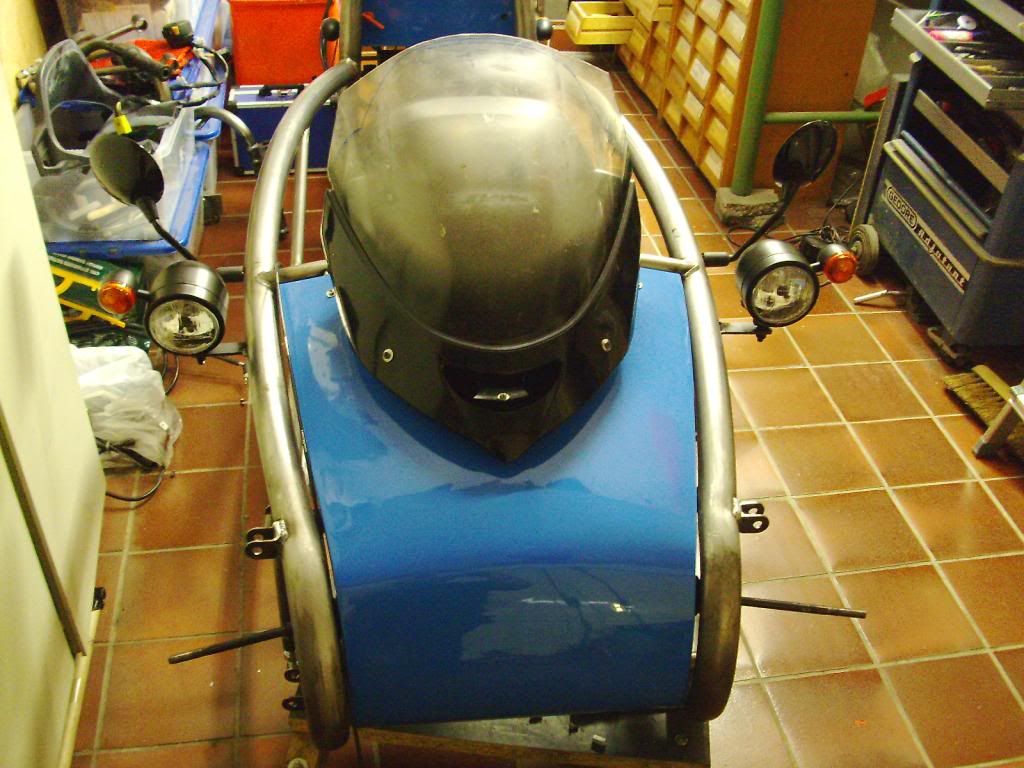 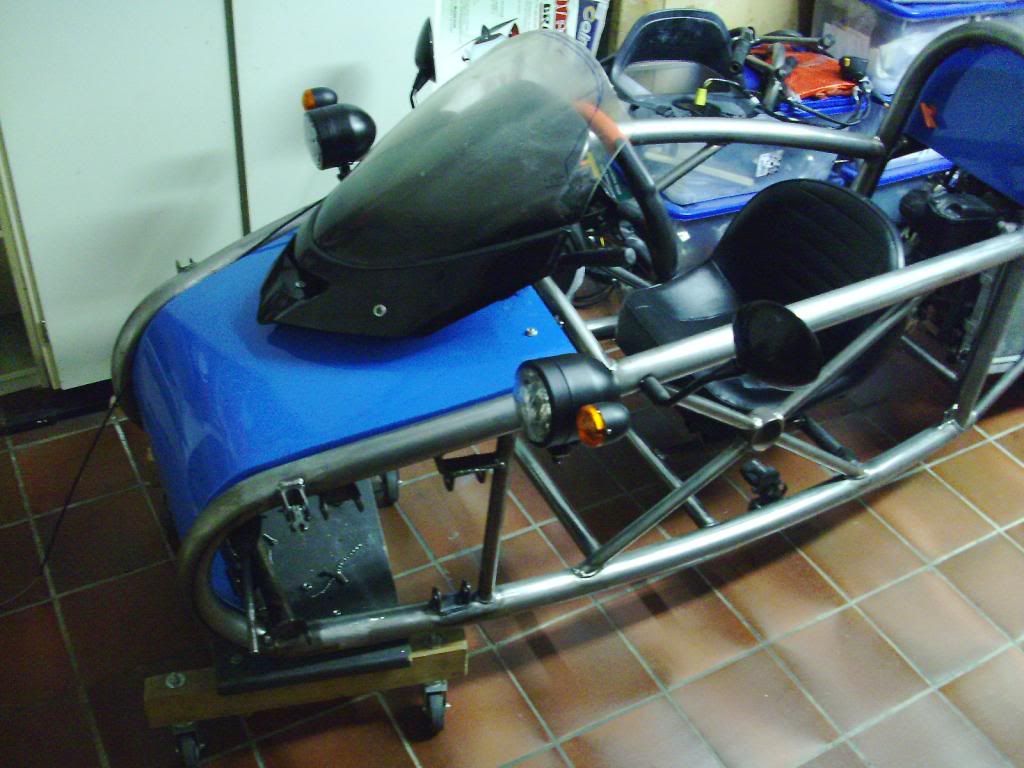 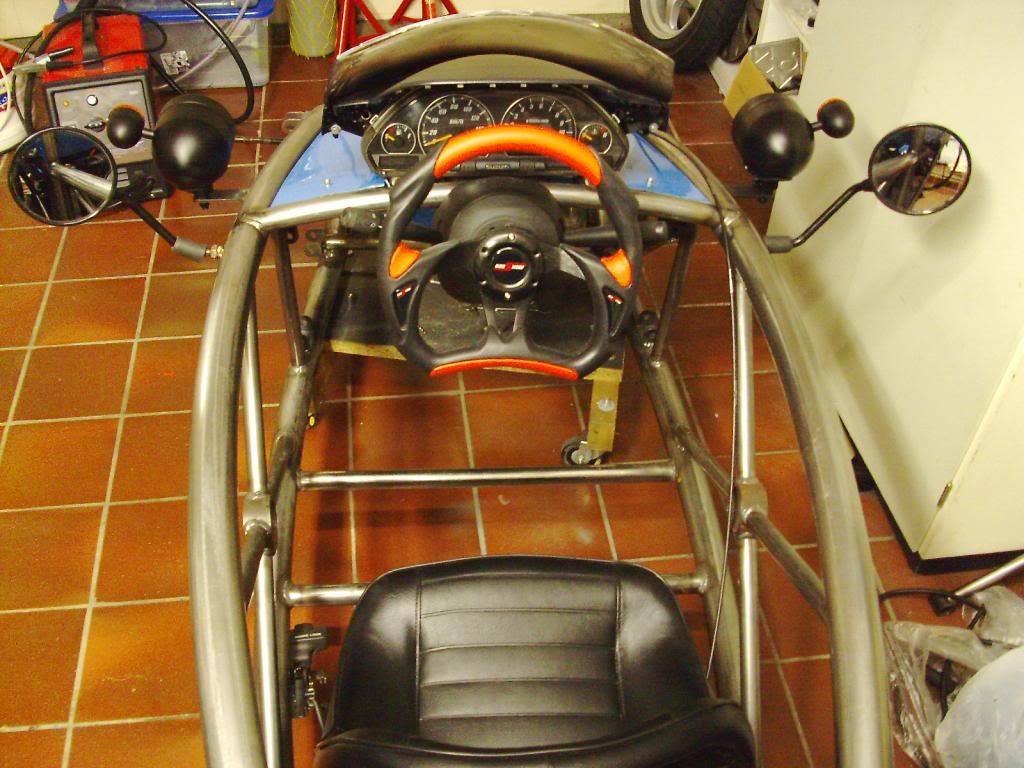 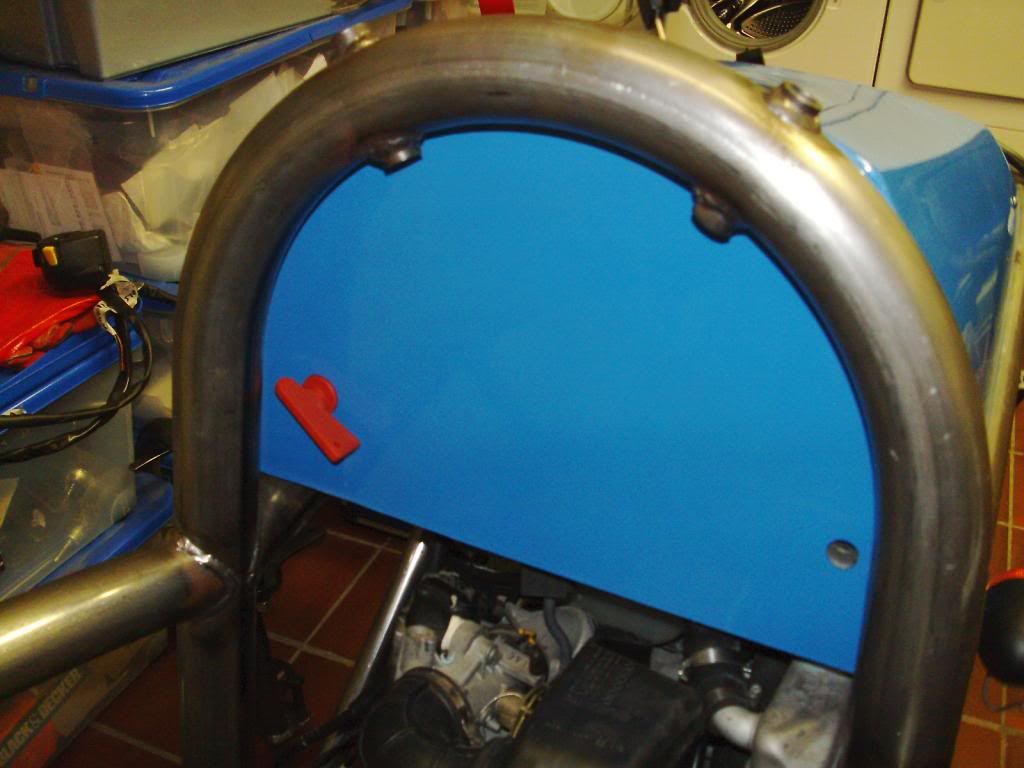 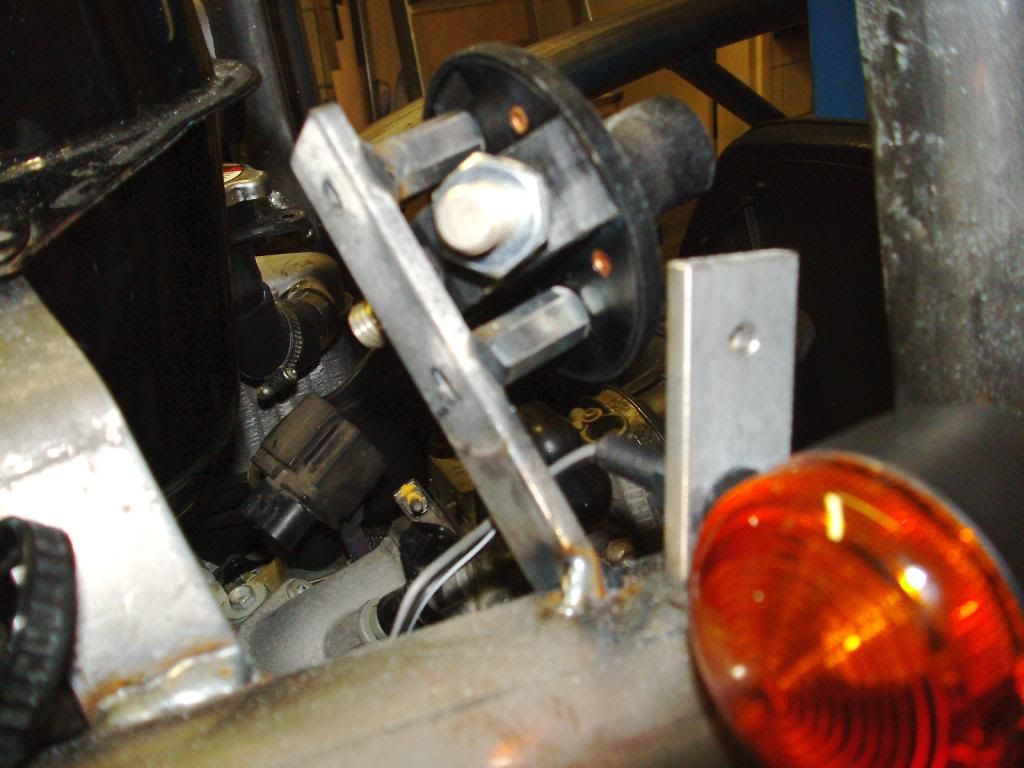 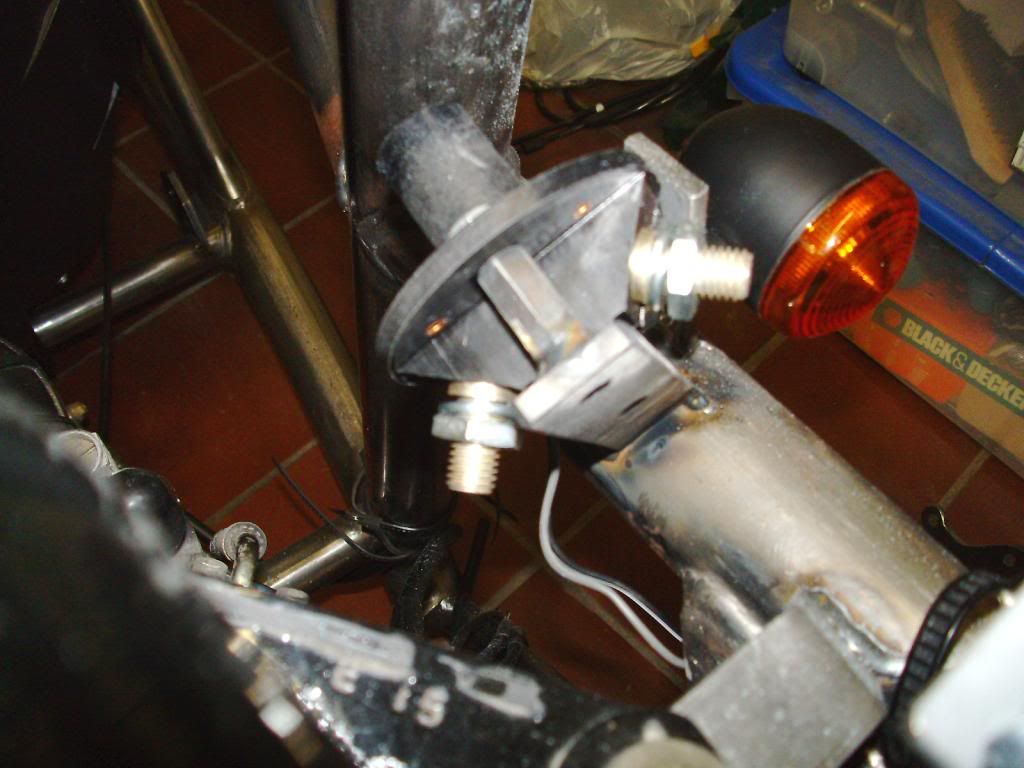 |
|
|
|
Post by edvb on Jan 13, 2014 22:00:47 GMT
Looking good!
It is funny but that was where my lights were mounted in the first place. After installing the front end a friend and I moved them back and forth and I think Roger also checked both positions. I ended up in front close to the body as we have different rules here. We all thought that it would be less glare off the bonnet doing it that and we all thought it looked better overall. Time will tell when it is all done.
The brake switch should work fine either way but this was easy to install because I already had the tab so I put it to good use.
You should be done in no time if you keep this up!
Edward
|
|
|
|
Post by erik on Jan 15, 2014 20:25:53 GMT
Hi Edwin, On Scott's Exo and Exo-r versions different frontlight locations passed MVSA. IMO one needs to have solid arguments to modify original concept design. An other reason not chosing the original -r location is at Scotts version the indicator is barely insight at side view. The front fender blocks the indicator lens quite a bit. For this reason I angled the indicator stalks upwards to raise the lens and moved the light unit backwards (= wider and higher on the chasis tube). I feel more comfortable in traffic crossings like this and I feel the over all look is great. I do not think there will be more glare on the bonnet as on Scott's versions. The front bonnet is very short to show much reflexion. Progress is getting on low pace now. Yesterday removed the stalks and added a piece of An400 handle bar to the chasis. Because of the strange angles I had to set the trimmed bar I didn't chamfer the trimmed bar end to match the tube diameter. I tack welded in a few spots and made a wide bead to cover the seam on the top side. Too bad pics don't show the real finish of my welds. they don't look too bad in real  . Final welding in future. With the bar in place I set the switches in best position, drilled locking holes and cut of exess bar at the and. When assembled it looks not bad at all and it really looks like a trike-bike instead of a trike-car which isn't my cup of tea like my tR1ke. Pointing the bar upwards like the stalks creates good step in acces and operating the switches when leaning the forearm on the top chasis tube feels natural and relaxed. Visibility on the switches and prints seems prio #1 for approval so had to be creative The brake light unit arrived (thx to Scott helping to source these!) and look great. I ordered the rear reflector dec 29. and just requested an order status of this ebay seller. Not in a hurry but I like to have my items as expected. I just ordered a simple 30cc Brembo brake fluid bike reservoir with horizontal flange. I want to place this reservoir insight. For dutch leglisation the reservoir needs to be in sight or has to have a fluid level sensor inside and this can be a pain to solve because the female connector+wire isn't easy to get. When the reservoir is insight it is easier to see the level+color and easier maintenance. I guess an extended nut will be wedled on top of the tube in front of the dash where the right stalk used to be. need to add a strip for the front wheel reflectors and from this point I am close to disassemble the front end and tweak the throttle pedal throw once more. I found the leverage too big to operate comfortably and now I can measure the free space I have left between the front bonnet and top of the pedal lever. I am not going to remove the windshield assy before I placed the brake reservoir bracket. This will give me about a week to evaluate the build to find any short comings and get the bolts for the wishbone assembly. Some spacers need to be made on a lathe. By then I guess it is ready to build the loom and brake lines. br, Erik Scott's indicator position side view. 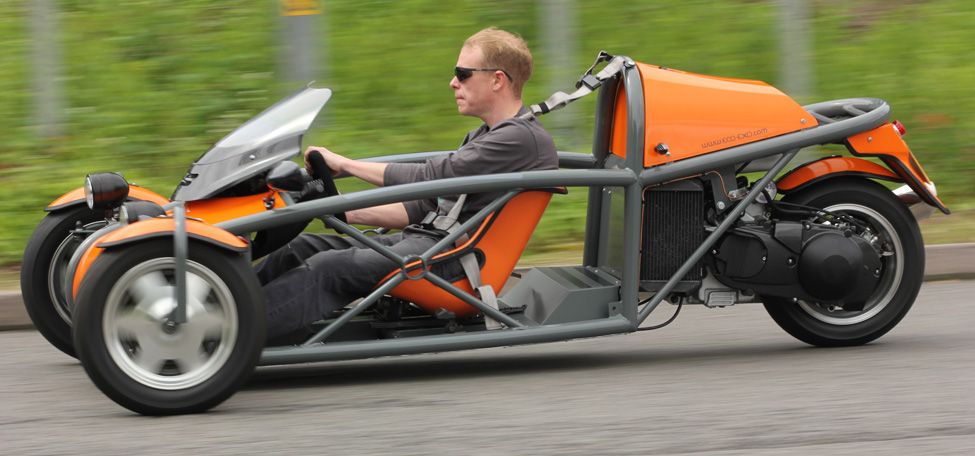 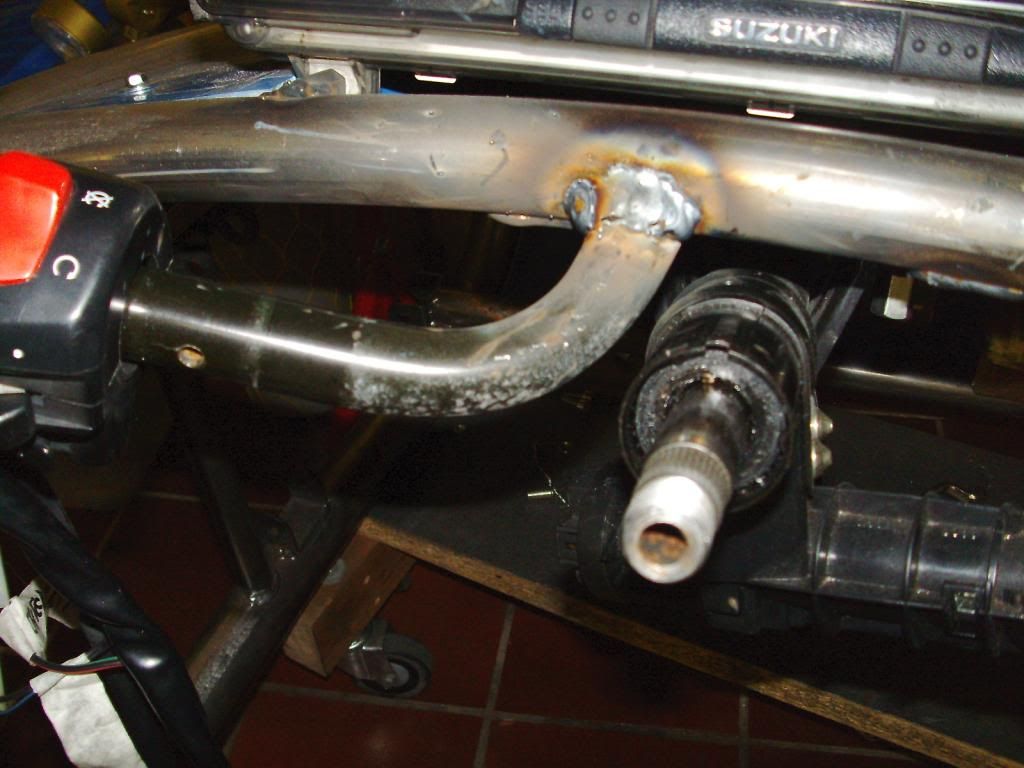 drivers view: 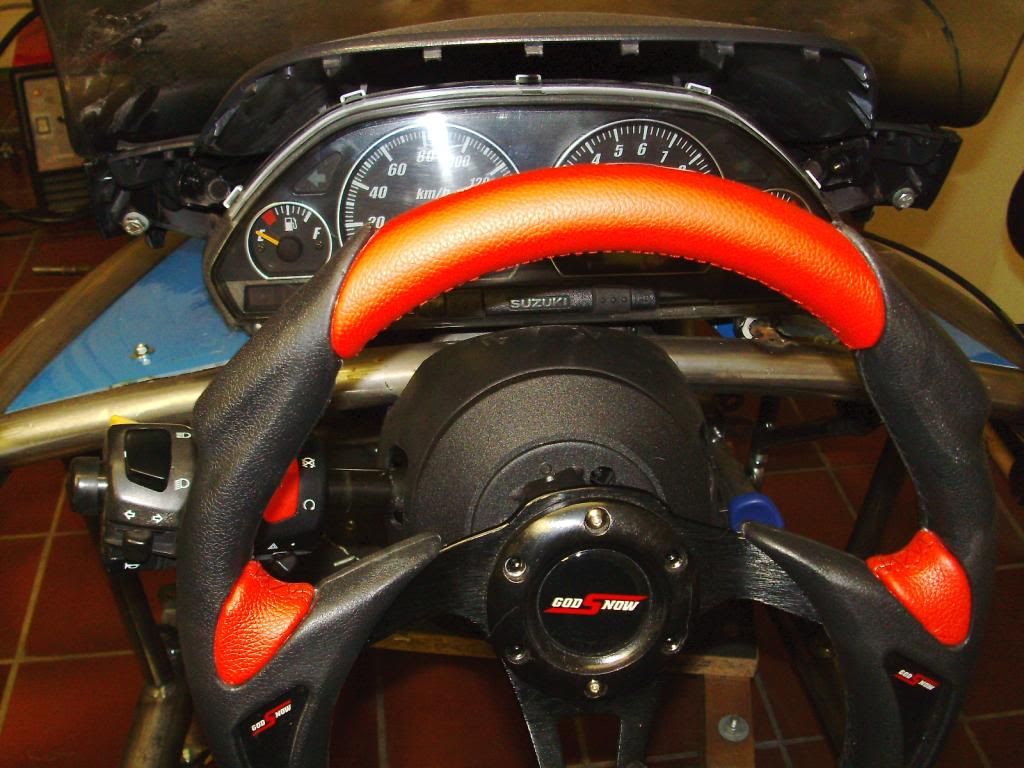 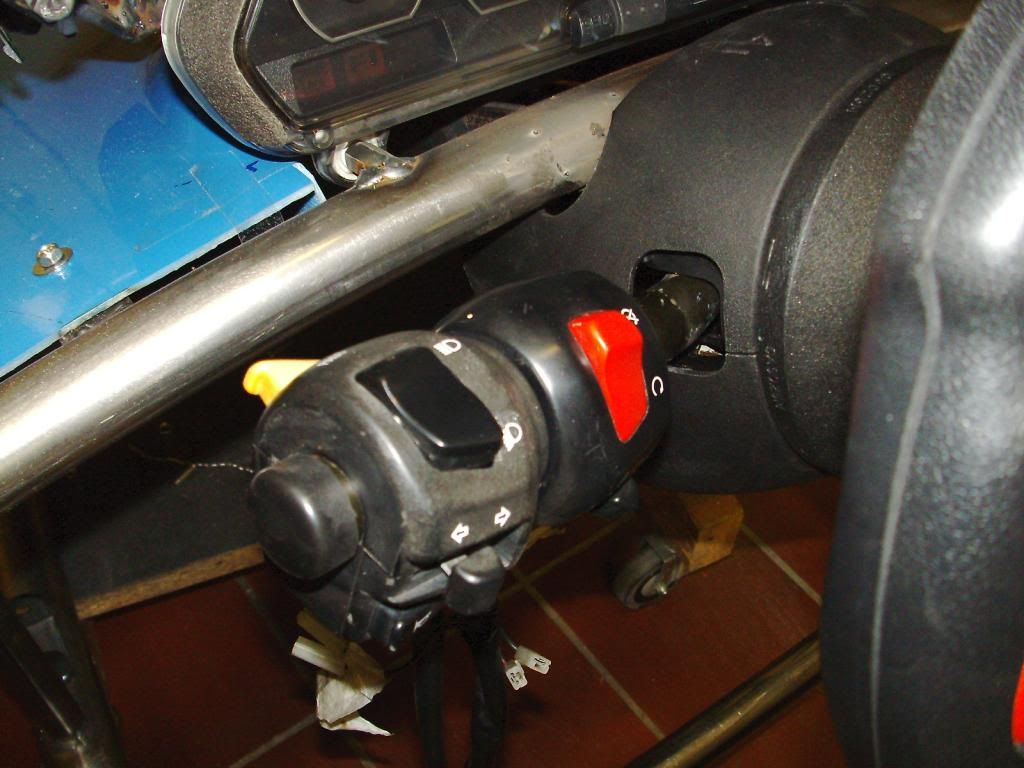 pic of the ordered tail light assy. Note the shape of the plate to be sure you have the same lights if desired (ebay) 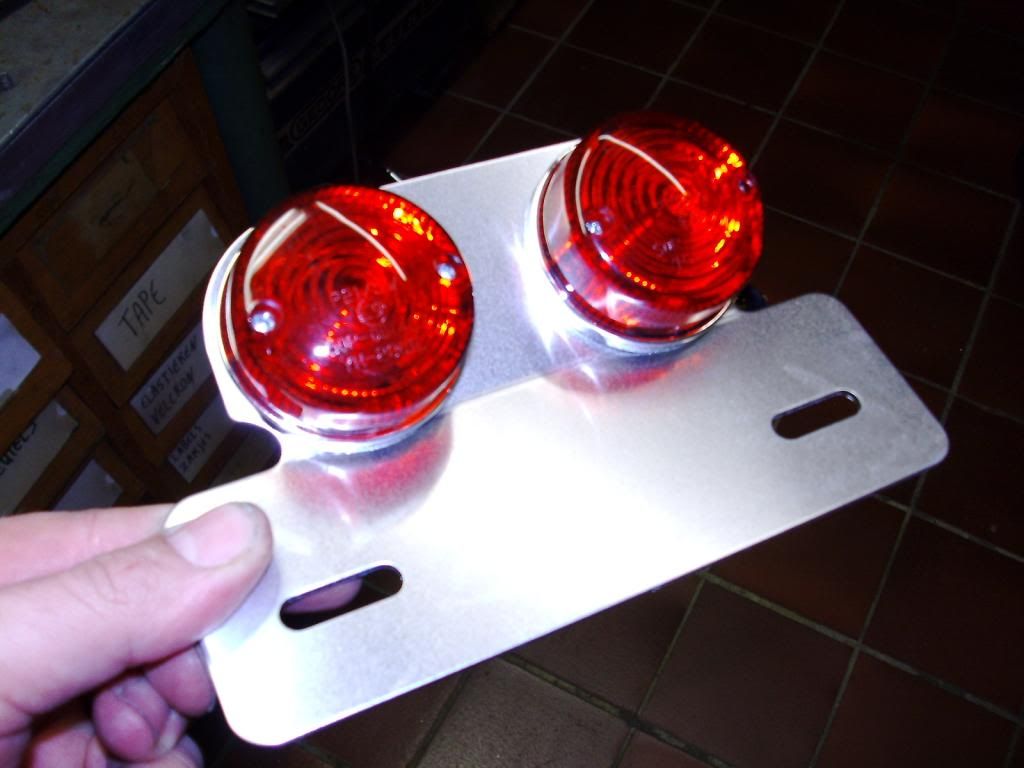 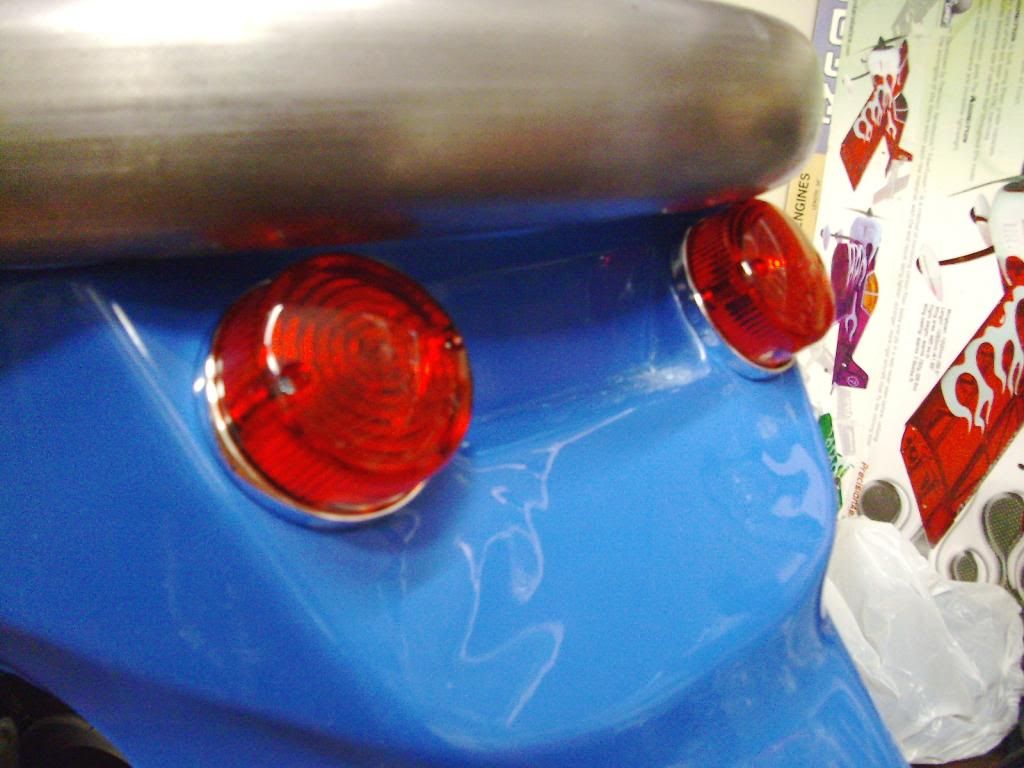 |
|
|
|
Post by edvb on Jan 16, 2014 0:36:25 GMT
Hi Erik
Good call on the front turn signals. From the picture with Scott driving you can see the trike is not level.
Roger and I just discussed his review after driving his about 45 miles. Like I he is also going to find some 14" shocks instead of the 13" that are on Scott's trike. He found out when he was in it the front was lower than the back with him in the seat. That should help with the height of the front turn signals.
Also the way we mounted our turn signals when the trike is done and the correct shocks fitted I will see if you can see the turn signal over the fender. If not I will just fabricate a higher mount to clear the fenders and it will be done.
Yes those are the same taillights I got. I just added the center LED Tail/Stop light that is fully programmable and very bright. Even the State Patrol use these on their motorcycles as the work very well.
Well the good thing is we are all individuals and every Eco Exo R built so far reflects that even more so than the Tr1ke. It is so adaptable to fit everyone's needs that is shown by every build made so far.
Regards
Edward
|
|
|
|
Post by erik on Jan 16, 2014 16:59:51 GMT
Hi Edward, The picture from the Demo-R I posted doesn't show the floor is level or not. In fact, I think the floor is level if not a tad higher at the rear. This is an important detail because if the front is raised or level it may cause a lift at high speed and suffers stability. In worst case the vehicle (like racing cars, speed boats etc) do backflip. Because of this the rear should raised a bit to create a vacuum under the floor. hehe, I'm highly amazed the Exo's build here look all very different. I think I have been very close to the original concept exept some minor changes. Personalli I think if a design is nice one needs to have solid reasons to make big changes. With the lights and switches it took me a while to pin point in words why my changes do make sense and I guess I did a nice job on this project so far. I have been in doubt to change the orange chasis to red but right now I think orange will be awesome and stick with this choice I made very early in the build. Right now I'm pretty much finished with welding on the chasis. I really have to spend some time in the garage sitting and start writing in my notebook how to proceed. There is a change I may forget small details before powder coating and really need to place the build on hold for now until the brake reservoir comes in. when this is mounted and the wishbones pre assembled i guess i'm very close to dissasemble the front part and add the "under the bonnet" hardware. Need to double check the manual pictures too (just in case ) btw, did you integrate the engine stop switch of the an400 in to the Fiat key switch? I am thinking to do this as well as the starter button. if there is anything I missed plz shout. br, Erik |
|
|
|
Post by edvb on Jan 16, 2014 18:32:27 GMT
Hi Erik
I think the main reason for the 14" shocks is that we can get the trike exactly level to maximize ground clearance and with about 1.25" of sag from ride height. This will leave about 2" of travel for compression. I have talked to a few custom shock manufactures that will be building my shocks and all came to the same conclusion on this, and everyone of them prefered the 14" shock as a start point. So at least for me I am going this route.
The stop switch would be easy to incorperate it if needed but with my ignition switch on my steering column I do not think I will need it to pass the inspection as I am on a stable platform. If I do it will be easy to wire in later.
As we are all located in different parts of the world and different riding conditions we all build our trikes to suit our conditions.
As far as the under bonnet hardware I found out early on that I did this first so I could locate all the tabs I needed to be welded on for the relays, horn, stereo, Amp, ECM and other items. Once all that was fitted I could work on the bonnet knowing everything would fit properly. But that was just the way I tackled it on my build.
All that could be bolted on but it was cleaner and rattle free doing the way I did it.
I am getting close to putting everything together this weekend for the test fit so then I can see what still needs to be tweaked a little.
Regards
Edward
|
|
|
|
Post by roger32849 on Jan 16, 2014 18:59:44 GMT
Erik
I have been looking at your build with as much interest as Edward in Wisconsin. One of the things that we all have in common is our own grand design on the build...... From color scheme to how we mount and secure simple things like mirrors or mounts for accessories. Sometimes, simplicity is the best designer and often times simplicity is the most difficult to achieve. Of the three of us, you, me and Edward, mine is probably closest to Scott's MEV design even though I used a 2008 engine. For me, modification of the wiring harness was difficult to do, but not impossible, but it resulted in a simple design of using the Fiat light and signal switch cluster. I preferred to do it this way over the route you chose utilizing the OEM Burgman switches. Believe me, I labored over that decision a long time. I looked very closely at your TR1KE and how you had your switches mounted... It was brilliant. I see you are going the same route again on your Eco-Eco-R build. If this method works for you, great!!!!, as for me, using the Fiat cluster works wonderfuly. I was not required to have a kill switch because a trike is not an unstable platform and it is equipped with the OEM tip over system. What makes a project like this "YOUR OWN" Is doing your own thing like you did with your previous build. While I may not agree with what you do, does not make it wrong.... IT MAKES IT YOURS. I look forward to your progress and if I can help or answer questions please let me know. Happy building.....
Roger
|
|
|
|
Post by erik on Jan 16, 2014 22:13:37 GMT
Hi Roger & Edward, There are only a few mods I made which may be item of discussion which could be the original key switch and the batterie kill switch. I do not think these switches are very elegant and mounting options are a pain if one insists not to bolt any items to the GRP parts to prevent wear. But over here, we have to have at least 2 immobilizers incoperated in our vehicles and a batterie cut off switch to prevent fire hazzard. I was lucky to find a dry location for them but the brackets had to be welded in unreal angles and attachement points. if I have the choice going this route or carry an additional chain+lock as anti theft device along with the Exo I think I made a fairly decent compromise without spending $$$. Too bad the key switch is extremely long but it is hidden well and hard to reach to bypass for theft. Other than that I'm very pleased if I manage to keep the rear shock bay floorless. Hehe, under the tank there is even space for a tube to store some drink cans if I want to! I didn't expect I was in need for this many brackets but they really do add up when you're having fun The biggest mistake I made in the tR1ke was not to add a plate under the bonnet to place the electronics on. The wiring could be layed out much less cramped and it will add more cooling area to the rectifier. I think near all electronics in the AN400 which are located in the front will be placed under the bonnet here and adding a plate under the steering column L-brackets would be easy. What drives me to modify the original loom to a minimum is I did spend about 200hrs in the tR1ke loom. I like to make a big shortcut here. I'm okay for trimming/extending looms but adding a dozen of extra solenoids was a PITA. I just don't dig it to do this over again this intense. Have a closer look at the Kreidler kart switches. It's location is very interesting. The stalk has been welded to the shaft and the switches will rotate along with the steering wheel. because the wheel needs to be turned only a few degrees the wiring isn't rolled onto the shaft. still I like this example insimplicity: maartennouwens.wordpress.com/f-kart-galerij-3/This evening I cleaned the garage and made a list to do in future. i started to make 2 thick washers fromstrip steel. These will be welded on the front wheel hoops to mount reflectors on. Just doing nothing on the Exo makes me feel lazy LOL!! br, Erik |
|


 . Final welding in future. With the bar in place I set the switches in best position, drilled locking holes and cut of exess bar at the and. When assembled it looks not bad at all and it really looks like a trike-bike instead of a trike-car which isn't my cup of tea like my tR1ke. Pointing the bar upwards like the stalks creates good step in acces and operating the switches when leaning the forearm on the top chasis tube feels natural and relaxed. Visibility on the switches and prints seems prio #1 for approval so had to be creative


