|
|
Post by erik on Nov 23, 2013 21:45:19 GMT
FYI:
Official documents shows my tR1ke is not in need for APK (yearly checkup).This will be identical for the Exo later.
|
|
|
|
Post by roger32849 on Nov 25, 2013 11:02:49 GMT
Congratulations on the TR1KE.... Are you back to working on the Exo now? I know you put it aside until you made arrangements for your other project. After building the TR1KE the Exo should be quite easy for you. My build was not really hard, but using a 2008 Burgman donor presented its unique challenges. Suzuki has a lot of cross platform parts among their scooter family. I have a 1999 instrument cluster, a 2006 speedometer wheel sensor as well as 2006 rear shock linkage and upper motor mount. The 2008 wiring harness was easy to adapt because almost all of the wire colors were the same between years, and finally, my front brakes, and rims are from a 2004. Even the 2008 windshield fits well with the 1999 instrument cluster. If you need a difficult to find part chances are a different year scooter might have what you need.
We have not written much but I do correspond with Ed in Wisconsin a lot and he speaks very highly of you and your skills as a kit builder. I have referred to your blog several times to get a third opinion on how to proceed. I am nearing completion of my project and as soon as the temps rise above -10c I will go to my Garage and finish my build. I have enjoyed the project and would consider building another... (I already have a donor)
Again, I look forward to reading your blog and checking your progress. Oh, what is your color scheme going to be? I like the color blue you selected for the GRP parts and was wondering about the frame.
Anyway, good luck and happy building on the Eco-Exo-R.
Roger
Worcester Massachusetts
|
|
|
|
Post by erik on Nov 25, 2013 17:21:39 GMT
Hi Roger,
The tR1ke has been fixed 100% now but need insurance now. after this has been cleared i can make room in the garage and continue the exo-R.
My Tr1ke thread is a well documented process and many builders showed great interest how I build the tR1ke. I tried to exell her in simplicity which seemed to work pretty well. I will attempt to do this with the Exo too. Not only for this reason I cancelled the column stalks and will use the original An400 switches.
The color sheme is already posted in this thread. The grp parts sky blue, chasis pure orange and wishbones red. I still like this setting and I don't think there will be a good reason to change this fresh setting.
hey that's cool you're going to build a new Exo-R?
|
|
|
|
Post by roger32849 on Nov 27, 2013 0:50:12 GMT
Erik:
I may not get around to building one right away. I do have a donor, but I will have to see how this project works out. Right now I am still tinkering with the details. The heavy building is over and I need to have some pieces powder coated then install them... Thats pretty much it.
The temps warmed up today. It was 32 Degrees F or 0 Degress C. I started the trike, but had to prep for my son being home from college for Thanksgiving. I made the tail light mount and did my usual routine.
Keep on building Erik.....
|
|
|
|
Post by erik on Dec 6, 2013 20:49:43 GMT
  Hi All, Finally, the tR1ke project is 99% completed. all documents, taxes, insurance have been completed now and i could take her out to the bike mechanic to have a look at the wet plug issue exept... snow has fallen yesterday thus salt has been seeded on the tarmac. No driving until april 2014. Only monday an expert will come to my place to estimate the real value of my build (for insurance purposes). I cleaned up the building garage, stored the tR1ke and got to my ExoR. Tack welded the bracket. I had only to replace one bracket and use a longer bolt+washers to fit. The shock is perfectly aligned! Tacked the seat support to the chasis and made a testsit with the tR1ke harness to see if I do have the correct lenght and locations of the anchor points. The lower rear point turned out to be just a little too far away ad the front anchor point is horizontally placed which is not ideal for the load on the harness bracket. Scott send me some spare shock brackets which may come of use now. Only downside is I need to trim off the original anchor point which is quite a ride to tidy up. I am still not very comfortable on the steering wheel location. I feel it is about 2" to close to the driver. i still haven't decided to remove the collapseable boss or the indicator stalks. I am not in favour to use the stalks. They seem to make wiring more complex as I want it to be. I'd rather wished the basic internal dimensions to be more straight forward but I know if I do not optimise it I'll probably will regret this later. I realise the upgrade from eco-exo to -R was a compromising step forward. For the "little" brittisch it looks like a good deal but for me being 1.76metre it just feels like it hasn't been designed for me unless I make a few minor modifications. Still I like this project to exell in simplicity. For this reason I'd like the loom to be straight forward as possible. The tR1ke took me 200hrs on the loom (not difficult but labour intensive) and like to make some shortcuts here. I do like the original switches too which may be more suitable for rainy conditions as the stalks. br, erik 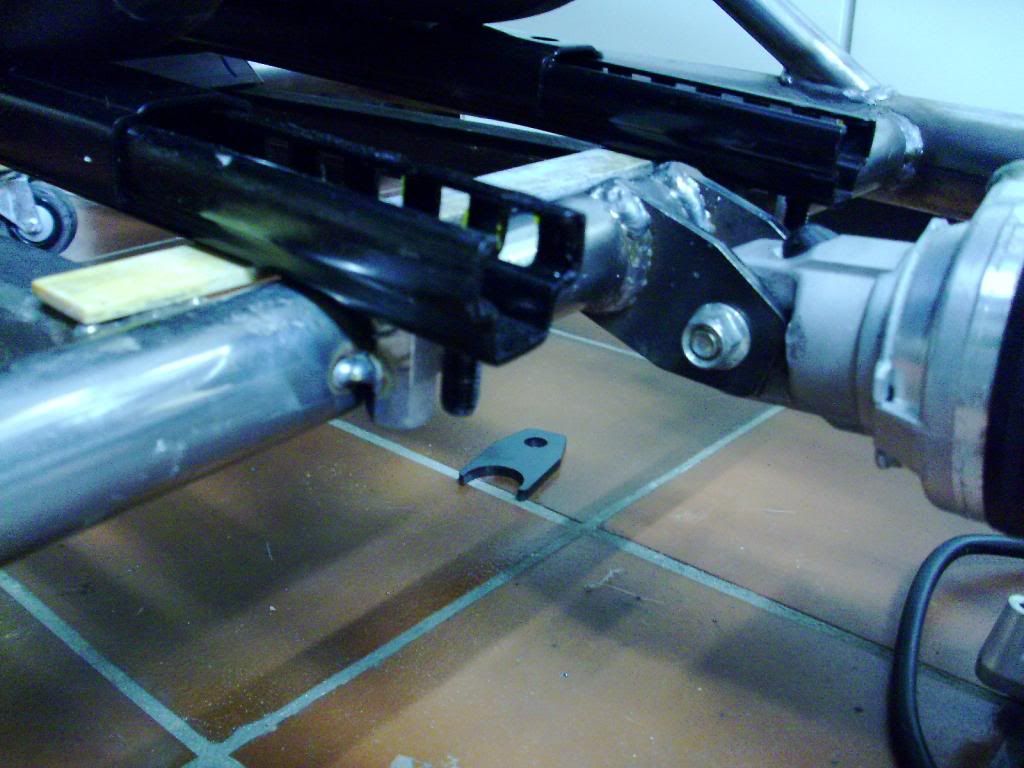 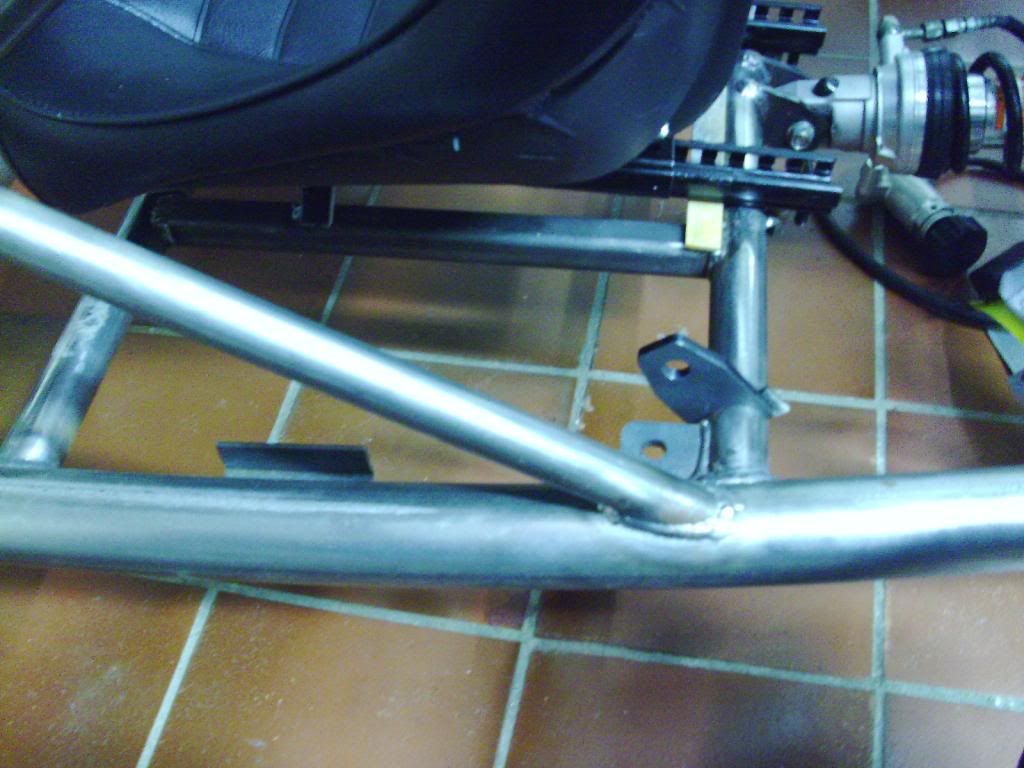 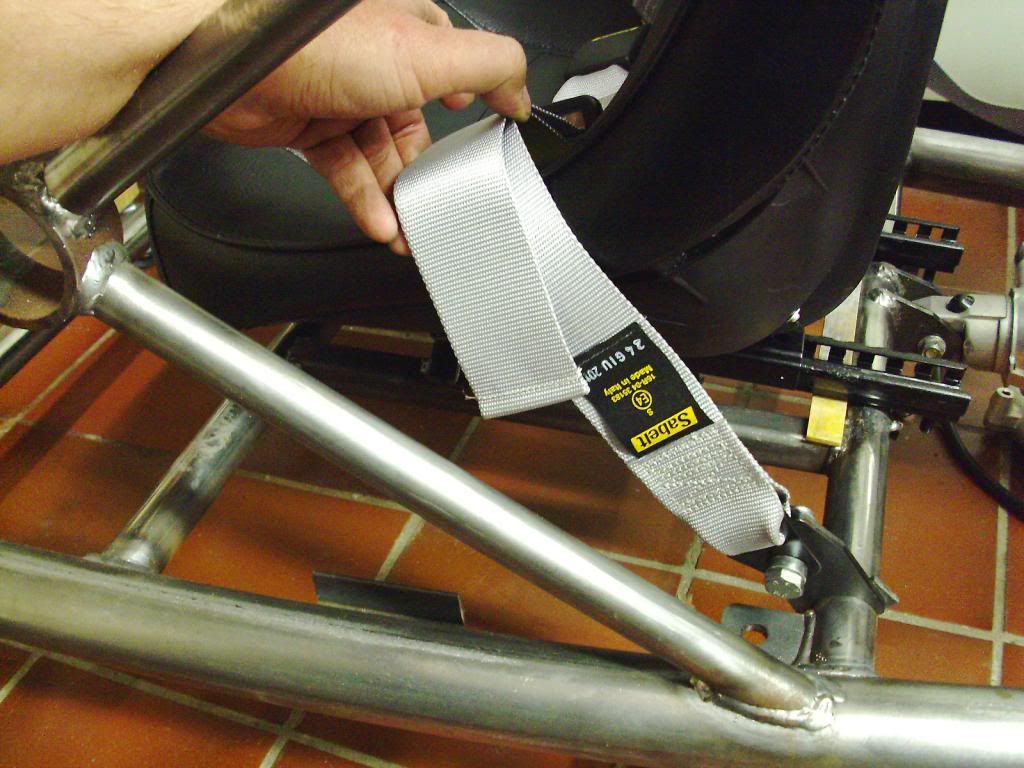 |
|
|
|
Post by edvb on Dec 8, 2013 4:32:34 GMT
Hi Erik
I know what you are going through!
Follow your instincts as it will always bother you when the build is done.
It looks like you are moving right along.
Since you built your Tr1ke you pretty much know you will have some obstacles to overcome but most are pretty easy to figure out.
The steering wheel dilemma will take a bit but I am sure you will come with a compromise that you can live with.
The same went with my seat when I wanted the radiator in front. Overall it is not as low as Roger is trying to make his but for my height it is a good compromise and it is very comfortable for me.
You are very talented and will come up with the best solution that will fit you best.
|
|
|
|
Post by erik on Dec 8, 2013 21:15:08 GMT
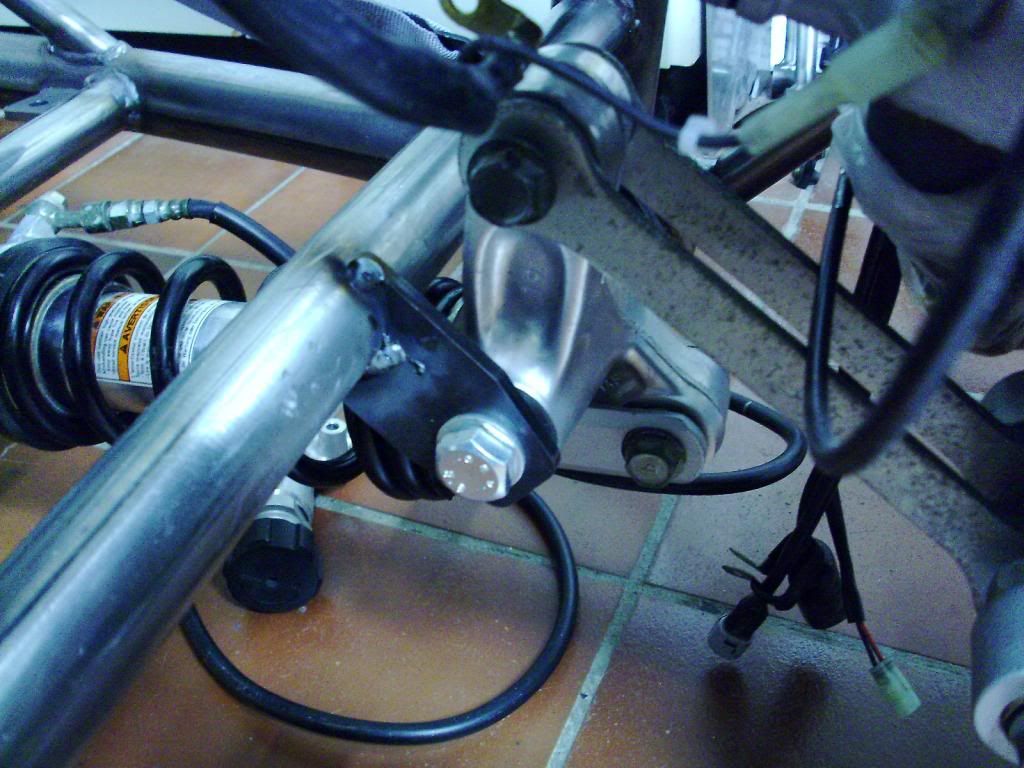
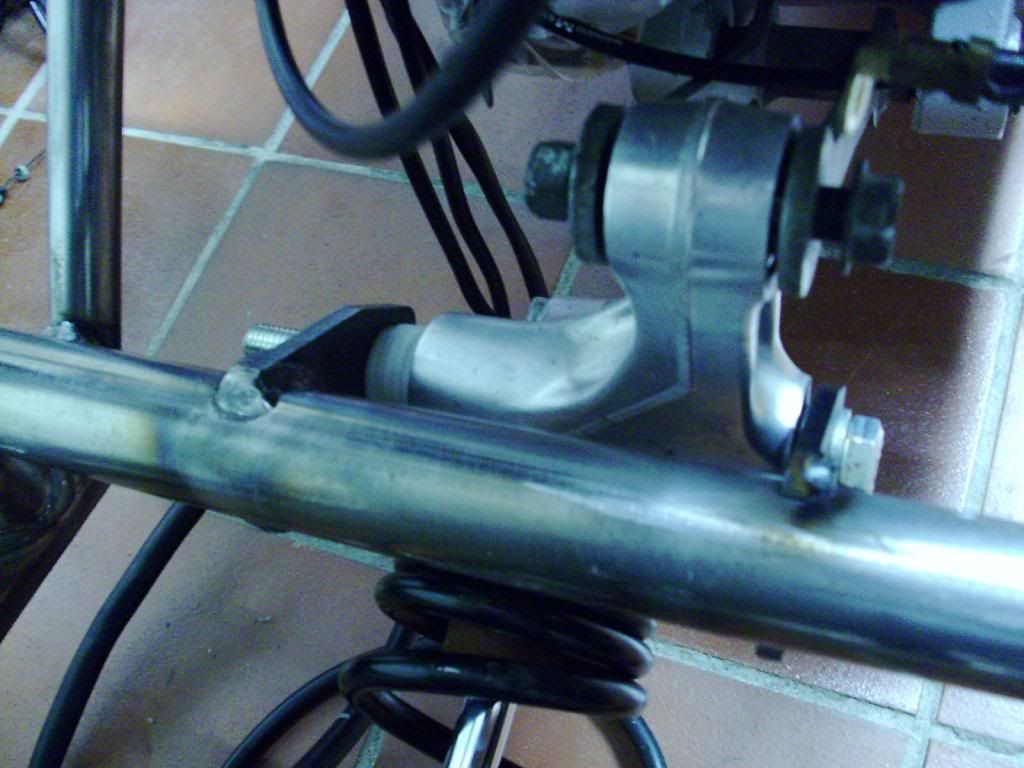
Hi Edward, I made a list of changes of my tr1ke build. I made various changes (differences which haven't been made in other tR1kes) to make it a good build and came to number 27 for this moment  Unfortunately, the build appears to exell in simplicity. For this reason I need to show an expert these notes to estimate the value of my tR1ke TOMORROW. Because there is little left to be desired on the tR1ke build, the Exo-R will be build very similar but I feel there are only a few changes to be made. However, this weekend I chopped off the seat brackets I welded. The welds shows trapped bubbles inside and I cannot tweak the welding machine properly and need somebody to have a look at it. Unfortunately i do not know any local welders to help me out here and need to call my car mechanic to source some help. I did remove the tank brackets and modified the front harness bracket to make the shock brackets a sturdy fix later. I placed the airbox on the engine and placed the fuel tank on top of it and noticed i was in need for 2"more height under the tank cover. If the arch and cover had been designed higher (no reason not to) that would be great to keep the original airbox and reduce engine noise and have some weather protection. Luckely, without the airbox the fuel tank fits in very well. Only to fix the position, making new brackets and get them welded in position is quite a hassle when the bottom of the tank isn't flat at all. The tank only needed to be tilted very little to make it fit under the cover. I managed to tack the rear bracket on before I noticed the welds were crap so here it is in all it's glory. Too bad the welds need rework. I am in doubt to keep on tack welding like this, have an expert weld the brackets on the other side and grind off the tacks and reweld or have a struggle to find some help. These things beat me up quite a bit. I was in doubt to place the cover brackets first vs the tank brackets. I went for the tank brackets to center the tank cap but I do have no clue how to fix the cover brackets tot he chasis from the inside. I think gluing the cover brackets on the chasis and tack weld them, remove the epoxy and weld them fixed might be the best route. Not sure if I need to remove the engine for this. fixing them with rare earth magnets is an option as well but rather "moveable" Any input highly appreciated. rear tank bracket L-strip: 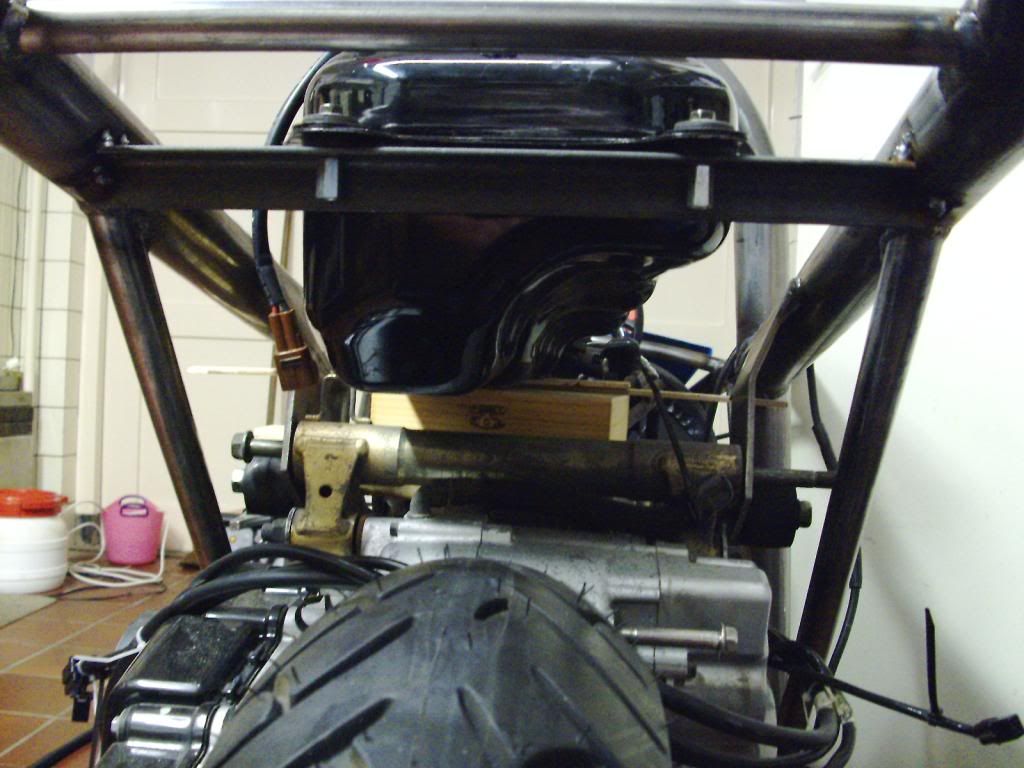 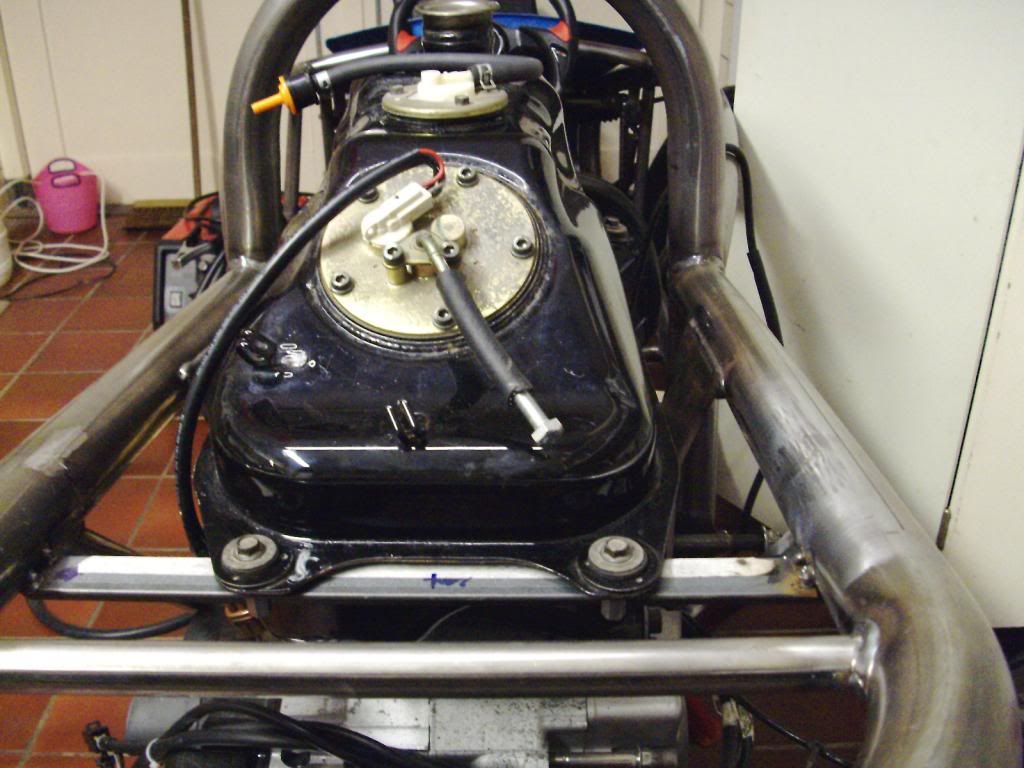 rear wheel off the ground, lotsa clearance. 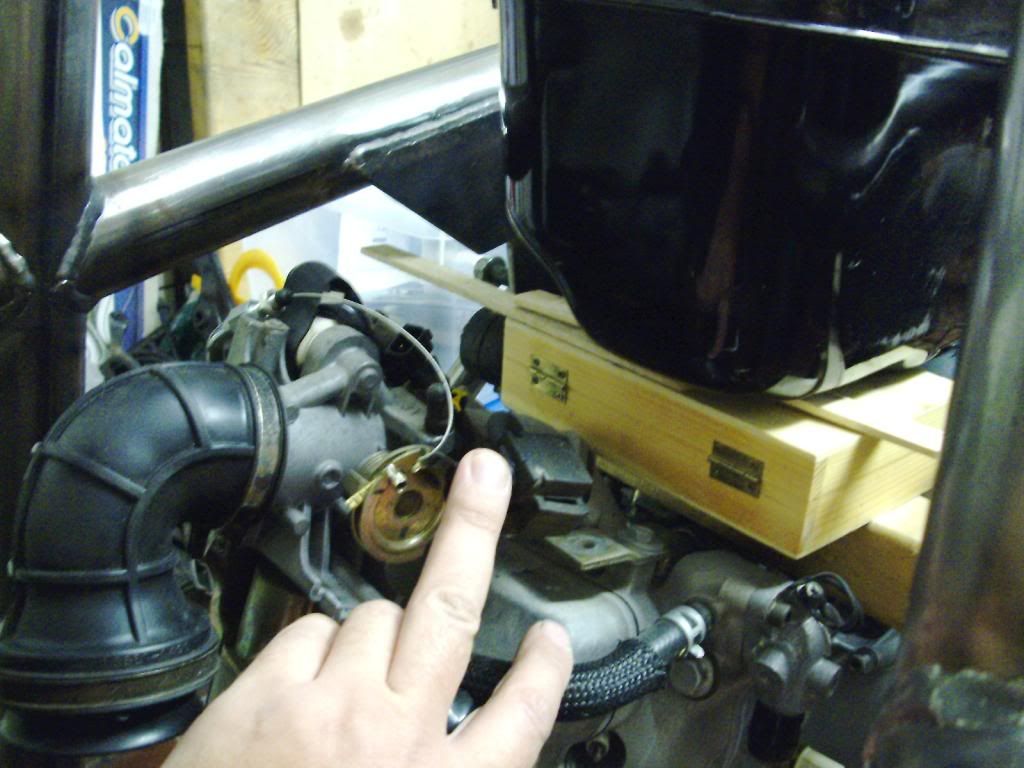 Hmmm Orange chasis 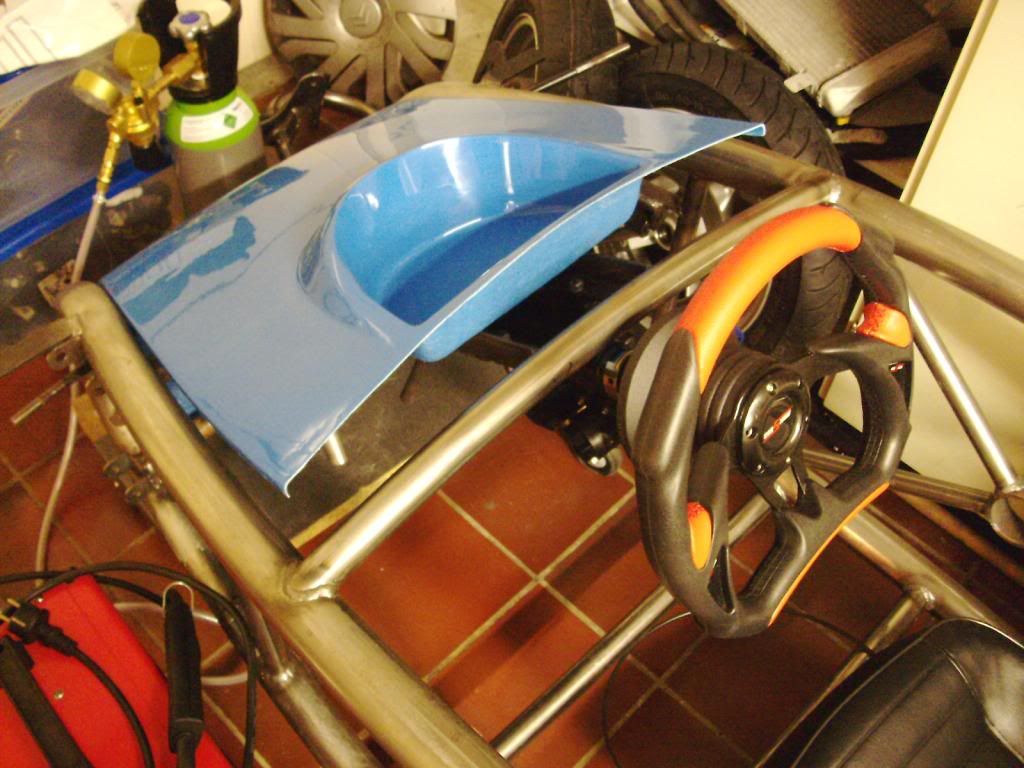 front harness bracket  |
|
|
|
Post by edvb on Dec 9, 2013 3:40:05 GMT
Hi Erik
Early on I made a stick and marked the top front of the engine with the rear suspension totally uncompressed and fully compressed.
That way when I needed to check the clearance for the gas tank or anything else I could quickly see if I would have any interference problems.
I was lucky to have a couple of friends that did all the tack welding and final welding for me.
Hopefully you can get your welder straightened out. Roger had problems with his and bought a new one. He said he wished he had done it sooner in the build as it made all the difference in laying some nice beads!
The easy way to weld the tabs for the gas tank cover and fender is to fit the pieces in place and tape the outside in places so it does not move. Then I take my tab that already is threaded and hold it in position with a gloved hand while my friend tacks it in place. He normally does one or two tacks so I can let go and tweak it a bit if necessary. After all four are done I remove the tape holding the cover, take the cover off and he will do a couple tacks on the back side if needed and slip the cover back on to check fit.
It worked well and the gas cover and fender fits snug and is aligned properly.
You will need to cut the hole in the tank cover so the filler tube is centered and high enough that the gas cap fits properly. Once everything is aligned and taped so it does not move is when I mark the holes to fasten the tank to the frame. There is not a lot of room and the filler tube and gas cap only fits in one position properly. You also have to make sure that you trim the hole properly so you can lift the cover off once the gas tank is firmly mounted. Mine was on and off probably six times before everything fit properly.
I found having everything on the frame tacked in and all parts fitted before final welding worked well for me.
I found out my ground tab when I got everything installed did not work in that location. It was easy to pop off and just a touch of the flap wheel and it was gone. The new location worked better and cleaned up the wiring to boot.
I had to do that with a few other ones as the systems went in as it just made a cleaner look and I could not live with myself if I just left it the way it was.
You may find out on your build, when all the parts are in place that there are a few tweaks to make all the systems work better. It will also require you to move or modify the tab or tabs to work properly.
Edward
|
|
|
|
Post by roger32849 on Dec 12, 2013 20:26:36 GMT
Erik
I have been looking at your welds and reading your comments. Since the metal you are welding is clean mild steel there are two things that may be the cause of your problem. The initial cause is your polarity. On US spec welders (don't know if there is really a difference) if you are using "flux core" wire in your MIG instead of using a gas cylinder you must inter-change the connections on your stick and ground clamp inside the welder box. The ground then becomes positive and your stick (wire feed) becomes negative. When you use a gas cylinder you must switch them back. The other cause is you are simply welding way to cold and not using enough amperage. If you resolve the problem there may not be a need to cut off all your work. Just grind the welds down a bit and go over the top. The steel will all flow together and lay flat and smooth if you have sufficient heat, proper polarity and somewhat of a steady hand.
I am ruling out contamination because your steel is new and clean. I am also ruling out the fact you could be using just steel wire instead of flux core with no CO2/argon shielding gas. A good weld sounds like frying eggs... Proper feed rate and amperage. I hope this helps.
Roger
Worcester Massachusetts
|
|
|
|
Post by erik on Dec 12, 2013 22:08:03 GMT
Hi Roger,
The welding machine did a good job on the tR1ke but with the new gas tank it's crap. I used new steel wire, new nozzle, new tip , tested the hose from leaks, feed rate, amp, pressure and still crap. Only thing left to do is to exchange the gas tank for a new one. The mixture could be the flaw now. When the new tank will arrive monday new test will be done and if this is still crap, the welder store should show some other alternatives. I might be even in need to bin the welding machine which is sorta brand new but a butget version wich should be able to spot weld. At least that's what it only needs to do for me. The final welding needs to be made by a professional with professional tools IMO for safety reasons.
For this moment the project is down until further notice.
br,
Erik
|
|
|
|
Post by roger32849 on Dec 13, 2013 0:34:17 GMT
I know the feeling. I had to buy a new welder in the middle of my build. I took a grinding wheel to the old welds and made new passes with the new one. WHAT A DIFFERENCE!! It is difficult to weld when things are going as they should and when they go bad, it is impossible! Sorry the project is down... I hope you have a rapid resolve to your welding issues and are back to your build...
Best wishes for the Holiday season
Roger
Worcester Massachusetts
|
|
|
|
Post by edvb on Dec 13, 2013 2:05:29 GMT
Yes good luck Erik. I do not like some of the delays I get into on the last parts, but being winter it does not effect me too much.
I am sure in a couple weeks you will have it sorted out and be moving forward again.
Regards
Edward
|
|
|
|
Post by erik on Dec 13, 2013 22:24:14 GMT
I took the tank back to the welding shop and a new one is ordered under warranty because the tank might have wrong mixture. I showed the salesman a piece of strip with iron turds on it and he liked me to bring the machine along with me when the new tank arrived to see what went wrong. He agreed with me if the machine is fine the mixture might be the cause so I'm looking forward to his help.
Hope to catch up with the exo early next week.
br,
Erik
|
|
|
|
Post by erik on Dec 18, 2013 21:01:24 GMT
Hi all,
At the welder shop, my welding machine was placed on the counter for a checkup and no issues were found. The new tank was connected and airflow goes like a charm. The shop owner told me he had to pick up a tile from outdoor or his wife would get angry and he made a testweld on the carpet floor 6 feet away from his parrot LOL!!! Turned out the gas tank had wrong mixture. Exellent service with no additional costs.
This evening I bend a new front tank bracket. Identical strip size as the original but with an offset of 3mm around the tank bottom half. After 4 hrs of fiddling I welded it in place and drilled the hole for the front gommet. At this point I am not sure if I'd add an additional cross brace or not. I'll add some rubber on the bracket first to see if the construction gets more rigid.
How did you deal with the front tank bracket?
I'll post some pice later.
br,
Erik
|
|
|
|
Post by edvb on Dec 19, 2013 0:35:21 GMT
Here is how I did mine.  |
|


 Unfortunately, the build appears to exell in simplicity. For this reason I need to show an expert these notes to estimate the value of my tR1ke TOMORROW.


