|
|
Post by gwnwar on May 9, 2014 16:14:58 GMT
Good choice of wheels.. like the rear vent, makes lines flow better.. You have done a 4.0 job on the dash and console..
|
|
|
|
Post by Toed64 on May 10, 2014 13:17:14 GMT
I kinda like the steels with your '32 coupe-style rear cover - it makes look a bit rat-rod...
|
|
|
|
Post by gwnwar on May 10, 2014 18:12:33 GMT
Right on the rat rod look.. just need more surface rust on the frame.. and voomy tubes for the exhaust..
|
|
trident
Senior
   Improvise, Adapt and Overcome
Posts: 629
|
Post by trident on May 10, 2014 18:36:01 GMT
Sorry to disappoint but the rust will go along with the steel wheels. They are two things I definitely don't won't to have on this car.. The vent will stay though.
|
|
trident
Senior
   Improvise, Adapt and Overcome
Posts: 629
|
Post by trident on May 31, 2014 15:43:40 GMT
I can honestly say blood sweat and tears have gone into this built.... Ok no tears but at the moment I'm sat in Southampton Hospital A&E wait to have my leg stitch up after the angle grinder I was using caught on the metal I was cutting got ripped from my hands and hit my leg just above the right ankle ..... Result = nice deep cut down to bone and a trip in an ambulance.
Just a reminder to everyone ... Please be careful when using power tools.
|
|
trident
Senior
   Improvise, Adapt and Overcome
Posts: 629
|
Post by trident on May 31, 2014 21:29:59 GMT
Severed nerves and 5 stitches but lucky for me no tendons of ligament damage.
|
|
|
|
Post by bauer on May 31, 2014 23:54:41 GMT
ouch. glad to hear you are ok
|
|
|
|
Post by Toed64 on Jun 1, 2014 11:04:54 GMT
Bad luck. Wish you a full and fast recovery.
Angle grinders are marvelous tools, but it's so easy to get complacent and then losing control can happen so fast. I had a nasty moment with an angle grinder a few years ago. I was using a wire wheel on a chassis. It caught and span up my hand, arm and into my belly. Unlike you, I was only superficially hurt, but very bloody and torn skin hurts like hell. I (almost) always wear welding gauntlets and always wear goggles. However, these precautions would not have prevented your injury...
|
|
trident
Senior
   Improvise, Adapt and Overcome
Posts: 629
|
Post by trident on Jun 1, 2014 20:44:49 GMT
Cheers guys… I was very lucky…. even got a couple weeks off work now!!
|
|
|
|
Post by mrjingles705 on Jun 1, 2014 21:04:09 GMT
Mend soon.
|
|
trident
Senior
   Improvise, Adapt and Overcome
Posts: 629
|
Post by trident on Jun 2, 2014 20:14:32 GMT
All stitched up and on the mend but popping antibiotics and painkillers. 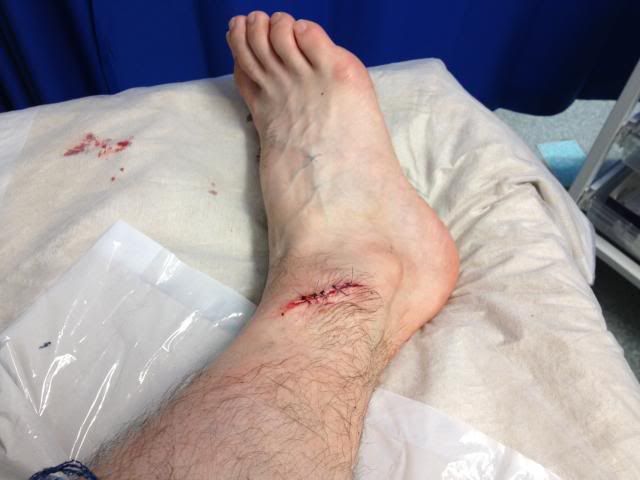 Anyway before my mishap I had done a little more work.. Steering column hole opened up a bit more so I could fit the original mx5 rubber surround in order to prevent water getting through the bulk head. 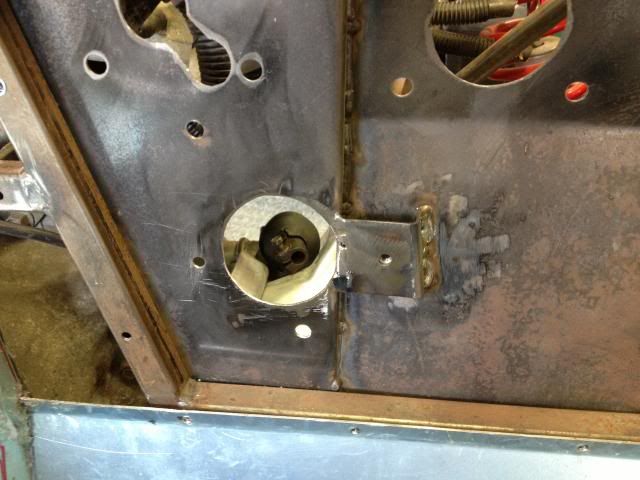 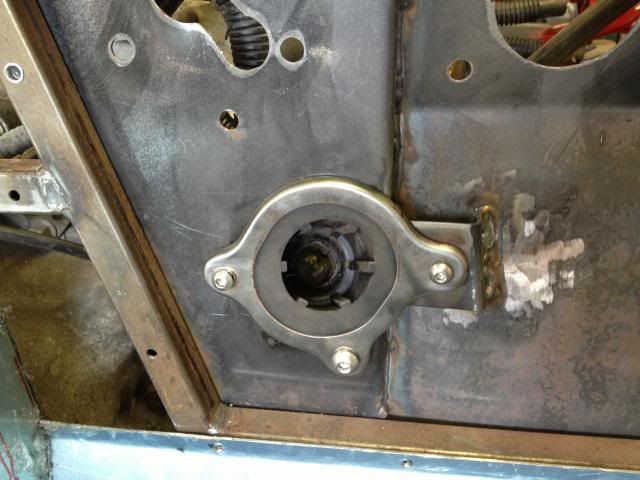 Welded in my new seat belt harness bar. My welding is getting much better now which is why I left this for such a long time. I wanted to be sure that my welds were getting nice penetration. Mind you it was such a good tight fit that it stayed in position without any supports anyway. 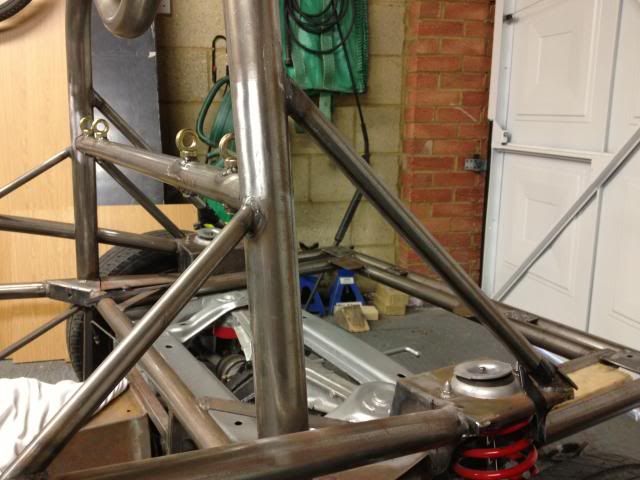 The other thing I plan on doing once I remove the chassis is to weld another bar from the roll bar down to the suspension mount. Two, well OK three reasons for this… 1. extra bracing. 2. prevent IVA mans 100mm ball hitting the suspension mount and 3. I prefer the look with two bars as it evens up the look on the rear mount, much the same as the early Exocet chassis looked. 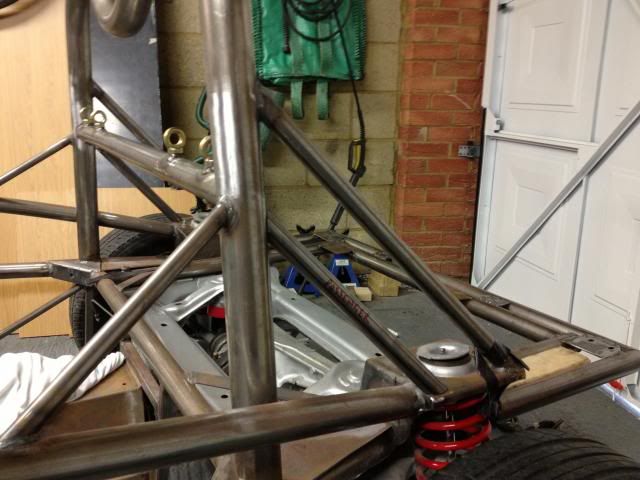 Getting closer to getting the chassis powder coated but not there yet.  |
|
|
|
Post by jgilbert on Jun 2, 2014 20:30:11 GMT
Great idea re the rear mount/IVA ball access.
|
|
|
|
Post by gnc on Jun 2, 2014 20:58:14 GMT
Glad you're on the mend, hope the nerve damage isn't too bad. Make sure you take the recommended time off, its too easy to go back and end up getting an infection (speaking from experience rather stupidly) !!
At least you have plenty of time to consider yet more groundbreaking Exocet mods.
|
|
trident
Senior
   Improvise, Adapt and Overcome
Posts: 629
|
Post by trident on Jun 6, 2014 14:42:03 GMT
Might be out of action for doing big jobs on the car but that doesn't mean I can't spend short periods doing small jobs. I would go crazy if I just sat on the sofa anyway… One thing that I had been thinking about for a while was how to do the fuel filler and what style to go for.. The cost of my build is also mounting up, mainly due to my dash and rear cover so if I could do something that wouldn't cost a lot that would be a bonus. Mind you I wanted something that sat flush with the panels and looked half decent. The idea I came up with was this ….. Total cost .. just over £10. First steal the dogs water bowl…. or if the wife and dog aren't impressed go to the pet shop and buy one for about £2.29. The one I got was a small 13cm stainless steal one. 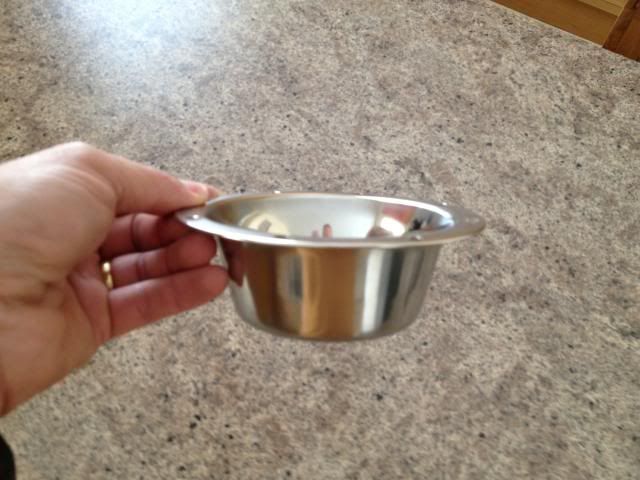 Next you need to cut out a whole in the bottom… for the filler neck to fit through and then drill the bolt holes. 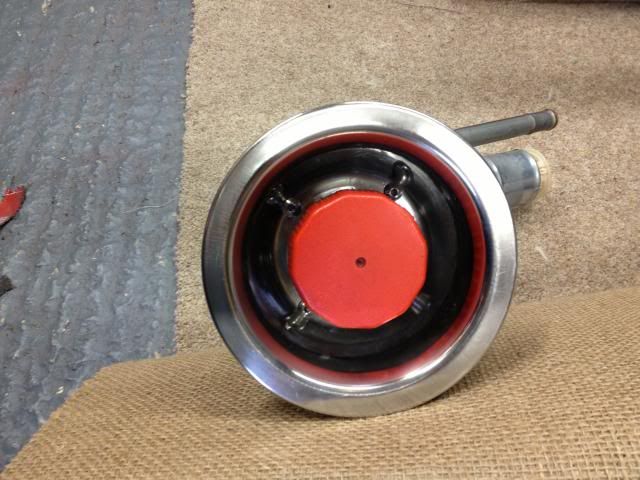 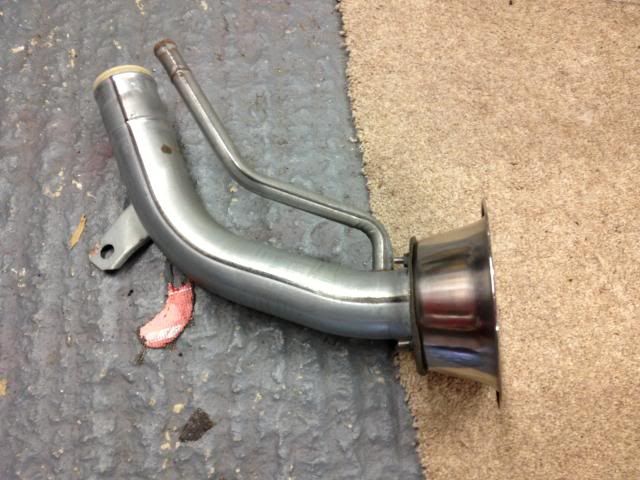 Then drill out the rest of the holes. Because I wanted to mount the filler on top of my cover so I can get a full tank it meant I needed to drill some drainage holes. I then used a the taper of a centre punch to round out the edges of the drainage holes so it's nice and smooth inside the dish part. 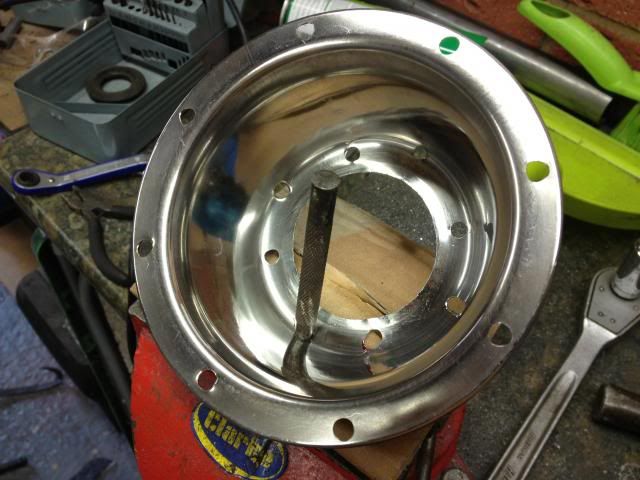 For the mounting holes I made a paper template folded it and used whole punch to get the spacings equal. 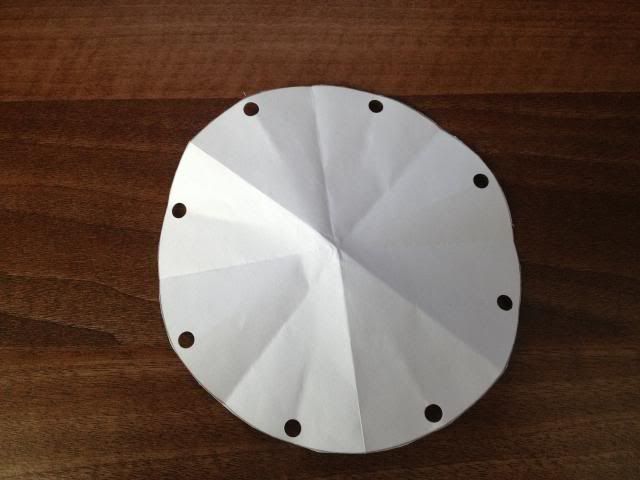 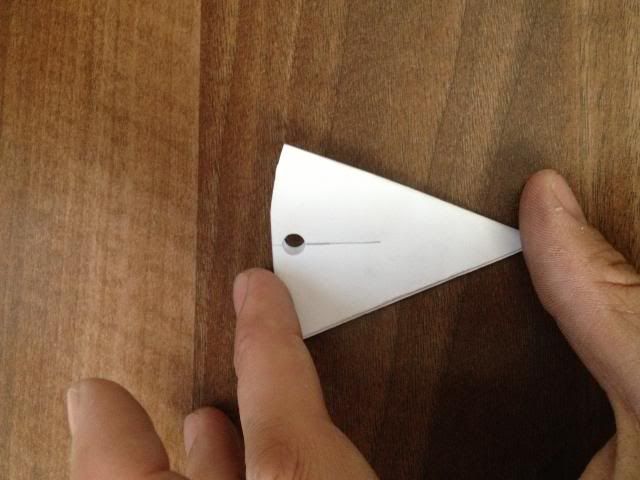 Add some stainless domed bolts and there you have it. |
|
trident
Senior
   Improvise, Adapt and Overcome
Posts: 629
|
Post by trident on Jun 6, 2014 14:52:55 GMT
|
|