trident
Senior
   Improvise, Adapt and Overcome
Posts: 629
|
Post by trident on Dec 17, 2013 19:29:19 GMT
Got the rear cover mounted on a board ready to go to guy that does the fibreglass mould etc. It might not look great at the moment but it's smooth and will look much better will when it's done..….. I hope. If there are any small imperfections then they will be sorted out when it's sprays with a two pack paint prior to the mould being made. The two circles will be fitted with two high level brake lights and the number plate will sit in the recess in the centre. 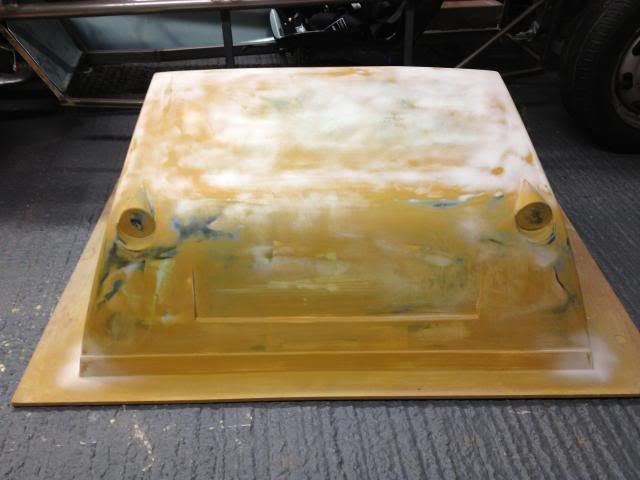 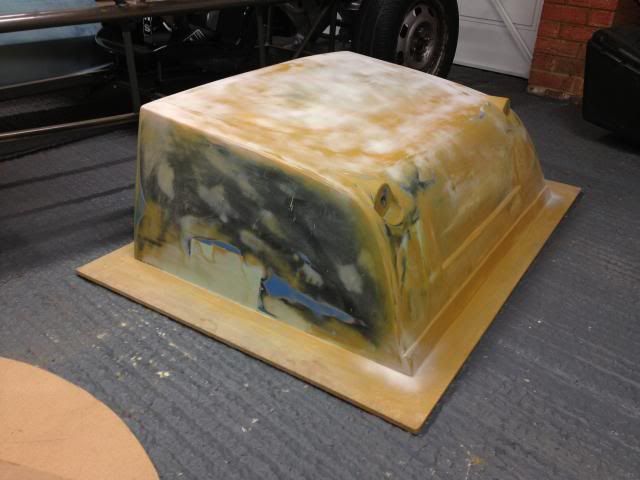 Until this is made I can't get the frame powder coated as I want to weld some brackets on the frame that this will then fix to. |
|
trident
Senior
   Improvise, Adapt and Overcome
Posts: 629
|
Post by trident on Jan 9, 2014 20:54:23 GMT
Took the rear tank cover over to get it moulded and made into a nice black fibreglass cover but unfortunately had to bring it home again and do a small rework as the back wall that sits behind the seats had a negative draft. i.e. the top of the cover came out slightly further than the bottom. Keeping it like this would have meant that when the mould was made it would have been impossible to get the cover out of the female mould. These things are sent to test us and delay other parts of the build. Simple fix though. just had to cut up both edges on the back panel and pull the whole pack out slightly at the bottom. This now means that I should be able to get the finished cover out of the mould… fingers crossed…. Once the back was pulled out and re screwed to the board it was just a case of adding some filler to re do the corners. Just a little more rubbing down to fill the joint line between the board and the mould and hopefully I can get it back over to the fibreglass workshop tomorrow. The photo below shows the cut on the rear cover. 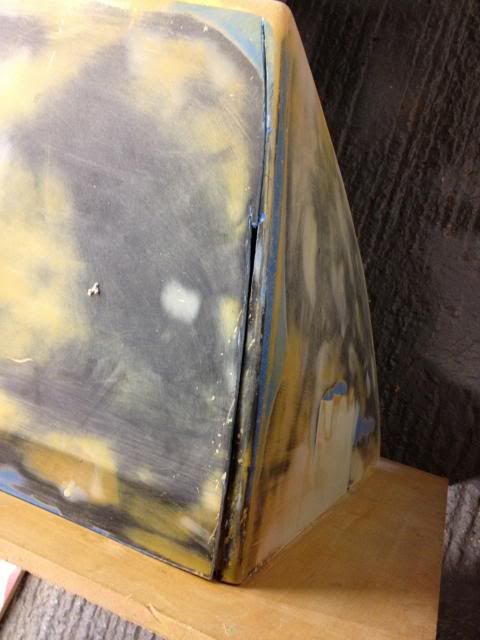 I've also started to do some work on the centre console…but your just have to wait for that as I need to get some more steel tubing etc tomorrow.  |
|
|
|
Post by jgilbert on Jan 9, 2014 23:24:09 GMT
Coming along nicely. How was the orignal moulded its it didn't have the correct draft?
Can't wait to see the centre console job number 3 on my list.
|
|
trident
Senior
   Improvise, Adapt and Overcome
Posts: 629
|
Post by trident on Jan 10, 2014 15:24:34 GMT
I don't think it was the original cover… it probably happened when I cut the original one in half and added the extra middle section. Sorted now though.
Got the extra metal I needed for the centre console this morning but I'm not having a good week. When I was cutting the parts I cut one of the tubes that I had previously cut to the correct size… Now I have to go and get another piece of tube before I can start…. Only going to cost a about a fiver but the air was blue when I realised what I had done.
And they say things happen in 3's…. well I must have forgotten to turn of the main tap off on the argon shield and obviously have a small leak at one of the connections as this morning I had no gas left.. lucky for me that I only have a small bottle.. Still about £20 up in the air.
Maybe next week I'll have a bit more luck.
|
|
|
|
Post by jgilbert on Jan 11, 2014 8:47:38 GMT
I don't think it was the original cover… it probably happened when I cut the original one in half and added the extra middle section. Sorted now though. Got the extra metal I needed for the centre console this morning but I'm not having a good week. When I was cutting the parts I cut one of the tubes that I had previously cut to the correct size… Now I have to go and get another piece of tube before I can start…. Only going to cost a about a fiver but the air was blue when I realised what I had done. And they say things happen in 3's…. well I must have forgotten to turn of the main tap off on the argon shield and obviously have a small leak at one of the connections as this morning I had no gas left.. lucky for me that I only have a small bottle.. Still about £20 up in the air. Maybe next week I'll have a bit more luck. On well only a small set back. These things are sent to try us. Must have been expensive tube? Stainless maybe? 6mtrs of tube for my bonnet only cost me £12. I need to get my tube rolled by a firm in the Midlands as I can't find anyone locally. Either that or I change our design. I can recommend a great web site you can use to get patterns for the profile you need to cut in the end of tube when you join the tubes together (called coping). It's wwww.metalgeek/static/cope.pcgiYou enter the tube sizes and joining angle and it draws the pattern you need. Print and cut this out and transfer it to the end of your tube and then you have the perfect fit. Easy. Anyway have a great weekend. |
|
trident
Senior
   Improvise, Adapt and Overcome
Posts: 629
|
Post by trident on Jan 12, 2014 10:17:38 GMT
Cheers for the link John.
No it's not stainless… it's standard 25mm OD tube that will be powder coated the same as the chassis… costs about £4 metre and I'll need about 1.25m more to rectify my co*k up. You have obviously got a better price than me for your tubing. I was looking at putting a bend on the tube to form the console but have decided to change it to straight sections and weld it… two reasons - 1st its going to be easier to get the angle of the bend the same on both sides and easier to fit the infill panels, 2nd it will be a bit more in keeping with the angles on the car in general.
|
|
|
|
Post by jgilbert on Jan 12, 2014 11:14:52 GMT
Hi Yeah, I get my material from a local fabricator, cheaper to get whole 6 mtr length that short bits from him. Dropped a bottle of wine off for him at Christmas as a thank you. Means I get lots of scrape bits of material free.
What does the 25mm tube look like in terms of proportion? I was planning the same size. 25mm should also fit into am electricians conduit bender it you decided to go that route. Should make replicating bends easy.
The design I'm kicking around at the moment mimics the arc of the top chassis tube. Your profile picture shows this really well. Hoping to incorporate this into my console design. But impossible to bend without specialist equipment.
I also picked up what I hope is a nice addition to my bonnet from ebay on Saturday. Will post some pictures once I receive it.
Anyway, off out to a cold garage now to fibreglass the bonnet tubes.
|
|
trident
Senior
   Improvise, Adapt and Overcome
Posts: 629
|
Post by trident on Jan 12, 2014 17:07:13 GMT
25mm tube looks great and is actually used on the chassis in a few places anyway such as the brace bar from the roll bar to the rear suspension strut. I've used it before on the rear back section I made for my rear lights along with 38mm OD which is the same as the top chassis rails.. it definitely won't look out of proportion to the rest of the chassis.
|
|
|
|
Post by pincherrn on Feb 8, 2014 16:55:21 GMT
Hi Trident,
Just a quick question about your seats. How did you get the seatbelt holes at the same height and level on each seat. I saw you had marked pencil lines on the seats. What did you use as a reference. I am planning on doing the same as you but can't find any flat areas on the seat to use as a reference. I was now going to wait until the seats were in the car and level the car. That way the seats would be at the same height.
Colin
|
|
trident
Senior
   Improvise, Adapt and Overcome
Posts: 629
|
Post by trident on Feb 10, 2014 22:46:33 GMT
Hi Colin
Sorry it has taken a couple of days to reply but I'm very busy at the moment.. I drew a shape that I I liked on one side of one of the seats making sure that the harness had plenty of space to go through the hole etc and once I was happy I started to drill small pilot holes around the line and then filed the rest out.
Once one hole was made I just got a small bit of 3mm hard board and drew the hole shape on the hard board that I held behind the opening in the seat that I had made. You can just about get enough bend on the hard board to follow the contour of the seat back etc.
With the template cut out and sanded down to fit it the original hole shape it was just a case of flipping the template over and marking the other side. I just drew round the template lightly with pencil on the masking tape and measured from different points until I was happy. I then used a heavier pencil line once I was happy.
The main thing is getting the template to fit inside the original hole and then just flip it over to get the mirror effect etc. Hope this makes scene.
Chris
|
|
trident
Senior
   Improvise, Adapt and Overcome
Posts: 629
|
Post by trident on Mar 12, 2014 23:40:56 GMT
actually managed to get some time to work on the car and sort out the centre console that I had planned from the start along with the dash. Same as the dash I have tried to keep the console in keeping with the except design by using tubing.. much the same a jgilbert.. nice work by the way John. To be honest it is a pig of a job due to the passenger footwell shape ( UK car ) or drivers footwell for everyone else that has the steering wheel on the wrong side!! It took me two attempts to get it just about right after I failed on the first by not having the passenger seat fitted and making it slightly too wide meaning that I ended up with the passenger seat side hitting the tubing when I fitted it. Second attempt and it fitted just about fine except for the fact that as I'm using a straight run along the console from front to rear so it's all parallel because of my dash in that I only had a certain amount of space because of my instrument panel on the dash sitting lower than most. This result in a bit of panel beating on the standard gearbox cover so that the support legs would fit. Tt will all be hidden by new panels so I wasn't too bothered. 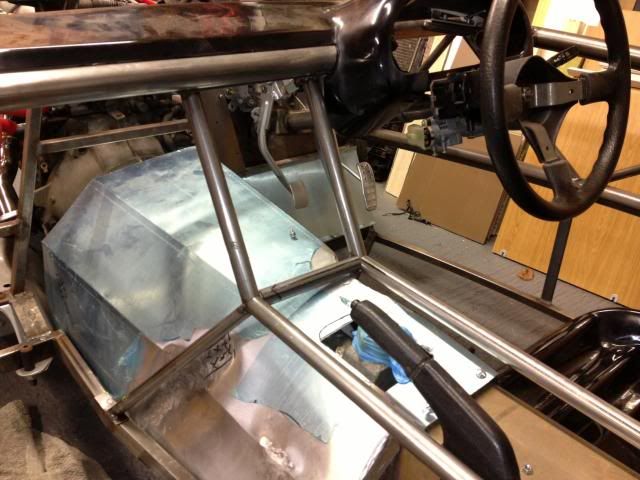 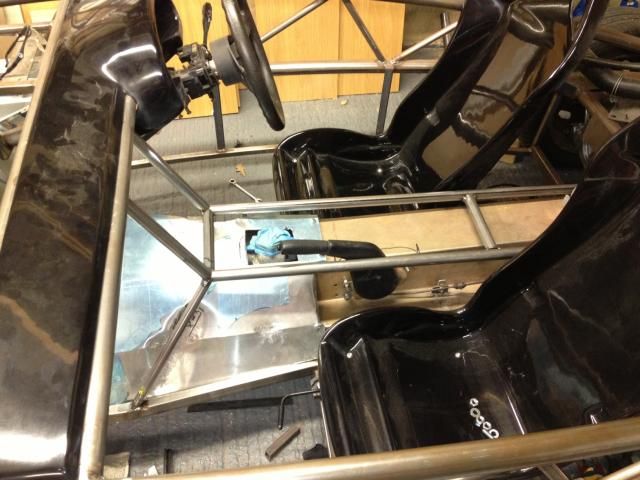 Another reason this build is taking longer than expected is because of these… at least they have 4 wheels and my son loves them. 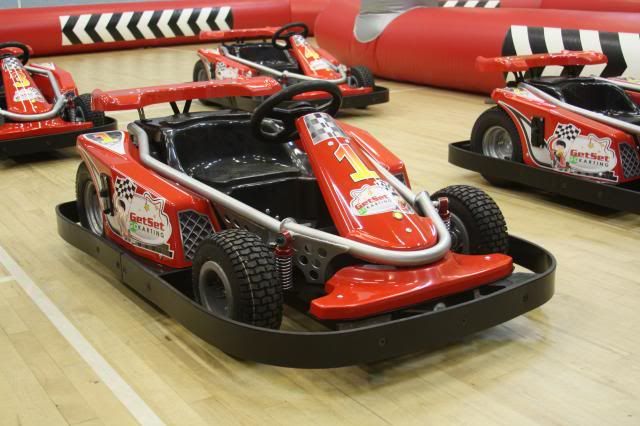 A new business my wife and i set up recently after she had to leave her current employment. www.getsetgokarting.co.ukwww.facebook.com/getsetgokarting -- make sure you like us we also offer a franchise if anyone else wants a change of direction. More updates soon I hope. Cheers Chris |
|
|
|
Post by jgilbert on Mar 15, 2014 18:33:47 GMT
Chris,
Good work, yes the shape makes fabricating the center console a pig! Did you use the coping template link for shaping the tube ends where they join?
What material are you planning to use for infill panels ?
The dash looks very good, I like the way it sits ontop/behind the new cross tube you have fitted. Goes with the whole exposed tube theme. Very Good, keep the updates coming.
|
|
trident
Senior
   Improvise, Adapt and Overcome
Posts: 629
|
Post by trident on Mar 17, 2014 20:33:21 GMT
Cheers John
I didn't use the template. Just did it by hand with a half circle file. It all fitting quite nice. Just hope I don't mess it up when I weld it. I'm planning on using 2mm steel for the top panels and 2mm alloy for the side panels so I can bended them slightly easier. The panels will be powder coated black to match the fibreglass.
I'm just in the process of making loads of small brackets and fixings before I remove the chassis and have a day of welding. Should also have the finished rear cover soon. As soon as I have I'll add some photos.
|
|
trident
Senior
   Improvise, Adapt and Overcome
Posts: 629
|
Post by trident on Mar 19, 2014 20:18:49 GMT
Need some help.. Before I weld my brackets for the expansion tank can some one please tell me if the radiator expansion tank needs to set at a certain height in relation to the Radiator it's self. In the photo below the lower level mark on the expansion tank is sitting at the same height as the flat bit at the top of the radiator which you can just see at the bottom of the photo. Do I need to lower the tank or will this be OK ? Cheers Chris 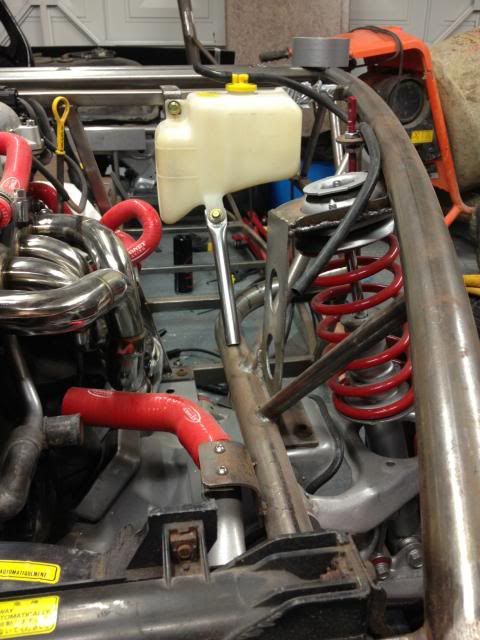 |
|
Deleted
Deleted Member
Posts: 0
|
Post by Deleted on Mar 19, 2014 20:22:42 GMT
Mate, it doesn't matter. Its to do with pressure and when the pressures on it will work
|
|