|
|
Post by snowbird1 on Nov 2, 2014 14:15:16 GMT
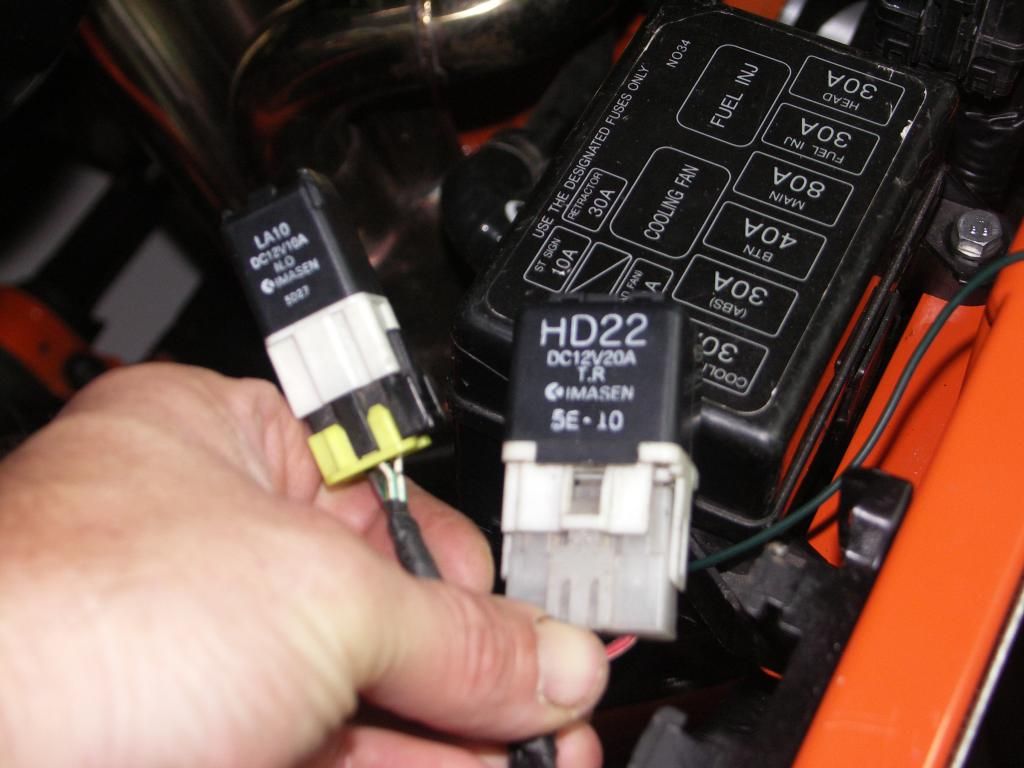 They are on the LHS on the loom. Can anyone tell me want they do? The wiring colours don't match any of the wiring diagrams I have got? .photobucket.com/albums/o740/JohnandLuke/PICT0011_zpsea32b853.jpg" style="max-width:100%;"][/a][/quote] Did your donor also have the big finned resistor on the LH under bonnet harness? My UK donor also had this system, I stripped it out along with the relays and retractor wiring, I thought it was some type of DLR but it turns out to be a system that prevents the headlights lighting to full brightness until they are fully raised.
|
|
|
|
Post by jgilbert on Nov 2, 2014 17:30:55 GMT
Snowbird many thanks. Yes mine had the finned unit you mention. So are both these relays redundant?
|
|
trident
Senior
   Improvise, Adapt and Overcome
Posts: 629
|
Post by trident on Nov 2, 2014 18:39:50 GMT
John, I removed the larger of the two relays and the lights didn't have any delay switching from full to dip like I did before with the engine running.... Well done sir for sorting this out..
|
|
trident
Senior
   Improvise, Adapt and Overcome
Posts: 629
|
Post by trident on Nov 3, 2014 15:25:37 GMT
John just been looking at my relays again and noticed that the smaller one has a wire that is the same colour as the horn wire.. Can't check myself as my loom is disconnected at the moment but before you cut the smaller one out make sure the horn works without it..
|
|
|
|
Post by jgilbert on Nov 3, 2014 20:37:13 GMT
John just been looking at my relays again and noticed that the smaller one has a wire that is the same colour as the horn wire.. Can't check myself as my loom is disconnected at the moment but before you cut the smaller one out make sure the horn works without it.. Trident, good detective work! Yes its the horn relay. Just checked on my car and horn only works when the small relay is connected  And the best bit, lights still work fine!!! I would still check earth's throughly, I think the 'shutter solenoid' is very senstive. Confirmed via a schematic now I know what I was looking for. One last thing I had to run an additional earth to each of my horns in order to get them to work. Powder coating is a good insulator. Cheers mate. 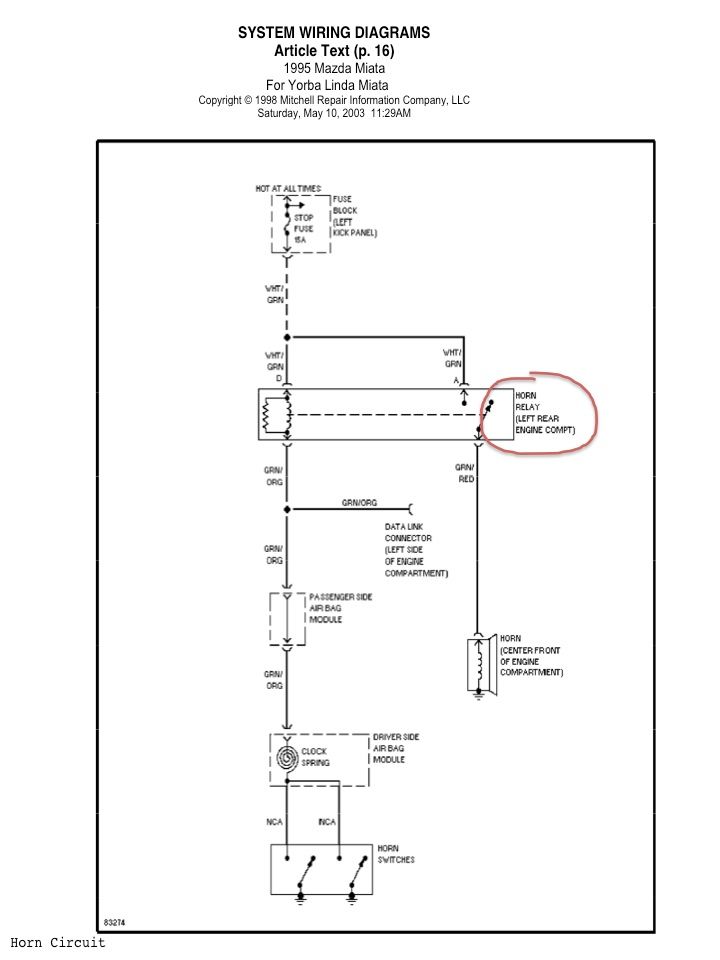 |
|
|
|
Post by jgilbert on Nov 6, 2014 22:45:20 GMT
More wiring loom work tonight. Slowly getting there. Continued the efforts to strip and remove unwanted wiring. So in the process of measuring, cutting, stripping, soldering and then heat shrinking every wire in the loom that runs across the car from the drivers side to the EMU and the passenger side. Definite case of OCD. But starting to see the fruits of my labour. 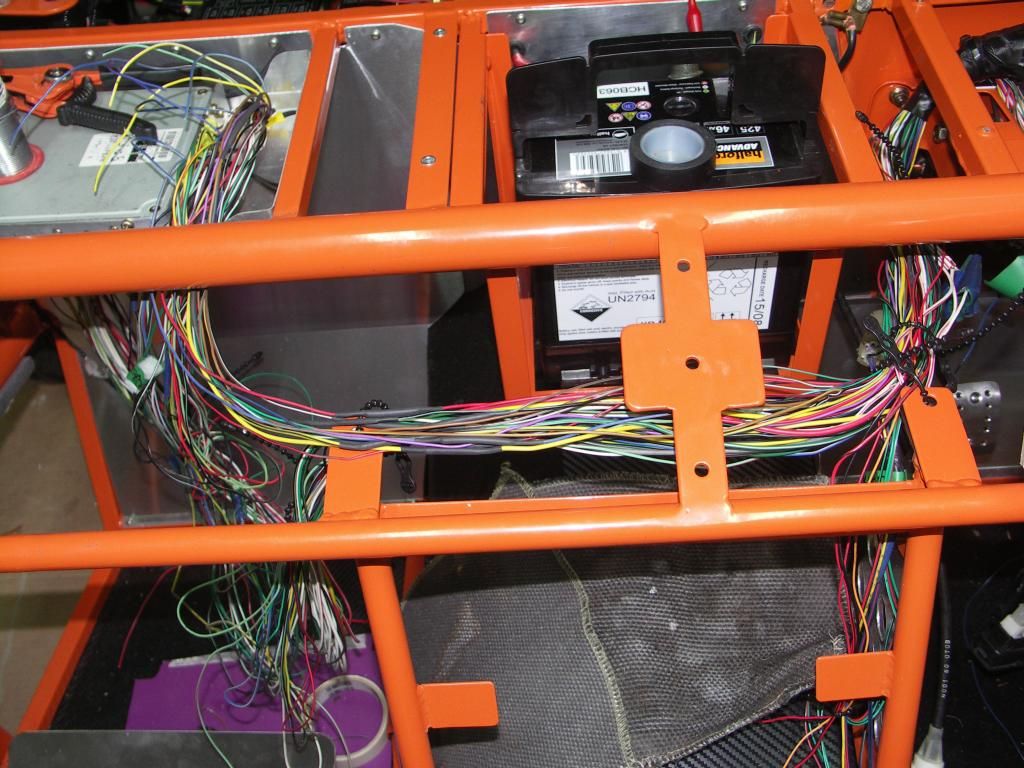 Cut and soldered wires will run along behind my dash. LHS the 'birds net' of wiring still to sort . 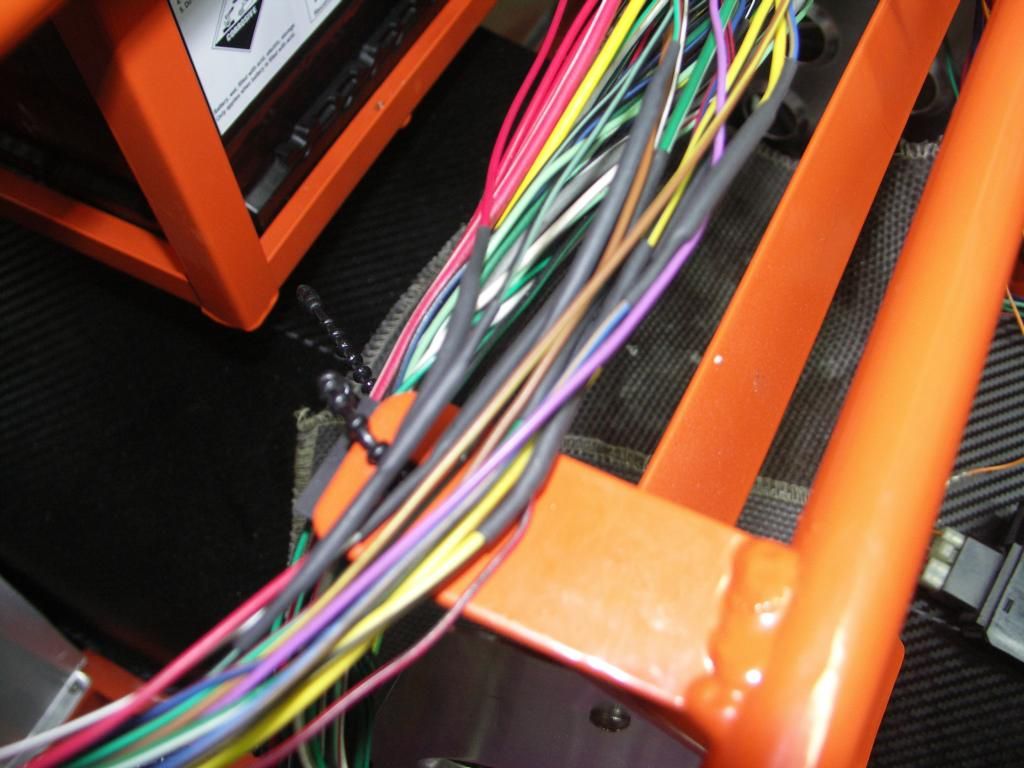 Close up of joints. Solder should provide a sound electrical connection and the heat shrink finishes it of. Just hope I never have to move the EMU! |
|
|
|
Post by gromit on Nov 7, 2014 18:29:09 GMT
Love the car and your attention to detail is great. Just wondered what mirrors are you fitting and can I steal your ideas when I get the money to buy an Exocet. Keep up the great work and hurry up and finish it and don't keep us waiting.
|
|
|
|
Post by jgilbert on Nov 8, 2014 21:32:36 GMT
Love the car and your attention to detail is great. Just wondered what mirrors are you fitting and can I steal your ideas when I get the money to buy an Exocet. Keep up the great work and hurry up and finish it and don't keep us waiting. Cheers thank you for your comments. Re mirrors I will need to go the IVA compliant route to start and then plan to go smaller. I have one option sorted and working on others. Will post pictures when I get that far. Whilst saving your money I would say plan, plan and plan again and steal away. I am trying to get it finished. Trident, another UK builder has throw down the gantlet to get our cars finished for spring next year. |
|
|
|
Post by jgilbert on Nov 9, 2014 0:09:10 GMT
EMU and LHS cable management done ! Couple of hours this evening spent cutting and trimming the loom on the LHS of the car. This will all be hidden behind my dash so will hopefully never be seen. Just need to slip some plastic conduit over it to give a second layer of protection. Whilst its has been a pains staking job, in someways I was always looking forward to sorting the loom out and removing the excess wiring. Now its done I'm pleased I made the effort. If anyone else decides to undertake the same job, one tip, the thickish grey wire that runs to the EMU is, I think a shielded cable eg it has an outer core rapped around an inner cable. Just take care when cutting this that you leave enough of the cable to join both the shield and inner cable. Just need to sort out my fog light switch and remove a spare switch from the RHGS and I think that will be the loom done. Finished job:) 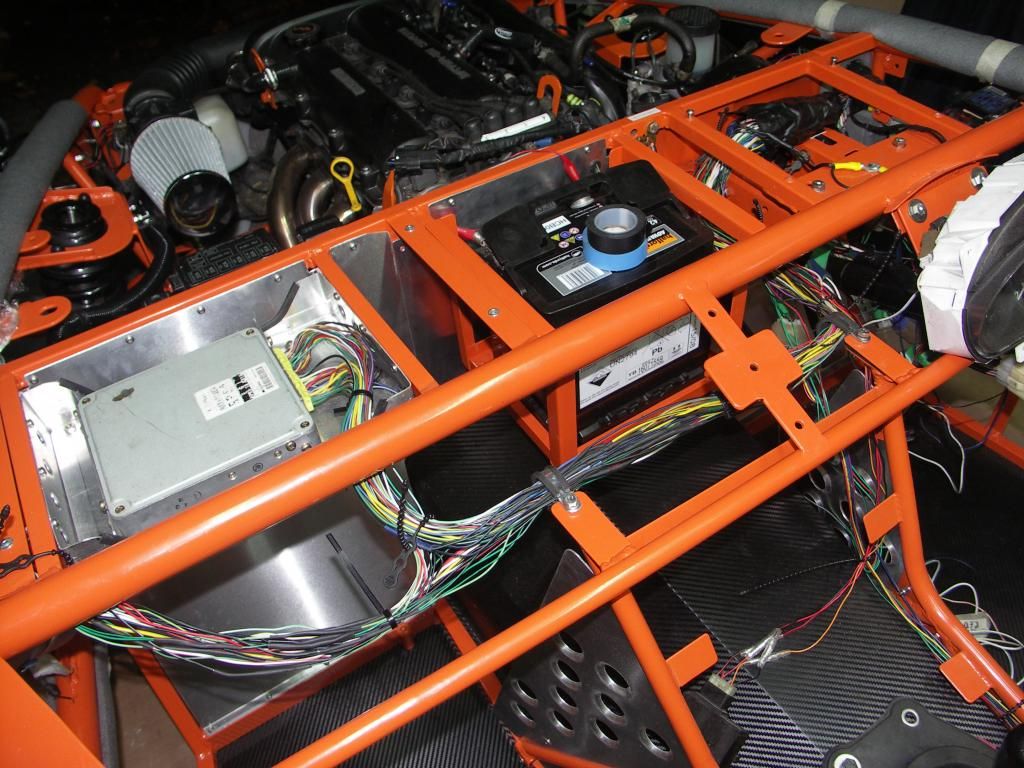 |
|
|
|
Post by clintavo on Nov 9, 2014 5:54:25 GMT
Looks great, nice tidy routing.
|
|
|
|
Post by gwnwar on Nov 9, 2014 7:50:08 GMT
Very smart job.. some split plastic harness cover will finish job off nicely..The gray wire you mention
is the O2 sensor lead..
|
|
|
|
Post by jgilbert on Nov 14, 2014 0:03:10 GMT
Ok so wiring in the passenger compartment is complete.  Its been a long haul but I'm pleased. The last job was completed yesterday and it was to remove the spare switch (remembering to connect the red and black wire to ensure the dash lights work) and move the rear fog light switch over to the centre console area. What could be easier? Snip, Snip,Snip, solder, solder, heat shrink, bit more tidying up of wires, few more redundant wires removed. Then my normal check, lights, and start her up. Lights good, engine turns over, cough, splutter ! but doesn't fire up!!!!!!!!!  OH NO ! what have I done! instead of cutting one wire at a time and checking, I get over confident and carried away with myself. Now I'm in all sorts of sh1t. Where do I start? Panic sets in. What are my options??? I'm going to have to unpick all my changes, could it be a dry solder joint?, how could I test for this. Anyway I decided to sleep on it. Today, this issue has been at the back of my mind all day. I really can't see a simple and quick way out. Then I calm down and think. Well, I got a cough and splutter when I did try to start her, so I must have a spark? could it be fuel?  ? Got home, said a little prayer to the MEV gods, then went out to the garage and checked the tank........ Empty. Added fuel, tried again and she fired up second turn! Boy I'm relieved. Guess I just panicked and suspecting an electrical fault. So a big piece of advice, if you decide to modify your loom, cut and then check all systems. Don't do i I did and get to carried away. So couple of photos of the finished job.   I've also noted down my tips for loom modification, should others be thinking of a similar exercise; a) Label everything, if you cut a wire a bit of masking tape and a note will come in handy. b) Only remove one wire at a time. c) I purchased some removable cable ties and these were a god send as I could cable tie in position and then undo if I had to re position the loom. And I did have to do this a number of times. d) I think soldering is a good option for joining wires over cable connectors. e) Heat shrink is invaluable. I brought three different sizes from Ebay and this worked well for me.  f) Don't rush, take your time and really try to work methodologically g) Start somewhere simple eg the wiper cables, there were lots of spare dead end connectors on my loom, I know this because I labelled EVERY connector when I removed the loom. This gave me confidence to also remove these one at a time. Final thought is, this is a nice winter upgrade project if you want to get your car on the road first. |
|
trident
Senior
   Improvise, Adapt and Overcome
Posts: 629
|
Post by trident on Nov 14, 2014 1:36:19 GMT
John, very very nice work.. I'm pleased it was only lack of fuel that caused the starting issue.. More that once have I thought I had messed up mine only to discover I've not reconnected a connector . You're braver than me .. I've not cut my loom down as much as you .. Mine was just a simple short back and sides. Best loom job I have seen.
|
|
|
|
Post by jgilbert on Nov 24, 2014 22:59:03 GMT
Hi everybody, latest update. So now that the loom is more or less done, time to turn my attention to my side panels. Before powder coating I added some tabs to the frame allowing me to fit some infill panels to the front top section of the chassis as shown below.  Carbon fibre is the material of choice for all my panels. So in order to do it correctly I've been hunting ebay for some cheap vacuum resin infusion kit. I got luck about a month ago. This allows me to make near perfect finish carbon fibre panels both cosmetically and in terms of strength (controlled volume of epoxy resin evenly distributed). I've have to fabricate a moulding and curing 'table' which is also heated to help cure the resin, see below. So with the Misses away at the weekend the production started in our dining room. First a picture of the kit involved.  The carbon fibre is laid up on a treated glass surface (glass being smooth and flat, in fact its a shower door). A special core material is then added and then more carbon. This is covered with a peel ply which separates a special mesh to allow the air to be removed and resin to flow, then the whole lot is covered in a plastic sheet which is stuck down to the glass allowing a vacuum to be pulled by the vacuum pump. This means all the air is removed and the carbon and core material is compressed absolutely flat. Close up of the above before infusing the resin with everything under vacuum.  Then the scary bit (carbon isn't cheap to muck up!). The resin is 'infused' into the carbon, assisted by atmospheric pressure. Next photos shows this mid-way during infusion.  And a finished infusion.  Then its a case of allowing it to cure (24hrs) and then I'm left with a super-light but strong panel approximately 2mm thick. In order to give an idea. The main side panels that go along the bottom of the frame will weight less that 500 grams using this method! First panel templated, cut and fitted tonight.   It's been great fun and a good technical challenge getting this far. |
|
|
|
Post by gwnwar on Nov 24, 2014 23:49:15 GMT
You never stop amazing with your ideas turned into finished projects.. Great work again..
|
|