Post by nitram on Sept 11, 2012 11:13:43 GMT
I left home in 1967, as a teenager, to join the Royal Air Force. After a couple of months, I returned home for my first leave and I found that my mother had given away my Meccano set. Nowadays, this would have been classed as child abuse but in those austere years, ChildLine had to wait another 20 years for Esther Rantzen to come along and the gauleiters of Social Services were just a glint in Harold Wilson’s eye. I suppose I forgave my mum, eventually, but I may have mentioned my loss on a few occasions to anyone who would listen.
Fast forward to 25 May this year and I hear my wife on the phone: “(giggle, giggle) … so I hope we can now get some closure on the epic Meccano saga … (giggle, giggle).” My wife doesn’t understand me much, but she was right on that point. 25 May was the date I took a spanner to the Exocet donor for the first time and the Meccano ghost could be laid to rest.
Here is a picture of the donor, in case nobody has seen an MX5 before.
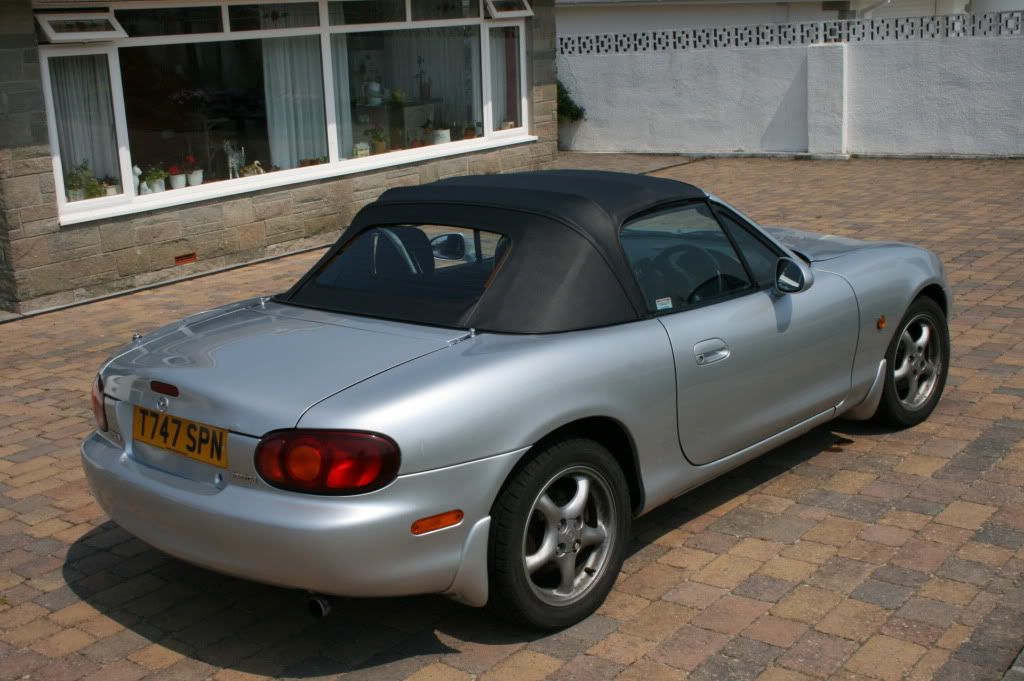
1999 Mk2 1800S for £500. There are bargains out there and this one came with a “serious electrical fault” – the battery kept going flat in a couple of hours with nothing switched on. Managed to trace the fault in the time it takes to drink a cup of tea; the radio aerial socket was full of gunge. The aerial motor was constantly trying to lower the aerial even when fully retracted. Ten minutes to fix; over a grand saved.
My cunning plan was to go for Stuart’s “easy build” and retain the wheels, seats, suspension, ABS and power steering, at least until after IVA.
I am a huge fan of the Forum and I suppose I experienced most of the problems and frustrations written about previously. Rusted nuts and bolts can be shifted with copious amounts of WD40 applied the previous day, sometimes. Sometimes not. I had a mains voltage impact driver which loosened the hub nuts in a flash but proceeded to rip the heads off any other bolt or nut smaller than M14. It quickly went back on to eBay where it came from. Most fasteners came out with sockets, with or without breaker bars. I had some square section girder lying about and cut this up into breaker bars as required. I finished up with three about 1, 1.5 and 2m long. Some heads rounded and some captive nuts escaped so other fasteners had to be removed with hacksaws and angle grinders. I’m not a fan of nut splitters but I found them useful for removing castellated nuts especially those where the split pin had corroded in. Enough bolt shanks were left in the components to be retained to warrant the purchase of a cheap-ish tap and die set.
The workshop manual provided in the Forum is very useful and is worth more than a passing glance before starting a job. I have a narrow garage and assumed it would be a good idea to remove the car doors before pushing the car in and putting it on axle stands. Go to workshop manual. To remove the doors, remove the wings. To remove the wings, remove the bumper. To remove the bumper, remove the wing liners, and the headlights. So, basically, I would recommend a holistic approach and while you a lying on the cold concrete floor, take out any nut and bolt you can see. By the time the scrap man takes the body away, there is nothing left to undo.
A lot has been said about labelling everything. Excellent advice. The MK2 wiring harness, weighing in at 14kg, has an extraordinary number of connections and also a huge number of unused connectors. These also have to be labelled. But remember that most of the fluids used in the car or during the disassembly are great for turning ordinary biro into invisible ink. I know that I have a number of very clean, word-free labels.
Most of the bits went on eBay as they came off the donor. The demand now seems to have dried up but the net income so far is £677. I still have the 2 doors to disassemble and put the components up for sale – but they can wait.
With the nuts and bolts removed, the body came off the running gear without a hitch, and went to scrap for £40.
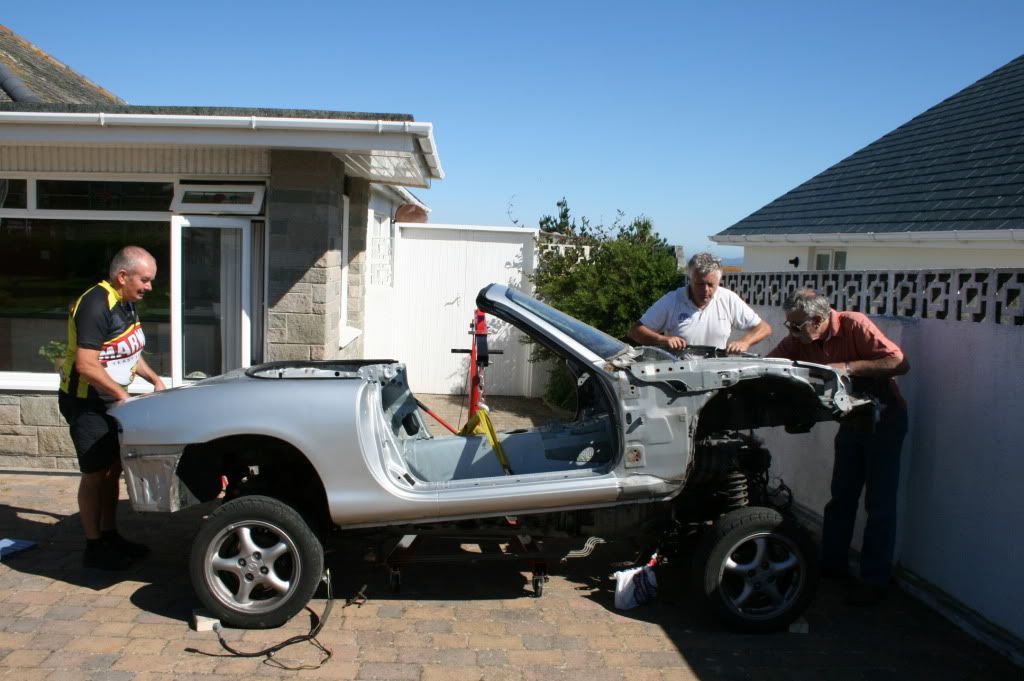
I was helped by a passing cyclist, on the left of the picture, who rides for Team Marmite!
Power washing the rolling chassis revealed an extraordinary amount of rust.
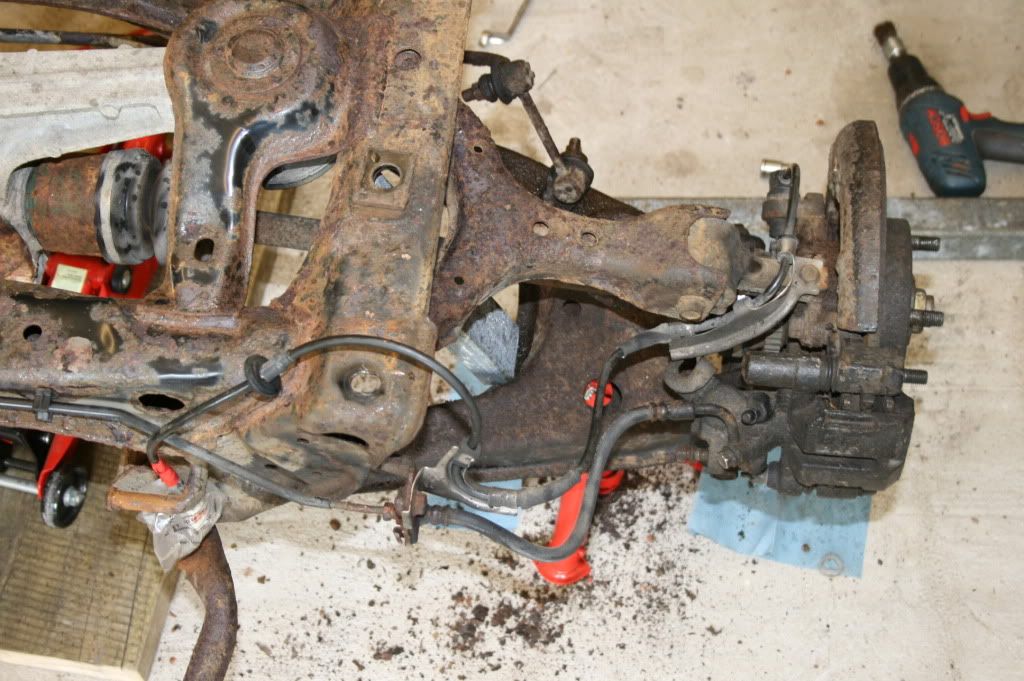
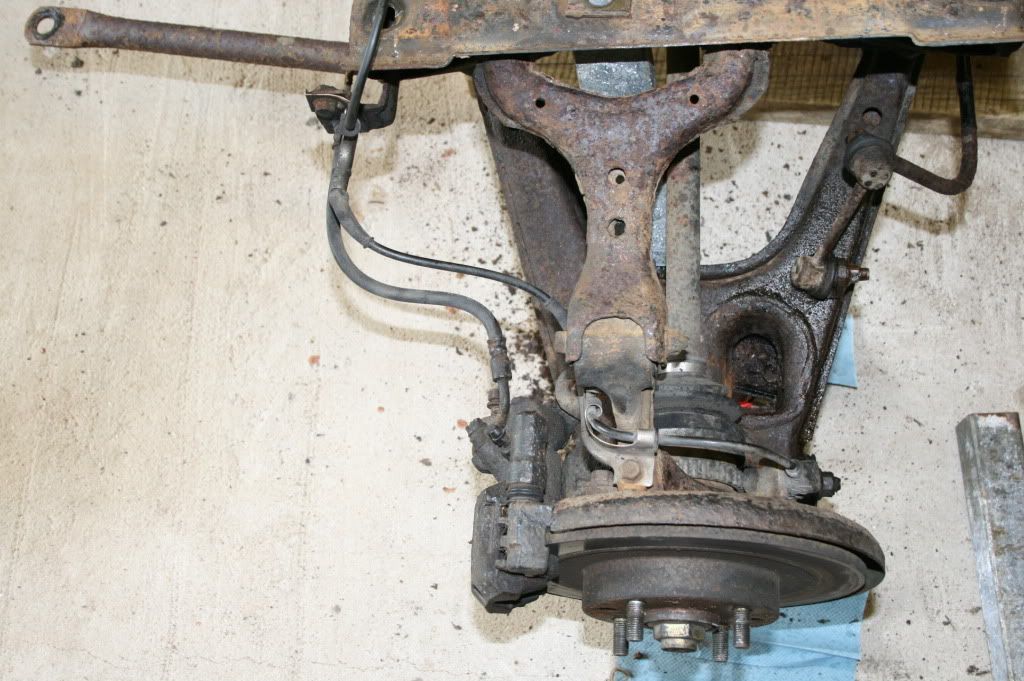
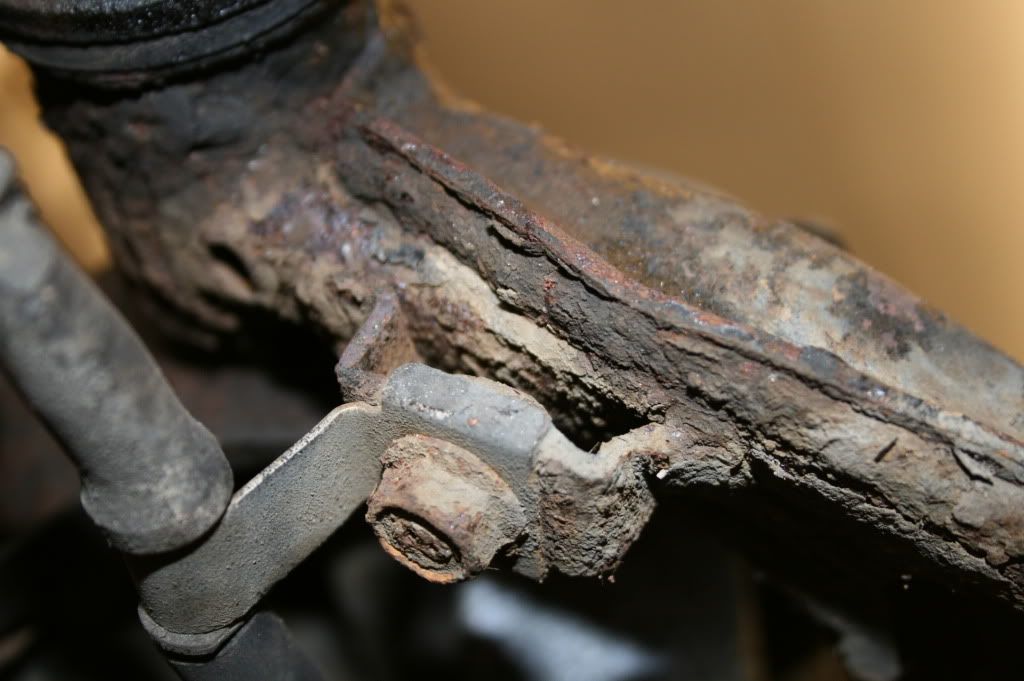
It was clear that a large amount of stripping, cleaning and painting would be required. The best estimate I got for blasting and powder coating the components was an eye-watering “about £1000”. So, roll up the sleeves, buy a selection of cheap-ish rotating wire brushes and get on with it.
So much for easy build. The perceived wisdom on the Forum is that bushes can be really ragged but still work and pass IVA/MOT. But those on my donor looked really awful, like, well, bushes. As I was now committed to stripping to component level, I went for a cheap-ish set of Flo-flex. Having read the Forum, it came as no surprise to find that I could not press out the old bushes using a bench vice but I tried it anyway. (This was before the suggestion of freezing the bushes appeared). So, I burnt them out using a blow torch – really good fun, very satisfying.
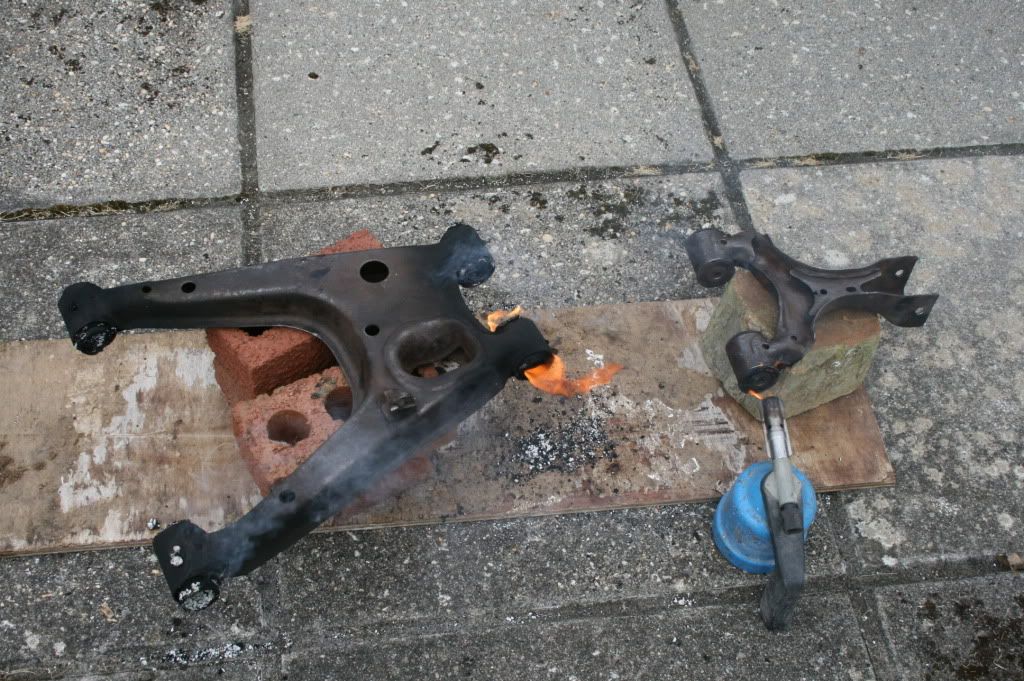
The new bushes can be pressed in using a vice.
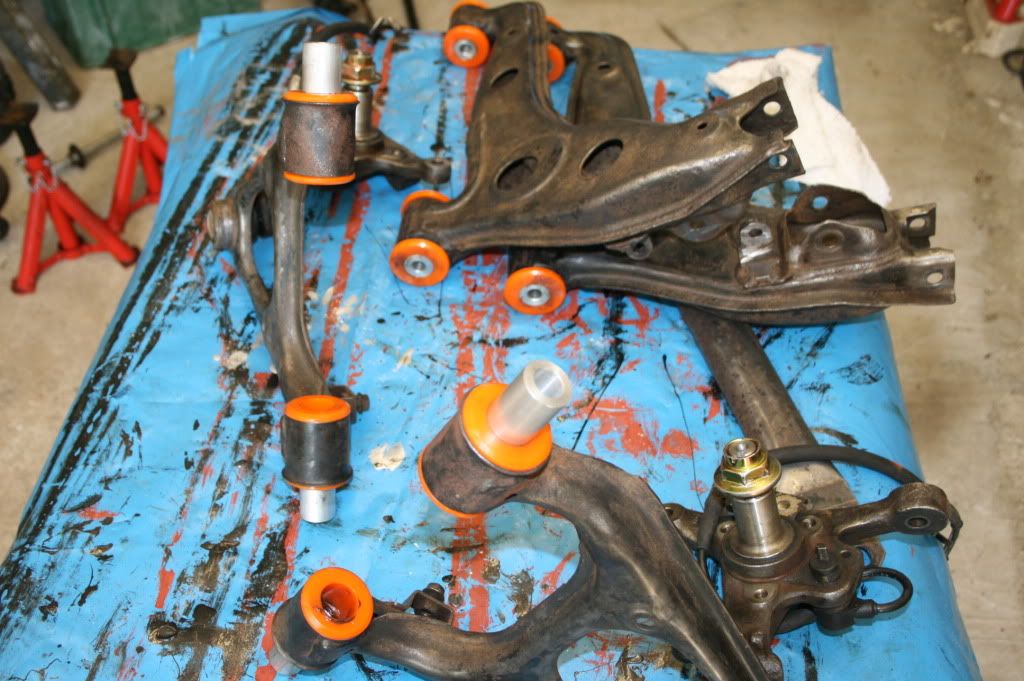
Surprisingly, I got a lot of satisfaction from cleaning up the components although it did take an age. Best technique is to start with large, coarse wire brushes and work down in size to get into the intricate parts. Some of the humungous brushes are sold for use on a 4.5 inch grinder. This is a lethal combination; the torque generated is phenomenal and the gyroscopic precession cannot be handled by a mortal. However, they work equally well on a 9 inch grinder and are much more controllable.
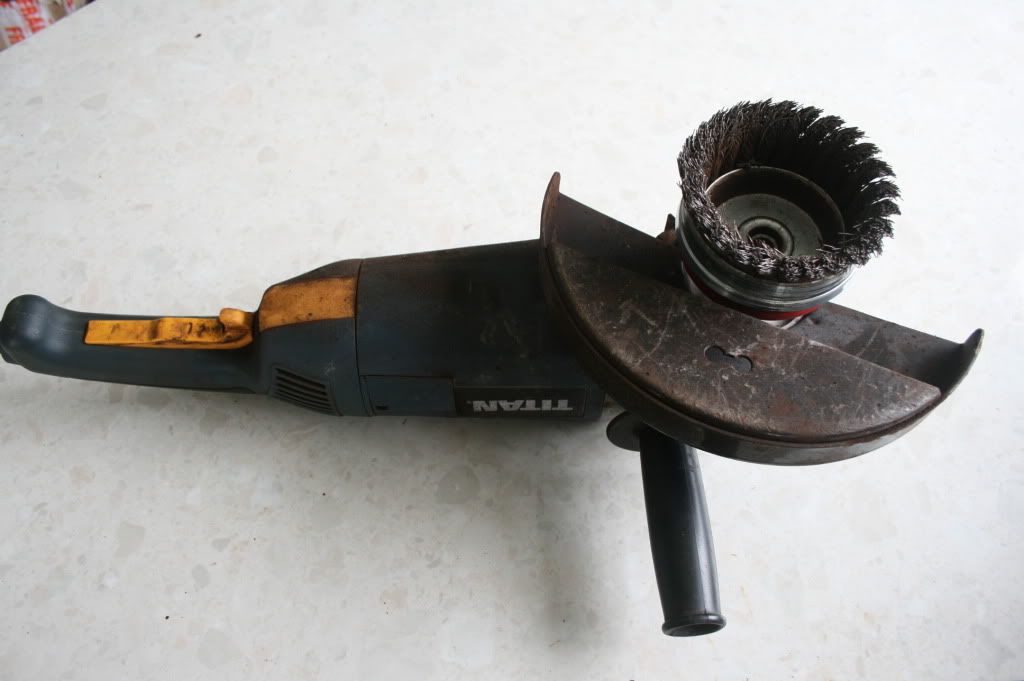
Red oxide and Hemmerite paint completed the job on the suspension. I left the engine much as it was but sprayed it with a de-greaser one day and steam cleaned it the next. I made a really controllable little steam cleaner from a wallpaper stripper, discarding the stripping plate and improvising a nozzle.
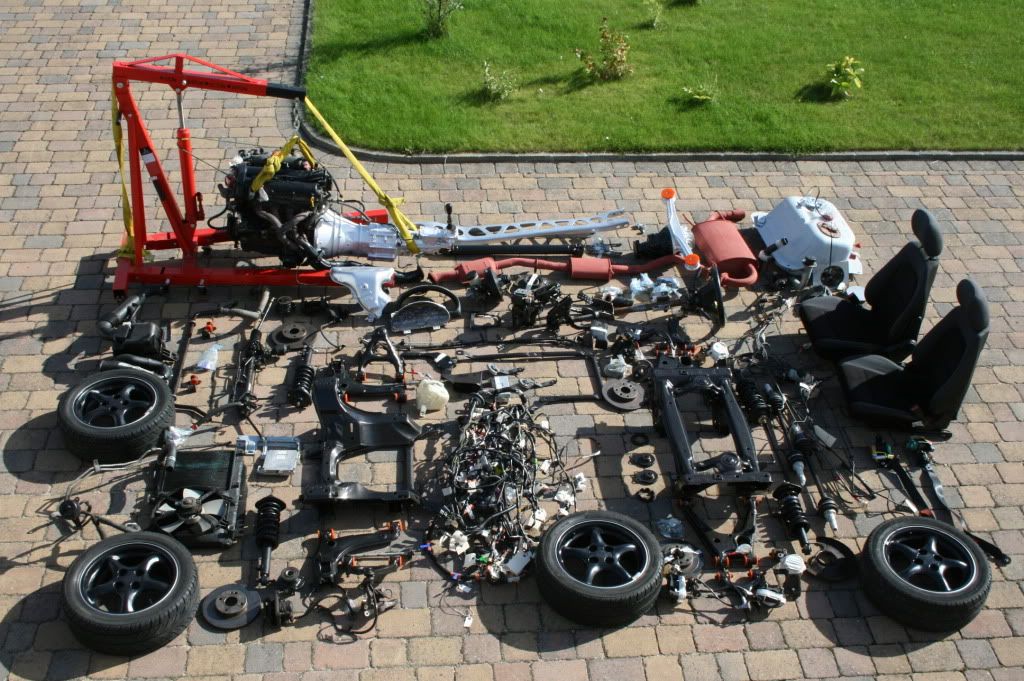
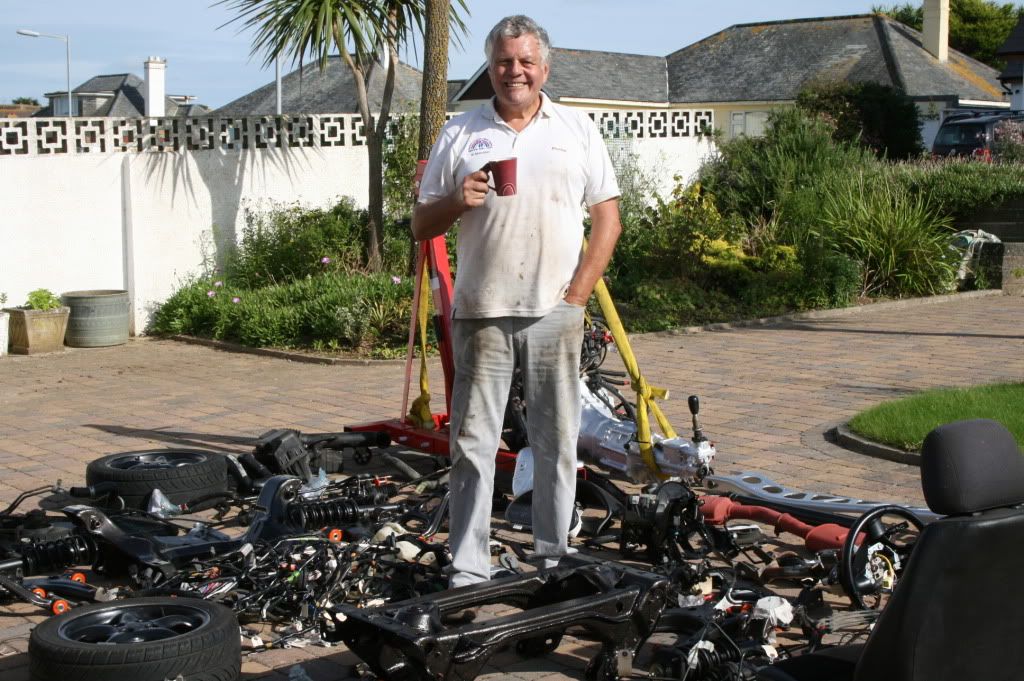
So, the bits are ready for re-assembly and here they are as they would appear in a Meccano catalogue. The amorphous lump, bottom centre, is the wiring harness.
As the workshop manual says, the re-assembly is the reverse of dis-assembly. And so it is. The process is quick but moderated by the need to accurately torque the nuts and bolts. A good-ish torque wrench is essential. (All these –ish bits are beginning to add up.)
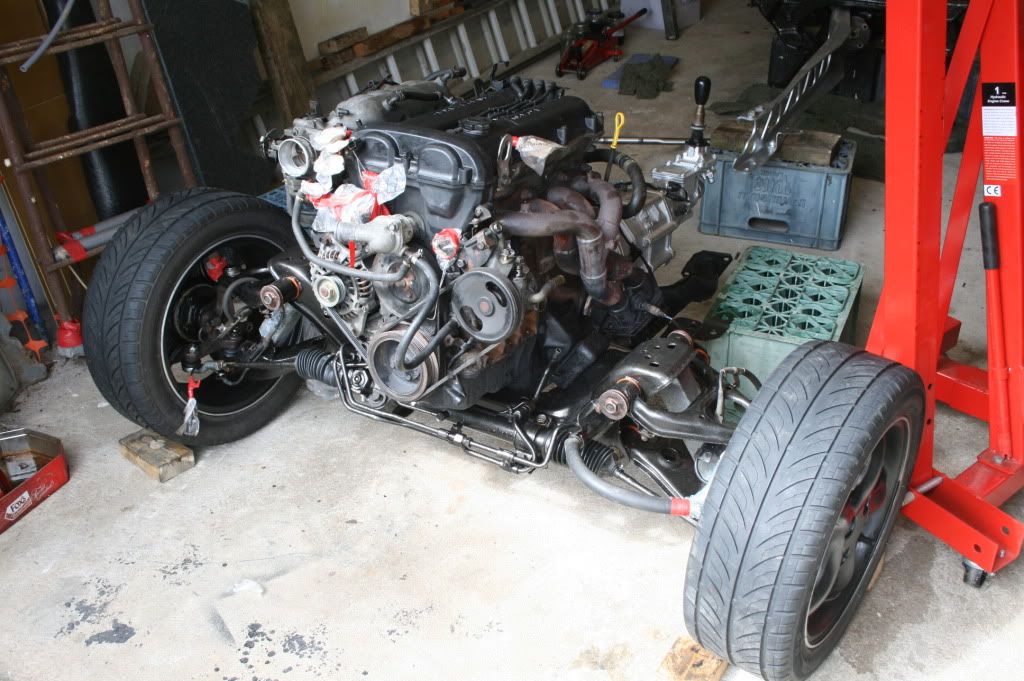
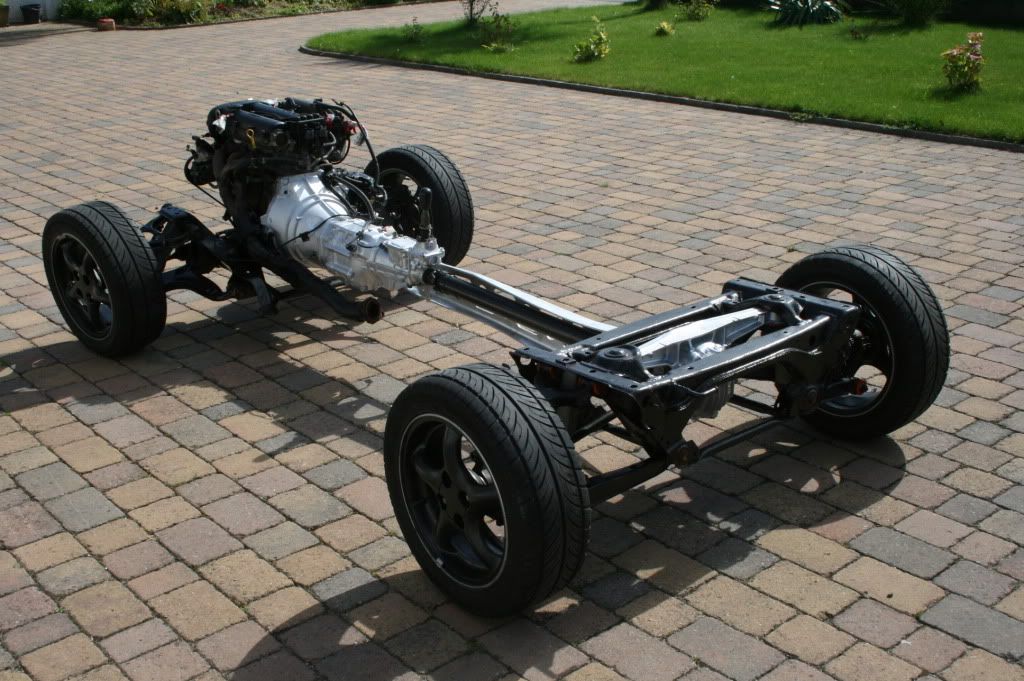
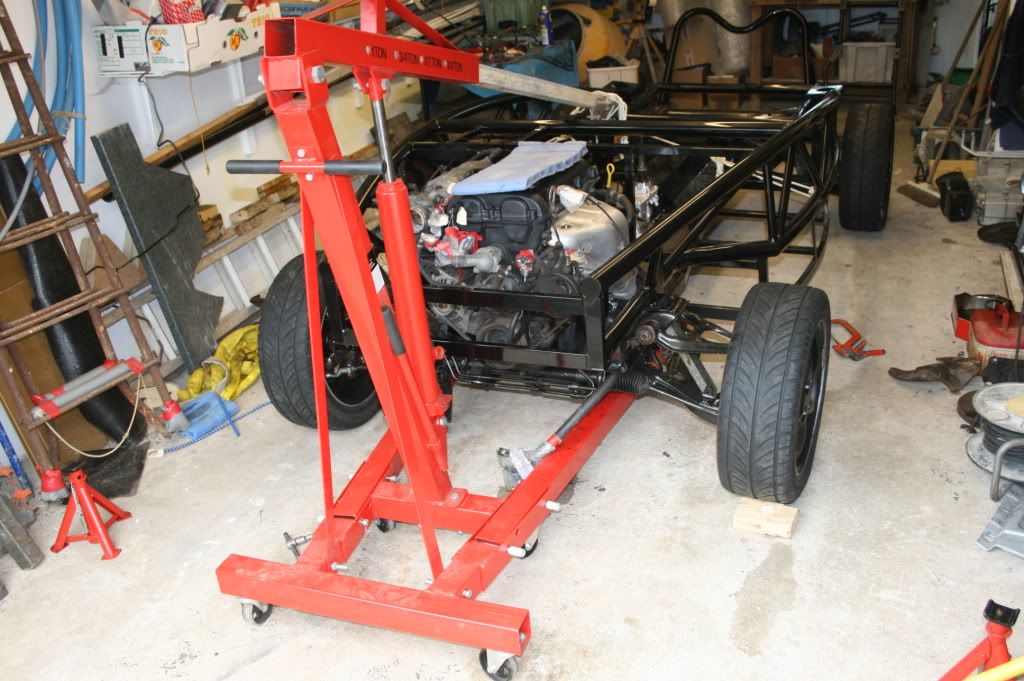
The rolling chassis awaits the first trial fit of the MEV framework. You will also note that the sun shines all the time in Cornwall. I’ll be collecting the kit on 26 Sep, so have a bit of time for some housekeeping – replenishing gearbox and diff oil that ended up on the garage floor and getting rid of sacks of rust.
Incidentally, I spent 5 months looking for the engine number. In desperation, I looked in the workshop manual and it turned out to be exactly where it says it should be.
I will report on progress towards the end of Oct.
Fast forward to 25 May this year and I hear my wife on the phone: “(giggle, giggle) … so I hope we can now get some closure on the epic Meccano saga … (giggle, giggle).” My wife doesn’t understand me much, but she was right on that point. 25 May was the date I took a spanner to the Exocet donor for the first time and the Meccano ghost could be laid to rest.
Here is a picture of the donor, in case nobody has seen an MX5 before.

1999 Mk2 1800S for £500. There are bargains out there and this one came with a “serious electrical fault” – the battery kept going flat in a couple of hours with nothing switched on. Managed to trace the fault in the time it takes to drink a cup of tea; the radio aerial socket was full of gunge. The aerial motor was constantly trying to lower the aerial even when fully retracted. Ten minutes to fix; over a grand saved.
My cunning plan was to go for Stuart’s “easy build” and retain the wheels, seats, suspension, ABS and power steering, at least until after IVA.
I am a huge fan of the Forum and I suppose I experienced most of the problems and frustrations written about previously. Rusted nuts and bolts can be shifted with copious amounts of WD40 applied the previous day, sometimes. Sometimes not. I had a mains voltage impact driver which loosened the hub nuts in a flash but proceeded to rip the heads off any other bolt or nut smaller than M14. It quickly went back on to eBay where it came from. Most fasteners came out with sockets, with or without breaker bars. I had some square section girder lying about and cut this up into breaker bars as required. I finished up with three about 1, 1.5 and 2m long. Some heads rounded and some captive nuts escaped so other fasteners had to be removed with hacksaws and angle grinders. I’m not a fan of nut splitters but I found them useful for removing castellated nuts especially those where the split pin had corroded in. Enough bolt shanks were left in the components to be retained to warrant the purchase of a cheap-ish tap and die set.
The workshop manual provided in the Forum is very useful and is worth more than a passing glance before starting a job. I have a narrow garage and assumed it would be a good idea to remove the car doors before pushing the car in and putting it on axle stands. Go to workshop manual. To remove the doors, remove the wings. To remove the wings, remove the bumper. To remove the bumper, remove the wing liners, and the headlights. So, basically, I would recommend a holistic approach and while you a lying on the cold concrete floor, take out any nut and bolt you can see. By the time the scrap man takes the body away, there is nothing left to undo.
A lot has been said about labelling everything. Excellent advice. The MK2 wiring harness, weighing in at 14kg, has an extraordinary number of connections and also a huge number of unused connectors. These also have to be labelled. But remember that most of the fluids used in the car or during the disassembly are great for turning ordinary biro into invisible ink. I know that I have a number of very clean, word-free labels.
Most of the bits went on eBay as they came off the donor. The demand now seems to have dried up but the net income so far is £677. I still have the 2 doors to disassemble and put the components up for sale – but they can wait.
With the nuts and bolts removed, the body came off the running gear without a hitch, and went to scrap for £40.

I was helped by a passing cyclist, on the left of the picture, who rides for Team Marmite!
Power washing the rolling chassis revealed an extraordinary amount of rust.


It was clear that a large amount of stripping, cleaning and painting would be required. The best estimate I got for blasting and powder coating the components was an eye-watering “about £1000”. So, roll up the sleeves, buy a selection of cheap-ish rotating wire brushes and get on with it.
So much for easy build. The perceived wisdom on the Forum is that bushes can be really ragged but still work and pass IVA/MOT. But those on my donor looked really awful, like, well, bushes. As I was now committed to stripping to component level, I went for a cheap-ish set of Flo-flex. Having read the Forum, it came as no surprise to find that I could not press out the old bushes using a bench vice but I tried it anyway. (This was before the suggestion of freezing the bushes appeared). So, I burnt them out using a blow torch – really good fun, very satisfying.

The new bushes can be pressed in using a vice.

Surprisingly, I got a lot of satisfaction from cleaning up the components although it did take an age. Best technique is to start with large, coarse wire brushes and work down in size to get into the intricate parts. Some of the humungous brushes are sold for use on a 4.5 inch grinder. This is a lethal combination; the torque generated is phenomenal and the gyroscopic precession cannot be handled by a mortal. However, they work equally well on a 9 inch grinder and are much more controllable.

Red oxide and Hemmerite paint completed the job on the suspension. I left the engine much as it was but sprayed it with a de-greaser one day and steam cleaned it the next. I made a really controllable little steam cleaner from a wallpaper stripper, discarding the stripping plate and improvising a nozzle.
So, the bits are ready for re-assembly and here they are as they would appear in a Meccano catalogue. The amorphous lump, bottom centre, is the wiring harness.


As the workshop manual says, the re-assembly is the reverse of dis-assembly. And so it is. The process is quick but moderated by the need to accurately torque the nuts and bolts. A good-ish torque wrench is essential. (All these –ish bits are beginning to add up.)


The rolling chassis awaits the first trial fit of the MEV framework. You will also note that the sun shines all the time in Cornwall. I’ll be collecting the kit on 26 Sep, so have a bit of time for some housekeeping – replenishing gearbox and diff oil that ended up on the garage floor and getting rid of sacks of rust.
Incidentally, I spent 5 months looking for the engine number. In desperation, I looked in the workshop manual and it turned out to be exactly where it says it should be.
I will report on progress towards the end of Oct.




 Keep up the good work and posts.