|
|
Post by gnc on May 18, 2013 8:25:15 GMT
We've never tried re-inserting driveshafts or CV joints before.
Is there any secret to aligning the C clips before pushing them back in, or do you just centralise them and give everything a good whack back together?
|
|
|
|
Post by welshy1 on May 18, 2013 17:01:47 GMT
Make sure it's aligned then give it a hit with a hammer. Should pop in then.
|
|
|
|
Post by gwnwar on May 18, 2013 19:15:57 GMT
Make sure you have it centered in hole not hanging down.. hold it up and hit flange or if you have the whole drive shaft put nut on and use a block of wood and big hammer. some times pulling it out 1/8" and slamming it in will do it.
|
|
|
|
Post by gnc on May 19, 2013 21:41:54 GMT
Thanks guys, looks like brute force and ignorance is the order of the day.
I've got 6 C clips on order just in case we have a little mis-hap.
|
|
|
|
Post by gnc on May 26, 2013 0:00:25 GMT
The genuine oil seals for the diff arrived. 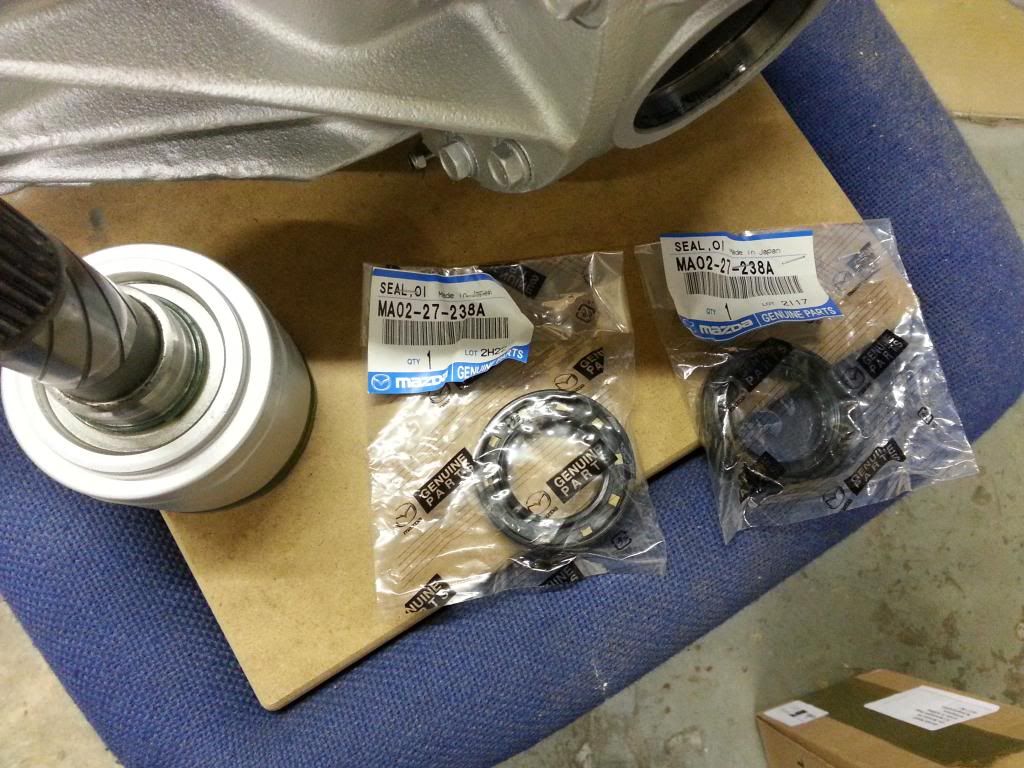 These were inserted easily, just find something with an outer diameter the same as the seal and tap it gently into the housing until its seated flush. Then reinstalled the inner CV casings. Thanks Welshy1 and Gwnwar, this really was straightforward. Aligned the C clip centrally, located the splines upto the clip and then gave the casing a tap with a rubber mallet. The CV went in smoothly and snapped into place. 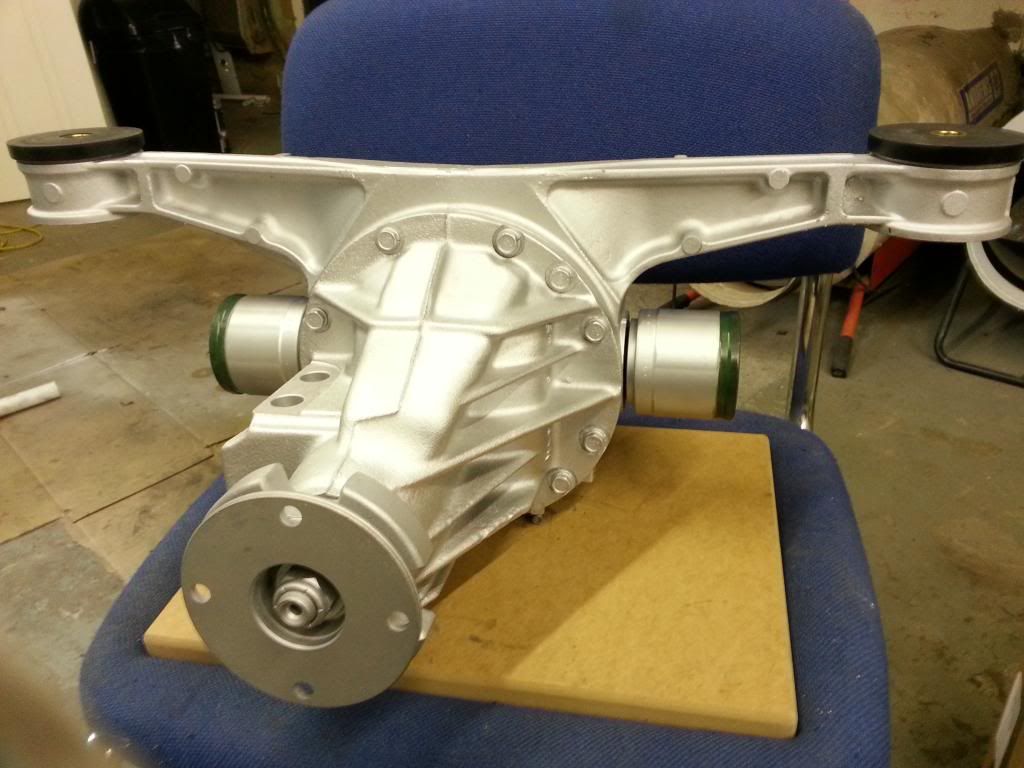 Filled the diff with the recommended oil and checked for leaks. Everything seems to be sealed correctly. 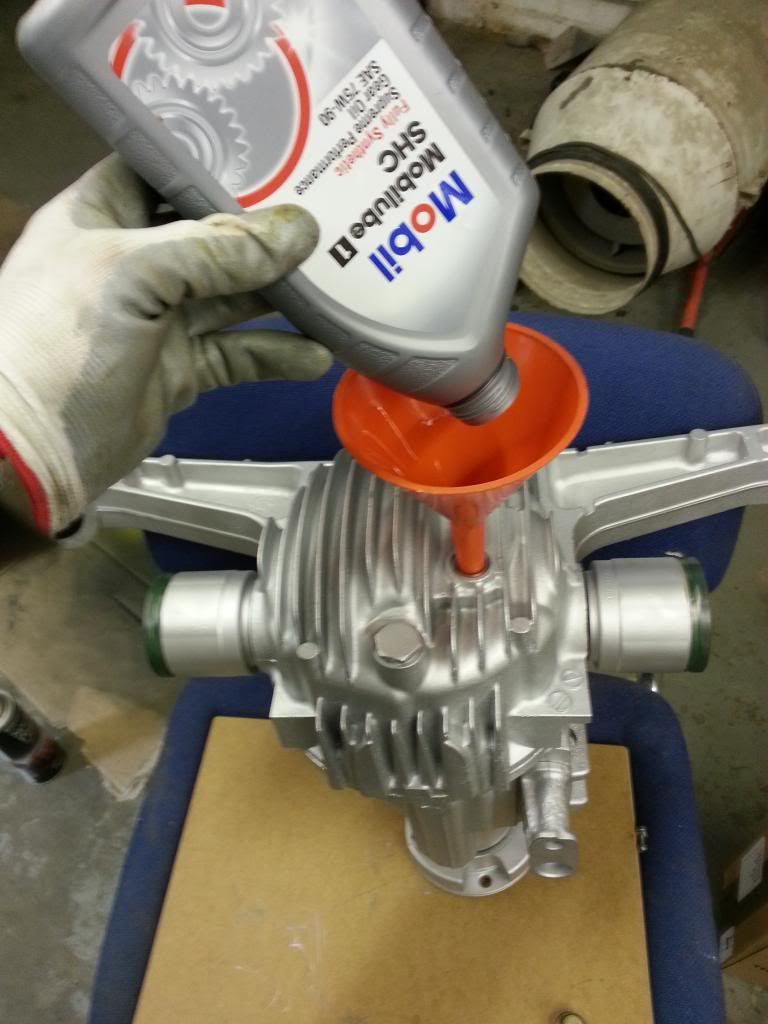 Then remounted the ppf to the diff and remounted under the subframe. Also reassembled the inner CV joints and inserted the driveshafts. Currently looking for a supplier of inner CV boot kits. Each week we see a little bit more go back together. 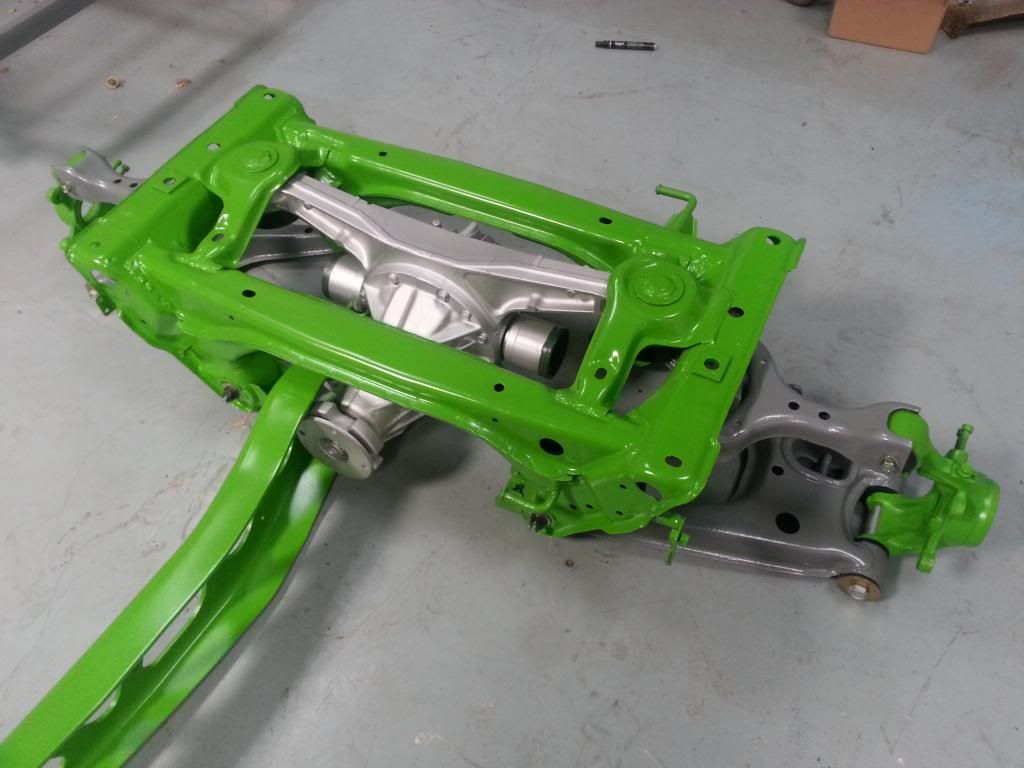 |
|
jord
Junior

Posts: 27
|
Post by jord on May 26, 2013 12:33:33 GMT
That green and grey scheme looks amazing!!
Wish I had mine coloured now, rather than dark silver! Tut
|
|
|
|
Post by gnc on May 26, 2013 17:59:20 GMT
To be totally honest Jord, I did ask the powder coaters to do the wishbones in silver to match the chassis, which is a quite dark silver done by the people that MEV use.
When it came back it looked very grey indeed but after many coats of lacquer, it look like a grey/silver in real light, only a little bit darker than the chassis. It's not quite the same but close enough not to get upset about it.
|
|
jord
Junior
Posts: 27
|
Post by jord on May 27, 2013 11:18:03 GMT
.... Still looks amazing! After a year of being in a garage, my subframes have started to rust, even after powder coating and sandblasting!
I think I'll do a colour like yours if I end up stripping it down for a refurb!
When its all together, this is going to look ace!
|
|
|
|
Post by mattapo on Jun 5, 2013 20:32:52 GMT
Looks like the same green as my frame, is it Mamba green?
|
|
|
|
Post by gnc on Jun 5, 2013 21:38:56 GMT
Its Kawasaki Green, unsure if there's a specific name given to it. All I know is that its VERY bright !!
|
|
|
|
Post by gnc on Aug 3, 2013 19:23:19 GMT
It's been a little over two months with absolutely no time on the car whatsoever. This is simply unacceptable. No more visits to people and NO MORE WEDDINGS. THERE IS A CAR TO BE BUILT!!!!! Took the clutch slave cylinder off the gearbox and removed the starter motor. Undid a few more bolts, stored them all in sequence and was left with one loose gearbox. 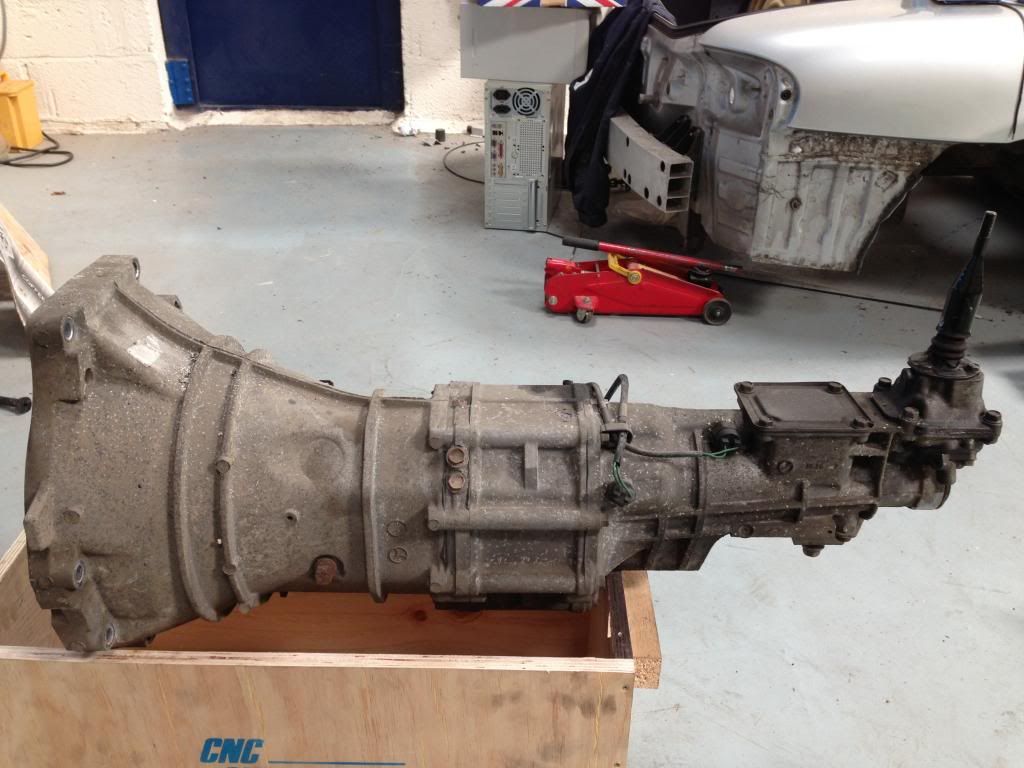 Drained the oil and started the long process of dirt removal and cleaning. I think this may take some time.... 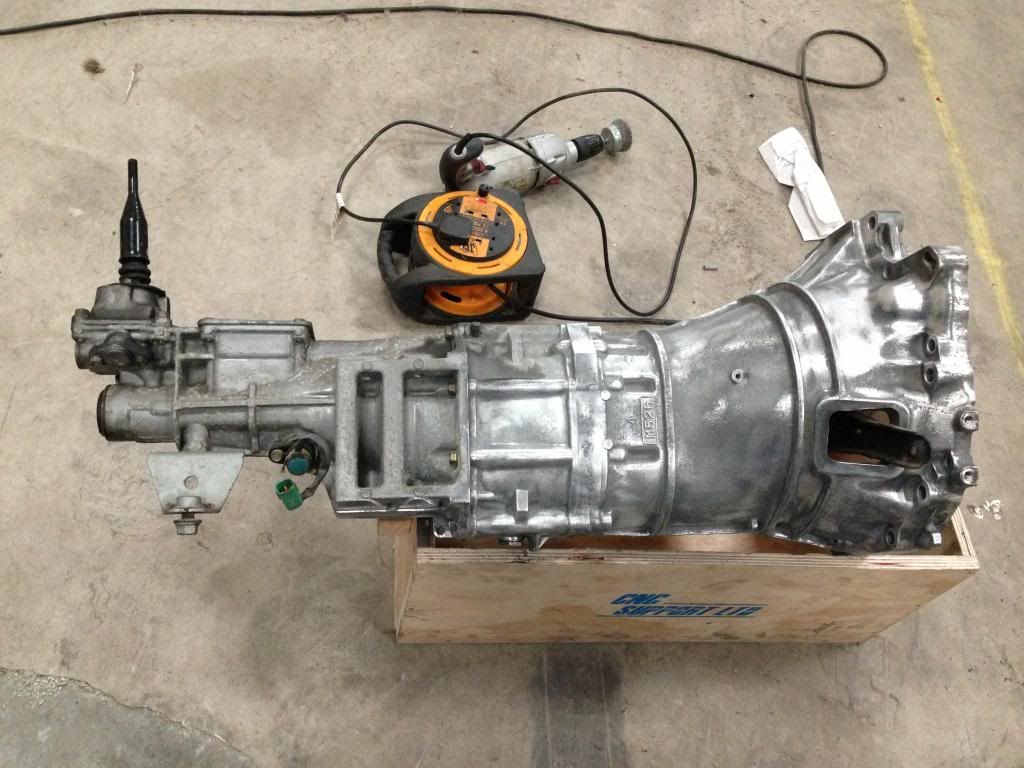 Still waiting for the inner CV boots to arrive to finish off the drive shafts. Fingers crossed they should be on by the next post. |
|
|
|
Post by gnc on Dec 27, 2013 20:58:50 GMT
Well, it's been an awful long time since we did an update and very little has taken place over the last six months. Having a factory may be very useful for storing a kit car but its a big drain financially if its not doing the job it was intended for so... it has been modified, had the builders in and is now up for rent. Six months of simply trying to keep things afloat. But however, onwards and upwards, it is now time to put some of our attention back into our little bit of a distraction, factory disaster averted for the moment. After cleaning the gearbox, it has been degreased, primed and given a fresh coat of paint. 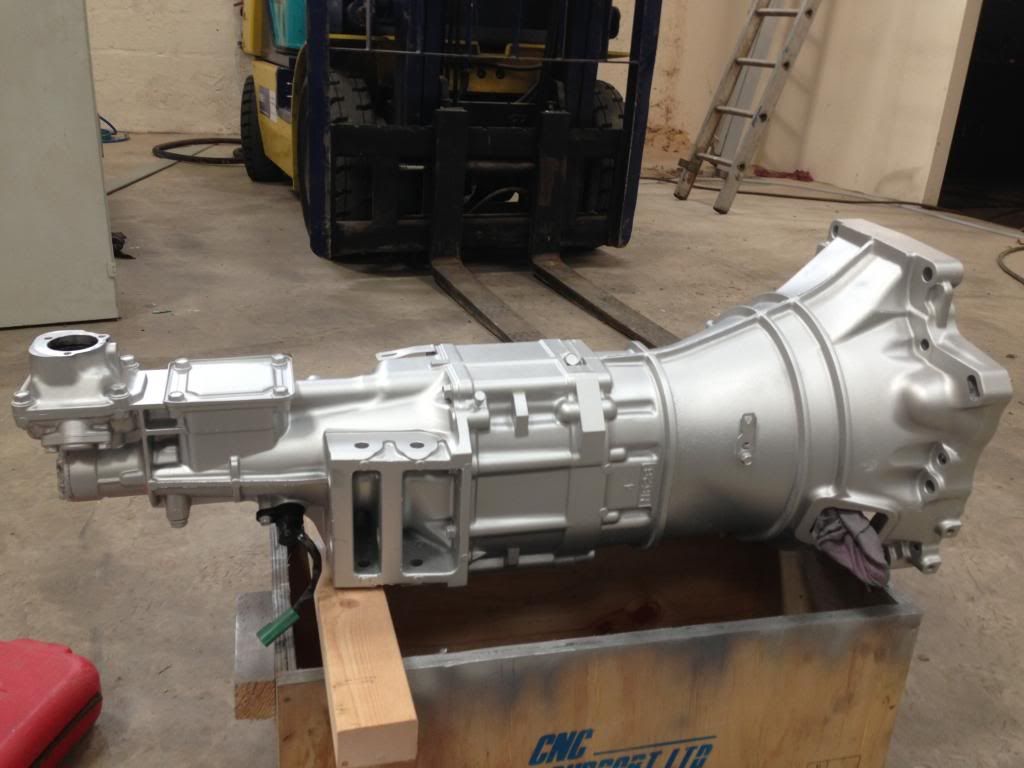 The switches have now been refitted, the only bit still to be sourced and replaced is the gaiter for the gearlever. 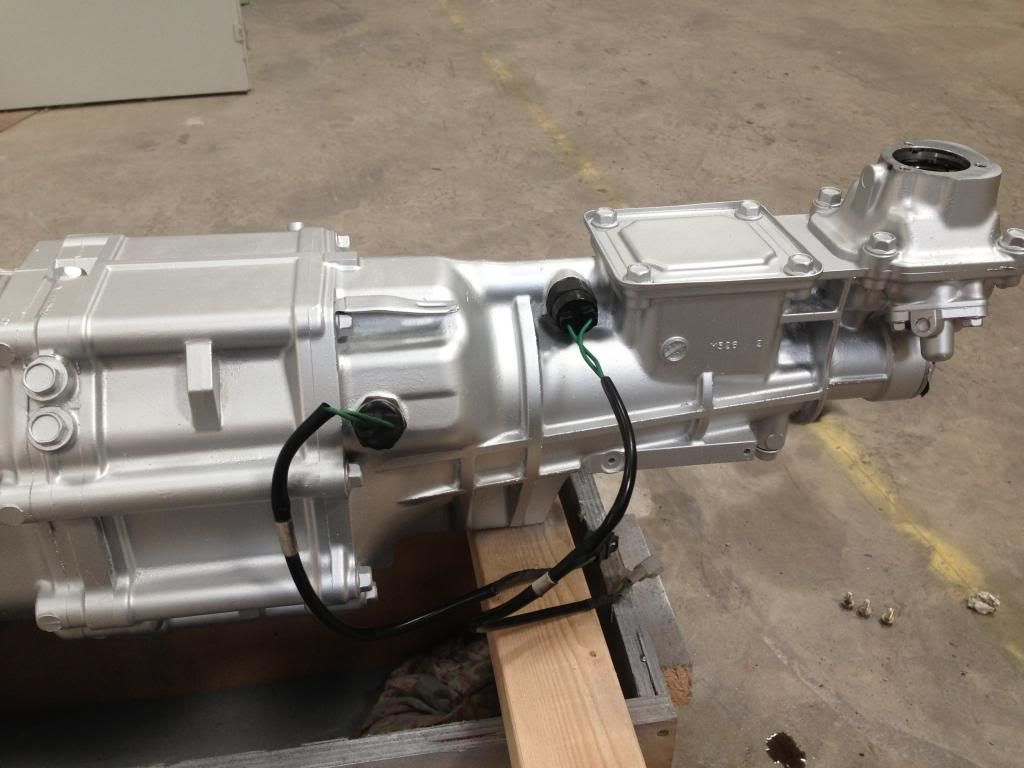 If anyone knows of a source, please post me a link. By the new year, the inner CV joints will be fitted, freshly greased and the boots fitted. Pics to follow very shortly. A new engine frame has just been ordered from Ebay, a present for the new year. Hopefully, things should get back on track albeit a little delayed. More to follow soon. |
|
|
|
Post by Stewart on Dec 28, 2013 0:35:54 GMT
For the gaitors, speak to Anthony at Autolink, tell him Stewart at FreakyParts sent you, he'll sort them out for you.
|
|
|
|
Post by gnc on Dec 28, 2013 12:30:13 GMT
Many thanks Freak, will give him a call. I don't see the point in not replacing these bits while the car is in pieces and easily accessible.
|
|
|
|
Post by gnc on Jan 12, 2014 11:06:08 GMT
With the gearbox looking all shiny, it showed just how dull and dirty the engine appeared. Time for a new purchase...... 680KG Engine Stand, engine not included. 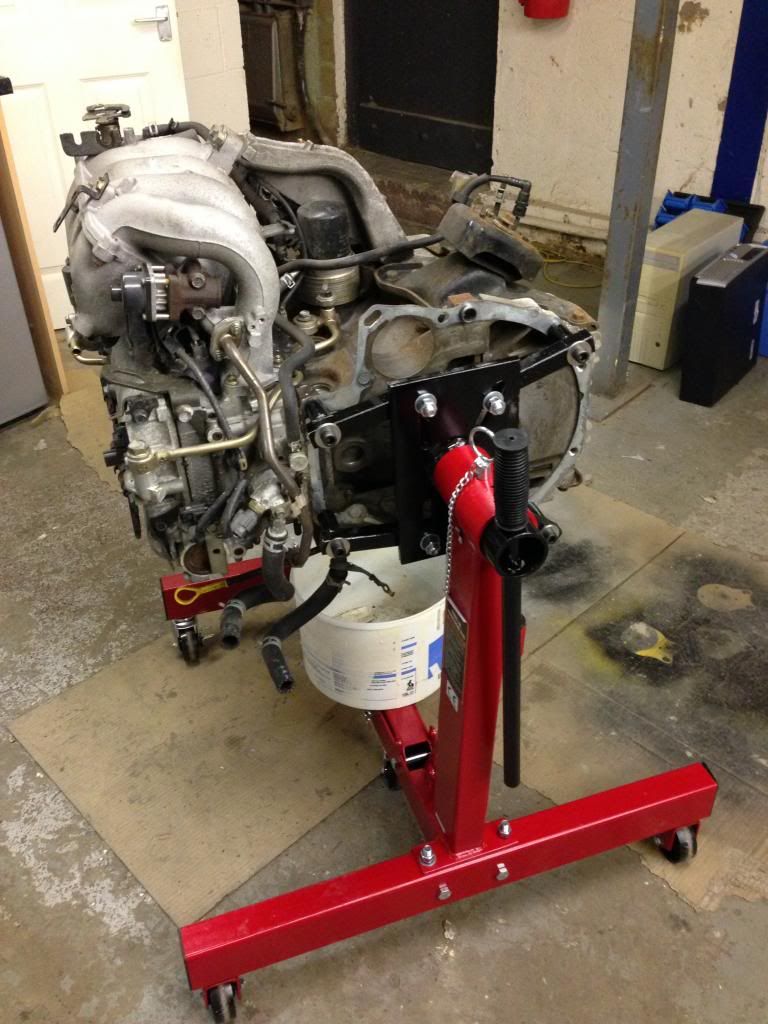 Now there are so many parts attached that will need stripping before the real cleaning can commence so here goes. 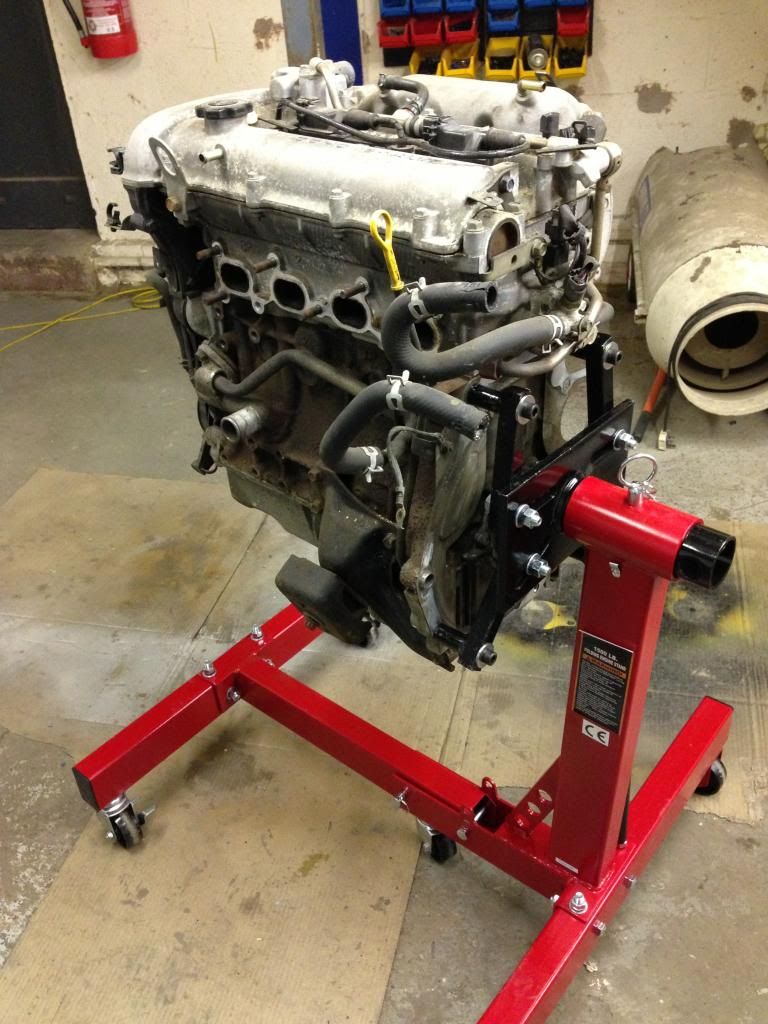 We have taken a whole lot more pictures than shown here, trying to note the location of every bolt and bracket. The first main piece to come off was the inlet manifold. Access is so much easier on the stand, as well as being able to rotate it for ease. The best £79 ever spent. 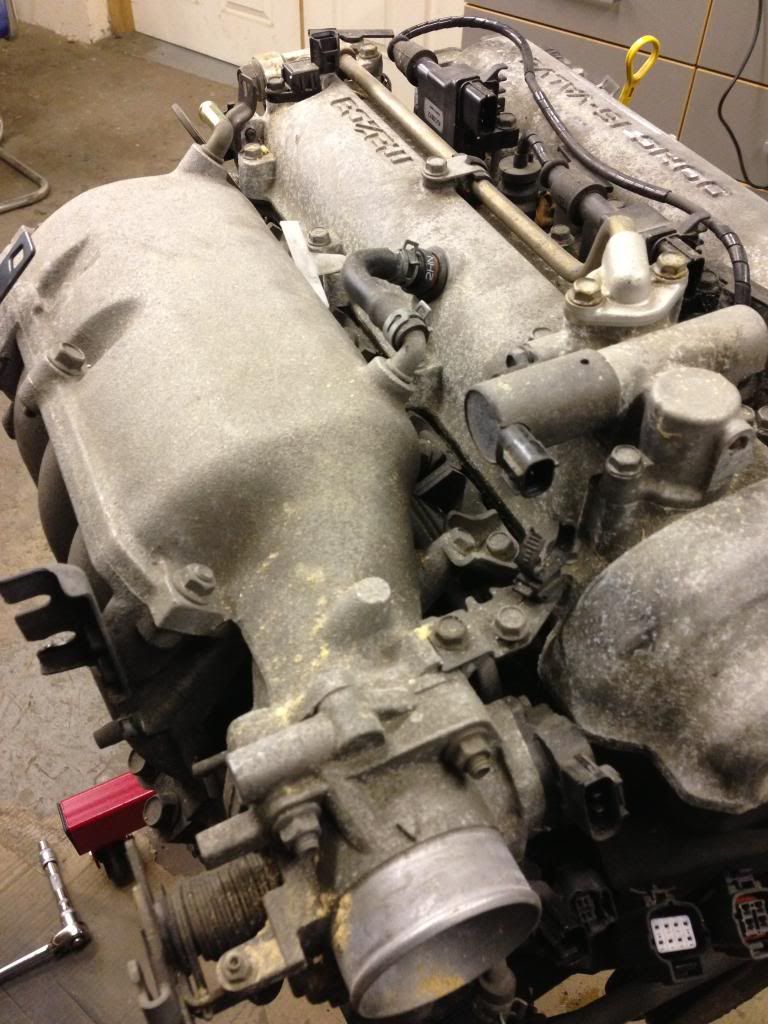 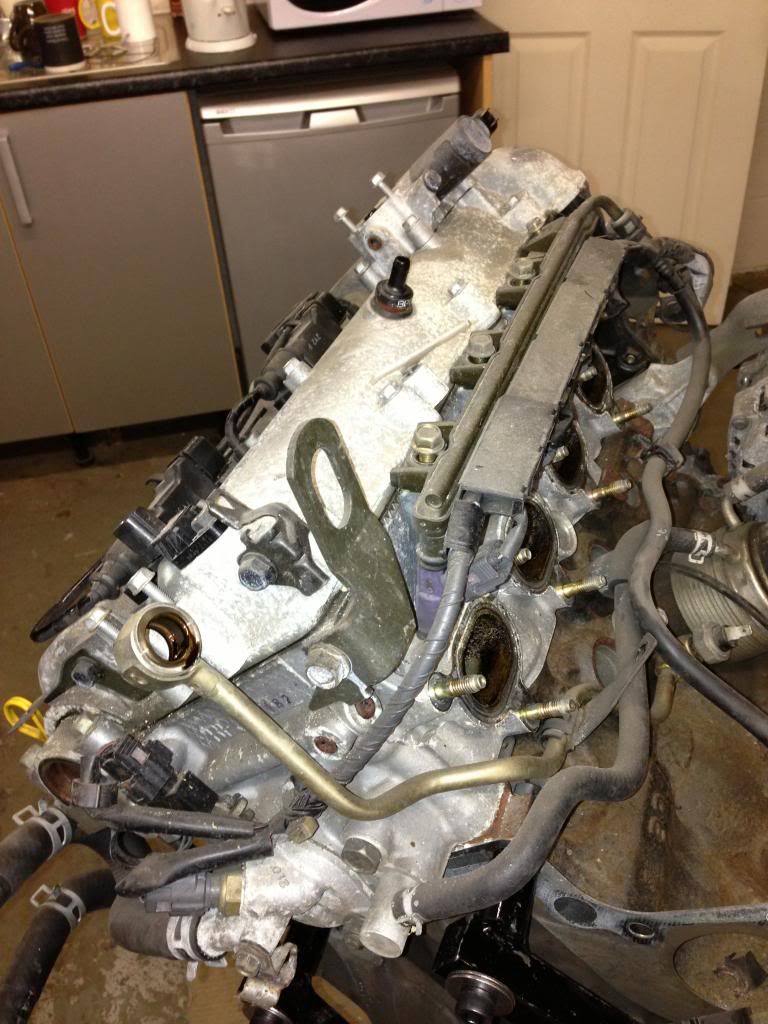 With the fuel rail off, this side starts to look pretty bare. |
|


