|
|
Post by browno on Mar 28, 2017 13:44:04 GMT
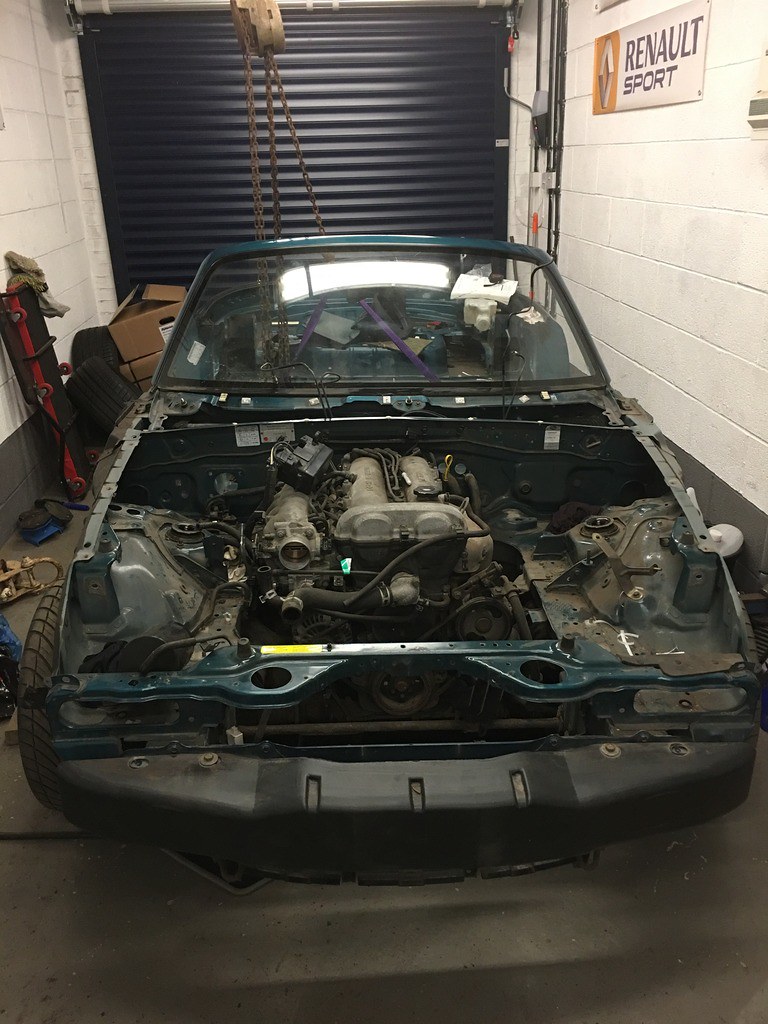
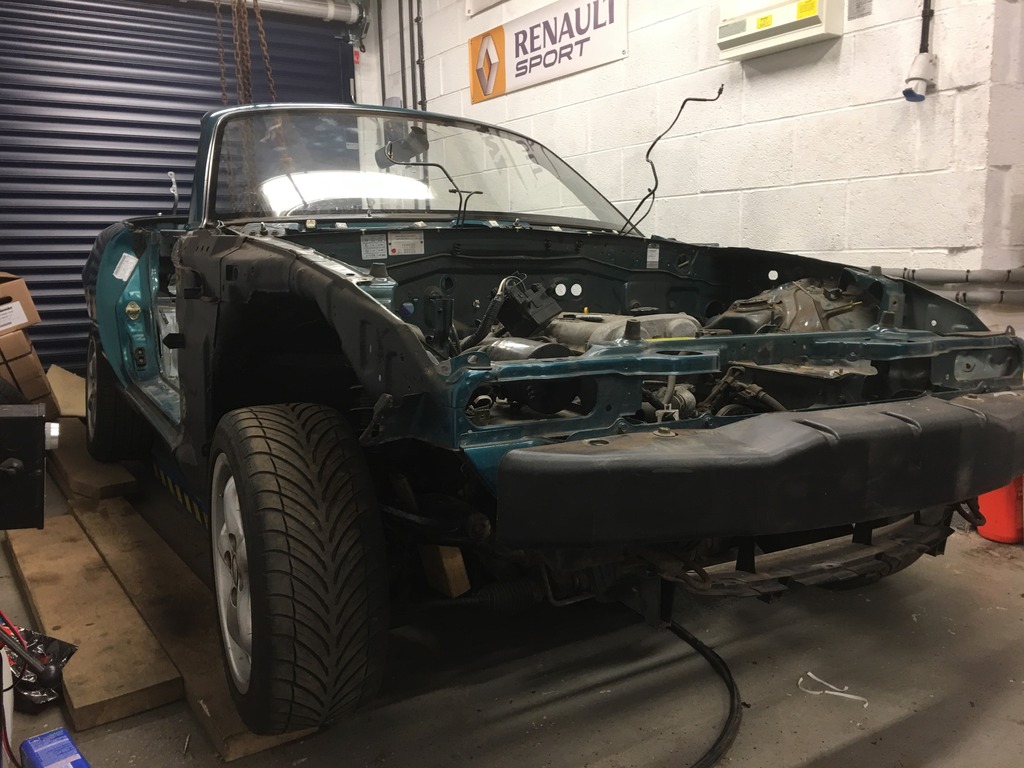
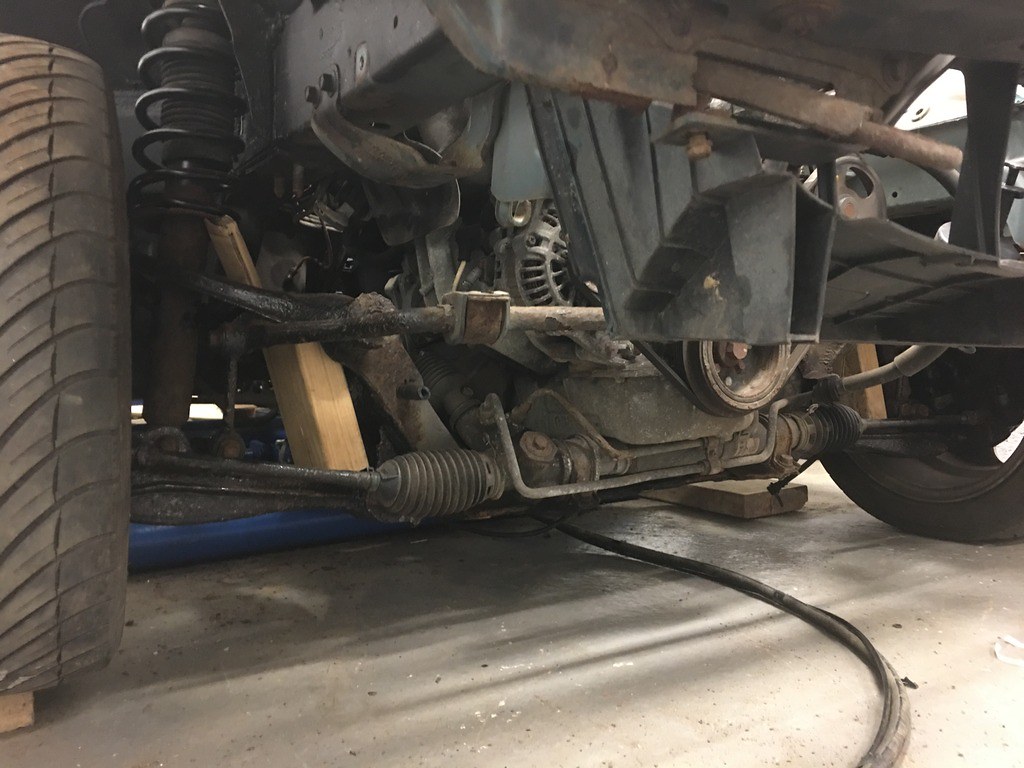
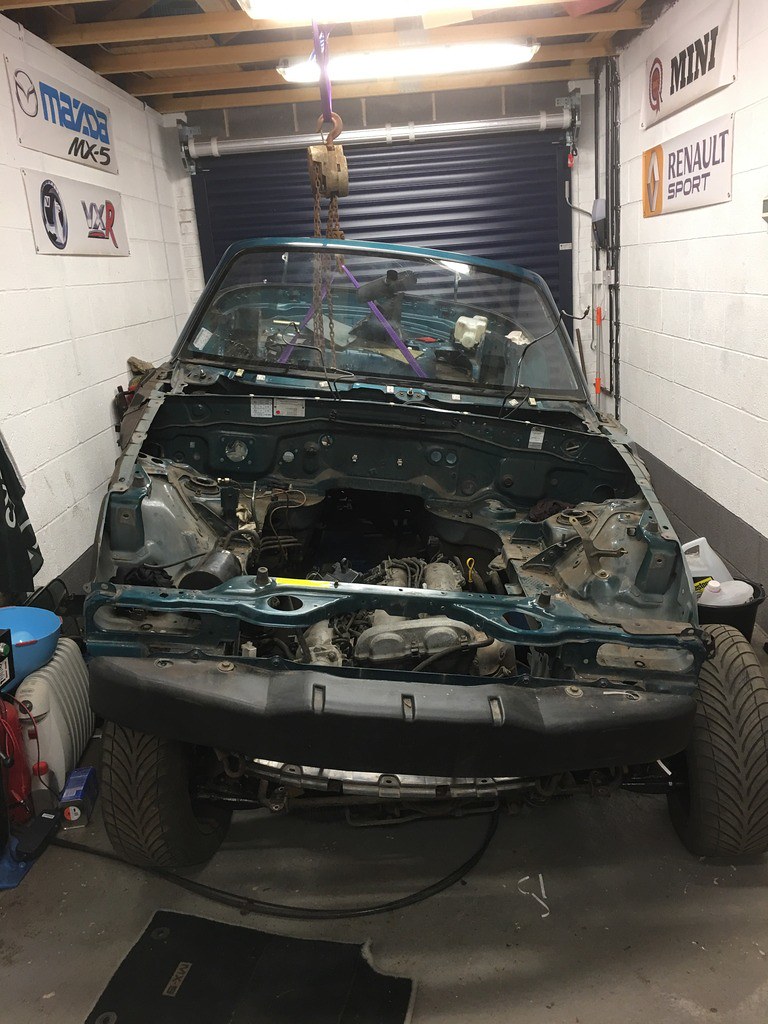
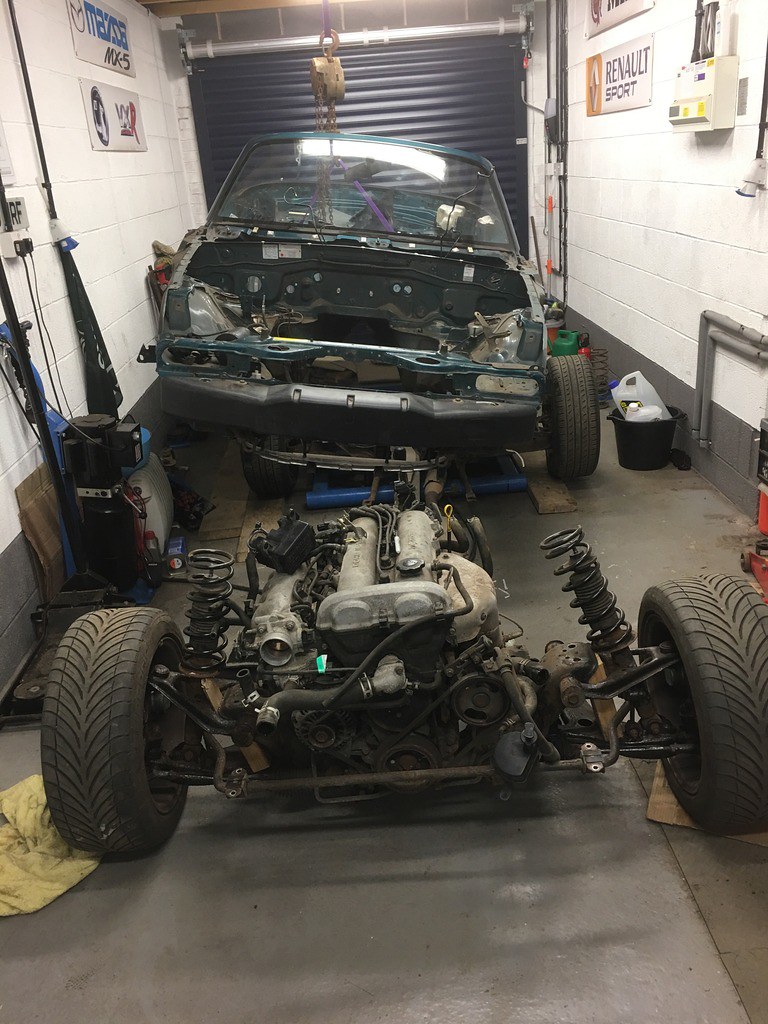
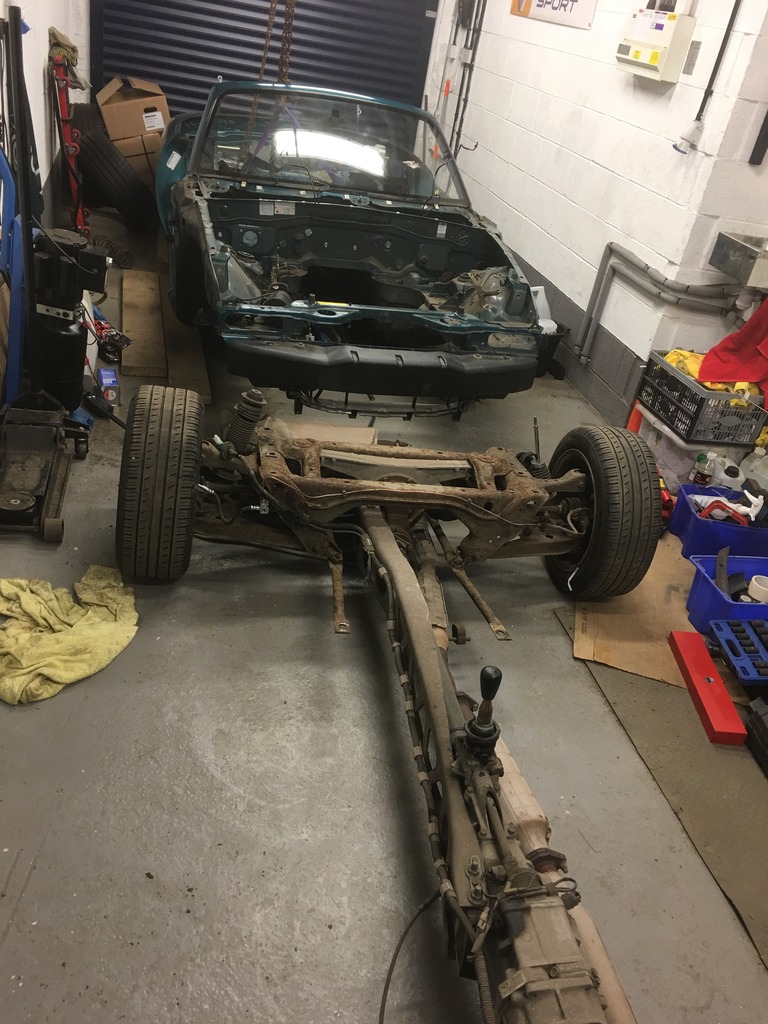
Hello All, Edit - Due to the photobucket mess up, I have rehosted all of my photos on flickr www.flickr.com/gp/31795518@N05/LYX484 where you can view the whole album of my build until I manage to re-edit the whole thread to looking decent again! I have been lurking on here and reading many build threads while I have been working out what to do with my project! I have a thread running on the story so far over on MX5nutz thread here but to cut a long story short, I bought a '98 mk1 from a colleague that had been family owned from new, but had failed the MOT on rusty sills - seen below alongside my current Roddisons Motorsport-sorted mk3 that I use for the odd trackday. 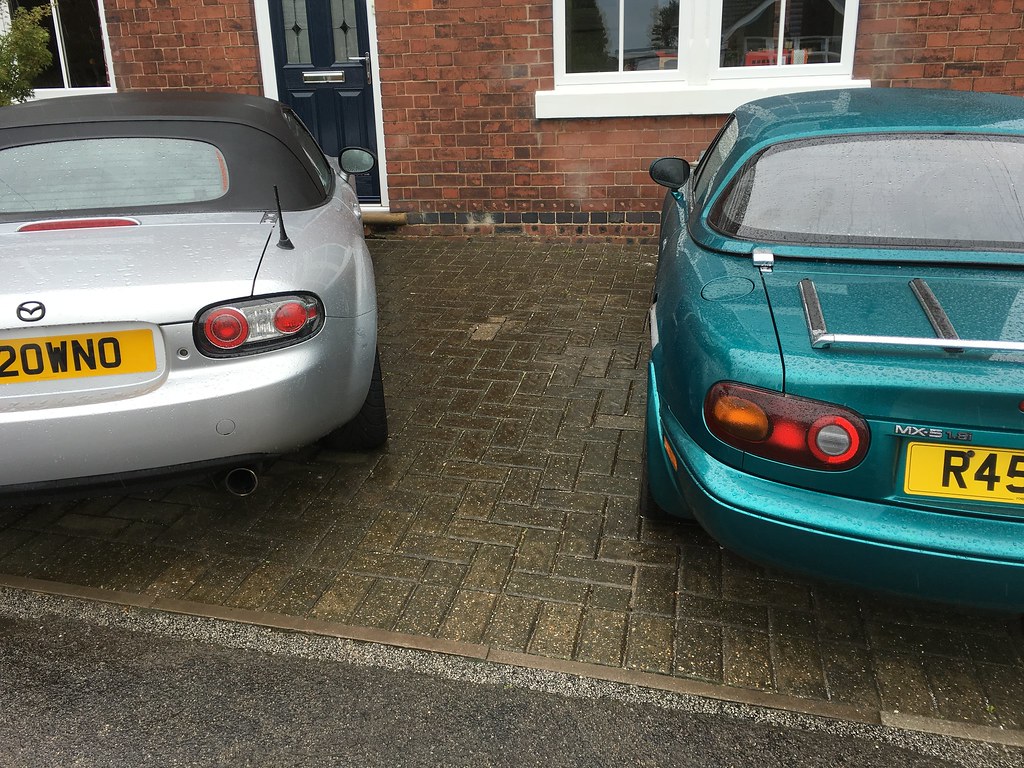 9302DD67-FAF7-4475-AA32-45ED84BB5CB2_zps6itvad5t 9302DD67-FAF7-4475-AA32-45ED84BB5CB2_zps6itvad5t on Flickr My initial plan was to turn it into a kit, but as I got it I thought I might actually restore it - so started tidying it up and then chopping out to get it sorted. As I discovered the extent of the rust, I have reverted back to the original plan - to stop being sentimental and get stuck into stripping it! While it is a nice car, with good history, I think that unless I did a full restoration job it would still only be in average condition (below being the n/s sill after I chopped it open and cleaned it up).  D0AE19B1-D149-4536-8336-2F953F1AB944_zpslxftk4ad D0AE19B1-D149-4536-8336-2F953F1AB944_zpslxftk4ad on Flickr Before I did that though, I promised myself that I would finish off my long-term project, which is a 1985 mini that I bought in 1995 to tidy up as my first car - and hadn't quite got to finishing! So that now has been sorted to at least get it an MOT and roadworthy - which is quite a pleasing achievement after all this time! 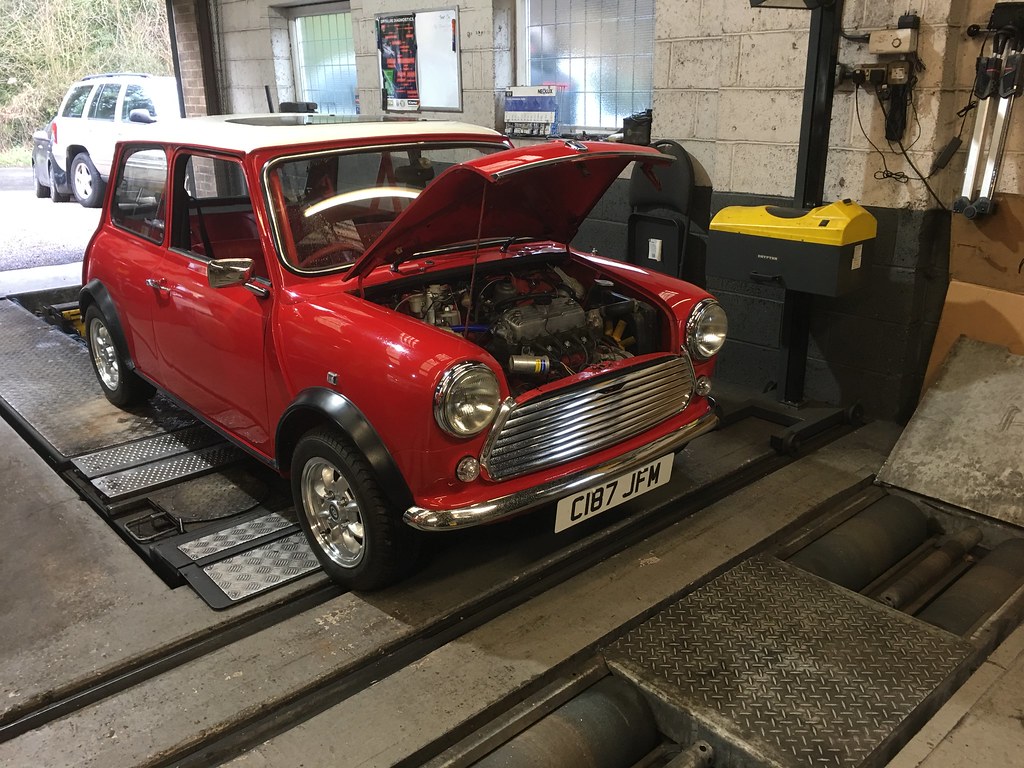 Untitled Untitled on Flickr So I have so far sold off a decent few parts through the mazda forums and got the car coming apart nicely - so the loom is out and I am should be ready for body removal within the next week or so. Incidentally - a top discovery on the loom removal was a handheld brother label maker that was £7 from costco - the label tapes aren't cheap at about £5 each, but it makes clear, legible labels that should be durable too - so I have been busy labelling and removing - a work in progress shot below!  34D8B972-6077-415D-BE7B-E5CD3E26CC48_zpst3xqztbm 34D8B972-6077-415D-BE7B-E5CD3E26CC48_zpst3xqztbm on Flickr Since this shot, I just need to remove the column, remove the handbrake cable from the calipers and disconnect the fuel pipes and I will be ready to lift the body. One good piece of news is that I stuck it on my lift yesterday and just tried a few of the subframe bolts and they all look to be ok to remove with my impact gun - so that's another worry off my mind. To get ready for the next steps I had a ride over to Mansfield on Friday to meet Julie and Stuart to have a good look over an exocet in the metal (I had had a look at Stoneleigh last year, but at that point was erring towards a restoration!), and more importantly think about options and colours that might work. It was great to spend some time looking over the cars and chassis (and the work in progress for Stoneleigh this year too!), and get Julie and Stuart's experiences of many different builds. I had thought of a colour scheme (that I hadn't seen done before), but then having played with photoshop was not convinced by it. I have then been playing around a little more and have an idea that is close to a final plan (again a combination that haven't seen) - so I will likely be placing the order this week. This should then give me plenty of time to get the body off and everything tidied up before collection day! My plan at this stage being that I want the build to be quicker than the mini... quite a lot quicker in fact, and would like to be on the road by next spring - let's wait and see! |
|
|
|
Post by browno on Mar 30, 2017 14:50:36 GMT
After a bit of confirmation with Stuart, my order is now in - pending confirmation of any very final changes once I have seen the new demo car at Stoneleigh...
I have also sold the interior from the donor today, so that's a little more into the pot for shiny bits!
Now, I guess I had better get on with getting that body removed and the mechanicals sorted!
|
|
|
|
Post by browno on Apr 4, 2017 8:28:43 GMT
A mini-update for today, but with a couple of important steps achieved!
As mentioned, I have ordered my kit from MEV, which is exciting news - and so means I need to get my finger out on getting everything else going. As a result of that, I have been getting the last bits stripped from the donor, and it is currently sat with all but 2 subframe bolts out ready for the body to come off later this week.
Finally, (and slightly prematurely!) I spotted magikwheels on ebay (which I am told is the Team Dynamics factory outlet) had a set of new pro-race 1.2 wheels on auction, so I snapped them up - 15x7 et25 in matt black - which will suit my colour scheme perfectly. I am a fan of the pro race wheels, having had a set of anthracite 18's on my old Vectra VXR, and I think the style and light weight of them will suit the Exocet well...
No pics for today - but I will make sure to add some more as the body comes off!
|
|
|
|
Post by browno on Apr 7, 2017 22:58:06 GMT
|
|
|
|
Post by gwnwar on Apr 8, 2017 6:02:57 GMT
Don't forget to remove the shock top hats from the body.. Now the fun starts..
|
|
|
|
Post by browno on Apr 9, 2017 21:23:07 GMT
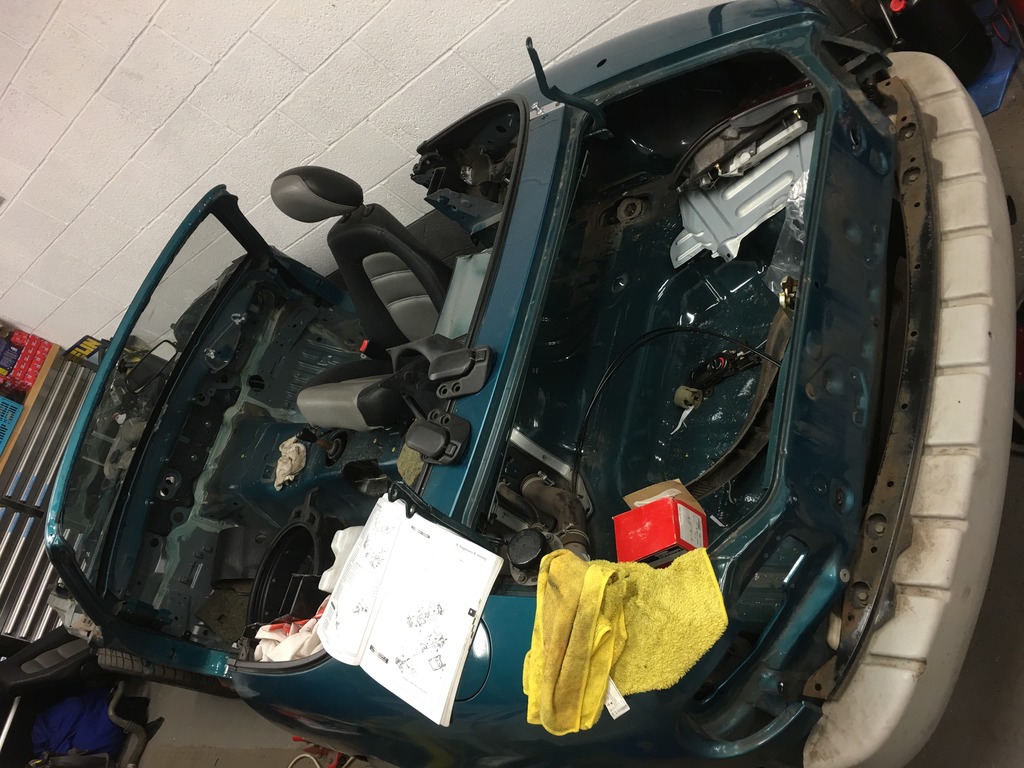
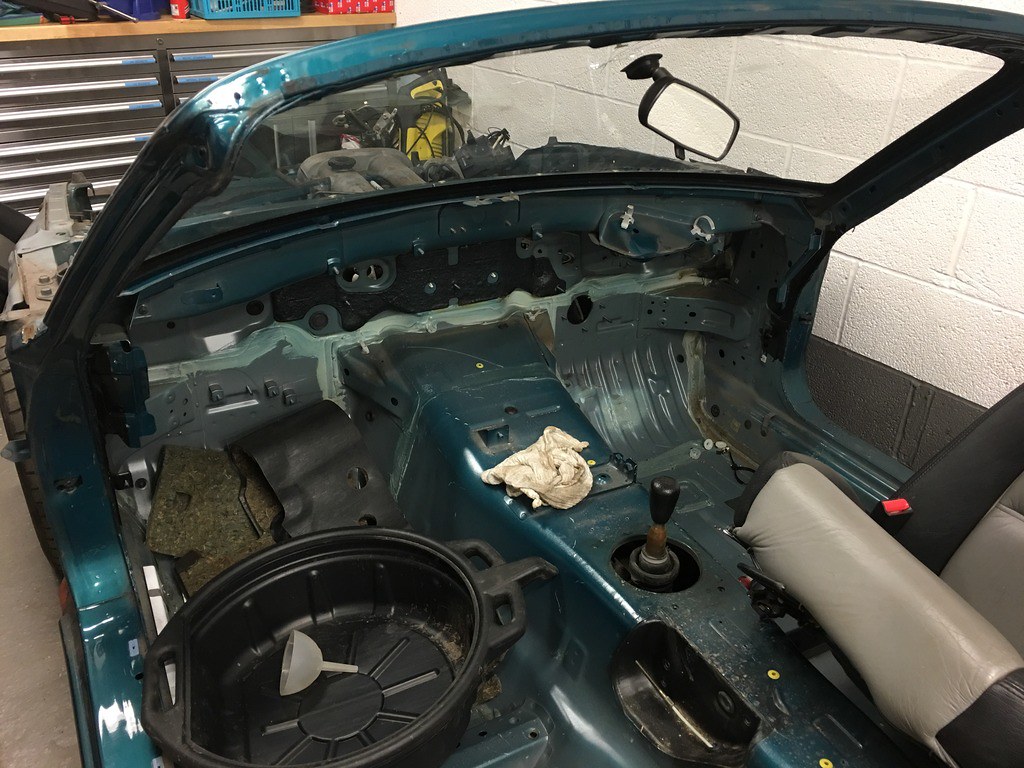
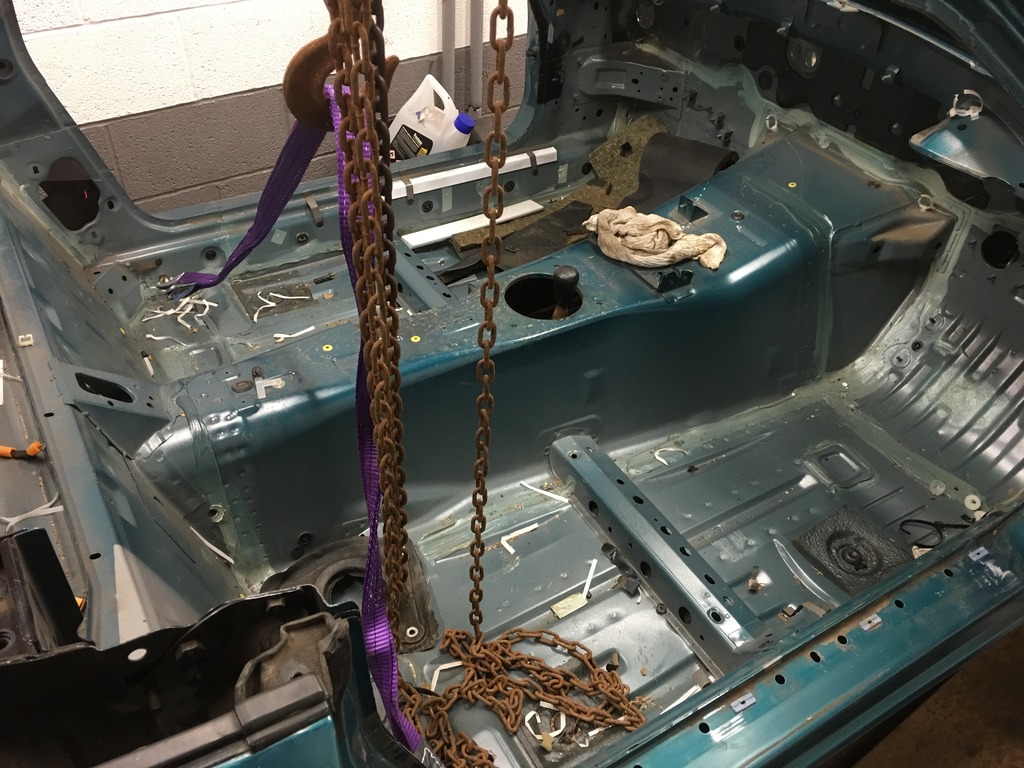
So, a bit more work completed over the weekend to keep the momentum going. Those of a squeamish persuasion might want to look away now... (MX-5s were harmed in the making of this post) First jobs were to remove the strut tops, fuel tank (and all lines down the tunnel - the reason for which will soon become apparent!) and also remove the VIN plate and stamped in VIN from the shell ready for disposal... 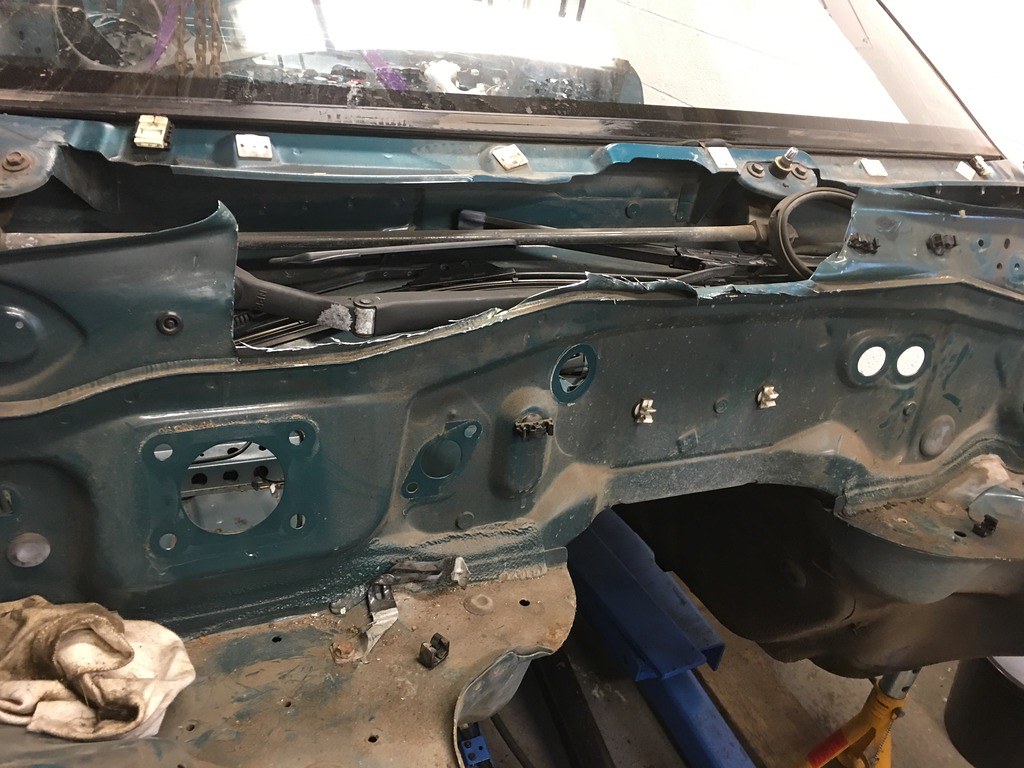 131F8633-A7A0-49F4-94C3-E035E93FB6C9_zpsek0iroyi 131F8633-A7A0-49F4-94C3-E035E93FB6C9_zpsek0iroyi on Flickr Then it was out with the tools to make the shell a bit lighter to remove... 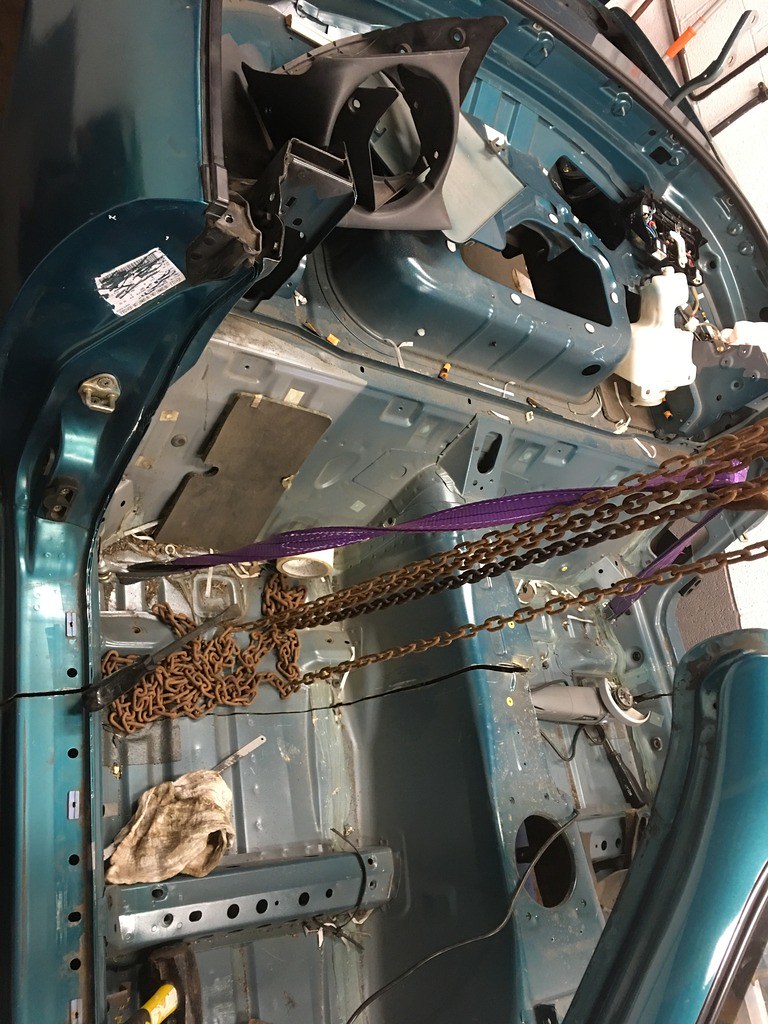 D960D07C-20D0-4969-8C93-D507AF6622D1_zps4bd64glm D960D07C-20D0-4969-8C93-D507AF6622D1_zps4bd64glm on Flickr and after a bit of swearing and chopping to get through all of the layers of the sills and the chassis rails underneath we had separation again... 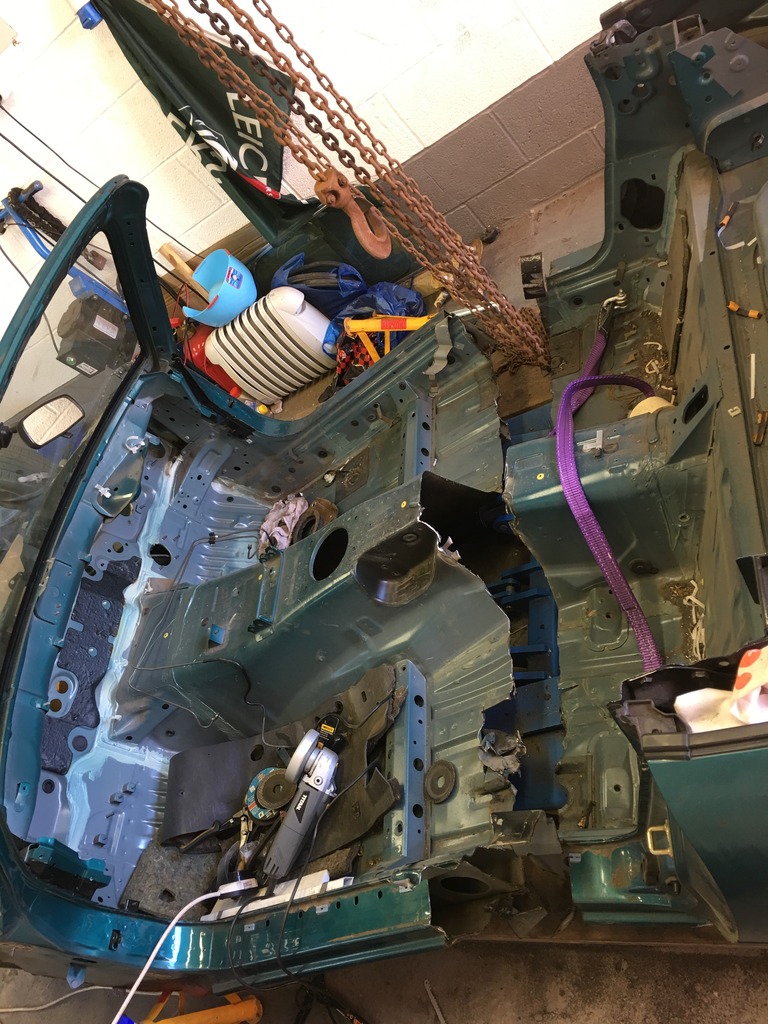 35C6B568-0E15-4534-A87D-70760A690E20_zpssfv5gdol 35C6B568-0E15-4534-A87D-70760A690E20_zpssfv5gdol on Flickr Which resulted in me giving it a stretch... 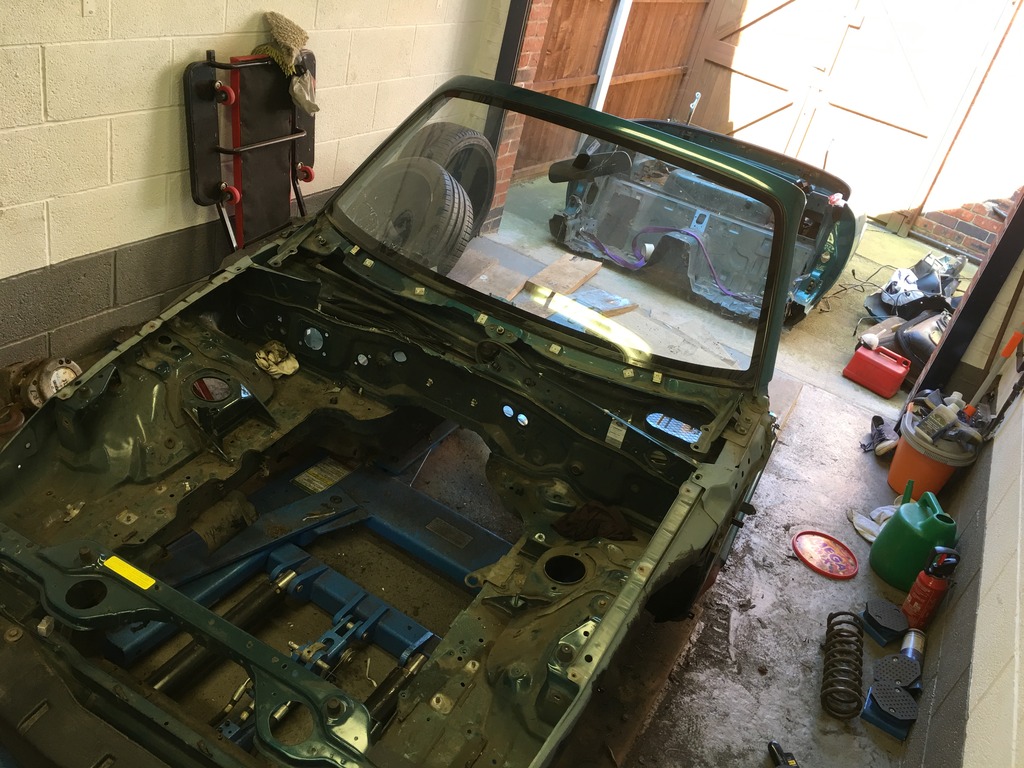 BB40FC8A-CD81-406B-A672-7A1C1E3D7998_zpsjarb9glp BB40FC8A-CD81-406B-A672-7A1C1E3D7998_zpsjarb9glp on Flickr which then allowed me to recruit an extra pair of hands (and a trolley jack and creeper) to get it out of the way and ready to be removed - a sad sight, but at least the rest of the car will live on and the majority of other parts are going on to keep others on the road... 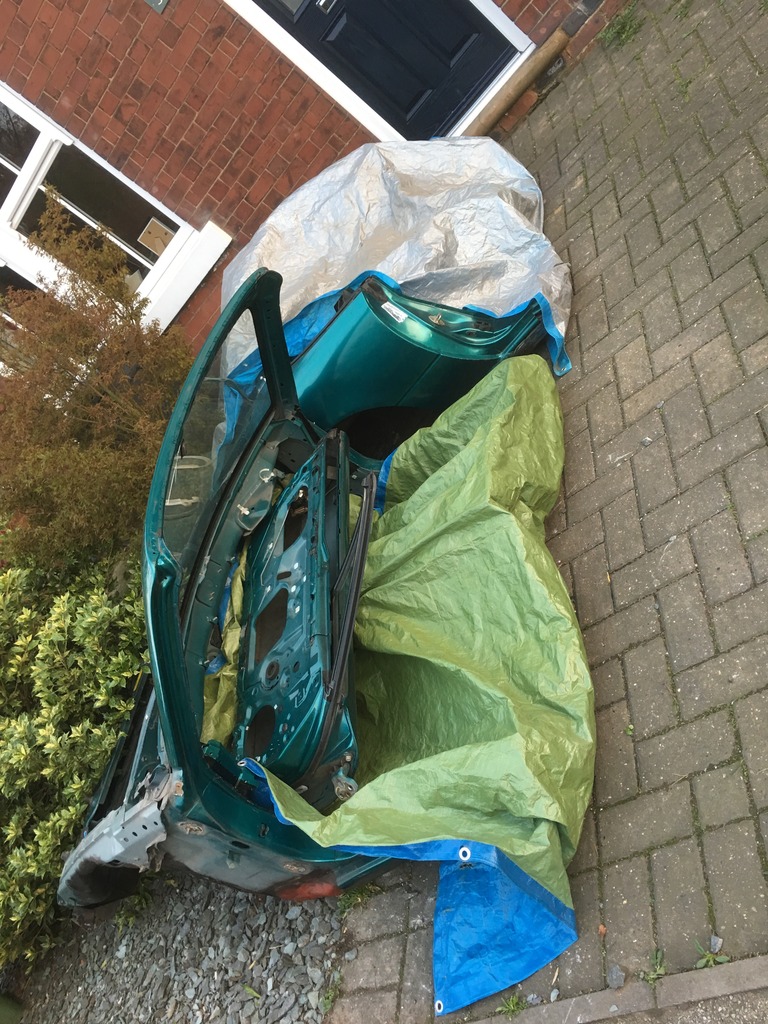 95DCFA2C-5D95-46D9-9A8D-2AA301614A2A_zpsu8djzfc3 95DCFA2C-5D95-46D9-9A8D-2AA301614A2A_zpsu8djzfc3 on Flickr Now I need to get cracking on stripping down the roller-skate ready to get everything looking nice and shiny ready for the kit arriving! |
|
|
|
Post by browno on Apr 23, 2017 21:27:39 GMT
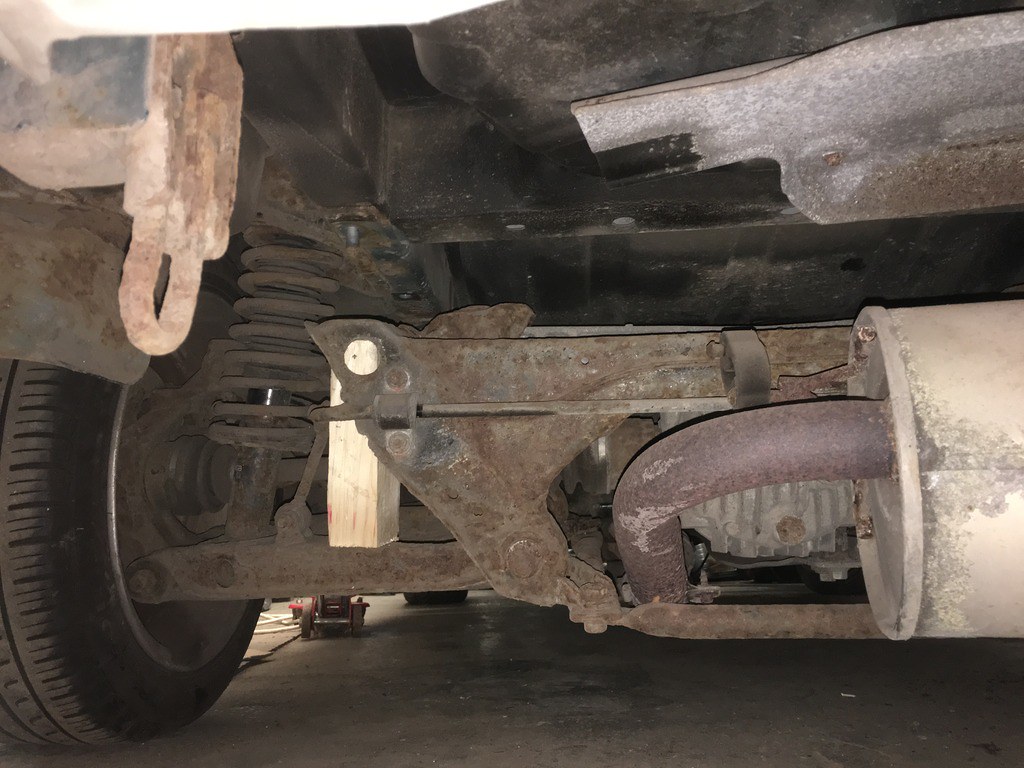
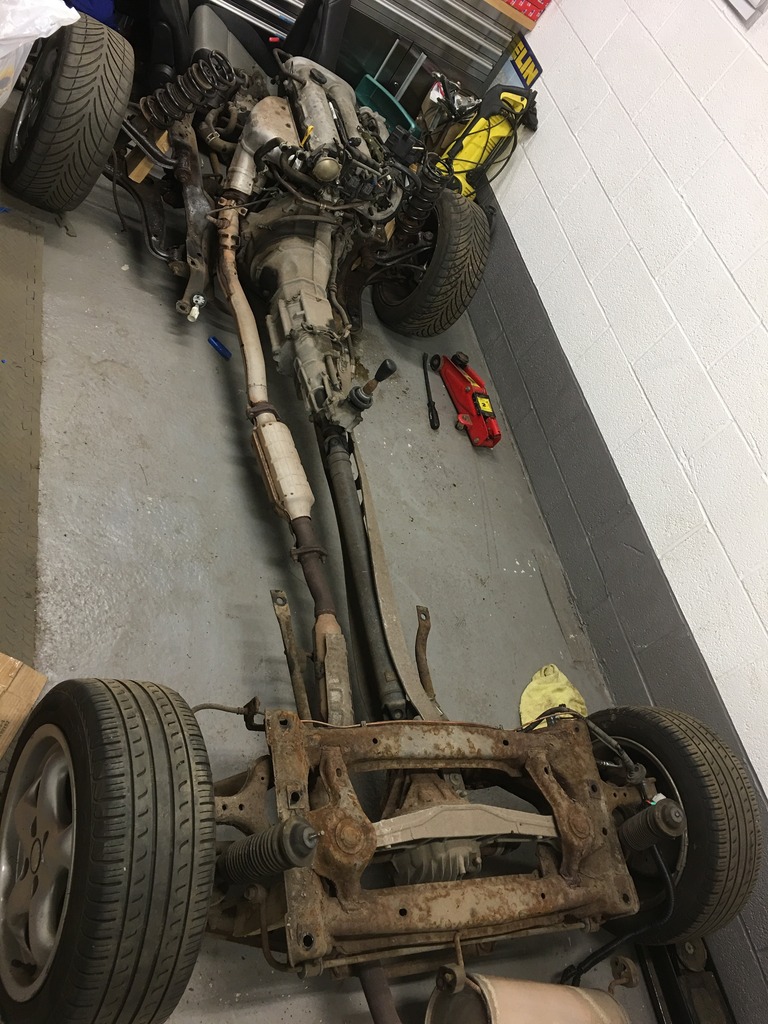
Here goes with the latest update - and a little more stripping. First job after the last update was to get the roller-skate up on stands and start separating the front and rear halves. 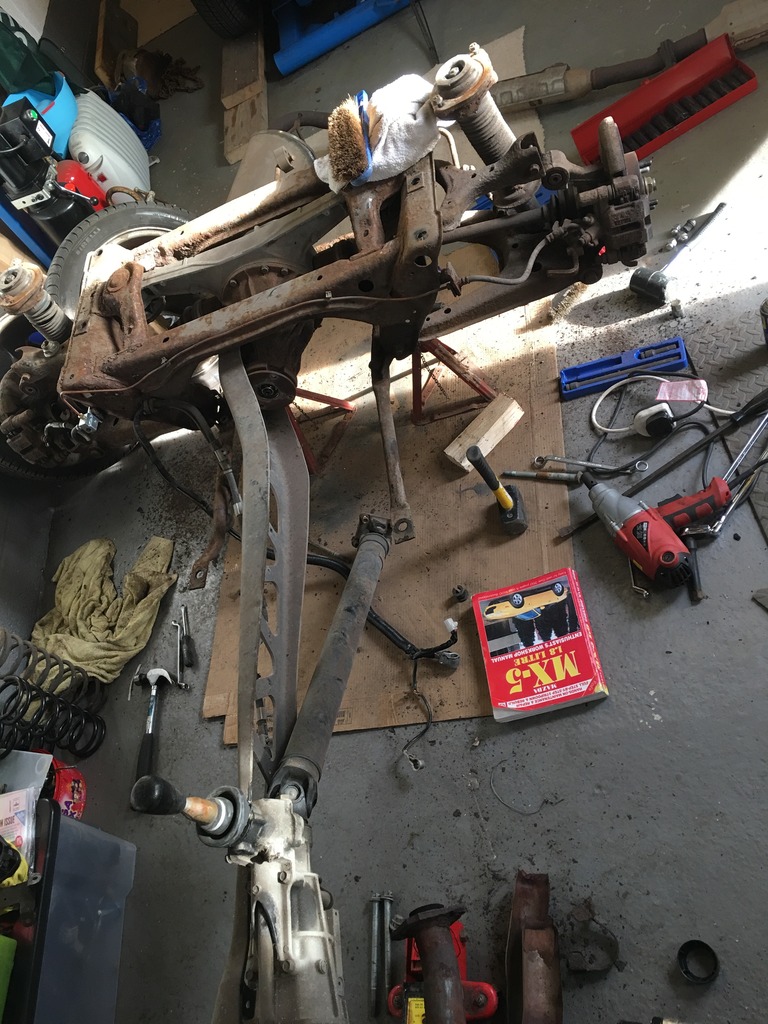 4CC8D452-200C-4420-9AFC-E3219DC00F57_zpsdq5guthg 4CC8D452-200C-4420-9AFC-E3219DC00F57_zpsdq5guthg on Flickr and one rear shaft even popped out quite easily 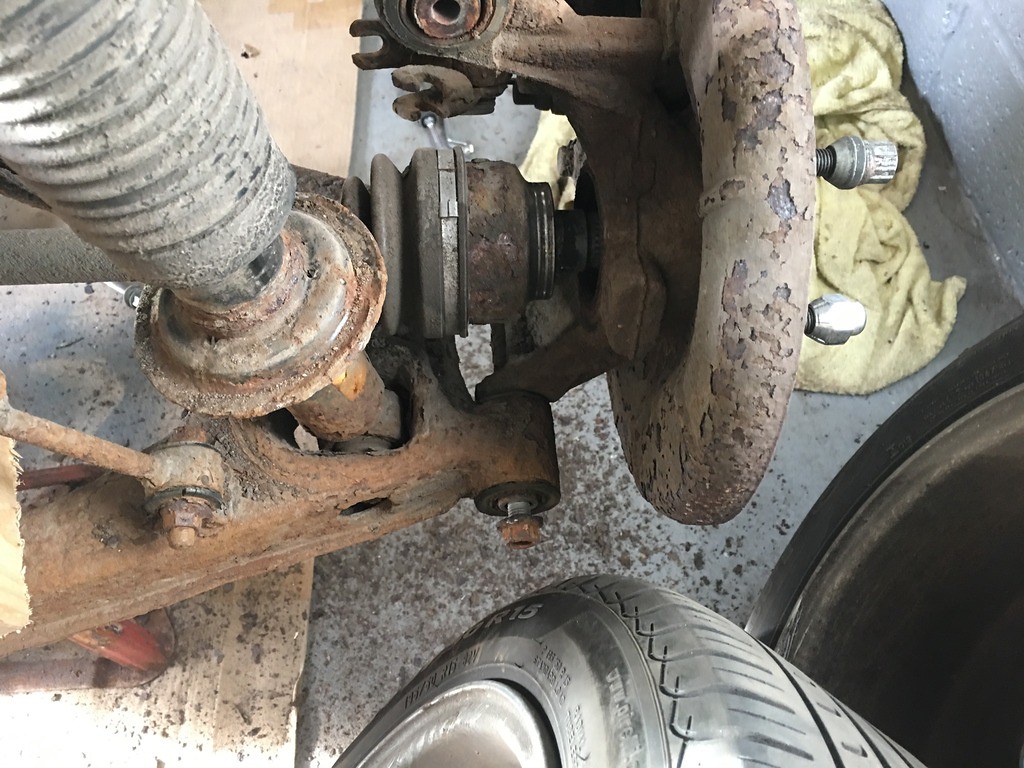 9BFFE99A-D056-4614-B5A5-3A50484312A5_zpsiohlumix 9BFFE99A-D056-4614-B5A5-3A50484312A5_zpsiohlumix on Flickr Dropped the diff oil which has clearly been changed recently. 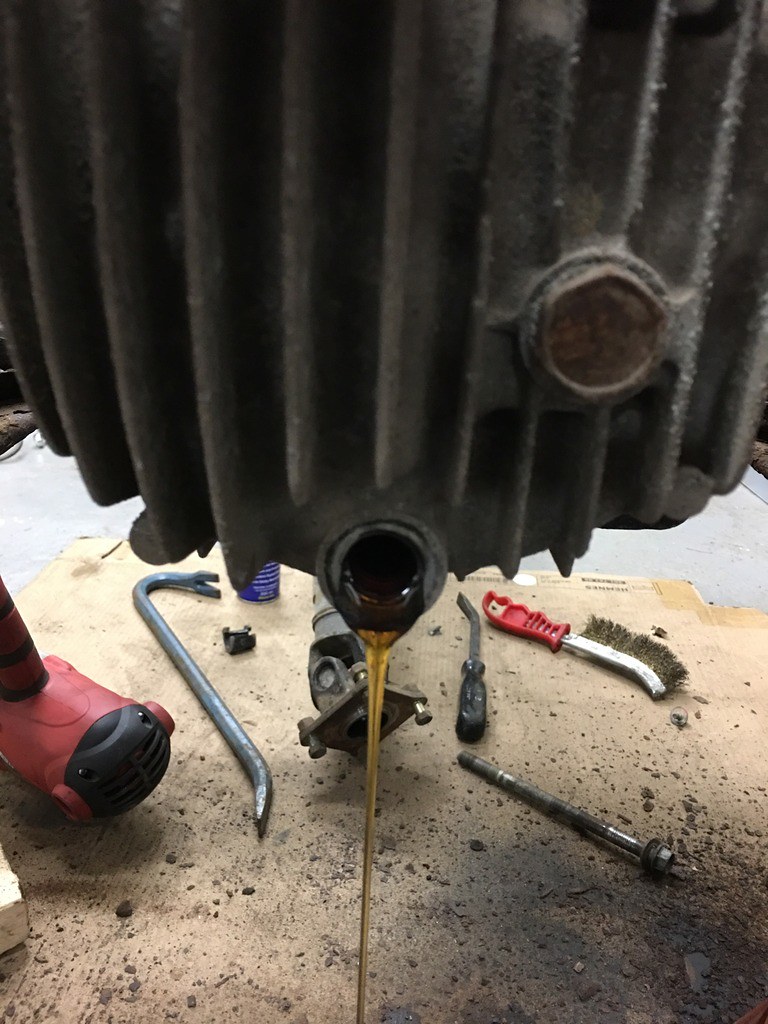 7AF0E4F9-A829-4C65-9E43-EED396C779AB_zpsa7njbmah 7AF0E4F9-A829-4C65-9E43-EED396C779AB_zpsa7njbmah on Flickr and managed to strip back the subframe. It looks pretty ready for a clean-up, and you can see just how much rubbish had flaked off it in the process of stripping! 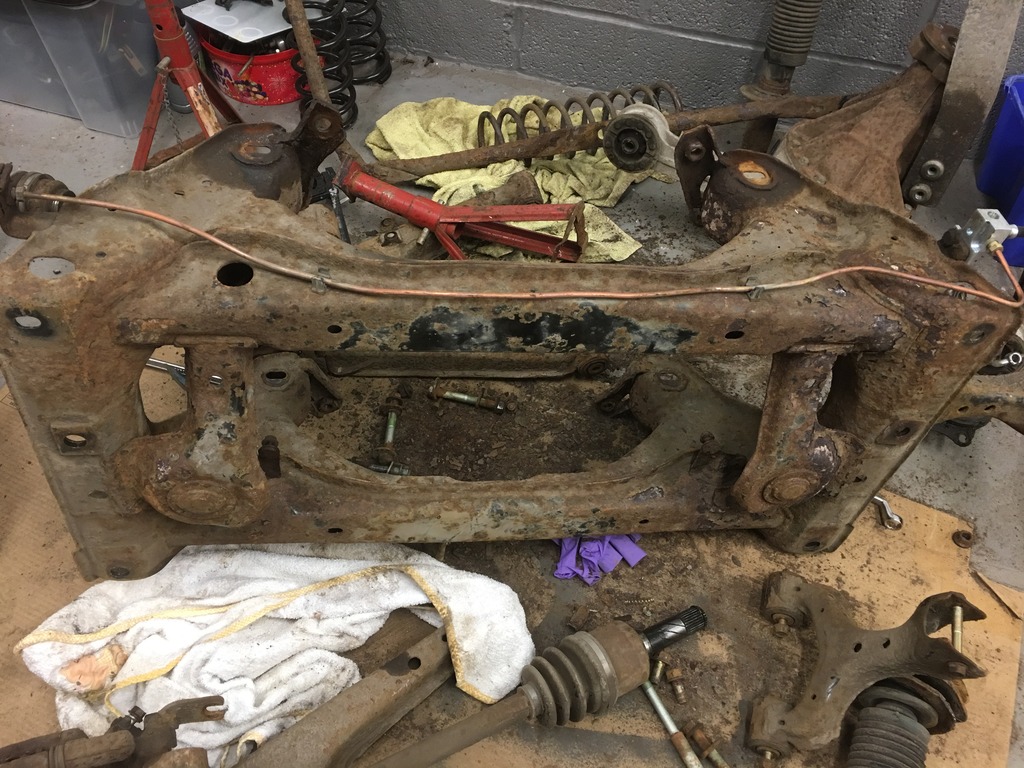 9CF24439-F7D2-44D8-990F-11AEF0F7E551_zpsk8bvfv2g 9CF24439-F7D2-44D8-990F-11AEF0F7E551_zpsk8bvfv2g on Flickr In the meantime, the scrap man came and picked up the shell (and decided to hold it secure on the truck using the winch cable - which the kids found most amusing...) 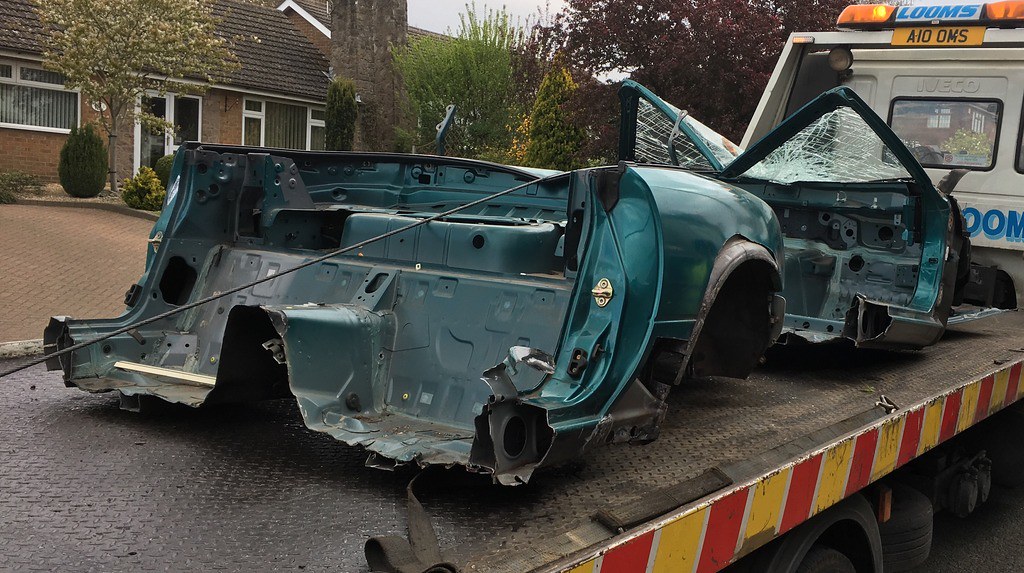 2CA32BD3-D95D-4706-9830-E14FB40D0520_zpswffxvdu8 2CA32BD3-D95D-4706-9830-E14FB40D0520_zpswffxvdu8 on Flickr I haven't yet managed to get the long bolts out of the rear hubs, but am working on steadily cleaning up the bolts and getting plenty of penetrating fluid around to avoid chopping them out. 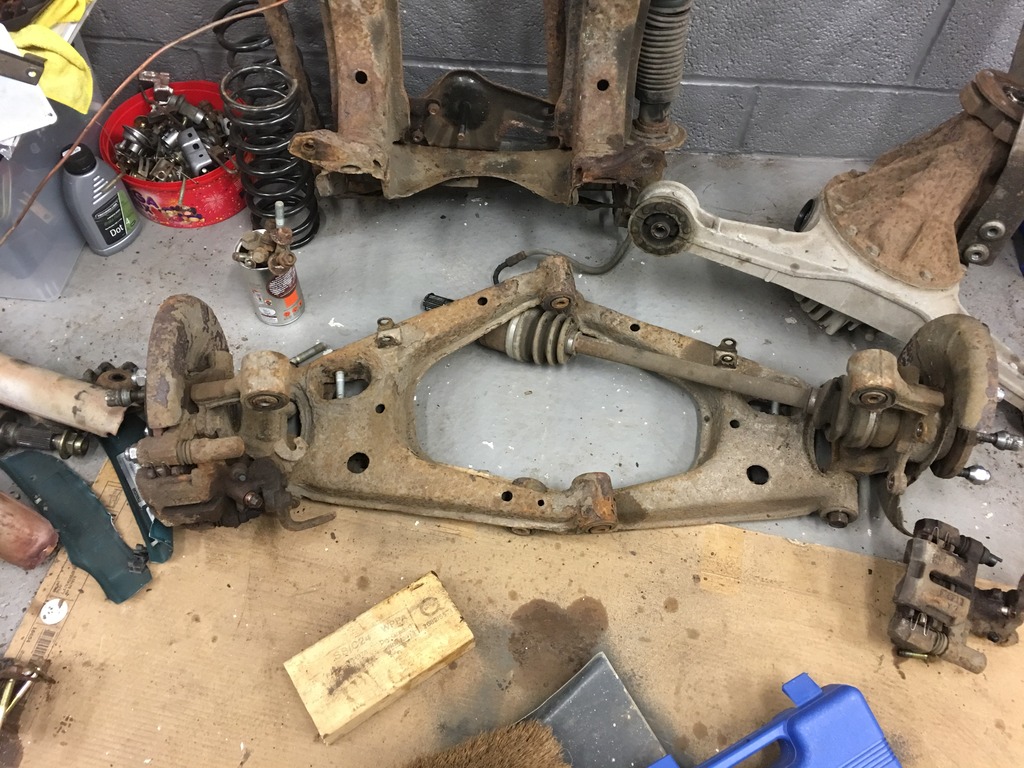 9D36DC4C-937C-47AC-9E58-022EE180789D_zpsrl4qdm3s 9D36DC4C-937C-47AC-9E58-022EE180789D_zpsrl4qdm3s on Flickr next was to start stripping the front subframe - so I started taking off wishbones and separated the engine and gearbox (and created a bit more mess in the garage in the process!) 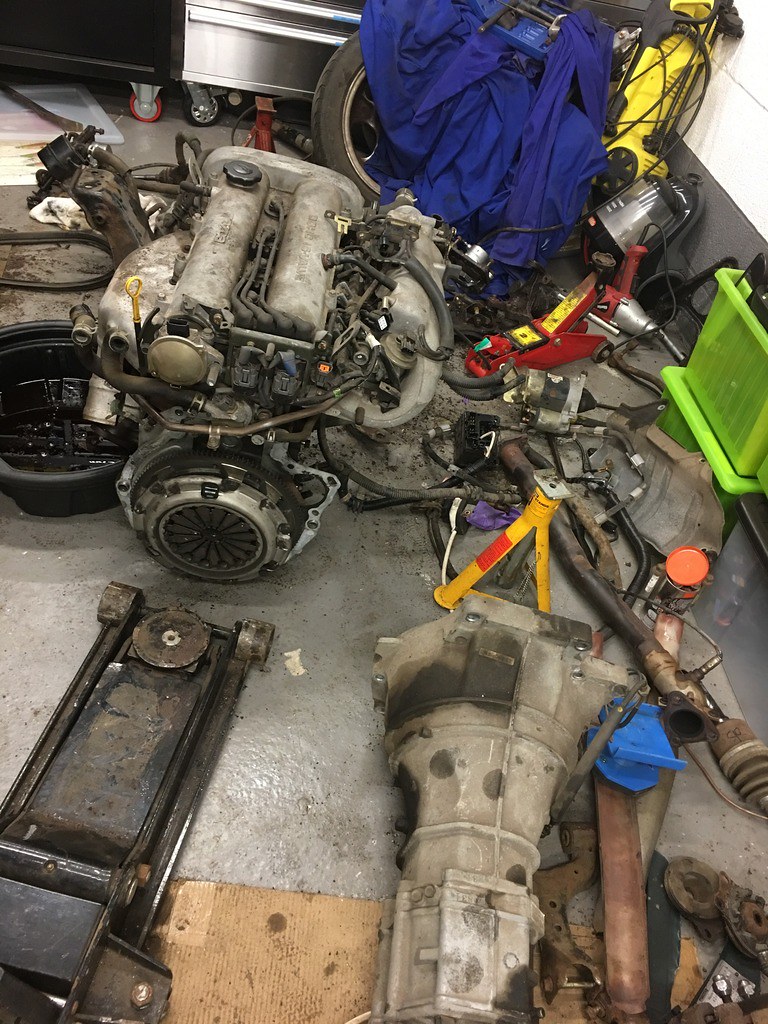 7467B3AC-7669-49A2-AE4C-C92CB3976A82_zpshubpxy0d 7467B3AC-7669-49A2-AE4C-C92CB3976A82_zpshubpxy0d on Flickr So I now have everything split (and have removed the final wishbone from the front subframe), I have started to get ready to clean things up. I have had a good look over everything and have decided that I am not going to be changing bushes as they are all absolutely fine, and I think decent standard bushes will be as good as cheap poly bushes (and I will see more impact on handling spending the money on decent springs and dampers). As a result, I will paint the wishbones rather than powder coat them, but I am going to get the subframes and other bits off for coating this week. 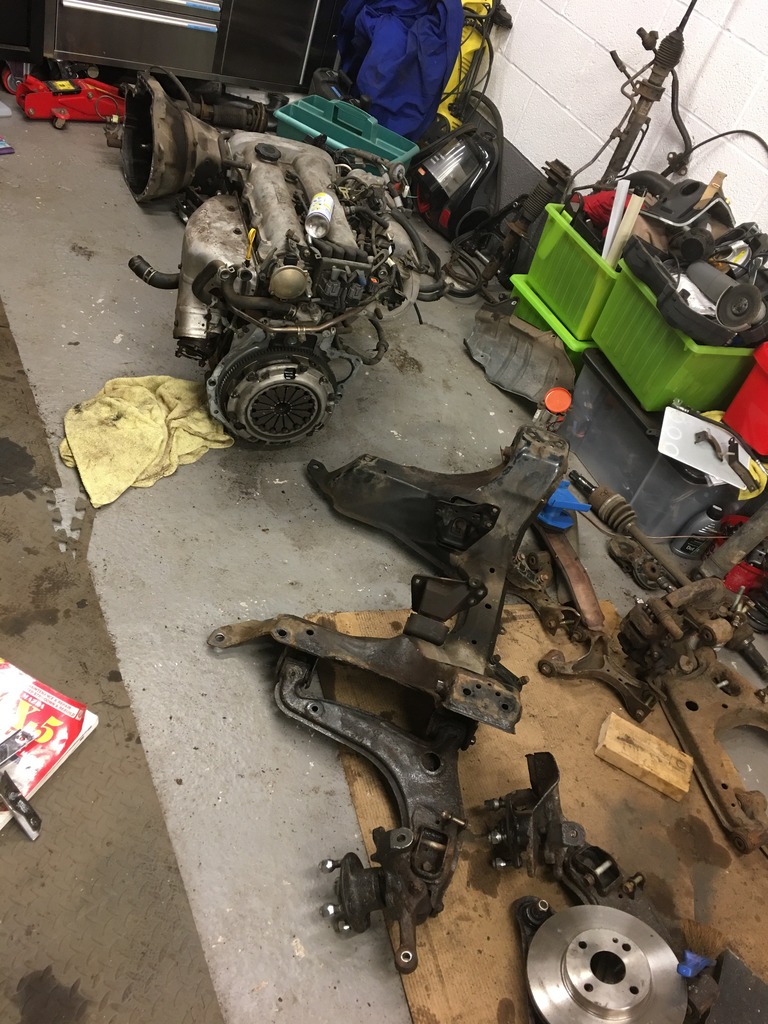 2591DD61-291E-411B-A5CB-5B8C9A4A0052_zpsr4qonbtt 2591DD61-291E-411B-A5CB-5B8C9A4A0052_zpsr4qonbtt on Flickr [footnote]Edited by browno on Tuesday 15th August 22:46[/footnote] |
|
|
|
Post by ciaoberto on Apr 24, 2017 18:23:31 GMT
Powering on there browno, nice work!! I've decided to just clean up the lower rear wishbone with the hub attached. It rotates easily enough for me to get into most of the nooks.
Wow, I'm envious of your space for activities!! I find myself covering in shelter whenever the weather turns.
Have you ordered your kit yet?
Keep up the pace good sir!!
|
|
|
|
Post by browno on Apr 25, 2017 13:26:21 GMT
Thanks - it's nice to see some progress!
The garage is very useful (it was a bit of an indulgence when we extended the house a couple of years ago!) - and nice to be able to work in there in the evening once the kids are packed off to bed!
I have ordered my kit - so have got to keep the momentum up to make sure I have the oily bits ready to bolt to the frame (ETA is mid-June-ish).
After a look last night I am going the other way and have decided that some of the bushes look worse than I had thought, so am going to be ripping them all out and adding the wishbones to the powder-coating pile... once I can get everything apart!
|
|
|
|
Post by browno on Apr 26, 2017 14:11:58 GMT
Time for another update, and some good news! Using a combination of 3 mechanical engineers, a 20 Tonne press, a blasting cabinet, a large impact gun and a big bar, we have managed to remove the lower wishbone long bolts and the n/s driveshaft...  8A1E2EC6-0872-4342-9B58-CF203B4D34D6_zpsip9n2dzj 8A1E2EC6-0872-4342-9B58-CF203B4D34D6_zpsip9n2dzj on Flickr There was, however a casualty in the fight - we (well, ok, I) got a bit keen to load up the press on the first bolt, and while it moved with a bang, we realised that the bang wasn't only down to the bolt moving... 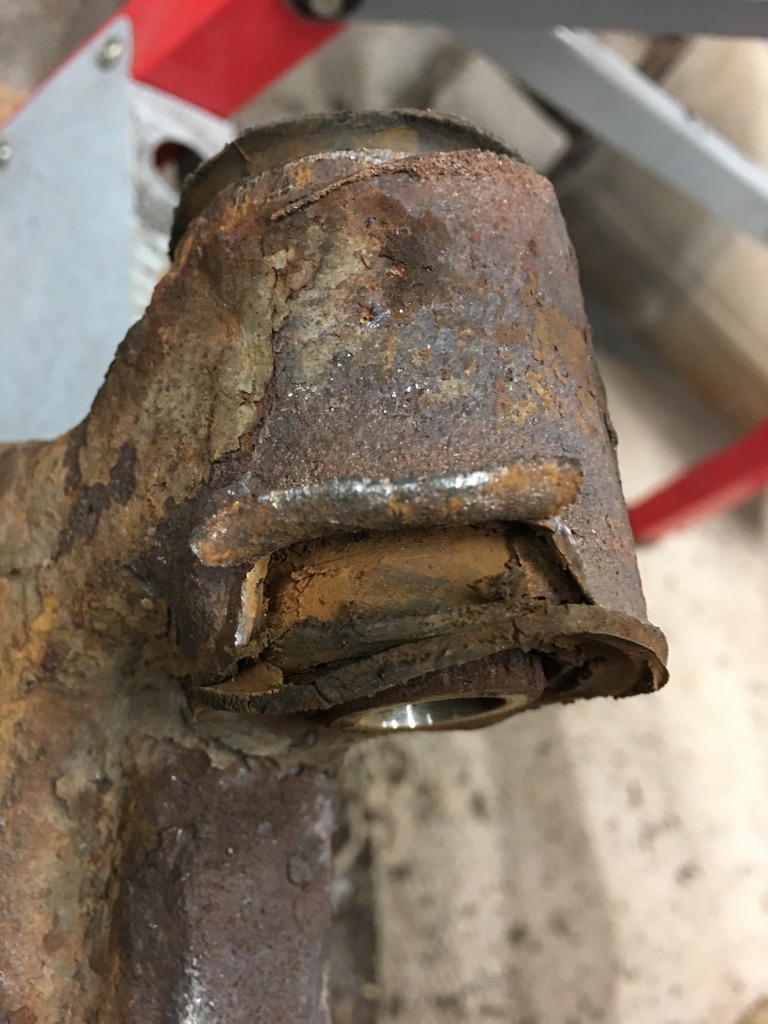 2B50800A-CF96-43EF-89A4-87B0A42FB56C_zpstveko4qg 2B50800A-CF96-43EF-89A4-87B0A42FB56C_zpstveko4qg on Flickr So, I have ordered a replacement arm from Autolink, which wasn't too costly. One good note was that the bolts both came out good and straight and are reusable with a good clean-up (you can see where I tried to clean up the right-hand one in-situ with the soda blaster, which helped a little). 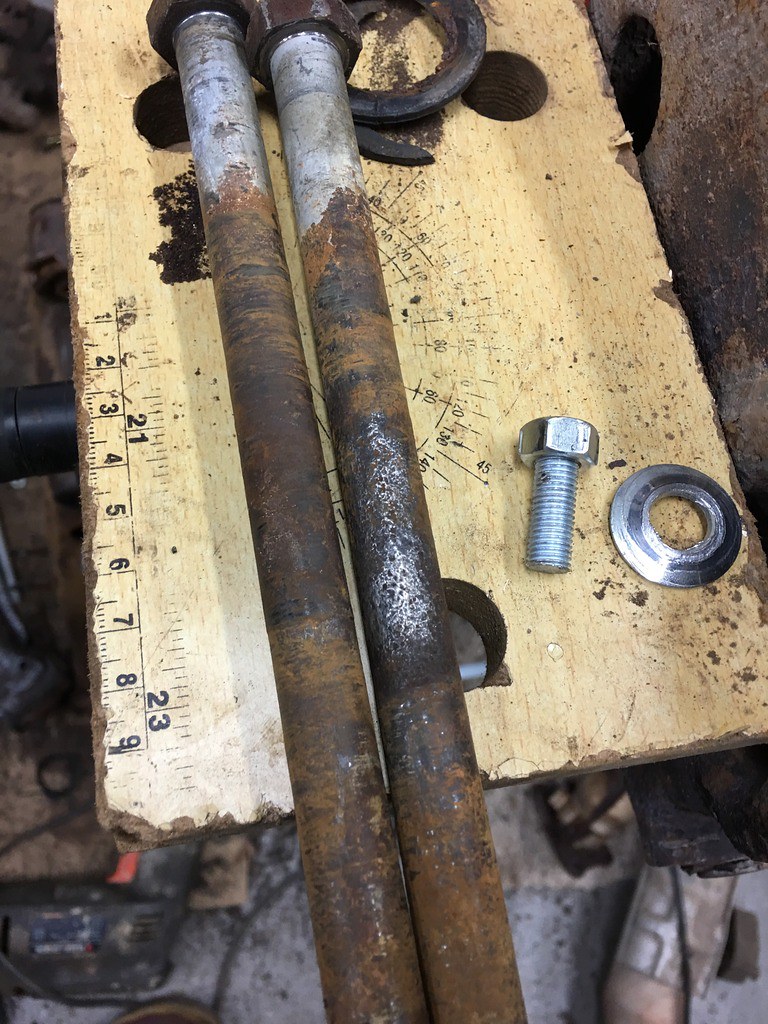 3BA26D31-8145-4099-9C43-9CF05BF06F53_zpsjruhylzo 3BA26D31-8145-4099-9C43-9CF05BF06F53_zpsjruhylzo on Flickr The next job is to work on removing the bushes, for which I am planning on making use of the press again - I tried one using sockets and threaded bar last night, and just succeeded in devising a way to tension the threaded bar until it snapped, so I think the press will be quicker, easier and safer too! |
|
|
|
Post by gwnwar on Apr 27, 2017 16:27:47 GMT
You can always get the outside grill going and burn them out if the press doesn't work. If you use the press make sure you back up the
control arm on the coming out side good or it will bend.
|
|
|
|
Post by Fin on Apr 27, 2017 17:36:59 GMT
Time for another update, and some good news! Using a combination of 3 mechanical engineers, a 20 Tonne press, a blasting cabinet, a large impact gun and a big bar, we have managed to remove the lower wishbone long bolts and the n/s driveshaft...  There was, however a casualty in the fight - we (well, ok, I) got a bit keen to load up the press on the first bolt, and while it moved with a bang, we realised that the bang wasn't only down to the bolt moving...  So, I have ordered a replacement arm from Autolink, which wasn't too costly. One good note was that the bolts both came out good and straight and are reusable with a good clean-up (you can see where I tried to clean up the right-hand one in-situ with the soda blaster, which helped a little).  The next job is to work on removing the bushes, for which I am planning on making use of the press again - I tried one using sockets and threaded bar last night, and just succeeded in devising a way to tension the threaded bar until it snapped, so I think the press will be quicker, easier and safer too! Well done on making progress and getting those bolts out. If you take a look at my build page #8 you'll see a video of how my sockets & threaded jack screw bar popped the bushes out like a chicken laying an egg! |
|
|
|
Post by browno on Apr 28, 2017 9:48:52 GMT
Time for another update, and some more good news! Thanks for the link on your screw remover fin - that was one of my backup options. I first had a go at removing the bushes on the press, and was a little worried about how much pressure was needed to push the bushes out, and that this might affect the integrity of the wishbones (I don't want to damage any more!), so I resorted to FIRE! I set myself up a workstation at the bottom of the garden and attacked the bushes with the blowtorch - which (after I had got a decent technique and replaced the gas canister!) was proving relatively quick at about 5 minutes per bush, and was quite satisfying! 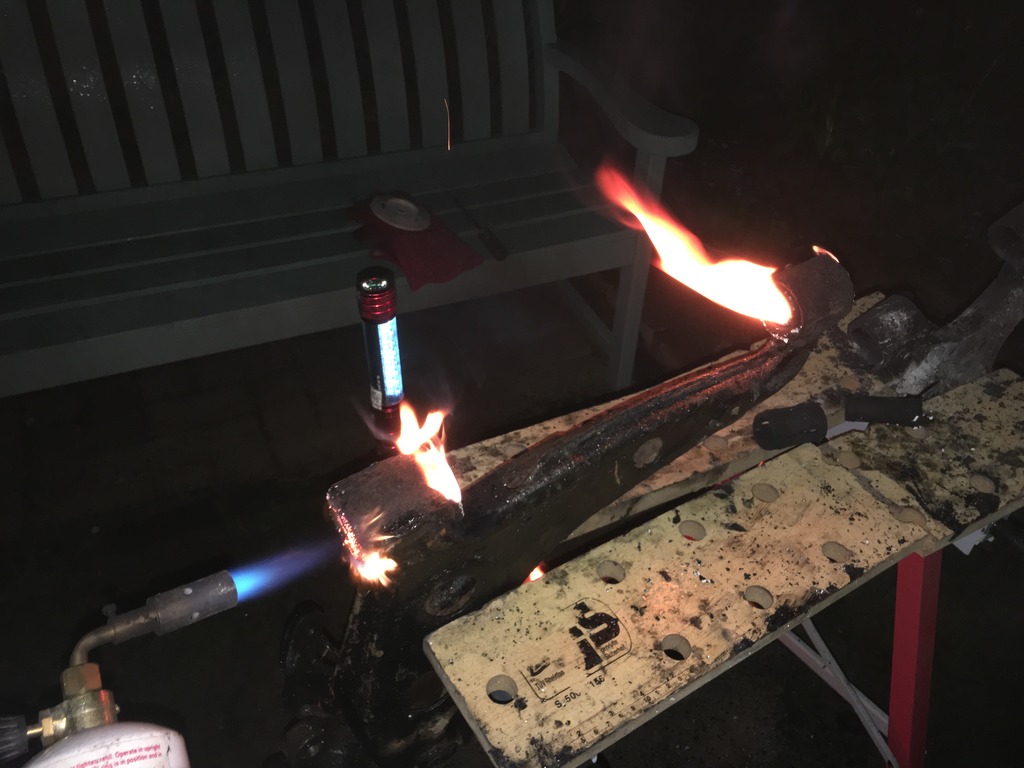 FC53532A-5710-4DFF-A322-D5BF9470A465_zpstqoqhwha FC53532A-5710-4DFF-A322-D5BF9470A465_zpstqoqhwha on Flickr So I now have a good pile of wishbones without bushes that just need a bit of a cleanup of the last traces of rubber before I can take them off for powdercoating early next week (hopefully should get the replacement wishbone from Autolink today, so I can get that prepped too). 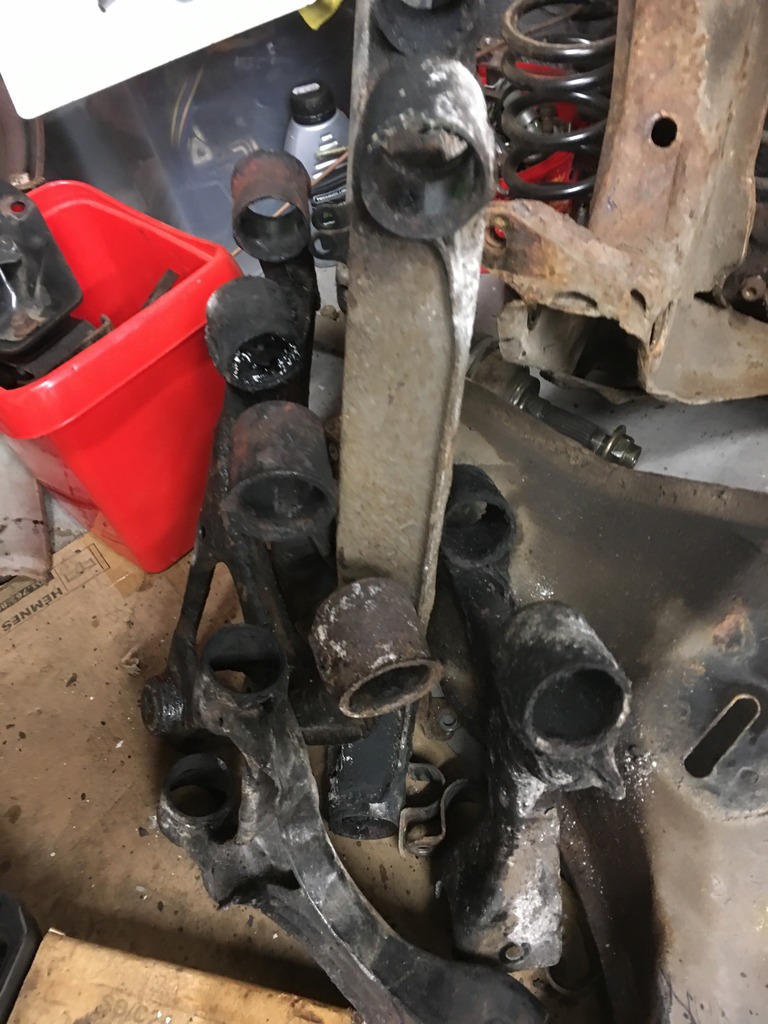 6A6B929D-EE1D-4C95-A08C-DC08BDC6DEBF_zpsc7bgpicw 6A6B929D-EE1D-4C95-A08C-DC08BDC6DEBF_zpsc7bgpicw on Flickr Hopefully I can also have a decent weekend - and pick up some more bits and bobs at the kitcar show on Sunday! |
|
|
|
Post by browno on May 3, 2017 22:26:16 GMT
So, update time again and more progress (and a trip to the kit car show too) Firstly, while waiting for my bits to arrive, I have got the engine mounted on the engine stand, and have started cleaning and painting some bits, starting with driveshafts, diff housing and engine block... 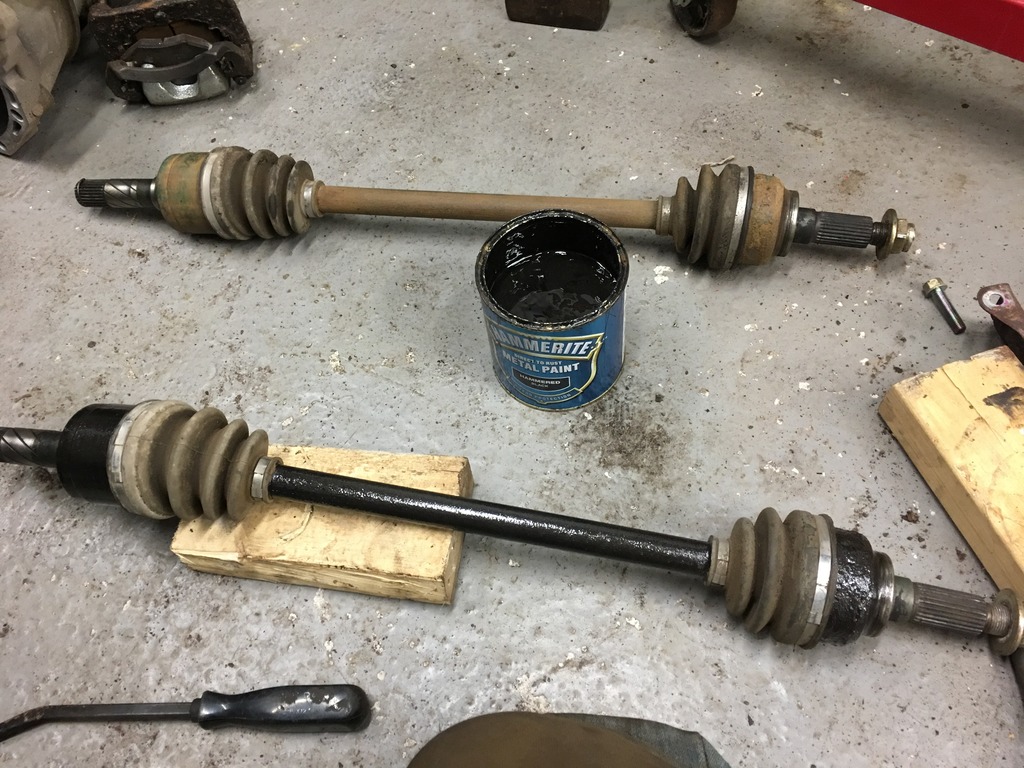 6C37449F-52AF-4EEA-87B2-169770DCF018_zpsk9vwnieg 6C37449F-52AF-4EEA-87B2-169770DCF018_zpsk9vwnieg on Flickr 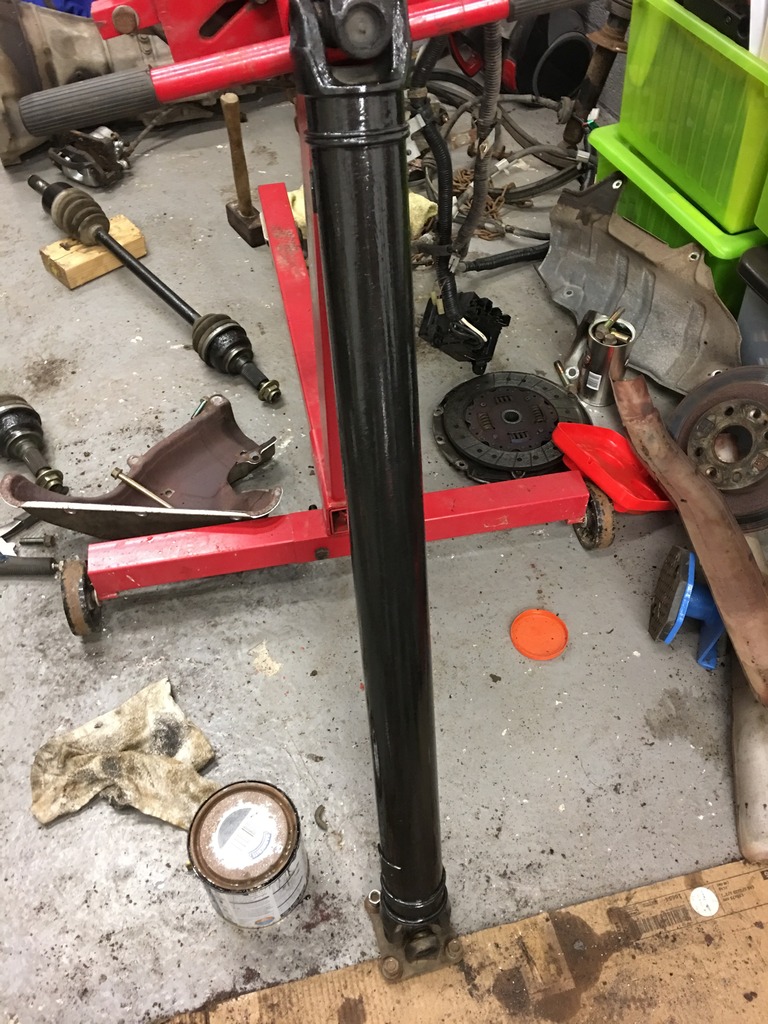 7A68B931-CA8A-4C53-9DA4-DEF8251EE708_zpsjy7ebfxz 7A68B931-CA8A-4C53-9DA4-DEF8251EE708_zpsjy7ebfxz on Flickr 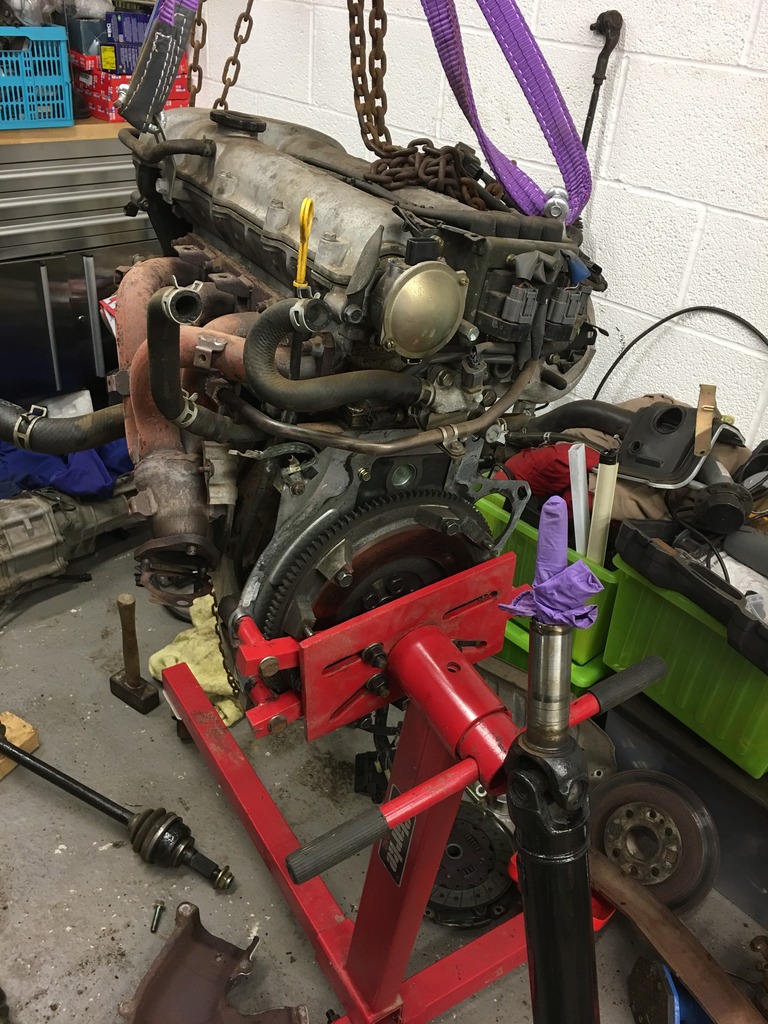 F27E9249-4821-443D-93E0-9AA05A6DBB74_zpsu60hhkzz F27E9249-4821-443D-93E0-9AA05A6DBB74_zpsu60hhkzz on Flickr 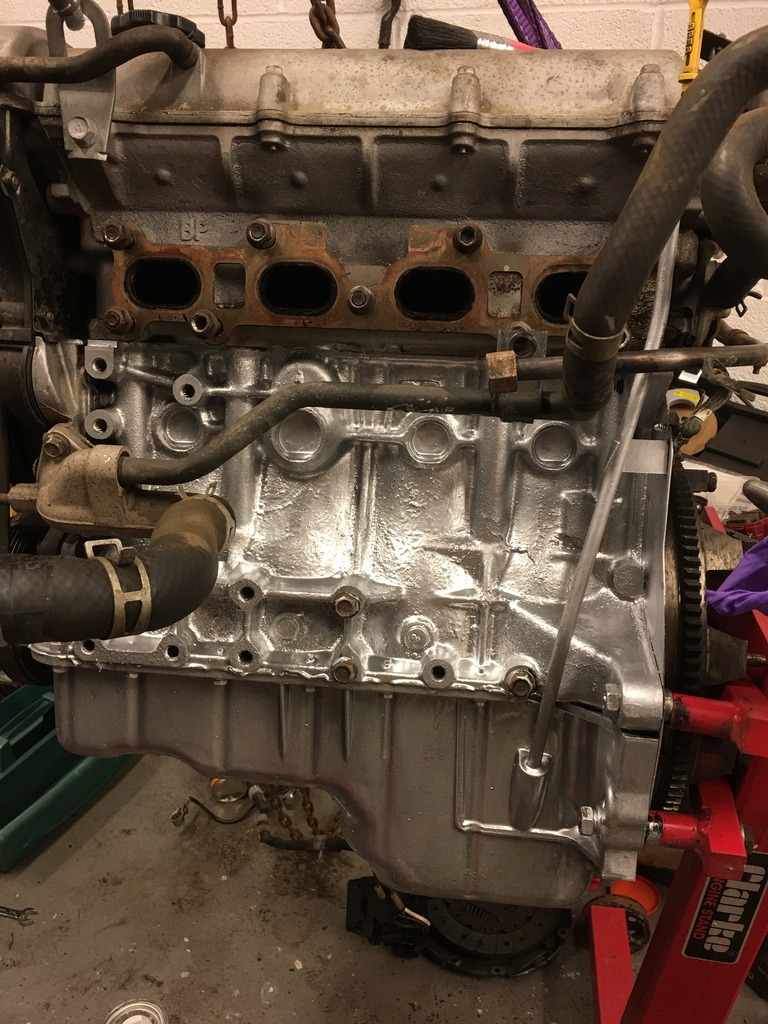 29FDBD70-C03F-43F0-8ECD-DDC620694840_zps0ekmevl9 29FDBD70-C03F-43F0-8ECD-DDC620694840_zps0ekmevl9 on Flickr 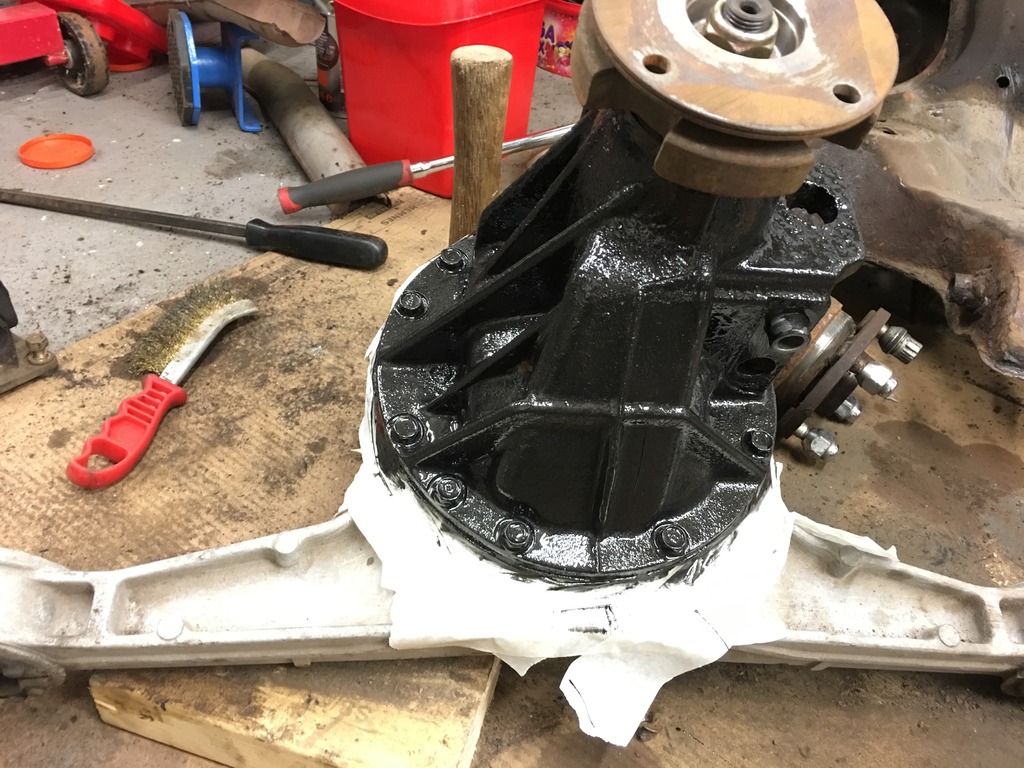 9C1DBBEB-253F-47D1-9067-00CB9761900E_zpsq1kkvfmt 9C1DBBEB-253F-47D1-9067-00CB9761900E_zpsq1kkvfmt on Flickr I have also been getting the last bits of pre-powder coat prep done, including trimming the edges of the front subframe to prevent interference with springs (as recommended by Stuart when I visited MEV) - I have chopped back so the edge is now 15mm from the outer edge of the bolt holes. 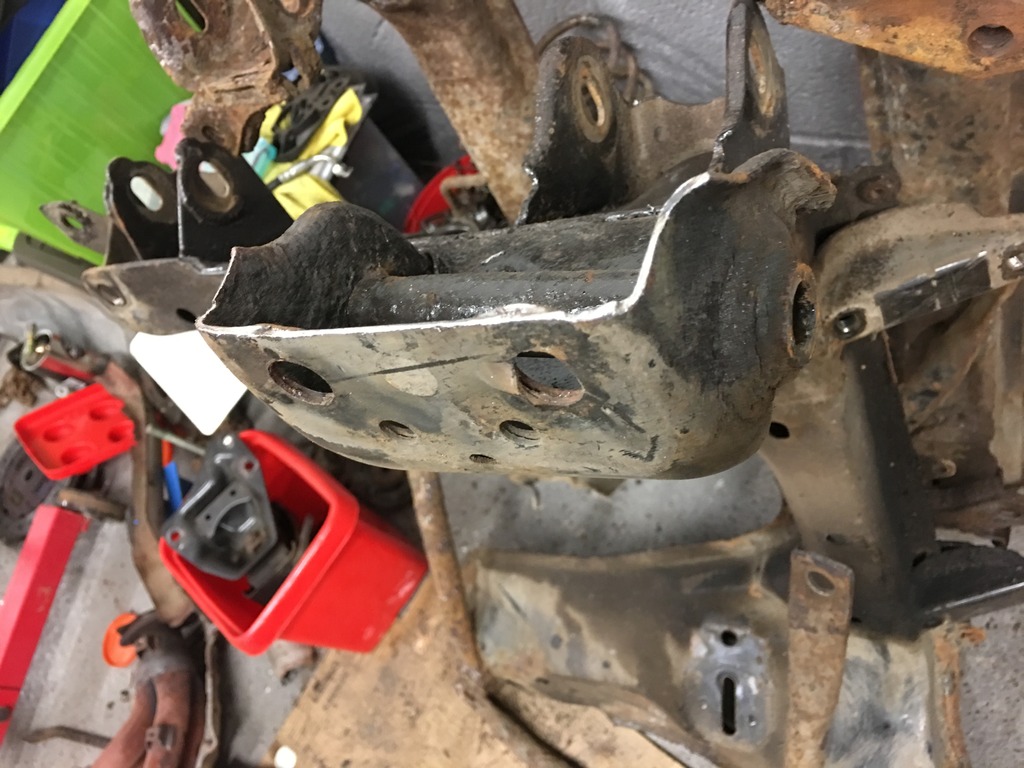 B862FCBA-B2B5-448C-BAD2-1BFA8B70851B_zpsserroloh B862FCBA-B2B5-448C-BAD2-1BFA8B70851B_zpsserroloh on Flickr and also trimmed the rear U-brace to remove the extraneous end sections 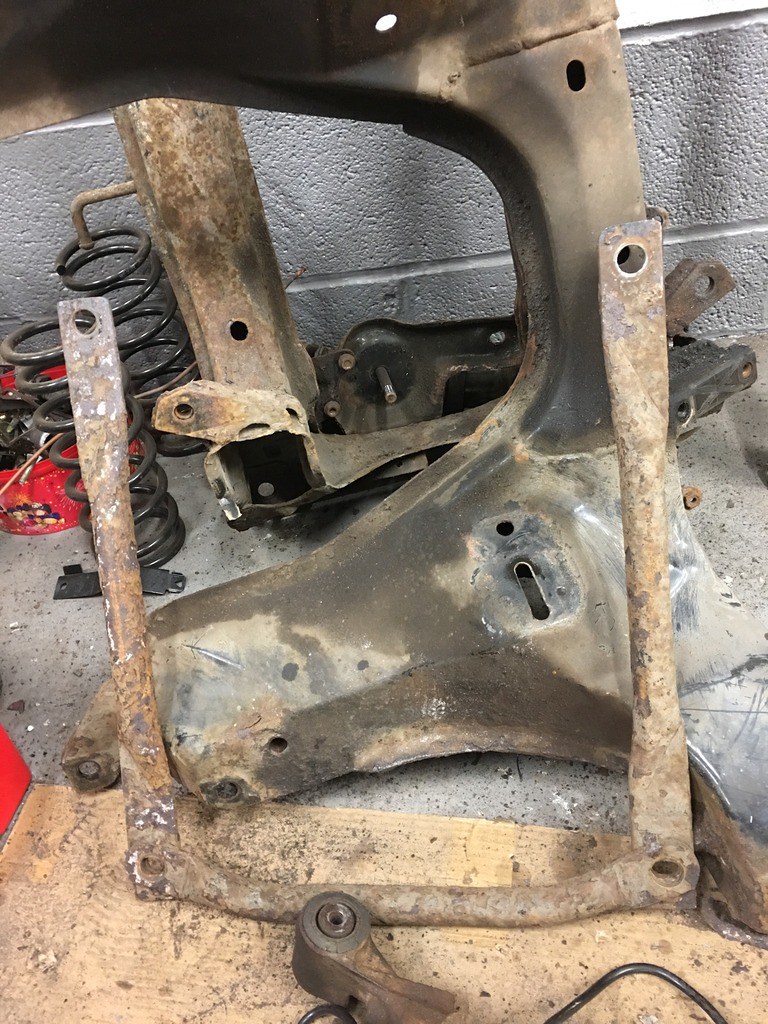 DD99206F-DD2E-401C-BBED-031A62626523_zpseqhp5tqp DD99206F-DD2E-401C-BBED-031A62626523_zpseqhp5tqp on Flickr I had a good trip to Stoneleigh on Sunday where I had a good look over all the various cars there, and a chat to a few folks about my build. I did get a bit of a kick to get moving when I went to the MEV stand and Julie told me that my chassis is built and powder coated (and apparently looking very good!) and they are now getting the bodywork made up - so it will be ready imminently! Today I have been able to make some more progress, as I had still be waiting for my bits from Autolink and had thought that they were delayed due to the bank holiday - and thankfully checked the tracking, which told me that (despite no card being left at my home), the parcel had been taken to the post office in the next village. At least that meant that I could fetch that and now have my final wishbone - so tonight whipped out the bushes from that and have got all my bits ready to drop in for powder coating in the morning, which will be a good step in the right direction. I also had a second parcel today, in the form of my Energy Suspension bush set - which looks very good, but also makes me think I've still got plenty of work to do to get all of them fitted! 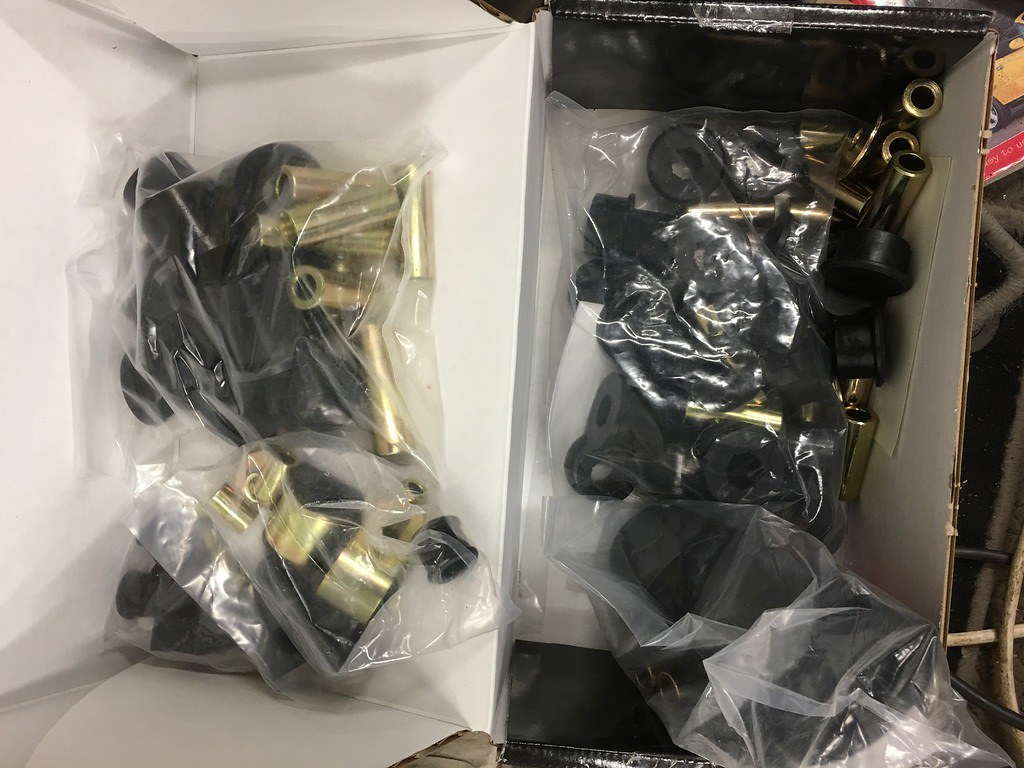 B8240572-A9CD-42A7-86EC-EE5887672582_zpsenumwsle B8240572-A9CD-42A7-86EC-EE5887672582_zpsenumwsle on Flickr |
|
|
|
Post by jgilbert on May 4, 2017 6:47:38 GMT
The Energy suspension bushes are a dream to fit (once your wishbones are ready to go (Painted/ Coated)). Push in by hand using the grease supplier. Warm bushes on a radiator (if its cold) sit down with a cup of tea and an away you go. 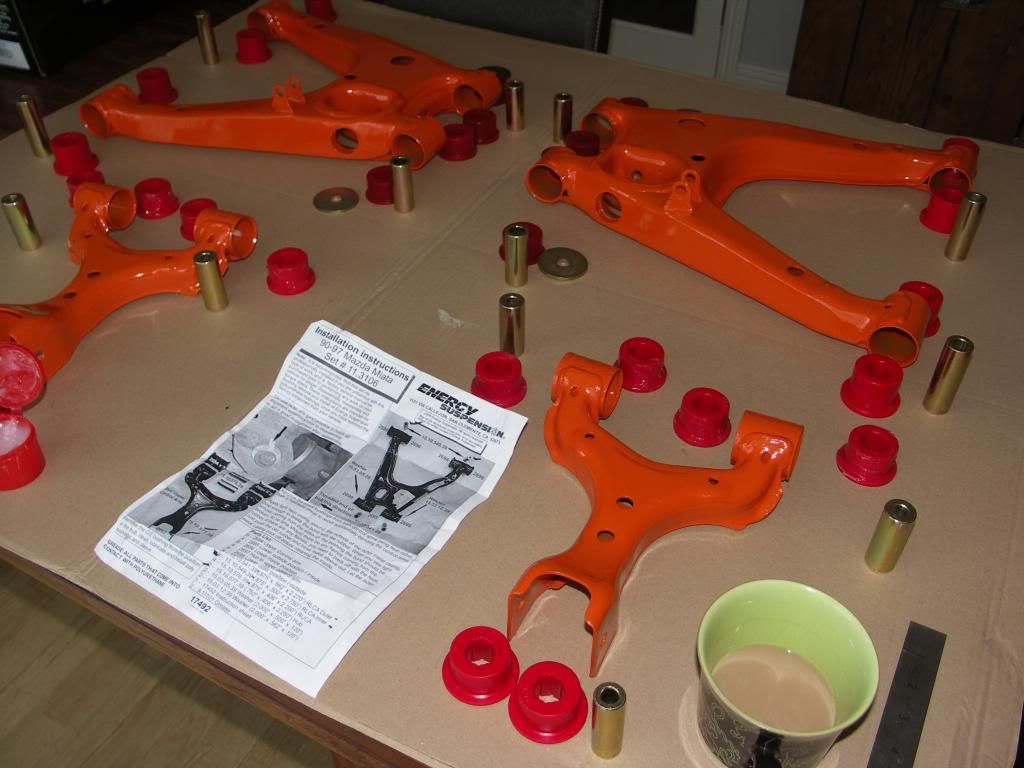 |
|
 9302DD67-FAF7-4475-AA32-45ED84BB5CB2_zps6itvad5t on Flickr
 D0AE19B1-D149-4536-8336-2F953F1AB944_zpslxftk4ad on Flickr
 Untitled on Flickr
 34D8B972-6077-415D-BE7B-E5CD3E26CC48_zpst3xqztbm on Flickr
 9302DD67-FAF7-4475-AA32-45ED84BB5CB2_zps6itvad5t on Flickr
 D0AE19B1-D149-4536-8336-2F953F1AB944_zpslxftk4ad on Flickr
 Untitled on Flickr
 34D8B972-6077-415D-BE7B-E5CD3E26CC48_zpst3xqztbm on Flickr
