|
|
Post by darkling on May 4, 2017 7:27:57 GMT
o this is the fun part that grease sticks to everything . i used the whole can it came with just on my rears ordered more today
|
|
|
|
Post by browno on May 15, 2017 9:47:49 GMT
So, a bit more progress again, so time for another update... Firstly, I painted up the manifold heatshield and remounted to the block (replacing a downpipe stud that snapped during removal in the process) 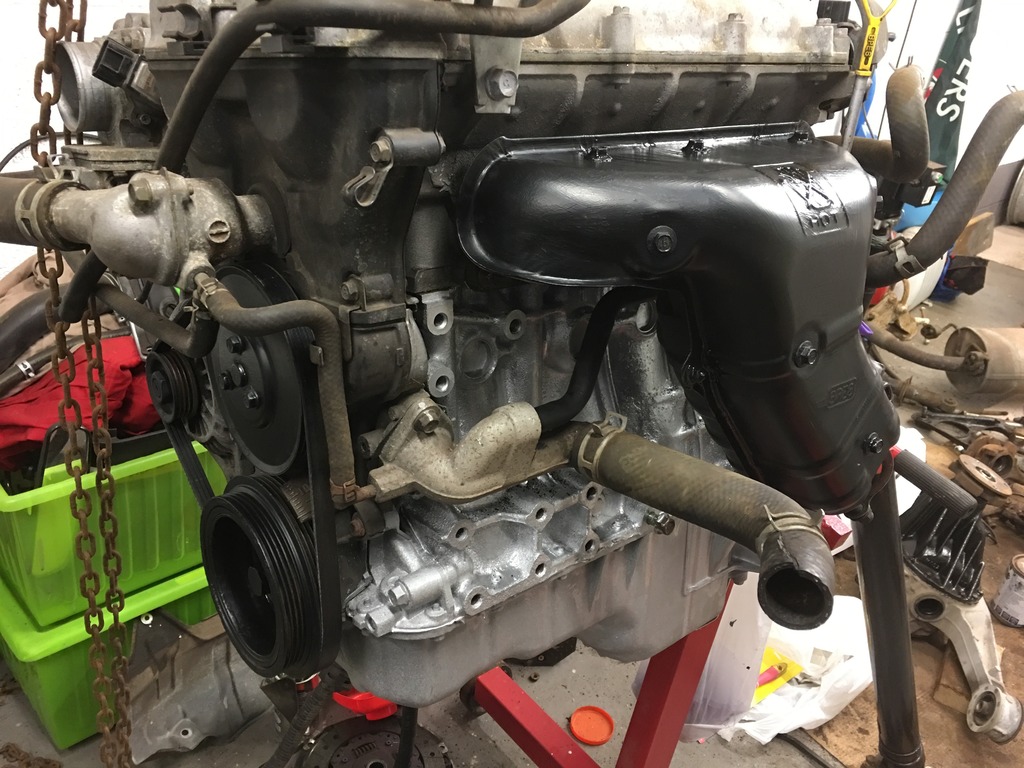 30363948-75BD-40A4-AD90-5CE616ADDA9A_zpspeeppuj2 30363948-75BD-40A4-AD90-5CE616ADDA9A_zpspeeppuj2 on Flickr and started cleaning up my front upper wishbones with rust converter followed by hammerite (I hadn't sent these for blasting and coating due to the upper balljoints), and also my rear hubs.  4710308A-C38D-4D04-81ED-1DF494C95DC4_zpsrzirtgkh 4710308A-C38D-4D04-81ED-1DF494C95DC4_zpsrzirtgkh on Flickr  5B10D8B9-56CF-4C02-8020-C98C5CC5A6A9_zpsmbvxtjrj 5B10D8B9-56CF-4C02-8020-C98C5CC5A6A9_zpsmbvxtjrj on Flickr and also picked up a bit pile of now shiny bits from powder coating - which look completely transformed! 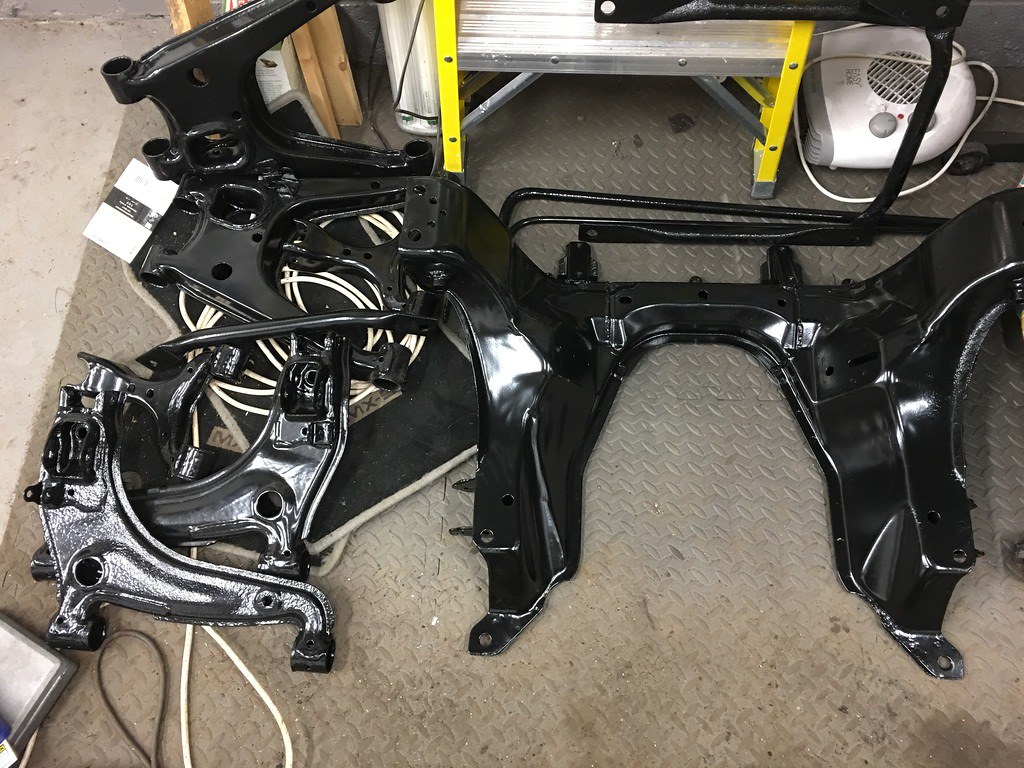 C12E4861-0B47-44EB-9F8A-395ADBF4C939_zpsbl6vvn0b C12E4861-0B47-44EB-9F8A-395ADBF4C939_zpsbl6vvn0b on Flickr I'm happy with the job they've done at even ensuring that the insides of some of the open sections on the wishbones and subframes are well coated too. 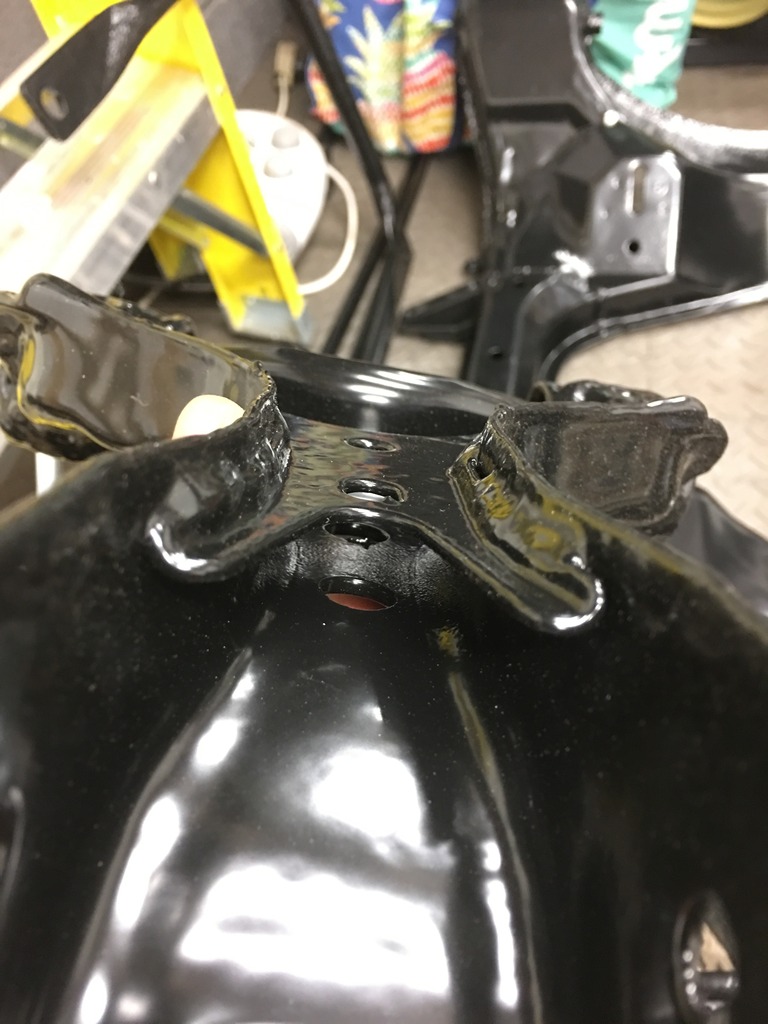 86A7212A-C665-49DE-93C8-65E60D5805C3_zpskwuyiybp 86A7212A-C665-49DE-93C8-65E60D5805C3_zpskwuyiybp on Flickr I also started cleaning up some of my nuts and bolts - and to do this, after looking around I used "frost rust remover" which was £25 for 5 litres and is said to remove the rust without the use of acids or alkalis (being an inorganic chemist, this will be using selective chelation of the iron oxide - essentially pulling the rust into solution). So far, I am impressed by the results - essentially leave the parts in the solution overnight and then give them a rinse off and a clean with a wire brush and it has a pretty decent effect (this is a very good one - others have needed a second dunk in the solution). 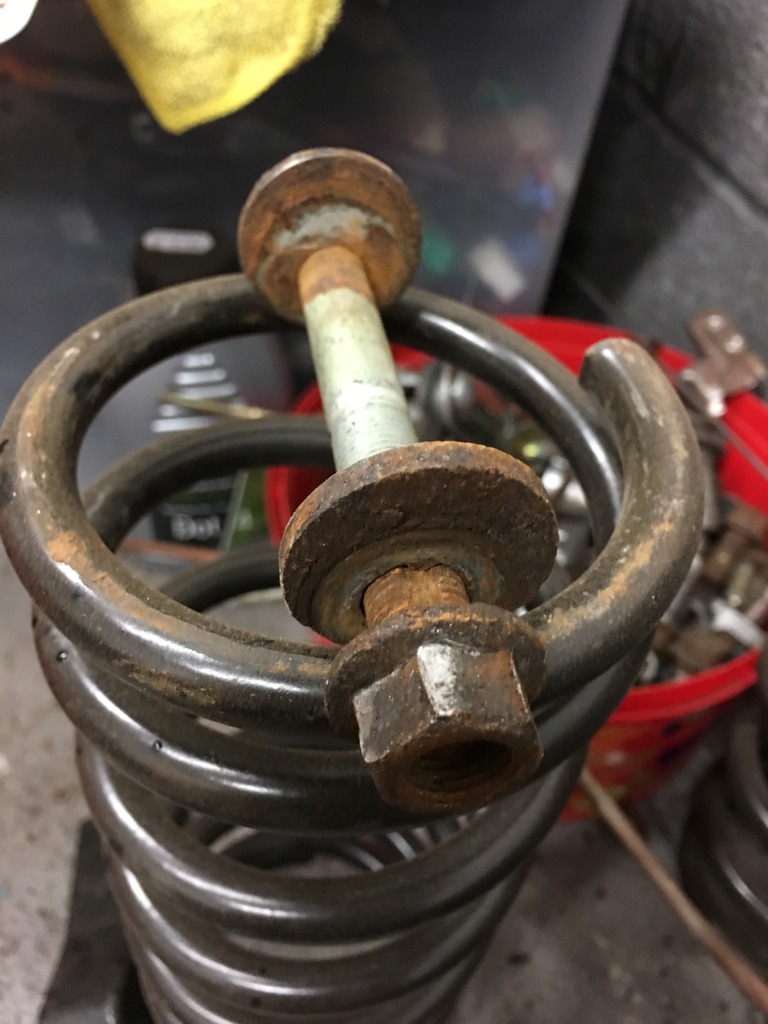 C1BACD93-C793-4621-8EC3-9A7E8E77855D_zpsjxbdulso C1BACD93-C793-4621-8EC3-9A7E8E77855D_zpsjxbdulso on Flickr 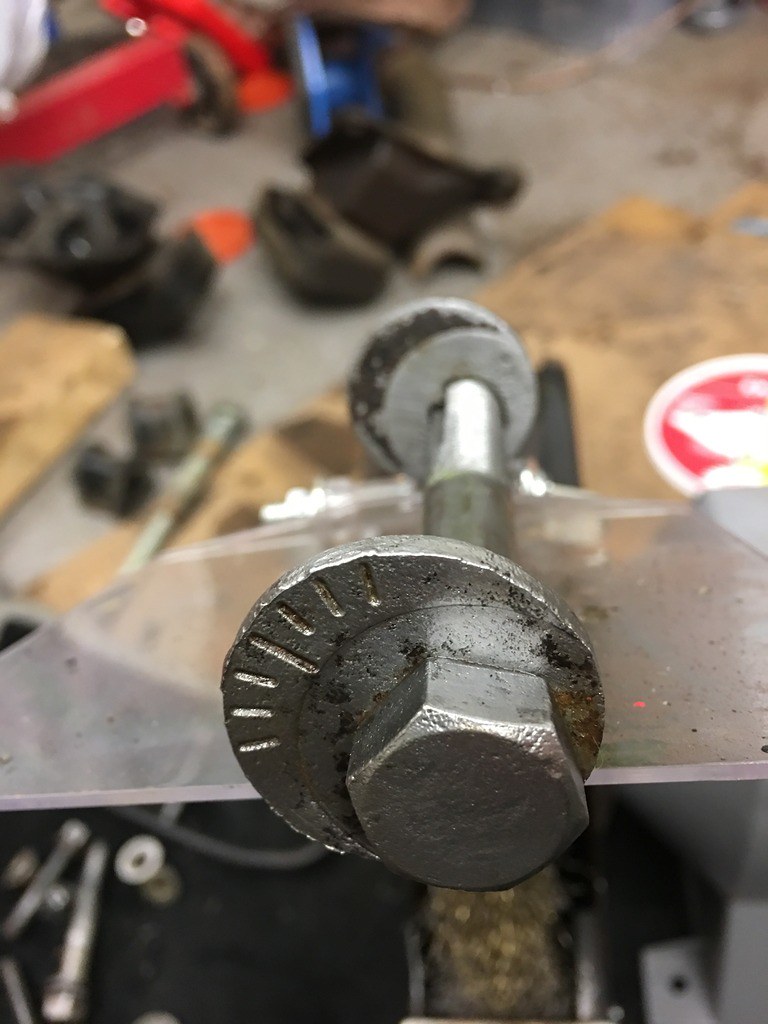 3F74FA3F-E6C0-4B74-B7AE-A09C4C2893AB_zpskhrpyfbn 3F74FA3F-E6C0-4B74-B7AE-A09C4C2893AB_zpskhrpyfbn on Flickr I have started mounting the diff into the subframe, ready to begin making the pile of parts back into something more like a powertrain, and have given the garage a good clean out, as I am now hopefully finished with having flaky rust and dust everywhere, and can start building in a cleaner environment! Once all was clean, I have then laid out the bits in preparation for a rebuilding session! 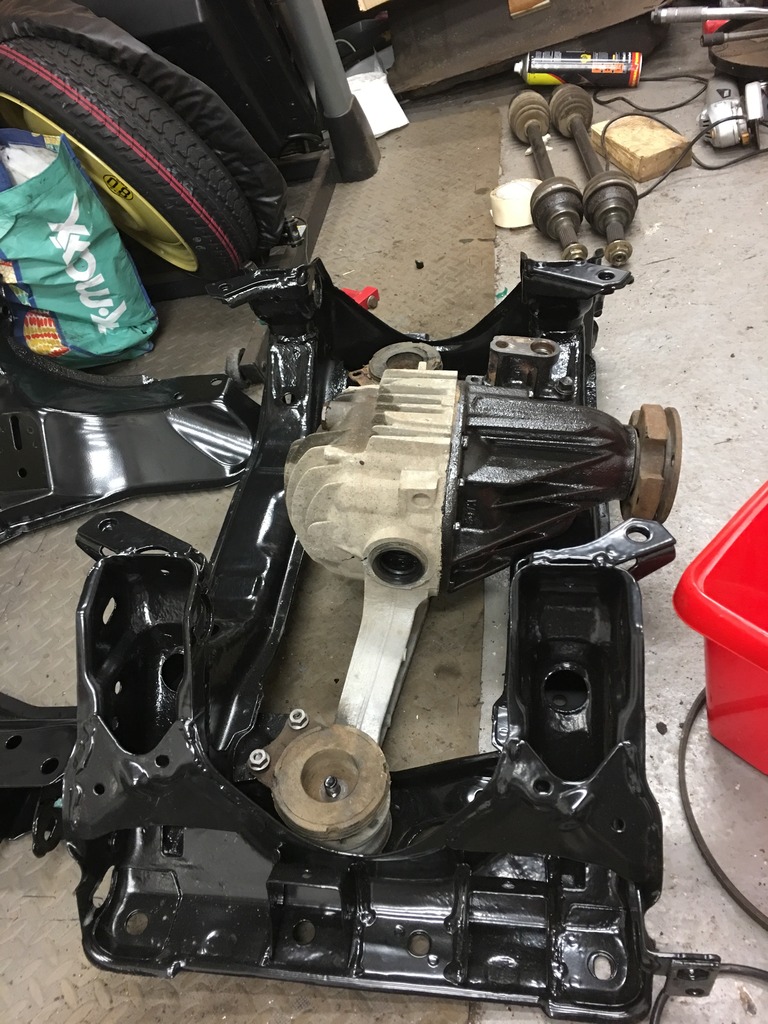 B631132C-EA0B-43F9-8617-709F766A352F_zpsfdbkhbte B631132C-EA0B-43F9-8617-709F766A352F_zpsfdbkhbte on Flickr 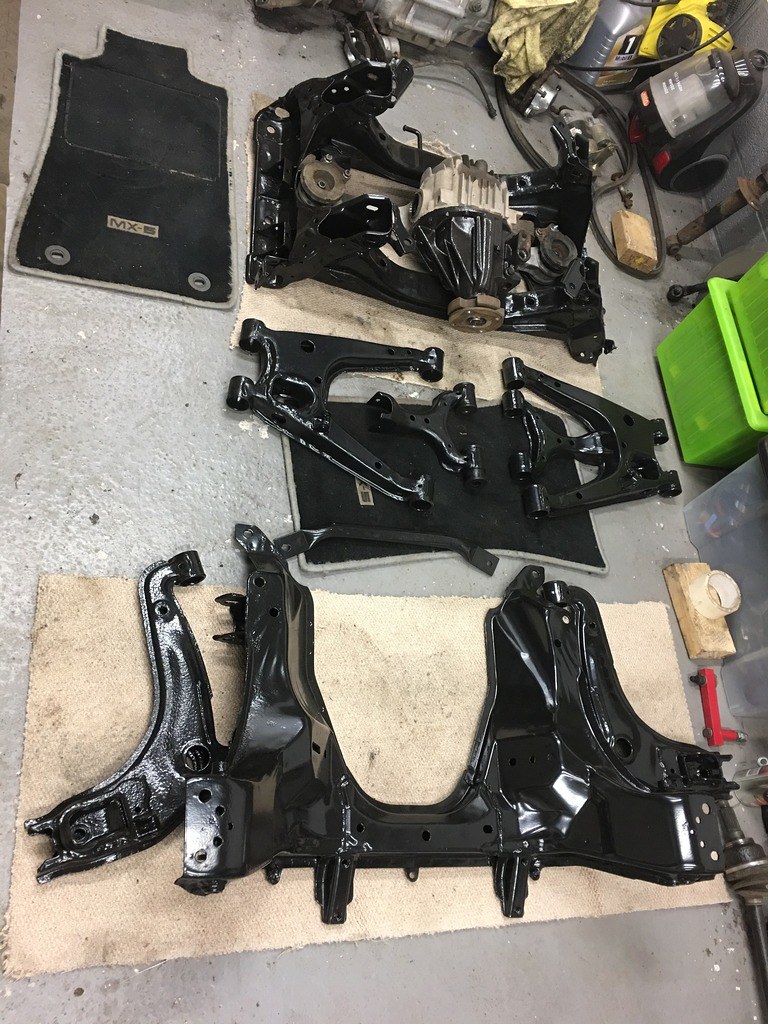 59E293AD-B989-411C-B8CE-33E3C37A89D3_zps6j48so1l 59E293AD-B989-411C-B8CE-33E3C37A89D3_zps6j48so1l on Flickr So, it feels like I am making progress and finally turning the corner from stripping down and dealing with mucky nasty parts into actually being able to start building something that will look nice and clean - hopefully the next update will continue that trend! [footnote]Edited by browno on Tuesday 15th August 23:16[/footnote] |
|
|
|
Post by browno on May 18, 2017 13:45:31 GMT
So since the last update I have been cracking on with assembly - and getting sticky polybush grease over everything I touch! First I started on the back-end and got everything together (although I initially put the hubs on the wrong sides, as I had turned the subframe around while assembling :whistle: ! 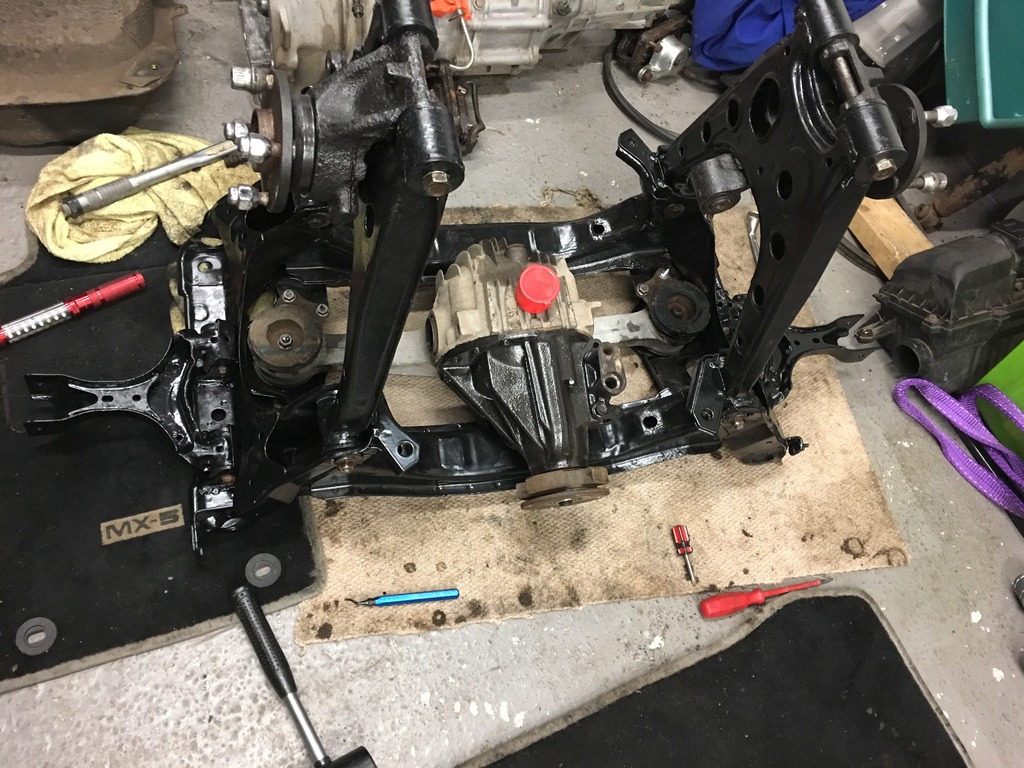 C8FED11C-0B97-4B4B-A3FB-7B8A921ACFCC_zpstlniiil4 C8FED11C-0B97-4B4B-A3FB-7B8A921ACFCC_zpstlniiil4 on Flickr I haven't yet got the driveshafts located into the diff - they are not locating by simply pushing them in, and I didn't want to get too aggressive with them - will have another go tonight. I guess it is just a case of getting the spring clips to pop into place - I can feel that the splines are lined up, so it is just that last push I think. 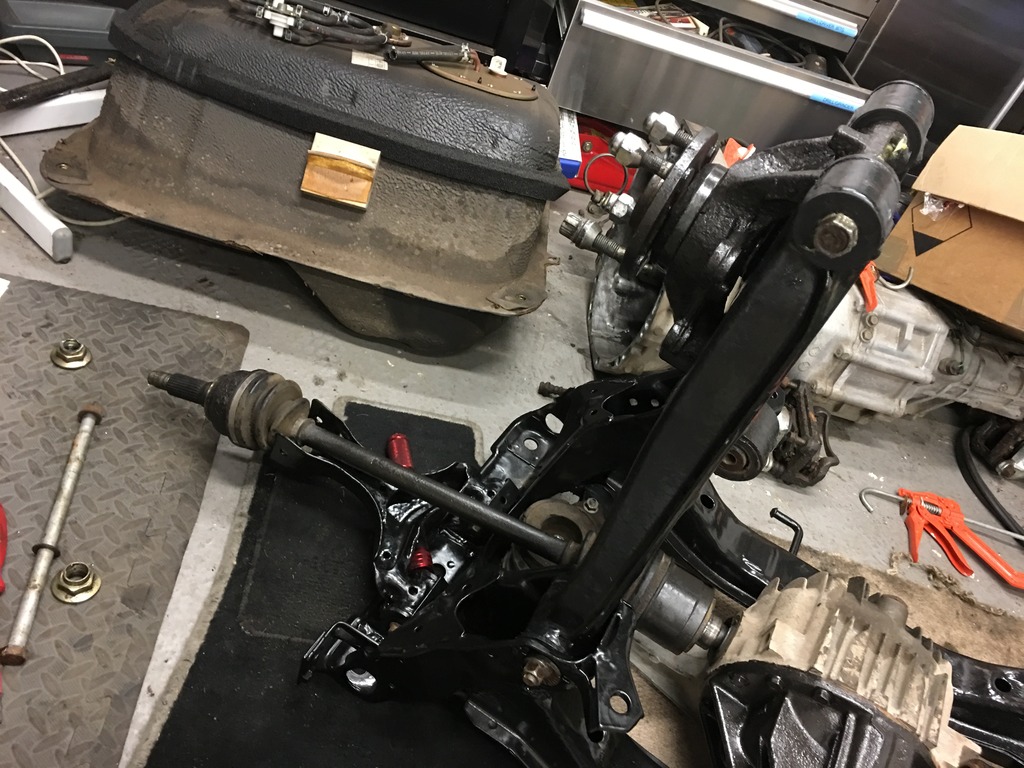 CC0BBBA1-2141-40CB-9653-2F341A676416_zpsmnevkmi5 CC0BBBA1-2141-40CB-9653-2F341A676416_zpsmnevkmi5 on Flickr next, I decided to mount the front subframe to the engine while it was on the stand, and got one pair of wishbones fitted 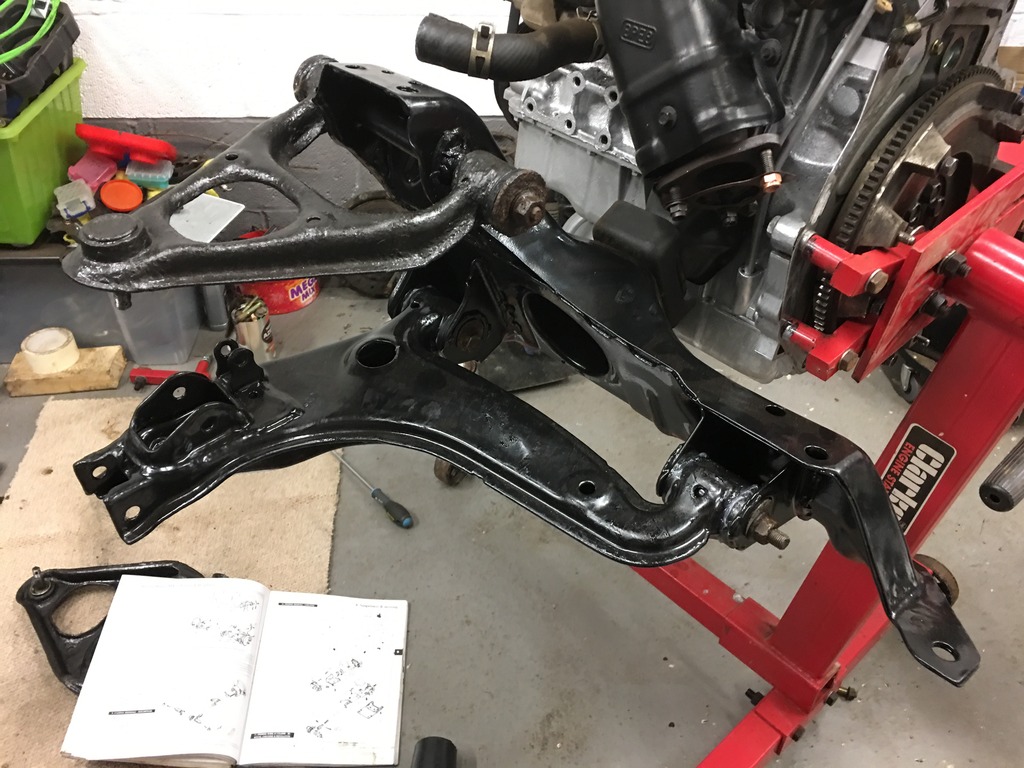 49210ABB-D209-4E10-9E29-44E7FE6DA5A0_zpsvmsst77d 49210ABB-D209-4E10-9E29-44E7FE6DA5A0_zpsvmsst77d on Flickr following which I then dropped the assembly onto axle stands to allow me to fit the new clutch - this was a step that I had wondered about, as the clutch was not too worn (but is on 74k) - and I am thinking that FI might eventually be on the cards, but having won some money in our monthly tote at work, I thought I'd get an Exedy clutch kit sorted and put it in while I had everything apart.  3C2F3E18-70D2-46EE-9EB0-37F6E7B1B956_zpsxpzktsjn 3C2F3E18-70D2-46EE-9EB0-37F6E7B1B956_zpsxpzktsjn on Flickr So with that done, I could reattach the gearbox - which I haven't painted - since it is bare alloy, I figure is isn't going to corrode, and isn't on display, so I've simply given it a good clean and will put some decent new fluid in it (as it is my job to develop gearbox oils, I am going to make sure of that!). I have also rebuilt the other wishbones too, so I am starting to pull together the powertrain. You will notice that the top end of the engine hasn't been played with yet - I am going to paint/coat the cam cover and change the gasket and CAS o-ring, but figured I can do that at any stage in the build. 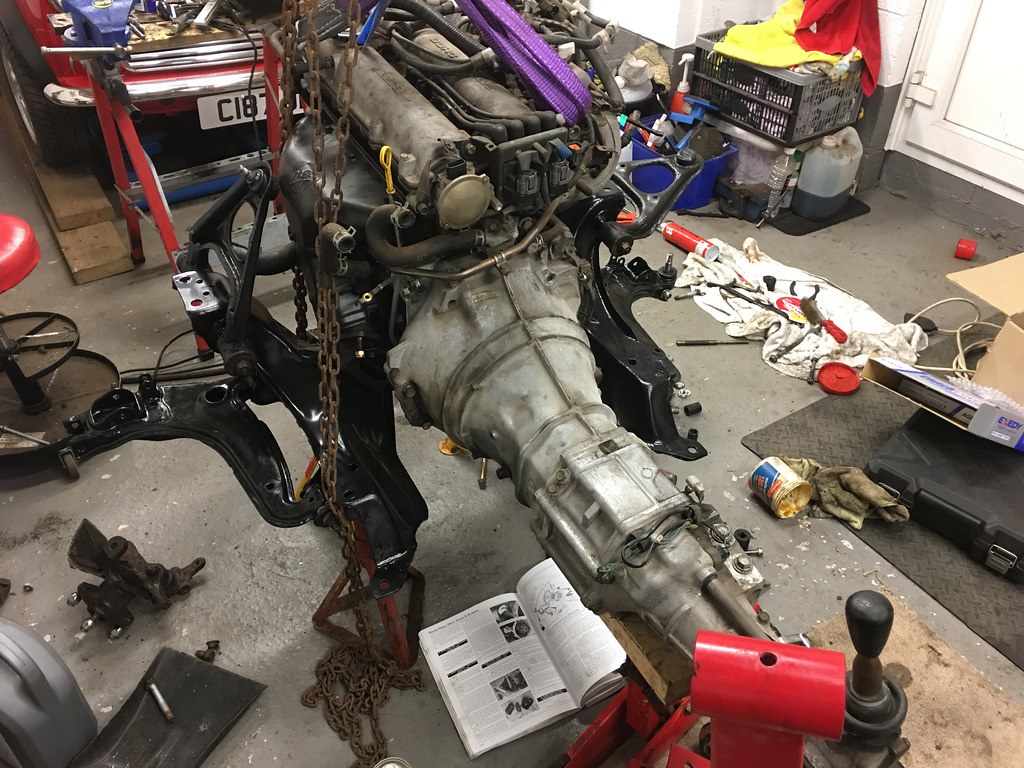 02C40877-53FD-4D34-94A4-DE090750F39F_zps0slhrj6w 02C40877-53FD-4D34-94A4-DE090750F39F_zps0slhrj6w on Flickr I have a few more jobs to do tonight, which include fitting up the front hubs (with new upper balljoint boots and one lower balljoint where I had to chop out a stuck bolt), swapping in the new clutch slave cylinder, fitting the rear driveshafts and hubs and then trying to get the PPF and propshaft installed so that I have a complete powertrain! (obviously I then need to add brakes - but they are also ready with new discs, pads and calipers all round to go on). |
|
|
|
Post by browno on Jun 5, 2017 22:24:50 GMT
So, it has been a couple of weeks since the last update and I have a little more progress to report. Firstly, continuing from the last update, I got the driveshafts popped into place properly, and then started to reunite both ends. 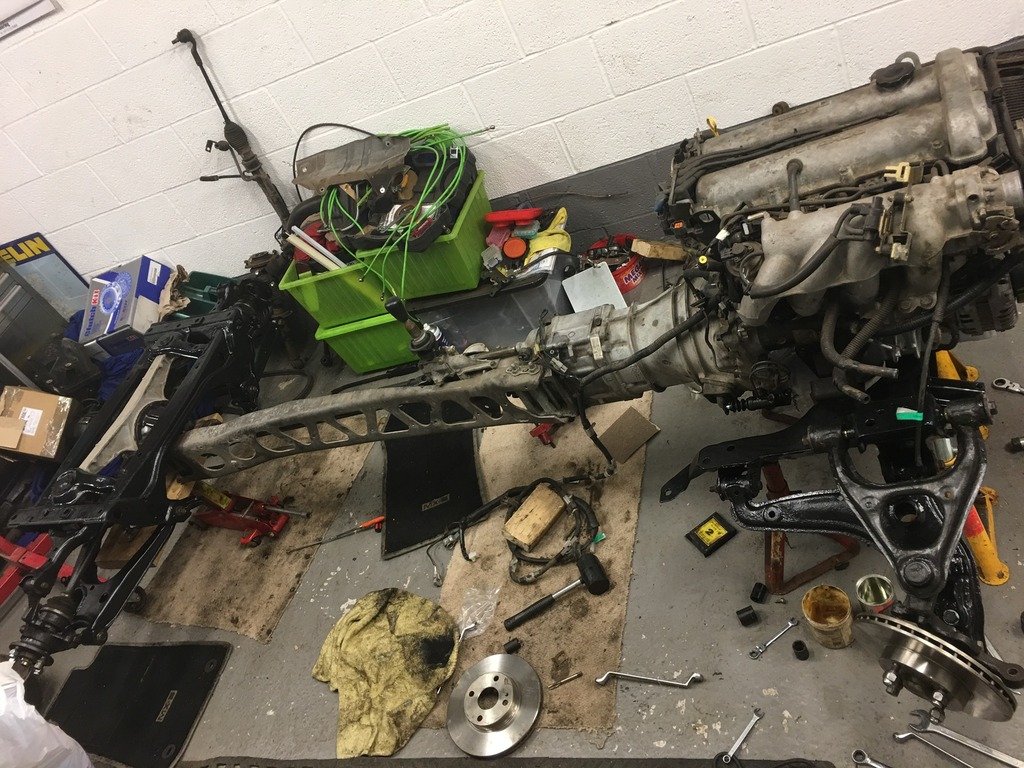 IMG_4949_zpsj3d5jg7z IMG_4949_zpsj3d5jg7z on Flickr 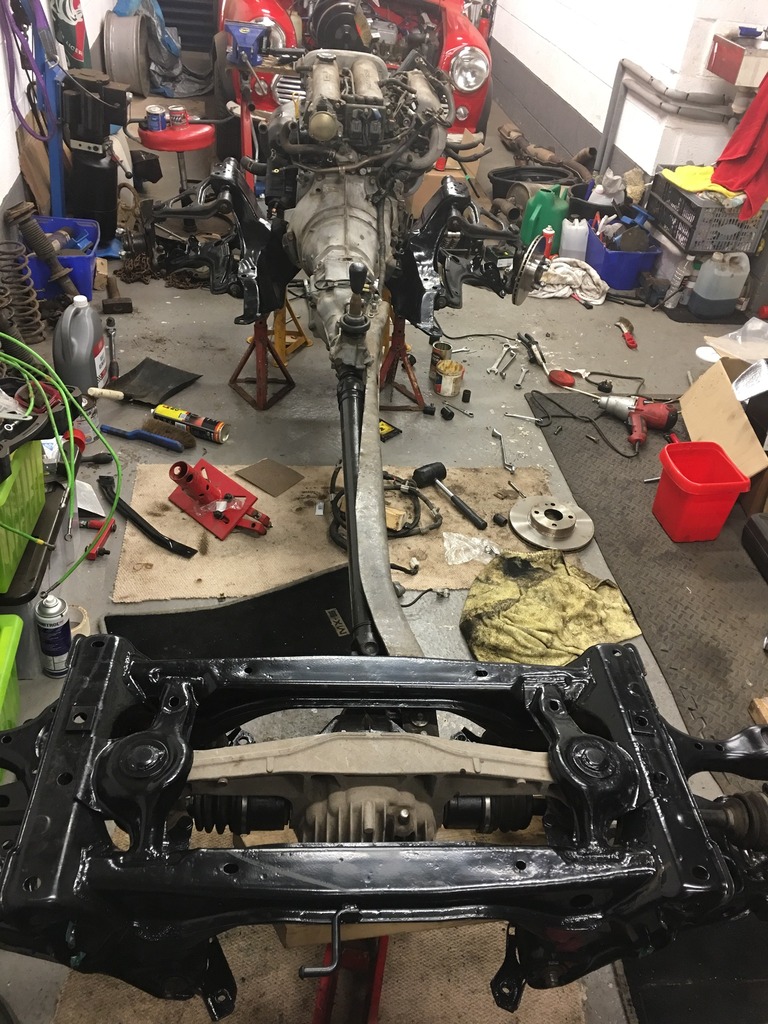 IMG_4951_zpszw4ij2ah IMG_4951_zpszw4ij2ah on Flickr Then I fitted up the new slave cylinder and pipework. 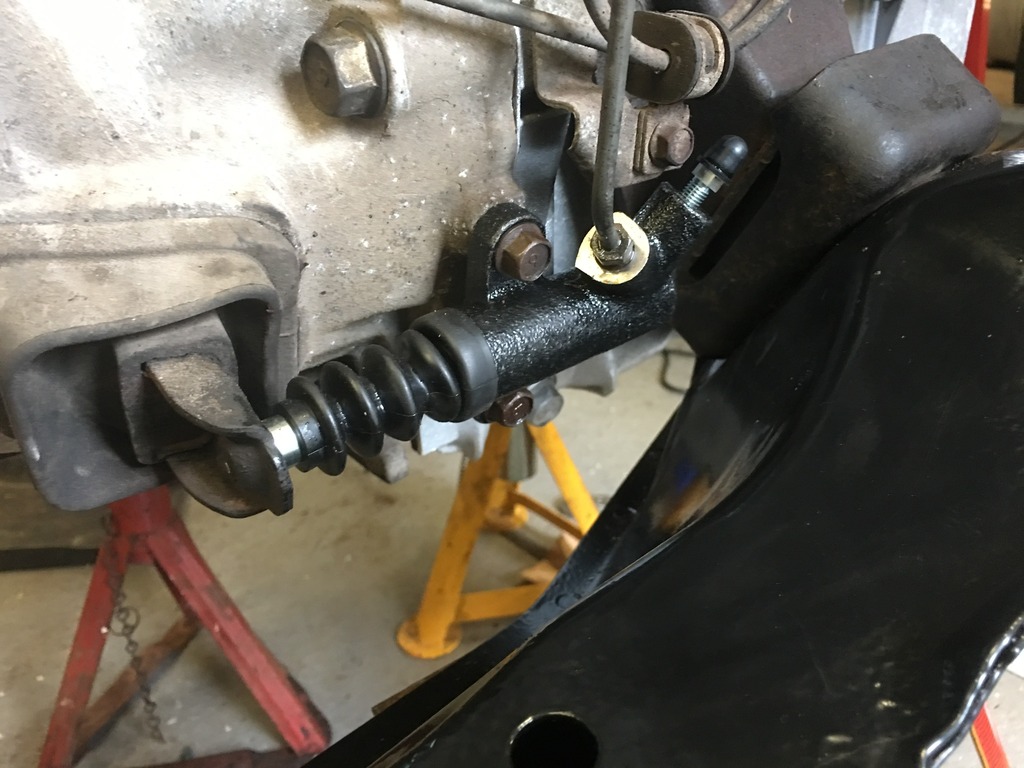 IMG_4956_zps7gxzjsbg IMG_4956_zps7gxzjsbg on Flickr I also replaced the bottom ballpoint that I had had to chop out and so could put the front hubs in place (not torqued or finished in this pic). 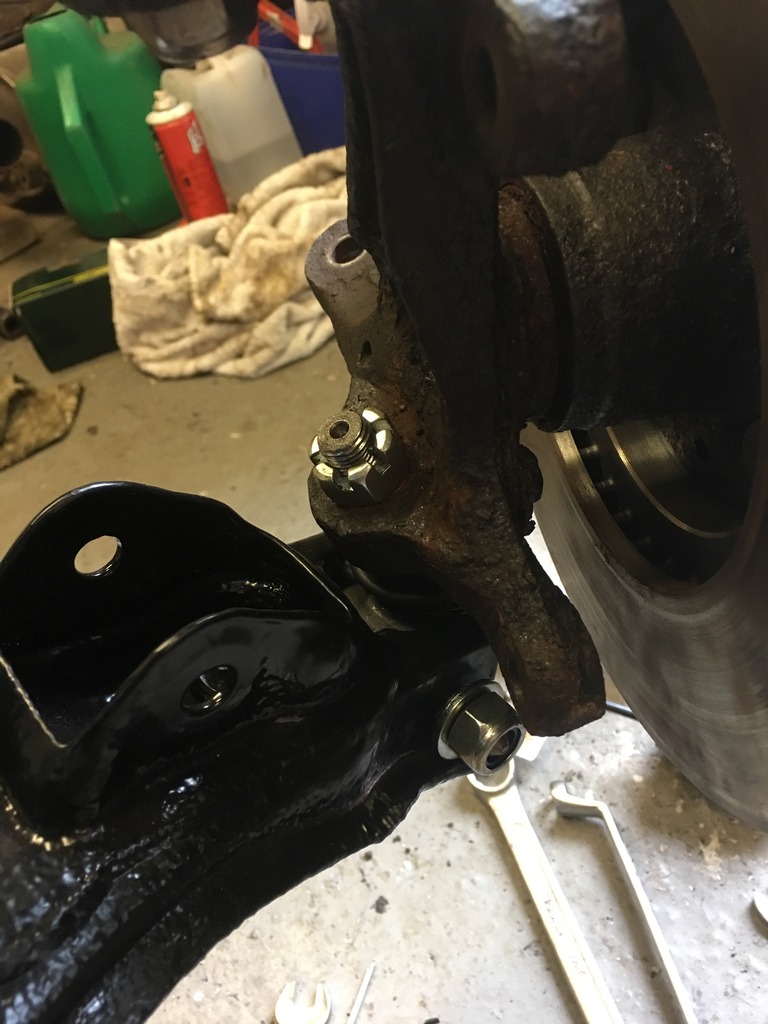 IMG_4957_zps7fj17wfr IMG_4957_zps7fj17wfr on Flickr And tonight (after a week's holiday) I have been depowering my steering - getting rid of the seals from the rack by carefully cutting it away. 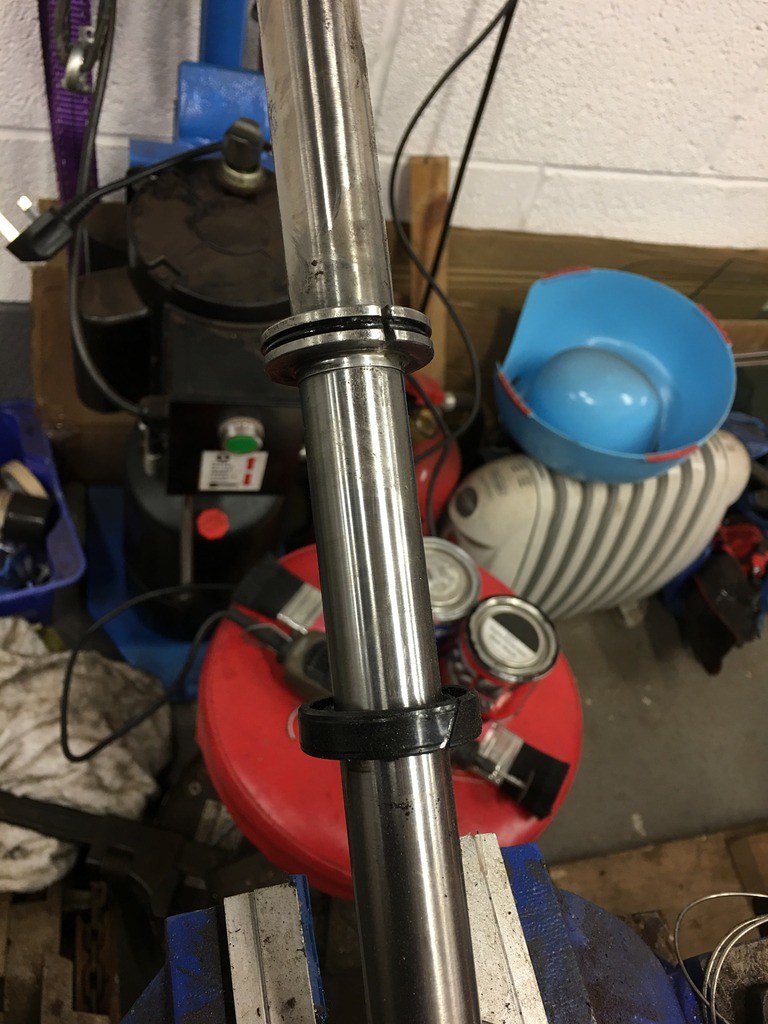 7DB4E3B4-239C-4103-BAF9-0F191E0405A9_zps3zbgjf5c 7DB4E3B4-239C-4103-BAF9-0F191E0405A9_zps3zbgjf5c on Flickr and all rebuilt (but needing a clean off before refitting)... 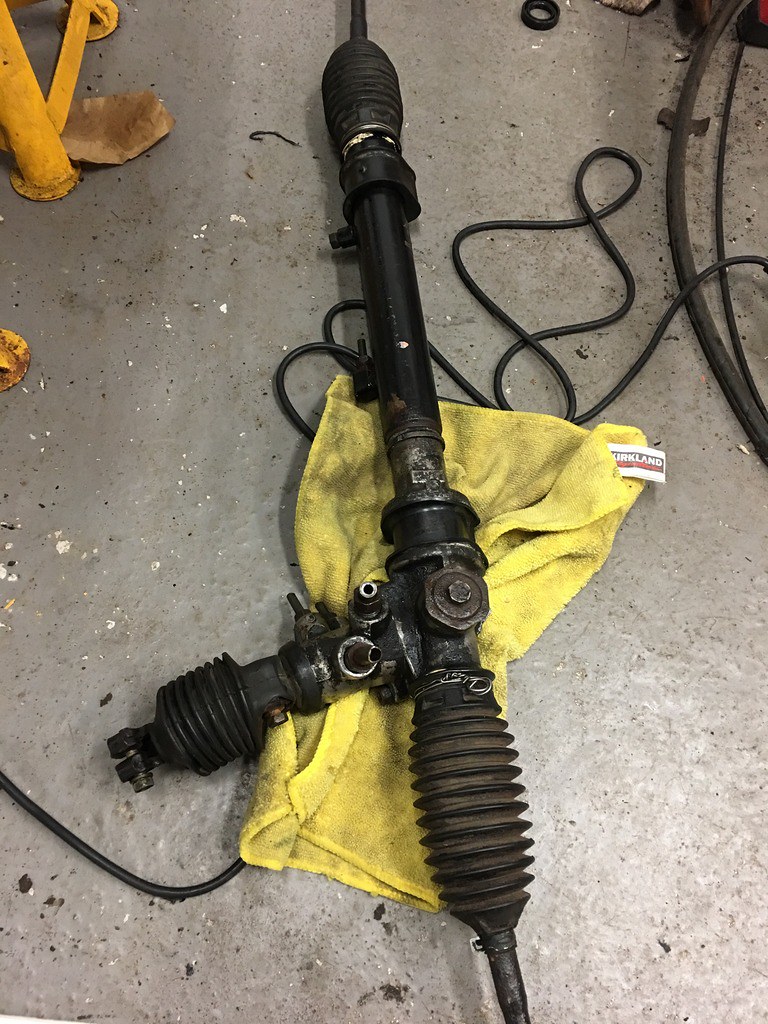 1BD853E9-3917-4740-A13E-0DAAB9804D1A_zpsyem4qykk 1BD853E9-3917-4740-A13E-0DAAB9804D1A_zpsyem4qykk on Flickr Now I need to get cracking as I have been in touch with MEV and my kit is ready - so I will hopefully be getting a van sorted to go and get the missing bit of the equation sorted out very soon - I just need to shift my Mini out of the garage temporarily so that I will have space to do the floors and pipework prior to fitting the chassis to the rollerskate. |
|
|
|
Post by browno on Jun 10, 2017 7:22:39 GMT
Another update today, and it is a big milestone! Firstly, I have been getting a series of little jobs on the mechanicals to get them sorted, and ordered (and quickly received) my suspension. I debated a lot about what to use on the Exocet - whtether to upgrade later or to go straight to coilovers. I have been very happy with the Meister R's that I have on my mk3 - and had thought to go for another set, but I have ended up with a set of Gaz gold pros - as many Exocets seem to use them, and to try something different. So they are ready to be fitted, along with a set of silicone hoses en-route from fast5 to sort the cooling system.  B670F95B-142C-4EDF-825C-77398BEBF8ED_zpschpwungf B670F95B-142C-4EDF-825C-77398BEBF8ED_zpschpwungf on Flickr Then, the big event - having seen Stuart and MEV getting a bit of coverage on the local news the other night - with my kit clearly visible in the background, I was keen to see it in the metal! I was pleased to head out of work early yesterday to pick up a van and head up to Mansfield, where I could pick up my kit. As you will see, I have decided that the car deserved a striking colour scheme - I was originally planning contrasting body and chassis as many (most) builders go for - but after deliberating and playing with photoshop, decided that a single colour would be good and allow me to have the option to add some vinyl to break it up later if it is too much! 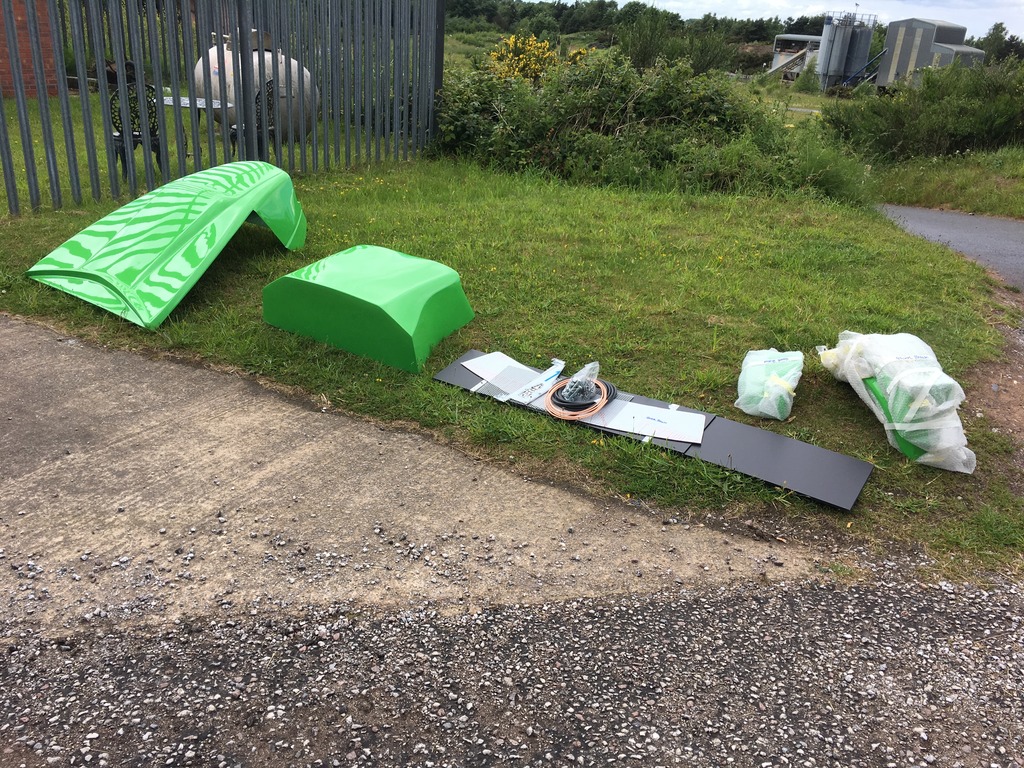 F7075B51-7E7C-4E6A-B61D-57A4F0641BDC_zpsagdvhjzr F7075B51-7E7C-4E6A-B61D-57A4F0641BDC_zpsagdvhjzr on Flickr We were upgraded to a jumbo transit - which was enormous, and so we had no worries about space!  F4858408-13CD-46B4-8D60-4AB8FC10F334_zpshnuptamj F4858408-13CD-46B4-8D60-4AB8FC10F334_zpshnuptamj on Flickr I had taken a trip to screwfix and bought a load of 28mm pipe lagging to make sure I could protect the powder coat - and so got plenty of that on to prevent chips - and after a short drive, we could lift it into the garage... 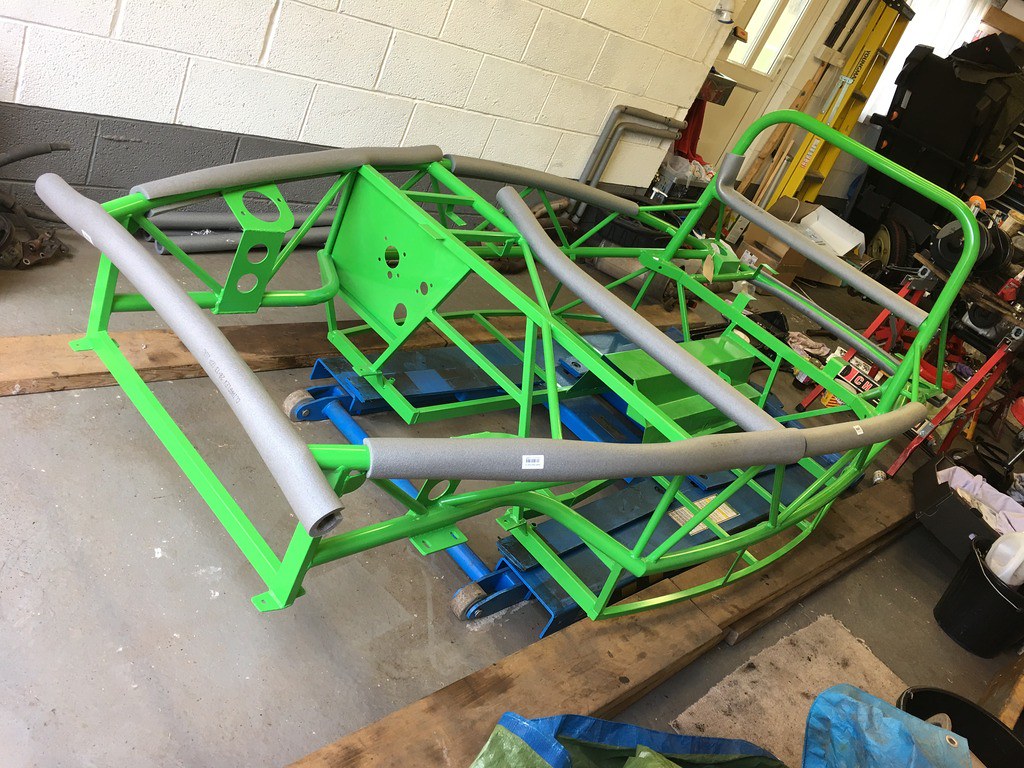 AB5CB4E2-8FDE-49CC-8825-840597809E17_zpscv1grxls AB5CB4E2-8FDE-49CC-8825-840597809E17_zpscv1grxls on Flickr And then set up the inevitable picture with the panels... 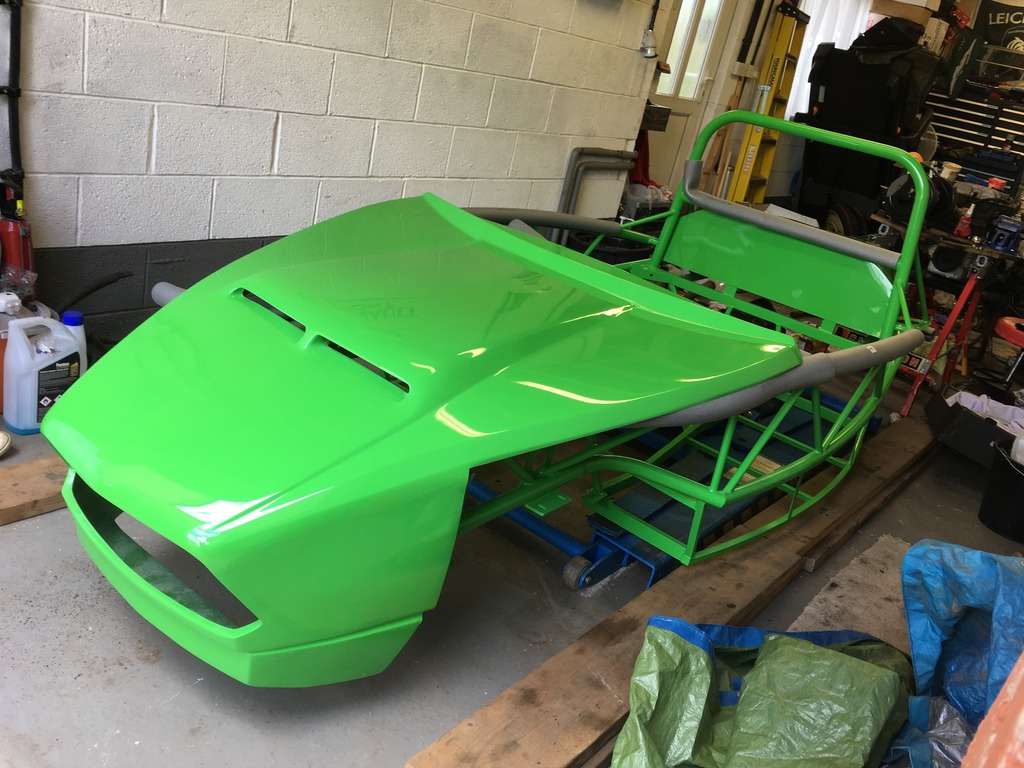 F9D84387-8040-4121-8811-C596D7DA68B4_zps7y9fgu2l F9D84387-8040-4121-8811-C596D7DA68B4_zps7y9fgu2l on Flickr  C9C3BFA8-B01D-49C2-B0D1-62D85B4C8AFE_zpsxyaxujgi C9C3BFA8-B01D-49C2-B0D1-62D85B4C8AFE_zpsxyaxujgi on Flickr So - thoughts so far are that I am liking the colour (which is a good start!) and I am liking the styling tweaks that have been done - the flat roll hoop is a big one, but also the new rear cover with the flat-top and areas mounded in for fog/reverse lights tidies up the rear end nicely. Overall, I am a happy customer - now to keep the momentum up and get ready to reunite shell and skate! |
|
|
|
Post by browno on Jun 18, 2017 21:40:50 GMT
Thanks again for the positive feedback! It's good to see that folks are enjoying reading my build! Time for another progress update. First job was to whip off the front hubs and remove the remains of the brake heat shields. Of course, the bolts weren't too happy to be removed, so four of six snapped (despite me carefully trying to work them out!), so it was out with the drill and taps to provide a thread for the next stage - fitting the front wing stays temporarily (I have removed them again until after the body is on, so that I don't damage them in the meantime). As I was looking at the front-end and torquing things up, I discovered that both front upper balljoints have dodgy threads which don't want to tighten up. As a result I ordered a pair of new ones - by searching eBay for MOOG K500210, which I found is the part number for the replacements with built in grease-nipples, I got a pair for £50 posted inc. customs charges - a fair bit cheaper than the £35 each + post from the UK. They should hopefully be here later this week to install using the press at work. 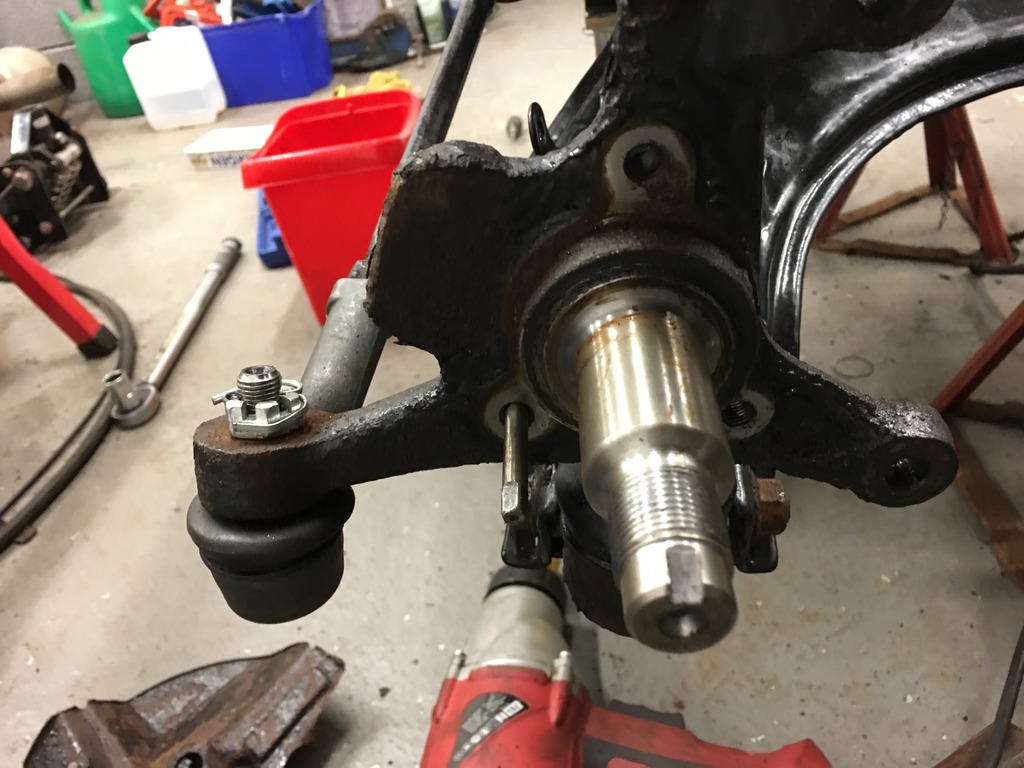 6463D30C-BCEC-4BC6-882A-8F484B999CE9_zps6dzujmdt 6463D30C-BCEC-4BC6-882A-8F484B999CE9_zps6dzujmdt on Flickr 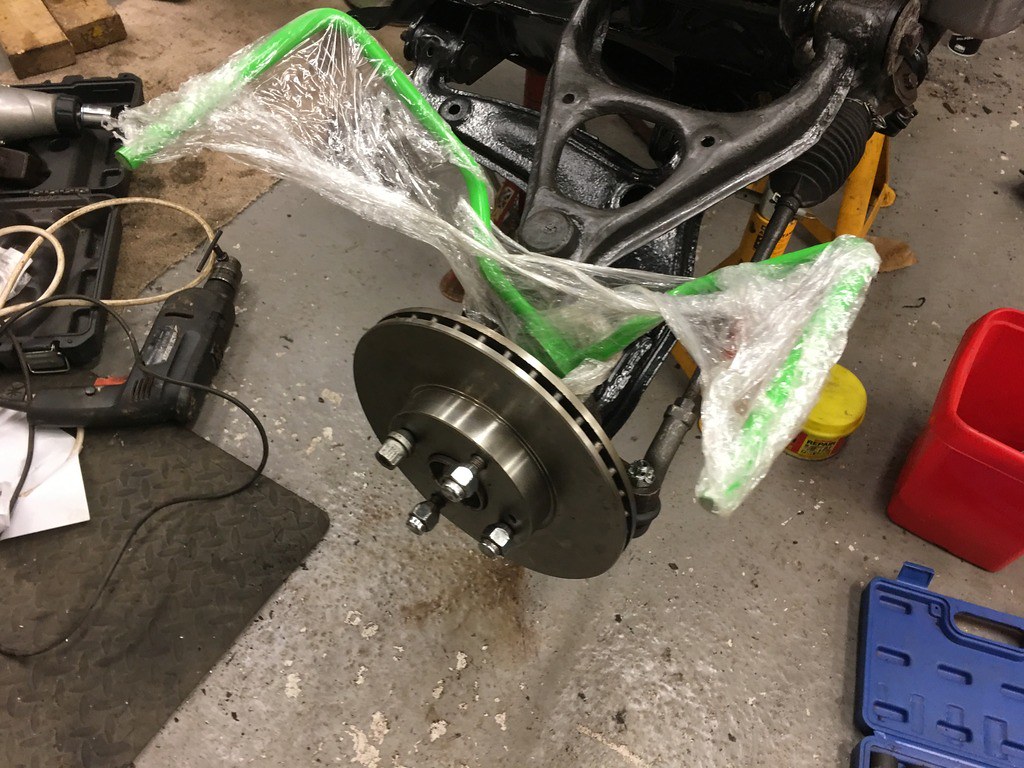 4EBF5B4D-2401-49A0-A69E-D96314681EEF_zpsidd2p1tp 4EBF5B4D-2401-49A0-A69E-D96314681EEF_zpsidd2p1tp on Flickr I then finished off fitting the bushes to the ARB drop links now that I have some more grease for the polybushes - I have left off the front ARB until I have the shell on and can bolt it into place.  64311FBC-3F5C-422A-8284-7400F3D8B06D_zpsapviiagj 64311FBC-3F5C-422A-8284-7400F3D8B06D_zpsapviiagj on Flickr I also rebuilt the rear brakes with new discs and pads and had a look if the lovely green HEL lines that I have acquired from a race-prepped Evo might do the honours - and I think that they will route nicely along the tunnel to meet a hard line along the way (they will be properly secured, I have just used a few cable ties to hold them in place for now). 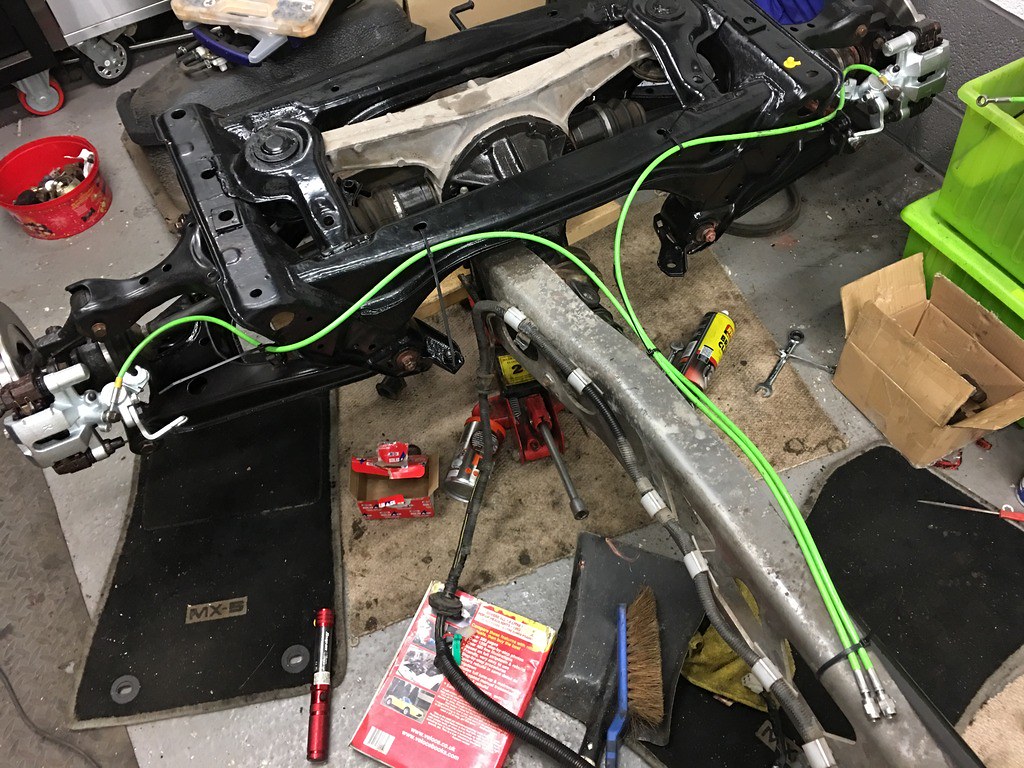 B09D22FC-7D6C-4AF1-8DB5-56B2BBBC56D8_zpschajkzcq B09D22FC-7D6C-4AF1-8DB5-56B2BBBC56D8_zpschajkzcq on Flickr I then fitted my silicone hose set from Dan at Fast 5 - which are very nice, and should keep things water-tight once it is all up and running - even coming with a full set of replacement hose clamps. 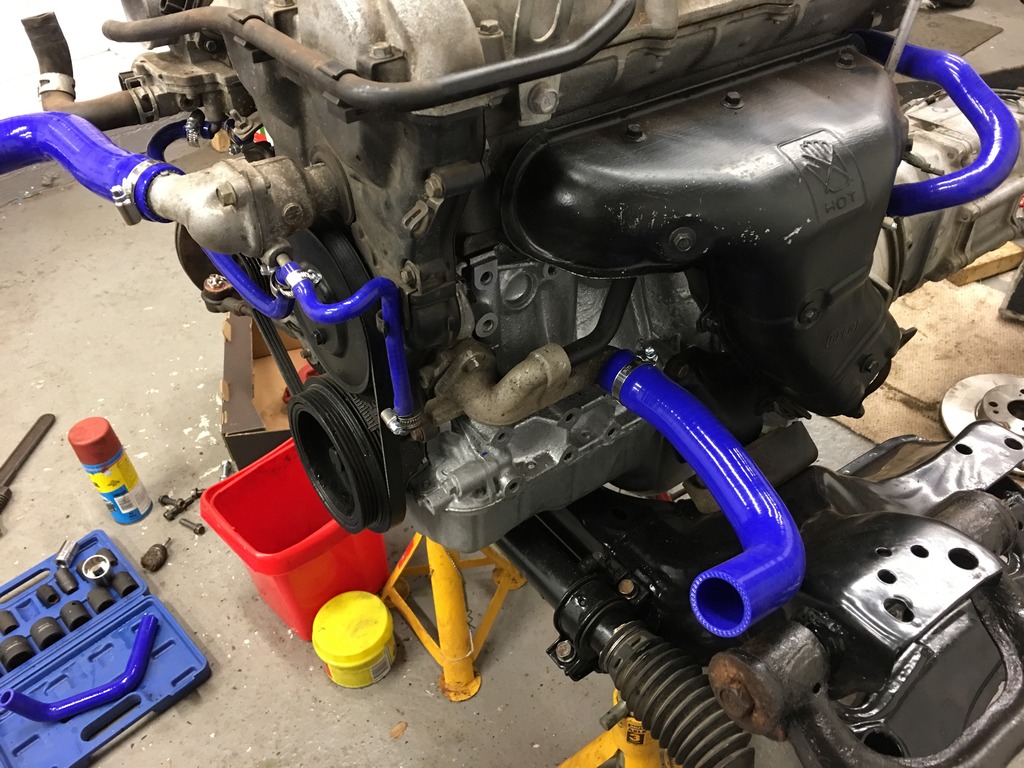 CC58BAC9-7798-4960-8095-57B4333C7D60_zps1uolbxbv CC58BAC9-7798-4960-8095-57B4333C7D60_zps1uolbxbv on Flickr I also tidied up the strut tops (seen here in primer), and have fitted them to my coilovers. 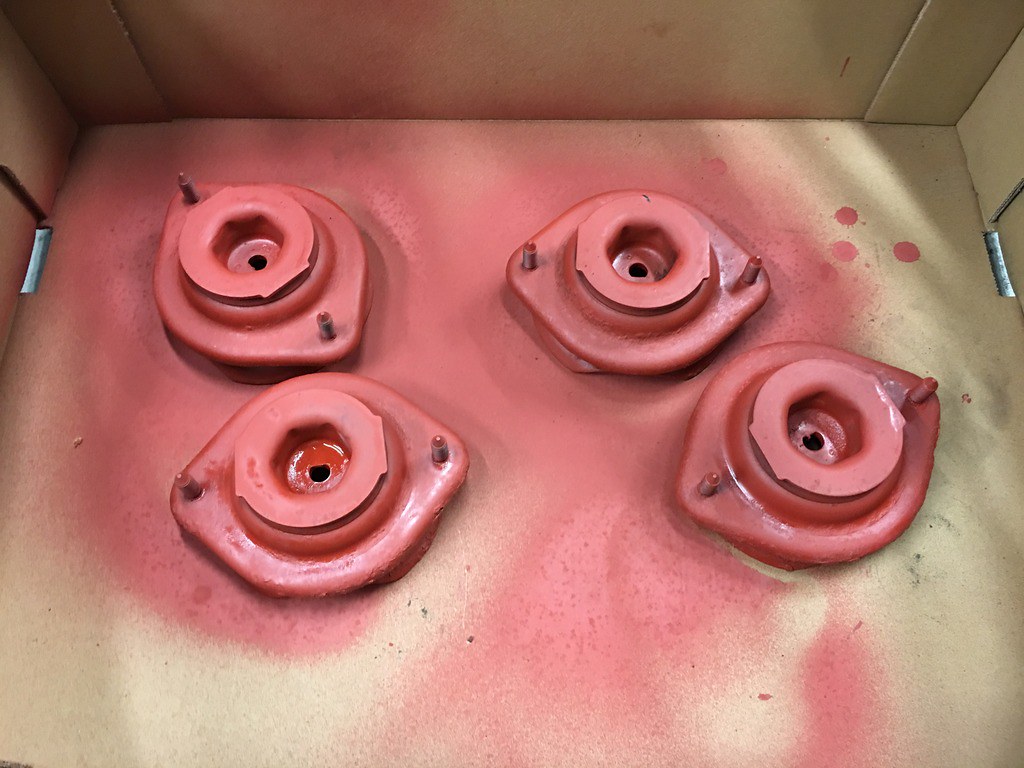 44E78D9E-BA4F-413E-A6D7-EAF36C784008_zpslg7kq4wp 44E78D9E-BA4F-413E-A6D7-EAF36C784008_zpslg7kq4wp on Flickr and finally, I have suspended the bonnet panel from the roof to keep it out of harm's way while I get busy preparing the floors and pipework into the shell, which is the project for the start of this week. 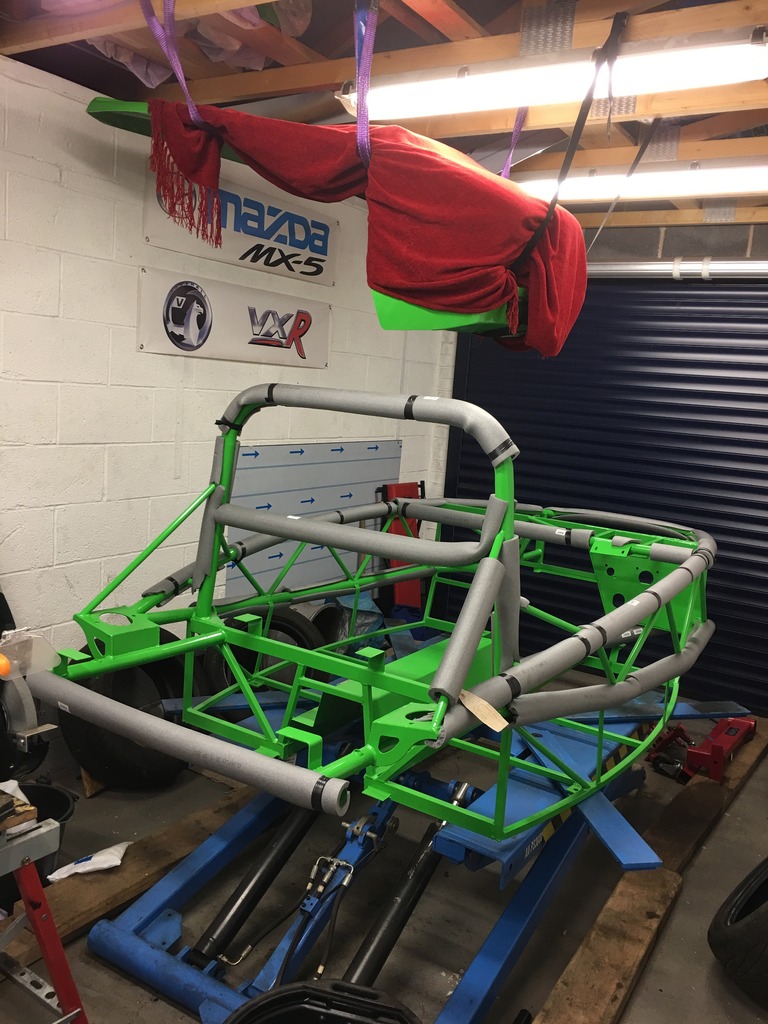 D6B180BE-ECC7-4A4A-BDA0-4590FD600E38_zpsxta6cnrt D6B180BE-ECC7-4A4A-BDA0-4590FD600E38_zpsxta6cnrt on Flickr |
|
|
|
Post by gwnwar on Jun 19, 2017 6:13:17 GMT
You will have to join the 2 rear brake lines into 1 to go forward to the brake proportioning valve..
Did you adjust the rear pads to the calipers/rotors??..
|
|
|
|
Post by darkling on Jun 19, 2017 7:22:37 GMT
good progress
|
|
|
|
Post by browno on Jun 19, 2017 9:40:02 GMT
Cheers guys, and thanks for the pointers gwnwar - on the flexible lines, I was planning to fit a y-connector piece to split the line from the single hard line - just that having the longer lines moves that joint forward a little more.
I haven't adjusted the calipers up yet (I have all-new calipers, so they are all backed off and free at the moment) - I have intentionally left that for now until I have everything plumbed up and will adjust and bleed all in one hit..
|
|
|
|
Post by browno on Jun 19, 2017 22:01:48 GMT
|
|
|
|
Post by gwnwar on Jun 20, 2017 18:12:15 GMT
Looks good.. Might want to make and install your fuel and brake lines stand off mounts and install them while you can work close to were they go.
|
|
|
|
Post by browno on Jun 21, 2017 9:32:44 GMT
Thanks again Gwnwar - the brake and fuel lines are next on the agenda - p-clips on order and a plan formulated for fitting them - which will be the next things to make.
After much thought I have decided to join the many in wrapping my floors - having thought about other potential finishes, so I am going to get them all prepped and hopefully ready to wrap as soon as the vinyl arrives.
|
|
|
|
Post by timbo on Jun 21, 2017 12:03:59 GMT
The other thing to think about is how you are going to run your electrics to the rear. There is room along the inside of the transmission tunnel on the opposite side to the fuel/brake lines (also handy for the handbrake wire) but if you are going to use p clips then best to drill the holes for rivnuts/rivets before you attach the chassis (difficult to get a drill in afterwards).
Tim
|
|
|
|
Post by browno on Jun 21, 2017 12:31:41 GMT
Thanks Tim - that is a good thought, I had wondered where people were running their looms to keep them out of the way. Will make sure that I prep somewhere to fix on the other side too then!
|
|
|
|
Post by gwnwar on Jun 22, 2017 4:01:10 GMT
Why not run them on the PPF like OEM harness.. that way they are away from the heat of the exhaust pipes and cat.. Remember it get real tight for space for the tubes at the end of tunnel and sub frame..
|
|