|
|
Post by Fin on Nov 16, 2016 11:40:08 GMT
Hmm, watched Boosted Miata & Car Passion Channel's guides and BM used Loctite and CPC neither. Both seemed fairly straight-forward, but I think I'll give it a go as is for the time being, and see how it feels. I can always come back to it and strip it later. One point against not stripping it totally seems to be the fact that you are still pushing a hydraulic seal backwards and forwards, even though there is no fluid there, this still feels dead & unresponsive. That said, surely this is because all the pipe outlets have been sealed to prevent dirt ingress, and so there is still some residual hydraulic (air) compression when the rack moves L/R. If the pipe outlets could be vented to allow air to flow out/in, but not dirt to enter, wouldn't this solve the problem? |
|
|
|
Post by Fin on Nov 16, 2016 17:18:31 GMT
Well, de-piped the steering rack ready for de-greasing and painting, and was tempted to press on and completely remove the valve, but decided to try it as it is first. For a change, decided to take the plunge with the cam cover inlays as I had practiced with the Milliput on the embossed back of an old hard drive, and the effect seemed fine. Mixed up the black binary putty, and rolled it out into thin sausages, and then inserted into the embossed letters of MAZDA. Made it proud so I could press it had into the nooks & crannies, and then skimmed the surface excess with a craft knife. As this stuff sticks like poo to a blanket, I dipped a finger in the wife's best 5W-30 extra virgin olive oil, and smoothed over the surface until I got a nice smooth finish and clean line around the letters. I'll polish it off tomorrow when it has hardened, either by hand or Dremmel, but overall very pleased with the contrasting effect. 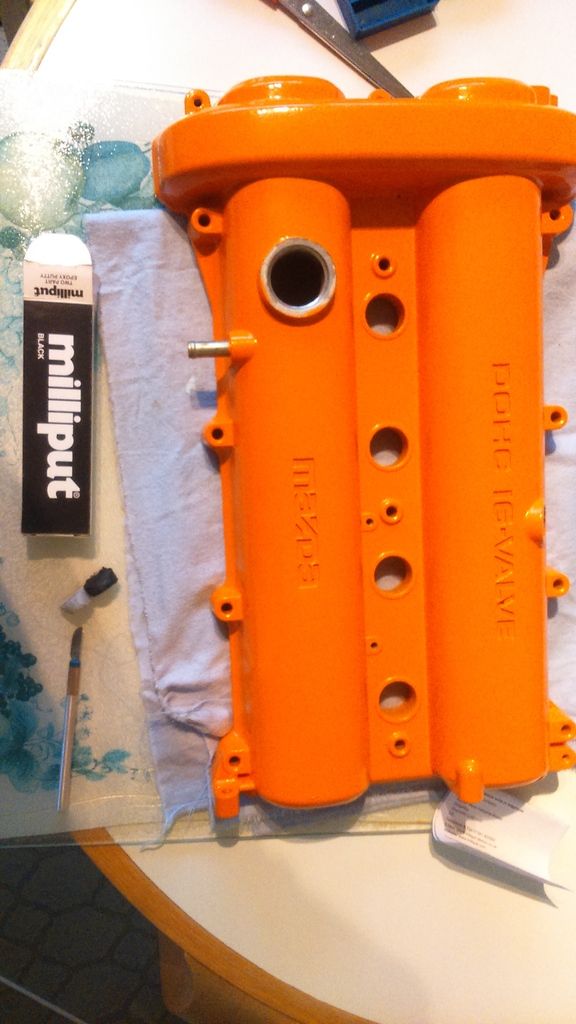  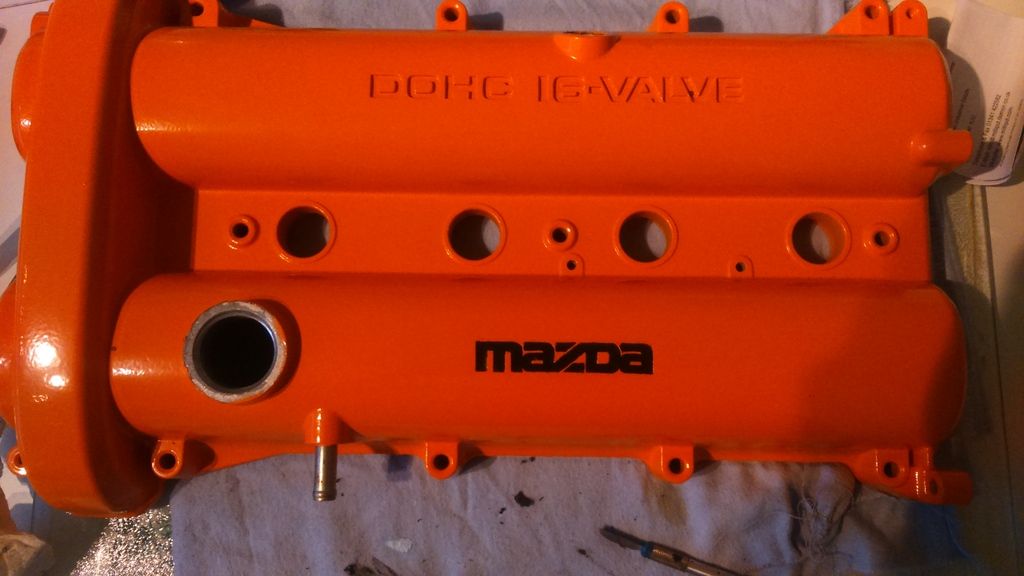 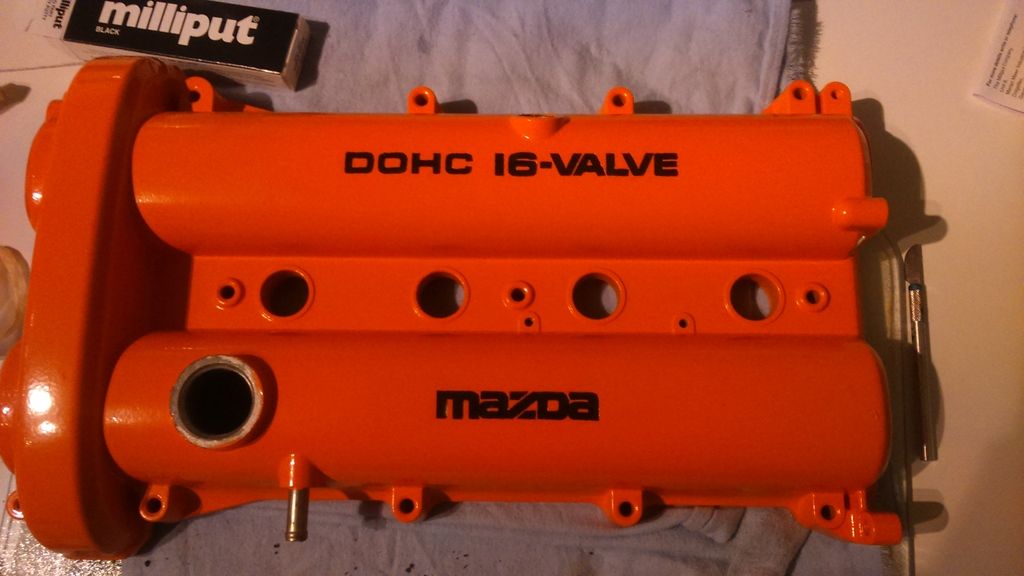 |
|
|
|
Post by Fin on Nov 18, 2016 18:55:06 GMT
HELPA quiet and uneventful day doing the top mounts of the suspension struts, turned into something of a nightmare after I decided to re-mount the cam cover. As I was tidying & cleaning the seating for the cover, I thought I should check the spark plugs, and give them a brush, or get some replacements. 1&2 were fine, but 3 was a bit oily and wet. I dried it off and gave it a once over with the wire brush, and then curiosity drove me to have a look down into the cylinder. Now the last time I did this, as a callow youth, was on an old Morris 1100, on which the head gasket had gone. Stupidly, as I was peering into the spark plug hole, I decided to press the solenoid under the bonnet (ask your dad) and turned the car over. How the resulting high pressure jet of water didn't take my eye out, I will never know, but this time there was no solenoid - or battery come to that - for me to play Russian Roulette with. However, with the aid of my trusty headlight, what I saw was a reflection of my own eye gazing moistly back up at me! Now, the old donor ran & pulled great, with no sign of a misfire or any lumpiness, and the temp and water levels were all fine, but I am assuming that (at best) the head gasket has gone and water has somehow made it into cylinder 3. Tomorrow, I will try to dip something into it to smell if it is unburnt fuel (hopelessly optimistic), oil (would that be gasket or head?) or water. Meanwhile, any suggestions would be gratefully received, or does it look like a strip-down to at least replace the head-gasket?? 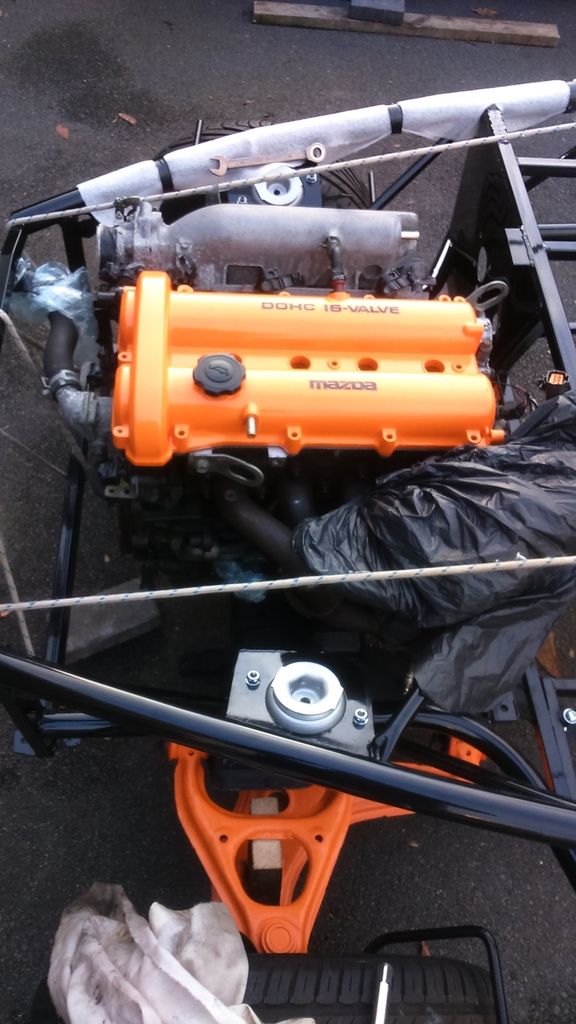
|
|
|
|
Post by gwnwar on Nov 18, 2016 22:08:03 GMT
A syringe with a piece of rubber tubing on the end should suck most out. So you can see what it is. Was the tip of the plug wet or the white and wrench part..
|
|
|
|
Post by Fin on Nov 19, 2016 9:29:23 GMT
Just a small part of the thread around the electrode - nothing major. Was snugly fitted, and covered with clingfilm and a towel + car cover whilst outside without the cam cover, so I don't think it's rain that has leaked in.
|
|
|
|
Post by gwnwar on Nov 19, 2016 20:02:54 GMT
Crank over the engine with a towel above it don't let it touch cams of gears.. see what comes out..might just be a leaking injector
|
|
|
|
Post by Fin on Nov 19, 2016 20:47:34 GMT
Thanks. Not wired up yet, so can I crank it by hand, or will that not be fast enough? Should I also remove all plugs to reduce compression resistance?
|
|
|
|
Post by gwnwar on Nov 19, 2016 22:52:02 GMT
Hand cranking won't work. just bring that piston up to TDC and some of the fluid might come up to mop up with a rag..
You could use a shop vac with a stepped down small tube to go into the plug hole to suck out fluid. First push a thin piece of rag into hole to see what the fluid is. gas,oil, water..
|
|
|
|
Post by Fin on Nov 26, 2016 16:51:56 GMT
Well, a week of a horrendous cold has seen little progress, apart from fault-finding my son's Citroen C2, which seems to have been an intermittent alternator fault, coupled with a BSI/EMS problem exacerbated by a piggy-backing "black-box" the insurance company thoughtfully left in situ. Highlight was finding an excellent mobile mechanic who has built several cars & bikes, and whose prices are so embarrassingly low I've had to offer more to salve my conscience.
Anyway, slapped the steering rack back on today, and with the steering wheel on tomorrow, I will again have a steerable beastie ready to roll into the garage until we're back from holiday.
Hopefully, can also test the fluid in pot #3.
|
|
|
|
Post by Fin on Jan 7, 2017 18:58:26 GMT
Well, first day back for some time, what with holiday, Man Flu and then Christmas.
Spent a couple of hours fitting the pedals and steering column, but most of the time went on compiling a "to do" list, that will have to be formatted into a sequential list. Will remove he chassis and mark out the flooring ready for cutting, but still fancying some additional sheeting to sandwich between the aluminium and the chassis, both for strength and aesthetics. Will plan the routes for fuel and brakes, and then decide at what stage I actually have to fit the floor.
Fun to get started again, once you get over that initial lethargy.
|
|
|
|
Post by Fin on Jan 29, 2017 17:38:45 GMT
Finally back into the build, with a long To-Do list, and an equally long list of stuff to buy! Wanted to get the donor shock absorbers re-assembled today so we could see how they fit the wishbones, hopefully without any need to cut and fit the "banana"plates. We lost the old upper mount "hats" when they were left in the body, and bought some replacements which seem twice as deep as the single plate originals. You'll see in this schematic Shock that the upper mount is one single plate. My replacement is twice as deep and doesn't leave sufficient thread for the final locking-nut in the specified configuration. My question is, as the two metal plates are bonded together with a rubber layer in the middle, does this effectively replace the lower bushing and bump stop support? Meaning the bottom of this would then sit on top of the shock boot? 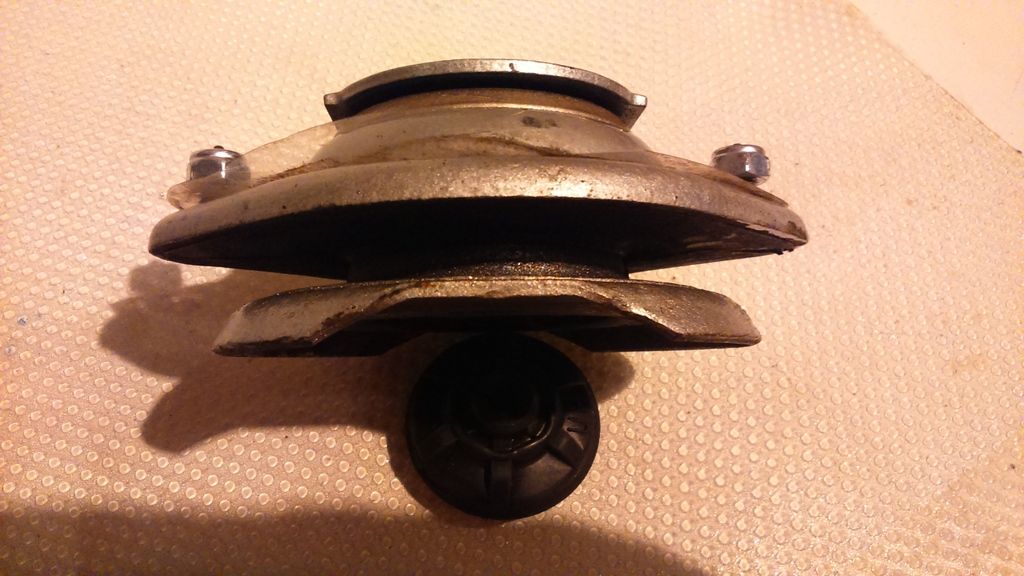 |
|
|
|
Post by Stiggy on Jan 29, 2017 18:17:40 GMT
they are MKI and they differ slightly from MKII but you can use either. You will need the bump stop but the top plate is only 2.5mm thick so the thread on the shaft will be long enough if the springs are compressed enough, the MX5's springs have massive preload though so be VERY CAREFULL!. I tend to use 40mm-50mm lowering springs, much easier to fit and less preload for a more compliant ride.
|
|
|
|
Post by Fin on Jan 29, 2017 19:12:43 GMT
Thanks Stuart. So, bump stop; shock boot; spring isolator; upper mount; upper bushing; upper washer; nuts? The bushings are differing thicknesses, so is the upper thick or thin?
Will use the donor ones initially to check ride height as there might be a problem with the drive, and a couple of speedbumps up the road.
|
|
|
|
Post by gwnwar on Jan 30, 2017 5:33:13 GMT
You are forgetting the bump stop support washer between the boot and lower bushing..That is what stops the rod from going through the bushings.
|
|
|
|
Post by Fin on Jan 30, 2017 8:38:20 GMT
You are forgetting the bump stop support washer between the boot and lower bushing..That is what stops the rod from going through the bushings. Hi gwnwar. I was thinking that with Stuart saying this was a Mk1 upper mount, the lower plate would replace the bumpstop support washer and lower bushing? With everything packed on, there is barely enough thread protruding for the lock nut. Might be better buying correct Mk2 upper mounts, because there is a further difference, in that the securing bolts on the upper mount are shorter, and there's barely a thread showing through the nylock nut when in place. |
|