|
|
Post by Fin on Oct 3, 2016 19:10:31 GMT
Maybe I should just PhotoShop it. 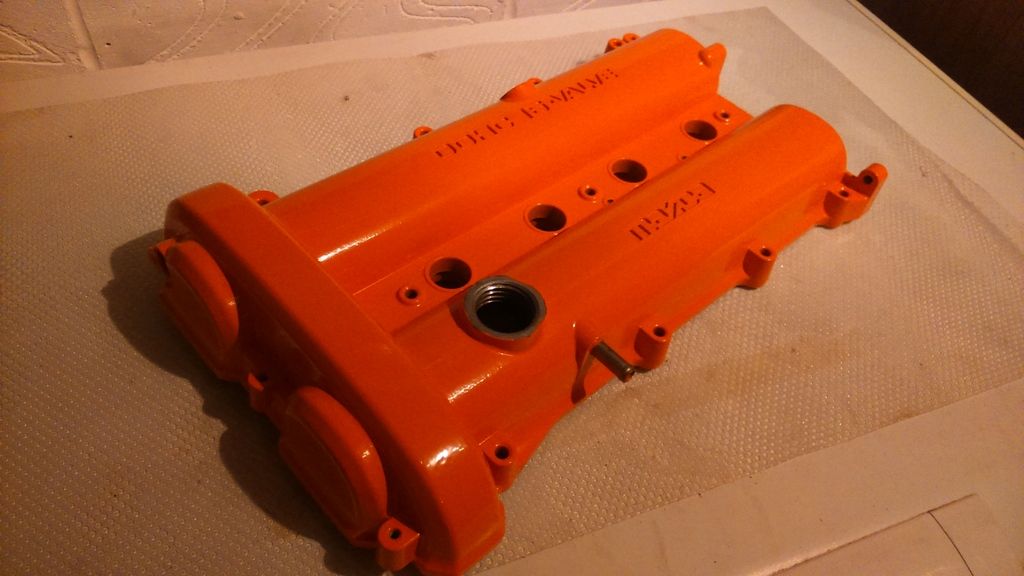 |
|
trident
Senior
   Improvise, Adapt and Overcome
Posts: 629
|
Post by trident on Oct 3, 2016 19:52:49 GMT
Put a piece of wide painter tape that really seals but pulls off easy over the lettered spot.. Then cut out the letters with a razor knife..paint (very small artist brush), dry, remove tape.. Just paint the bottom of letter cut out not the sides so no chance of paint on top of cover.. Thanks. I'd thought of cutting out a template like that with masking tape, but wasn't sure if you'd get "bleed" under the tape from the paint on the side wall, or whether you could spray it with an airbrush. Hadn't considered just painting the bottom like a shadow effect, and not sure how it would look as all the ones I saw today were fully covered. Might experiment. Frogtape is better than standard masking tape. just search in google |
|
|
|
Post by NJ. on Oct 3, 2016 21:25:46 GMT
Fin I used frog tape and cut the letters out with a sharp scalpel as george said. Just make sure u dont forget the dash as I did. Worked well imo just take your time with the trimming and use frog tape as it seals and comes off better than masking tape. Also remove the tape shortly after spraying whilst the paint is still wet. If you let it dry the tape will tear and/or pull chips from the letter edges.
Check out my build for pics.
|
|
|
|
Post by Fin on Oct 4, 2016 9:29:51 GMT
Fin I used frog tape and cut the letters out with a sharp scalpel as george said. Just make sure u dont forget the dash as I did. Worked well imo just take your time with the trimming and use frog tape as it seals and comes off better than masking tape. Also remove the tape shortly after spraying whilst the paint is still wet. If you let it dry the tape will tear and/or pull chips from the letter edges. Check out my build for pics. Thanks. So spray, rather that hand paint? With Hammerite (or equiv)? |
|
|
|
Post by gwnwar on Oct 4, 2016 16:10:22 GMT
The tape is the important think frog is the best I have used for a good seal. Wipe cover with some alcohol first..
|
|
|
|
Post by Fin on Oct 5, 2016 17:57:54 GMT
Well, finally bottomed-out on the dismantling and prep work, and managed to start putting the rear suspension back together once more. 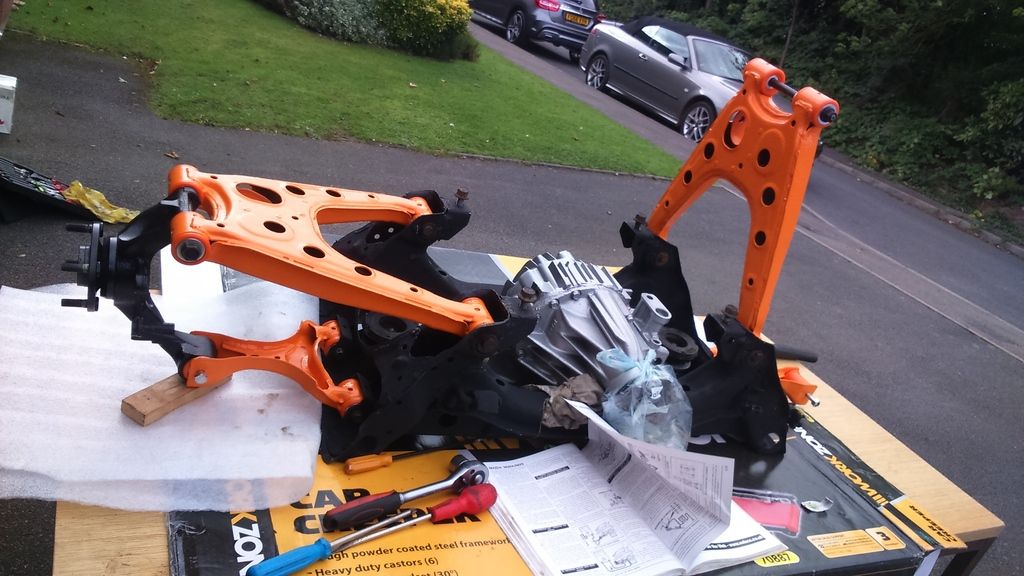 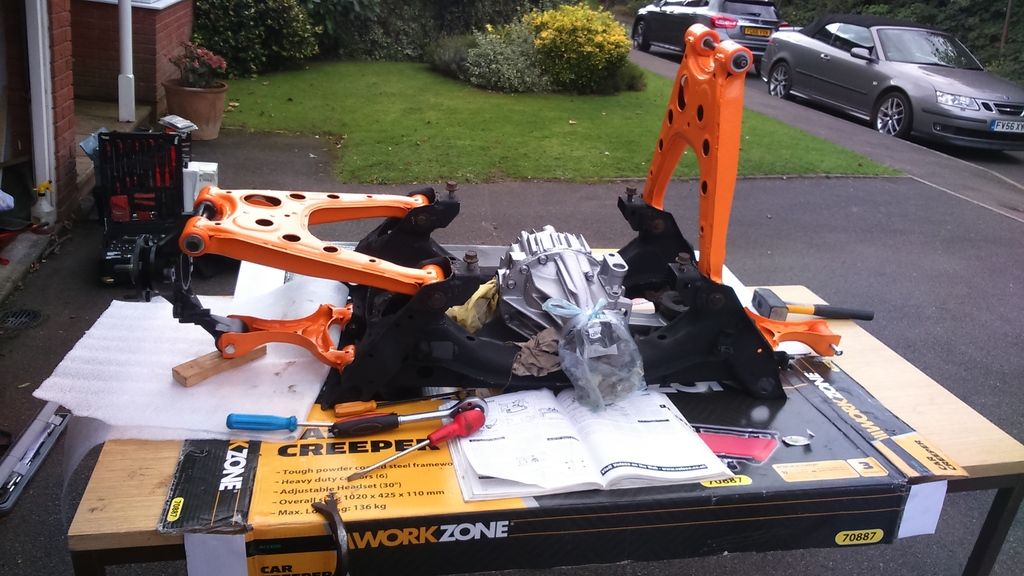 Have seen that some posts mention grooves inside the bushes ostensibly to retain grease. Mine came with no such grooves, and no such guidelines about greasing them at all. Should I? If so, inside by the crush tube, or externally? Also, on the diff/half-shaft seals, whilst removing the protective rags, I managed to pull out these circular springy coil-like seals. Can anyone confirm if they fit in the groove just inside the rubber seal, or somehow around the outside? 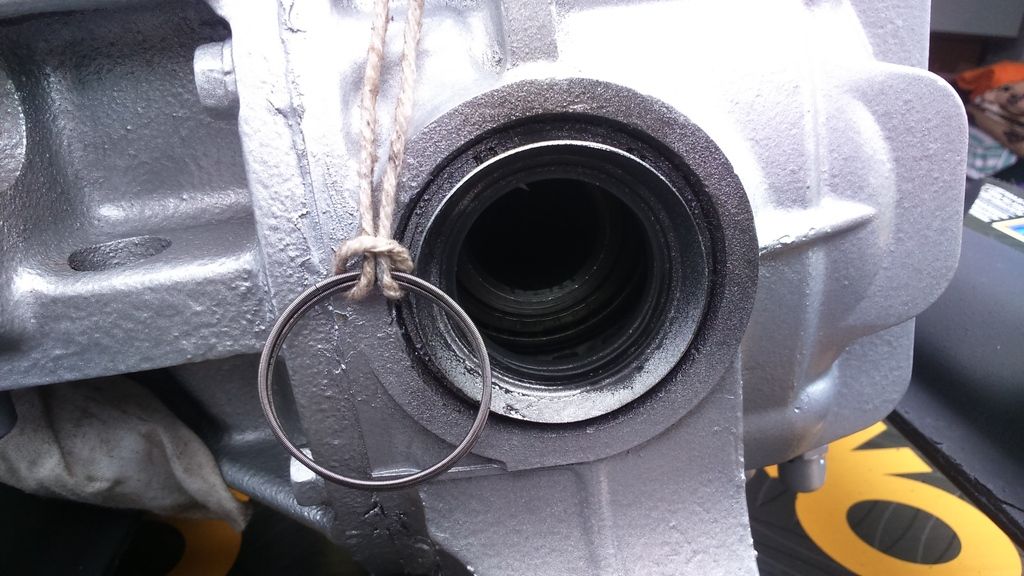 Getting to be a two man job now, so will do the front sub-frame tomorrow, with a view to getting the PPF connected over the weekend, and then the wheels back on. |
|
|
|
Post by gwnwar on Oct 6, 2016 5:50:55 GMT
Pop the seal out and replace it..cheap and easy to do now.. do both so you know both are good.
|
|
|
|
Post by Fin on Oct 7, 2016 20:47:41 GMT
In reassembling the front nearside suspension today, I have discovered my over-enthusiastic use of my lump hammer in breaking the seal on both the lower & upper ball joint bolts has damaged the thread, or possibly squashed the bolt above the split pin holes. A replacement upper arm is about £50 and a lower ball joint about £20, but then both would have to be powder-coated again! Juts wondered if anyone had suggestions regards buying a tap & die kit and re-threading the bolts (M12 & M14 I think)? Or, specifically, anything like one of these NES 1A re-threader which sell for about £50 on eBay. |
|
|
|
Post by p5curly on Oct 7, 2016 22:16:12 GMT
You have to watch for different thread pitch
It's not just a case of if it's M12 or M14
Is it M12 x 1.5 pitch or
Is it M12 x 1.25 pitch
|
|
|
|
Post by Fin on Oct 7, 2016 22:53:34 GMT
It automatically adapts to whatever pitch the bolt is
|
|
|
|
Post by gwnwar on Oct 8, 2016 4:18:30 GMT
I would grab my thread file to dress up the threads. The file has 8 different pitches on it. They cost around $12.00 now
I've had mine for a good 40 years. Or if you have a die with the right size and pitch..
|
|
|
|
Post by Fin on Oct 8, 2016 8:52:50 GMT
I would grab my thread file to dress up the threads. The file has 8 different pitches on it. They cost around $12.00 now I've had mine for a good 40 years. Or if you have a die with the right size and pitch.. I'll have a look for a file locally. Haven't got a tap & die set, but isn't it difficult to get the die started when the problem's right at the tip of the bolt? The NAS locks into the undamaged thread below, and can be wound back up & into the problem area. |
|
|
|
Post by Fin on Oct 8, 2016 16:43:53 GMT
Well, probably the worst day yet. Trying to refit one of the drive-shafts revealed a clunking and looseness in the CV joint that almost rivalled my arthritic knee. Trouble is, it is still welded solidly into the knuckle joint/stub axle, and no amount of heat, lube or pounding will release the spline. Managed to get an old castle nut part on to the deformed lower ball-joint, but cannot hold the bolt tightly enough to stop it spinning under pressure to get the nut down past the split pin holes. Mole grips came closest, but their width restricts how far I can wind the nut on. Upper control arm ball joint only seems salvageable by re-threading, and demon-tweeks have come up with this as a cheaper re-threader alternative to the NAS 1A. Ended the day trying to scrape powder-coating out of the threads on the brake calipers, and remember where those pesky clips fit. Think I need a bigger hammer........................ |
|
|
|
Post by gwnwar on Oct 8, 2016 20:29:23 GMT
**First put the BFH away that is what got you to this problem..
Take the lower ball joint off the control arm put in vice to work on it.. might start with a needle file to shape threads. or get a
new one..
Upper ball joint is serviceable but parts cost more then a good/nice used one..
Rear CV joints as far as I know there aren't rebuild kits for them just boot kits.. To regrease and or change boots.
SO..Use as is or get some used parts axle and up right.. Another bullet..
Brake clips.. Put guide plates into the brackets with the long tails pointing toward each other.. Top down Bottom up
The "M" clips attach to pads in drilled holes..
Top one 2 hoops up looks like a "M"
Bottom 2 hoops down looks like a "W"
Remember to remove 14mm head plug from caliper and use allen wrench to retract piston before trying to fit caliper to bracket.
After all together turn allen bolt in to move piston to just stop rotor from turning and back off 1/4 turn reinstall plug. Both sides should drag the same..
|
|
|
|
Post by Fin on Oct 16, 2016 13:17:57 GMT
Well, better day yesterday as we managed to salvage both front ball-joints through chamfering the tip of the bolt, and then using the thread file on the squashed/damaged threads. Not honestly sure how effective the thread file was, as the fee of it was just like skidding over the metal, with none of the usual "bite" of a file strike. Anyway, persistence eventually paid off, and with the use of a pair of mole grips and a 40+ year old thinner wrench, we finally got the castle nuts far enough over the bolt to engage the cotter pins. This is obviously just the day after I gave up and ordered replacement nuts and ball joint! Anyway, soon be ready for the wheels once everything is torqued on, and the brakes are re-assembled. On which, I knew one of the front pistons was beyond redemption, and had ordered a replacement with the seals. Only just opened it today to find the it is a bare piston without the inner winding gear of the old one. Have I ordered wrongly, or are the internals removable and able to be fitted into the new piston? If so, how are they removed? Any suggestions welcomed. 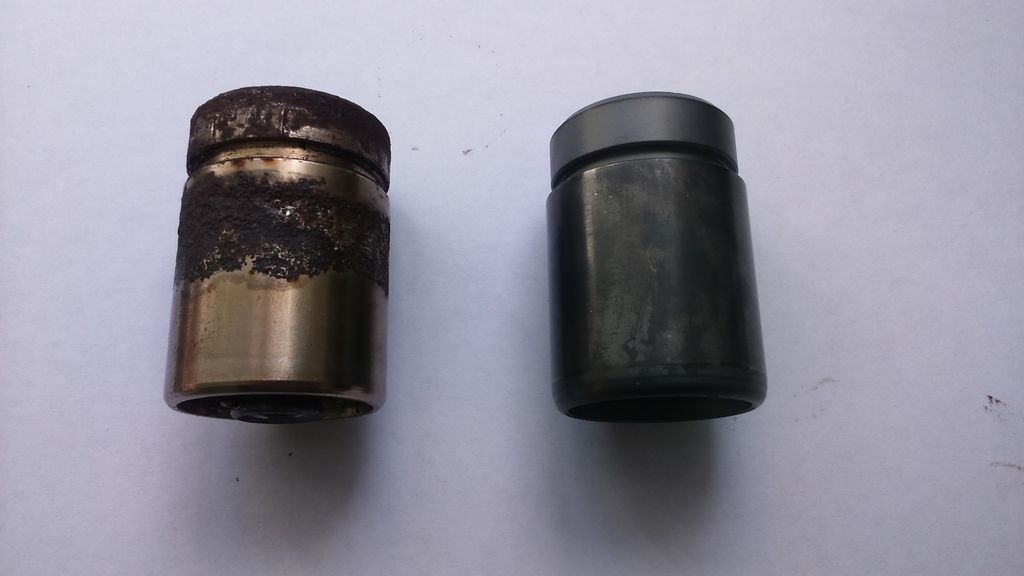 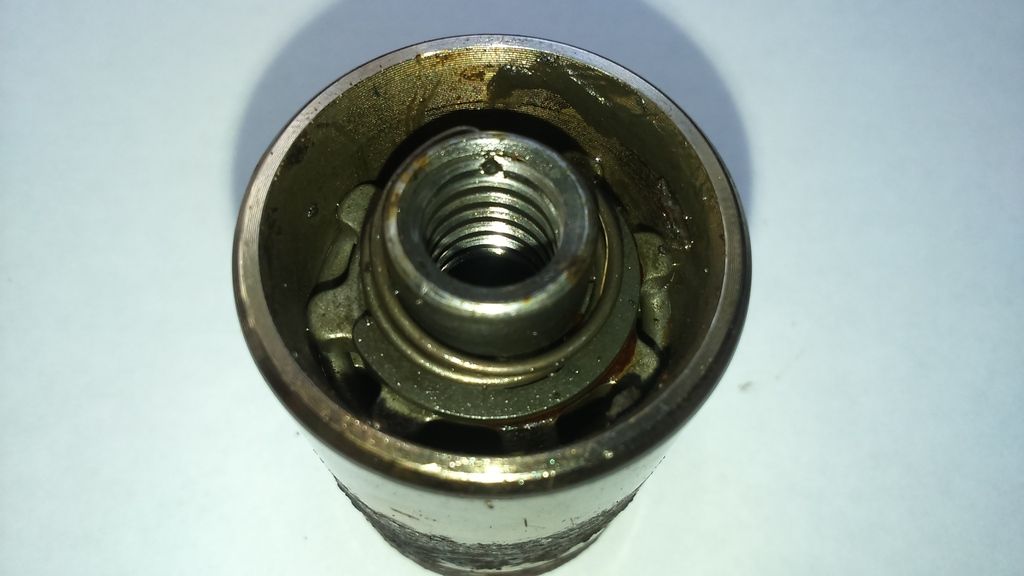 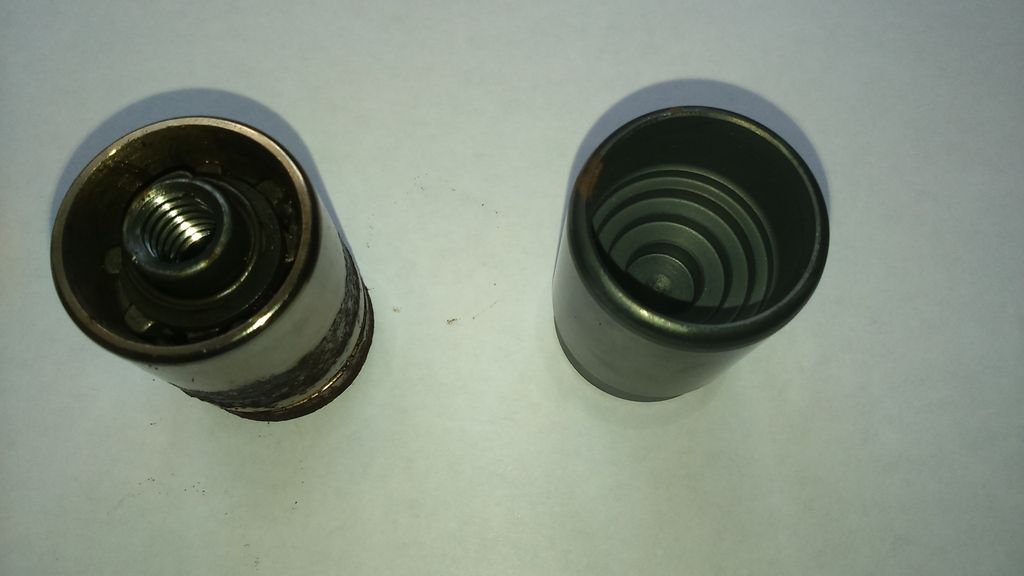 |
|