|
|
Post by ian360 on Jan 13, 2015 21:54:52 GMT
Just to record where I am now Gearbox seperated 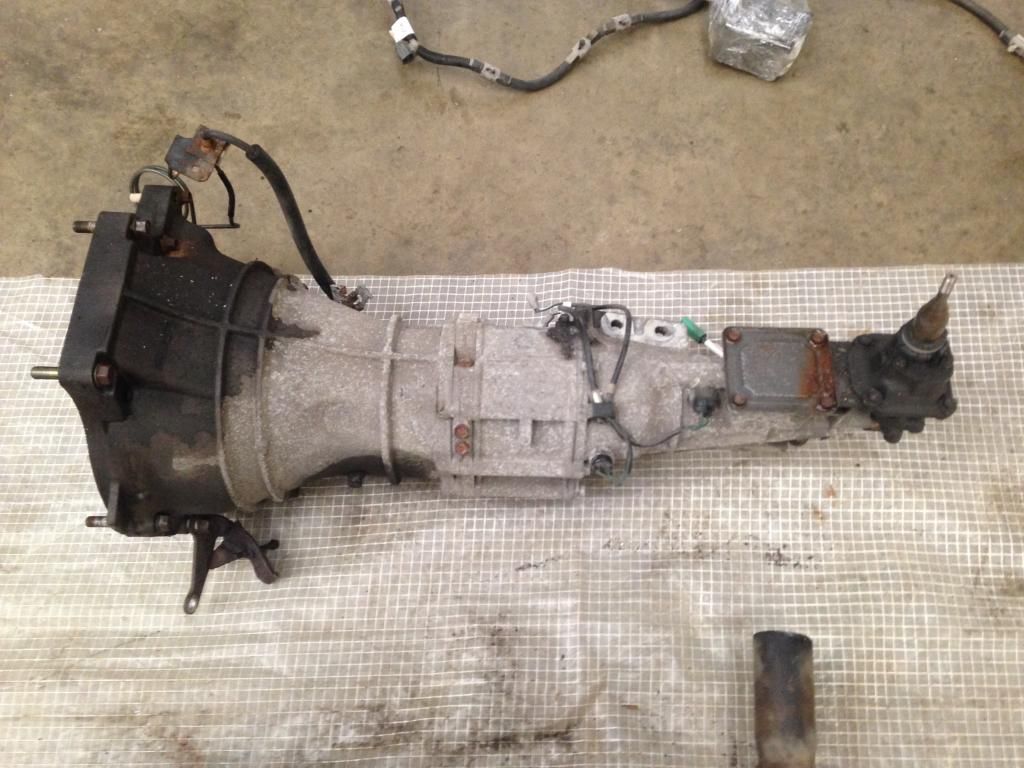 PPF came away with relative ease, 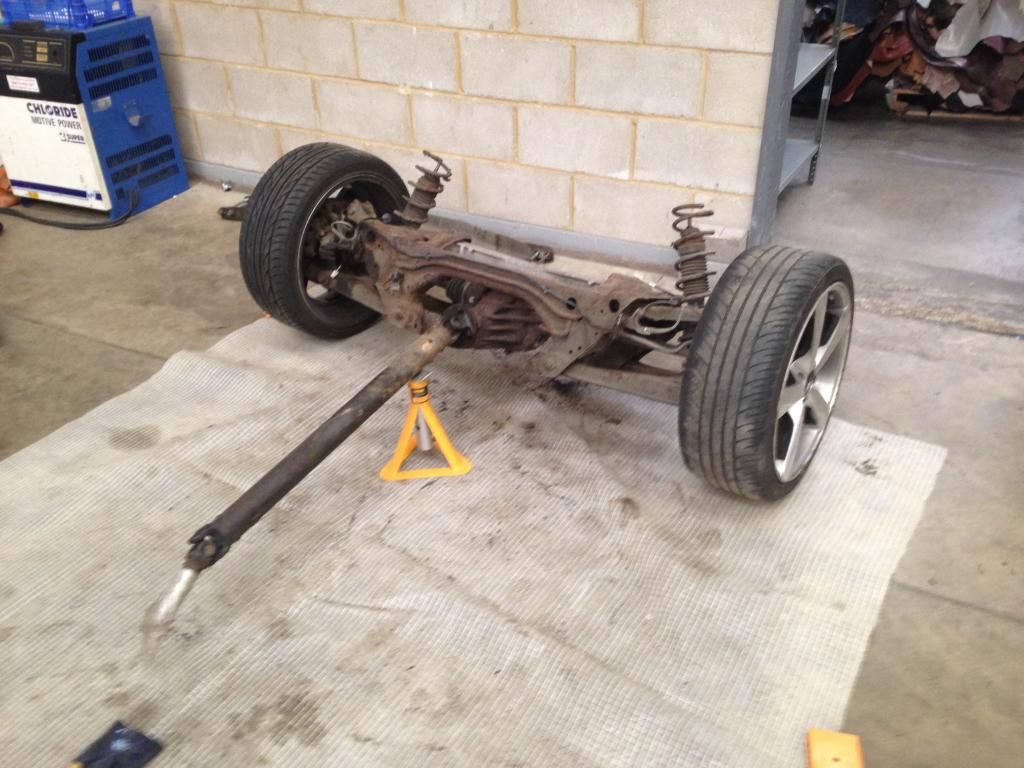 and prop quickly followed. |
|
|
|
Post by ian360 on Jul 13, 2015 9:22:32 GMT
It feels like an eternity, and looking at date of last post it actually is, since I updated this thread. Things keep getting in the way but am making very slow progress. Things I am learning very quickly - 1.) one job easily manifests itself into another 10 at least. 2.) no matter how many pictures you take, you are always missing the one with the small detail you need, probably because in that moment of exuberance having finally cracked the nut / bolt you have been working on for hours, and gloves covered in grease and oil, the excitement to move the job on means you forget to pick up the iphone and take a snap!
So quickly what I have been doing, and no real need to show pictures of progress - sand blasted and painted front and rear sub frames, suspension coils, calipers. Degreased and painted gearbox, PPF, propshaft. Took on first ever timing belt change and WP replacement. I left the cam seals as they didn't appear to be leaking and looked a proper difficult exercise to change without messing up the whole operation! Took me about 3 hours, but I reckon if I did it again would be a third of time! Prop, PPF and gearbox all now connected back together with no real issues. Currently in process have depowered the steering rack, primed ready to paint the cam cover. Here a some pictures of whats going on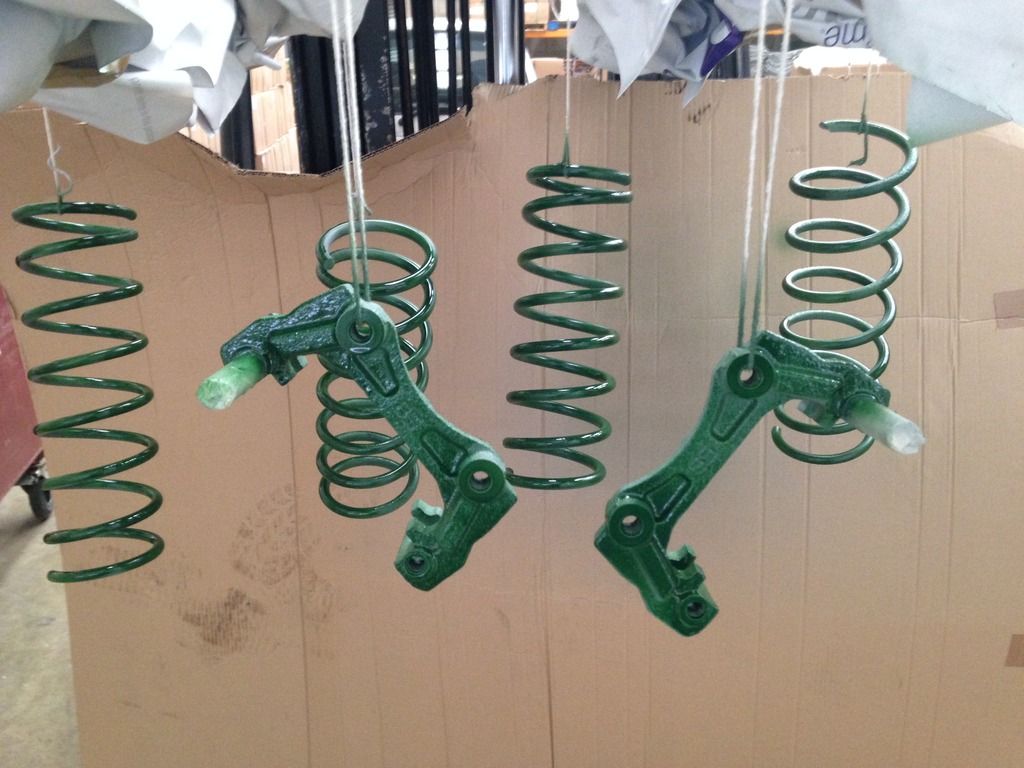 caliper and coil painting 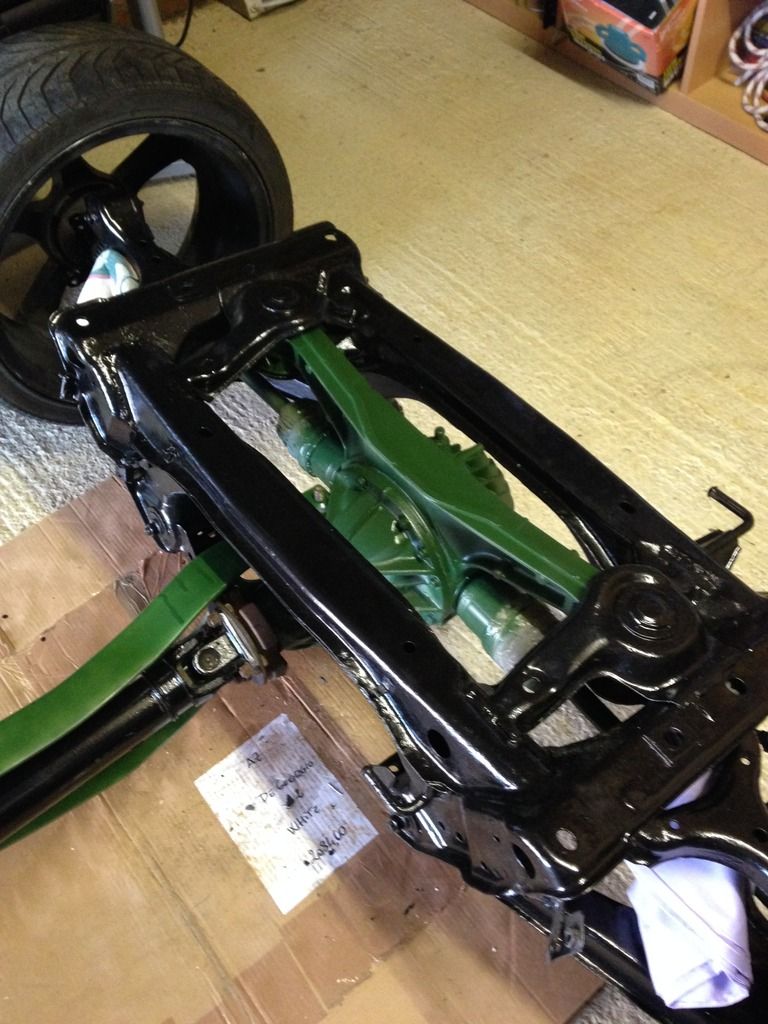
Rear sub frame and diff painted
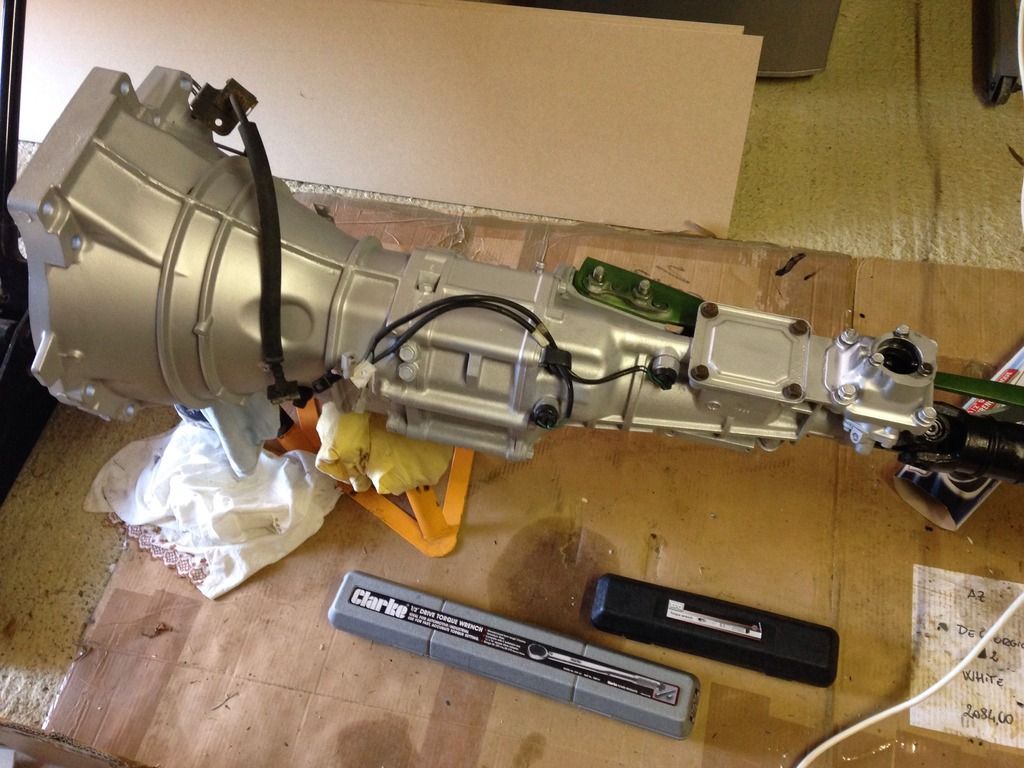
Gearbox cleaned painted and attached 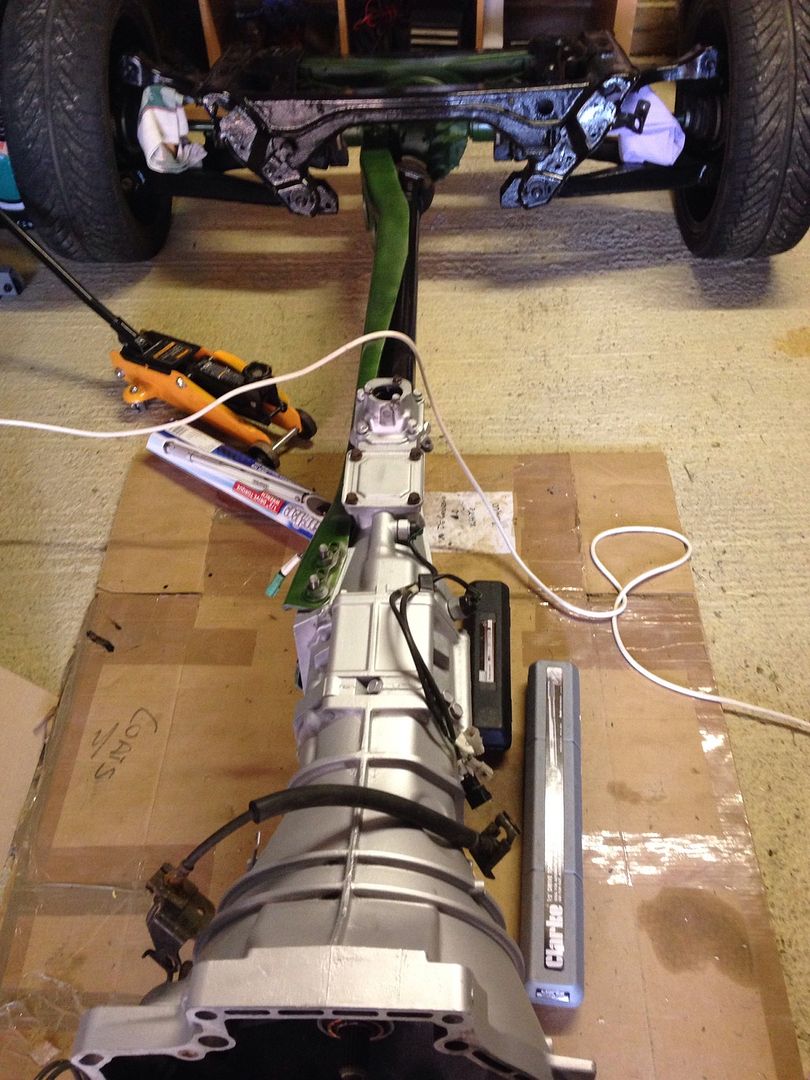
Back end running gear altogether again.
Question please: Am now putting the steering rack back together and the inner tie rods had a washer retainer on them. During dismantle these were pretty much destroyed - I can't find that you can buy new ones anywhere? Having made an attempt to reuse them, can anyone advise if they are absolutely necessary, and if so how do they go on - I can't see that they will hold the arm in place as nothing to 'lock' them to?
|
|
|
|
Post by tonysoprano on Jul 13, 2015 14:51:40 GMT
|
|
|
|
Post by gwnwar on Jul 13, 2015 16:41:54 GMT
They are a most have.. They have tabs on inner part that lock in and you bend over outter part. You can get from a dealer as they are replaceable item when working on rack.. INNER TIE ROD WASHER, Part number: HA1432146..
also try on eBay..
|
|
|
|
Post by gwnwar on Jul 13, 2015 16:52:22 GMT
On another note.. if you are going to be installing the OEM ground wire from battery to the rear of the PPF were it was.. Clean to bear metal were it touches frame, install a bolt and make sure you have a good ground flow with multi meter on OHMs (looking for 0.00 reading) all the way to the trans mount bolt spots and later to engine..
need good connection frame to trans and then engine and starter..
Nice clean up so far. Did you end up with 19 teeth on timing belt between the marks on cam gears..
|
|
|
|
Post by lukiez on Jul 13, 2015 19:44:57 GMT
Looks to me you've a couple of broken coil springs, which I noticed you just painted them up. Thought i'd mention it before you assemble the dampers
|
|
|
|
Post by ian360 on Jul 13, 2015 20:47:23 GMT
Thanks replies.
gwnwar - your advice always appreciated. On the washer I'll try and source with local dealer, if they are that important I think the ones I have are beyond acceptable! Electrics are getting to top of the list but thanks for the heads up. Timing belt, I'm not sure where to start and stop counting but same number of teeth between same marks at the finish as there was at the start. Turned crank by hand several turns and always end up with marks aligning so fingers crossed all ok?
Lukiez - where are you seeing the broken coils? They were in a pretty bad state but after blasting looked ok to an untrained eye?
|
|
|
|
Post by gwnwar on Jul 13, 2015 22:15:33 GMT
lukiez good catch.. I only see 1 bad.. Looks like the spring on right in pic is broken on top not a smooth cut. also ends of springs should end 180 deg out from each end. ian360 do you remember what color paint dots were on springs so you get same one.. remember long spring goes on short shock.. short spring on long shock..
|
|
|
|
Post by ian360 on Jul 14, 2015 8:28:36 GMT
Steep learning curve! Had no idea about the springs so thanks for that, I will check all tonight. Incidentally, if one is broken should both in the pair be replaced? I had noticed on painting the different sizes and kept them together - a future question may well have been what was the relevance so thanks for pointing that out. On the timing belt thought I'd show some pictures and check if it looks ok. Old belt 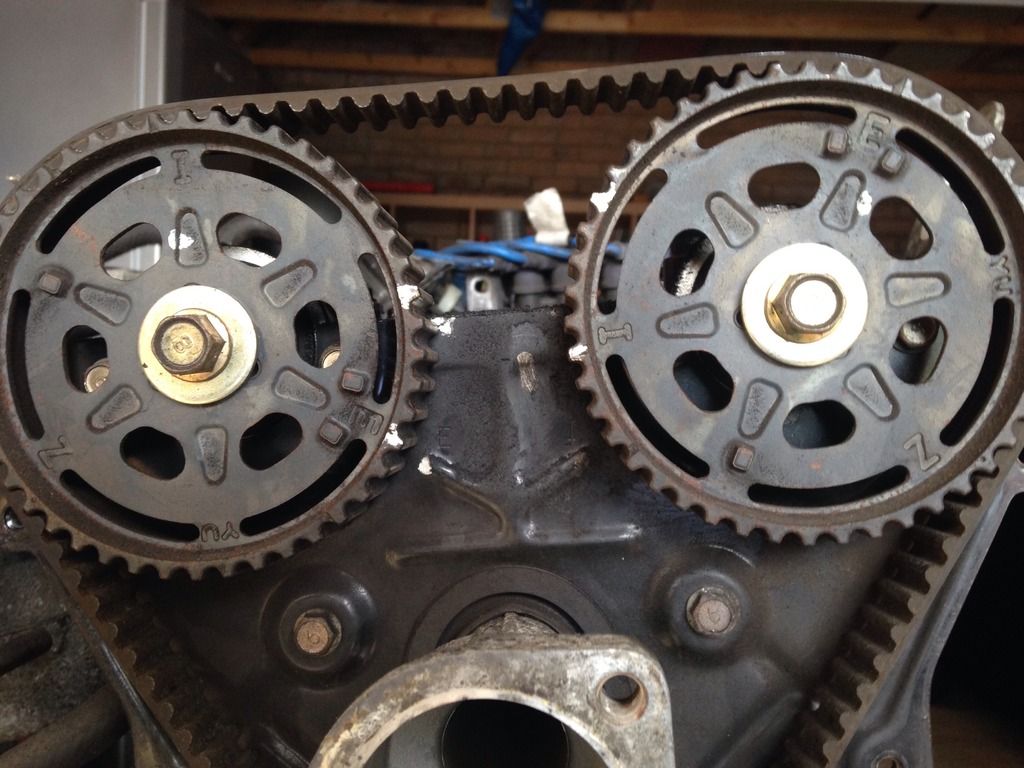
New belt 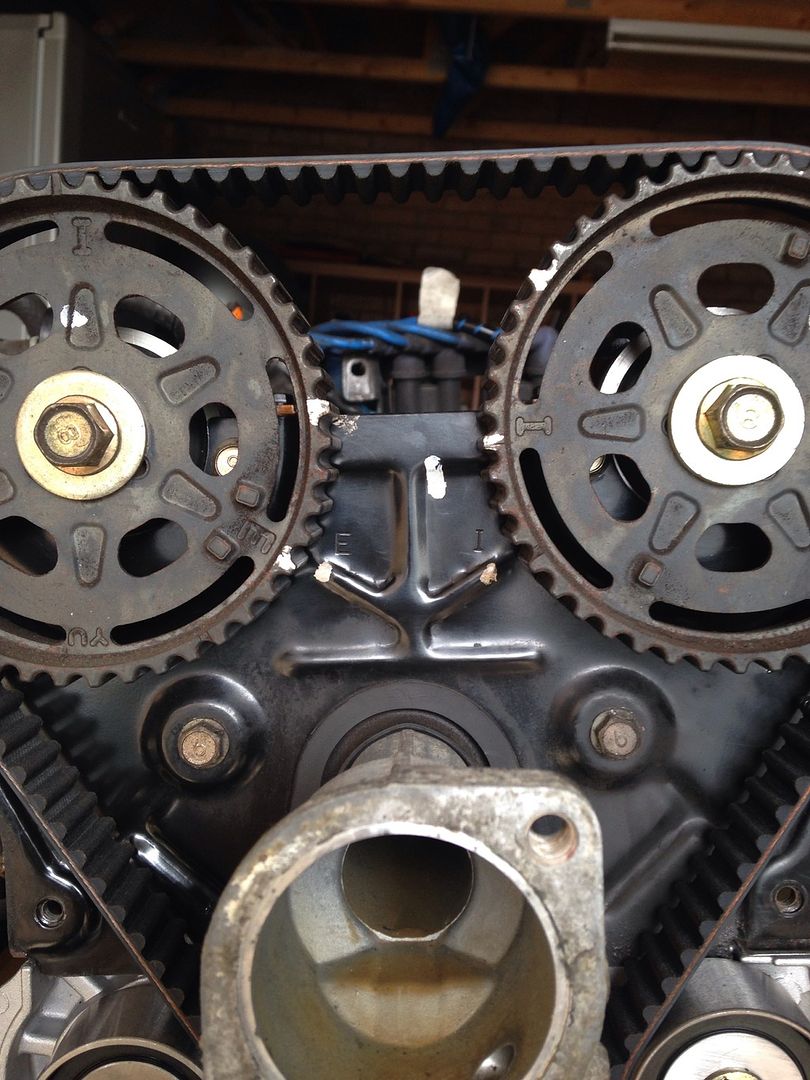
Finished job with new water pump, tensioner and idler pulleys 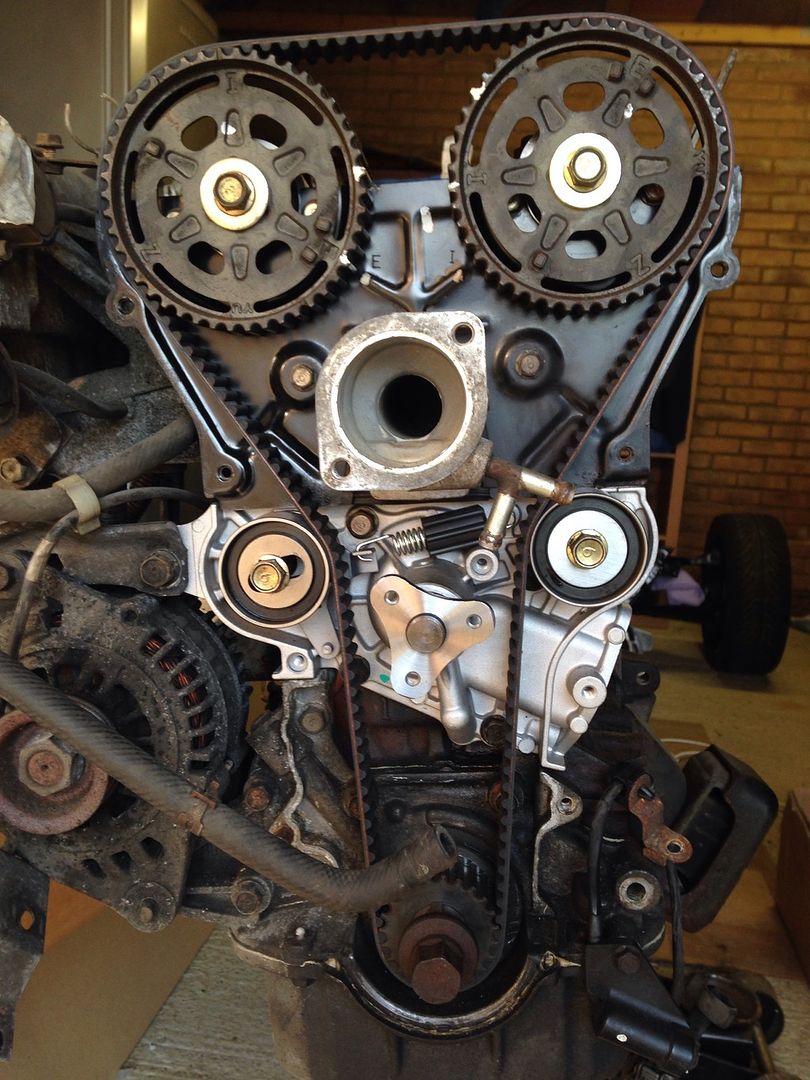
I'll be happy for any pointers that this looks wrong and re-do it. |
|
|
|
Post by lukiez on Jul 14, 2015 10:46:43 GMT
Yeah I saw the break on the rear spring, may have seen one on the front looking at the way it terminates.
I had a spring break in two places, and most of the springs had too much corrosion to identify any markings clearly, so I bought new standard springs instead all round from autolink and sold the old ones
|
|
|
|
Post by gwnwar on Jul 14, 2015 20:14:28 GMT
In new pic of TB you are way off in cam timing. at crank TDC the marks on gears should match up with marks on backing plate and top marks on gears I and E should only have 19 teeth between them. You have 21..4 to many.. same number 4 on exhaust gear is off on backing plate.. When you did TB did you do the rotation of the crank clockwise 1 and 5/6 turns and align crank with the tensioner mark on crank gear release tensioner and lock in place then turn crank CW 2 and 1/6 turns to check all marks line up.. Don't add any push to tensioner on to the belt only the spring tension..too mush pressure will make belt noise.. check this out for more info and pics.. www.miata.net/garage/timingbelt.html |
|
|
|
Post by ian360 on Jul 15, 2015 9:54:07 GMT
And there was me all chuffed it had gone well!
havent put anything back together yet so easy enough to to have another go, but some questions / observations then to ask
on the first picture with the old belt, the white markings aren't mine, they must have been from a previous change. I followed the guide on Miata.net and after two turns on the crank lined the 'E' up, to find that the 'I' didn't match the backplate, but did meet the white mark. Also there weren't 19 teeth between points..
after sometime checking I figured this must be right as the car was running ok before the strip down?
so clamped the camshafts in place with two wenches and removed belt.
When it came to installing new belt, turned 1 5/6 to tension mark, and then another 2 1/6 after and the marks all lined up as they had at the start. This is second picture - same number of teeth between points as well.
what is the relevance of the 19 teeth gap?
if all this is wrong appreciate some guidance on putting it right.
|
|
|
|
Post by gwnwar on Jul 15, 2015 17:07:10 GMT
Are the front lobes of each cam pointing outwards and just above the top of the head.cover surface?? They should be..
Post a pic of cams in the number 2 pic setup. Dowel pins in cam should be at 12oclock. The gear can go on to the cam in 2 ways, the lower (not used)leg/opening for a dowel should point inward (BACKWARD L) / on the exhaust cam. Intake cam gear opening (not used) also points inward \(Like L) Hope this is clear.. The 19 teeth put the cam in timing with the crank/pistons.. The I on the exhaust cam gear should line up with the I on the backing plate..
that will give you 19 teeth.. with dowels in cams at 12oclock..
|
|
|
|
Post by ian360 on Jul 16, 2015 16:57:36 GMT
Gwnwar - It made no sense until I looked at it but then hopefully came clearer. this is picture of cams as per second picture requested. Clearly the right side cams are in the wrong position 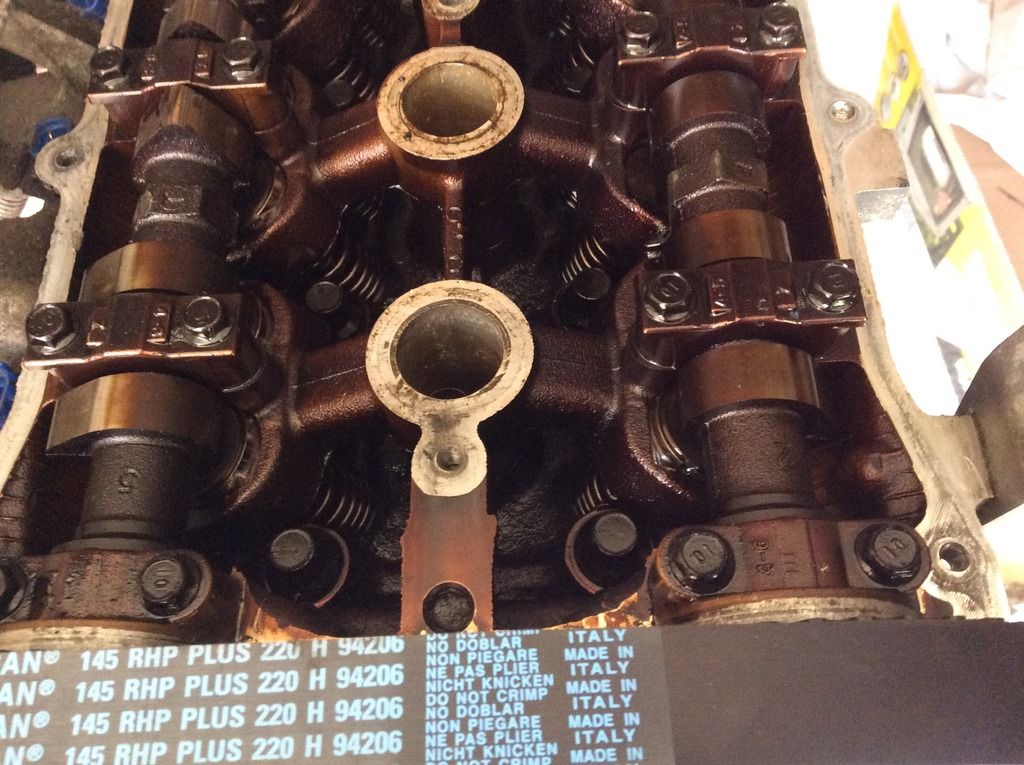 So so took the belt off and started again, adjusting the cam along lines of your description. This is now the set up after 1 5/6 turns to tensioner, and further 2 1/6 turns. All marks line up to back plate and 19 teeth between points. 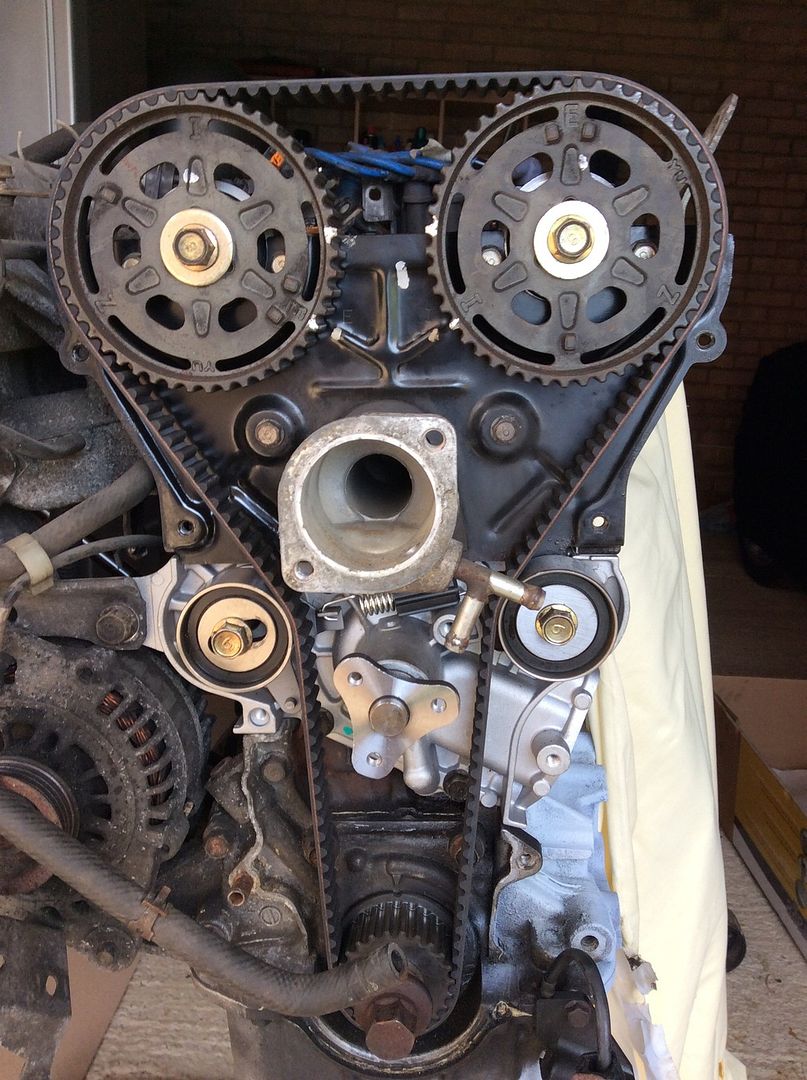 And this his is how the cams sit on this set up 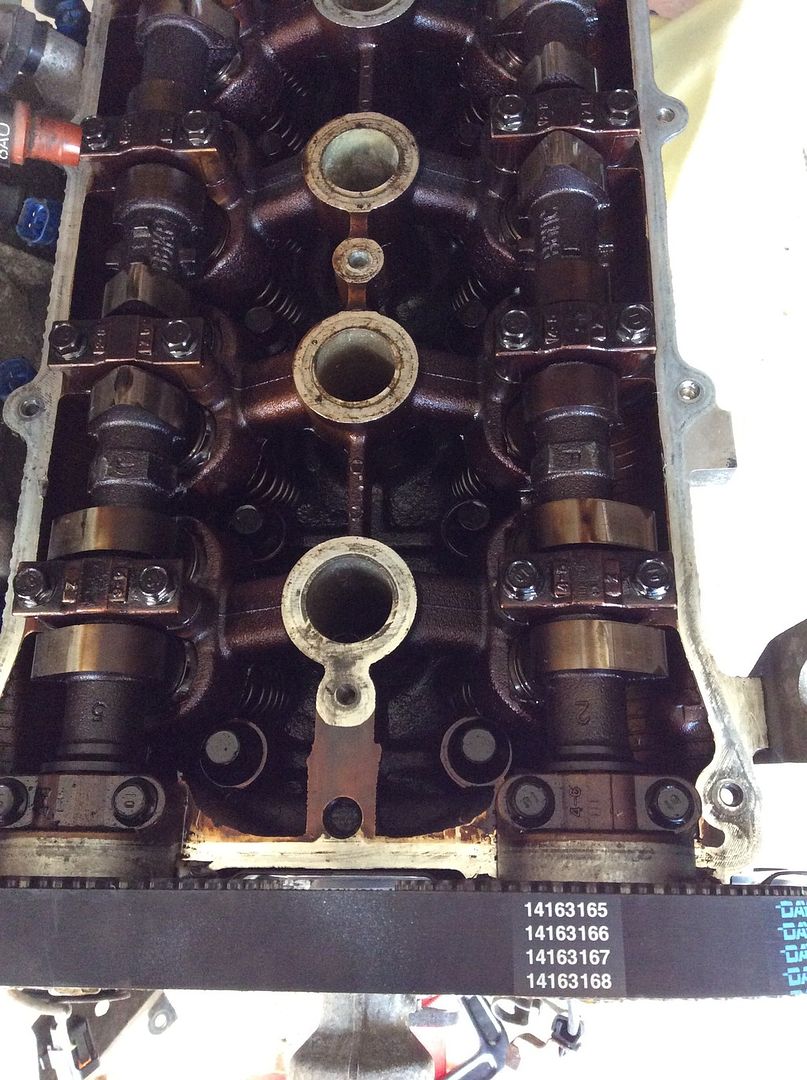 Hopefully this is now correct, please comment and thanks for your guidance. |
|
|
|
Post by gwnwar on Jul 17, 2015 5:10:35 GMT
You got it.. looks good.. better to catch it now then with it all together in car..
|
|