|
|
Post by lhintze on Nov 21, 2014 0:44:42 GMT
Stainless lines are from Exomotive.
|
|
|
|
Post by JIDiesel on Nov 21, 2014 2:20:55 GMT
I like the way you have run the lines on the PPF that looks great.
|
|
|
|
Post by lhintze on Nov 21, 2014 2:55:59 GMT
Thanks, this will make it easier when time comes to install the chassis.
|
|
montgom
Full
   Love Exocet
Posts: 274
|
Post by montgom on Nov 21, 2014 16:07:51 GMT
Anyone putting any insulation or heat shield in the area above the exhaust/ppf to reduce heat soak ? Is it needed???
|
|
|
|
Post by ashneyder on Nov 21, 2014 20:58:49 GMT
Small update: got tires (BFG Rivals 205/50/15) and stainless fuel, brake, and clutch lines in today!! Tire Rack has a $70 rebate on them now till 12/7, I was going to get them later but decided to take advantage of the savings. The stainless lines are awesome, everything is straightforward and organized. I was hoping it take me more time to install, but it was quick and easy. 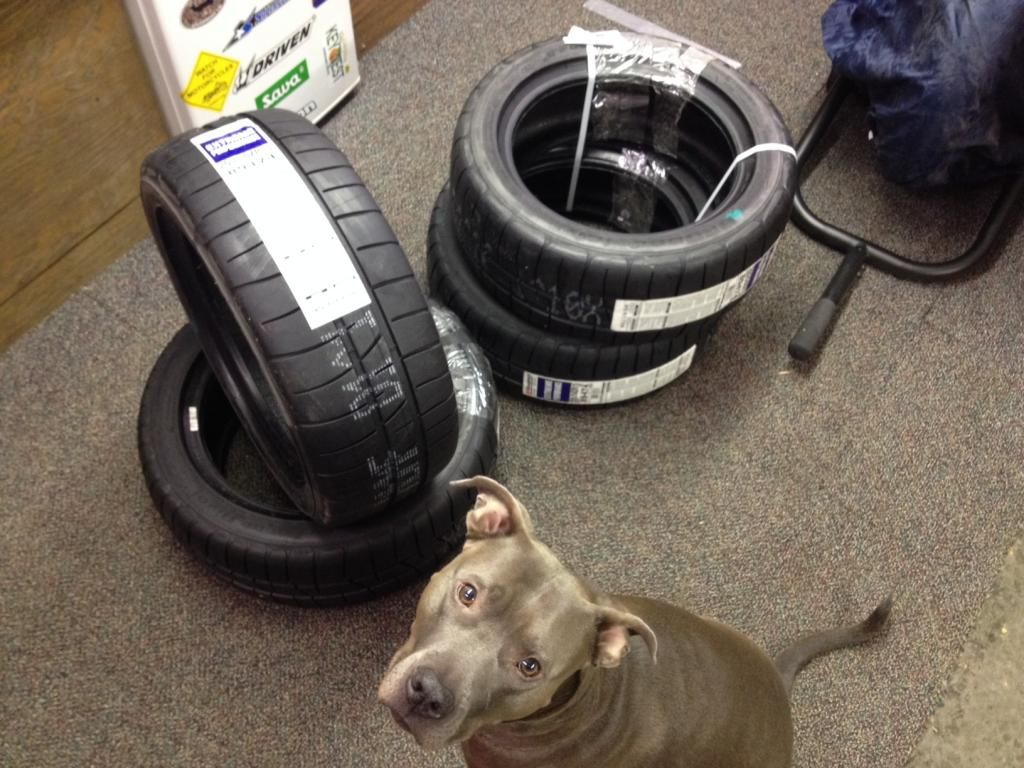 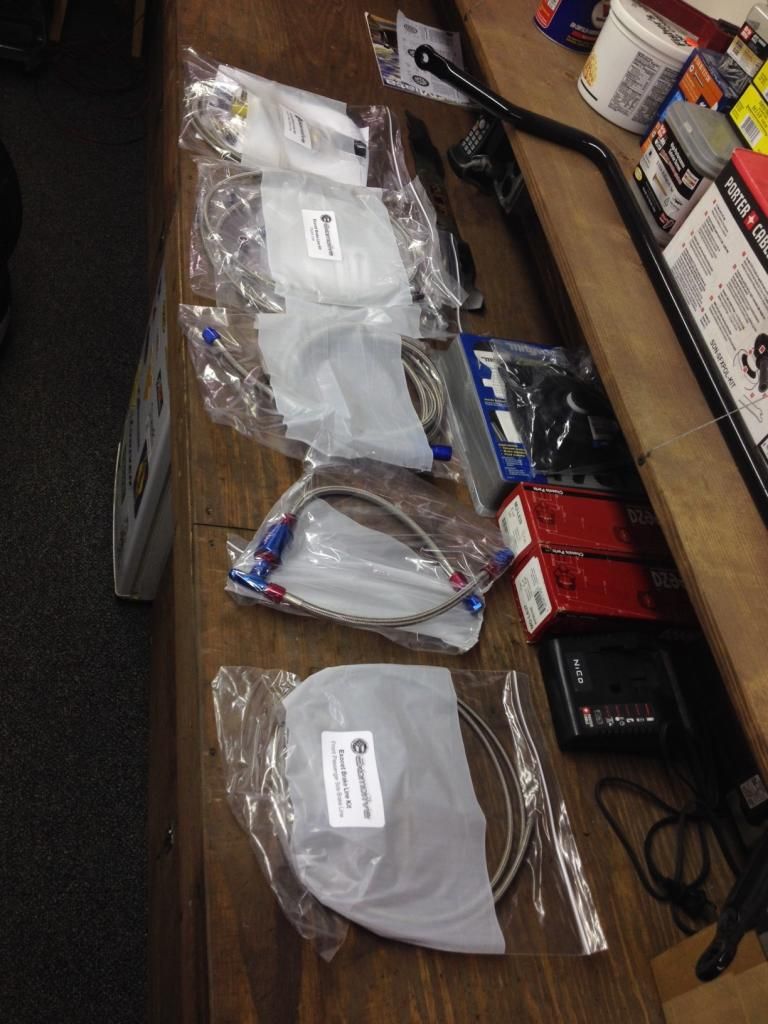 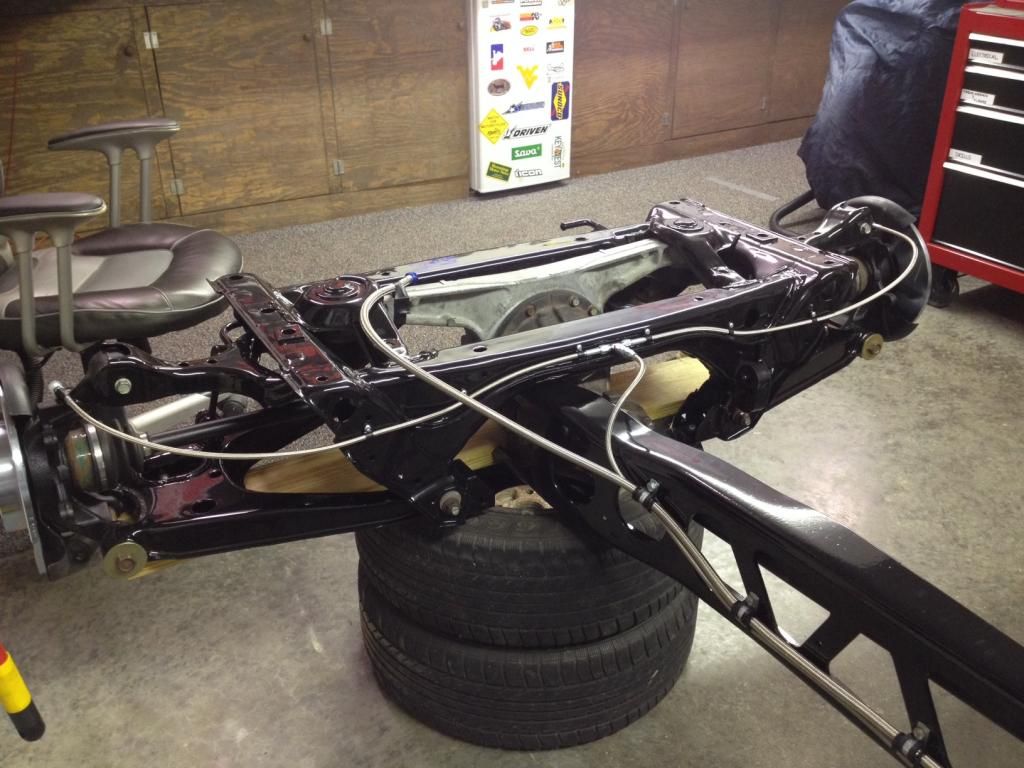 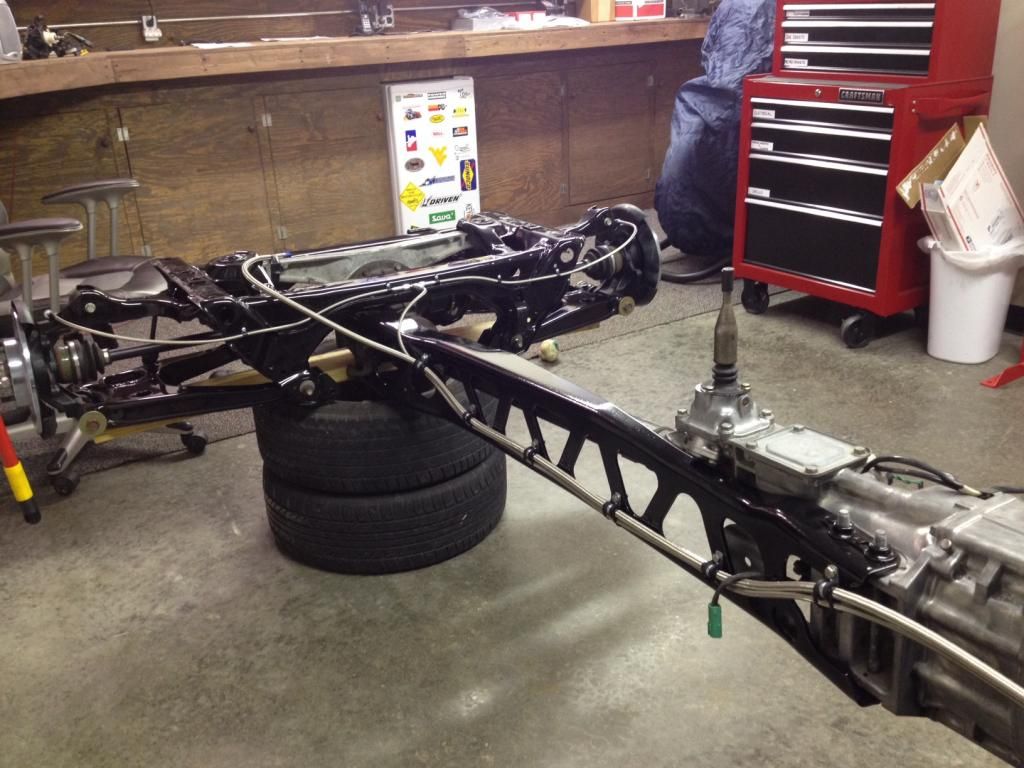 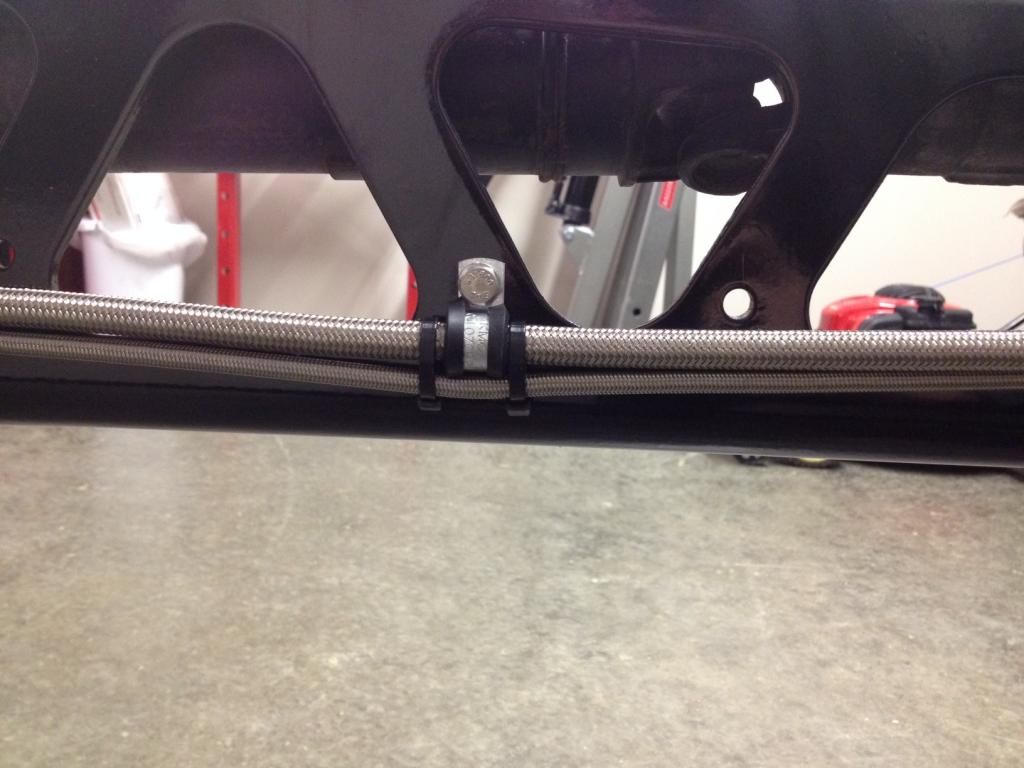 Great job. I am definitely running my lines this way now. Seems more straight forward to do it this way. Did you use the p-clips that came with brake lines? Did you drill new holes in PPF and did you use rivnuts ro attach the clips? |
|
|
|
Post by lhintze on Nov 22, 2014 12:18:40 GMT
This seems much easier than attaching to the chassis so I decided to go this way.
Yes, I used the p clips that came with the lines.
No, I used holes that were alread there.
No rivnuts, I used 1/4-20 x 3/4" bolts with lock washers and nuts. After I get the fuel line to its correct length I'll loctite the bolts.
|
|
|
|
Post by scareyourpassenger on Nov 24, 2014 21:22:04 GMT
I have to ask how the ball joints turned out after the powder coat. I have heard of it melting the Teflon inside the joint. I thought about going for the v8roadster rebuildable balljoints since, I would need to press them in and it would be post powder coating. Yesterday I picked up my parts from the powder coaters, they turned out very good. I had 19 parts done, color is gloss black. I replaced the boots on the upper ball joints, I used a vise and a 32mm socket to press the new ones on. 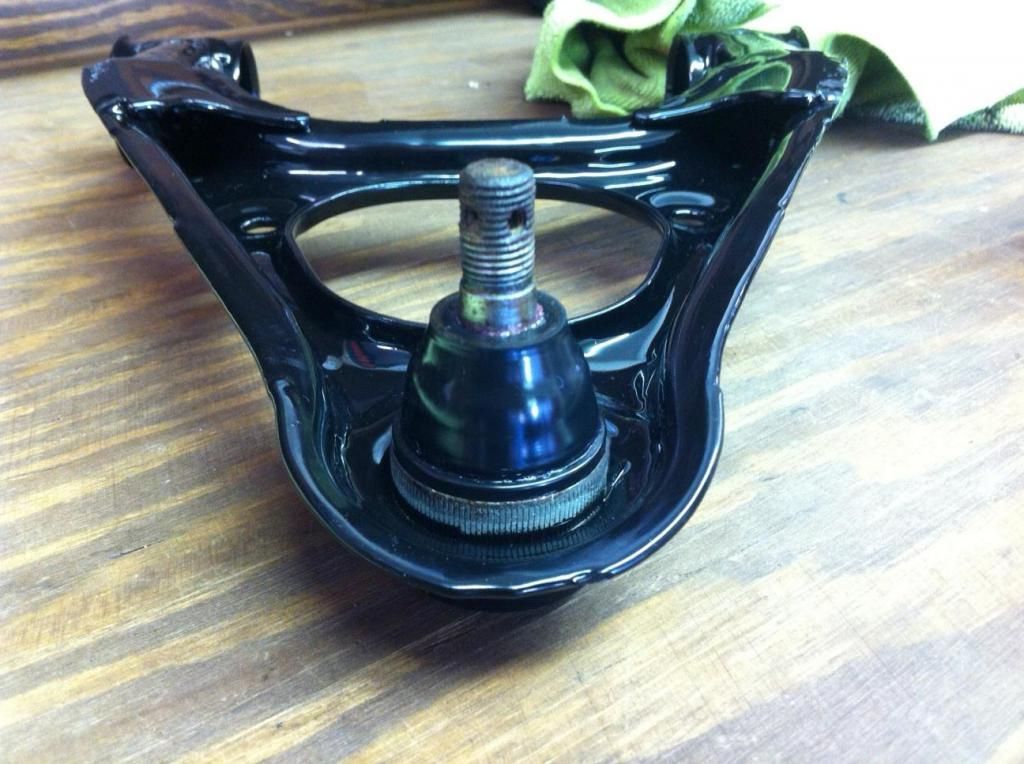 |
|
|
|
Post by jgilbert on Nov 24, 2014 23:11:01 GMT
This seems much easier than attaching to the chassis so I decided to go this way. Yes, I used the p clips that came with the lines. No, I used holes that were alread there. No rivnuts, I used 1/4-20 x 3/4" bolts with lock washers and nuts. After I get the fuel line to its correct length I'll loctite the bolts. Luke, Just a small word of caution. You see where you have your Tee joint for the rear brake line, the clearance between the Exocet chassis and the rear sub frame and PPF is pretty tight at this point. My tee joint was inline with the side of the PPF that the hose runs down and I ended up angling down a bit for clearance. The US frame may have more clearance that the UK one but I thought I would mention it. Found this photo of mine, hope you don't mind me mentioning this. 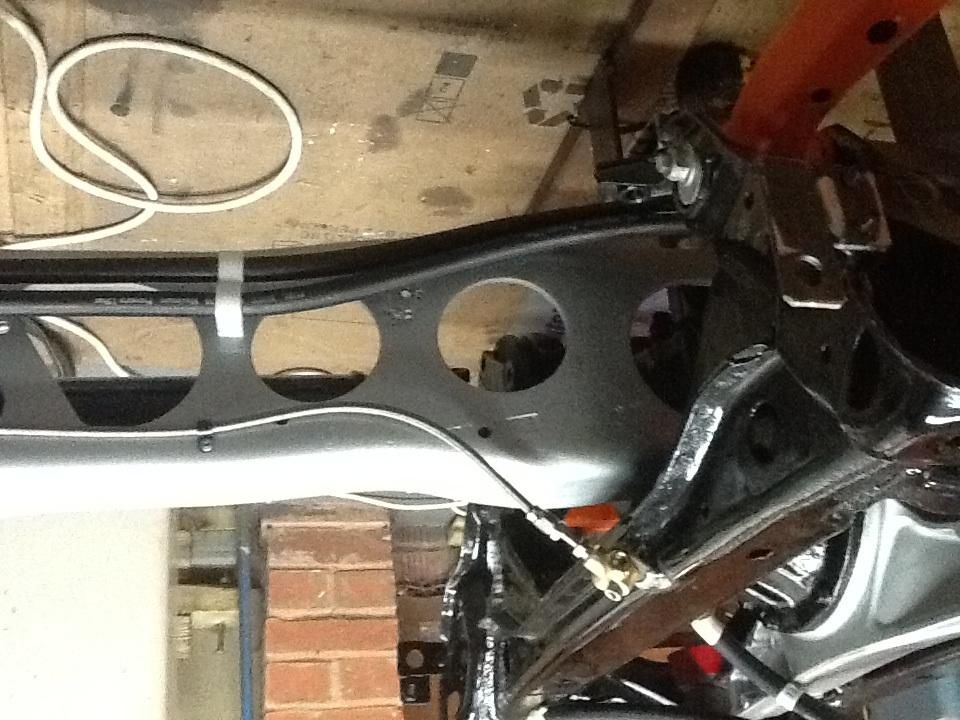 |
|
|
|
Post by lhintze on Nov 25, 2014 3:00:55 GMT
I appreciate the help sir, I think mine will have enough clearance as is. I made sure it sits below the subframe, and the chassis mounts a bit higher as well. I will be sure to check this after I install the chassis.
As far as the upper front ball joints, I didn't drive the car before so I will not have a thing to compare it to. The Teflon in the ball joint must withstand higher temps than powder coat, I saw the weld in ball joints also and decided to try this route first. I will let you guys know how it goes.
|
|
|
|
Post by lhintze on Nov 25, 2014 3:05:33 GMT
I asked the powder coated to hang the a arms so the grease would fall down when in the oven and they still have plenty of movement after regreasing them.
|
|
|
|
Post by lhintze on Nov 27, 2014 21:33:24 GMT
Worked on the steering column today, sandblasted it at work and spray painted it. I removed the right stalk, figured it was unnecessary since we won't have wipers. I removed the wires and re wrapped the small harness. 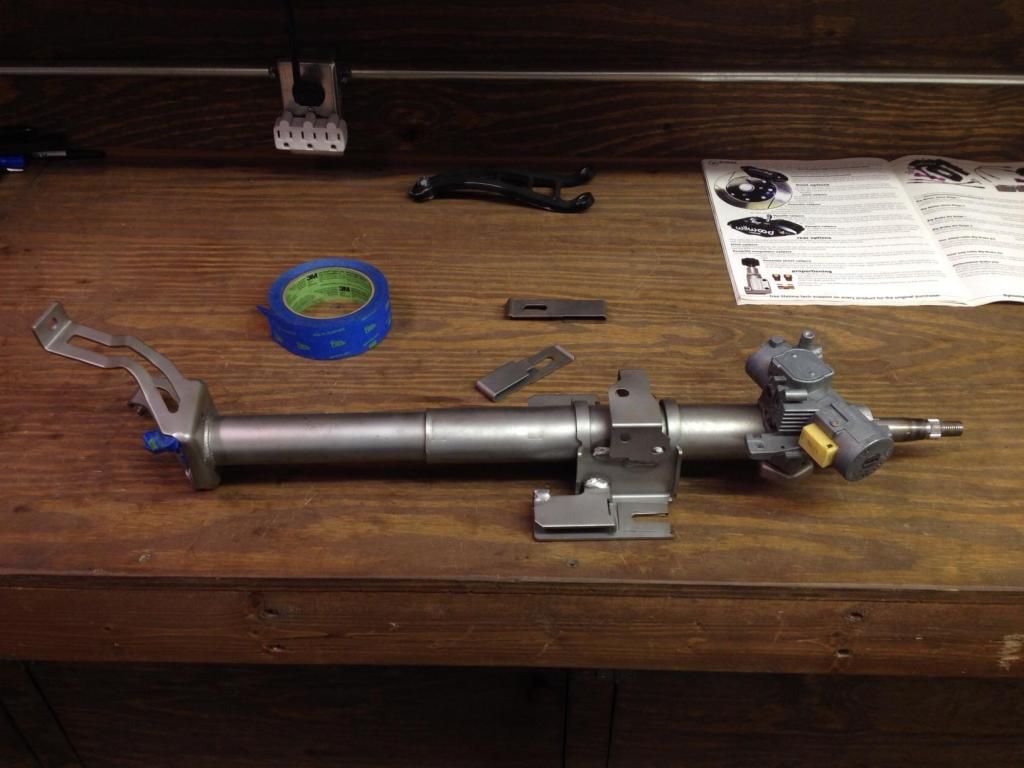 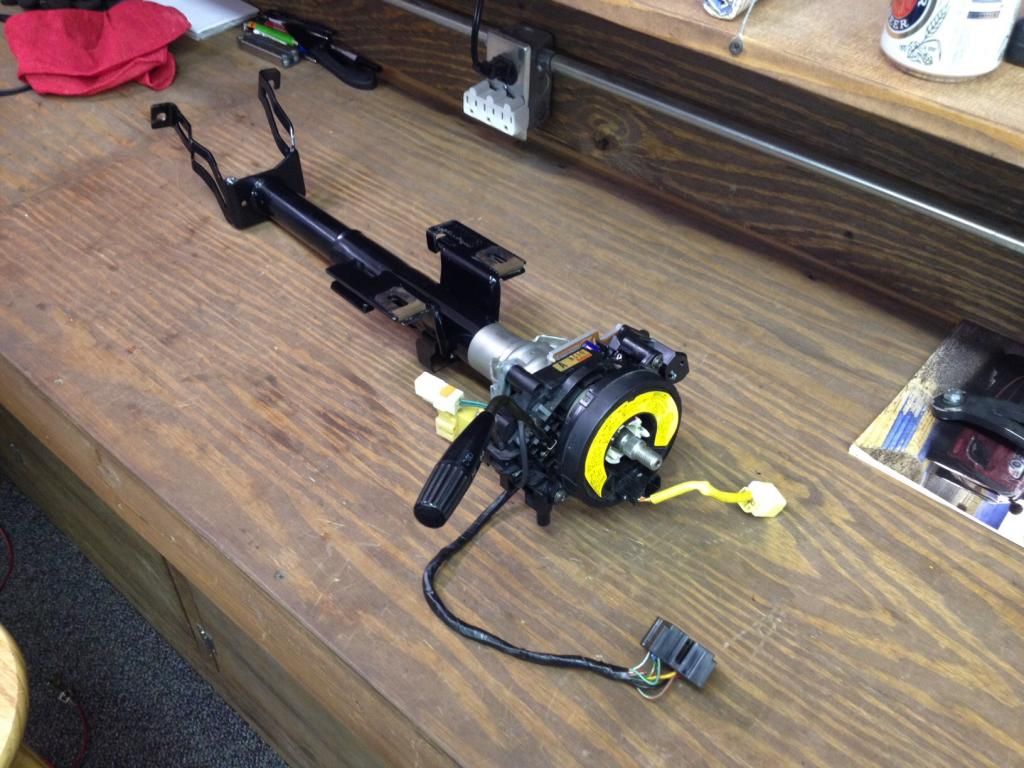 |
|
|
|
Post by gwnwar on Nov 27, 2014 22:19:46 GMT
Very smart looking.. Remember to center the clock spring before installing the wheel..
|
|
|
|
Post by lhintze on Nov 27, 2014 22:43:05 GMT
how exactly is that done? Putting it on once it's halfway from lock to lock?
|
|
|
|
Post by JIDiesel on Nov 27, 2014 23:47:26 GMT
You are correct in regards to the clock spring setting. Why are you using the clock spring? are you using the stock steering wheel?
|
|
|
|
Post by lhintze on Nov 28, 2014 0:45:35 GMT
No, I am using an aftermarket one. I thought I would need it to cancel the turn signals and keep the horn wires from twisting up. Is it not necessary?
|
|