|
|
Post by casesensitive on Feb 24, 2019 11:20:39 GMT
Still wouldn't start up though, and the plugs were wet, suggesting they're not sparking. Built a new rig for testing plugs, drilled out some 1.5mm wall 50mm box section to 12mm, tapped to 14mm, cut out one side and added an earth line. 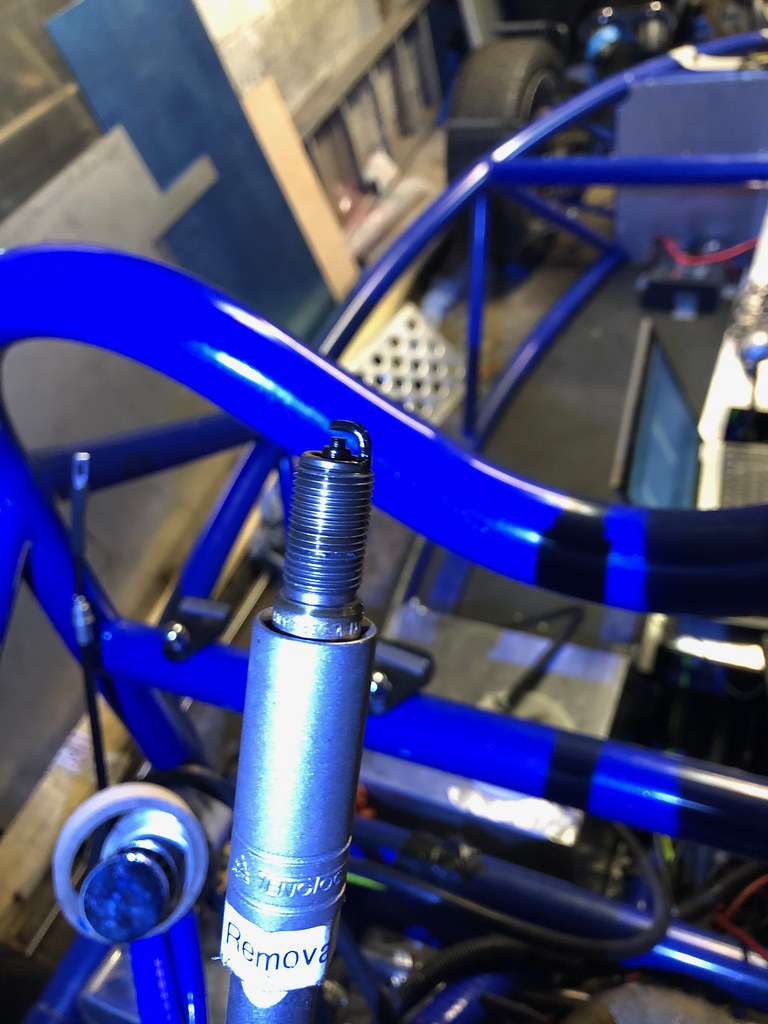 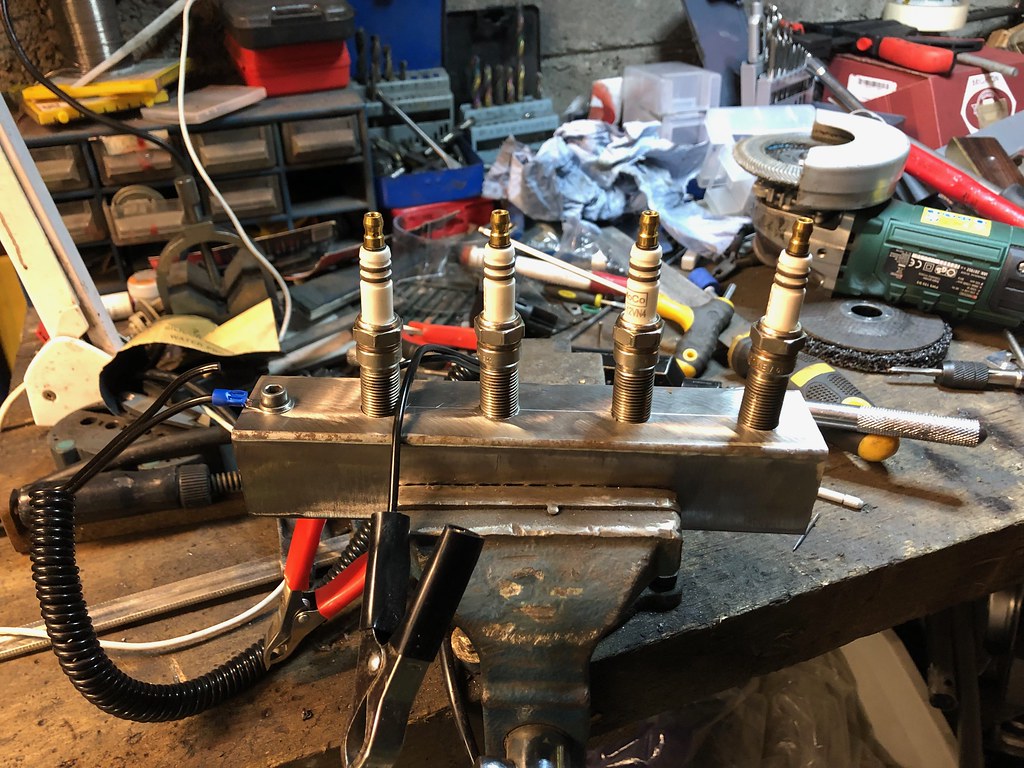 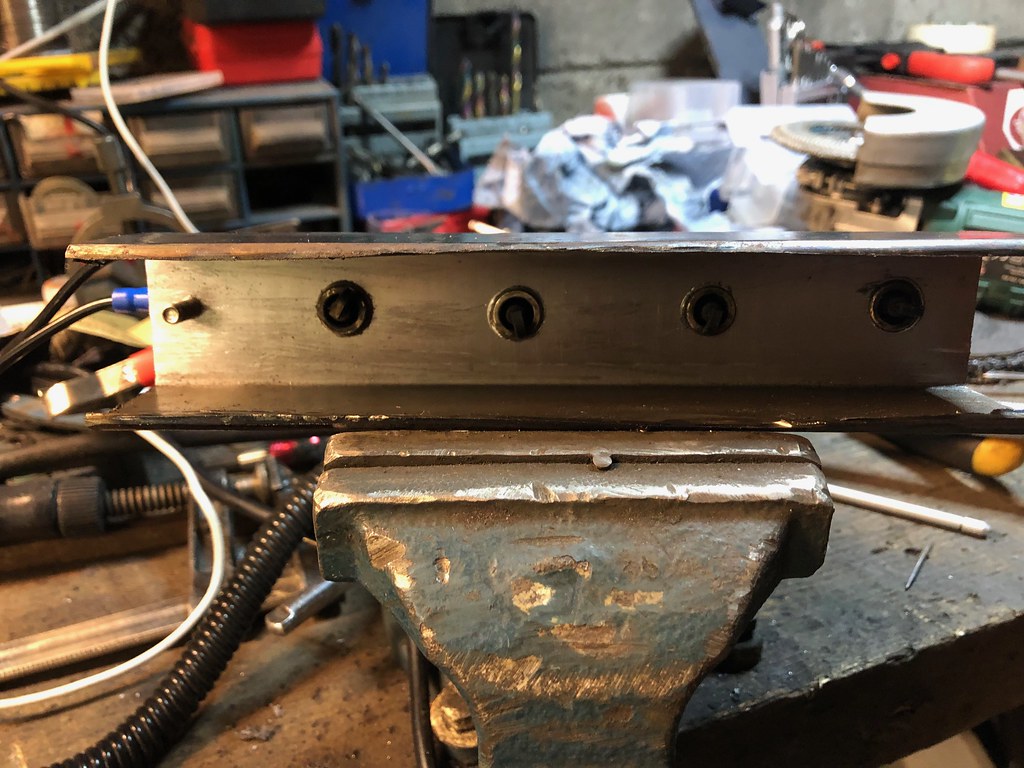 No spark though, looks to be further up the chain. Turned out to be a missing fuse I added to the return feed to the ECU from the coil pack, durh. Sparked up, rough and lean (17-20 AFR), but it spoke for the first time in a year or so. |
|
|
|
Post by casesensitive on Mar 4, 2019 9:08:35 GMT
Good and bad, this weekend was mostly bad. Dirty weather, so none of the outside jobs got done, and sort of wished I'd left my Rocket alone. The cheapo fuel pump lasted less than 2 minutes. Filter at the wrong angle, and then dropped dead. Orered a proper Bosch one that I can return this morning. Wasn't happy with the sealant gunk, so I set about installing M4 rivnuts in the tank lid. It didn't go stellarly. 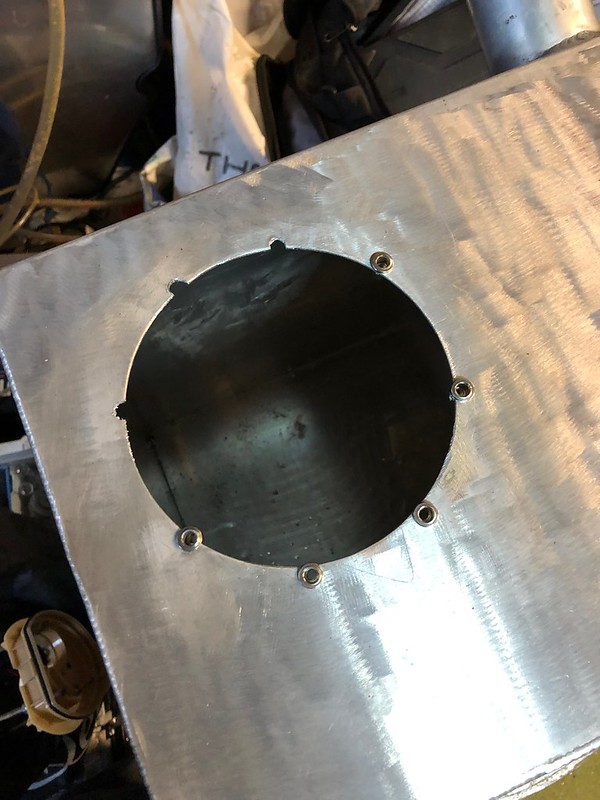 I tried doing an edge build up, or even tacking the rivuts to the aluminium sheet on a piece of scrap, and it just turned to mush. I hate aluminium sometimes. I'll more than likely have to use fuel-proof sealant again, but I think I'll wait till I'm all done. My travails in braking are covered on another thread, but Hispec repaired my caliper badly, so it'll likely have to go back to be done properly. 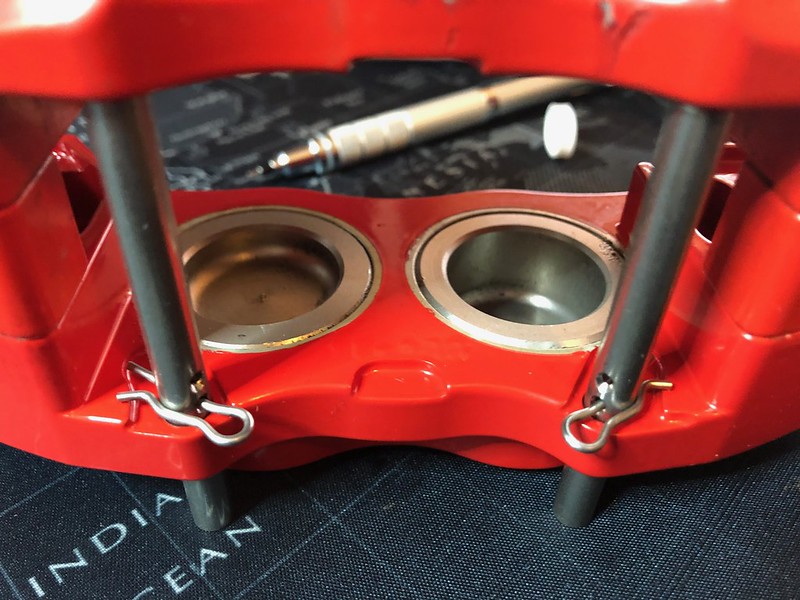 Then, to get something done, I dropped the seats in, and found the runners foul the eyelets, so the harnesses can't be clipped in. I'm sure a solution is there, it was just another thing that didn't work out on a short day at the garage. 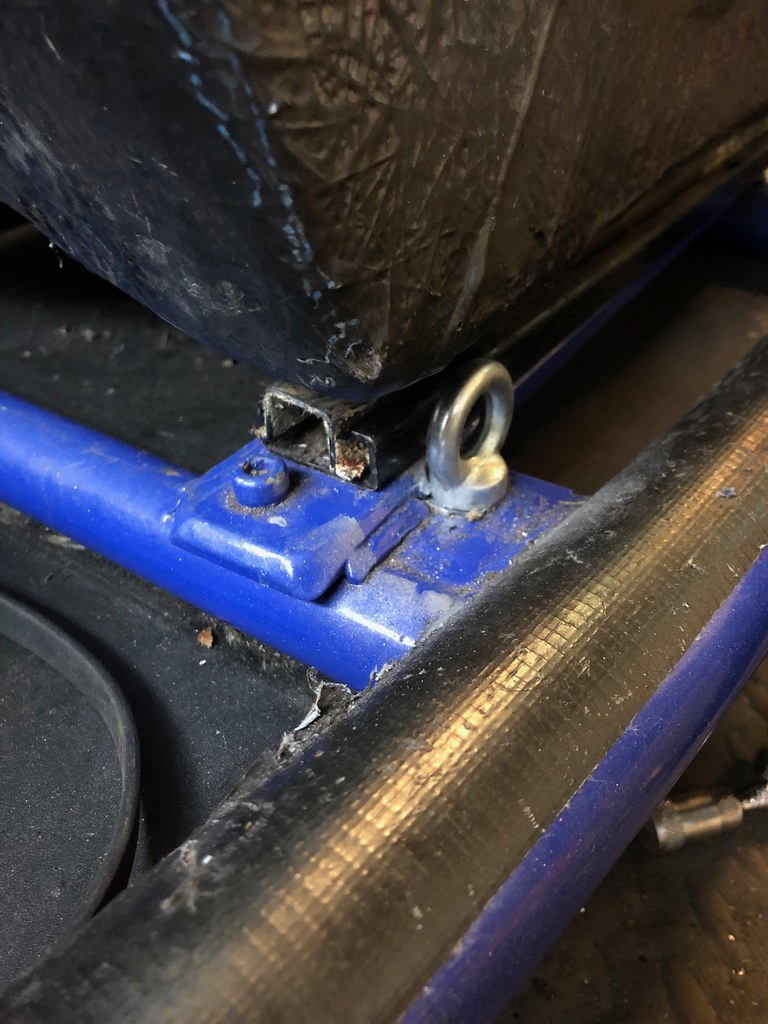 |
|
|
|
Post by carlyd on Mar 4, 2019 18:00:44 GMT
Some days everything goes wrong, I remember leaving my build for a couple of months straight as I was so unhappy at one point. A break form the build and a clear head will see you fix the problems.
|
|
|
|
Post by kiwicanfly on Mar 5, 2019 8:22:00 GMT
To swap the piston on the caliper you blow compressed air into the piston through a nipple hole. Yes I know taking out the nipples didn't go well last time. If you put a small clamp on the pistons you don't want to remove and leave the offending one free it will pop out nicely. However don't put you finger between it an a hard surface as it will hurt when it pops out. Can't figure out why RTR cut the holes in the tanks so big, is it standard for anything? I had a similar issue with my lower belt mount, made a bracket that followed the curve of the tubing and had two legs at 90 degree to each other, it went horizontal - curve - vertical. I bolted this to the chassis bracket with the result that the new mount hole was in line with the centre of the tube and thus well outside the seat. Your eye ends up horizontal but that's not an issue. Can't find a close up picture but hopefully it makes sense. This is is the best I can do, third picture you can make it out. mevowners.proboards.com/post/76486/thread |
|
|
|
Post by casesensitive on Mar 5, 2019 9:41:20 GMT
To swap the piston on the caliper you blow compressed air into the piston through a nipple hole. Yes I know taking out the nipples didn't go well last time. If you put a small clamp on the pistons you don't want to remove and leave the offending one free it will pop out nicely. However don't put you finger between it an a hard surface as it will hurt when it pops out. Ah, thanks, that answers the question I just asked out on the caliper thread, cheers. Can't figure out why RTR cut the holes in the tanks so big, is it standard for anything? It's very nearly the same size as the Focus stock fuel sender, about 2mm wider diameter I guess; not enough for the stock rubber gasket, not tight enough to not need it either  I had a similar issue with my lower belt mount, made a bracket that followed the curve of the tubing and had two legs at 90 degree to each other, it went horizontal - curve - vertical. I bolted this to the chassis bracket with the result that the new mount hole was in line with the centre of the tube and thus well outside the seat. Your eye ends up horizontal but that's not an issue. Can't find a close up picture but hopefully it makes sense. This is is the best I can do, third picture you can make it out. mevowners.proboards.com/post/76486/threadI know what you're getting at, and I have a vague idea what it looks like, but, in essence, remake the bracket so it protrudes further in or outboard than the seat rails. Shouldn't be an issue on the outsides, but on the tunnel side it's gonna be tight/definitely won't fit. I reckon something's getting chopped. 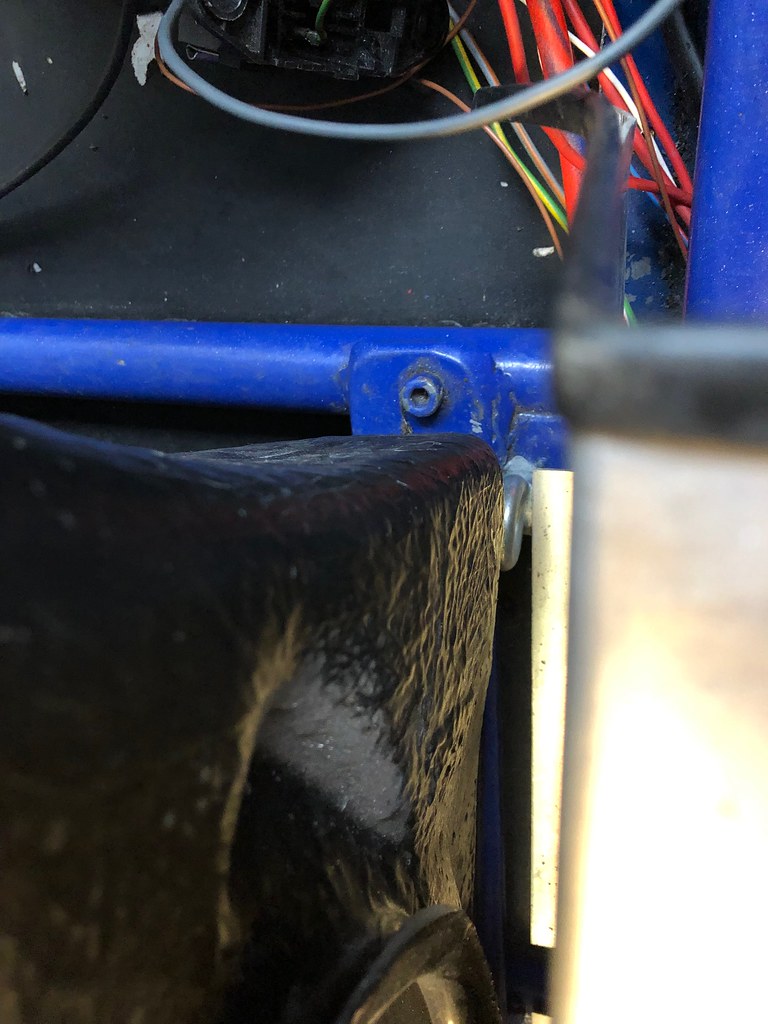 |
|
|
|
Post by carlyd on Mar 5, 2019 15:47:56 GMT
a lot...... Then, to get something done, I dropped the seats in, and found the runners foul the eyelets, so the harnesses can't be clipped in. I'm sure a solution is there, it was just another thing that didn't work out on a short day at the garage.  I had an IVA failure due to the seat belts fouling on (touching) the seat from the lower mount points. The IVA examiner reasoned that in a crash the belts tightening would/could crush the seats. My fix for this was to cut holes in the seats to pass the belts through. (see my build for photo's). I don't know how everyone else got around this issue? |
|
|
|
Post by buildityourself on Mar 5, 2019 21:50:38 GMT
I had an IVA failure due to the seat belts fouling on (touching) the seat from the lower mount points. The IVA examiner reasoned that in a crash the belts tightening would/could crush the seats. My fix for this was to cut holes in the seats to pass the belts through. (see my build for photo's). I don't know how everyone else got around this issue? I don't understand how some kits pass IVA with this and others don't. The seat belt bolts are part of the chassis, and the seats limited in choice. |
|
|
|
Post by kiwicanfly on Mar 5, 2019 23:30:11 GMT
I know what you're getting at, and I have a vague idea what it looks like, but, in essence, remake the bracket so it protrudes further in or outboard than the seat rails. Shouldn't be an issue on the outsides, but on the tunnel side it's gonna be tight/definitely won't fit. I reckon something's getting chopped. When I first saw a Rocket chassis in NZ (the only other one we have over here) I was with a certifier who's first comment was that the inner seat belt mount was a fail, basically a tab of metal butt welded to the cross member with no triangulation. The solution to that by RTR was to weld a 5mm thick plate across the whole width of the chassis allowing me to fit the lower mounts anywhere I needed to. However for the inner I did not use that, instead I drilled sideways into the box section inside the tunnel and welded a boss/nut to the inside face thus allowing me to bolt the seat belt plate to that, it also meant the seat belt mount plate was being stressed in the correct direction rather than at 90 degrees. Unfortunately the driver side is all cut away where the bolt needed to go so I had to weld a plate into the box section to accomplish the same result, basically I cut another piece of box section to fill the cap and allow good welding points. mevowners.proboards.com/post/37030/threadmevowners.proboards.com/post/39137/threadThe result allowed me to get a seat somewhat wider than the RTR ones in without fouling anything. However when I changed my belts for a six point harness I mounted the eye onto the 5mm plate but right against the edge close to the tunnel, I also took the crotch belts under the chassis tube at the front of the seat and attached to eyes mounted in the same plate. Originally I regretted having RTR put that plate in but it worked a treat for the harness. mevowners.proboards.com/post/102639/thread |
|
|
|
Post by casesensitive on Mar 7, 2019 10:18:09 GMT
When I first saw a Rocket chassis in NZ (the only other one we have over here) I was with a certifier who's first comment was that the inner seat belt mount was a fail, basically a tab of metal butt welded to the cross member with no triangulation. The solution to that by RTR was to weld a 5mm thick plate across the whole width of the chassis allowing me to fit the lower mounts anywhere I needed to. However for the inner I did not use that, instead I drilled sideways into the box section inside the tunnel and welded a boss/nut to the inside face thus allowing me to bolt the seat belt plate to that, it also meant the seat belt mount plate was being stressed in the correct direction rather than at 90 degrees. Unfortunately the driver side is all cut away where the bolt needed to go so I had to weld a plate into the box section to accomplish the same result, basically I cut another piece of box section to fill the cap and allow good welding points. mevowners.proboards.com/post/37030/threadmevowners.proboards.com/post/39137/threadOK, I *think* I know what I'm at now. If I drill into, and then weld a big deep nut onto the box section here that'll give me a mount point where the eyebolt runs in parallel to the floor, and the harness will then clip on readily enough. Measure twice, weld once.. It would be ideal to have the boss/but welded to the inside of the box section, but it might foul the coolant pipes and I ain't taking the floor off at this stage! The number of 'if I'd known...'s in this project are maddening. I feel like a second build would be done to a much better standard in about 1/3 of the time! Thanks Kiwi, this has been super helpful. 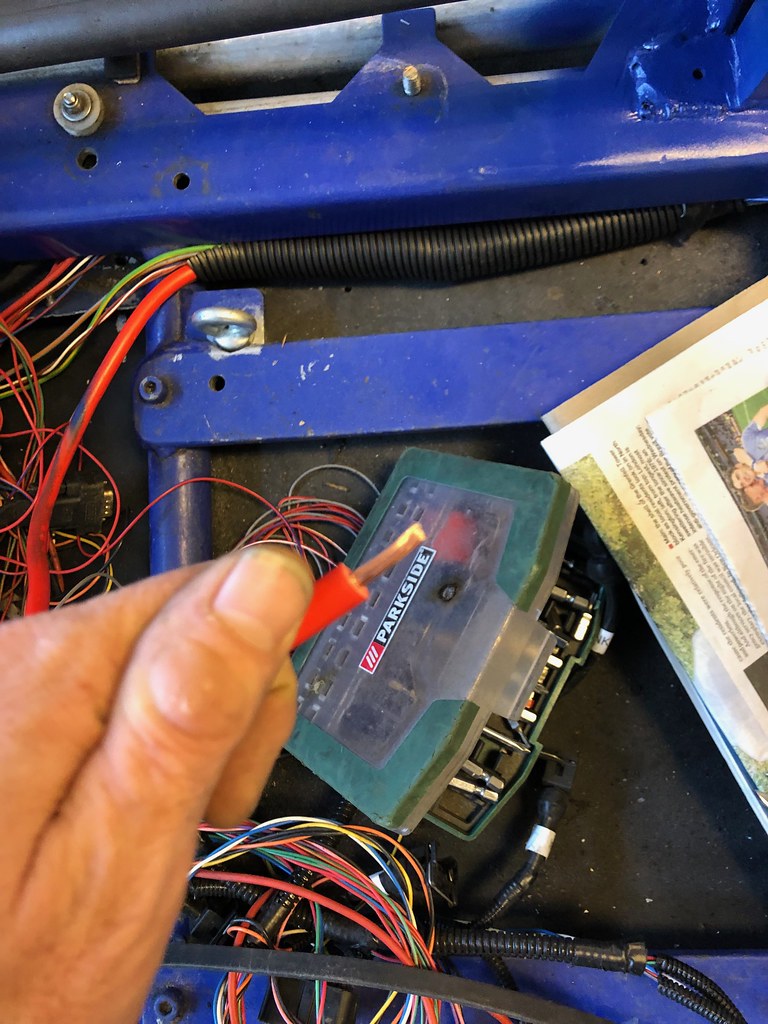  edit: of course, there's no box section on the passenger side, so that'll require the use of the thinkmeat 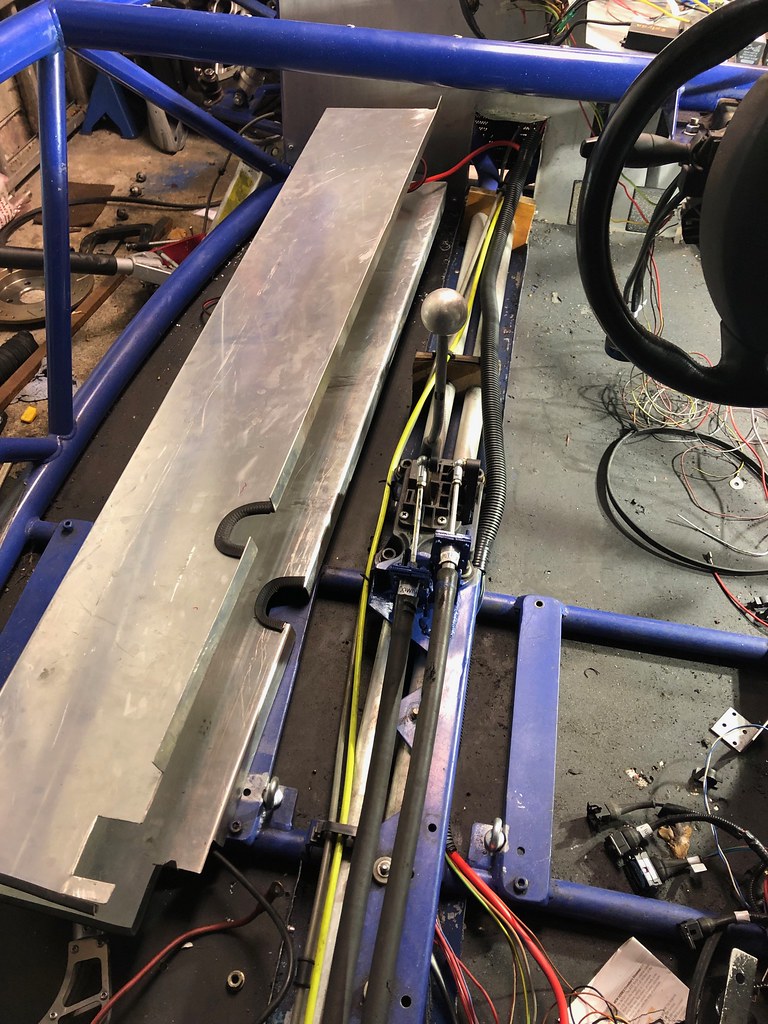 |
|
|
|
Post by kiwicanfly on Mar 7, 2019 20:03:34 GMT
I was wrong above, it is the passenger side I had to put the insert into the box section not the driver side.
Then nuts were welded on the insside, fortunately for me the chassis was bare at the time.
The nuts did limit the width for the coolant pipes but not too badly.
However all that said you could simply remove the RTR inner mount and weld a new one in the corner between tube and tunnel.
After all why on earth were the mounts not put in the corners anyway?
|
|
|
|
Post by casesensitive on Mar 20, 2019 9:31:37 GMT
Last week's attempt to get her to fire up were cut short by a dead fuel pump, been sat up for 9-12 months and didn't want to know. It looked like this when it came out. 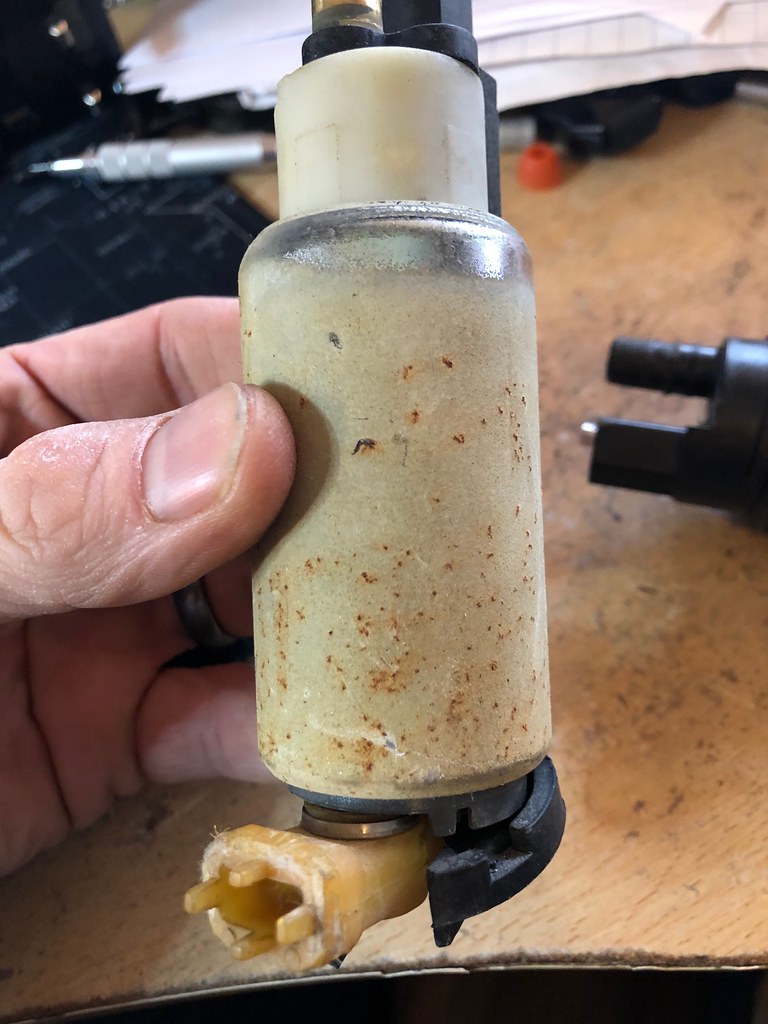 Another cheap pump of a similar type was procured and it seems that the good people at the Chinese Copying shop missed a trick, or knocked off early maybe. See if you can spot what part they didn't bother getting right. 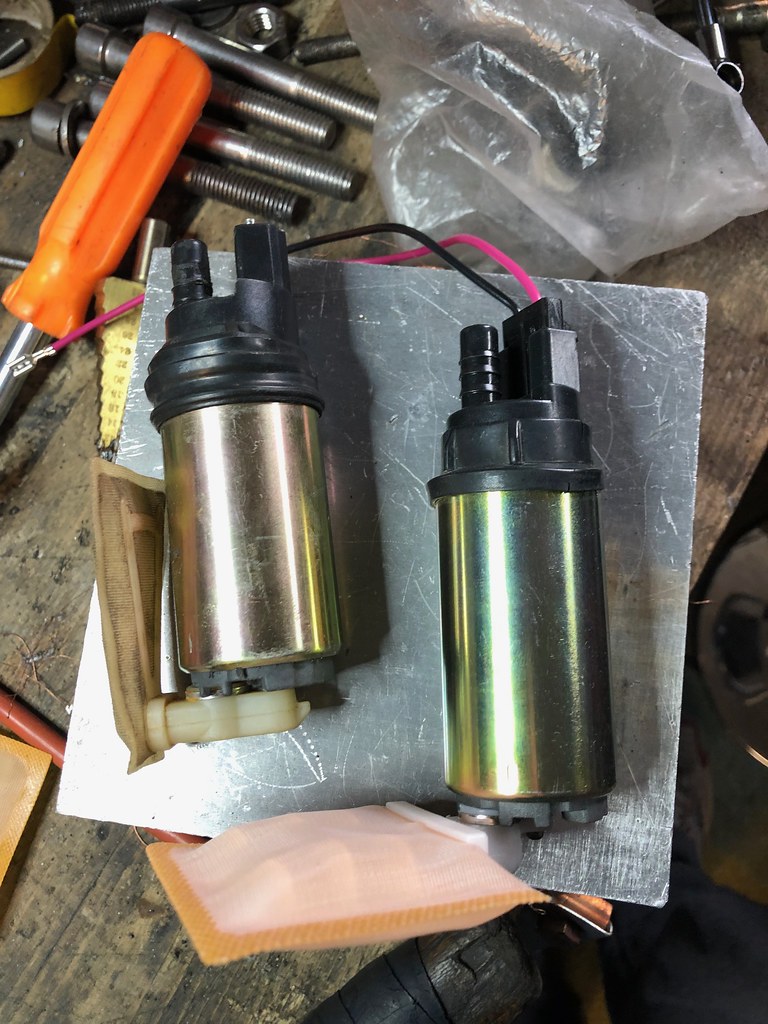 Fortunately, I still have the original broken Focus fuel pump, with the correctly-angled filter. It was dirty, so I used my new fuel/oil pump to push acetone through it backwards. This, or the petrol, melted the pump switch, interestingly. Another rubbish knock-off fuel pump from China showing it's value at £11, or about £4 per minute it actually ran. I shelled out a bit more for a proper Bosch pump, which has survived at least twice as long, as it sparked to life again for pretty much the first time in a year. 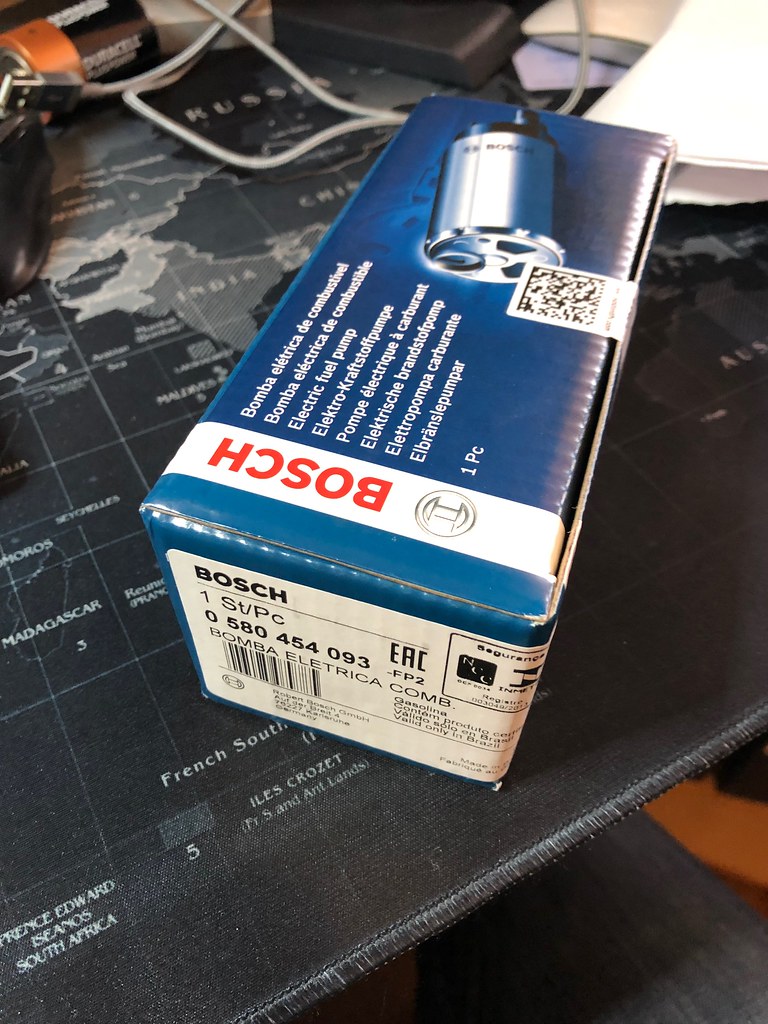 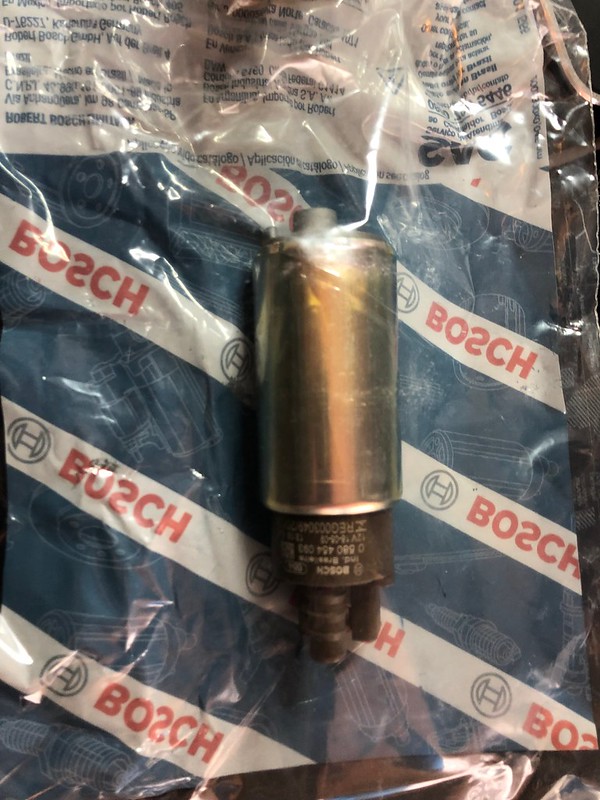 My coolant system was still leaking, so a 25mm cut was taken off my stainless steel tee, a silicon joiner was replaced and a tighter jubilee clip was added next to where the Mikalor clamp wasn't snug enough, and the dripping stopped. All the rusty brown water was drained and replaced with 5L of gloopy sticky green coolant, and topped up with tap water. Always surprised at how much water a Rocket holds. Took the car for the shortest of little drives, as I don't have any brakes yet. In a 4 hour day, I prioritised the gratification of engine noise over boring details like stopping. I have a very bad intake leak somewhere though, because with my Jenveys 'jacked open' with the throttle adjuster to 0.4mm, which seems very small, the car jumps to 3000rpm and stays there, no matter what I do with the fuel map. That's nearly half the redline, which suggests nearly half the max intake volume is getting in. I'll post in the technical section, maybe someone else withe Jenveys can shed some light. |
|
|
|
Post by casesensitive on Mar 20, 2019 9:48:18 GMT
|
|
|
|
Post by casesensitive on Mar 25, 2019 10:20:07 GMT
Leak located with trusty WD40 Paper gasket possible got too squashed due to too much tightening 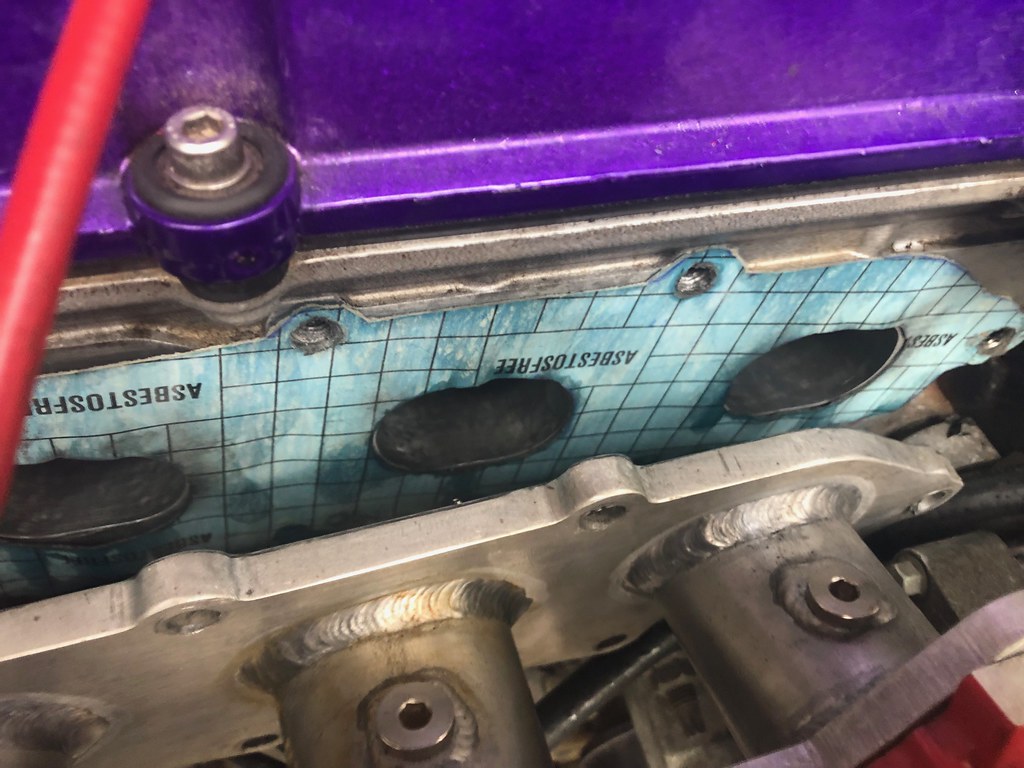 So I cleaned up the surfaces (I used spray glue to apply it) 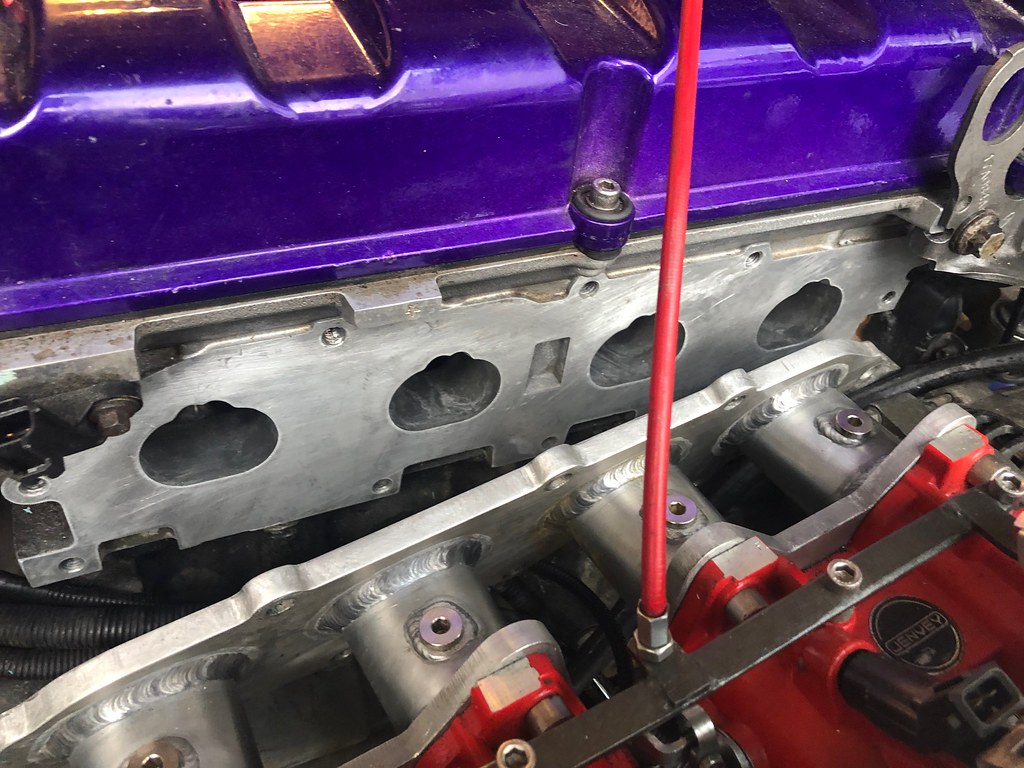 I ordered some proper gasket maker from Amazon, but I wanted to hear it go, so I temporarily substituted in some red rubber grease 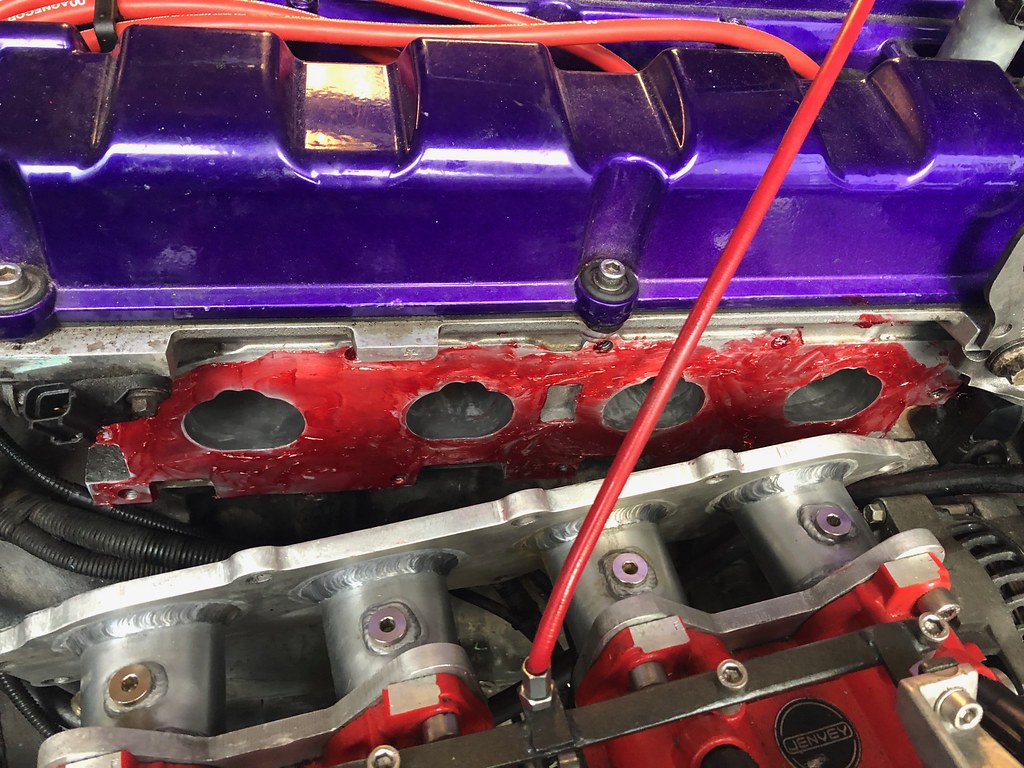 which worked much better and on one of its last days in this garage, she drove forwards and back, stopped on a firm pedal, held an idle between 1,500 and 2,000 (still more gaskets to be replaced) and didn't spit coolant everywhere. A good day at the garage all 'round. |
|
|
|
Post by casesensitive on Apr 5, 2019 13:50:26 GMT
Wasn't happy with the sealant gunk, so I set about installing M4 rivnuts in the tank lid. It didn't go stellarly.  I tried doing an edge build up, or even tacking the rivuts to the aluminium sheet on a piece of scrap, and it just turned to mush. I hate aluminium sometimes. I'll more than likely have to use fuel-proof sealant again, but I think I'll wait till I'm all done. Posted over on Rob's build about this, he and Mr Mills weighed in add a large alloy washer cut from 3 mm and seam weld, then you can drill and tap to sit the pump body flush rather than on top of the rivnut shoulders. Cut out a plate and put a hole in it slightly oversize, presumably this is the 0.5mm you were referring to. Then drill, tap and countersink this plate to suit the pump. Screw in countersunk screws and seal the heads, a) to stop any fumes escaping up the threads b) to ensure they don't come loose. Ideally you would weld the heads over but not sure if this can be done easily. Weld that plate to the tank with the screws sticking up (heads to the tank). Drop on the pump with a large o'ring under it. Cut another ring of aluminium and drill a set of clearance holes in it. You can now clamp down the pump and ensure no leaks but be able to remove the pump at any time, you won't require any sealant either. Alternatively if you do stick to rivnuts do ensure you use blinds ones as open ones will be a pig to seal. I'm not sure I 100% understood Rob's suggestion, but here's my first draft of a solution, based mostly on Stiggy which my febrile brain computed gooder, but with elements of kiwicanfly 's.  The top 'clamping ring' isn't something I can actually make, because I don't have a mill. I could try using/ruining my drillpress but I doubt I can pull it off. Drill out existing rivnuts, leaving a ~7mm hole in the tank. Make, from 3mm plate, a square piece with a hole in the centre that exactly matches the edge of the fuel sender, not 1.0mm wider, this should leave just enough material to host M4 screws pointy-end-up without going through the edge. The heads would hopefully seat nicely in the 7mm holes in the tank. Obviously they'd fall through as these holes would have to be drilled through, not tapped, so the currently-tapped m4 holes in the fuel sender would be drilled smooth to 4mm, and the upturned screws then clamped down with a washer and an m4 nut protruding from the plastic sender. Somewhere, I need a rubber o-ring or gasket, probably between new 3mm plate and sender. Once everything is confirmed fitting, I sacrifice a number 10 socket to the TIG gods and seam weld the plate to the tank. Any chance any of that actually happens and works?? |
|
|
|
Post by daydreamer on Apr 5, 2019 16:45:57 GMT
I did something similar. It was made by hand with a large holesaw to cut a template hole in a piece of mdf that was then used as a guide for a hand held router with tct bit to cut the hole in 6mm 8mm alu plate. Then turn over and cut with a tct rebate bit with guide to cut the rebate and then turn over again and use a rounding bit. The large outside radius was cut with a jigsaw and alu blade then rounded off with a file. FYI, I had earache for weeks about little silver bits appearing all over the house. To seal I used a fuel resistant gasket sheet and fuel resistant sealant to sandwich the white focus cap thingy. With this solution I could use rivnuts and not be close to the edge or drill the white plastic thingy. It works well.      |
|