|
|
Post by tom on Sept 21, 2013 22:38:08 GMT
That dash looks awesome!
|
|
|
|
Post by gwnwar on Sept 22, 2013 2:16:35 GMT
Very nice work on the dash unit.. Are you going to be selling them to others to use?? How much..
|
|
|
|
Post by red5 on Sept 22, 2013 13:56:10 GMT
Agree - you could sell the dash and the cross bar that could fitted by welding or bracket as an add on.
Not enough jobs for you to retire - but reckon a lot of us would take it up as this area of the exocet is v difficult to skin easily/ professionally.
|
|
trident
Senior
   Improvise, Adapt and Overcome
Posts: 629
|
Post by trident on Sept 22, 2013 18:25:52 GMT
Cheers guys for the very positive comments. I can obviously get more dashes made and various colours. I don't think it will enable me to retire just yet as they are not that cheap to make as they are from a split mould etc but if I can re-coupe some of the expense it cost to get the pattern and then the female mould made, I will be more than happy. In fact if I don't sell any I'll still be more than happy as it does look very nice and mine will remain the only one with it.
Each dash would need a little work to rub down the joint line etc and then a good polish to get a good shine.
Cost wise the dash would be £250 each + p&p. This covers the cost I have to pay to get each one made and then allows me to make a little on each one to off set my initial costs etc.
When I made it I allowed a fair bit of movement space between the dash and the ignition cover as I was aware that each Exocet will vary slightly with the steering wheel location as such I could not guarantee a good fit in this area. It depends on how you witted it but I can show the position of mine.
If I have serious interest in the dash then I can take a lot more photos showing how everything fits in detail.. Maybe start a new thread just on the dash.
I think the metal is best sourced locally due to the weight and carriage costs etc but I could supply that as well if needed.
Anyone interested then?
|
|
|
|
Post by gwnwar on Sept 22, 2013 21:03:04 GMT
Cost 250 seems fair.. Getting the metal local is good idea.. Just include of how and were attached..
Question how do you attach the gage cluster to the dash??
|
|
trident
Senior
   Improvise, Adapt and Overcome
Posts: 629
|
Post by trident on Sept 22, 2013 21:36:43 GMT
Cost 250 seems fair.. Getting the metal local is good idea.. Just include of how and were attached.. Question how do you attach the gage cluster to the dash??
4 long bolts stuck on the inside of the dash around the gauge area. The gauges then just bold on using existing holes on the original gauge housing. I'll post a photo tomorrow ( as long as I remember ).
|
|
trident
Senior
   Improvise, Adapt and Overcome
Posts: 629
|
Post by trident on Sept 23, 2013 18:35:58 GMT
Nearly forgot that I promised to add these photos so have just taken them... This is how I have attached the instrument cluster... Glued in 4 x M6 bolts I think they were 80mm long. The adhesive is waterproof and boasts a holding strength of 150 tons .... really? but its certainly strong enough to hold the cluster in place and has some flex in it.. keyed up the inside of the dash first. To get the bolts in the correct position I used two nuts and fixed the bolts onto the instrument cluster at the correct height etc ...I then added the adhesive to the dash... Next sit the bolts into the adhesive and leave it overnight to set. Then next day take the cluster off and add more adhesive to get a very good coverage around the bolts. 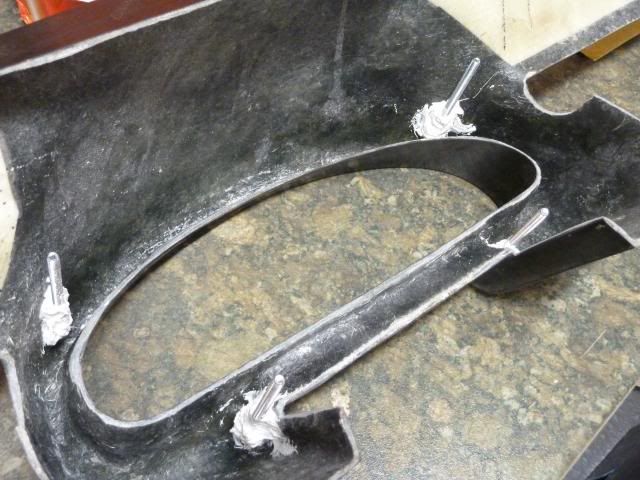 Next just just replace the instrument cluster and secure it in place using 4 x nuts. 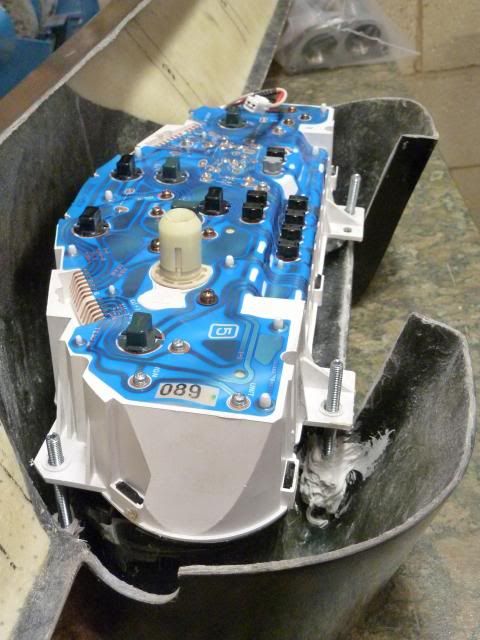 The only modification I had to make was use a round file to make the bolt holes slightly bigger and file the corner off the top tab as seen below. 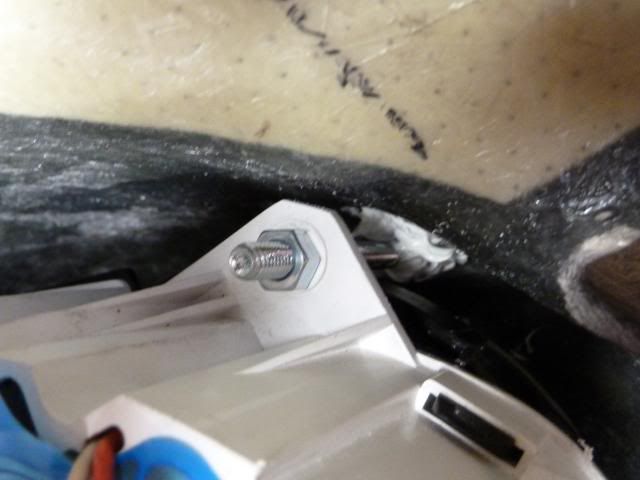 |
|
|
|
Post by gwnwar on Sept 24, 2013 2:26:32 GMT
Nice simple fix for a good fit.. Next how are you securing the dash to the cross tube and car.. maybe small blocks glued to back of dash and worm clamps to the cross bar..
|
|
trident
Senior
   Improvise, Adapt and Overcome
Posts: 629
|
Post by trident on Sept 25, 2013 19:28:34 GMT
The dash will be fixed with 4 brackets that will be bonded to the underside of the dash. These brackets then bolt onto the 4 new pieces box section between original tube at the back edge of the bonnet and the new tube that I have added. You will not be able to see any fixings from the top of the dash. I'll add some photos in due course but I don't have any at the moment.
Hope this makes sense...
|
|
|
|
Post by gwnwar on Sept 25, 2013 23:44:31 GMT
Looks like you will have room under the dash for a drop down storage box or two that would hinge on forward
original tube then snap/lock up out of sight on new tube.. Nice for gloves goggles and a pint to keep you warm.
|
|
trident
Senior
   Improvise, Adapt and Overcome
Posts: 629
|
Post by trident on Oct 22, 2013 19:04:22 GMT
Had a couple of hours on the car today.. Just don't seem to have had much time over the past few months.. Still progress is progress. I have now added some extra metal work to the rear end so my new rear tank cover has something to sit on. I'm now going to make a lower section that will fix to the two tubes that are coming out at the bottom part of the subframe. This next section will be completely removable so I can then get access to the exhaust etc. The rear lights will also fit on the rear section much the same as they do on the Rocket. Most of it is only tack welded at the moment but once I remove the chassis for powder coating everything will be fully welded. 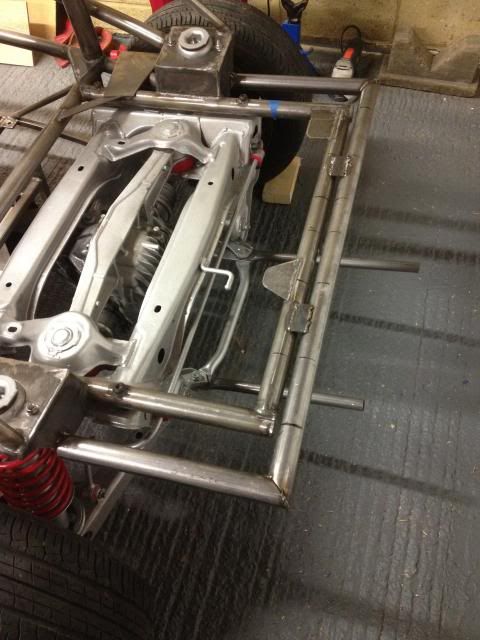 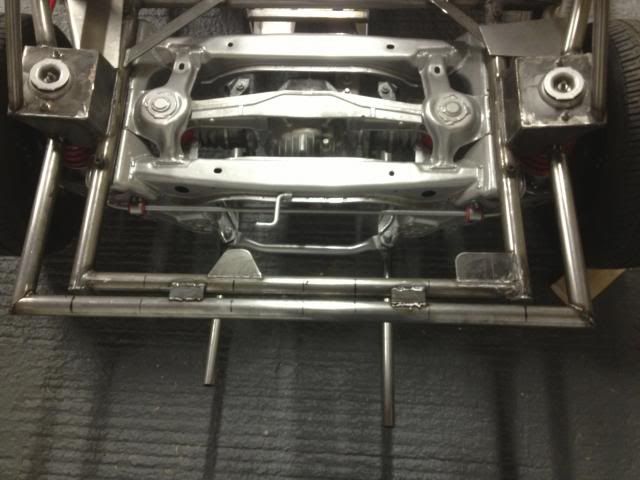 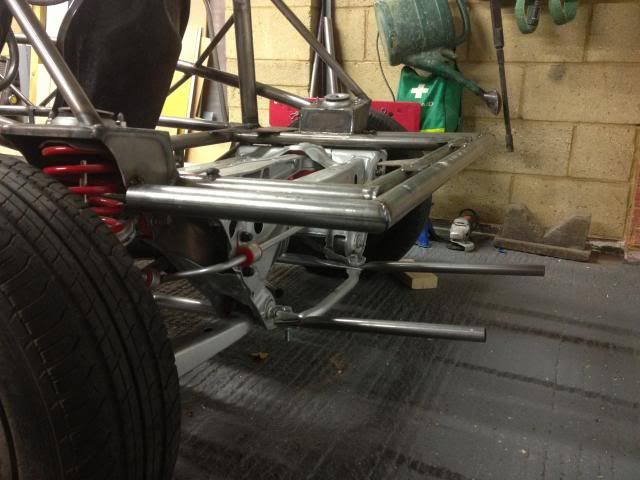 Whilst I'm talking about lights..Need to ask a question so I get it clear in my head and don't make something that will then cause me to fail IVA.... I know they have to be 400mm from the outside edge and 250mm up from the ground. Is that 400mm from the outside edge of the car to the outside edge of the light??? and 250mm from ground to bottom edge of the light?? |
|
trident
Senior
   Improvise, Adapt and Overcome
Posts: 629
|
Post by trident on Oct 28, 2013 18:49:41 GMT
Popped into my local IVA testing station during the week and spoke to a very helpful examiner just to make sure what I was planning would comply with IVA regs... It does so today I spent a bit of time on the car making a big bit of metal out of various smaller bits of metal. This was the first thing I made... and as I had such fun I made two!! 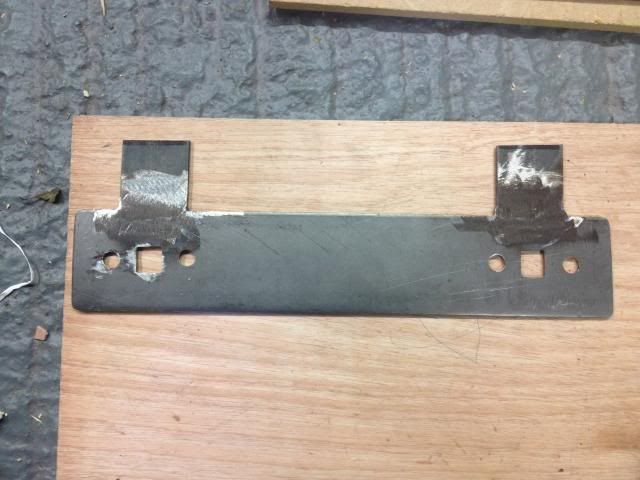 I then got a few bits of tubing and some 3 x 40mm flat steel and welded the bits all together .... This is what I ended up with. 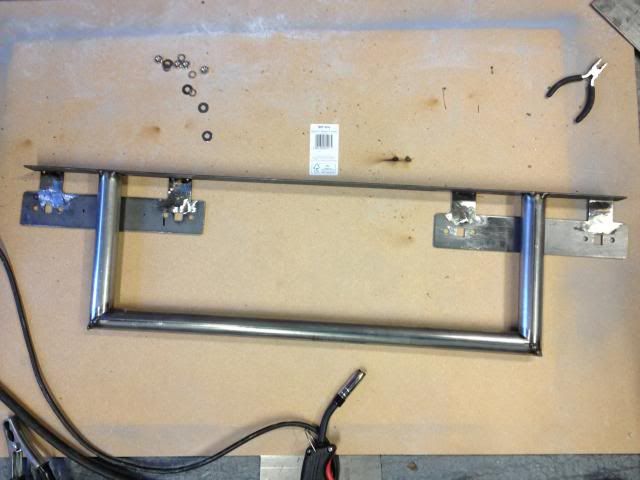 So far so good .... As i had a couple of other bits of tubing lying about I thought I would add these as well. The final result .....One big bit of metal from various smaller bits of metal. 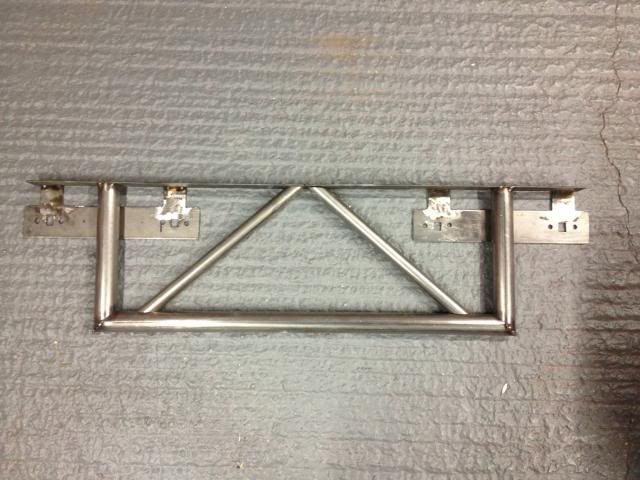 But it looks much better with the lights attached and fixed onto the car. 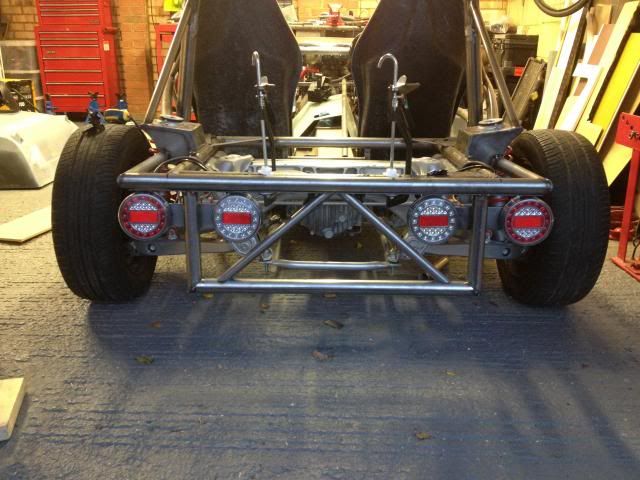 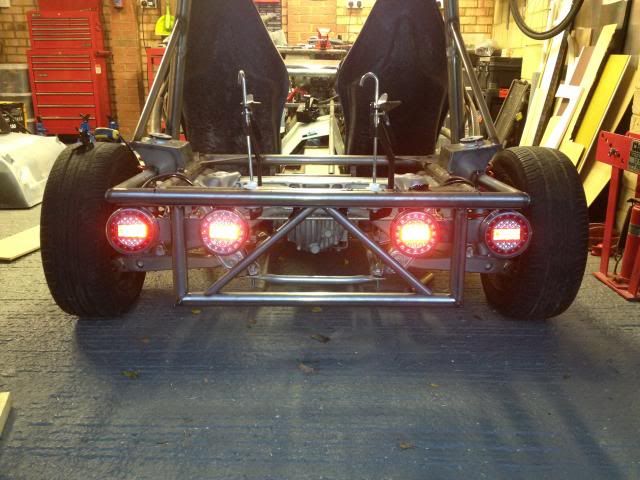 The bottom of the lights sit 360mm off the ground. Regs state min is 350mm off the ground and 400mm from outside edge of car. These will comply. I know I will have a bit more weight with the tank and full tank of fuel but even with me standing on the back end of the car to simulate the extra weight of the tank and cover etc they still comply with the min distance of 350mm. I'm very pleased and it really makes the back end of the Exocet look nice and wide and finishes off the lower back end of the car. The plan is for a centre exhaust to fit in the centre hole. |
|
|
|
Post by gwnwar on Oct 29, 2013 5:03:11 GMT
Now that looks great really like it.. Are you going to bring the exhaust through the center of it..
|
|
trident
Senior
   Improvise, Adapt and Overcome
Posts: 629
|
Post by trident on Oct 29, 2013 16:50:19 GMT
Glad you like it George
Yep the plan is to fit an exhaust through the centre triangle hole ..... I know some people might disagree with the extra weight I am adding but all the weight is at the rear which I recon will level out the centre of gravity for the car a bit more. It's also a little extra weight over the rear wheels on a rear wheel drive car + i'm not using the MX5 seats so what I'm adding here I've already lost else where.
Just need to add a couple of brace bars that will be weld to the lower horizontal tube and then back to the subframe corners where they will be bolted on. It will also be bolted onto the main chassis along the flat bar into the space between the original back end and the new tubing I welded to the chassis. This means it is a completely removable unit.
Chris
|
|
trident
Senior
   Improvise, Adapt and Overcome
Posts: 629
|
Post by trident on Nov 11, 2013 22:35:45 GMT
I have now finished the back end of my car. Just need my mate to weld everything up properly as I don't trust my own welding... The rear section under the new horizontal bar bolts on and off. It also fixes to the rear subframe which makes the whole thing very strong. 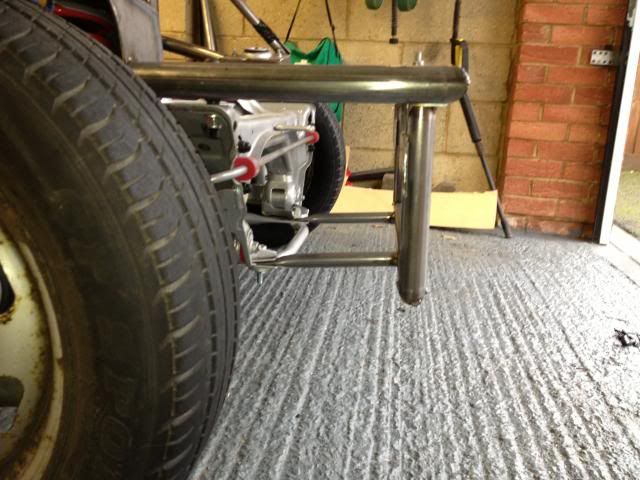 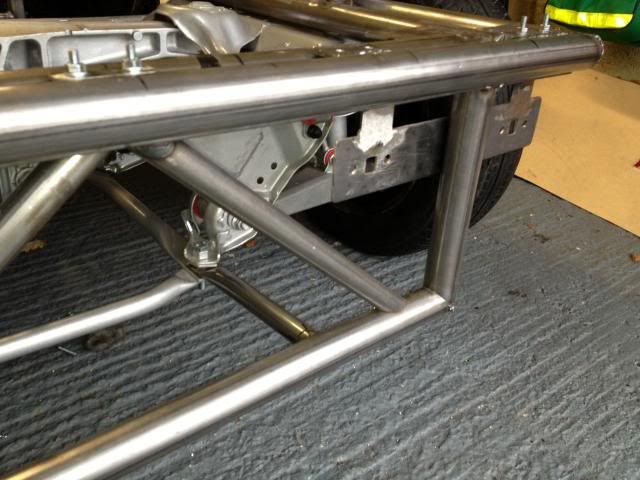 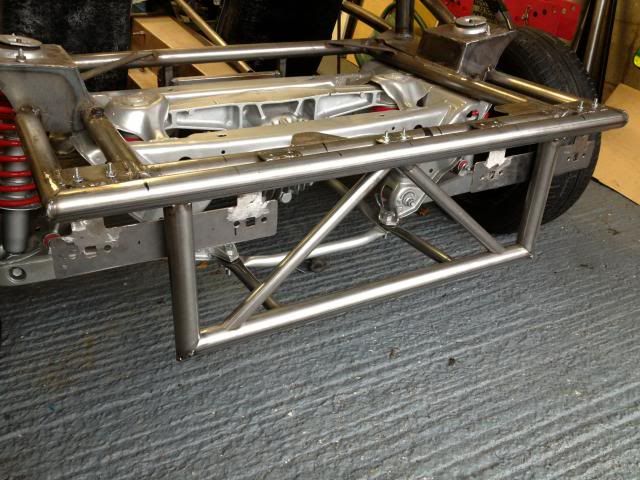 |
|