|
|
Post by nitram on Nov 5, 2013 15:05:22 GMT
Visited the Exeter show since the last posting. As reported elsewhere on the forum, disappointingly thin. But if you live in Cornwall, it is the only kit car show that can be reached in a day. To be fair, it did the essentials of what I needed: quick visit to the CBS stall; quick visit to the nice lady who sells trim and a quick chat with the ever-friendly team MEV. Met The Freak for the first time - nice bloke, nothing like his name! The build. Started fitting the wings. After initial trepidation, drilled the holes without too much of a problem. There is a tendency to get a bit of minor chipping around the circumference and, to tidy things up a bit, I will be glueing on some horse-shoe shaped rubber made from rubber washers - photos to follow. Attached the wings to the stays using 12mm rubber-lined P clips. Reasuringly solid. 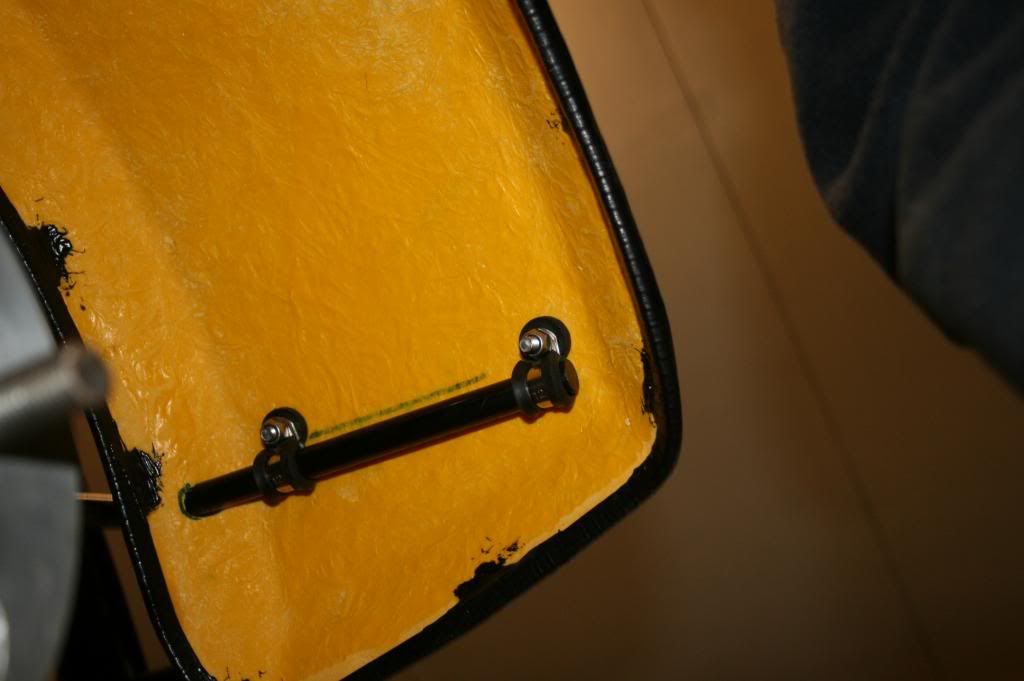 The dome-headed screw, washer and rubber washer combination is the way I have consistently attached GRP panels througout the build. 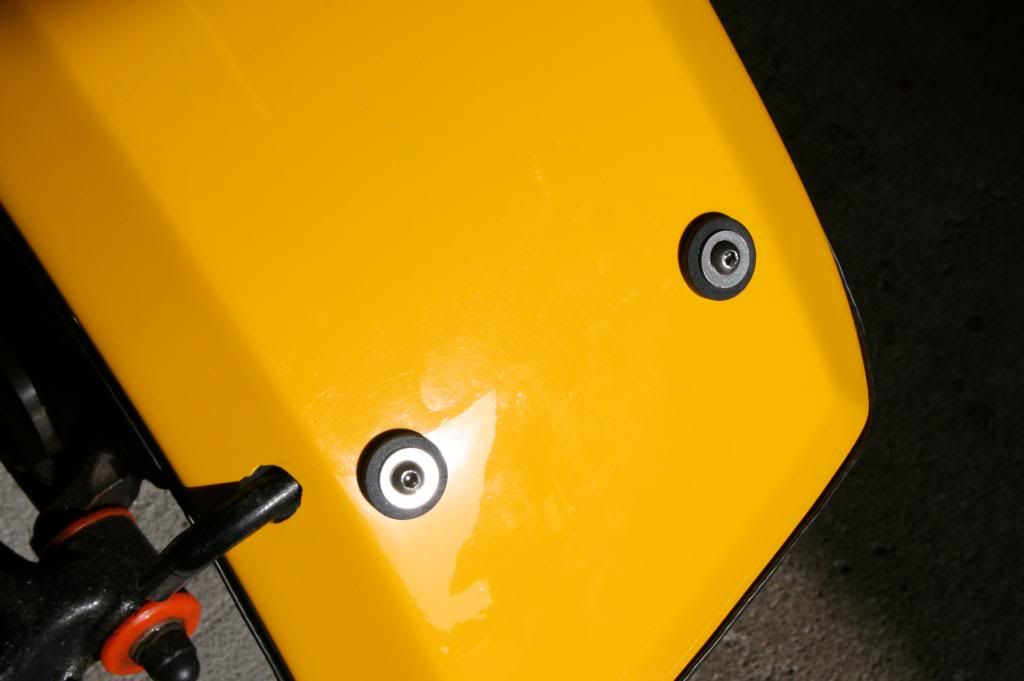 Fitting both front wings resulted in a slight foul on the brake flexible hoses when on full lock but a slight change of geometry using the two-pound-geometry-adjuster solver the problem quite easily. The car is on axle stands and has been on them for most of the build so I am anticipating having to re-check all these clearances when I lower the car on to its wheels. As reported in my last post, I didn't particularly like the way the MX5 exhaust stuck out the rear end. So I manufactured a mesh mini-skirt 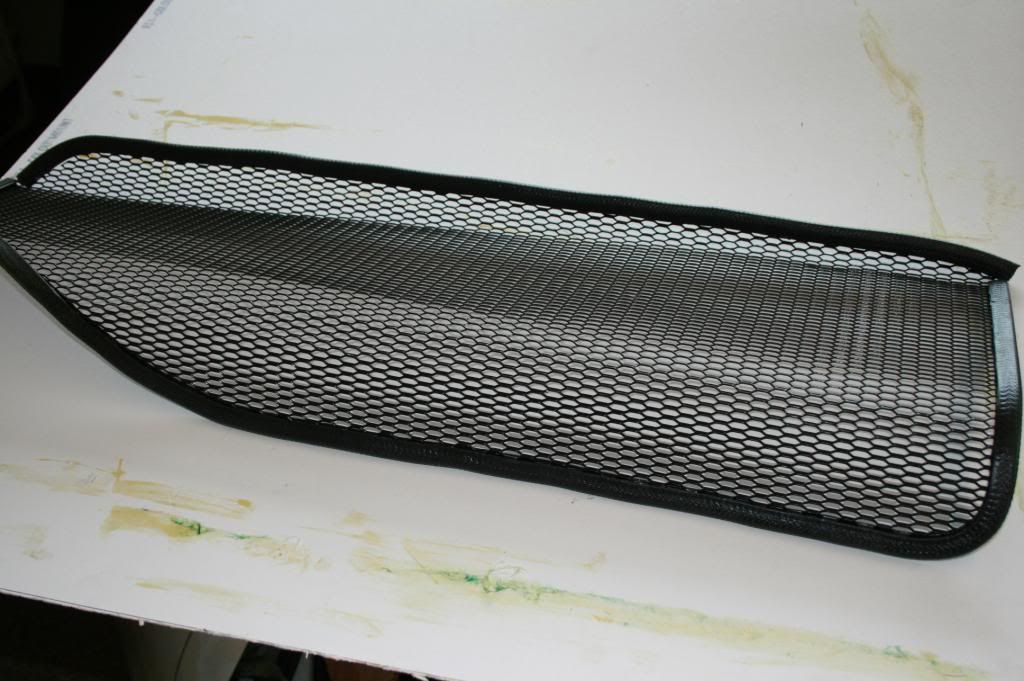 and covered the protruberance. 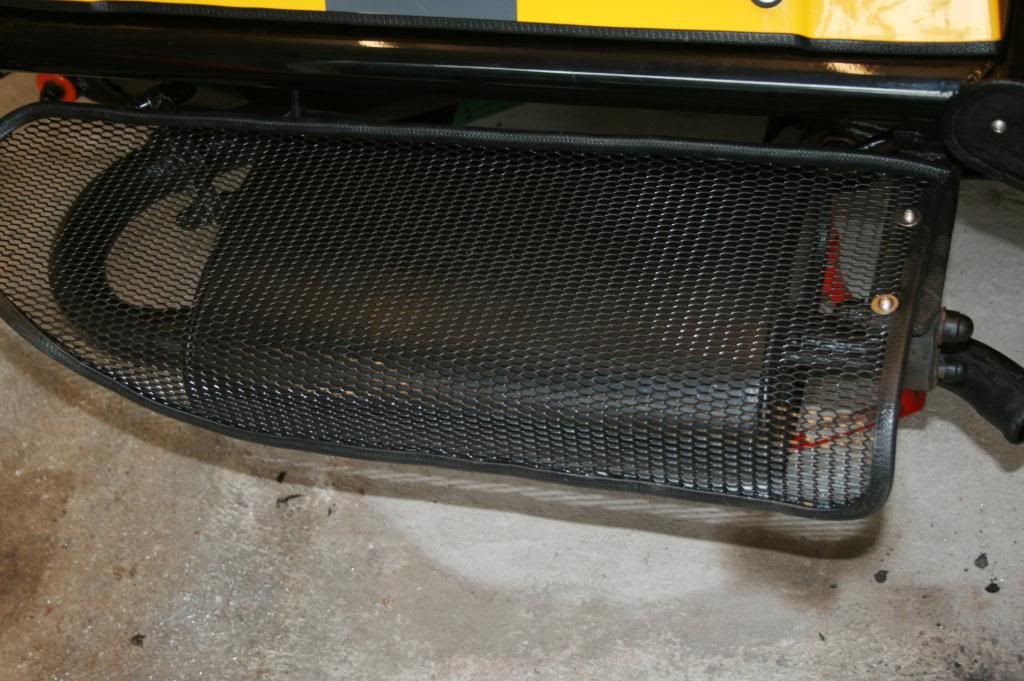 The list of things to do has now shrunk to a single page of A4, so the end is definitely in sight. However, I'll soon be heading to the Med for couple of months of Winter sun, so the build will have to wait. |
|
|
|
Post by nitram on Nov 11, 2013 14:12:37 GMT
Just found this photo. Shows the rubber washer, cut to a horseshoe shape, used to tidy-up the wing stay holes. 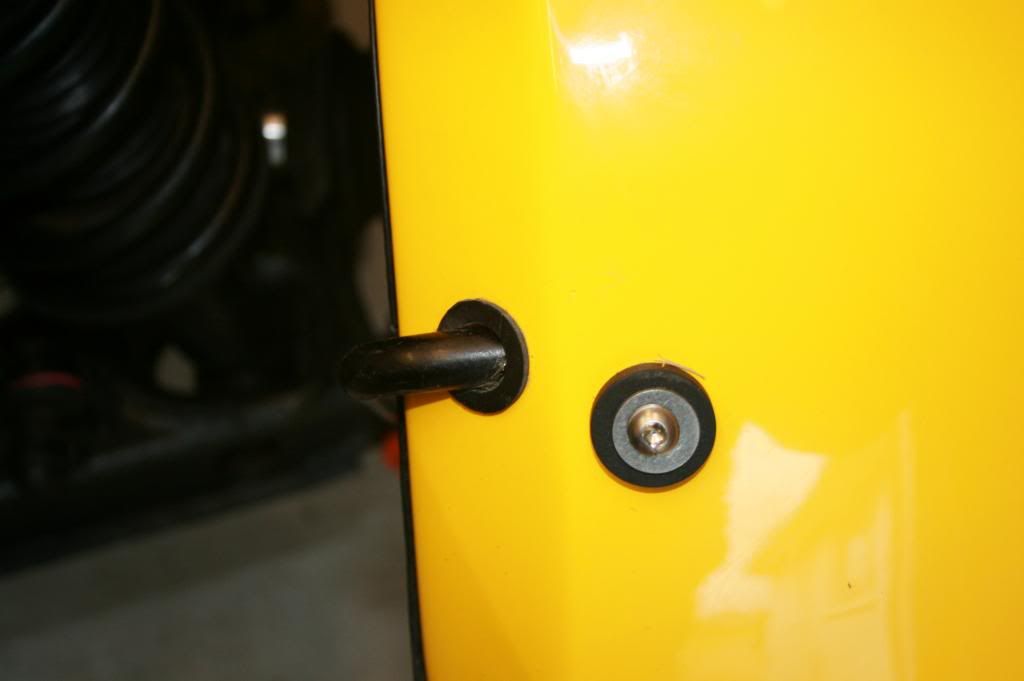 |
|
|
|
Post by Toed64 on Nov 12, 2013 13:52:58 GMT
Hi, I have a similar number plate light - I think we'll have to rubber trim the lower edge as it's really sharp! I like your mudguard mounting idea...
|
|
|
|
Post by nitram on Nov 12, 2013 15:33:30 GMT
Thanks for that. I'll have a look when I'm in the garage next. I had not considered the number plate light in any great detail as it is "E" marked and I just assumed this would be OK for IVA.
|
|
|
|
Post by nitram on Nov 13, 2013 14:11:21 GMT
Half a day to go before my holiday. So, a bit of tidying up. Thanks to Toed64, my sharp-edged number plate light now has a soft rubber overcoat. 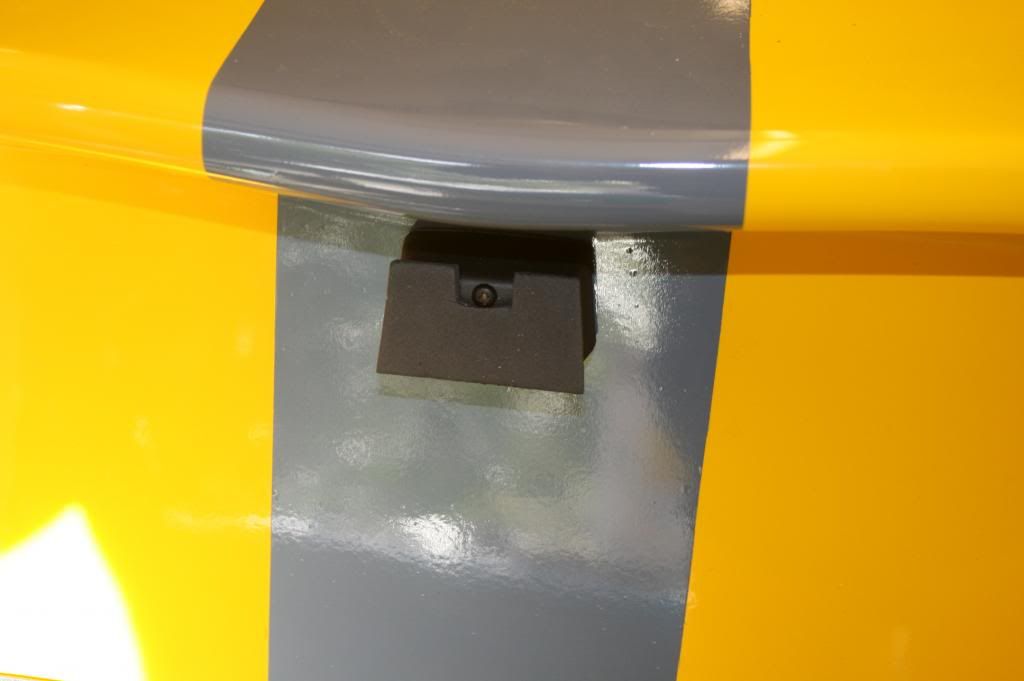 Secured a manufacturers plate and added the IVA required brake fluid label. What a waste of money. What do they expect you to put in the brake fluid reservoir? Had the Al engraved at a local engravers - £4.50. 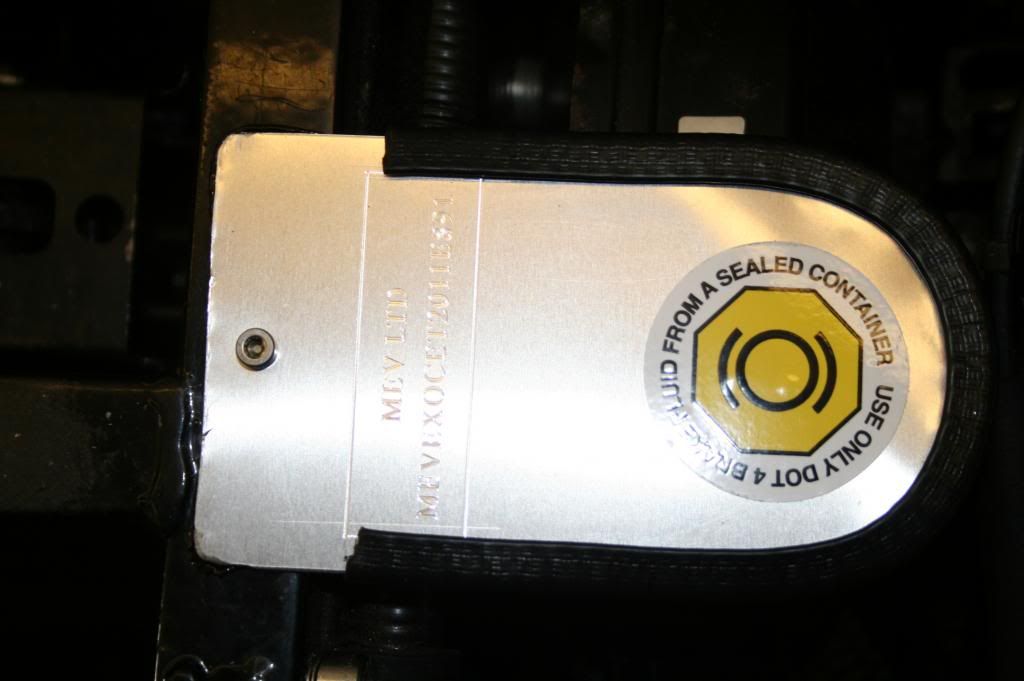 Has anyone cracked the VIN code? Mine reads: MEVEXOCET2011E891. First bit obvious; 2011 was when I ordered my kit but where does the E891 come from? Neighbour popped in and offer an hour's free labour. Not one to turn down a gift horse, decided to re-bleed the brakes. Bad move; should just have just gone on holiday. Noticed a fluid drip from under the ABS hydraulic unit/pump. This thing: 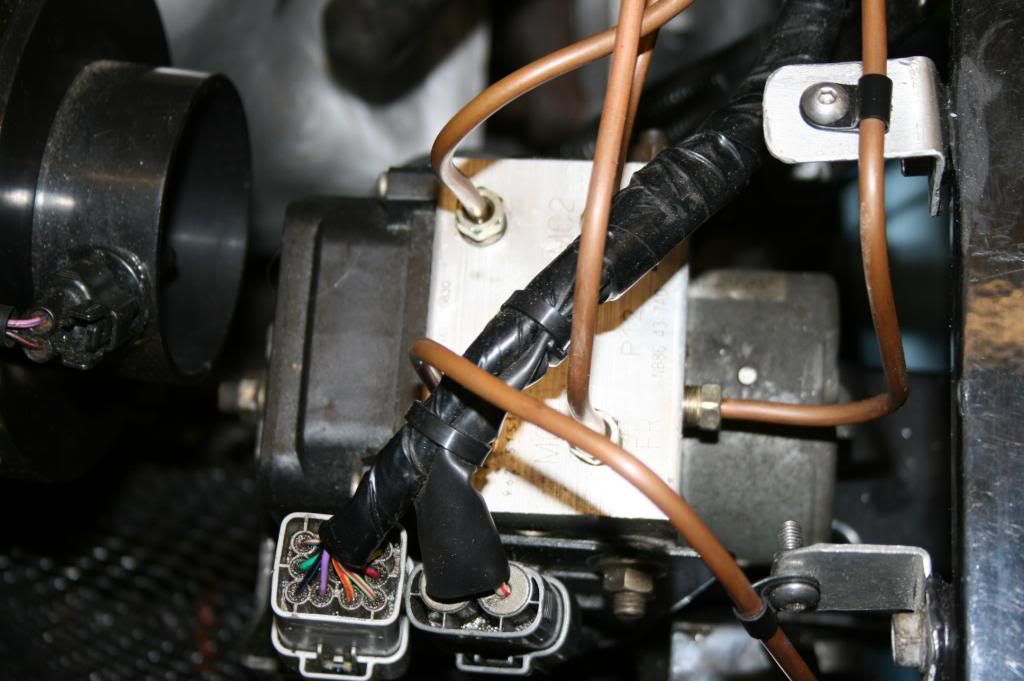 The leak is definitely not coming from one of the five pipes. It looks as though it must be coming from the body of the unit/pump and the leak gets worse with the ignition turned on (pump running?). It will be 2014 before I can get the unit out and investigated. In the meantime, has anyone had a similar problem? If so, what's the solution. Thanks. |
|
Deleted
Deleted Member
Posts: 0
|
Post by Deleted on Dec 3, 2013 18:30:55 GMT
Hi mate,
Do you have any full pictures of the car as I really want to see one in yellow.
Cheers
|
|
|
|
Post by nitram on Jan 6, 2014 10:53:12 GMT
Eight weeks since my last activity on the exo but now back in the country and keen to get going again. What better way to show little exo that I was back than to start the engine. Key in, ignition on and ...
Boom!
Initial thoughts: Where is the fire extinguisher? Where is the phone? Where is my spare underwear?
I thought the explosion had come from the engine area - nothing obvious. But then smoke starts pouring out from behind the driver's seat. The battery has exploded. Gosh, never heard of that before. Battery is about 2 years old and has split down two sides. The electrolite is pouring out but is fortunately contained in the battery box.
The internet gives a hundred and one reasons why I battery may explode (all of them new to me) but, with a modern sealed unit, likely cause is a failure of one of the internal connections (usually when the engine is cranked). I have e-mailed Bosche after-sales and await their reply.
So, chums, I would appreciate advice on what I should check out before trying to apply power again.
|
|
|
|
Post by martinw on Jan 6, 2014 12:38:51 GMT
Ouch! I bet that got your attention!  I'd check that you aren't for some reason getting a dead short across the battery when you operated the starter. I presume the explosion happened at that point? So, check the starter motor itself, and particularly the solenoid. Other than that, not a lot else to check. Had you had the battery on charge? Maybe there was a build up of gases around the battery / in the battery box? Are the battery leads securely attached, so no chance of sparking near the battery? Good luck with Bosch - at least the damage appears to be isolated by the battery box!  Martin |
|
|
|
Post by scooby1929 on Mar 8, 2014 21:31:45 GMT
Love your idea of doing the wing stays with the p clips this will make them a lot more secure and stop them flying off.
Sorry to hear about your battery incident i also had a fire in the hole but I wrongly wired a battery straight to the fuel pump and the wiring caught fire right on top of the fuel tank
|
|
|
|
Post by nobby on Mar 8, 2014 21:45:31 GMT
P-clipping the wings to the brackets is an excellent solution, thanks for sharing!
|
|
|
|
Post by hightower on Mar 11, 2014 7:55:33 GMT
I've done the same with the wings stays on my rocket feel more secure and ideally there removable too.
|
|
|
|
Post by scooby1929 on Mar 11, 2014 12:45:09 GMT
I like everything to be removable and adjustable so I am goin with Nitrams good idea.
|
|
Deleted
Deleted Member
Posts: 0
|
Post by Deleted on Mar 11, 2014 18:15:02 GMT
Guys good work by Nitram but have any of you tried removing a tiger sealed or silkaflex'd joint to a properly prepared surface? GBS tried and had to use an air chisel and the panels were scrap afterwards.
|
|
|
|
Post by scooby1929 on Mar 11, 2014 18:29:49 GMT
Its a nightmare to get off. The only disadvantage of doing the wing stays this way is that you will see the small fastener securing the p clip on to the wing stay
|
|
|
|
Post by jgilbert on Mar 11, 2014 20:58:46 GMT
Can I suggest a compromise,
So we know that tiger bond on a prepared surface works and the larger the contact area the stronger the adhesion.
Fixing using p clips gives a degree of mechanical strength and the wings can be removed.
It strikes me the issue with the tiger bond option is the contact area between the round profile of the stay and the underside of the arch is quite small. The issue with p clips is the head of the bolt showing on top of the wing.
So a thin metal plate with two threaded studs welded to it per stay arm could be 'stuck' to the underside of the wing using tiger bond. The plate would need to be bent to the wing profile but could provide a large contact area. Then use p clips in the stay screw up on the studs.
Care would be needed on the position of the plates and stud lengths but very doable.
Secure and removable.
|
|


