lad
Junior
 
Posts: 79
|
Post by lad on Nov 24, 2011 8:49:41 GMT
Hiya Tony, 70kgs - not bad! I suppose ours will be about the same come to think of it, we just don't add the subframes - the lightness isn't really in the chassis itself. I'm sure you'll be finished before us but good luck with it and maybe we'll come over your way to try Anglesey sometime when we're done.
|
|
|
|
Post by welshy1 on Nov 24, 2011 20:11:16 GMT
Will be following this very closely. Im plaining to build a lightweight exocet when ive sold my mgb gt and clear out the garage. This will be around april may time so should start building then.
|
|
|
|
Post by rharris19 on Nov 30, 2011 17:12:47 GMT
My lightweight should be hit our shores around mid to end January and I am going to tear into it ASAP. I already have:
The control arms painted,
engine/trans cleaned and completely assembled,
bigger injectors,
turbo, manifold, and downpipe installed
Gauges bought
Now I am tackling a custom wire harness for the car.
Hopefully everything will be ready to just drop in when I get the car.
|
|
lad
Junior
 
Posts: 79
|
Post by lad on Jul 1, 2012 22:34:10 GMT
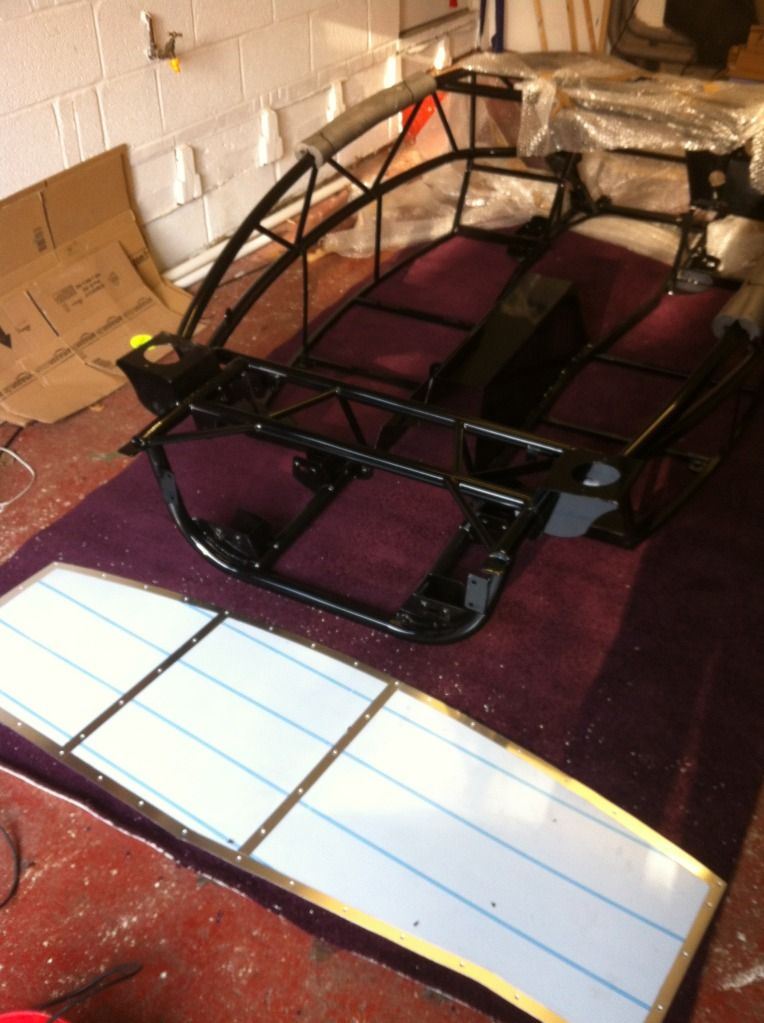
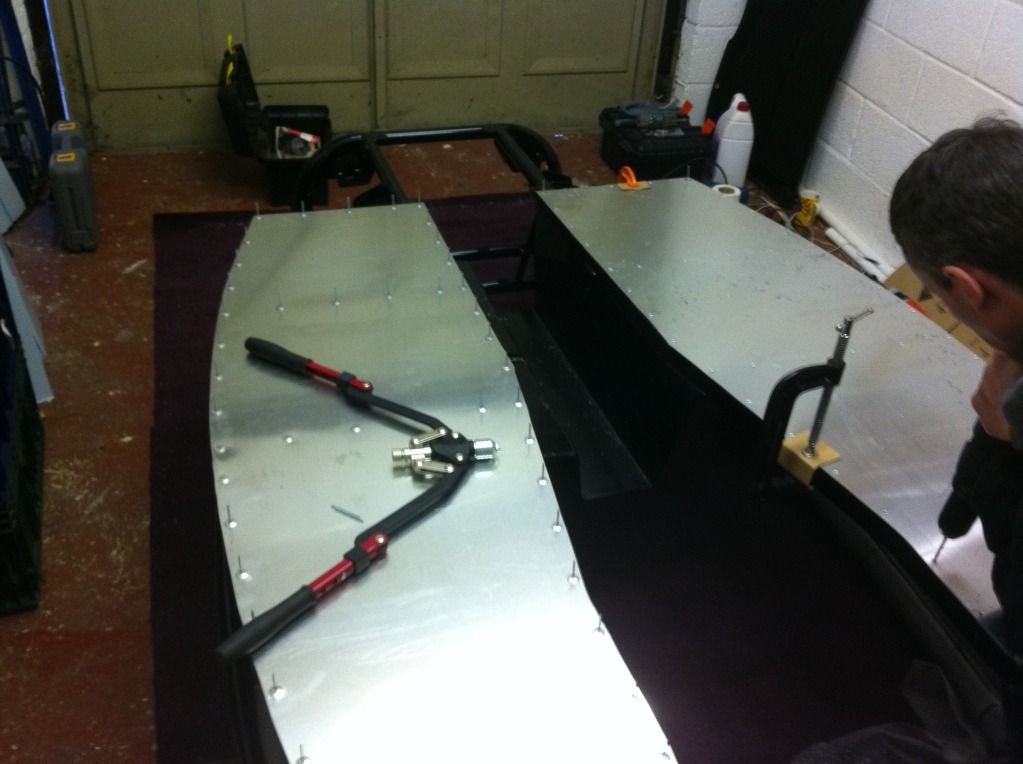
Looks like we've got a bit of catching up to do.........picking up where we posted last we had everything stripped and away for powder coating. We sent all of the suspension arms, anti-roll bars, uprights and small brackets etc away for media blasting and coating. There are a few lessons here - went just sent stuff and asked him to press the bearings and ball joints out etc. This turned out to be time consuming and costly. We ended up paying 300 quid and although the job was great, he wasn't to know that Mazda don't sell top ball joints so he ruined ours pressing them out. More of that later. Meanwhile around January/February we fitted the floor and the sides in one day, no real problem:  We were a bit fanatical about it and cut the plastic around where the bars are so we can keep it on there and peel it off when we're finished the build. A big riveter saved on elbow grease:  We bought black rivets for the sides so they blend in well. Meanwhile trawling Ebay netted some 20k mile Bilsteins from a Sport SVT for 200 quid so we had them and tidied up the rust spots with a little bit of hammerite on the bottom mounts:  We also bought some polybushes and all new bolts for the suspension build up. That wasn't cheap but ours were really rusty and because we're both busy we preferred to pay the cash and save the time. Lad |
|
lad
Junior
 
Posts: 79
|
Post by lad on Jul 1, 2012 22:38:35 GMT
In Feb we got a nice pair of Corbeau seats from Ebay for 80 quid. Since they're the same as Kevin's from the US, we know they'll fit.  One good tip this photo reminds me of is that Mark got loads of free foam tubes from his local bike shop to cover the frame with. They get the bikes in them and usually throw them away. That photo shows some pipe lagging we tried first but it just splits. Lad |
|
lad
Junior
 
Posts: 79
|
Post by lad on Jul 1, 2012 22:49:19 GMT
Having a Lightweight we did the next bit a bit differently and started building the suspension onto the chassis. We fitted the polybushes to the arms by just dumping the whole box of them bang in front of a small fan heater then once they were nice and soft greased them up and they slid straight in almost no problem at all. I'm missing a few pics of this stage but "here's one I did earlier" as Janet Ellis used to say:  and with the strut:  and at the back:  Yes the purple carpet doesn't help the pictures! Before connecting the rear uprights we hung the diff and shafts. They wasn't much bother and we just hinged the upright on the bottom arm, inserted the shaft and pushed it up to bolt the top arm.  Lad |
|
lad
Junior
 
Posts: 79
|
Post by lad on Jul 1, 2012 22:57:55 GMT
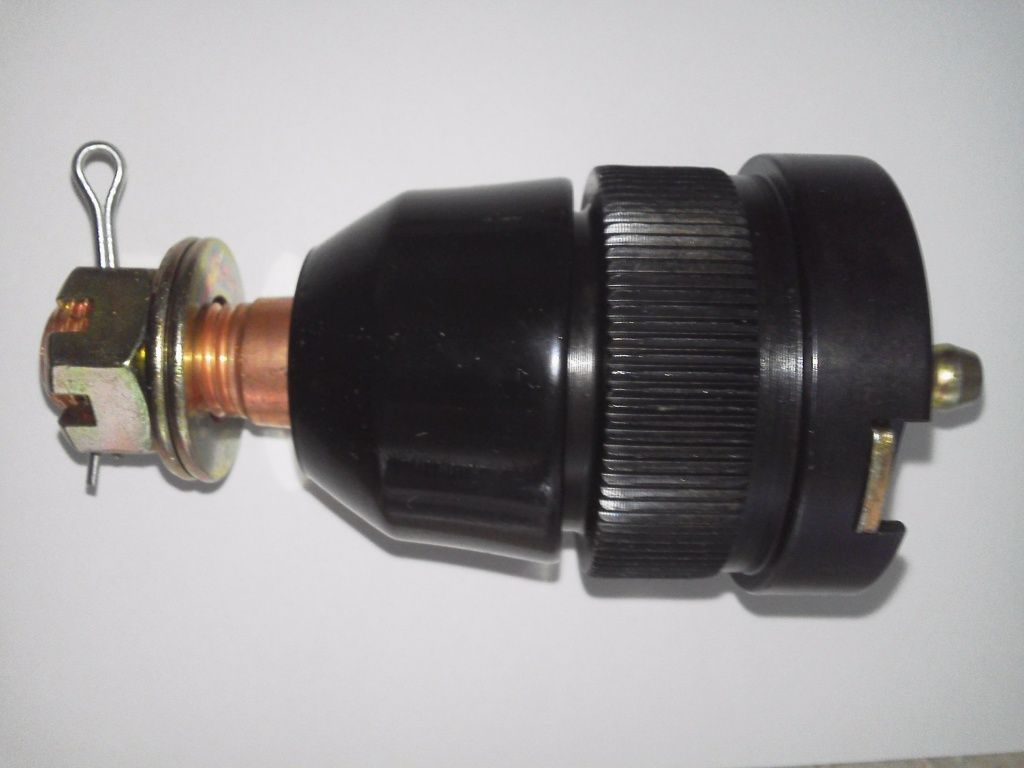
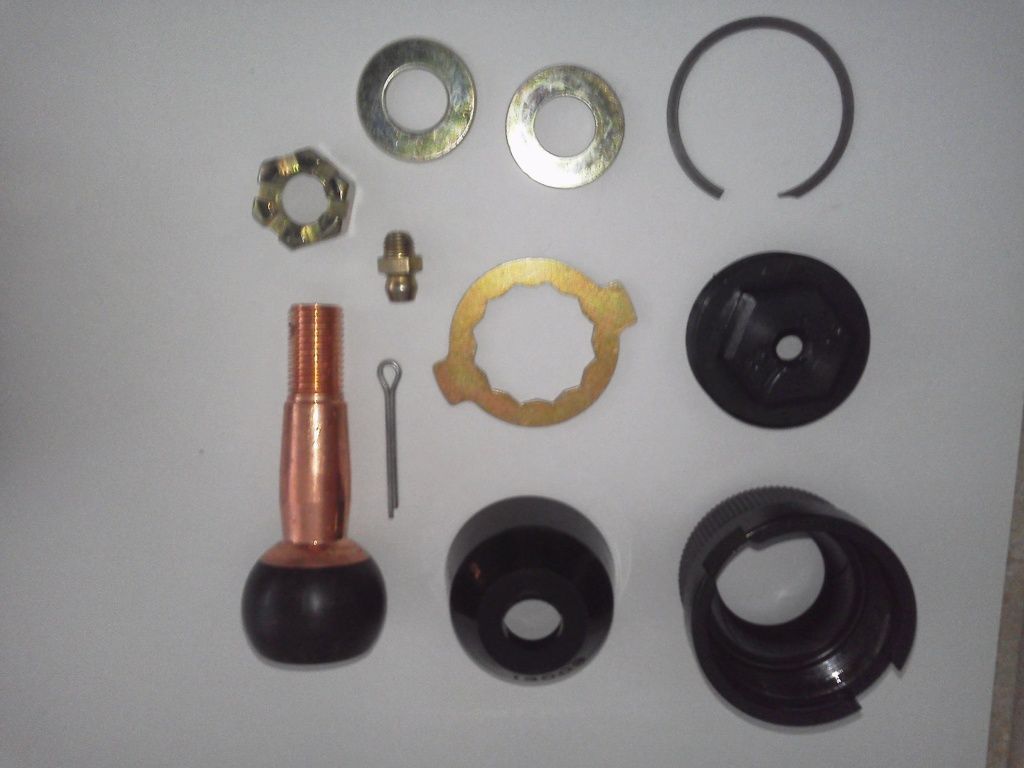
You'll notice from my last post our solution to the top ball joint problem - we bought some from V8 Roadsters in the States: www.v8roadsters.com/category-s/104.htmMark works over there a few times a year so it was easy for him to pick some up. I'm not sure what we'd have done otherwise. We did get stung for import tax in them mind. They're a really nice piece of kit and should be an improvement over standard with its lower drag and grease nipple for maintenance.   We bought another couple of sets which we'll be selling in the For Sale section for pounds for dollars so 75 quid a joint. PM me if you're interested. Lad |
|
lad
Junior
 
Posts: 79
|
Post by lad on Jul 1, 2012 23:01:19 GMT
Here's a pic of the rear all built:  and a rear corner:  and our powder coated cam cover:  The engine was pretty dry and clean so we're just adding a bit of bling on top and leaving the rest alone. Lad |
|
lad
Junior
 
Posts: 79
|
Post by lad on Jul 1, 2012 23:05:23 GMT
Steering rack came next with the pipes chopped and made off:   New track rods ends added and we able to get it on the old MX5 wheels. We found the track rod ends needed screwing in further than the old ones but this cold just be because they were a different brand. You can see the engine mounts back on the frame there too. For interest - Mk1 and Mk2 donors have different steering rack mounts. Lad |
|
lad
Junior
 
Posts: 79
|
Post by lad on Jul 1, 2012 23:13:15 GMT
With the wheels on:   ....we were able to get it outside, turn it round, take some pics and get ready to drop the engine and box in:    Nice to see it in the daylight and looking car-like. Before:  Washing up bowl ready for gearbox oil as we tilted the box down and into the gap. After:  The engine and box were a bit of a wrestle - they always are. If we did it again I'd consider removing the coil pack because it was this touching the top of the chassis that made it tight. Jiggling around to get the engine mounts to line up was also a pain but it was all done in about an hour. Lad |
|
lad
Junior
 
Posts: 79
|
Post by lad on Jul 1, 2012 23:19:41 GMT
The day after the engine and box went in I slotted the PPF in place and bolted it back up. This was an acid test for the accuracy of Stuart's chassis and sure enough it all lined up and bolted in. The trick was to use a couple of jacks to make each end horizontal as they had a tendency to sag on their mounts without the PPF in place. Here's the front:  and here's the back:  Yes - before you say it - I wish we'd done the pipes down the tunnel before now. The reason we didn't was that we offered up the old pipes without reading the build manual properly and expected them to fit. When they were nowhere near we assumed they'd look better when the box was back in. Of course, they didn't and we've got to buy some braided fuel line and run the supplied copper brake pipe from under the car. Pedals and steering next......... Lad |
|
lad
Junior
 
Posts: 79
|
Post by lad on Jul 1, 2012 23:25:04 GMT
That dent in the tunnel was Mark falling into the car carrying the diff on the very first day we started work! Ooops. That hole above the prop shaft coupling? I don't know why we've got it and no-one else has? Stuart?   Lad |
|
lad
Junior
 
Posts: 79
|
Post by lad on Jul 2, 2012 16:42:39 GMT
Next we fitted the steering column and pedals. We started with the rubber boot in the bulkhead for the lower steering shaft, put everything in place, marked up and drilled a couple of holes to keep it in place. We also reused the plastic cowl around the joint which bolts to the boot. You can see that here:  Next the clutch pedal went straight in, no mods necessary........or so we thought. Having read other forum posts about the pedal spacers I thought I'd try bolting it in without moving the spacers like the manual suggests. We found it left the pedals well aligned and allowed us to re-use the gasket on the servo to bulkhead joint so we torqued it all up and thought that was that.  All a nice snug fit on the other side.  Next came the top of the steering column. I found it best here to get all the bolts in place really loosely so you can play around with the fit. This worked fine until we realised the wheel was pointing towards the outside of the car. The problem was the two studs on the two pedal brackets you can see here:  The offset on the column bracket meant that once we got the wheel pointing in the right direction the right hand side of the bracket was hard against the pedal bracket whereas the left was 20mm out in fresh air. THIS IS WHY THE PEDAL SPACERS CAN BE MOVED I SUSPECT - NOTHING TO DO WITH THE PEDALS. Anyway, after sitting in the car and feeling the driving position we decided we were happier with the pedals where they were and we should make the column fit. To do that we bought some 24mm coupling nuts, trimmed the clutch plate stud a little, trimmed the coupling nut a little and threaded it onto the stud. We then bolted the column to the coupling nut.  Our pedals were a fair way off the bracket at the top too so we'll use some more coupling nuts to bolt them up tidily. Next we'll be finishing the tin plates on the floor. Lad |
|
|
|
Post by johnbrunt on Jul 2, 2012 23:30:12 GMT
Hi, you seem to be getting on fine....I'm building from a mk2 too, I wondered about building mine from the chassis down ie adding subframes etc as I don't think I'll have time before kit ready to make up whole power plant frame....I can't really see any obstacles in doing this way other than it might be abit slower!
|
|
|
|
Post by red5 on Jul 3, 2012 9:14:46 GMT
Building from the frame down is actually the way i would fit my PPF - if i had to again.
simple reason is none of the suspension is in compression and so your not fighting springs under load to marry holes up
|
|