|
|
Post by R2S on May 16, 2021 9:01:59 GMT
Bit more progress this week, body mounts to front of cockpit almost complete just need to cut out where plate extends into engine bay (will follow line of body as per line marked on surface. 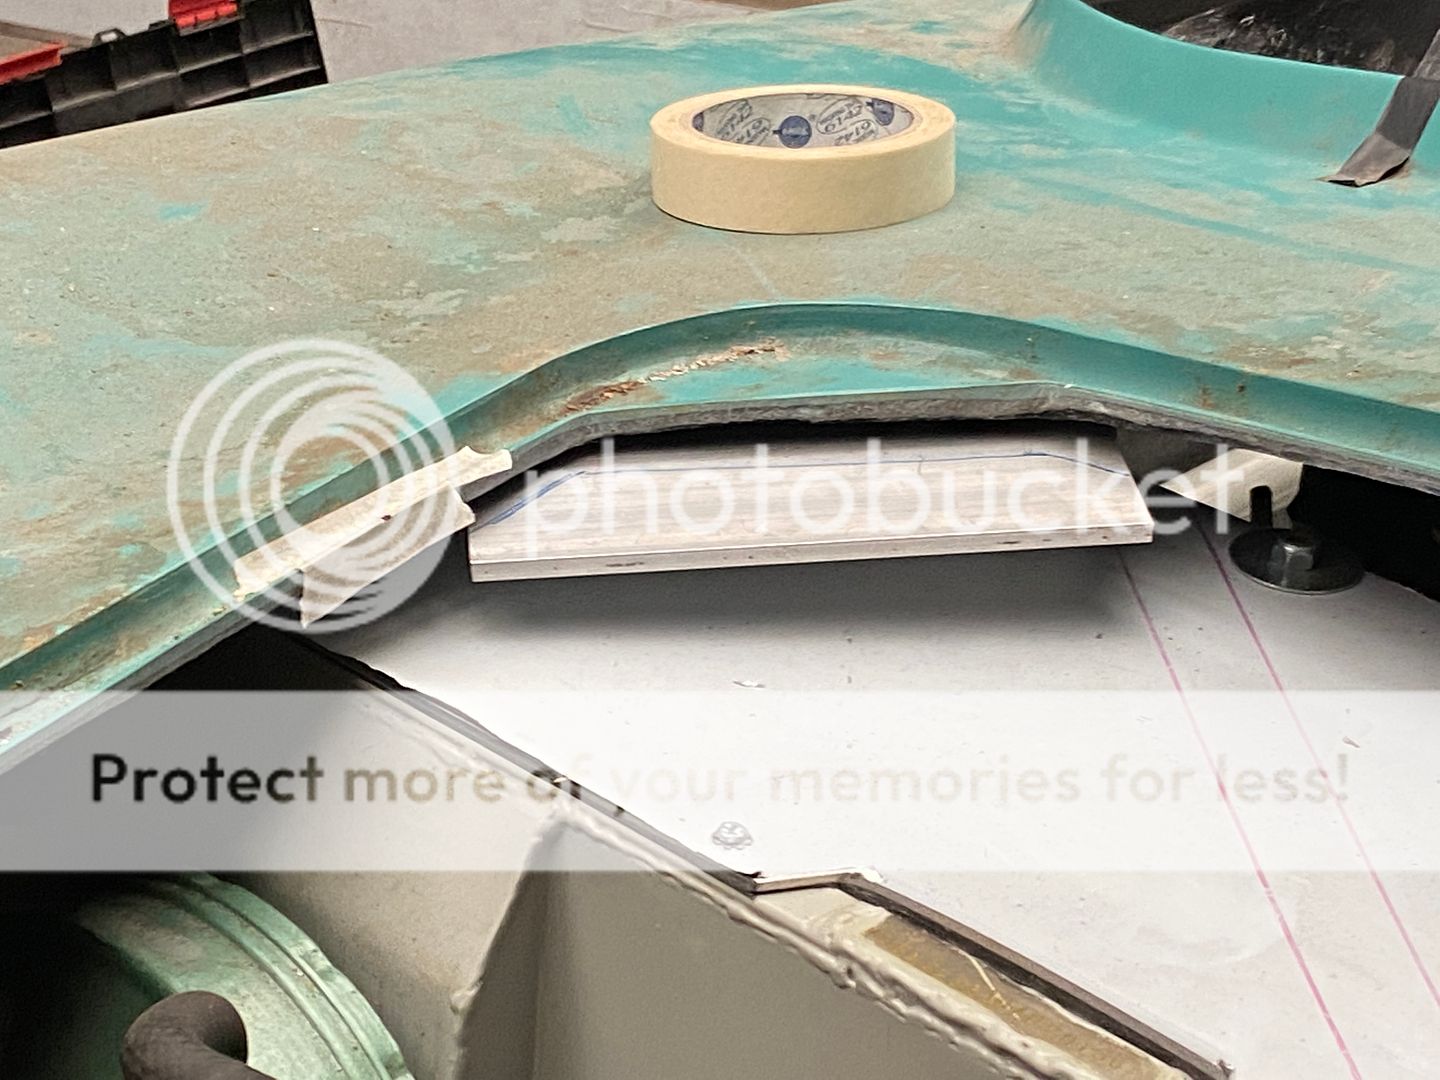 Finally got dashboard in position I want it, probably 75mm to the right of original. This meant I had to cut quite a lot off right end, face and top, to fit under body. 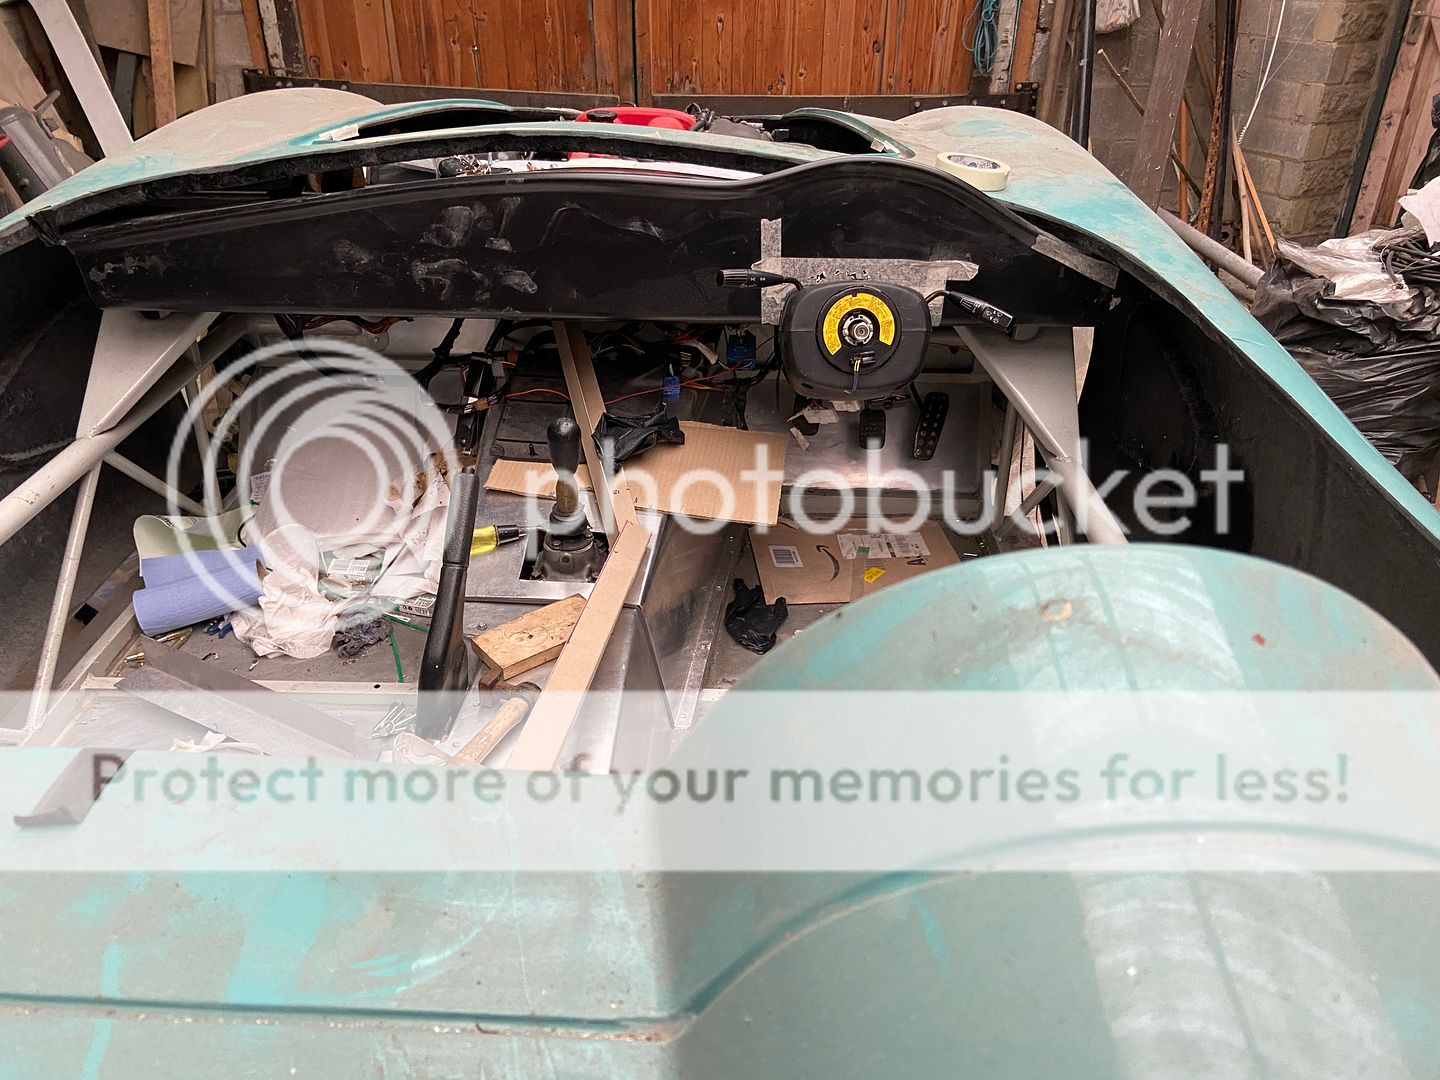 Quite a gap between top of dash and body but plan is to fill this with foam (could be left open to act as heater  ). Made sliding brackets to fit dash to tangs at either side of the car. Plan is to fit these using bonding to back of dash and to bolt to chassis, once bonding agent has gone off sliding fixing will allow adjustment. Brackets made, top face to be drilled and tapped, lower face to be slotted, just need wing nuts before fitting. 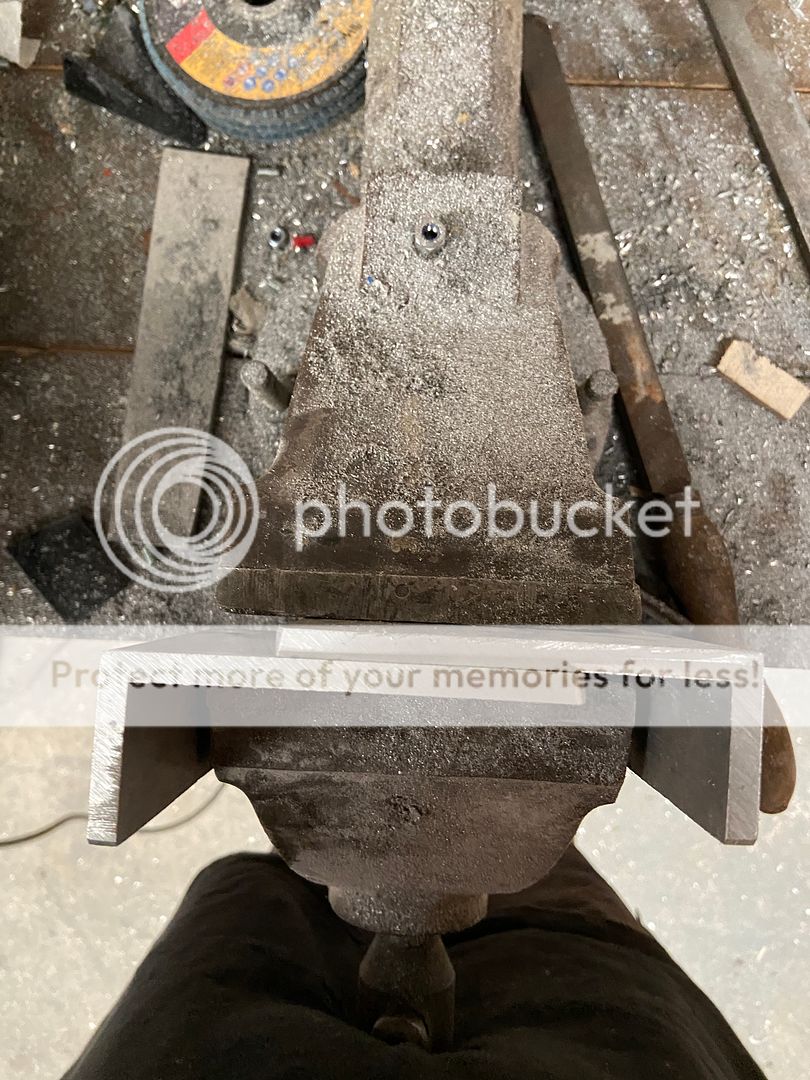 Having raised body on chassis (to get over any issue of rear lights not being high enough for IVA I know have a problem:- 1. I can leave GRP body as is and bring lower edge into top of chassis bottom rail, this will make a square section visible from side albeit I can paint body colour or more likely black so as to 'disappear'. 2. Other option is to cut body horizontally and insert strip say 50mm wide. In reality I will probably do 1 for IVA and once running, and pre paint job will convert to option 2. (Hope that makes sense) 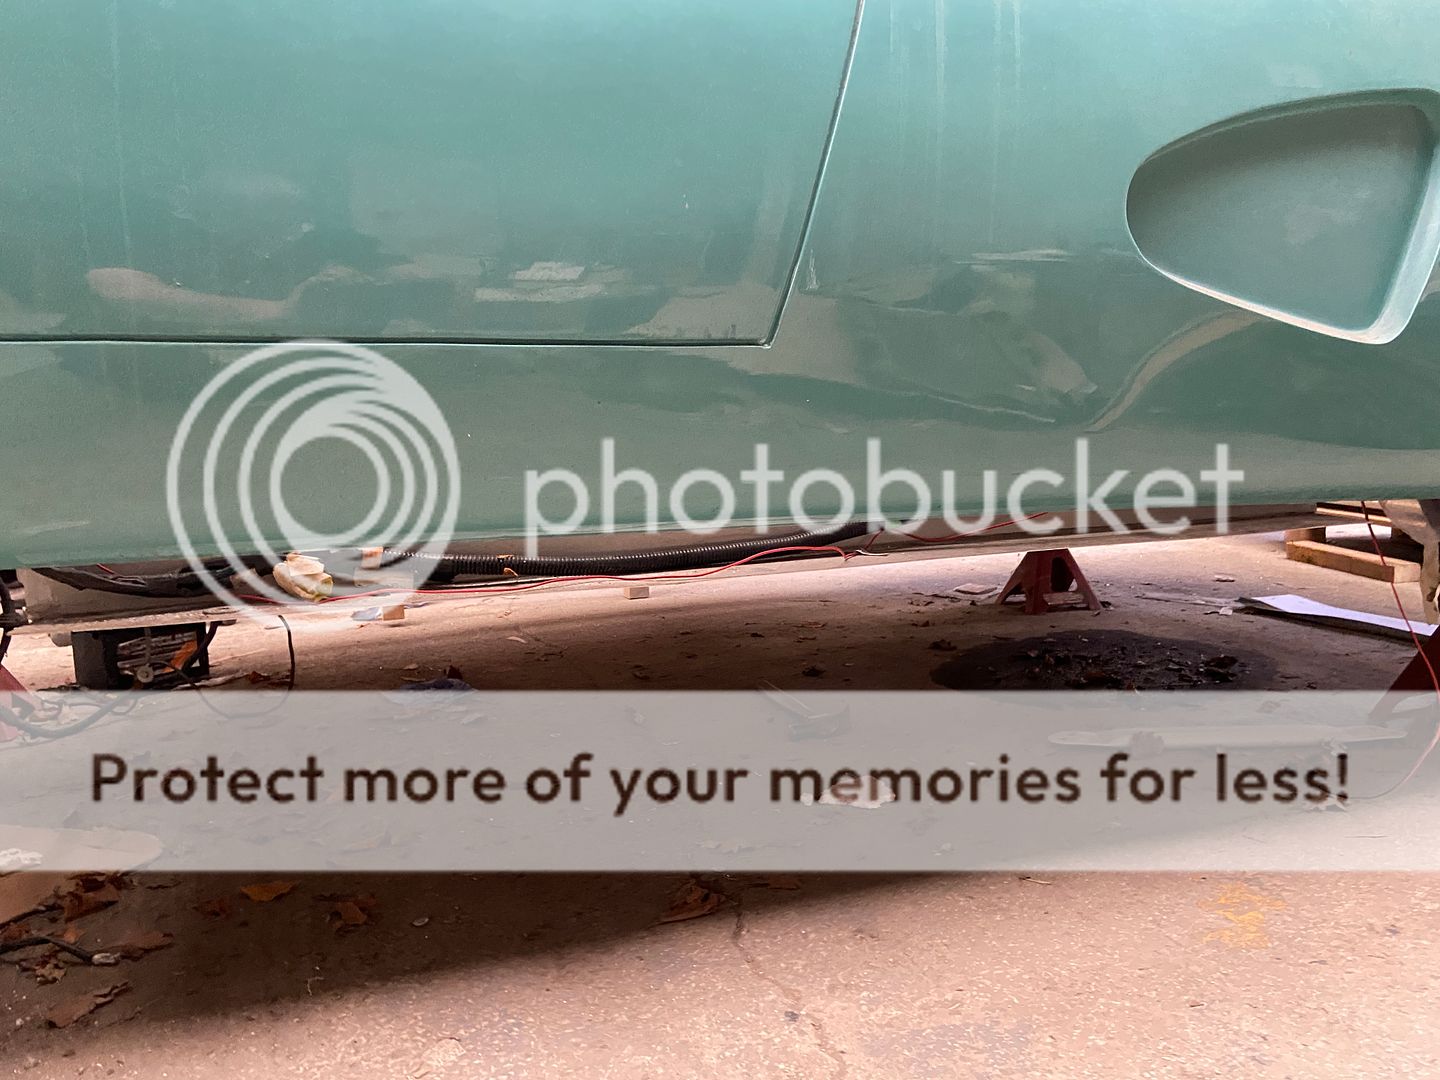 Next weeks challenge is to fabricate the front body mounts, template is made just can't decide whether to use mild steel and weld up or to stick with the ali angle I have been using. |
|
|
|
Post by R2S on May 10, 2021 17:02:36 GMT
Back on the car in earnest now, seats fitted (temp until appropriate IVA bolts arrive). Original plan was to mount runners onto angle bolted to cross rails thereby avoiding bolts protruding through floor. Realised drilling cross rails would be almost impossible due to floor being in place so went for the original design and holes drilled. Law of sod came into play, four of the eight holes interfered with floor fixings (rivets) as installed, two had to be drilled out as hole was in exact same place others had to be drilled out to allow large washer to sit flush (these aren't in place yet so no photo at moment. Whilst getting seat ready to install came across first problem, the seats had been made in such a way that the standard MX5 runner bar to allow sliding couldn't move so had to take front of seat cut back and reinstall (wifes upholstery stapler was a godsend). .jpeg?width=1920&height=1080&fit=bounds) Seats in place next potential issue, the harness mounting sleeve isn't central to the seat position which means one strap from harness will come to side of headrest whilst other will pass through between headrest legs. No idea if this is IVA compatible but will check out with fellow kit builders who have been there. 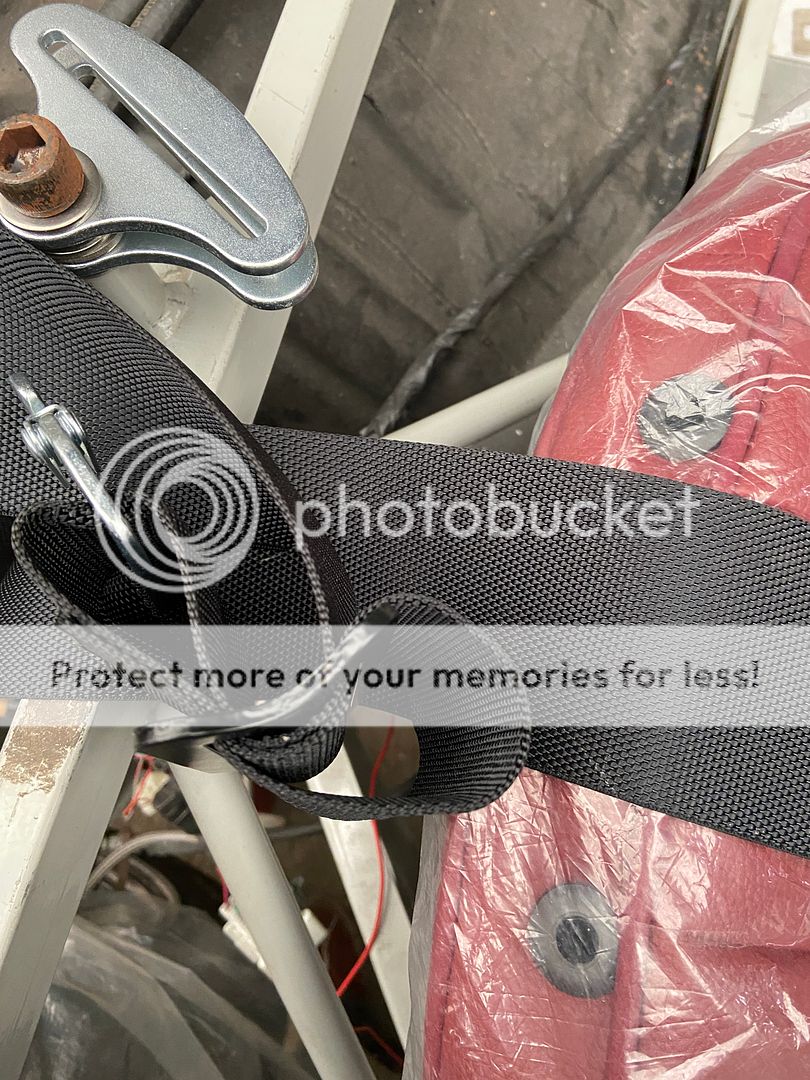 Really pleased with central upper rear mounting brackets I've fabricated, I think others have used rubber bobbins and have body resting, I have gone opposite direction with brackets bonded to body and bolted to the rear supports on the chassis with a dense foam washer between both surfaces. 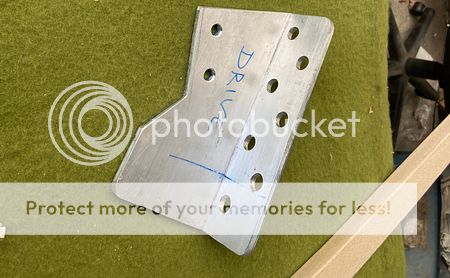 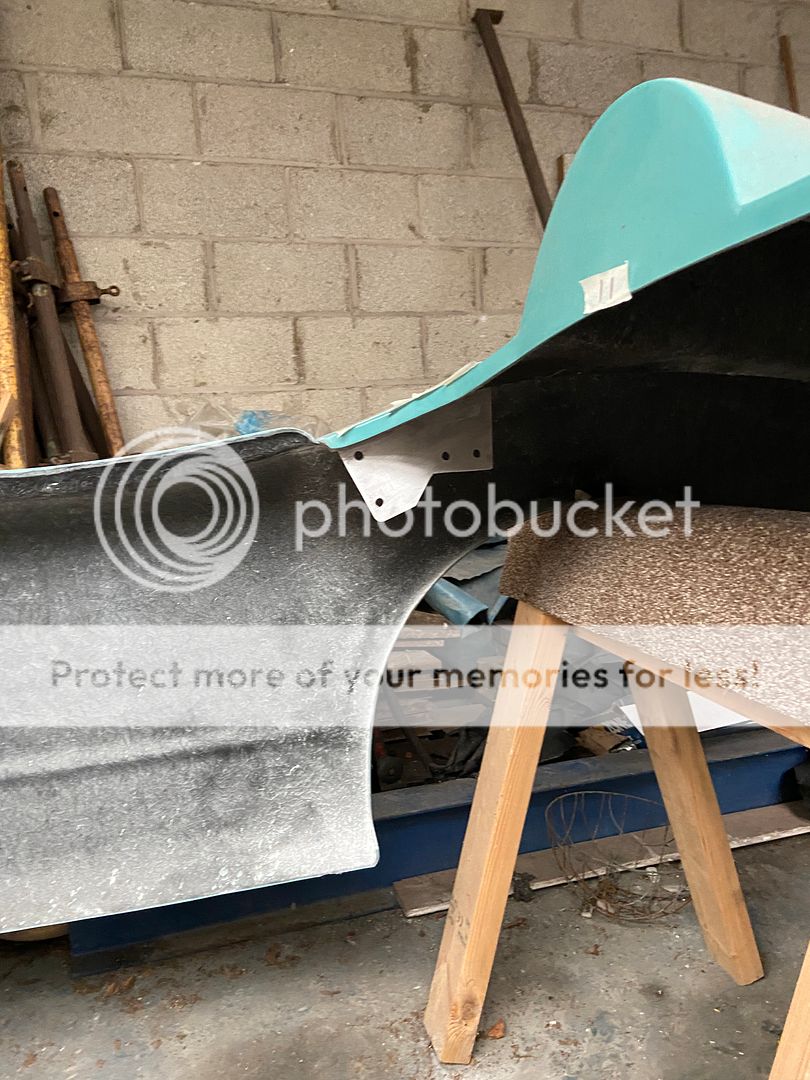 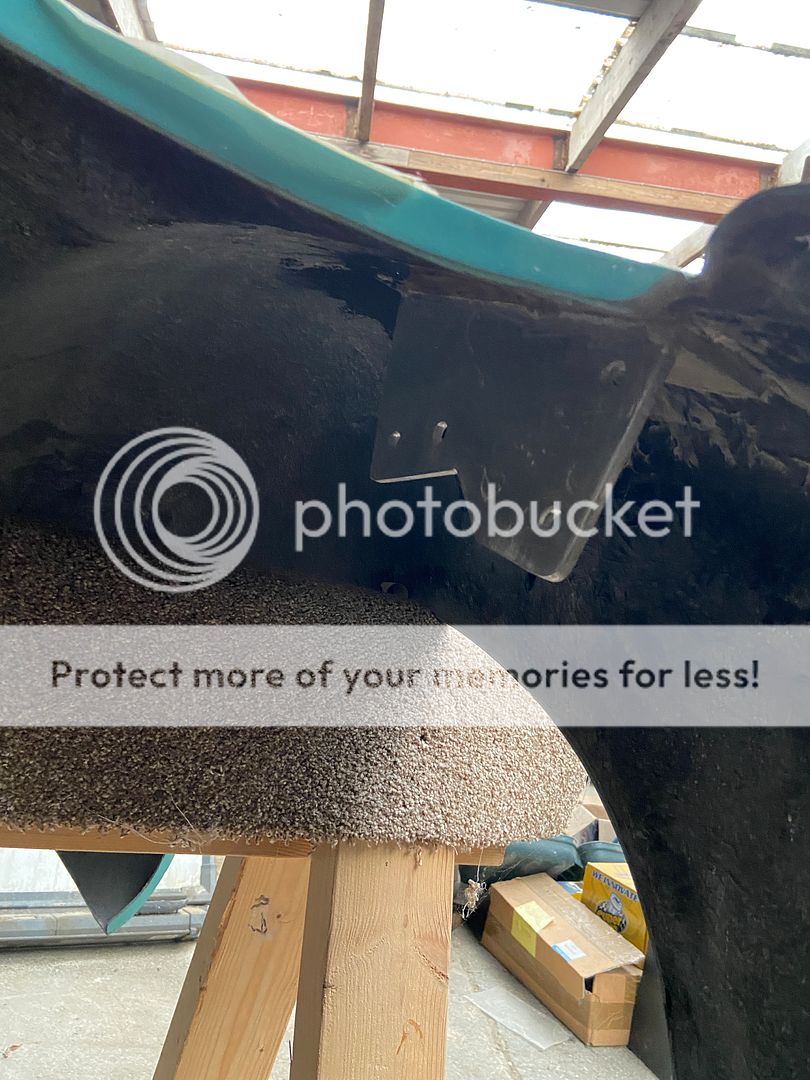 Front upper cockpit mounts in mid fabrication but I've arrived at a design I am happy with, basically a pice of angle on the flat ali over front bulkhead to which is bolted an angled piece of 5mm ali again mounted using dense foam washer. Front mounting bracket templates made and plan to make these on this weeks trip to the workshop. Once all mounts in place next job is to fabricate the exhaust (rear section) which will connect to a standard MX5 system just rear of rear subframe (basically replacing MX5 rear box with something that fits the kit). |
|
|
|
Post by R2S on May 10, 2021 16:39:36 GMT
Keith you have a number of options:- The expensive route, set of wires that fit MX5, they have the spacers built into their centres, up side, they look great, down side they are very heavy, cost over £400 per corner. Low cost route, you can bring the wheels out using spacers as refereed to by Stewart, freakyparts.co.uk/products/mazda-mx5-mk1-2-na-nb-bolt-on-spacer-2x |
|
|
|
Post by R2S on Dec 7, 2020 17:39:40 GMT
Lower arms, rear, on mine came back from blasters with pin holes was going to weld plate over but in end bought new from MX5 Parts. Halfords calliper paint in yellow works well but needs at least three coats.
Again having taken callipers off front I decided on new callipers from Euro car parts, new discs too at front.
Bought great gadget from Frosts for straightening brake pipe that came in coils. it really does make a difference, page 15 my build (calliper paint finish can be seen on p11).
I removed abs from mk2 donor but this meant I had to get another servo with balance valve, sourced it through one of the Exocet guys on this group.
|
|
|
|
Post by R2S on Nov 14, 2020 17:01:22 GMT
Build thread is Cheshire Build, Mark sold the car this summer and it was bought by a member of the MEV/ANC Replicar group on Facebook.
|
|
|
|
Post by R2S on Oct 30, 2020 17:20:31 GMT
Sure you can, weather outlook is rain for foreseeable future here in the Dark Peak.
Did you IVA with screen in place?
Fitting body next step for me.
|
|
|
|
Post by R2S on Oct 30, 2020 9:06:01 GMT
Well done, might see you about in the Peaks?
|
|
|
|
Post by R2S on Oct 6, 2020 8:45:04 GMT
Sidpotters I asked the same question some years ago, the cover was made locally to them and the car has to go in to be measured to get the quality you see in the picture. I did ring the maker of the cover (I'll try and find his number) and he will only make if you take car in. I seem to recall he was in Preston or Lancaster, will get my notes out when i next visit workshop (likely to be Friday).
|
|
|
|
Post by R2S on Oct 2, 2020 21:47:17 GMT
|
|
|
|
Post by R2S on Oct 2, 2020 21:41:25 GMT
The grilles and their surrounds came with the kit.
|
|
|
|
Post by R2S on Sept 4, 2020 18:01:39 GMT
adman suggest you contact ANC Sportscars who now make the Replicar, they have a page on facebook and a business web site.
|
|
|
|
Post by R2S on Aug 3, 2020 13:56:30 GMT
Well at long last I am back in the workshop! Ali panels all now complete, remember this car has no doors so internal horizontal panel runs full length. The inclined panels are only installed temporarily as they will need shaping on the outer edge to match the body inner face. Aluminium sheet arrived for top of dash last thing Friday so this weeks job will be to install. Had originally planned to have looms coming through this horizontal panel but now looking to pass through from firewall (main loom may prove a challenge on drivers side).  Trim rings have arrived for the dash, using MX5 plug and play set behind the dash, and undecided whether to have aluminium faced dash or whether to paint black. Finished off air box changed air intake to face forward.   Will now be able to connect with pipe to draw air from nose. Combined reversing/fog lights sourced from cbs, will place one either side under rear lamps now starting to pull together electrics for lights etc. |
|
|
|
Post by R2S on Jul 6, 2020 9:13:09 GMT
Great to see another of your builds complete, I feel quite put to shame, plan was to complete this year and IVA well Covid put a stop to that, remote workshop was the killer, can you imagine how much progress if I'd had build at the farm?
So what are you planning on next?
|
|
|
|
Post by R2S on Jun 16, 2020 7:15:02 GMT
Brettlawrence this forum fitted a roll over bar but again did full width rather than single Cobra type hoop.
|
|
|
|
Post by R2S on Mar 31, 2020 21:05:44 GMT
Like the idea of a set up that can be opened and closed. I templated up some copies of the original gills but I am so far away from IVA, and currently in lock down 10 miles from my workshop, that these will be a very late, probably post IVA addition (snowbird 1 used some of my templates for his build).
Thing that is bugging me is they will be totally for show and not functional as route to flow air away from engine is blocked by the sweep of the front wheels.
|
|


 ).
).