redgriff
Newbie
 Fitting the body to the chassis
Posts: 10
|
Post by redgriff on Sept 20, 2020 19:06:30 GMT
Hi guys
I've just started on my project to build a Replicar. So far I have only just purchased my donor car. Currently I'm just completing a service on the car before I start stripping it. The donor is a 2004 1.8 VVT Euphonic with an MOT - bought on ebay.
I've got a blog site where I will be documenting my progress and loading pictures. I'm also on the FB group.
Colin
|
|
|
|
Post by R2S on Oct 2, 2020 21:47:17 GMT
|
|
redgriff
Newbie
Fitting the body to the chassis
Posts: 10
|
Post by redgriff on Oct 4, 2020 10:08:53 GMT
Thanks that's a good find.
|
|
redgriff
Newbie
Fitting the body to the chassis
Posts: 10
|
Post by redgriff on Oct 4, 2020 20:41:59 GMT
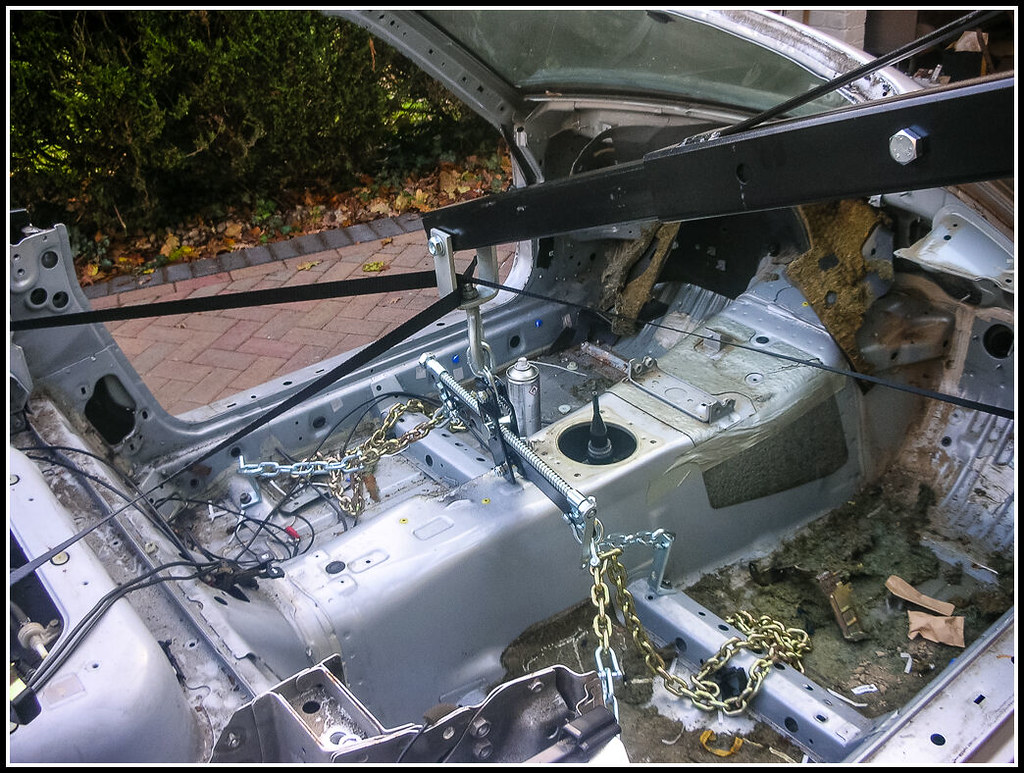
Started on stripping out the interior this weekend, after removing the wings, doors and bonnet.
Blog updated
|
|
redgriff
Newbie
Fitting the body to the chassis
Posts: 10
|
Post by redgriff on Nov 10, 2020 13:02:32 GMT
|
|
redgriff
Newbie
Fitting the body to the chassis
Posts: 10
|
Post by redgriff on Dec 6, 2020 10:05:54 GMT
Currently breaking down the brakes for painting and refurbishment. Subframes, control arms and braces have been dropped off for blasting and powder coating.
|
|
|
|
Post by R2S on Dec 7, 2020 17:39:40 GMT
Lower arms, rear, on mine came back from blasters with pin holes was going to weld plate over but in end bought new from MX5 Parts. Halfords calliper paint in yellow works well but needs at least three coats.
Again having taken callipers off front I decided on new callipers from Euro car parts, new discs too at front.
Bought great gadget from Frosts for straightening brake pipe that came in coils. it really does make a difference, page 15 my build (calliper paint finish can be seen on p11).
I removed abs from mk2 donor but this meant I had to get another servo with balance valve, sourced it through one of the Exocet guys on this group.
|
|
redgriff
Newbie
Fitting the body to the chassis
Posts: 10
|
Post by redgriff on Dec 18, 2020 12:10:58 GMT
Thanks - I've used some engine enamel (Ihad lying around) and cured it in a mini oven. Works really well, just gone for a plain aluminium colour. The front callipers on mine look like new and only needed a quick clean up. The rears calipers I fully rebuilt with new seals and pistons, the kit for both cost me less than one rear caliper. I picked up the subframes and control arms this week and they look really good. Before I sent them off I had a good go at them with a hammer to make sure they were OK, thankfully I think my base car was pretty solid. 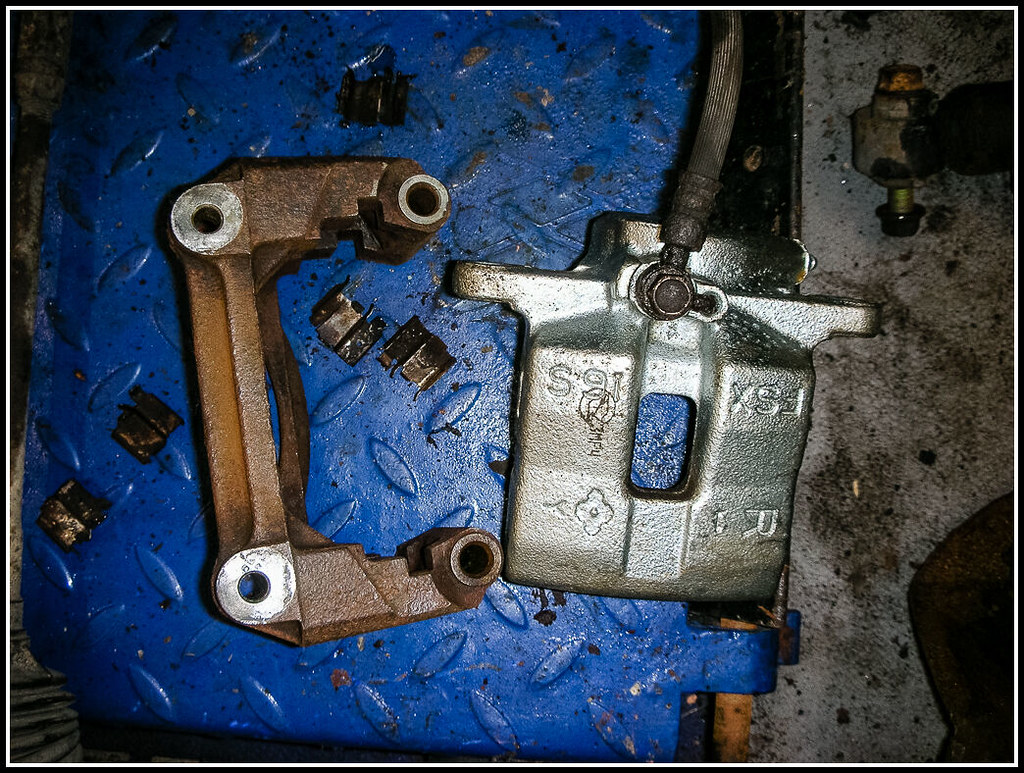 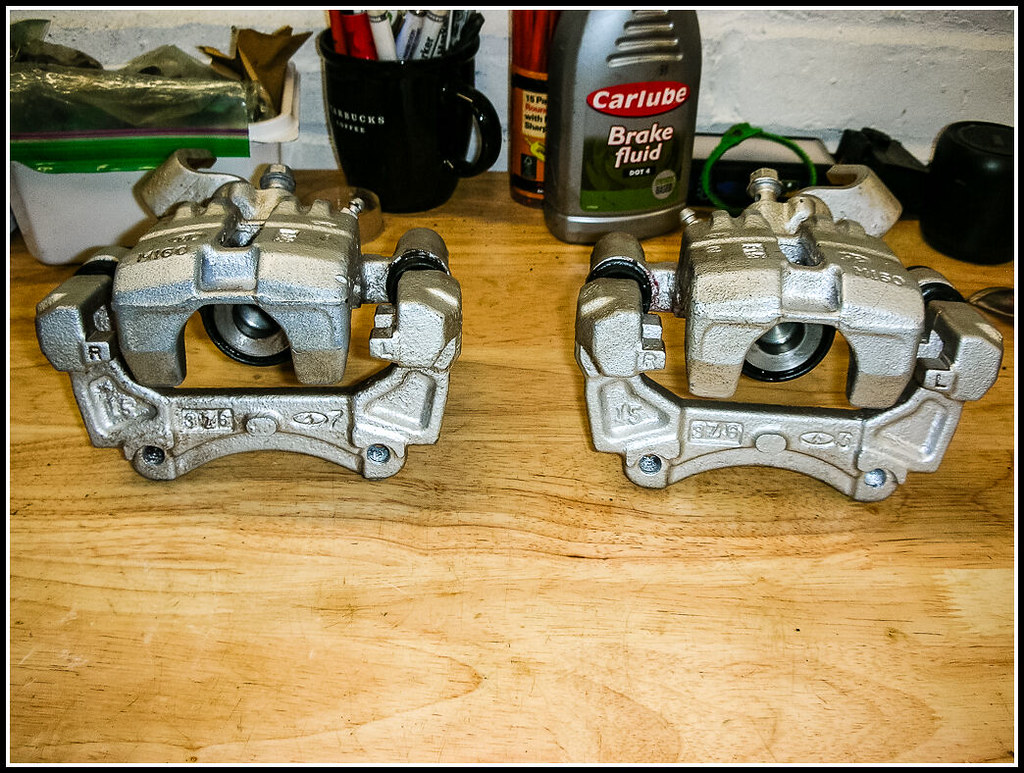  |
|
redgriff
Newbie
Fitting the body to the chassis
Posts: 10
|
Post by redgriff on Feb 21, 2021 18:50:27 GMT
The build is proceeding nicely. The chassis and subframes are bolted together, I've modified and fitted the rear subframe brace and started on fitting the pedals and steering column, just waiting for paint to dry before fitting them
|
|
redgriff
Newbie
Fitting the body to the chassis
Posts: 10
|
Post by redgriff on Oct 3, 2021 19:01:47 GMT
Sorry for the lack up updates here - I have been progressing nicely and have updated my blog site.
I've had the rebuilt engine with the Canems SCU running briefly. I've got the body position finalised and I've recently been working on the dash, which I've modified from the original design.
|
|
|
|
Post by R2S on Oct 4, 2021 8:22:43 GMT
Great work on the dash, are you leaving metal or painting with wrinkle finish (which is my plan)?
I had to move my dash 75mm to right to get dash, seat and rear fairing to line up (ocd).
Had a look at the blog some great shots (trying to upload photos is hampering any updates on my long build I've had the email from photo-bucket telling to to stop). I find some of the challenge is putting something together that can easily be removed re-installe with minimum pain if required, hence my dash fixings are slotted to allow some adjustment. Don't have a central support but having seen yours I think it might be a good move.
|
|
redgriff
Newbie
Fitting the body to the chassis
Posts: 10
|
Post by redgriff on Oct 7, 2021 7:44:03 GMT
Thanks
I don't want bare aluminium on the dash. I'm looking at anodising, it can be coloured and as it's semi translucent you can see machining on the metal so there might be some nice effects to be had. Not spoken to anyone but there's a place in High Wycombe I plan to visit. Hoping to do a dark blue colour - we shall see.
I have tried to move the dash over to the right as well, which is why I cut the dash returns off. I've extended the GRP on the left and I've got a bit to do with shaping and smoothing. I plan to cover the GRP in vinyl so the finish doesm't have to be perfect.
Yeah getting photo's on here is painful (I'm using Flickr hosted photo's) which is why I started a separate blog site.
The GRP bit of the dash won't come out without lifting the body; I wanted to be able to get to the dash wiring without having to do that. Which is partly why I did the seperate piece of aluminium. The aluminium bit will come undone from the GRP after undoing all the allen headed bolts and one bracket, need to check that once all the dials are in, it will still come out. The brackets in the middle have eliminated a lot of wobble.
|
|